How to Insert a Table in Gmail on PC & Mobile [2024]
 Reviewed by Huzaifa Haroon
- Adding tables in Gmail enhances clarity and organization, making emails more professional and easier to understand.
- To add tables on a PC, copy data from Google Sheets and paste it into a Gmail email on its website.
- On mobile, copy data from the Google Sheets app and paste it into a new email in the Gmail app.
Tables in Gmail are a powerful tool for organizing and presenting information effectively within emails. In our guide, we’ll provide detailed instructions on how to insert tables to enhance the clarity and professionalism of your email communication. Stay tuned to learn how tables can streamline content structure, highlight key points, and improve overall readability in Gmail.
Table of Contents
- Why to Insert a Table in Email
- How to Insert a Table in Gmail
- ↪ On PC
- ↪ On Mobile
- Step 1: Open the Google Sheets App
- Step 2: Open a Spreadsheet
- Step 3: Enter Table Data into the Spreadsheet
- Step 4: Select the Table
- Step 5: Copy the Table
- Step 6: Launch the Gmail App
- Step 7: Compose a New Email
- Step 8: Paste the Selected Table
- Step 9: Fill in the Recipient’s Details
- Step 10: Send the Email
- Tips & Tricks
- Comparing Email Services: Gmail, Outlook, and Apple Mail
- Final Words
Why to Insert a Table in Email
Inserting a table in an email serves several crucial purposes:
- They enable the organized presentation of complex data.
- Tables enhance the visual appeal of emails, making them more professional.
- They facilitate better comprehension by highlighting key points and comparing data sets.
- Tables streamline communication and make information more accessible and digestible for recipients.
READ MORE: How to Make An Email With A Custom Domain in 2024 ➜
How to Insert a Table in Gmail
Gmail, being one of the most popular email platforms, offers the convenient feature of inserting tables directly into emails. With its user-friendly interface, adding tables becomes a seamless process, enhancing the organization and clarity of your email content. Here, we will explain how you can add them on a PC and a smartphone.
↪ On PC
Follow these steps to insert a table to an email from the Gmail website on your Windows PC or Mac:
Step 1: Launch Google Sheets
Open your preferred web browser and navigate to Google Sheets.

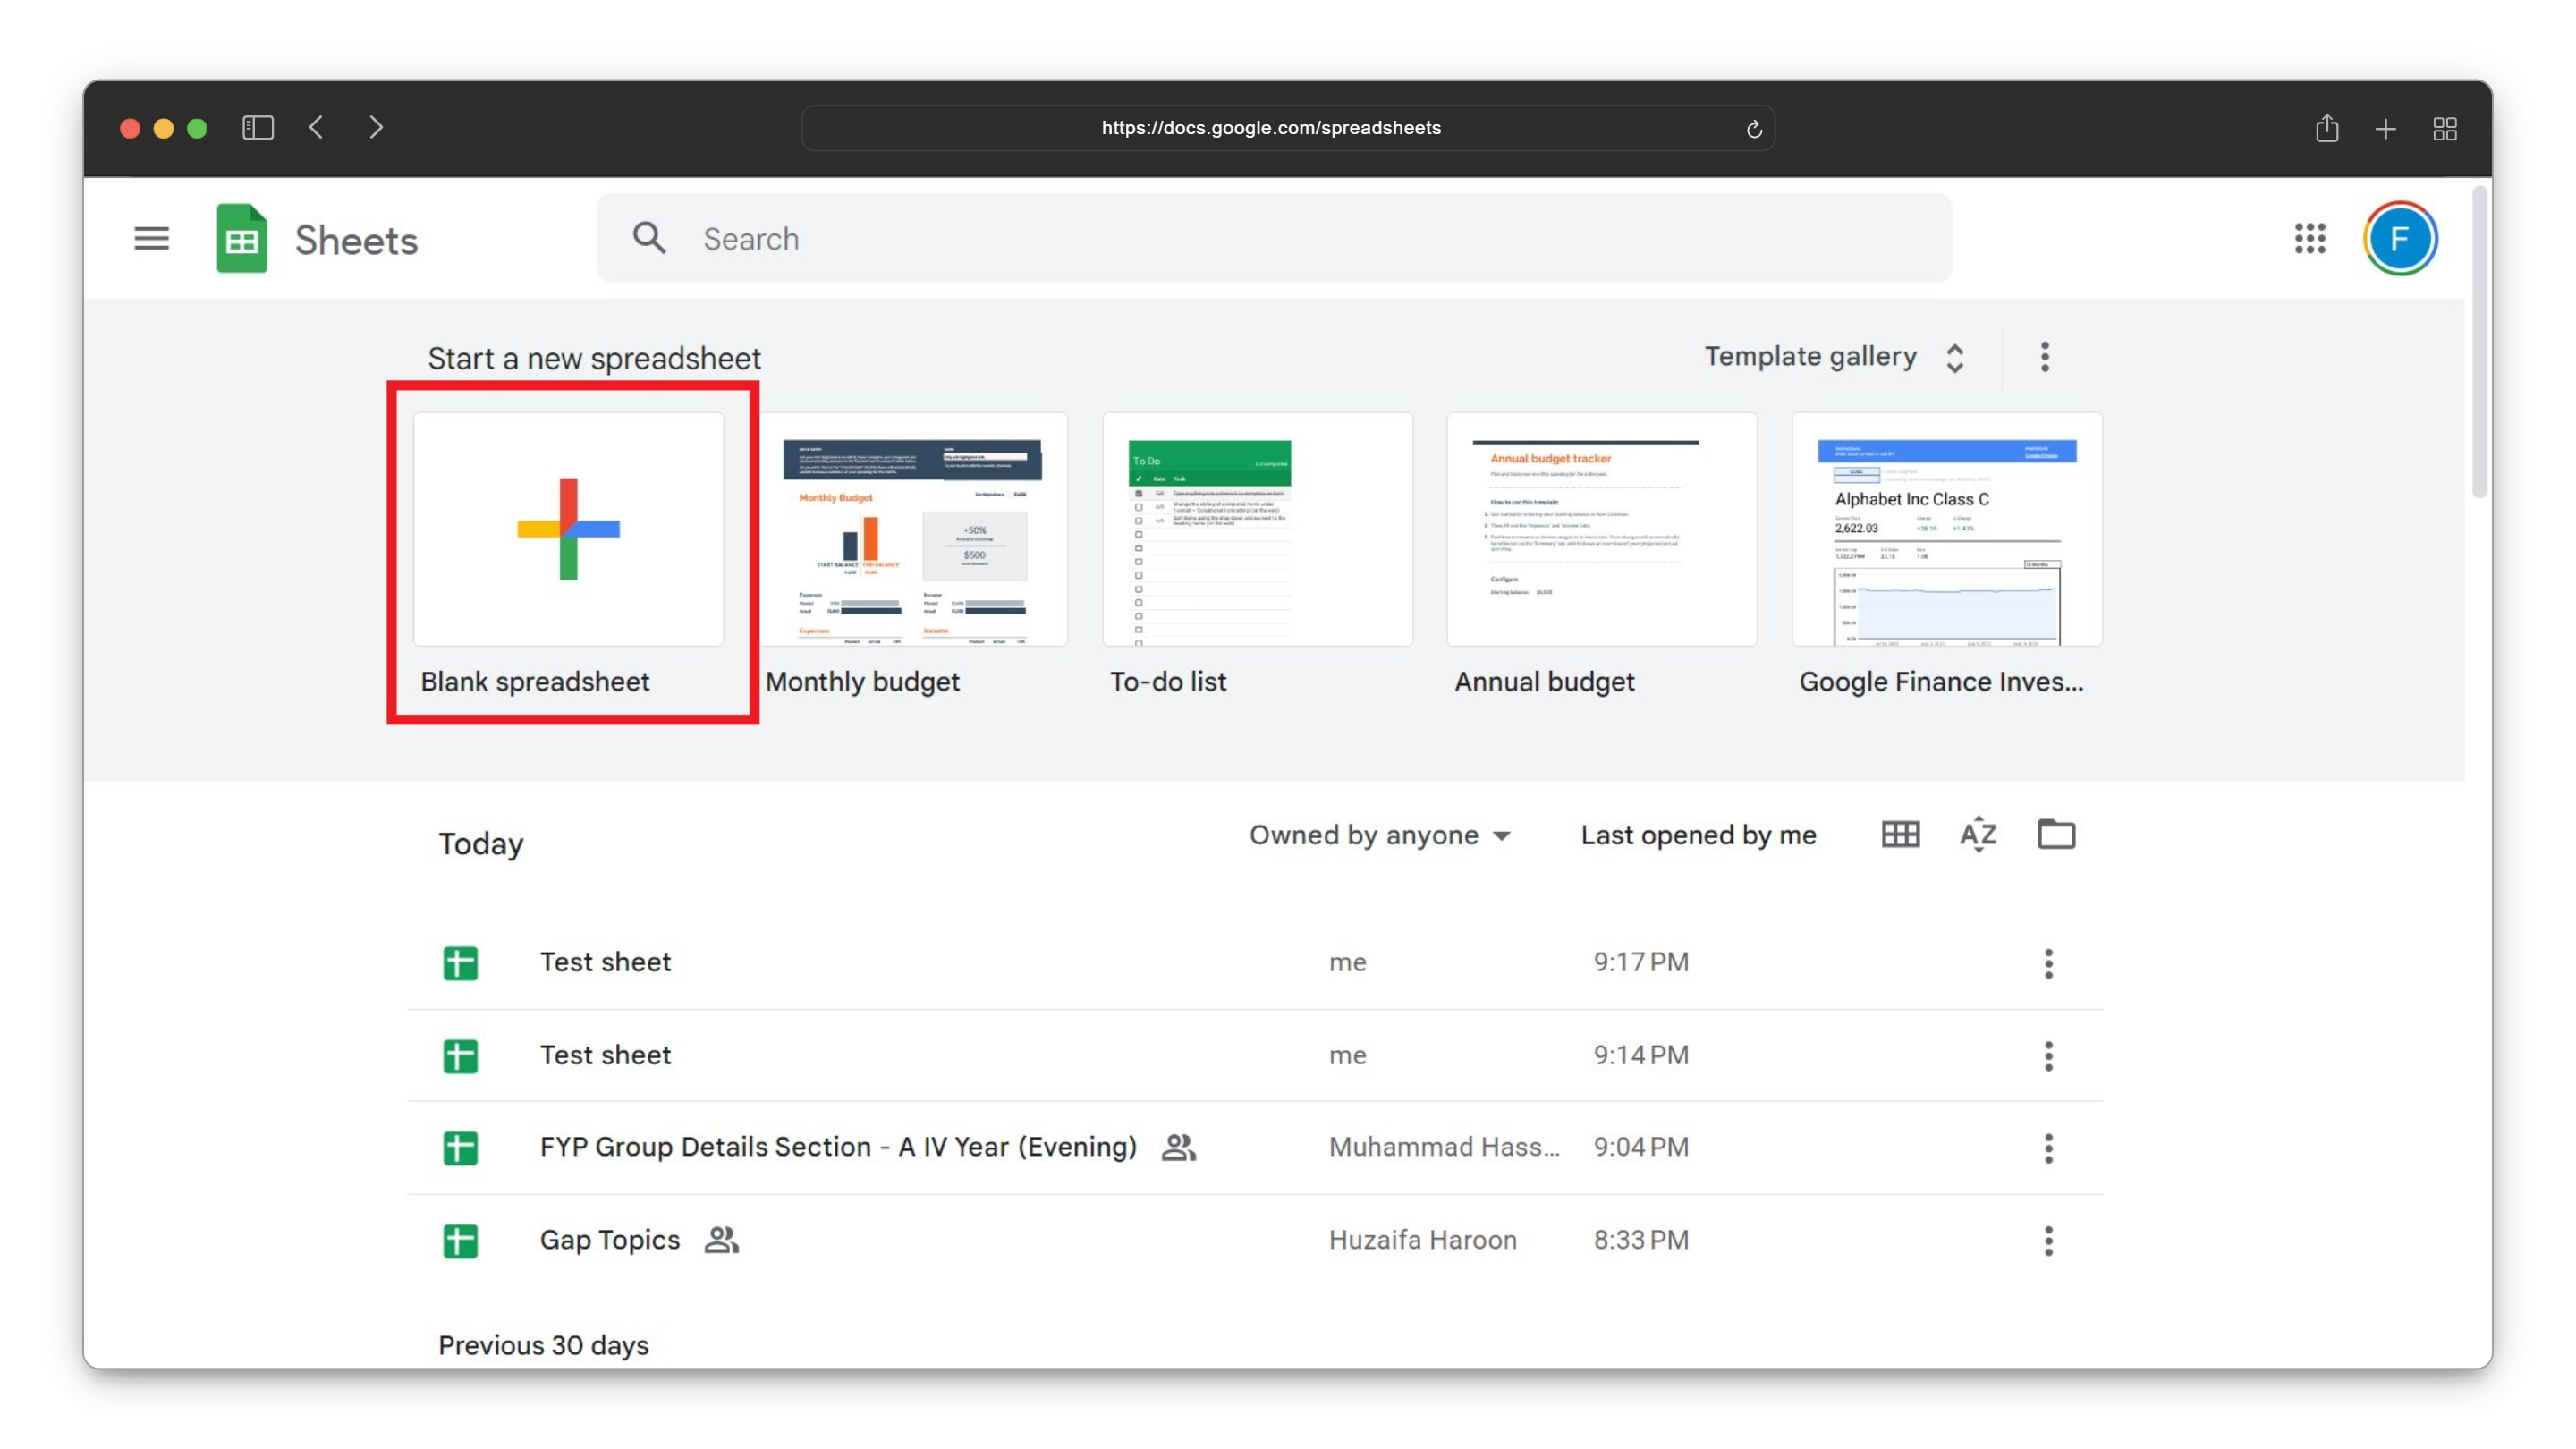
Step 2: Open a Spreadsheet
If you have an existing spreadsheet, click on it to open it. Otherwise, create a new spreadsheet by selecting “Blank spreadsheet” from the Sheets homepage.
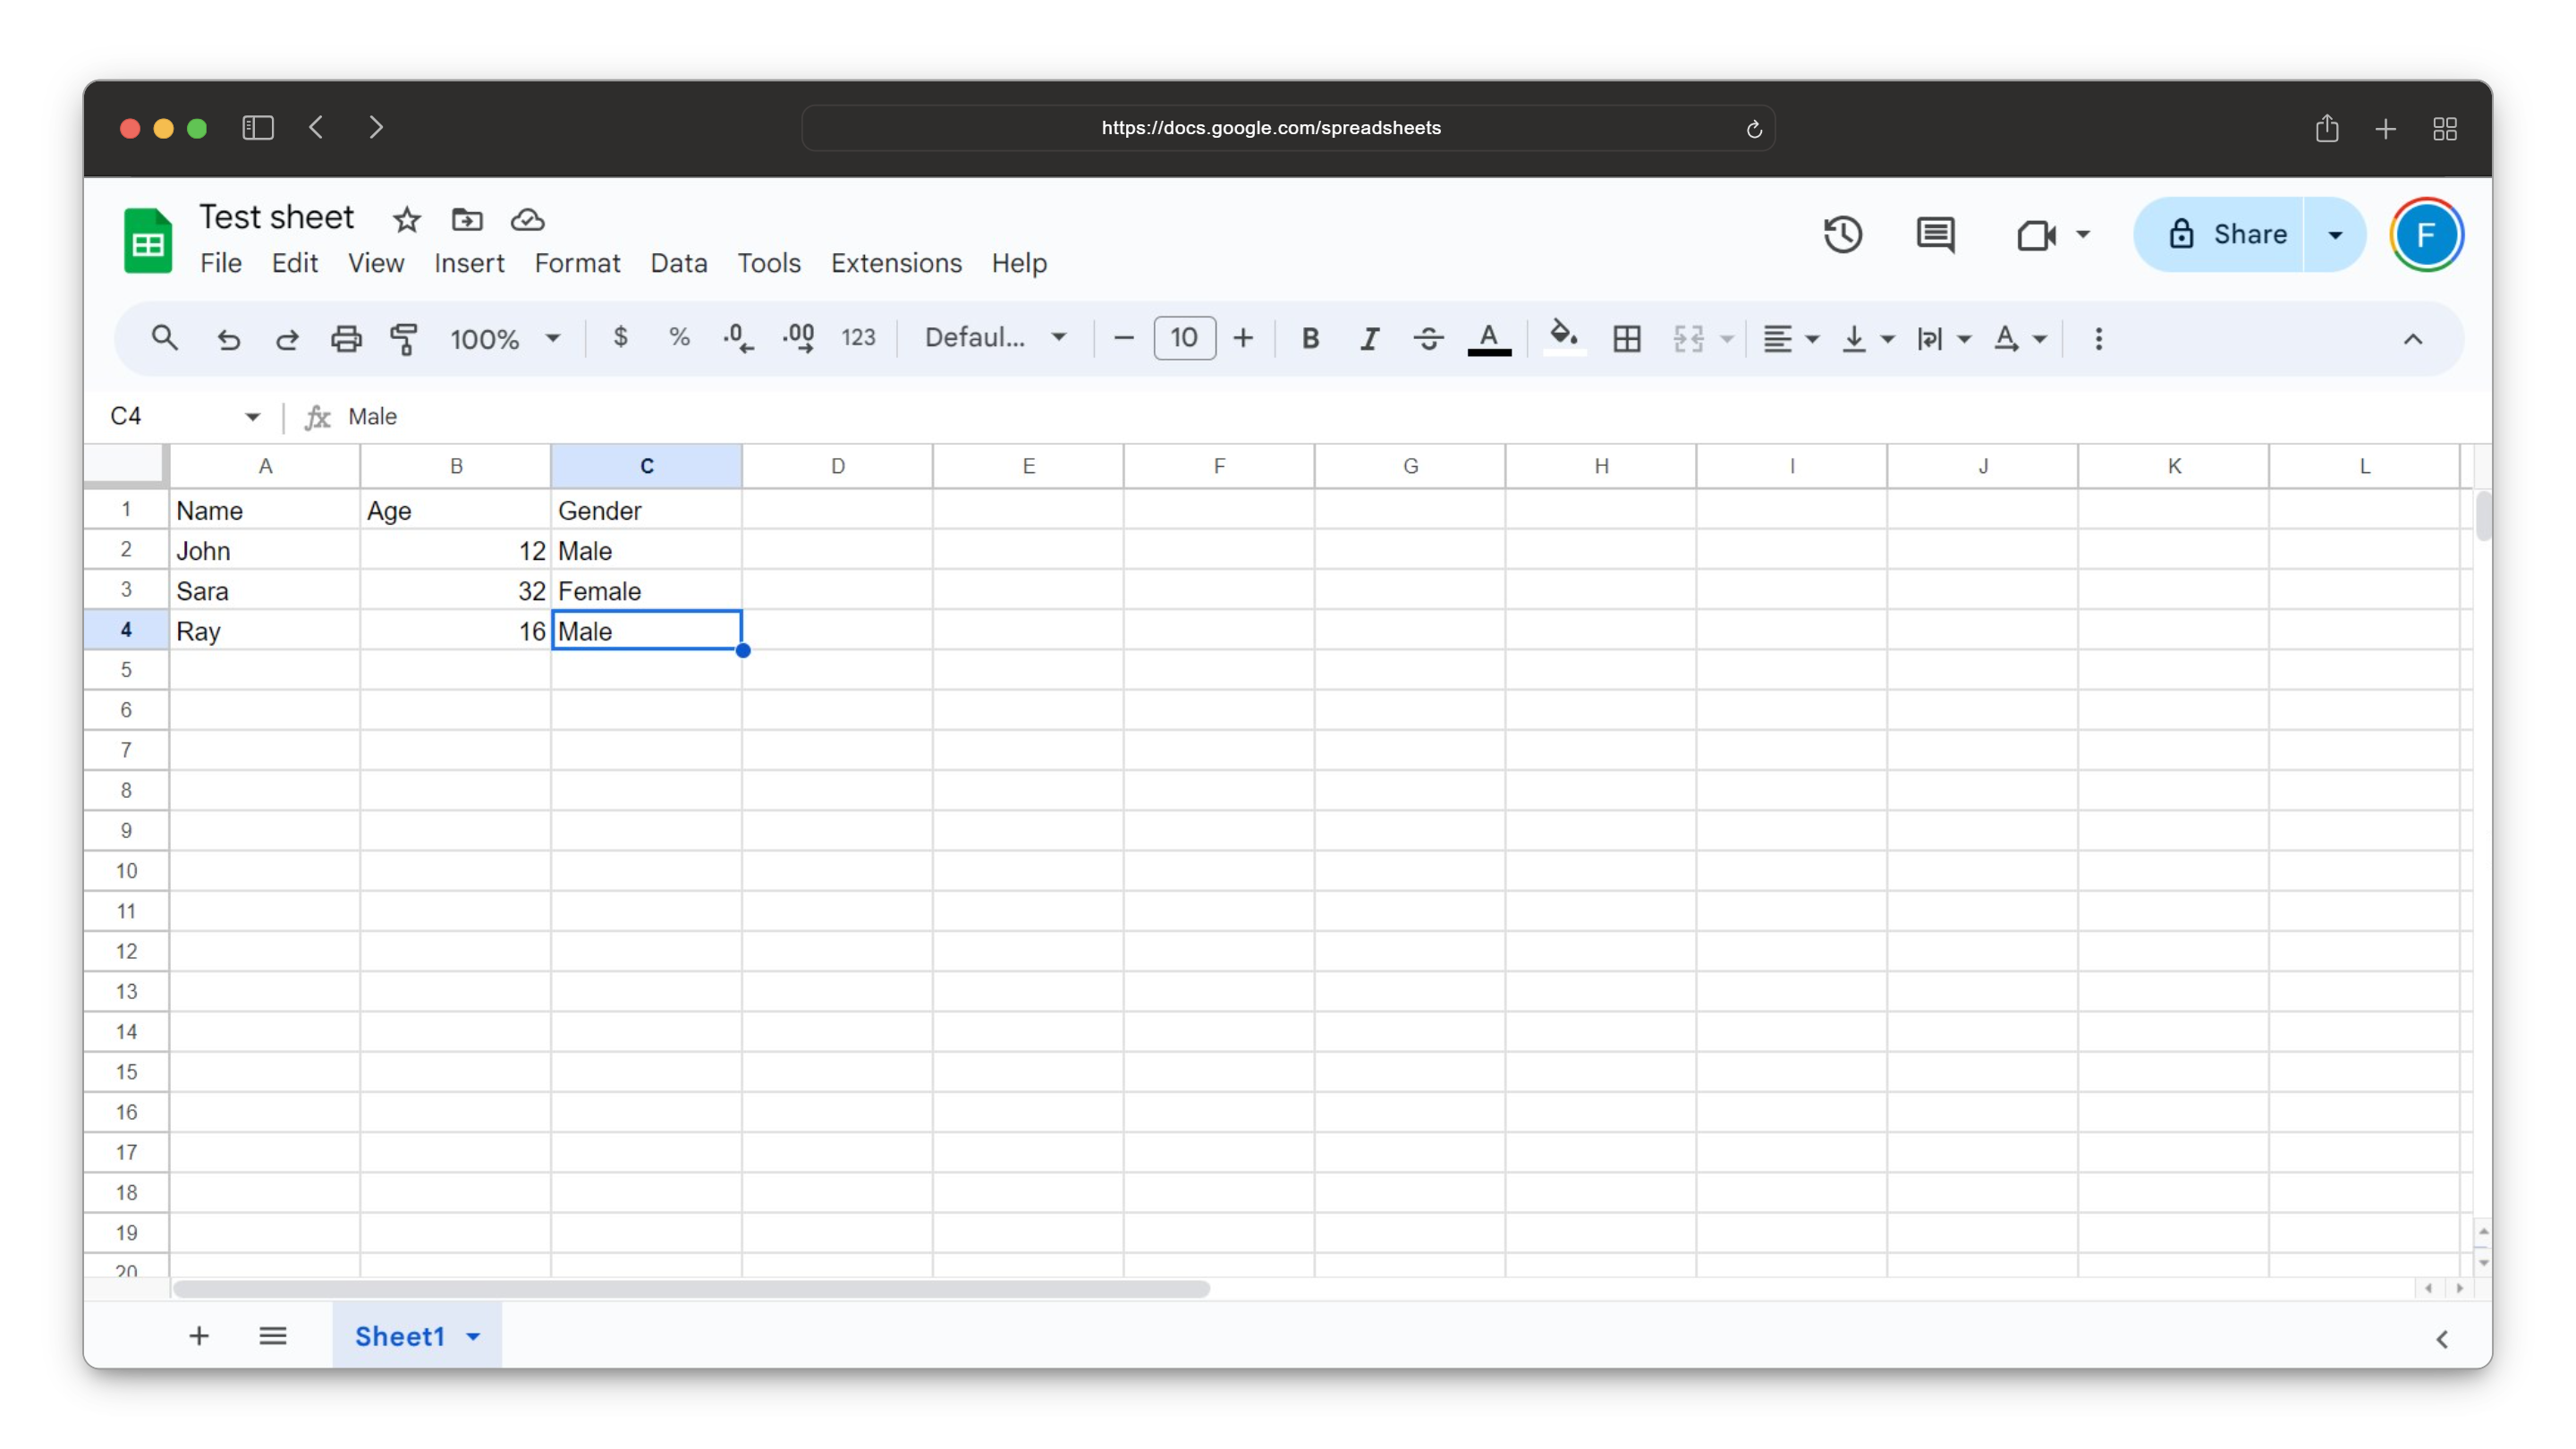
Step 3: Enter Your Data into the Spreadsheet
Input the data you want to include in your table into the cells of the spreadsheet.
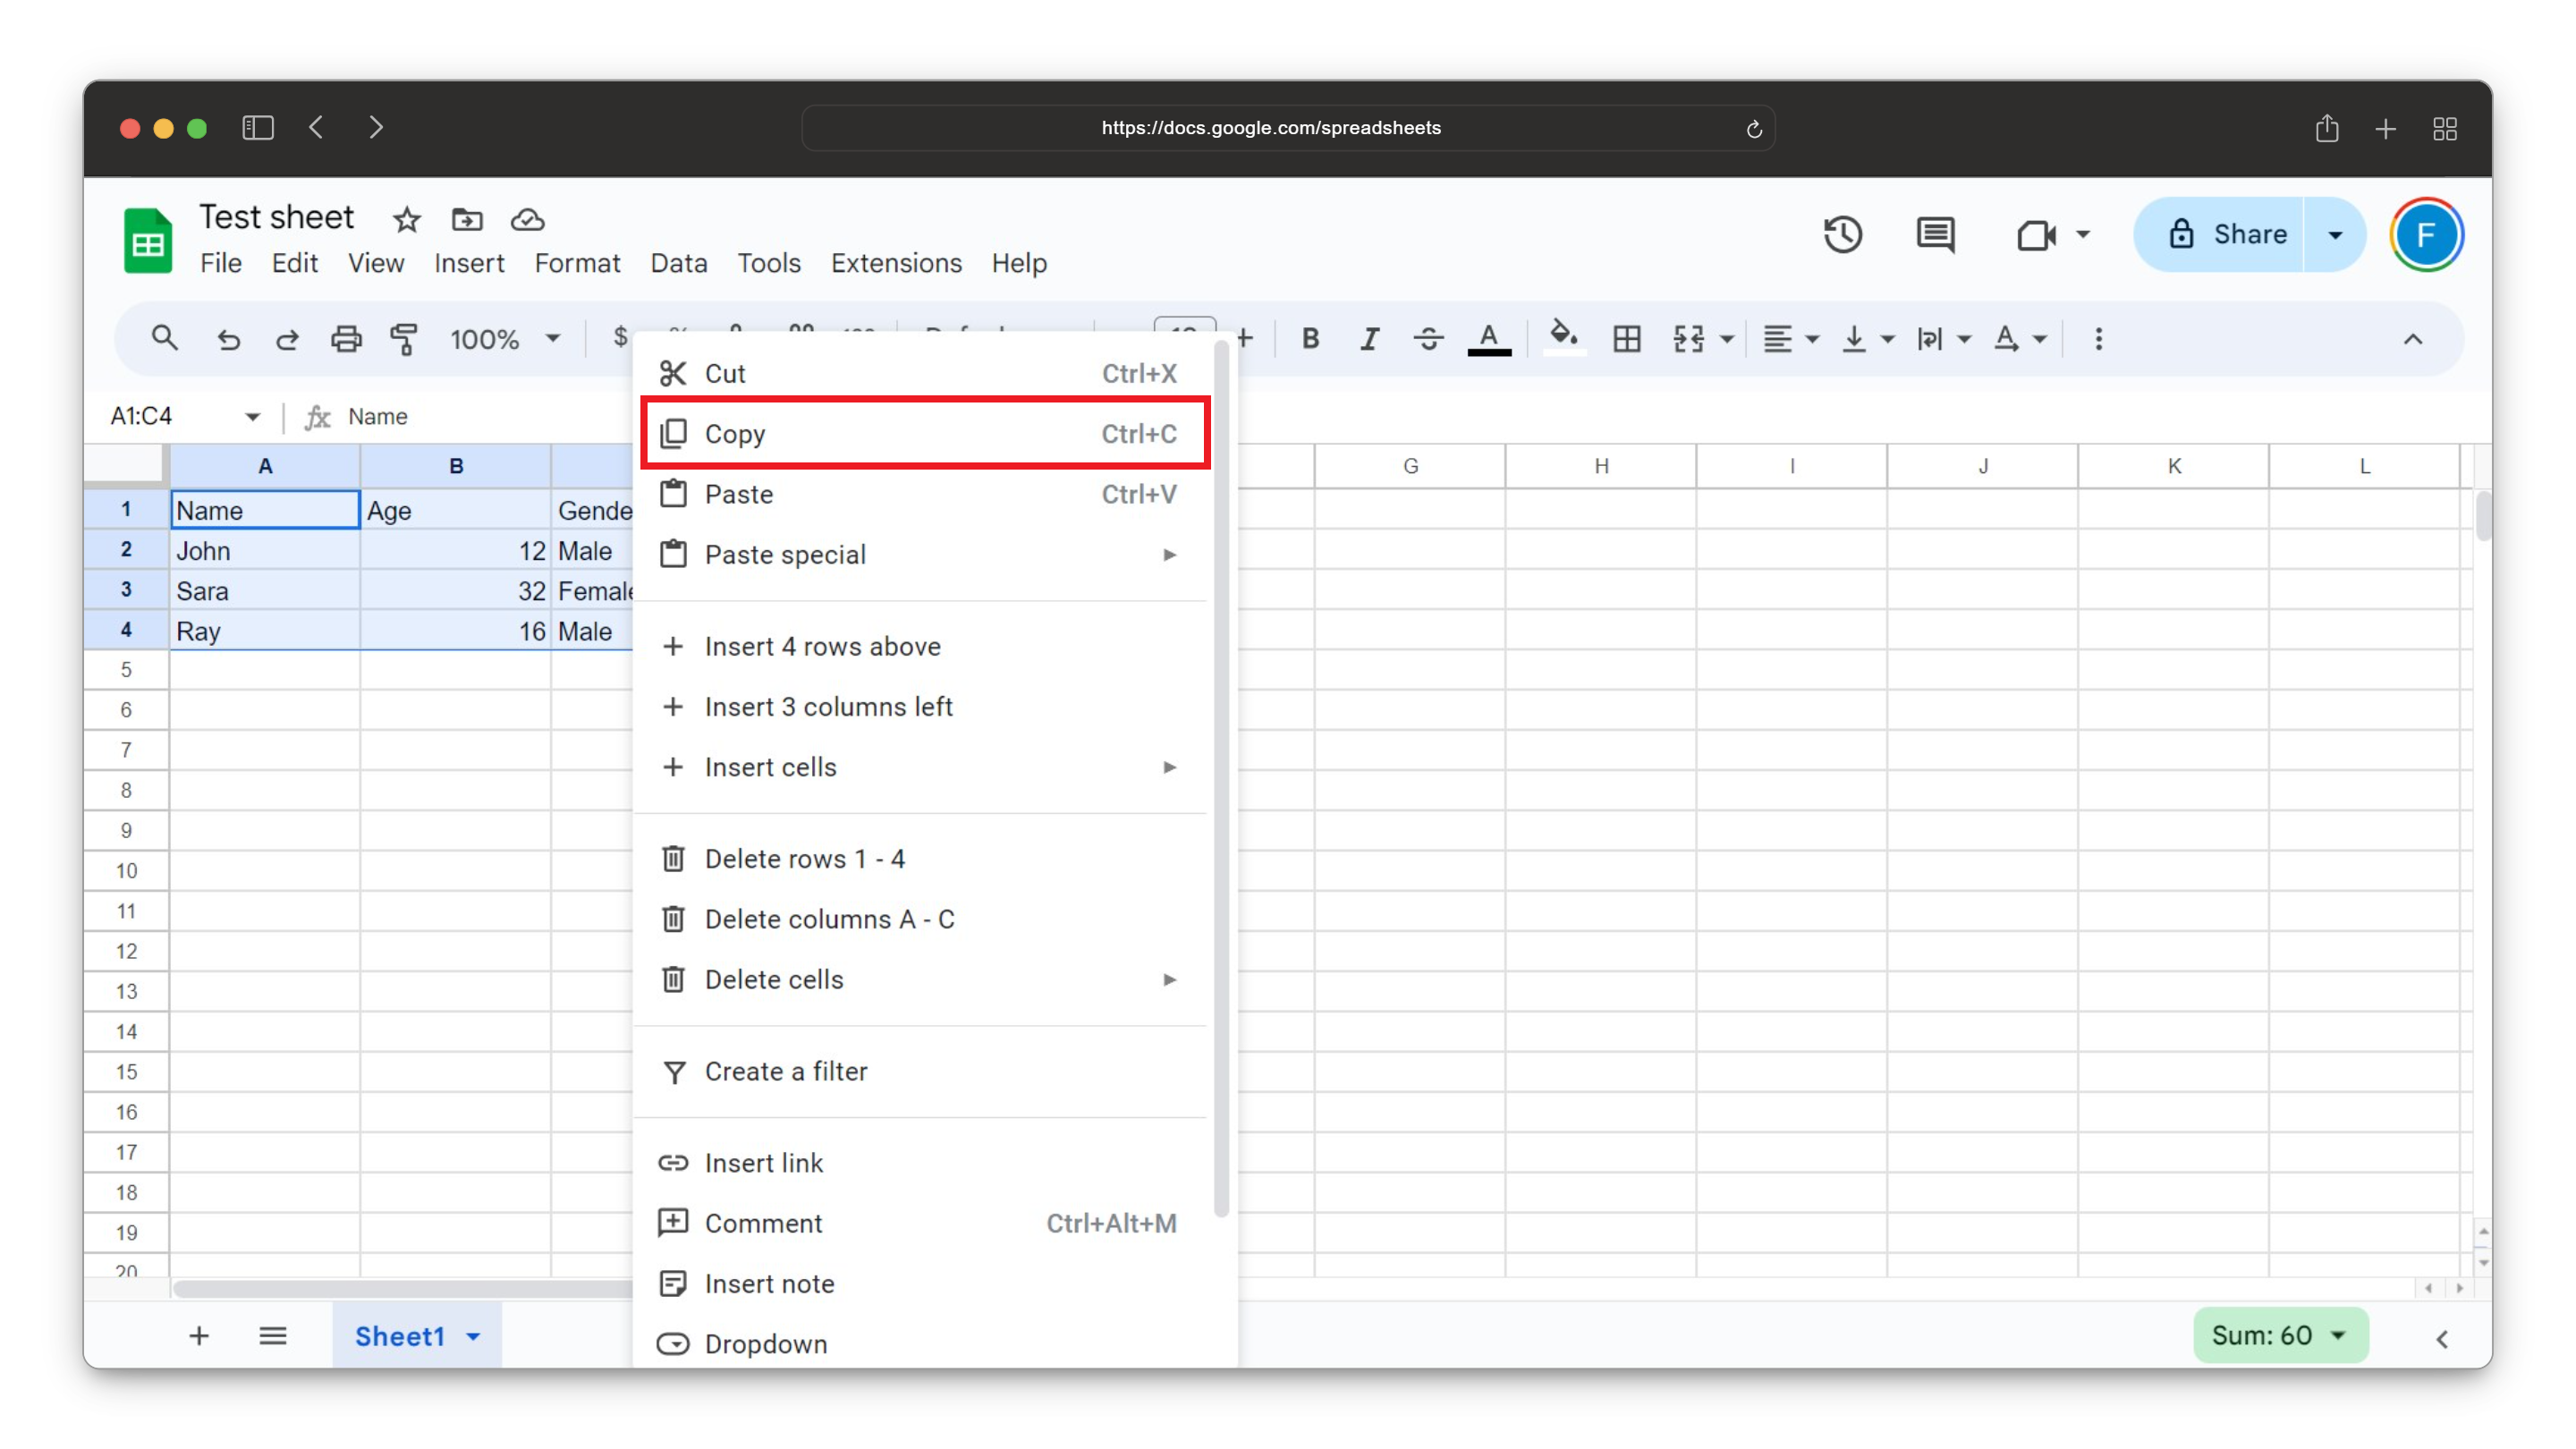
Step 4: Select the Data
Click and drag to select the area of the spreadsheet containing the data you want to include in your table.

Step 5: Copy the Selected Area
Right-click on the selected area and choose “Copy” from the menu, or use the keyboard shortcuts Ctrl+C (Windows) or Command+C (Mac).
Step 6: Launch Gmail
Open a new tab in your web browser and open Gmail.
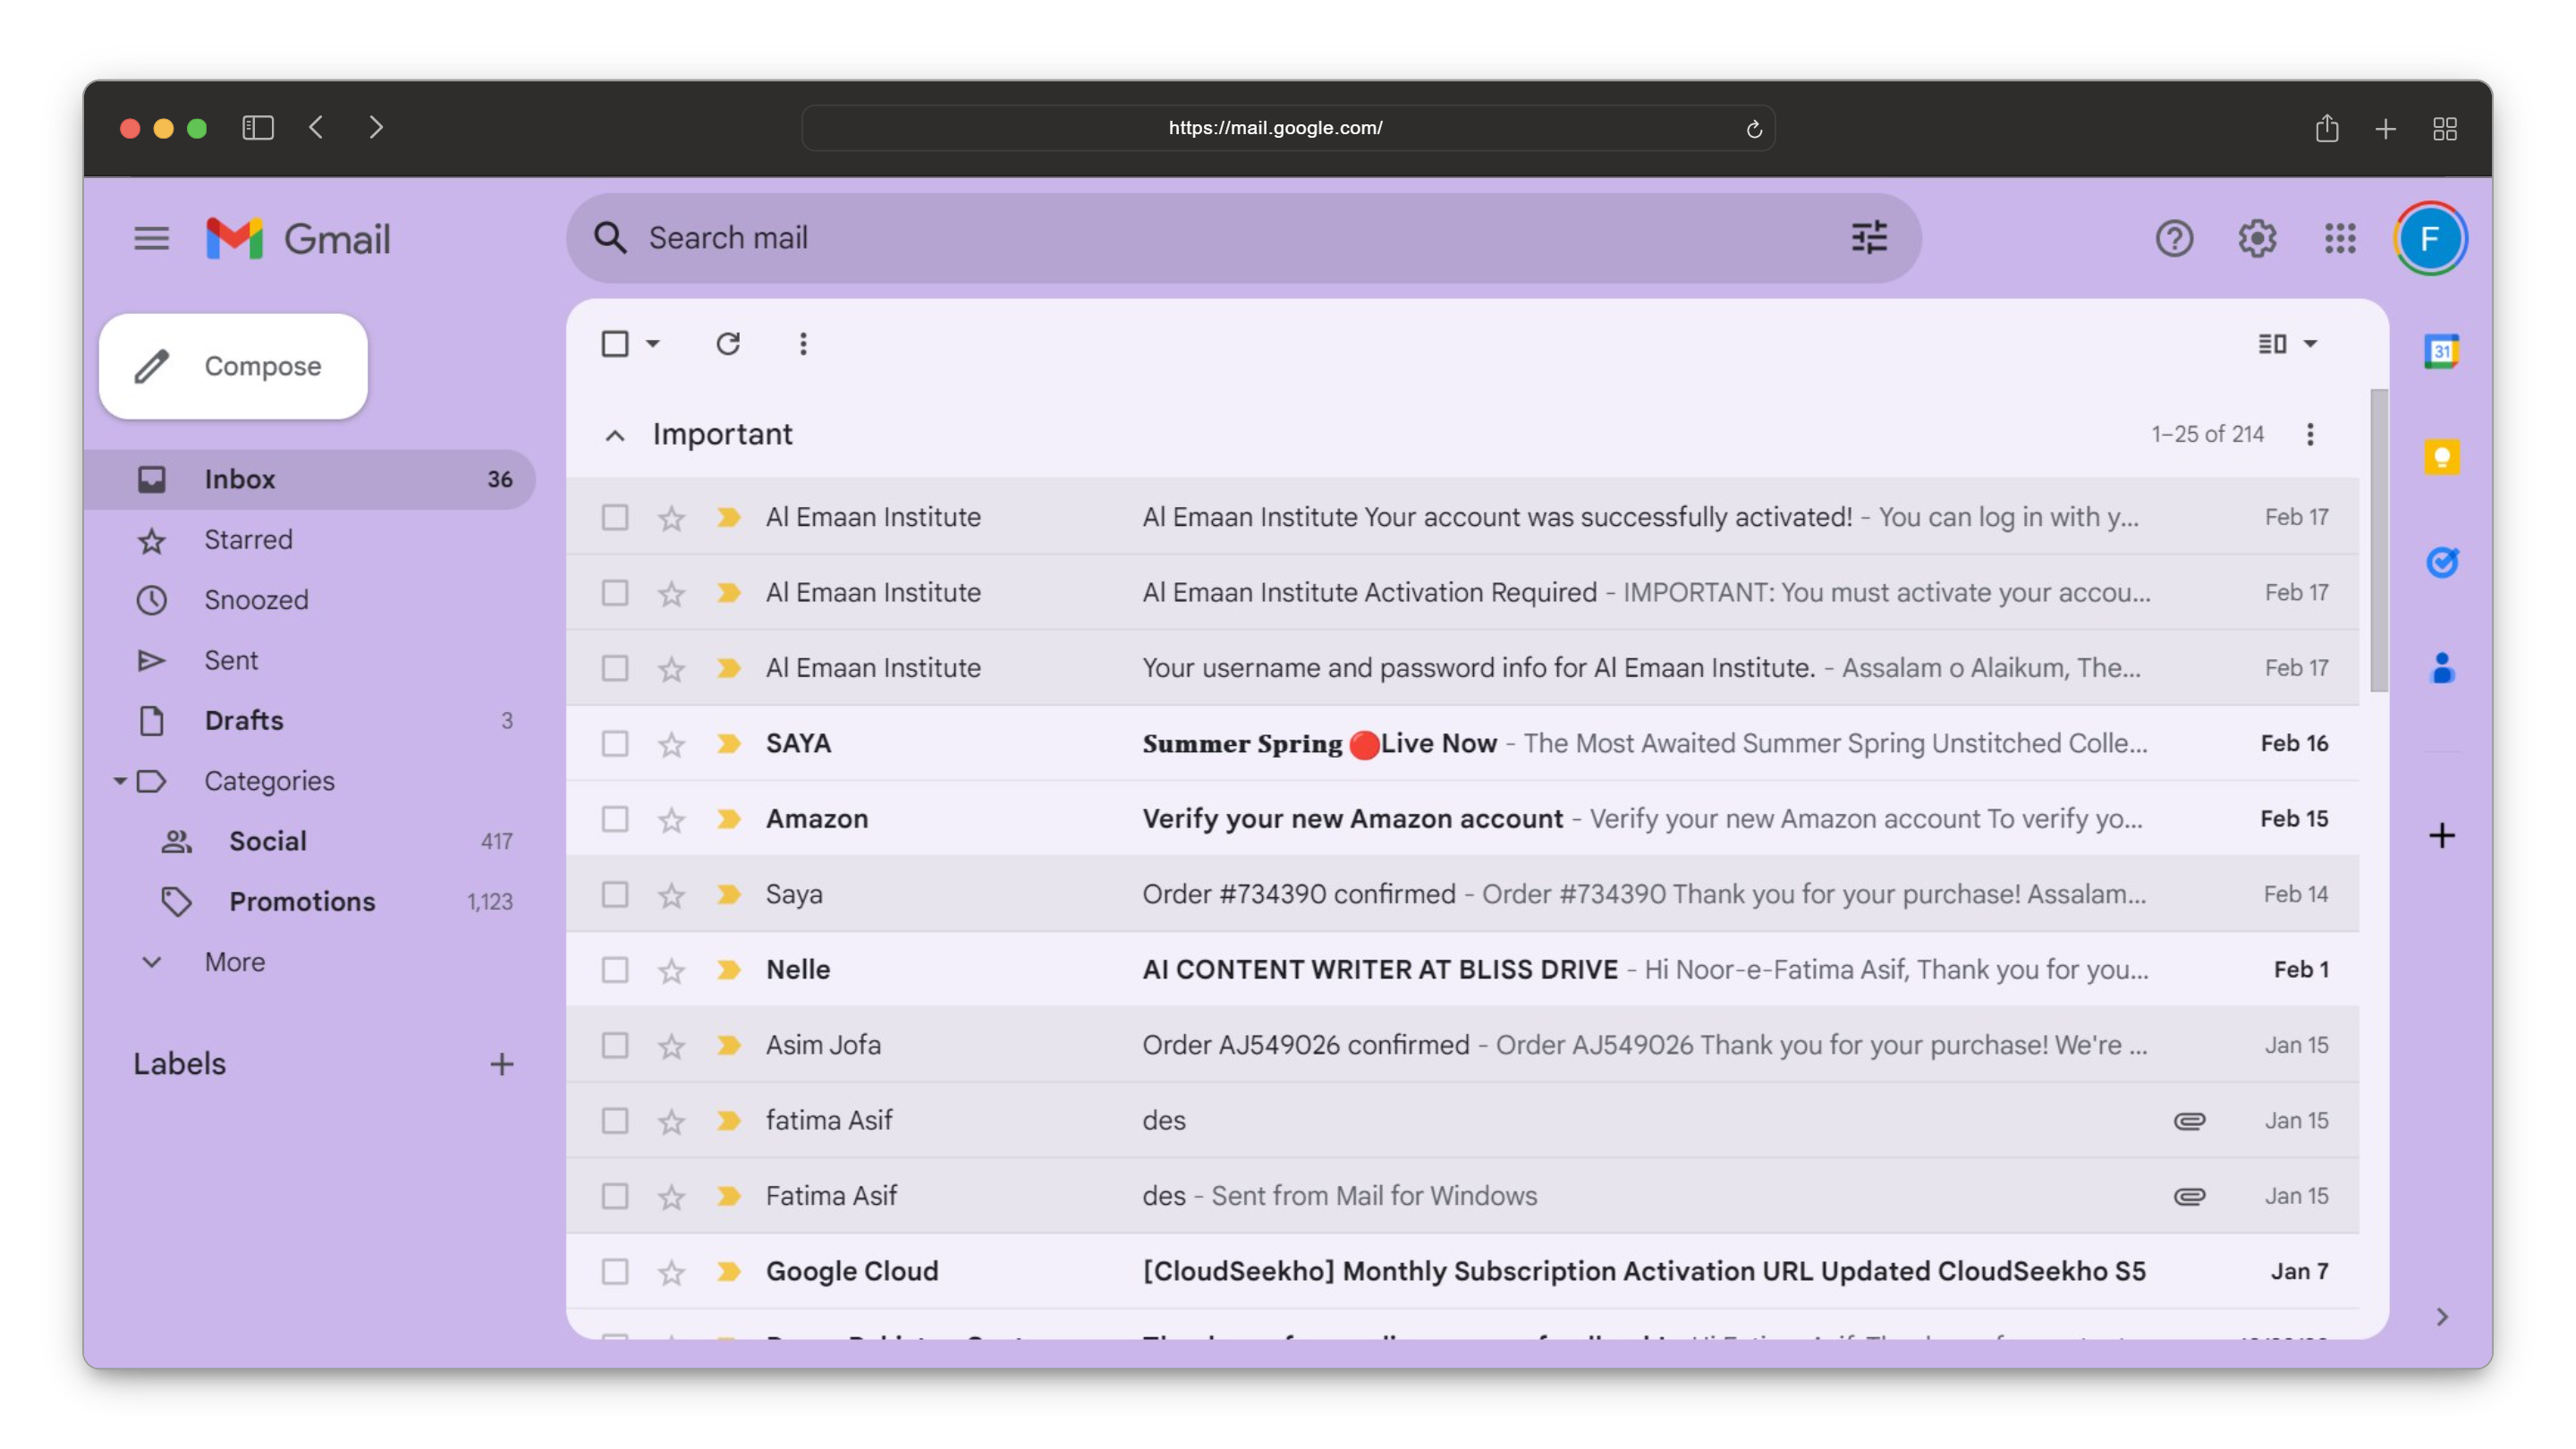
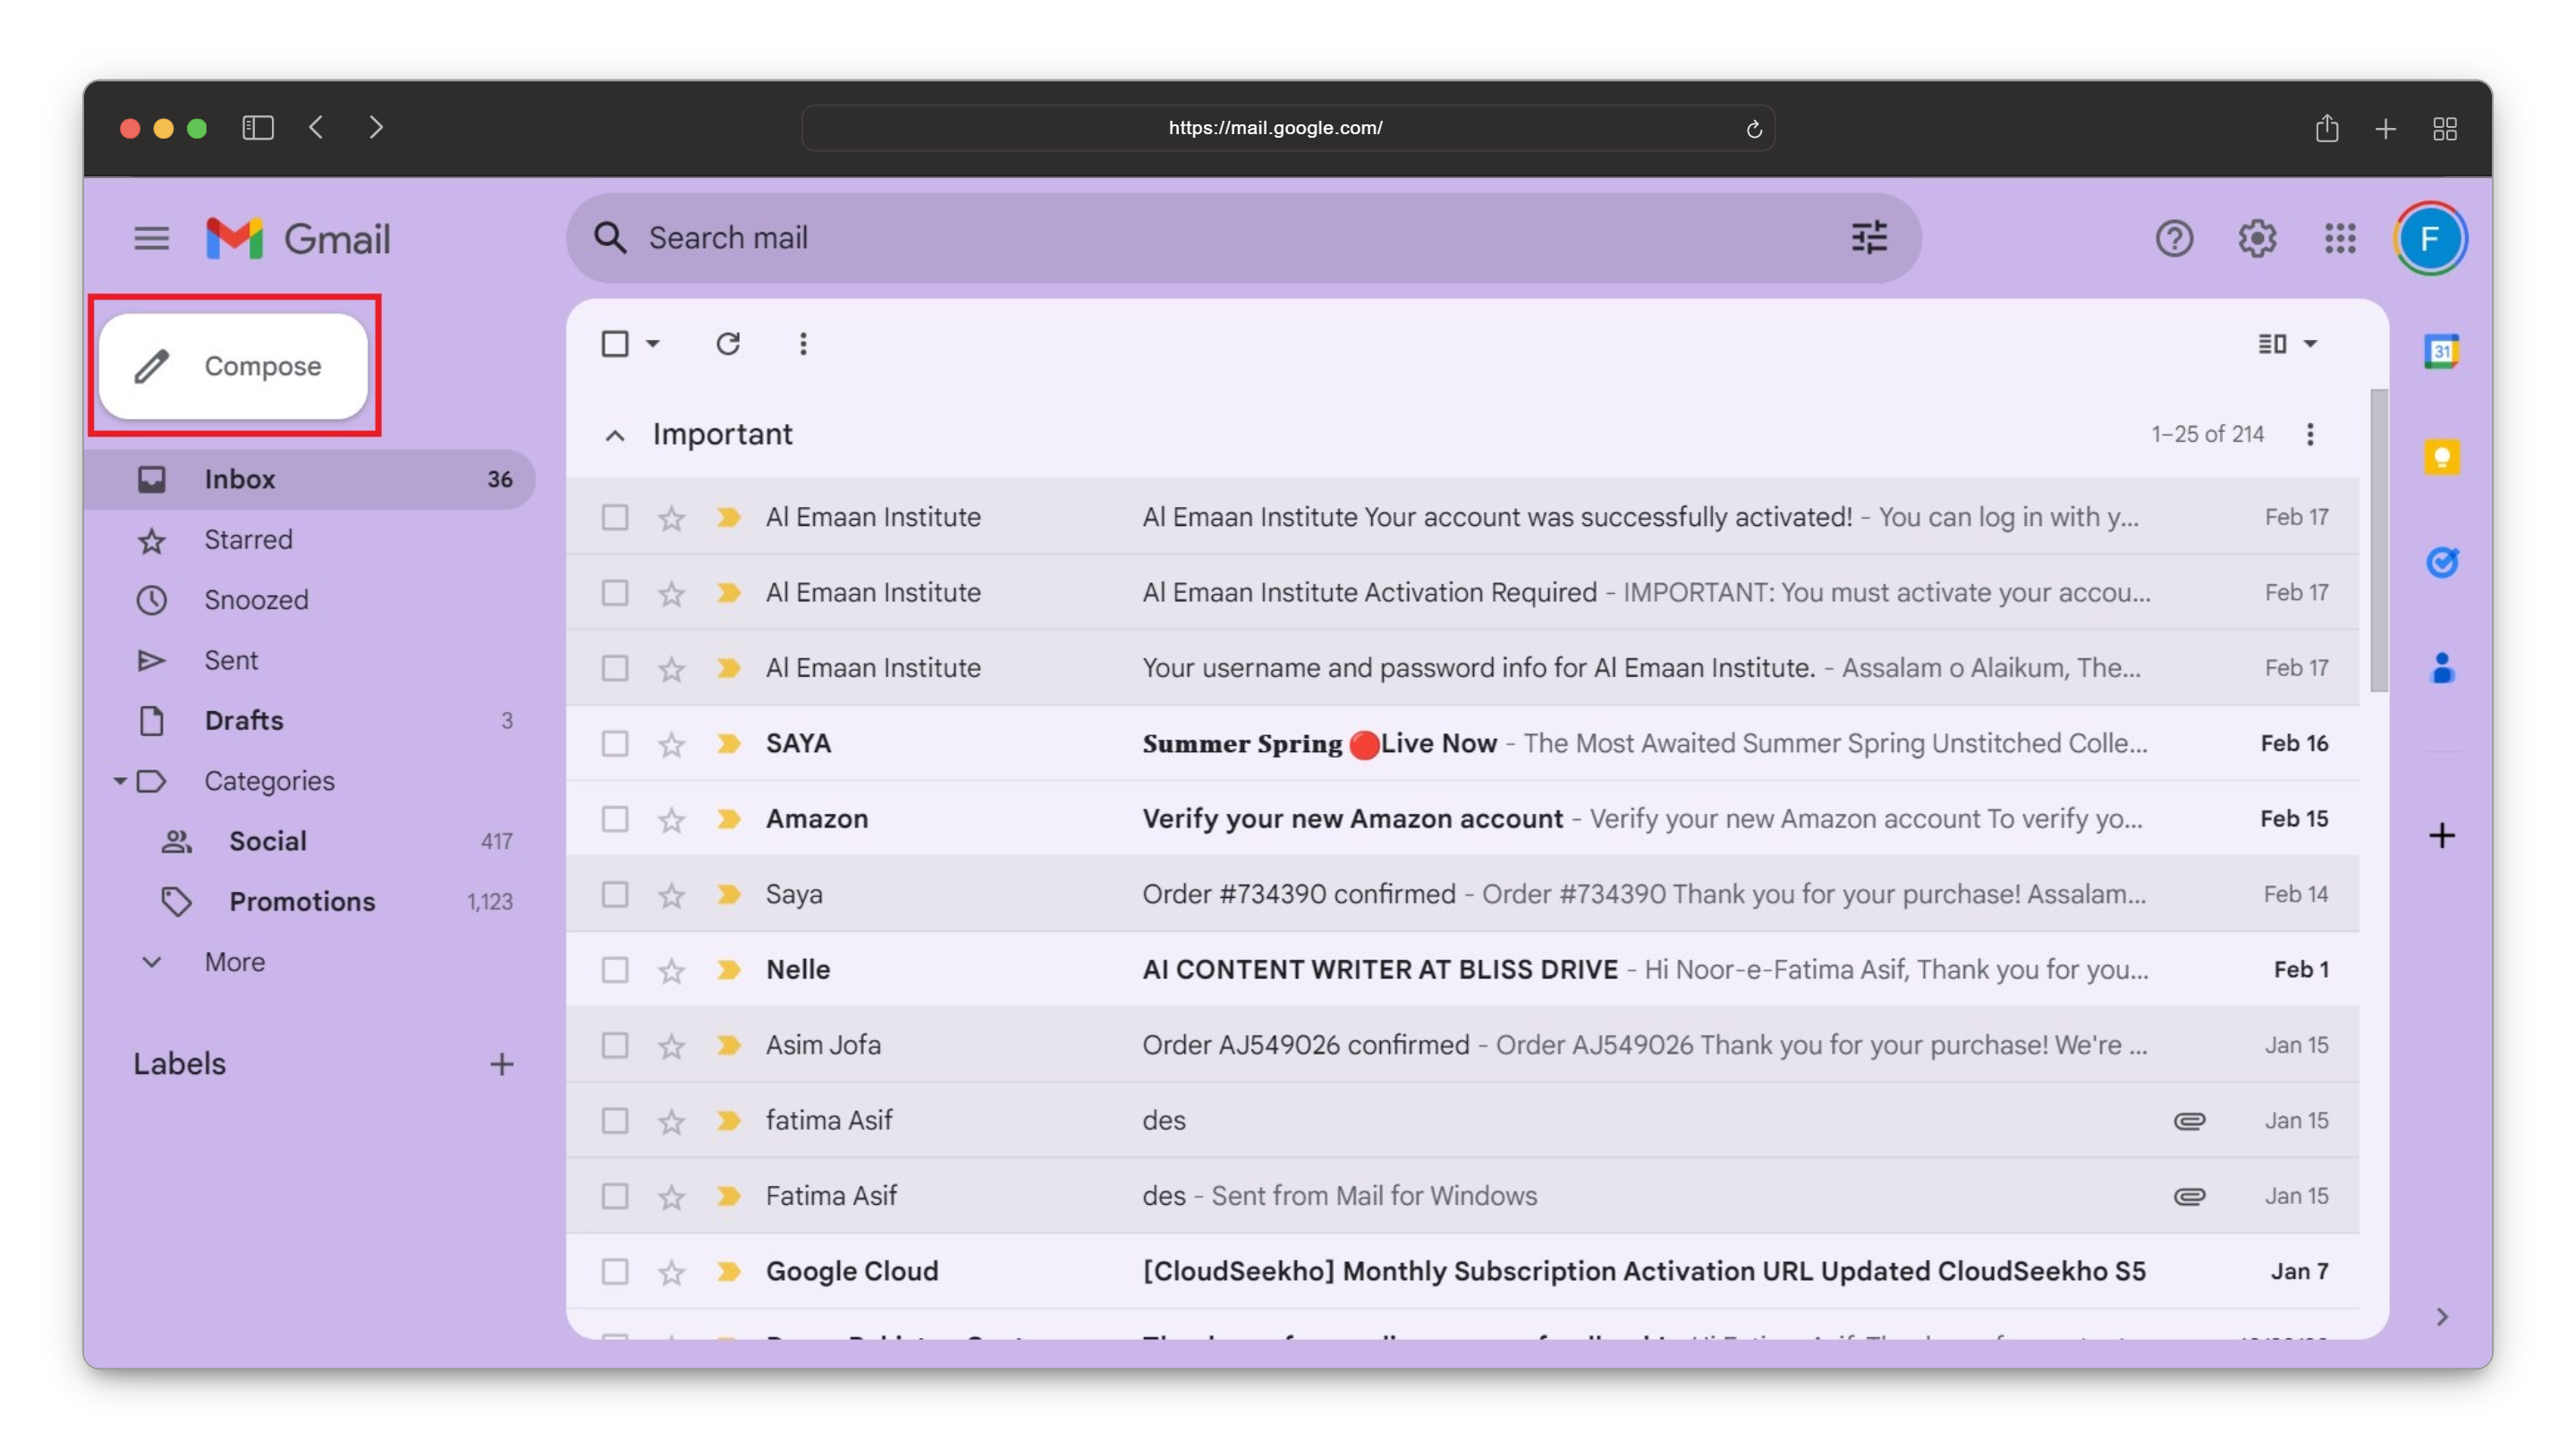
Step 7: Create a New Email
In Gmail, click on the “Compose” button to start a new email message.
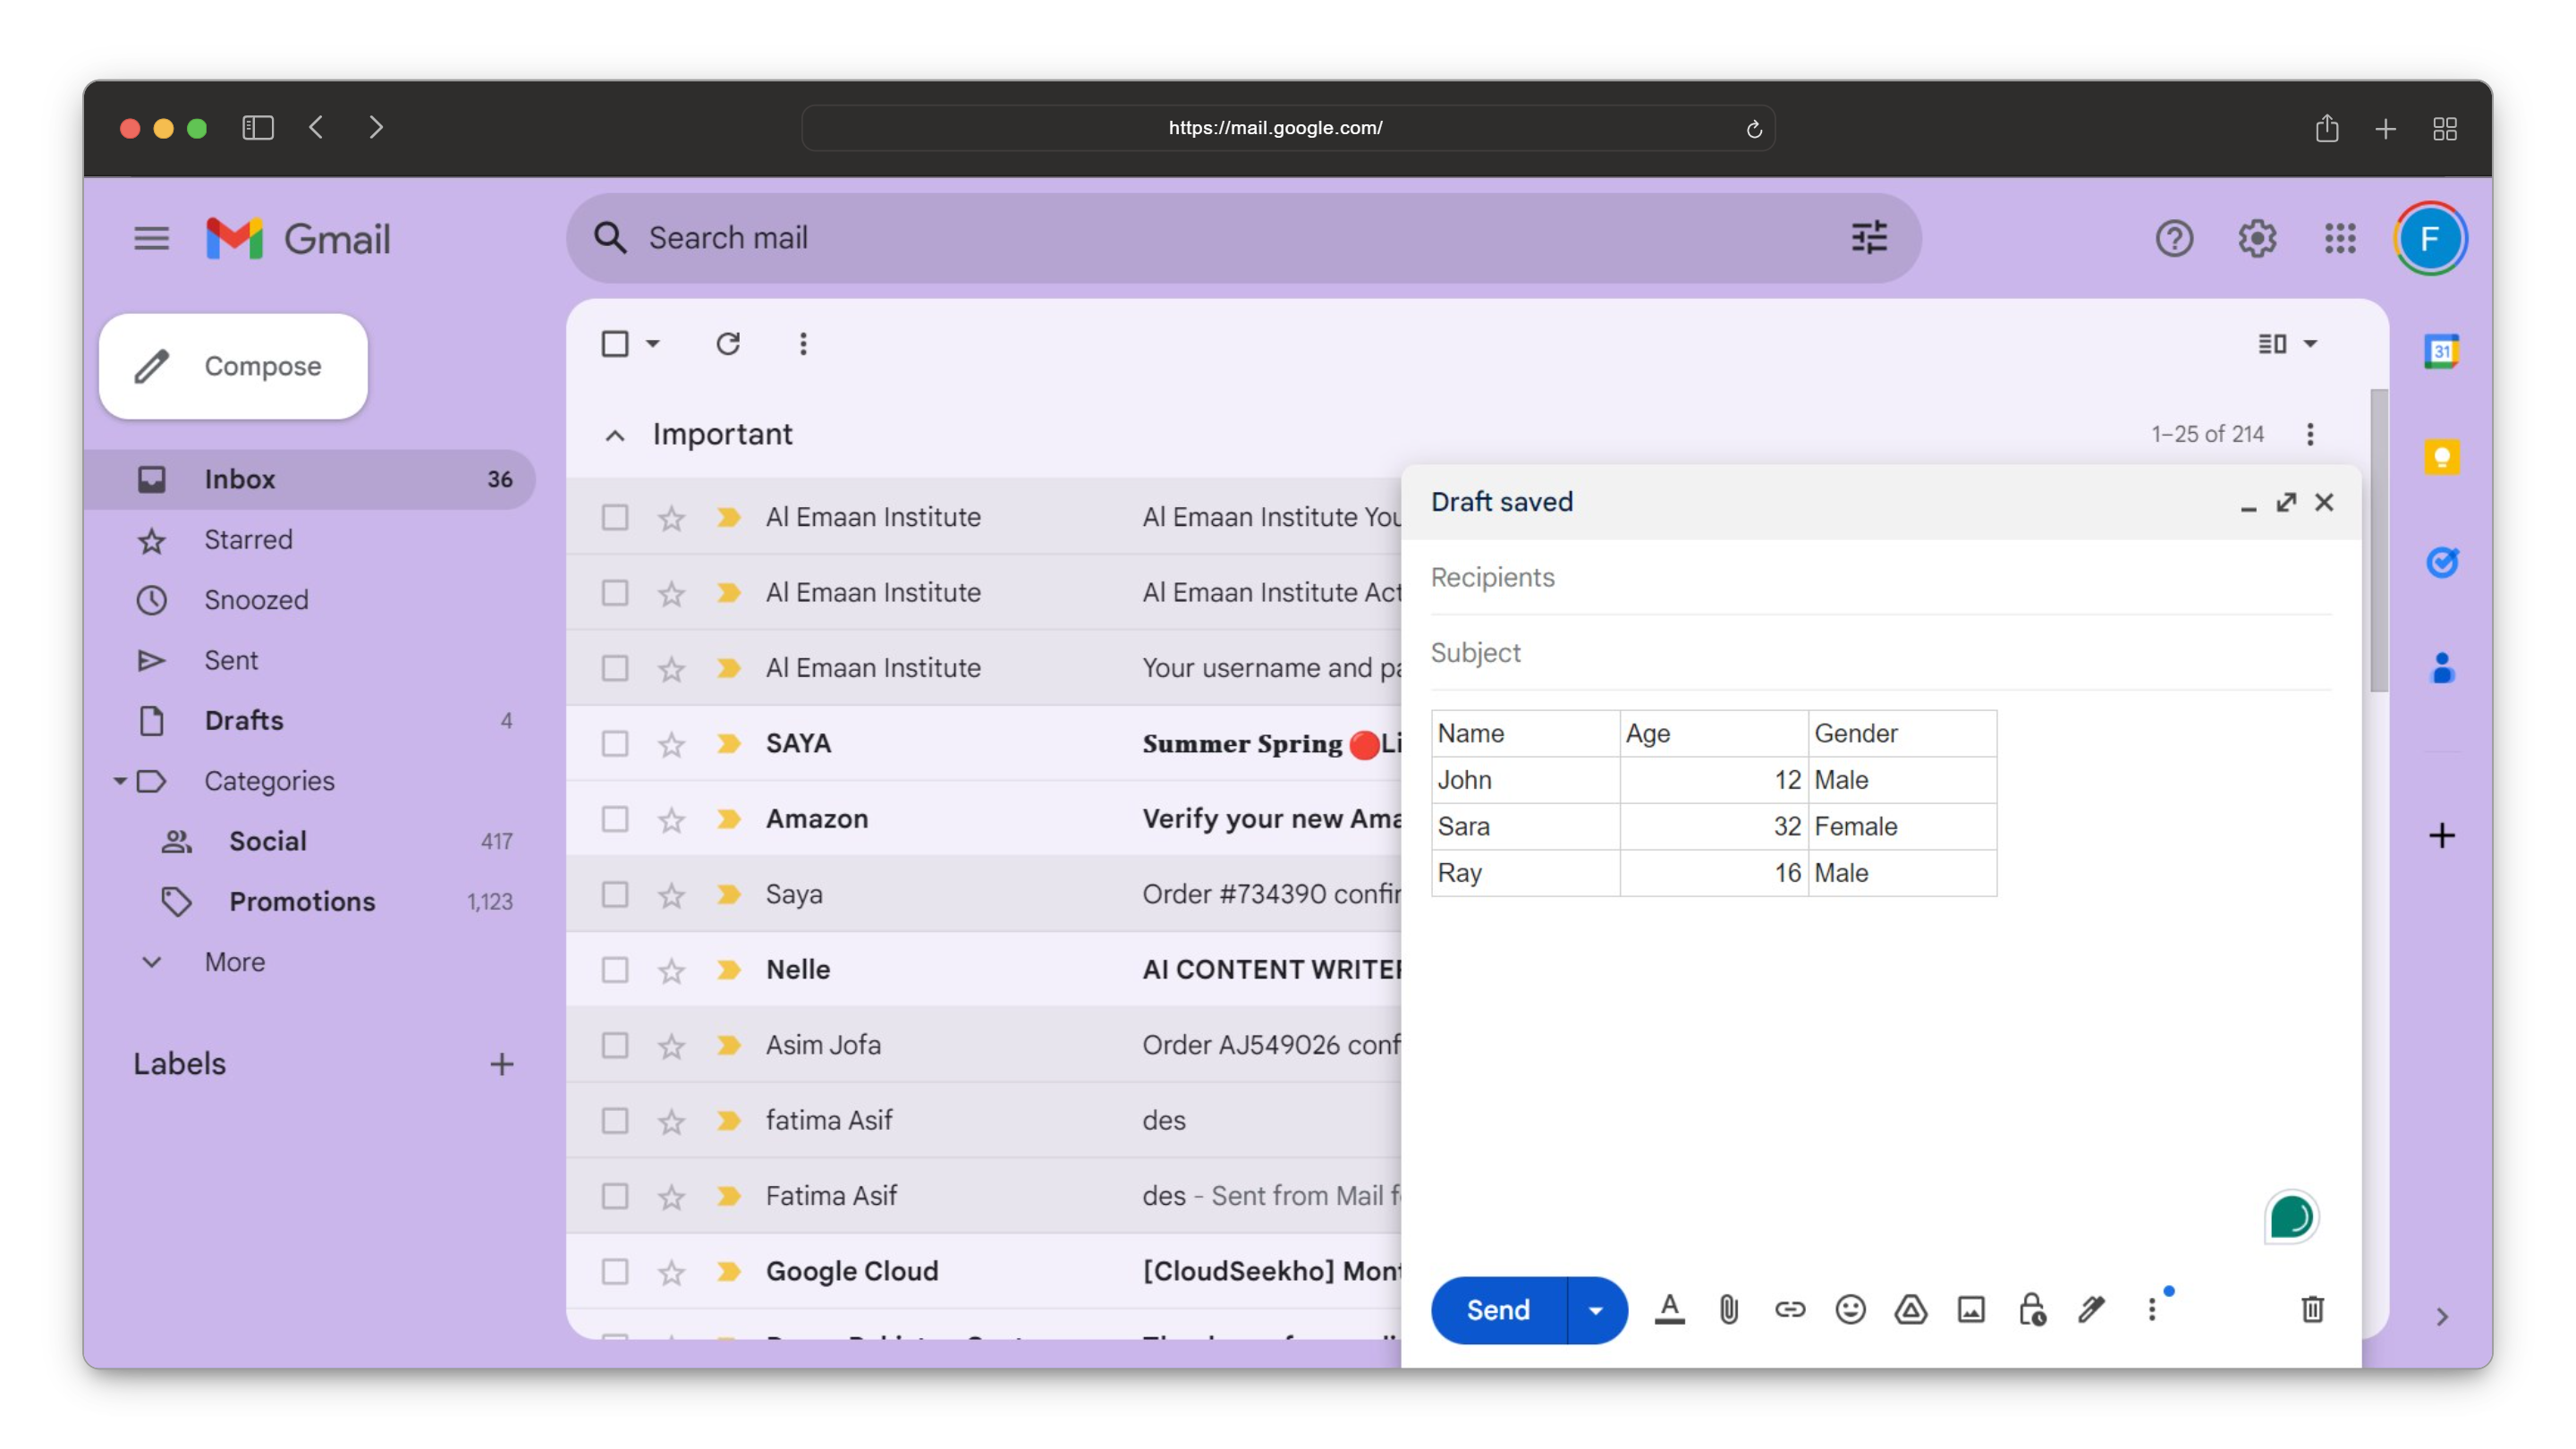
Step 8: Paste the Table
Right-click inside the body of the email or use the keyboard shortcuts Ctrl+V (Windows) or Command+V (Mac) to paste the table copied from Google Sheets.
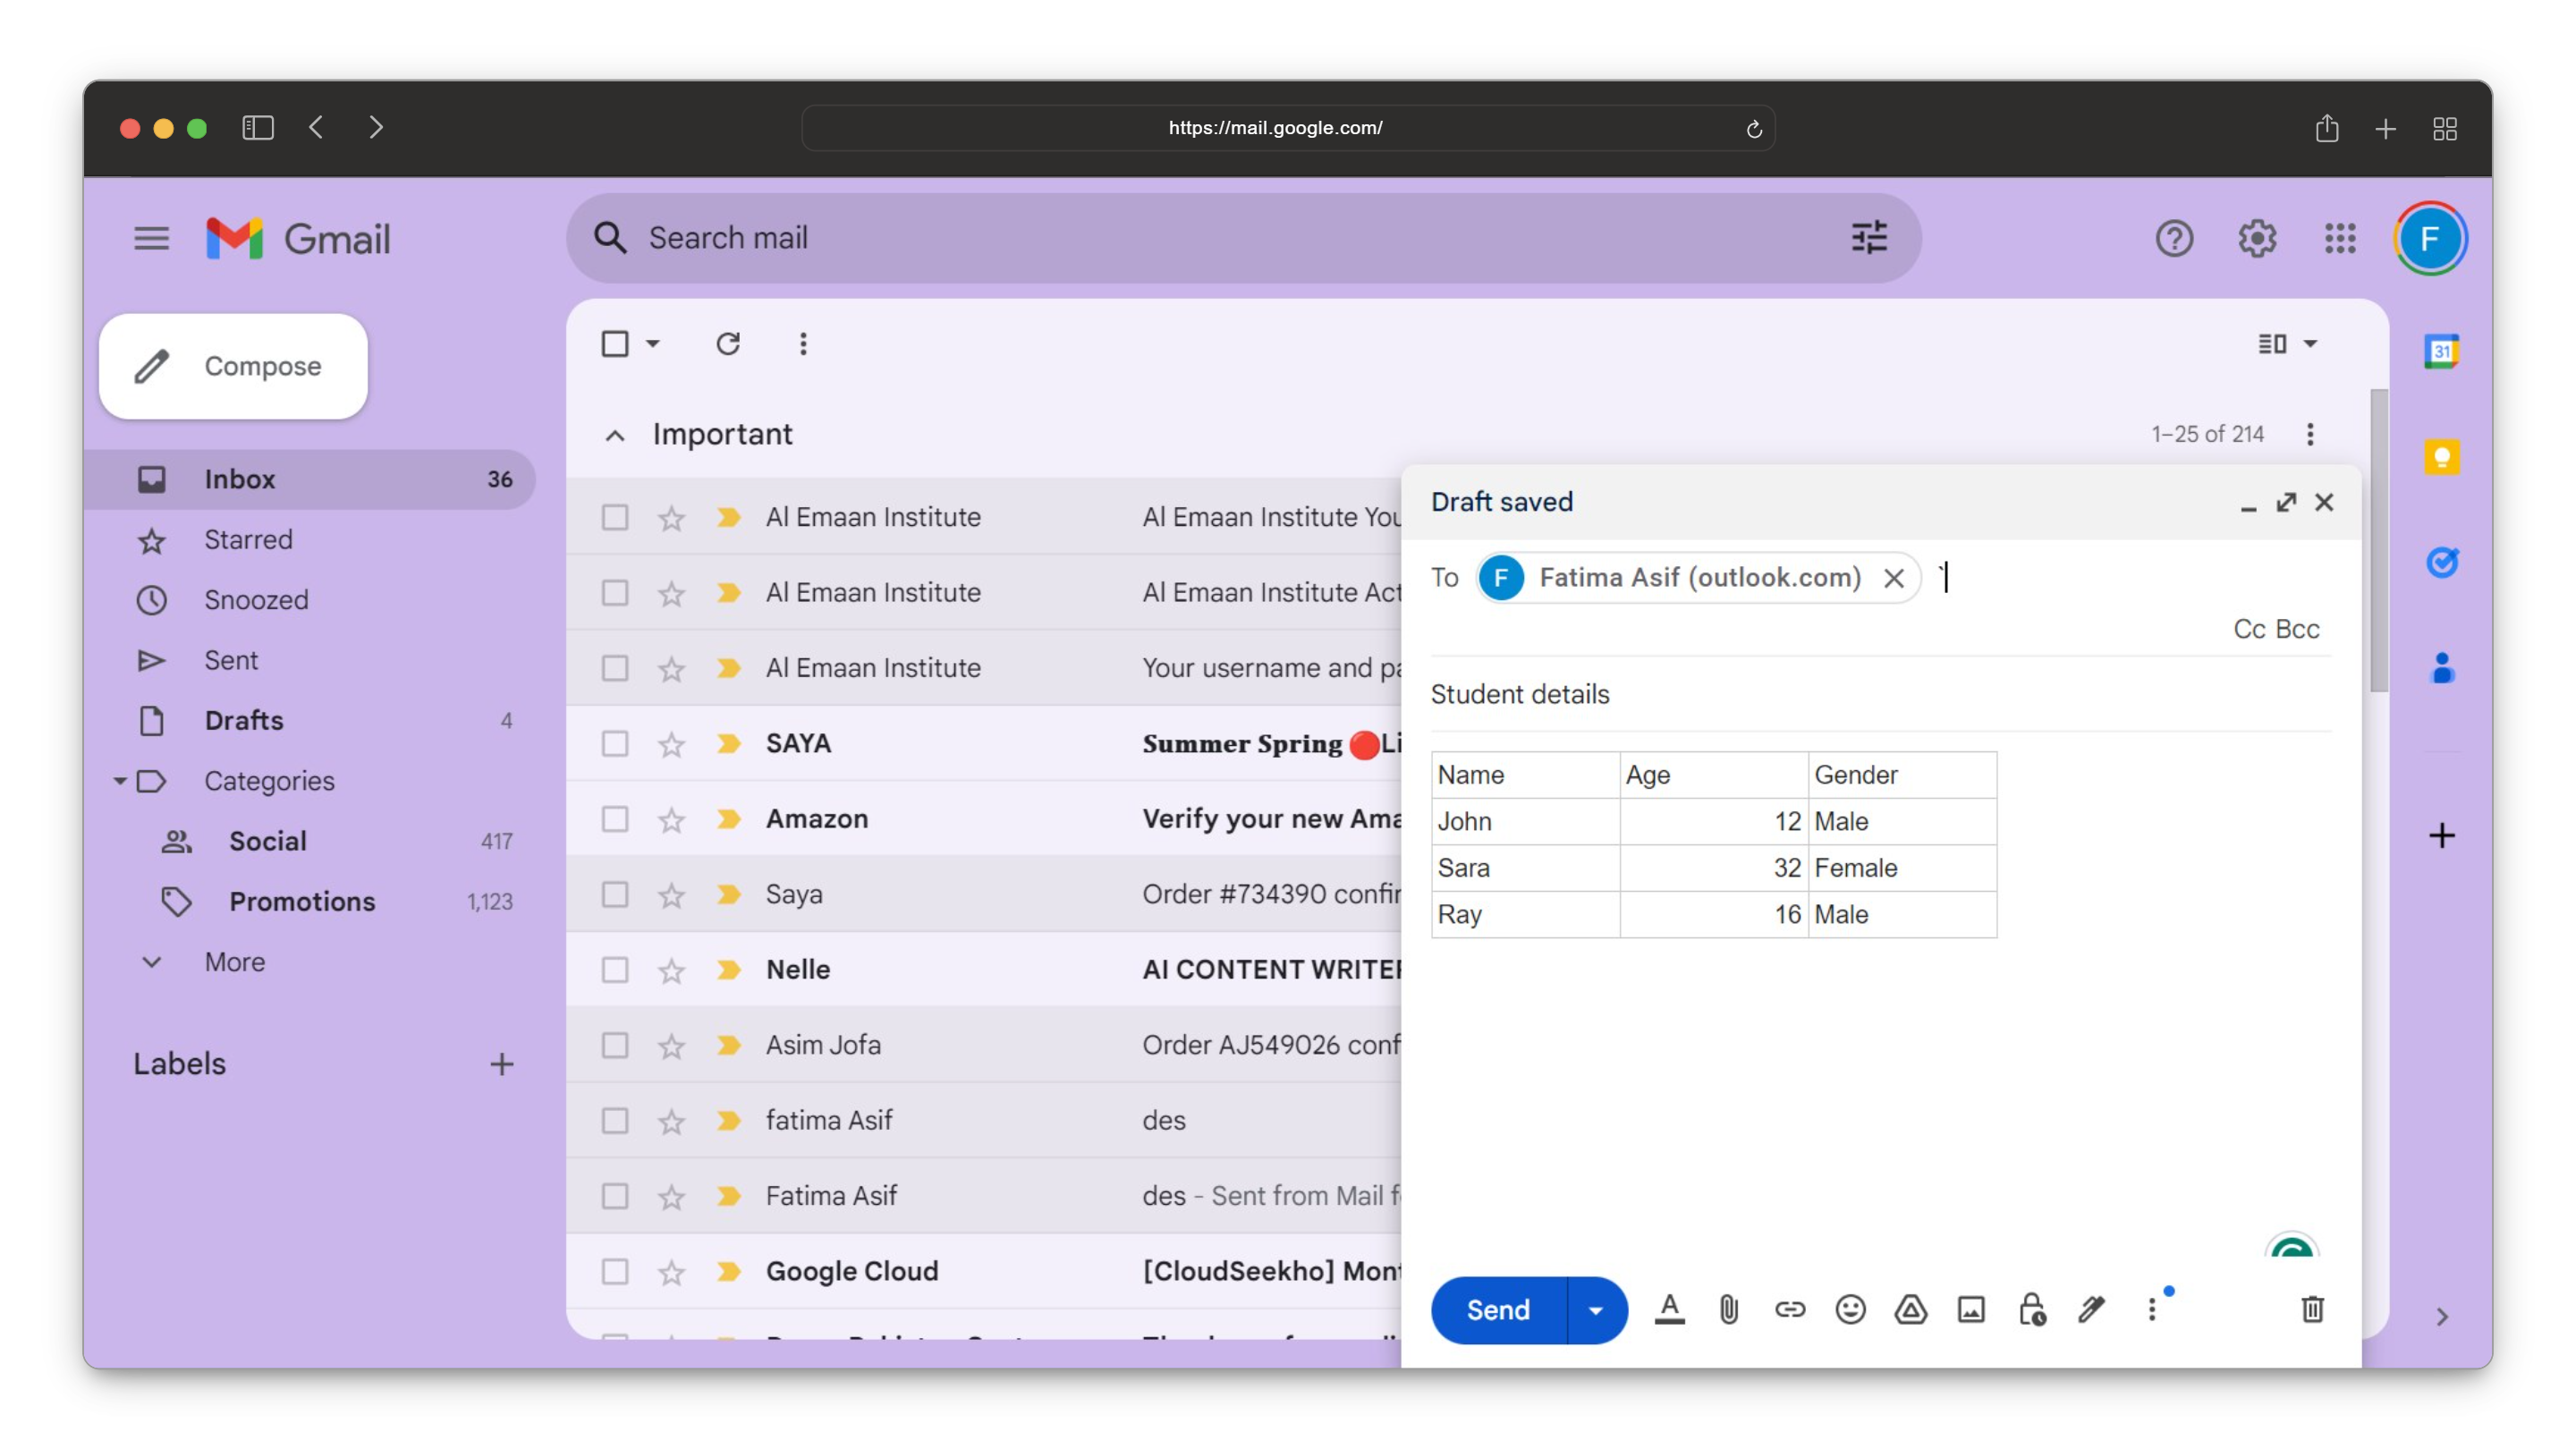
Step 9: Fill in Recipient’s Details
Enter the recipient’s email address, subject, and any additional information you want to include in the email.
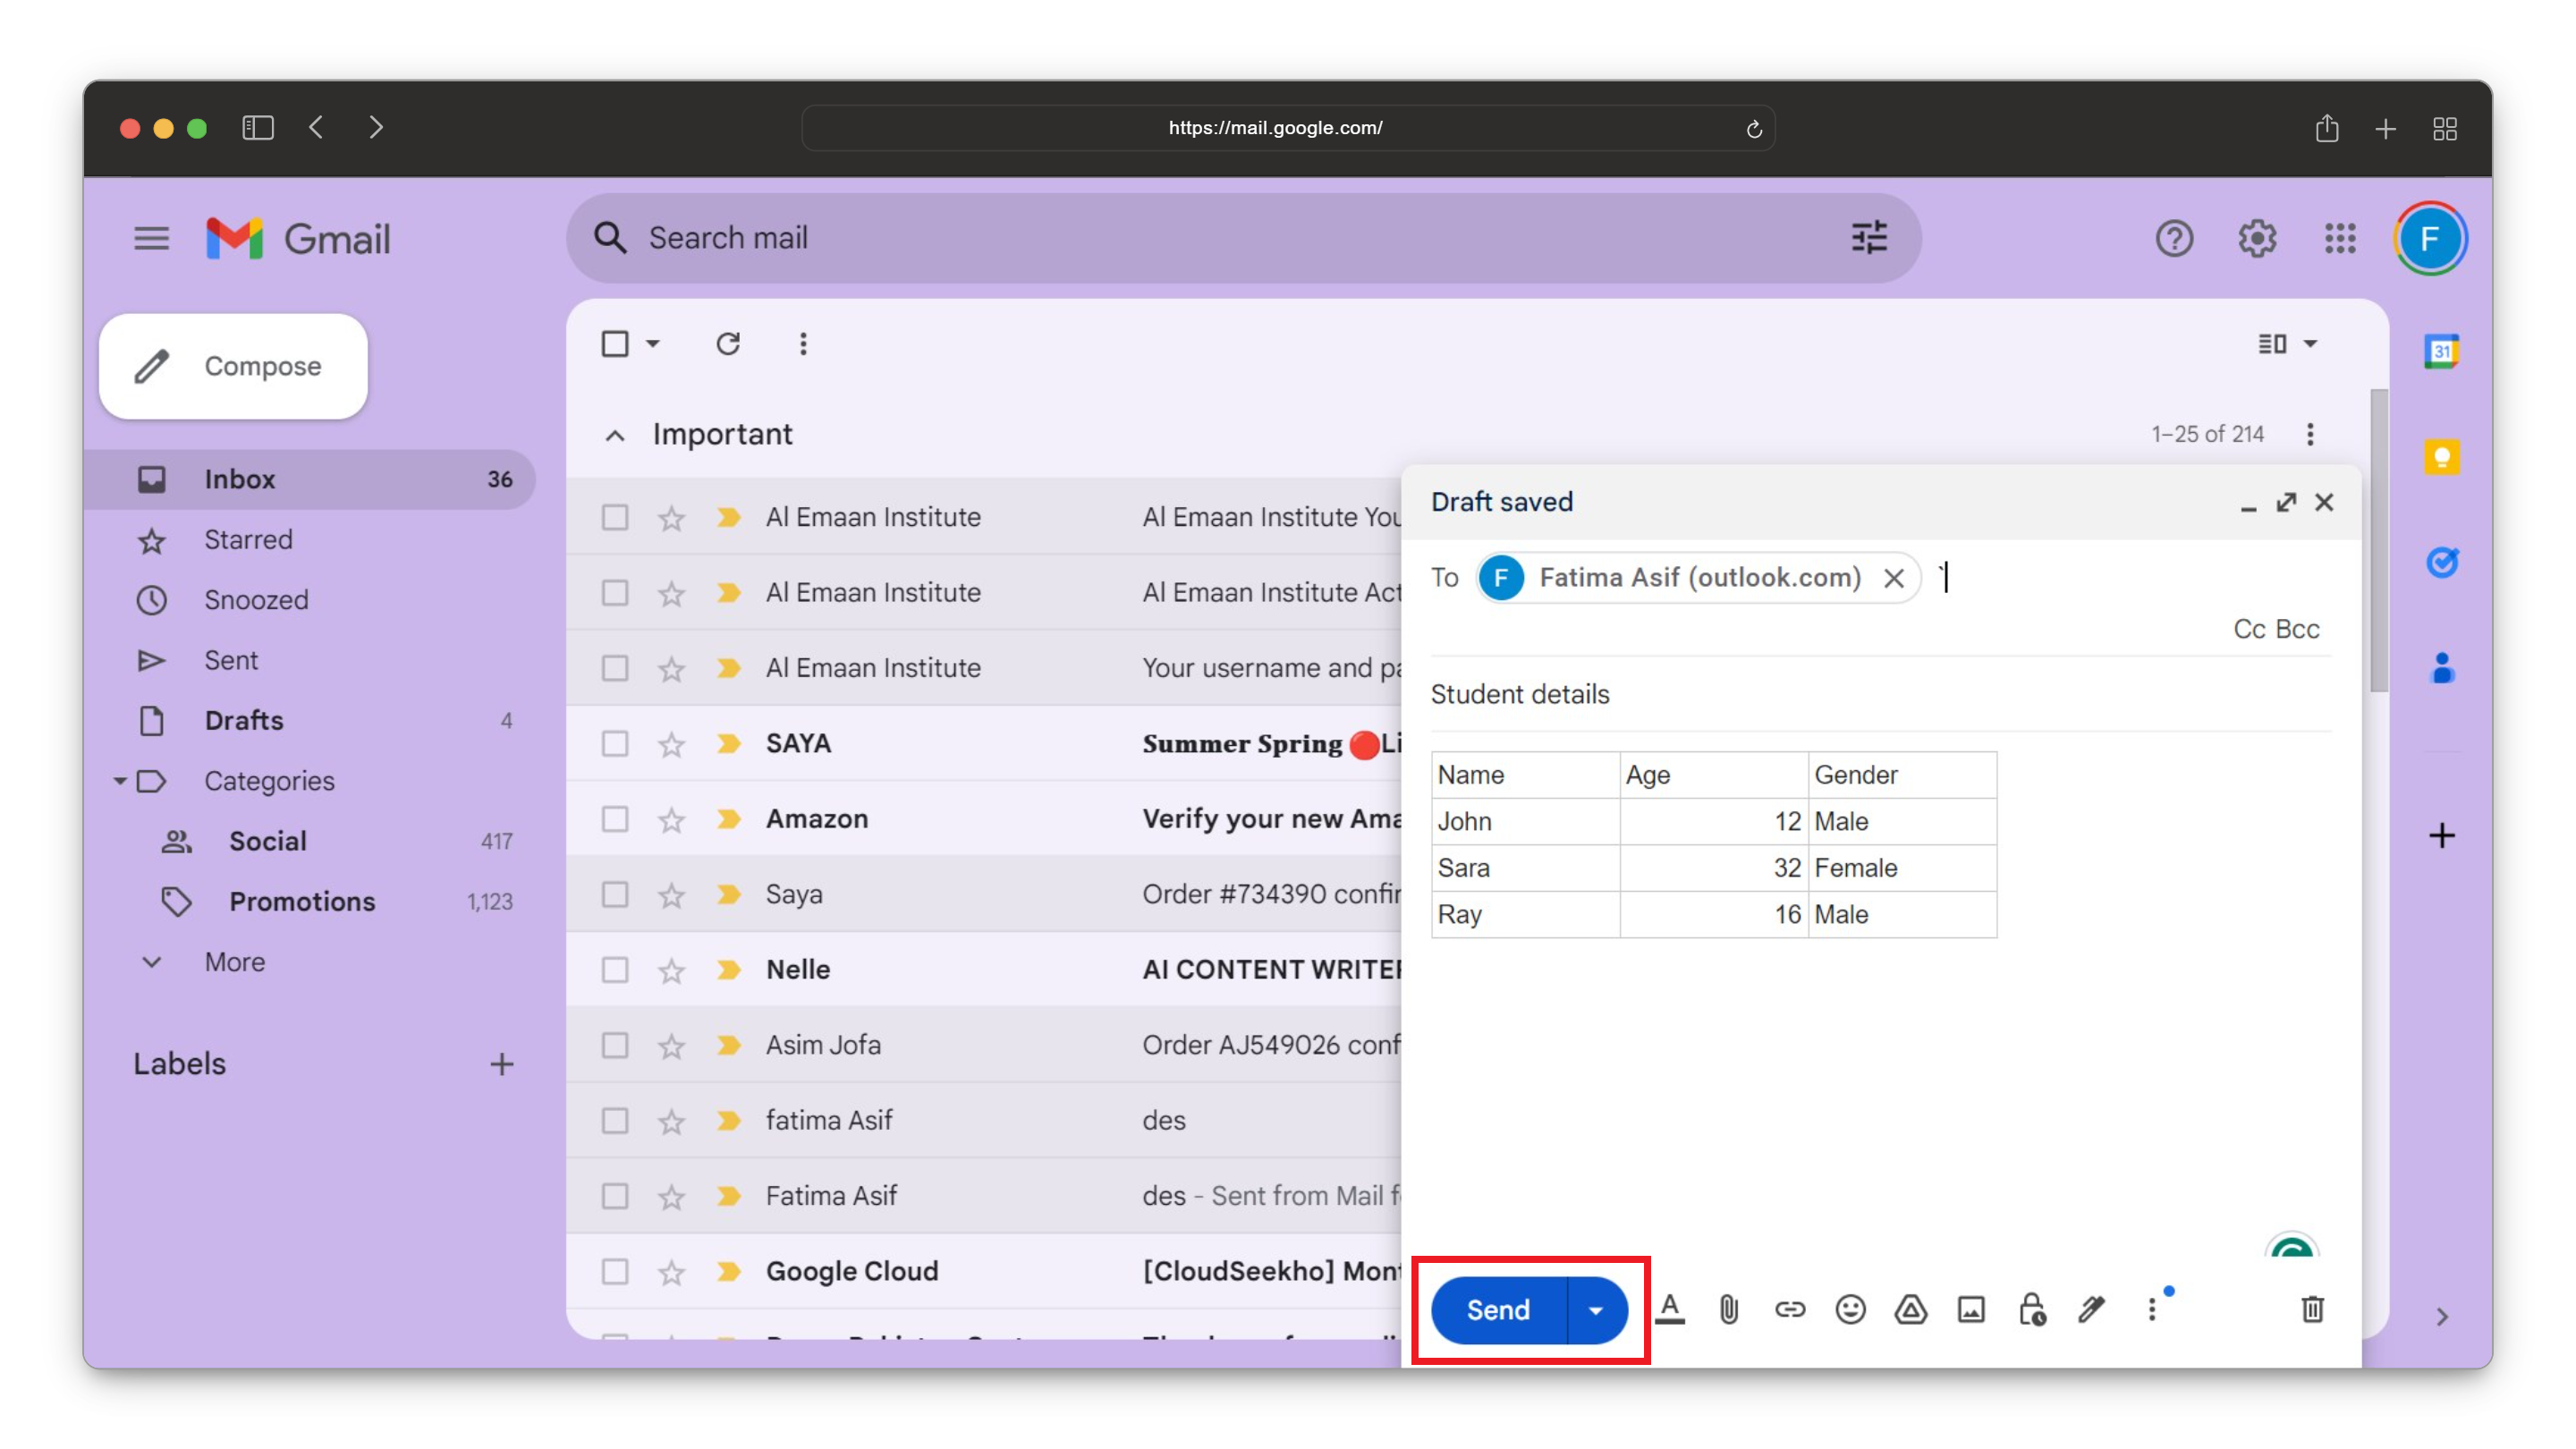
Step 10: Send the Email
Once you have completed composing your email, click the “Send” button to send the email containing the table.
READ MORE: 10 Easy Ways to Send Large Files Over Email [2024 Update] ➜
↪ On Mobile
Here’s how to add a table in an email with Gmail’s mobile app:
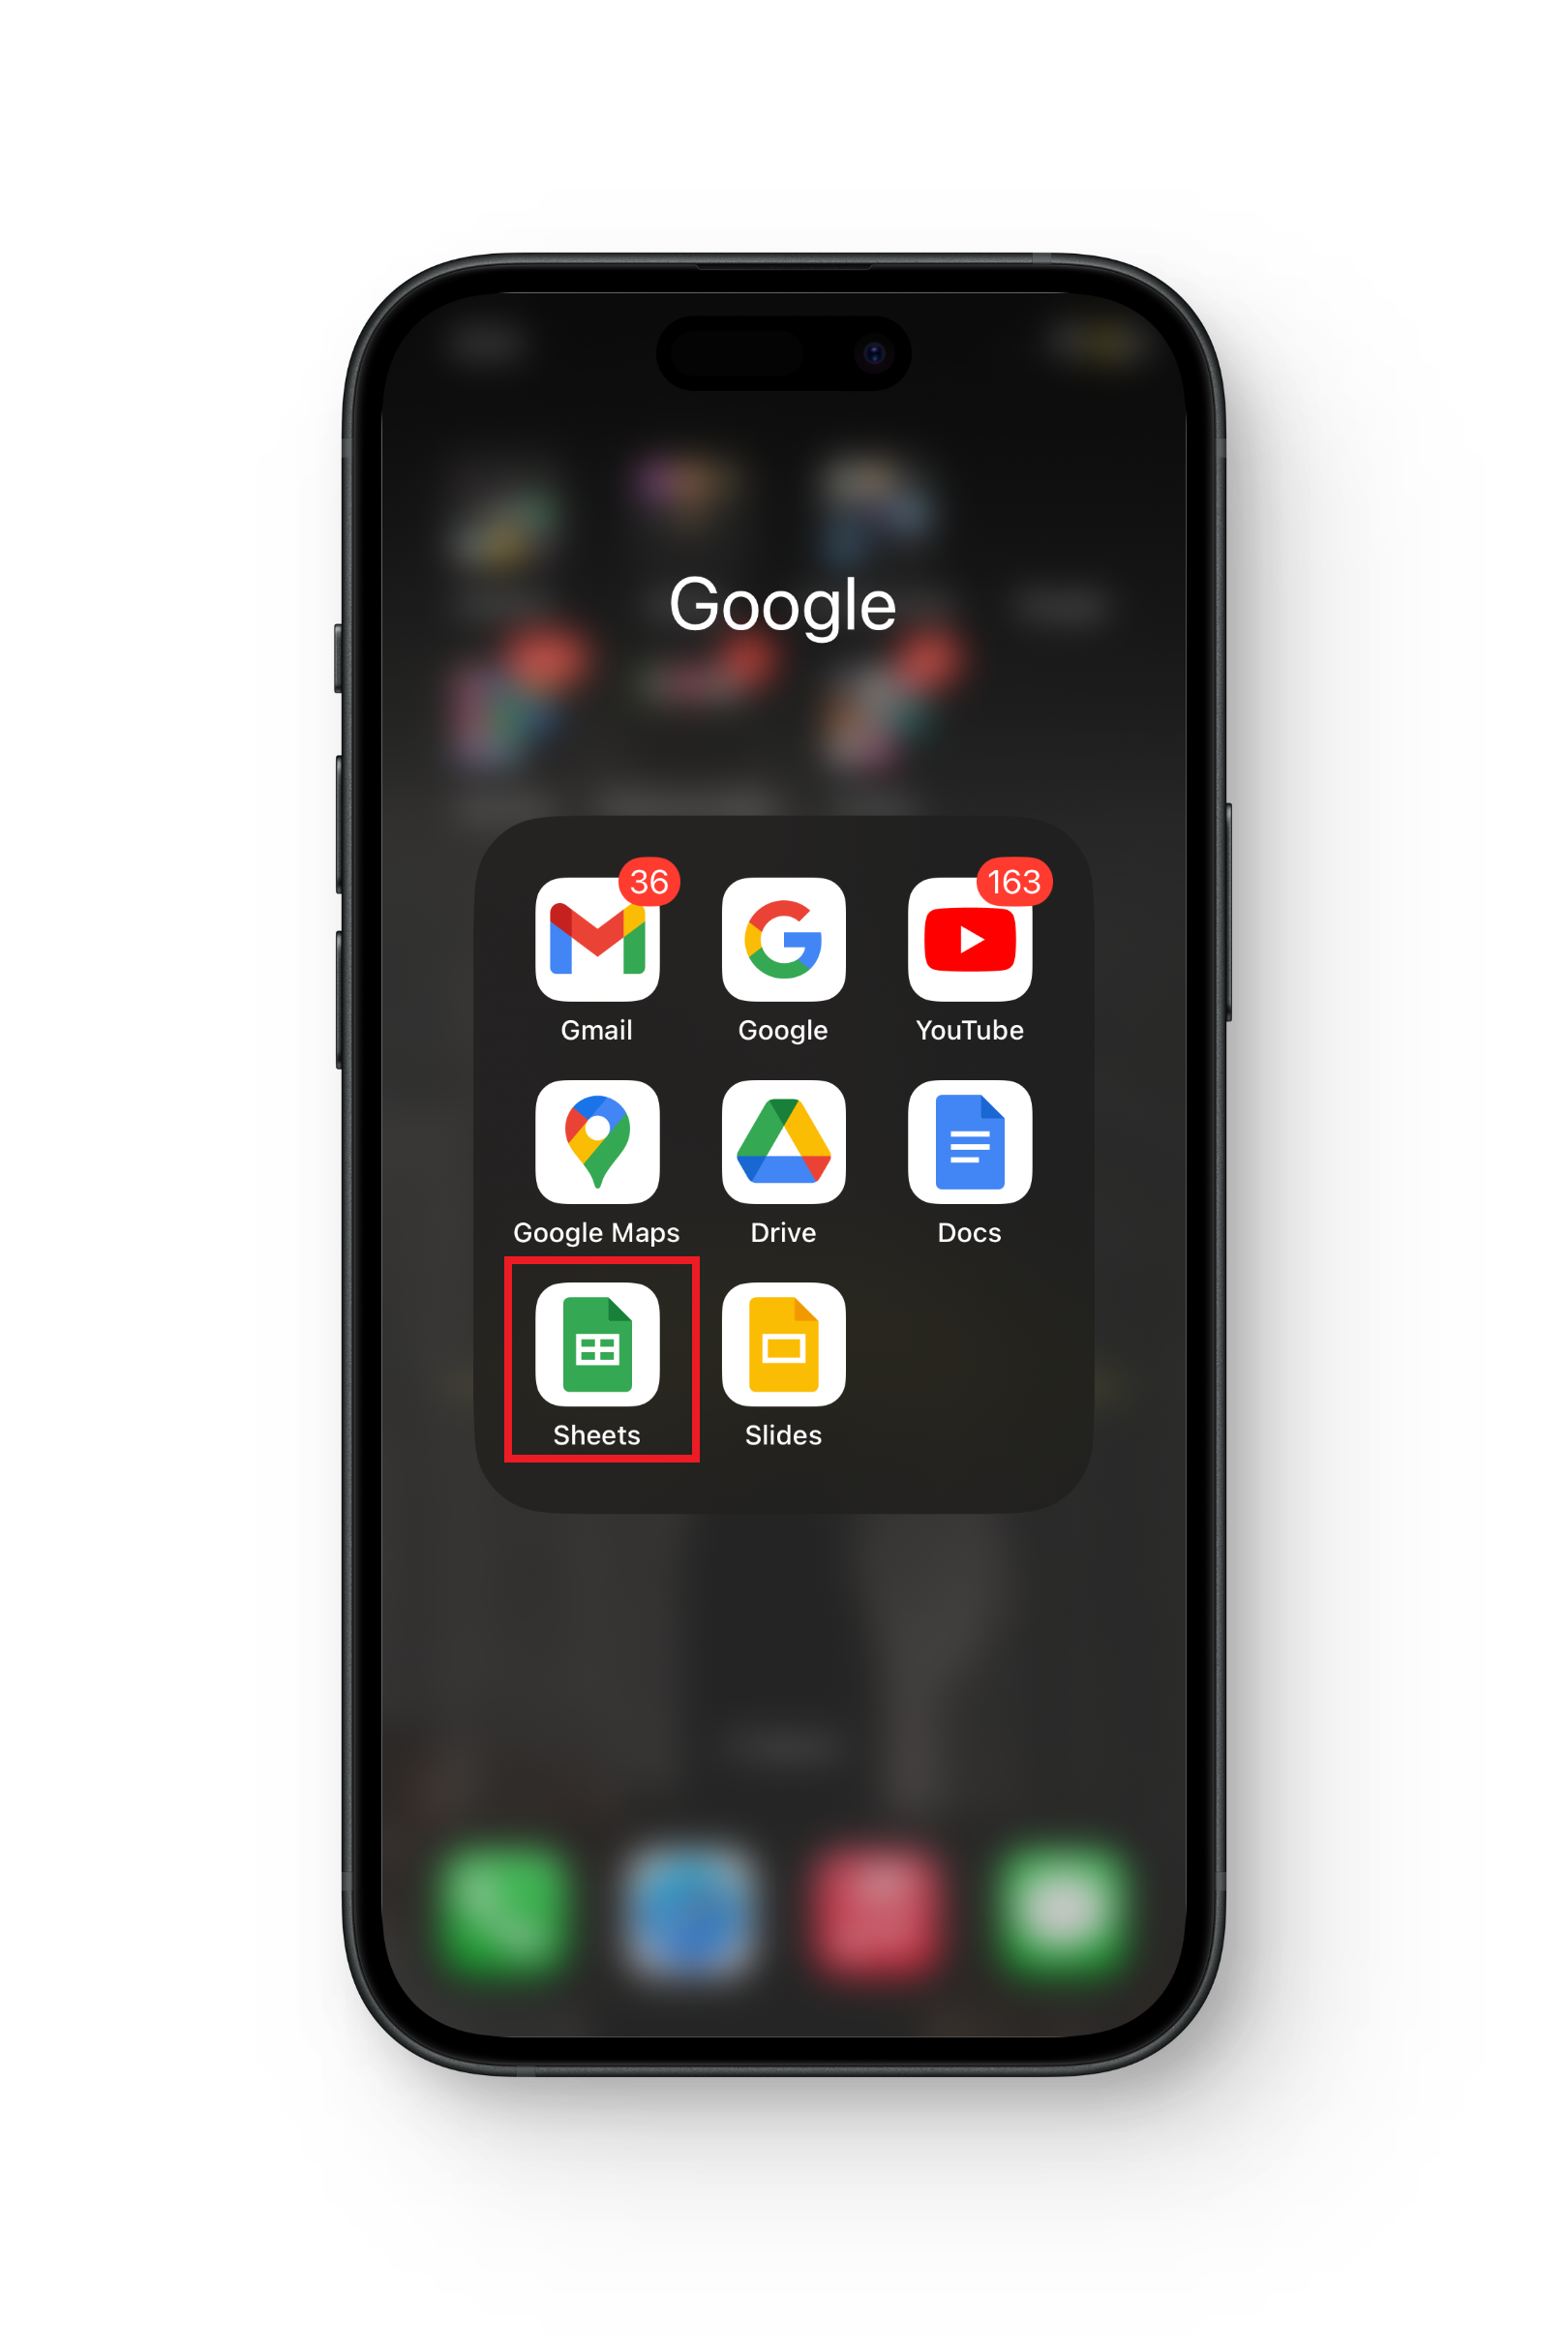
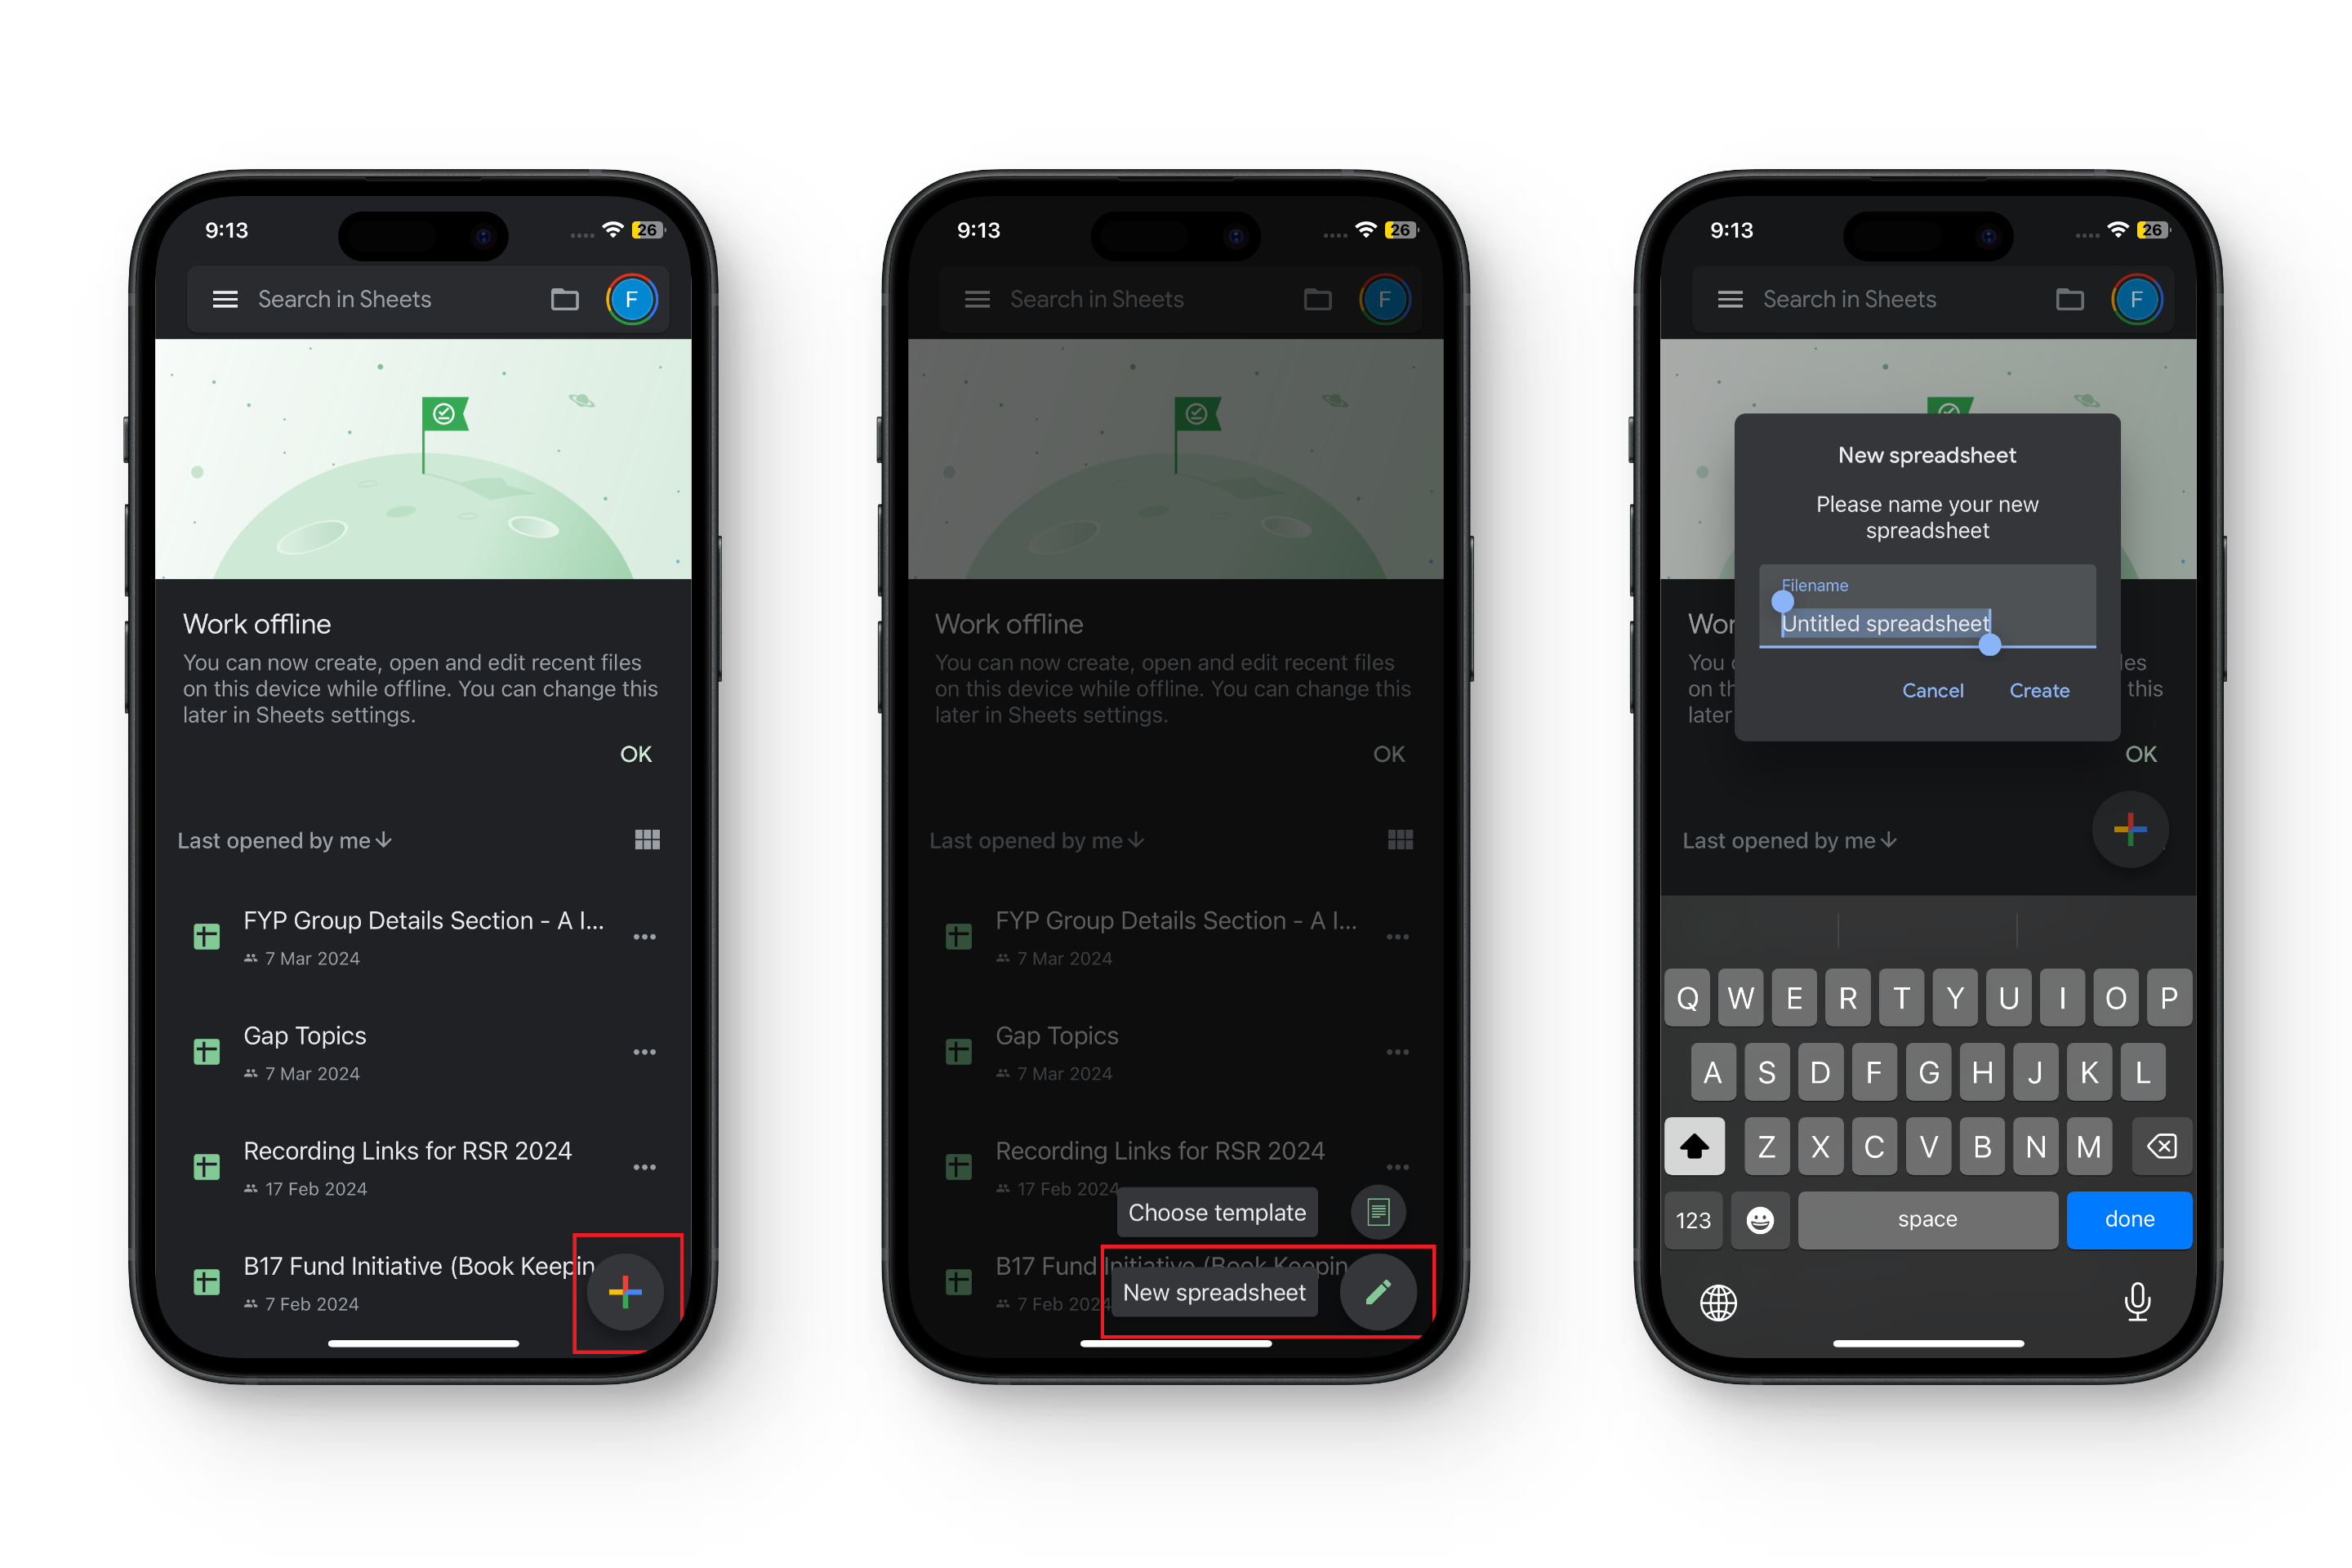
Step 1: Open the Google Sheets App
Locate the Google Sheets app on your smartphone or tablet and open it.
Step 2: Open a Spreadsheet
Create a new spreadsheet by clicking on the + icon, selecting “New spreadsheet” and naming it. Or open an existing one containing the data you want to include in your table.
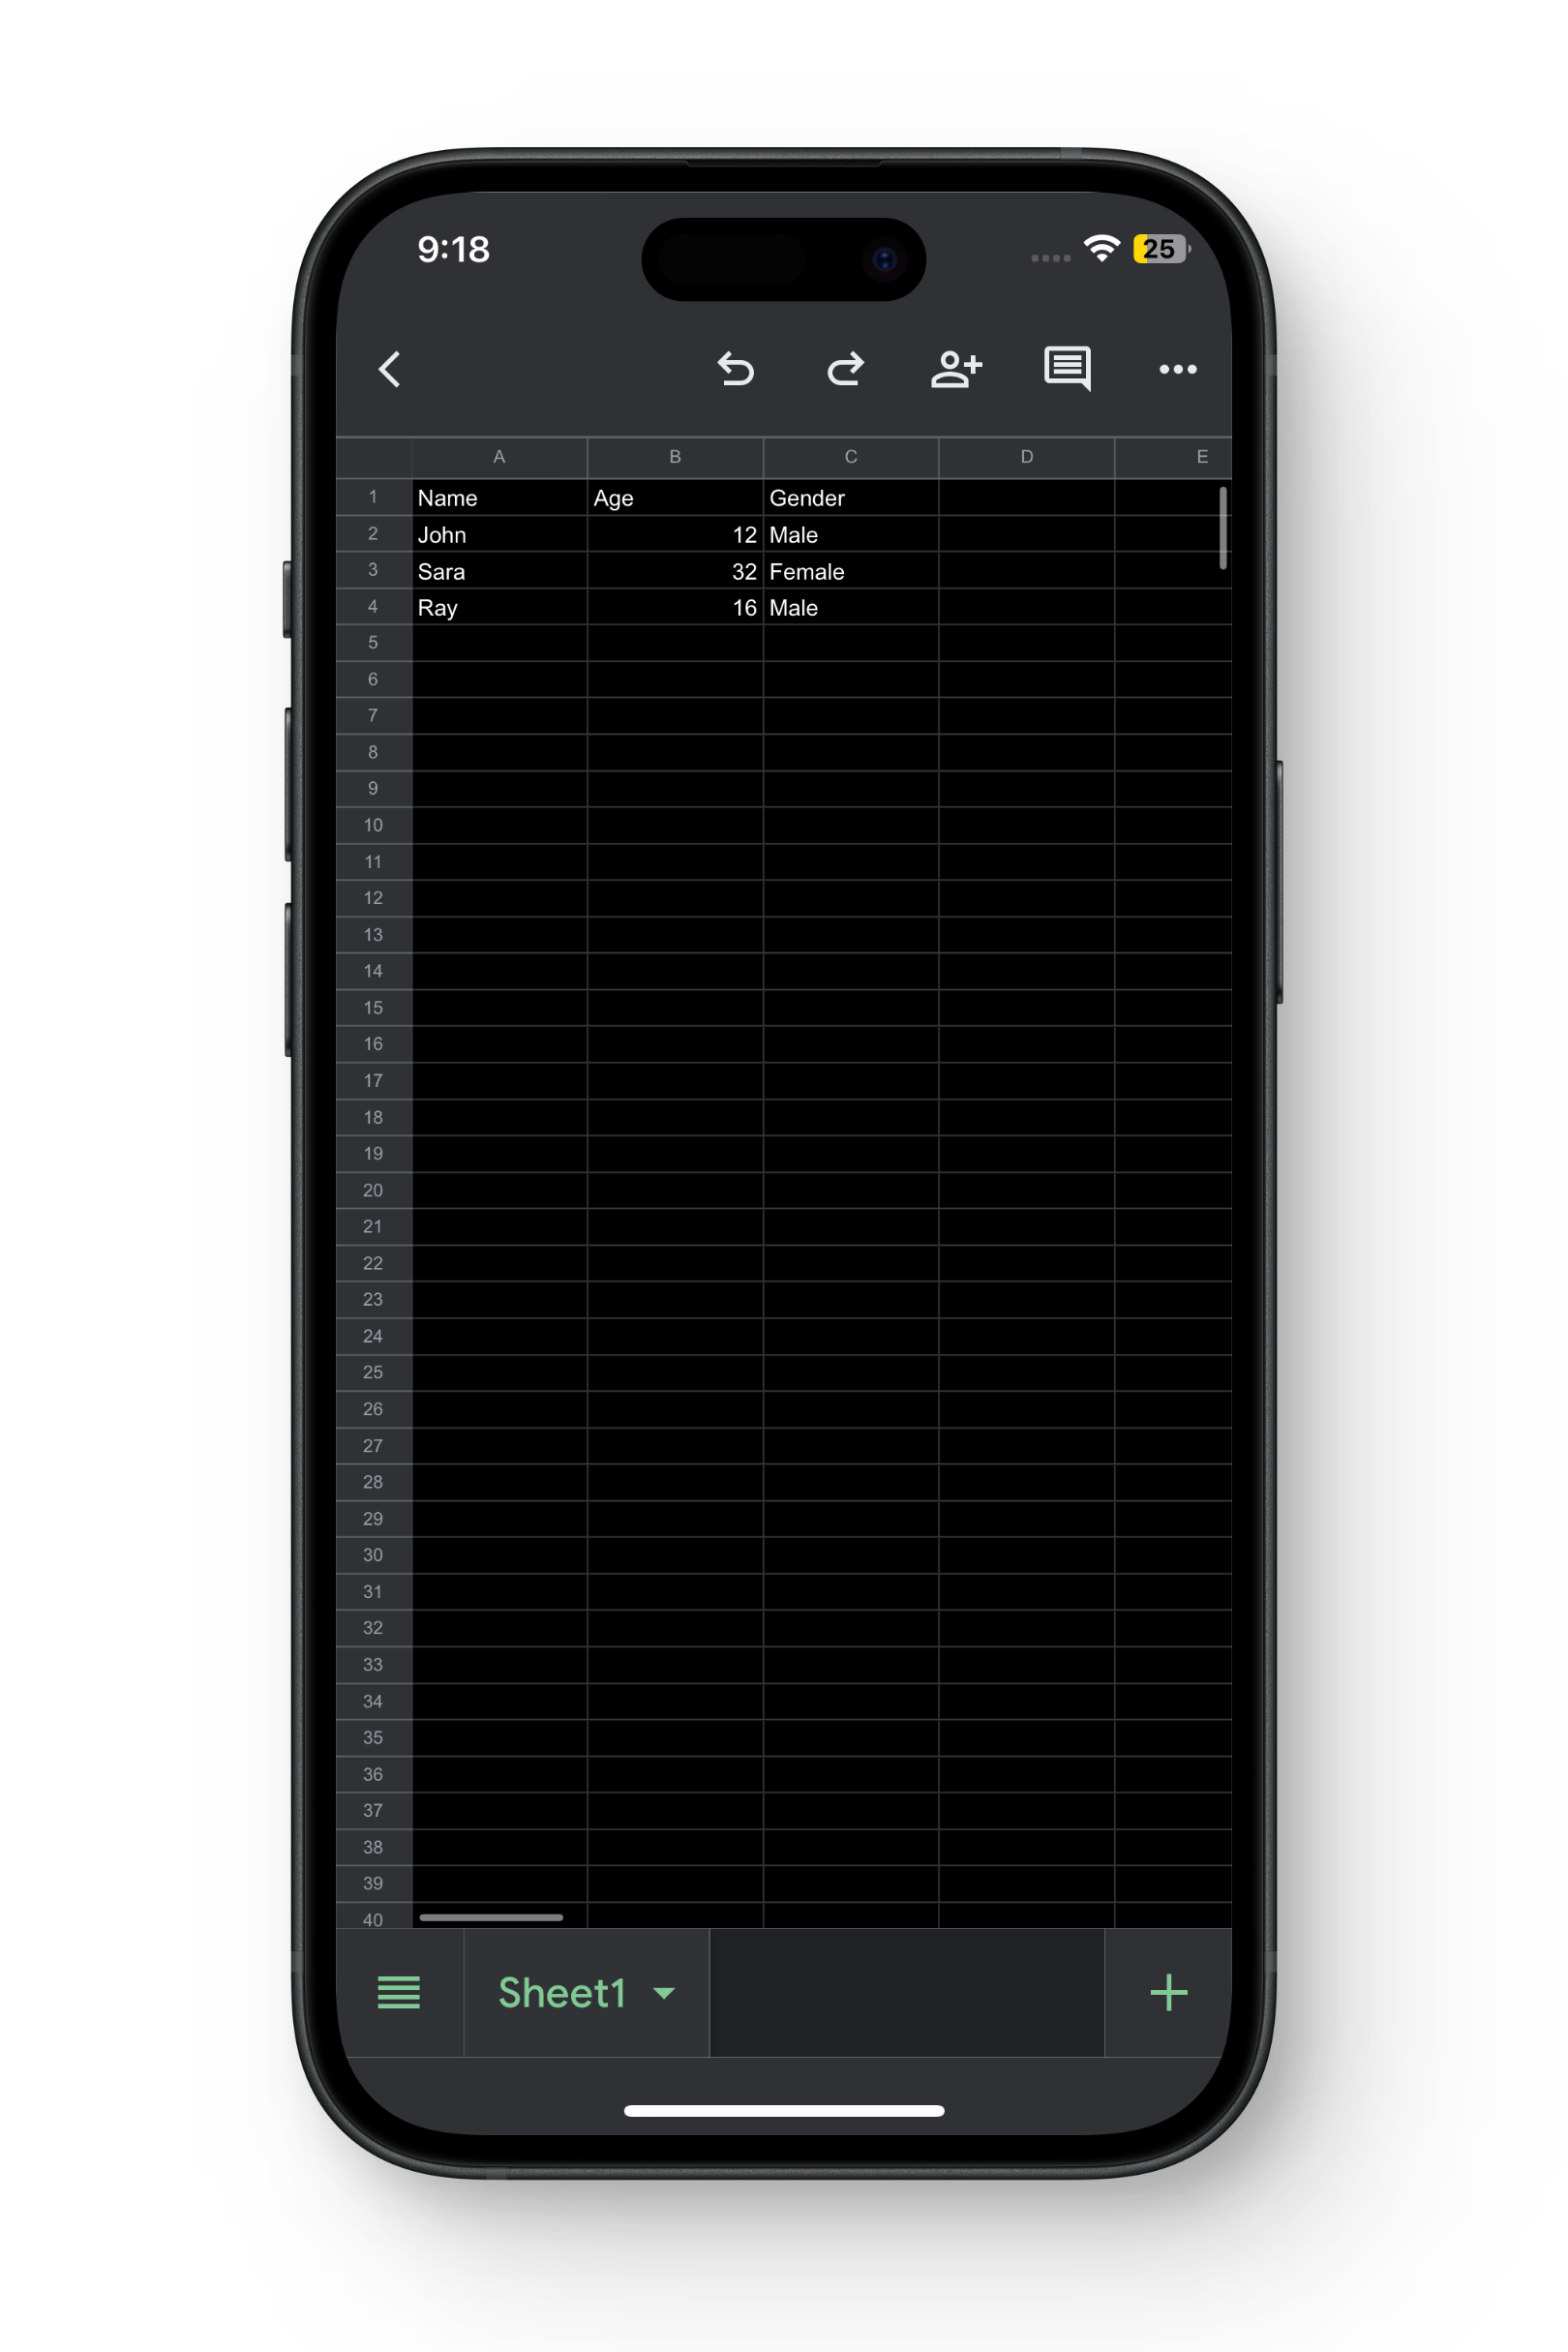
Step 3: Enter Table Data into the Spreadsheet
Input the data you want to include in your table into the cells of the spreadsheet.
Step 4: Select the Table
Tap and hold on the table, then drag to select the entire table.
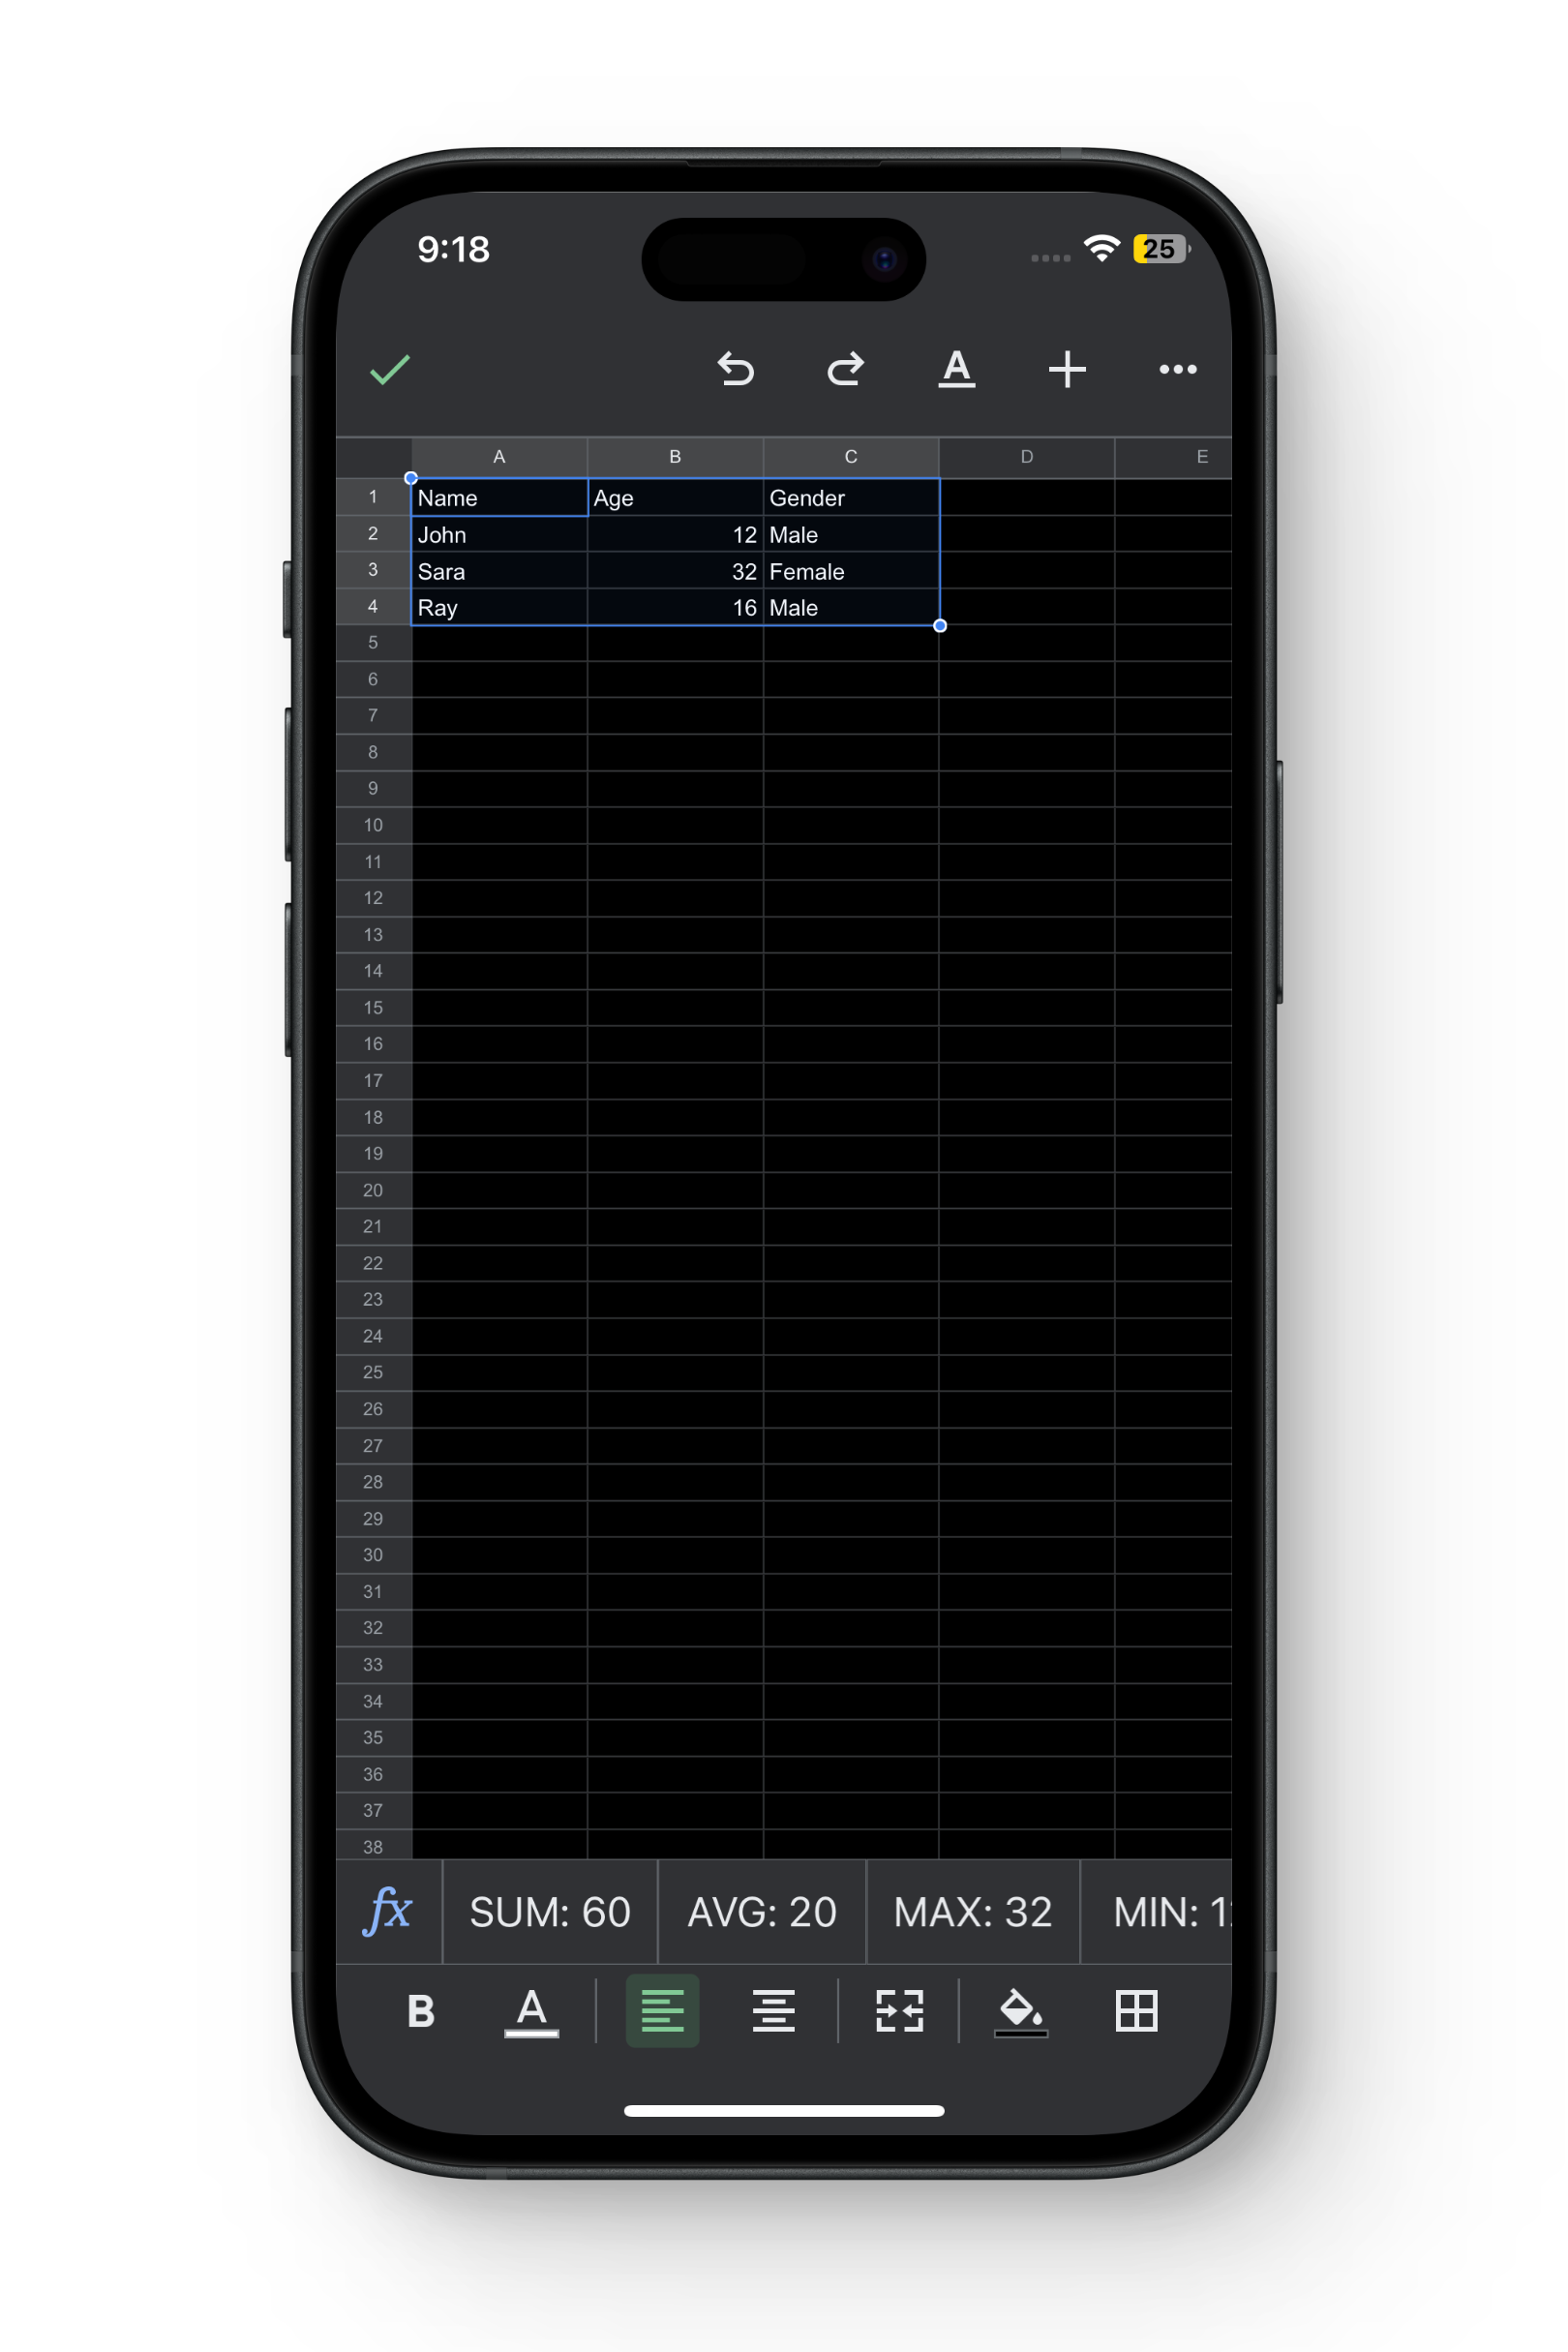
Step 5: Copy the Table
Tap on “Copy” from the menu that appears after selecting the table and close the Sheets app.

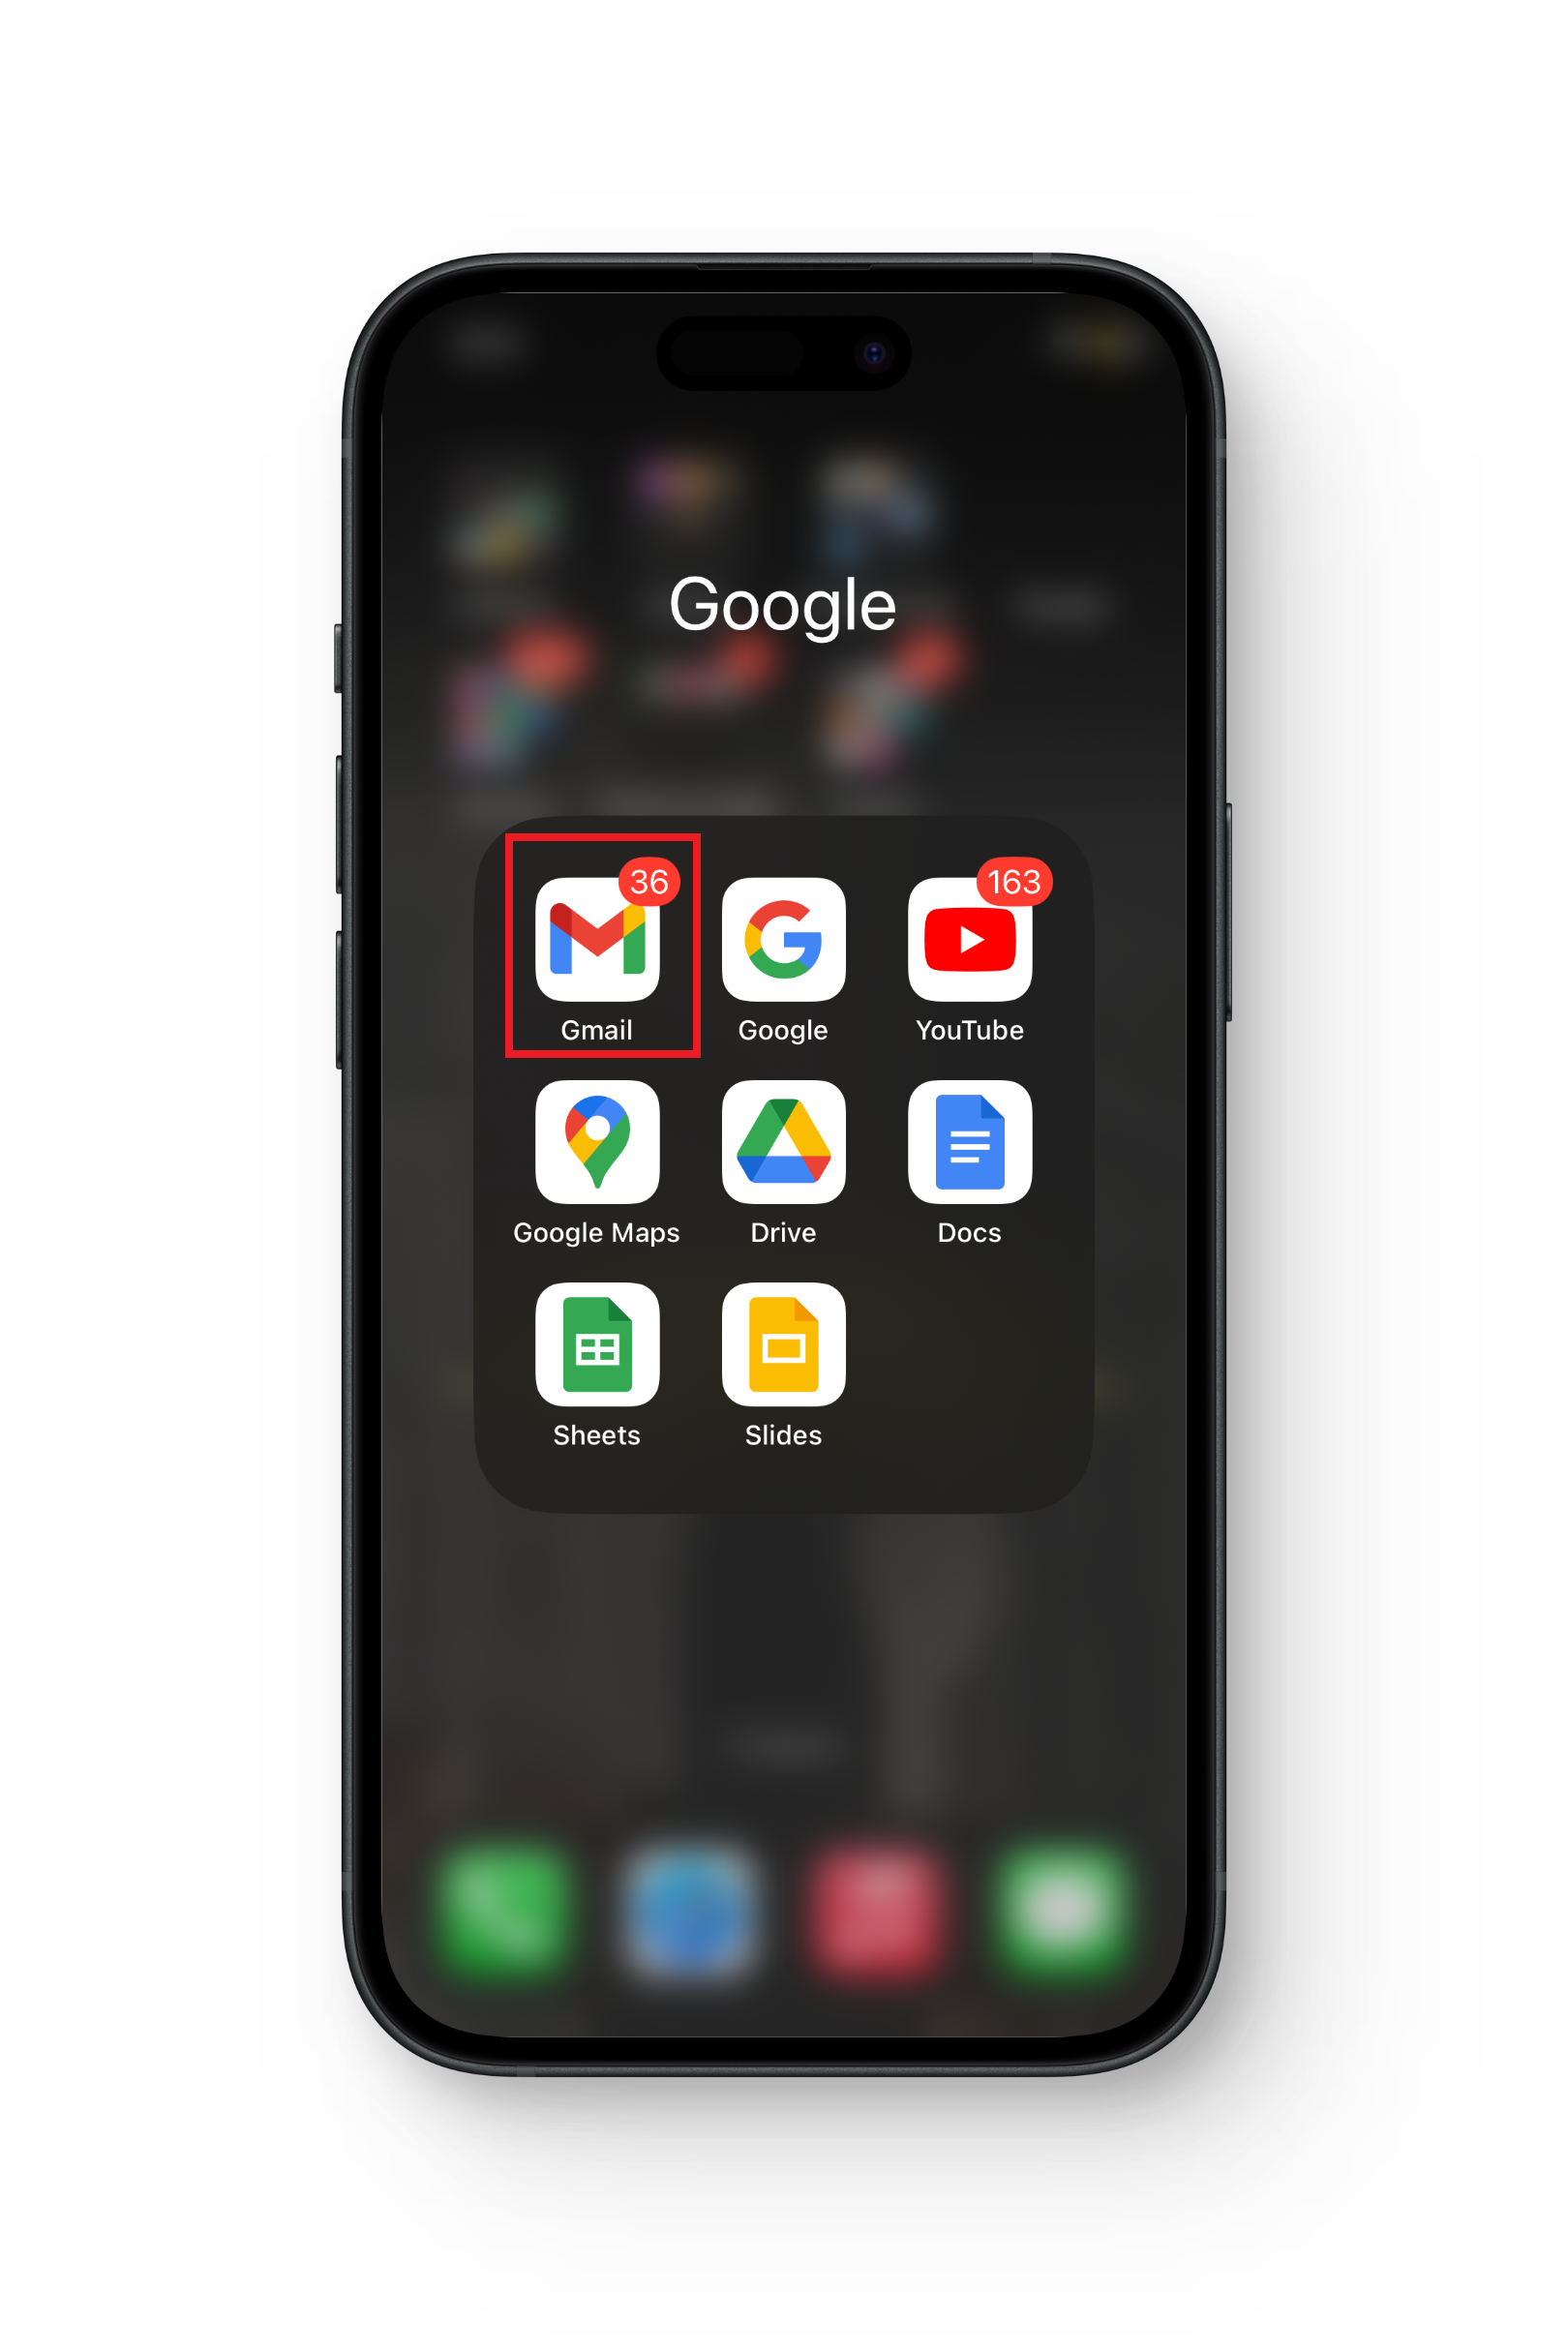
Step 6: Launch the Gmail App
Find the Gmail app on your mobile device and open it.
Step 7: Compose a New Email
Tap on the “Compose” button to start a new email message.

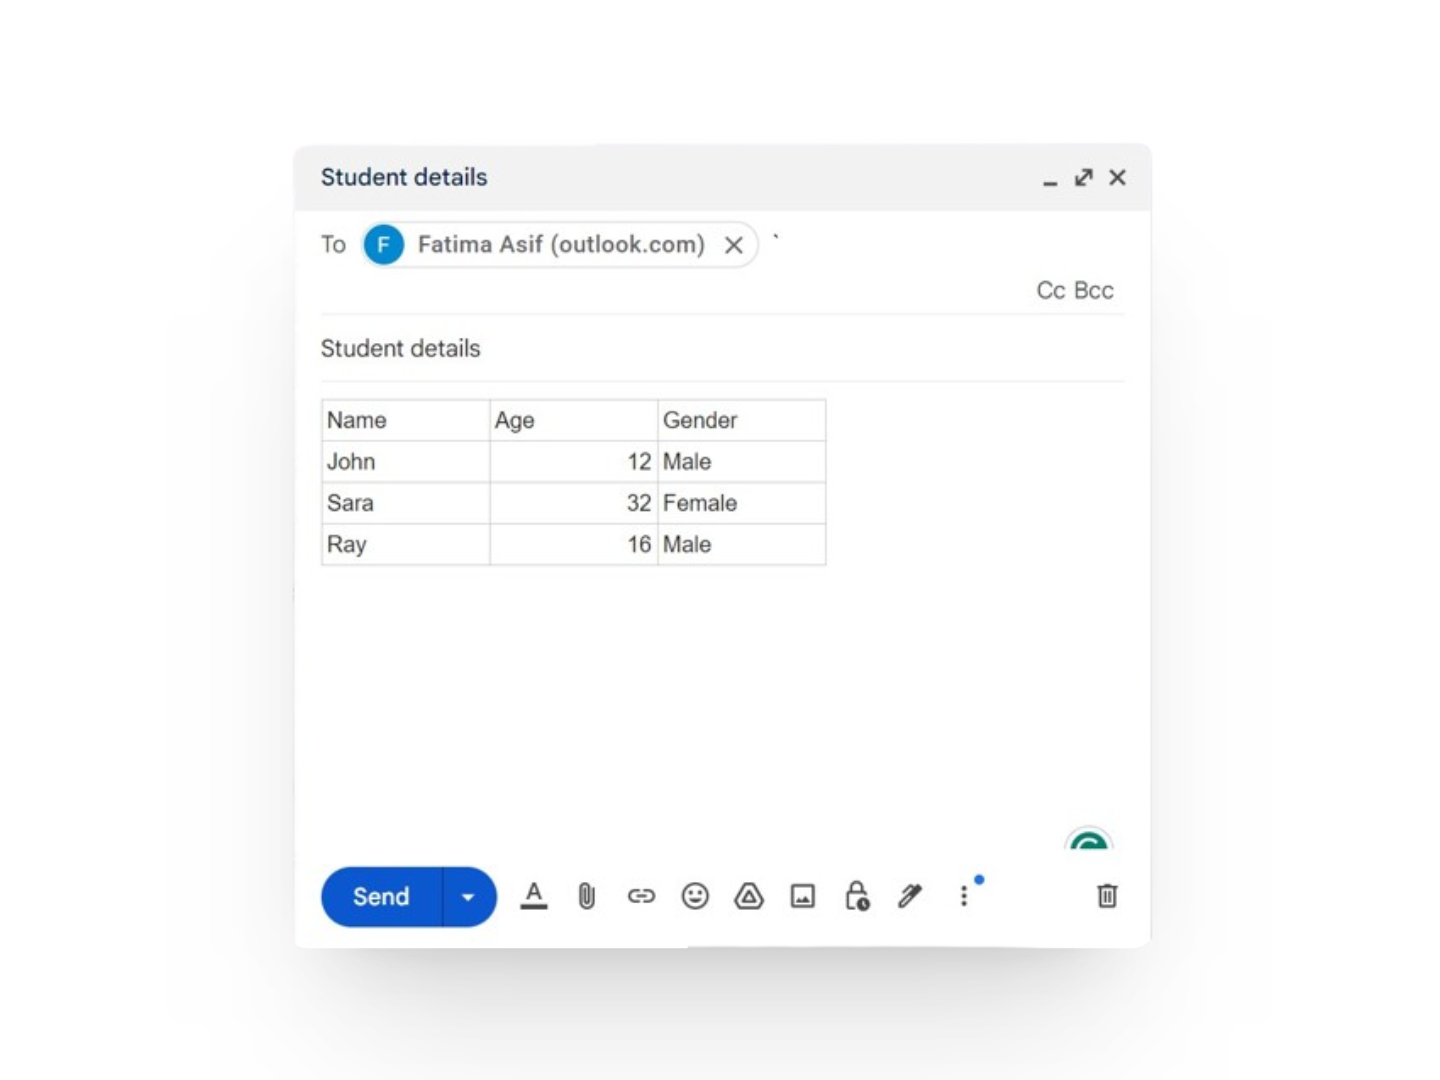
Step 8: Paste the Selected Table
Tap and hold inside the body of the email until the paste option appears, then select “Paste” to insert the table copied from Google Sheets.
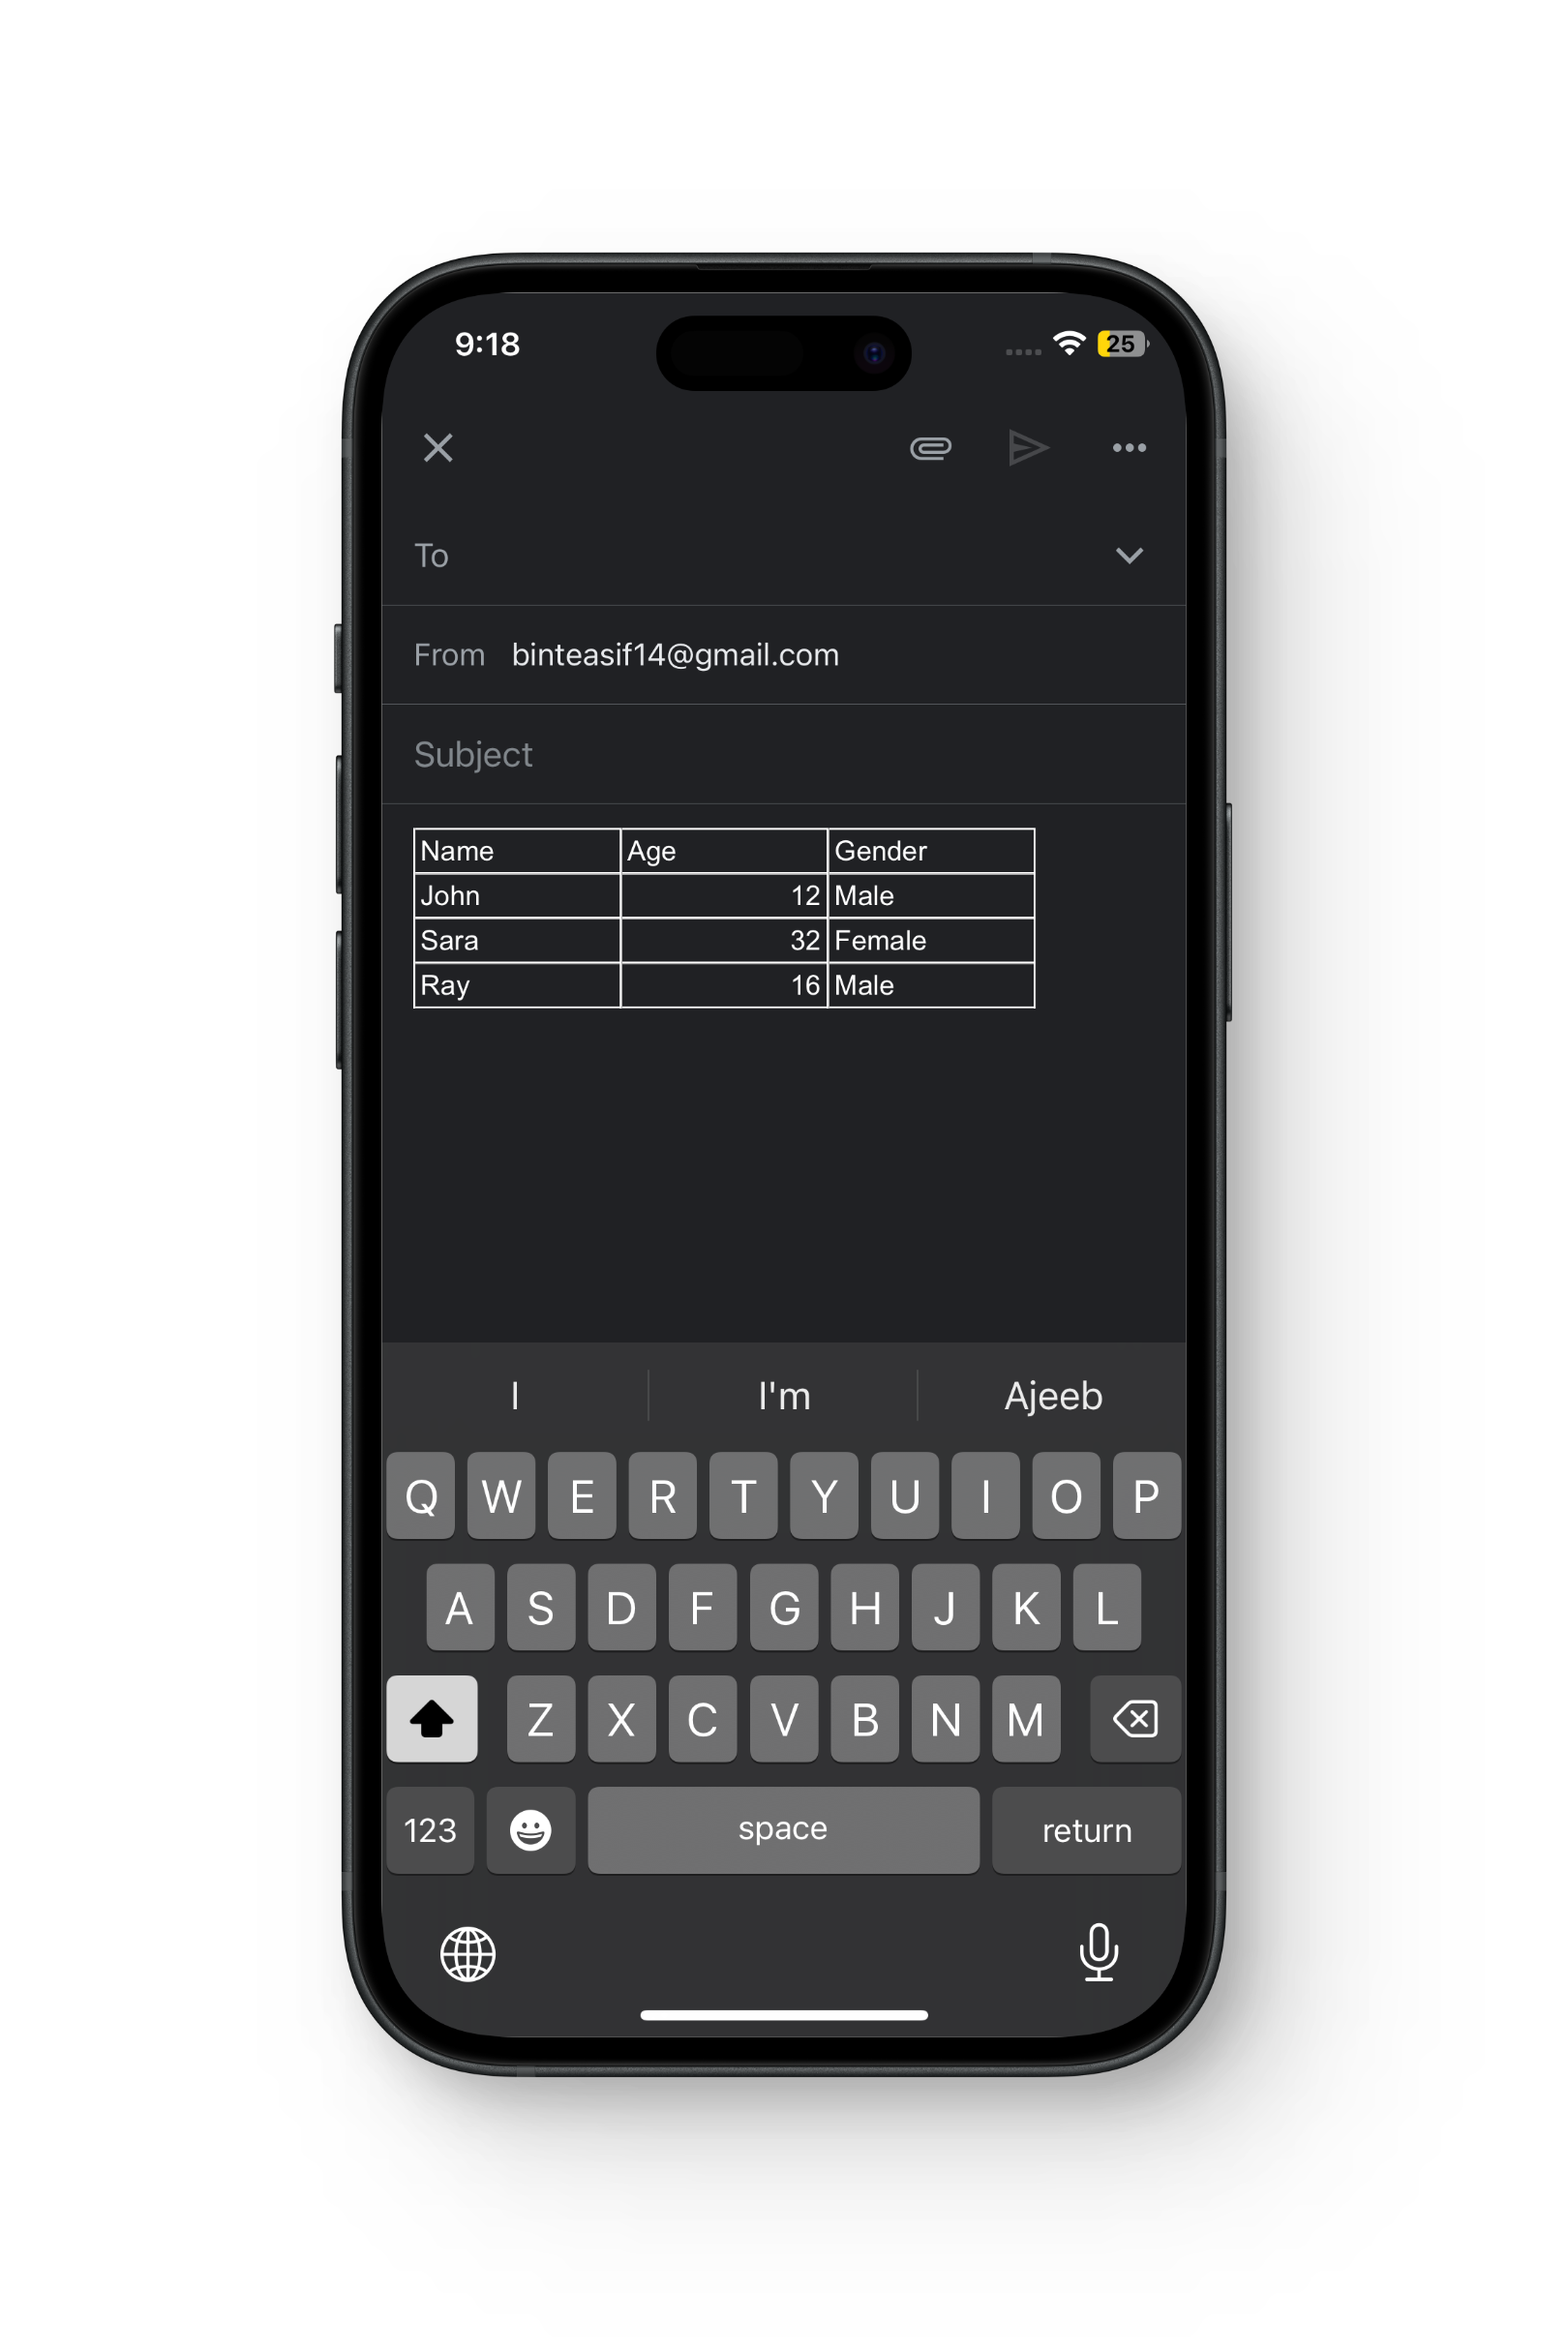
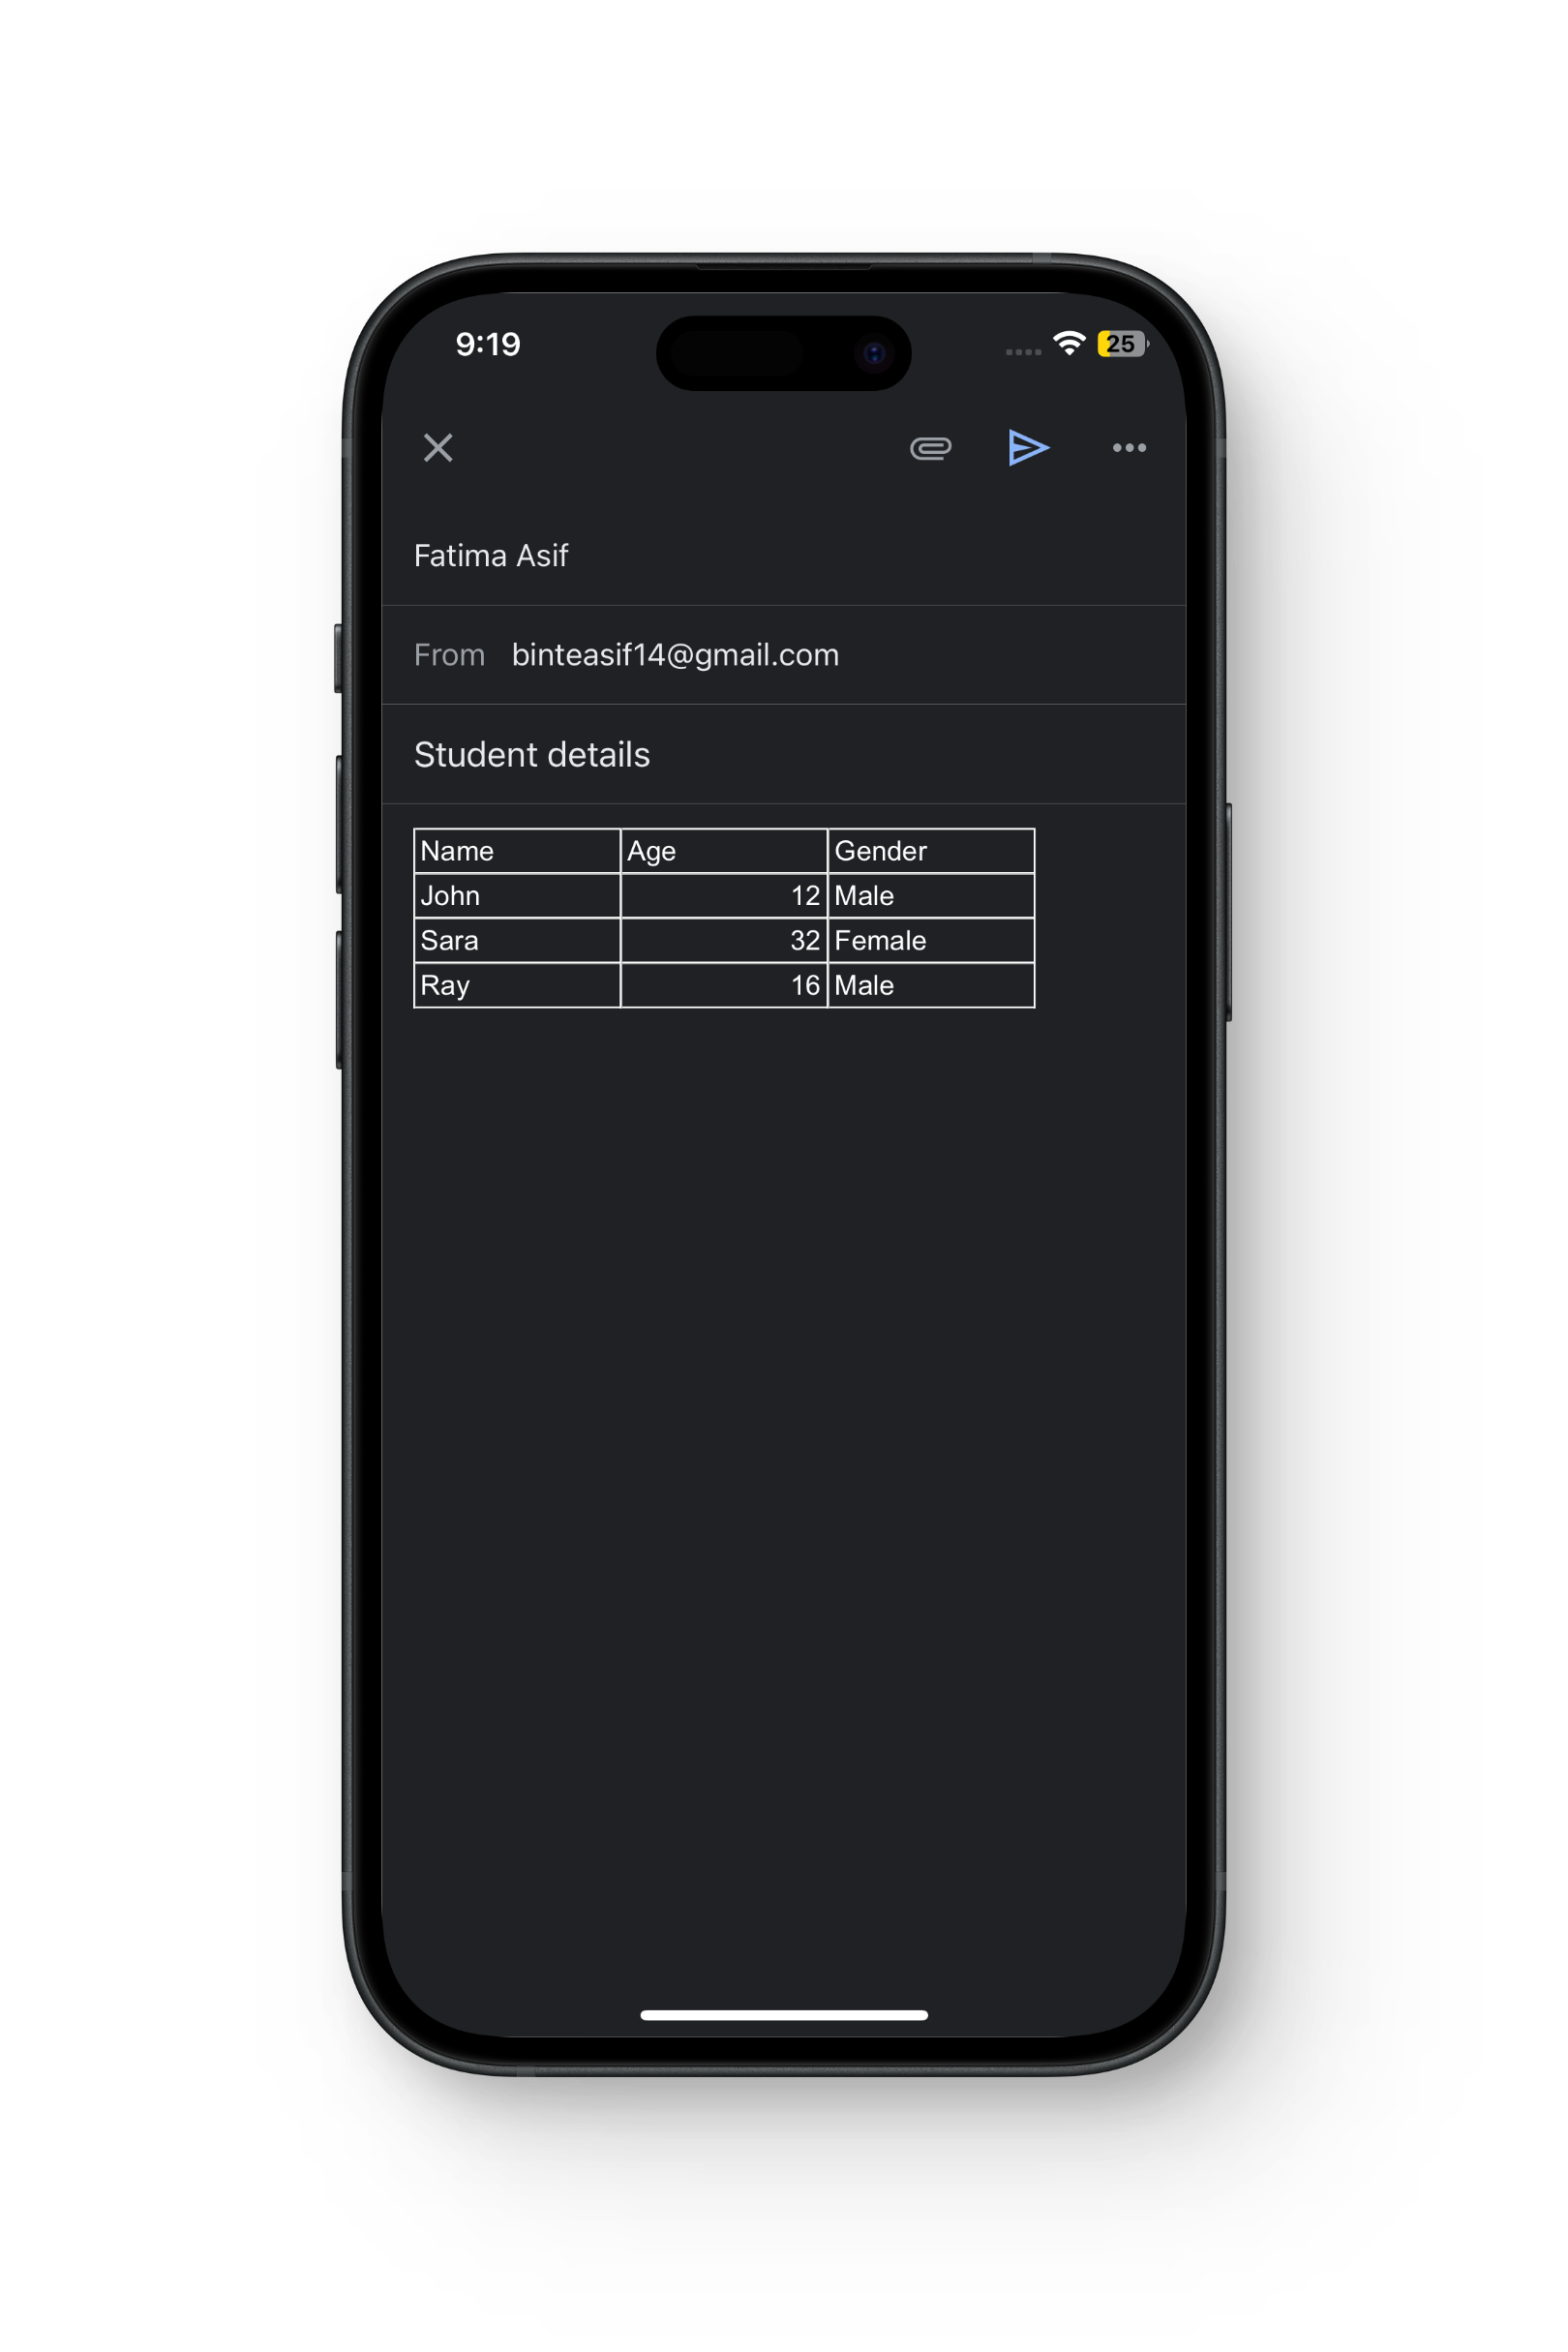
Step 9: Fill in the Recipient’s Details
Enter the recipient’s email address, subject, and any additional information you want to include in the email.
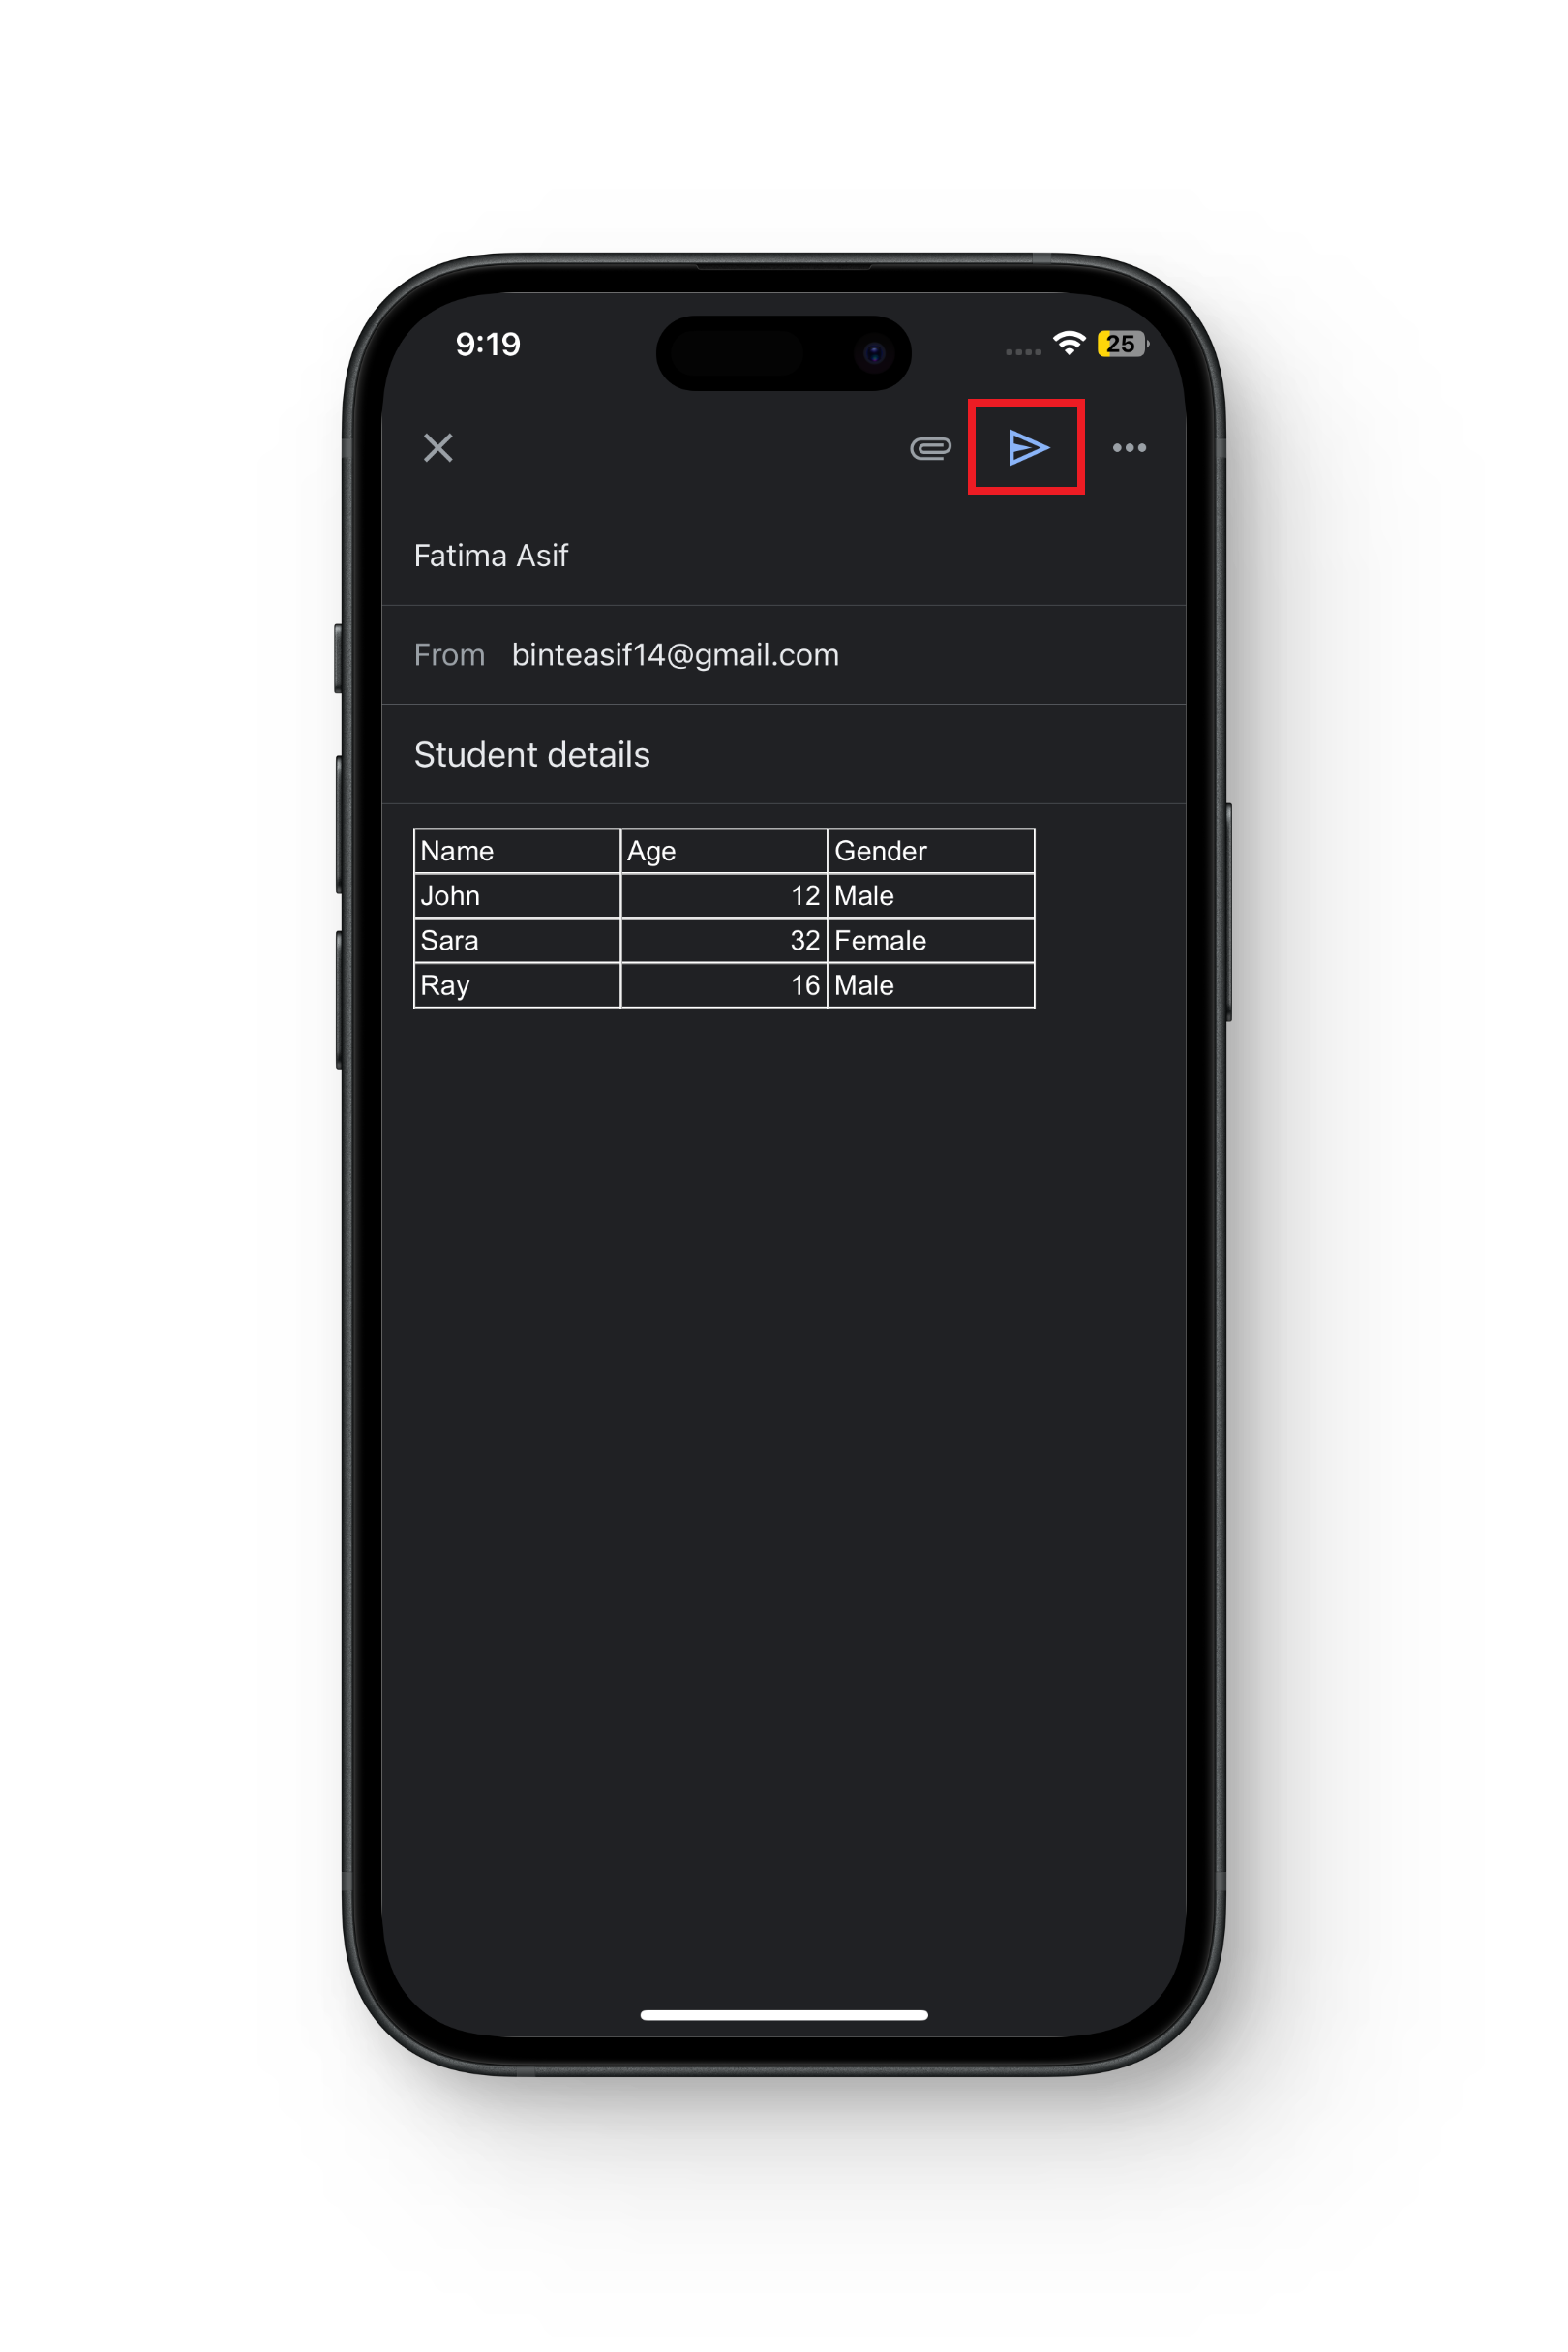
Step 10: Send the Email
Once you have completed composing your email, tap the send icon to send the email containing the table.
Tips & Tricks
By following the below-mentioned tips, you can make the most of tables in Gmail and effectively organize your information for your recipients.
- Keep it Simple: Use tables to organize your information neatly and avoid overcrowding your emails with too much data.
- Use Borders Sparingly: While borders can help delineate cells, using them excessively can make your table look cluttered. Use borders strategically to highlight important sections.
- Experiment with Formatting: Gmail allows you to adjust the text size, font, and color within table cells. Experiment with different formatting options to make your tables visually appealing and easy to read.
- Consider Accessibility: Keep in mind that some recipients may access your emails on mobile devices or with screen readers. Ensure that your tables are accessible by using clear headers and avoiding complex layouts.
- Test Before Sending: Before sending your email, preview it to ensure that the table displays correctly across different devices and email clients. This can help prevent formatting issues and ensure that your message is delivered as intended.
READ MORE: How to Use Temporary or Disposable Email Accounts ➜
Comparing Email Services: Gmail, Outlook, and Apple Mail
Gmail, Outlook, and Apple Mail are popular email services, each with its unique features. Gmail, with its user-friendly interface and seamless integration with Google services, is often preferred for personal and business use. Outlook, known for its robust productivity tools and integration with Microsoft Office, is favored in professional environments.

Apple Mail, default on macOS and iOS devices, offers a streamlined user experience within the Apple ecosystem. While Gmail is widely used across platforms, Outlook and Apple Mail cater more to specific user preferences, with Outlook being favored in corporate settings and Apple Mail among Apple device users.
READ MORE: What’s The Best Email Service in 2024? Best Clients Ranked ➜
Final Words
In wrapping up, knowing how to insert tables in Gmail can make your emails clearer and more professional. With the tips from this guide, you can organize your information better and present it effectively. Whether you’re emailing friends or colleagues, using tables in Gmail can help you get your message across with clarity. Give it a try and see how it improves your email game!
FAQs
Yes, recipients using any email client should be able to view the table, but appearance may vary slightly.
Yes, Gmail imposes limits on email size, including tables, so ensure your table doesn’t exceed these limits.
Yes, you can copy and paste tables from other applications into Gmail.
Tables may display differently on mobile devices, so preview before sending.
Reviewed by Huzaifa Haroon