How to Unarchive Gmail Emails?
Gmail, one of the most popular and widely used email services, lets you archive emails from your Inbox folder. While this is a really neat feature as it lets you keep your Inbox folder clean and maintain only the important emails in the Inbox folder, there is actually no archive folder which makes it sort of confusing. Archiving emails lets you move emails to a different folder without having to delete them which gets rid of it completely. This is really helpful when your Inbox folder is crowded and can help you in keeping the important emails closer to you.

However, when you archive emails, it is probably due to the fact that you are going to need them in the future. Otherwise, deleting the emails would have been a better option. When you wish to read your archived emails or access them, it can be a little confusing as there is no separate folder like we have mentioned. The emails are actually kept in the All Mail folder and you will have to search for them there and then move them back to the Inbox from there. This is something that you can do both via your desktop using the Gmail website or using a mobile phone as well.
While you can use multiple Gmail accounts, keeping the Inbox folder clean is important and that’s where archiving emails comes in handy. When you archive an email, it disappears from your Inbox folder. What essentially happens is that they are removed from your Inbox folder but kept inside the All Mail folder where all of your emails that you receive are kept. This is the difference between archiving and deleting an email where one removes the email only from a certain folder while the other completely removes the email from your account.
With that said, you can easily access the emails you have archived via the instructions given down below.
Unarchive Gmail Emails on a Computer
Using the Gmail website, you can unarchive the emails on your computer with ease. To do this, just follow the instructions given down below:
- First of all, open up your computer and then open up a web browser of your choice.
- Then, head to the Gmail website by clicking here. Go ahead and login to your account by providing your credentials.
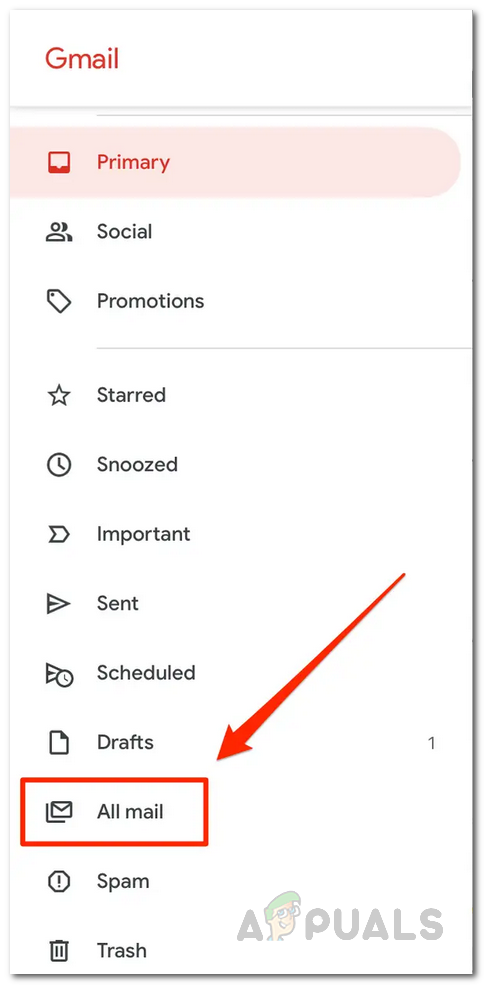
- Once you have logged in, on the left-hand side, click the More option provided.
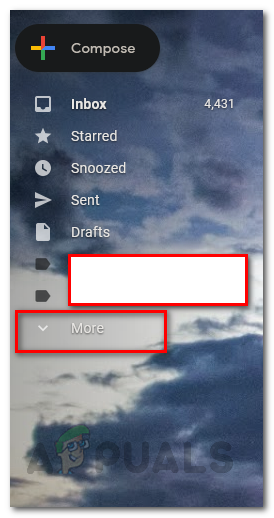
Expanding the Options List - This will expand the list. Once you have done that, click on the All Mail button.
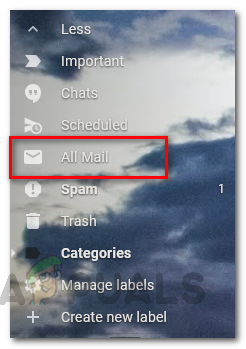
Opening All Mail Folder - After doing that, you will be able to see all the emails that you have received. Go through the list and find the email that you wish to unarchive.
- Additionally, you can also just search for the email via the search bar provided.
- After you have found the email, select the email by clicking the checkbox provided to the left of the email.
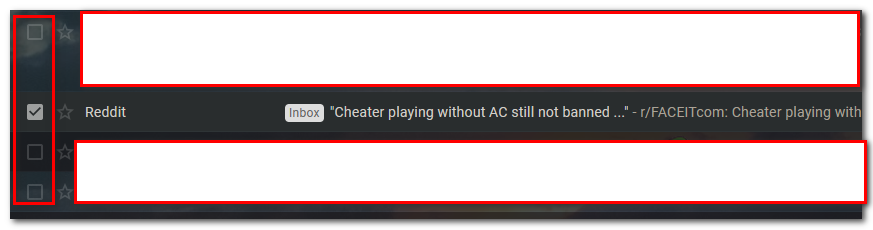
Selecting Emails - Then, from the options that appear, click on the icon with the down arrow as shown in the picture. This will move your email to the Inbox folder.

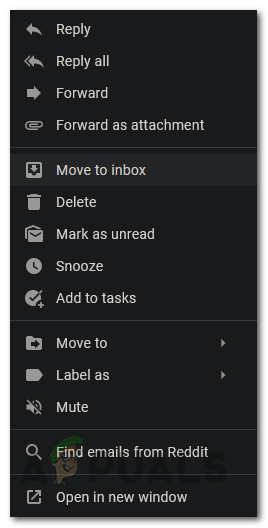
Moving Email to Inbox - Alternatively, you can right-click on the email and choose Move to Inbox from the drop-down menu that appears.
Choosing to Move to Inbox from the Drop-down Menu - You can also click on the Move to Inbox icon by opening up the email.

Clicking the Move to Inbox button - And you are done. You have successfully unarchived an email. Do this for all the emails that you wish to unarchive. To make it easier, you can select all the emails that you wish to unarchive and then click on the Move to Inbox icon instead of doing it one by one.
Unarchive Gmail Emails on Mobile Phone via Gmail App
As it turns out, in addition to the computer method, you can also unarchive emails using the Gmail app on your mobile phone. This is quite easy to do as well. To do so, follow the instructions given down below:
- First of all, open up the Gmail App on your mobile phone.
- Then, once you have opened it up, tap on the More button located at the top left corner.
- Scroll down a bit till you see the All mail option. Tap on it to go to the All mail folder.
Opening All Mail Folder on Gmail App - There, from the list of emails, look for the emails that you wish to unarchive.
- Once you have found that, hold down the email to select the email. Do this for all the emails that you wish to move to the Inbox folder.
- After you do that, tap on the Move to Inbox icon at the top (the one with the down arrow).
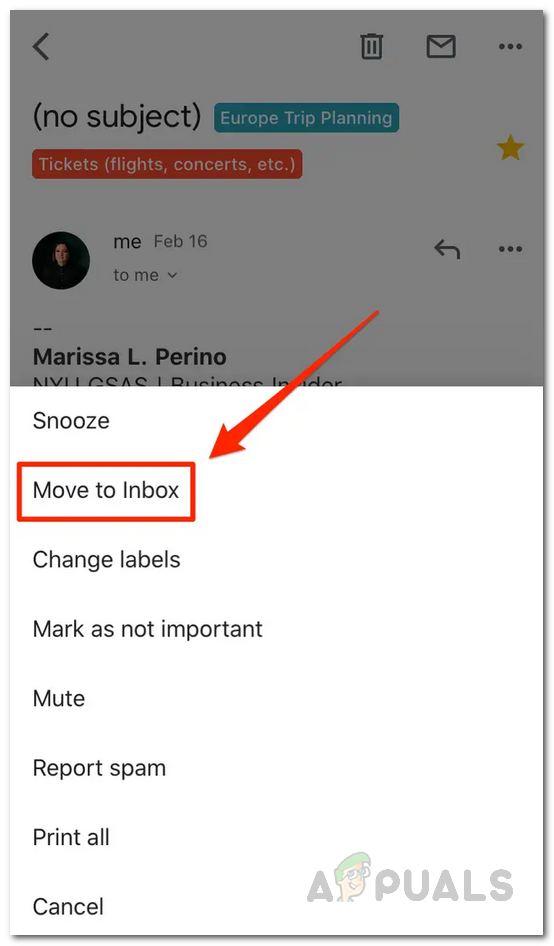
- Additionally, you can open up the email and then tap on the three dots at the top. From the menu that appears, choose Move to Inbox to unarchive the email.
Tapping Move to Inbox Option - Once you have done that, this will move all the selected emails to the Inbox folder and thus they will be unarchived. That is it.