How to Delay or Schedule Sending Email Messages in Outlook
Have you ever had an “Oh, no!” moment immediately after you hit the Send button on an email? I know I have. The email will immediately leave for the recipient inbox and there’s nothing you can do about it. And regardless of how many grammar mistakes you spotted, there’s no way to take it back.
Lucky for us, Microsoft Outlook is a solid email client with a list of impressive features. With the right tweaks here and there, we can give ourselves a little wiggle room to make the necessary corrections even after clicking the Send button.
Knowing how to delay the sending of your emails can prove to be hugely important. Let’s say you’re exchanging emails with a potential client that is living in a time zone entirely different than yours. It would be preferable that the notifications from your email don’t wake him at 3 AM. You can go about it in a smart way and schedule the email to send at a time when that person is available.
In this article, we are going to showcase some methods that will help you send messages at a later time. Below you have step by step instructions on delaying the sending of a single email in Outlook (Method 1). If you want to delay every email you send, it’s advisable that you set up a rule that will automatically run in the background and delay the sending (Method 2).
Whichever method you end up following, do not overreact with the postponement of your messages. Keep in mind that some Outlook versions and email clients use the original sent date when ordering the email list. So the recipient might miss your emails is you delay it for too long. Oh and remember to test properly before relying on one of the methods below for something important. Let’s begin.
Method 1: How to Delay the delivery of a message in Outlook
If you don’t believe you’ll delay messages that often, delaying a single message is a lot more convenable. The following guide will work on Outlook 2016, Outlook 2013 and Outlook 2010. If you’re using Outlook 2007, refer to the Note paragraphs under each step for the exact Outlook 2007 paths.
Immediately after you complete your email, don’t click the Send button. Instead, follow the instructions down below:
- After you write your message, click the Options tab and navigate to Delay Delivery.
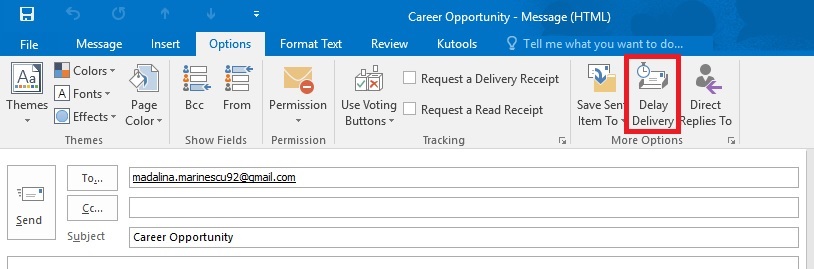 Note: In Outlook 2007, go to Options > More Options and click on Delay Delivery.
 - Now under Deliver options, enable the Do not deliver before check box. Then, click the drop-down menus of date and time to select the appropriate values.
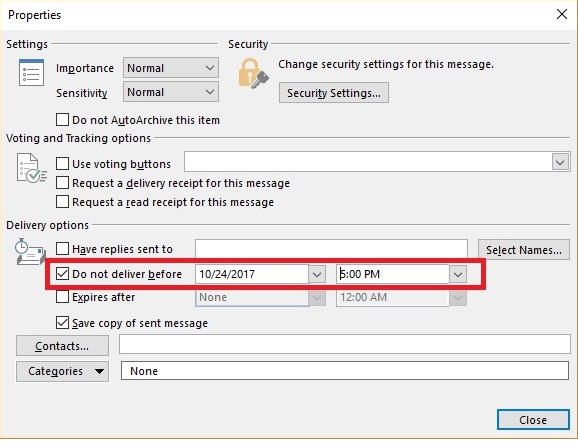 Note: On Outlook 2007, click on Message Options to access the menu in which you get to select the delivery date and time.
 - Now you can safely click Send. the message will remain in your Outbox until the delivery time is reached.
In case you decide to send your message sooner than the previously set date, here’s what you need to do:
- Expand the Outlook folder and click on the message you previously delayed.
- Go to Options and click on Delay Delivery.
Note: In Outlook 2007, go to Options > More Options and click on Delay Delivery. - Simply uncheck the box next to Do not deliver before.
- Close the settings window and hit Send.
Method 2: Delaying All Email Messages with a Rule
If you want to give yourself some wiggle room after pressing the Send button, this method will solve your problem. You can delay sending all your email messages by a certain number of minutes by enforcing a rule in Outlook. However, you can’t postpone them for more than 120 minutes, but I think that’s more than enough. Here’s what you need to do:
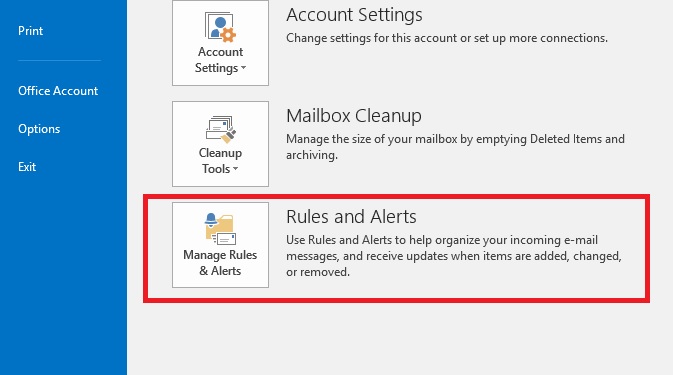
- While on the main Outlook window, click the File tab.
Note: In Outlook 2007, open the Tools menu then click on Rules and Alerts. - Then, find and click on Manage Rules & Alerts.
- Shortly after that, you should see a Rules and Alerts dialog box appearing. Click on Email Rules tab to expand it.
- Click on New Rule.
- When you see the Rules dialog box, click on Apply rules on messages I send (under Start from a blank rule). Hit Next to proceed further.

- Now you’ll see a list with conditions that you can apply. If you want the rule to apply to all the email messages that you send, do not select any of the conditions and click Next.

- You will have to click Yes at the next confirmation window.
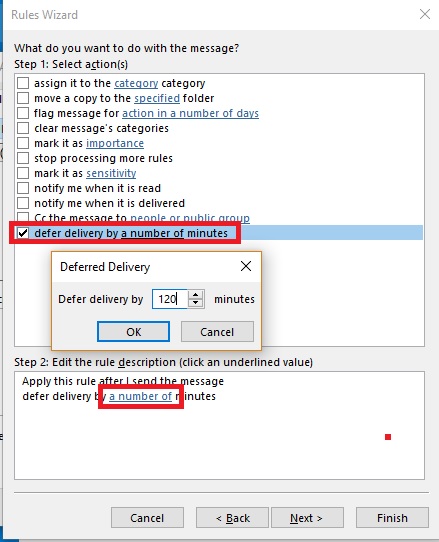
- Now from the next action list, check the box next to defer delivery by a number of minutes. Next, click on the “a number of” link at Step and enter the number of minutes to delay the delivery of all your email messages. You can insert the values manually or use the up and down arrows to adjust the value. Hit OK when you’re done.
- When you’re satisfied with the rule you’ve created, hit the Next button.
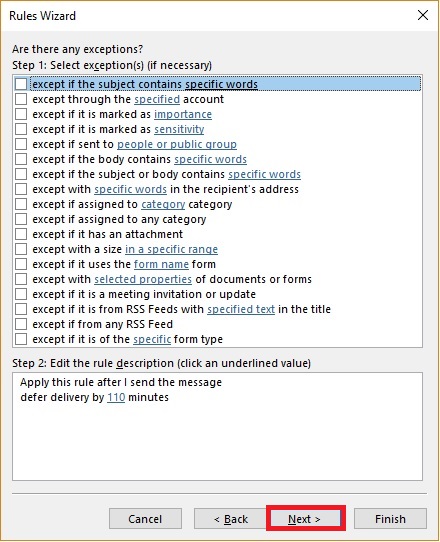
- You’ll be presented with another batch of exception rules. Again, if you want the rule to apply to all emails, hit Next without checking any box.
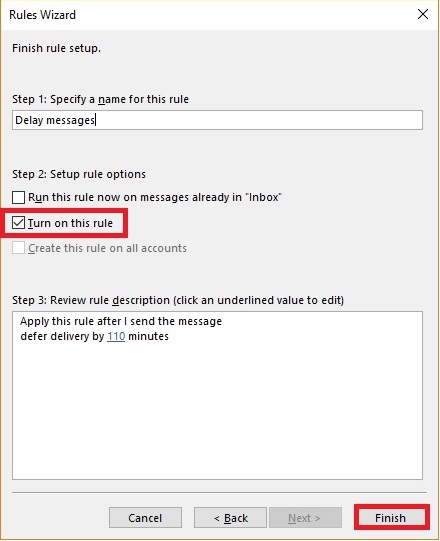
- Now on the final Rule Wizard screen, enter a name for the freshly created rule. Make sure the box next to Turn on this rule is enabled and hit Finish.
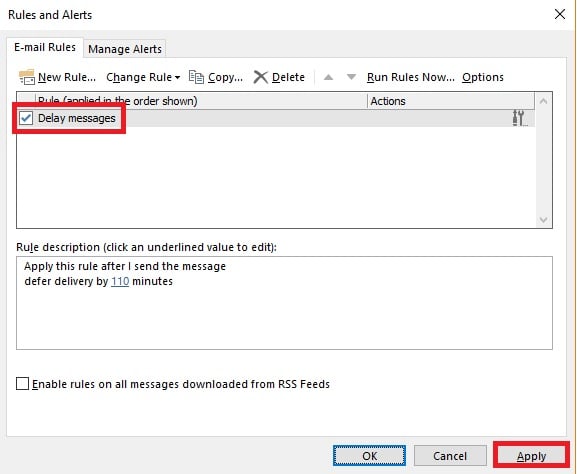
- You can return to the Rules and Alerts window and click on Email Rules. Confirm that the rule you previously created is in place by making sure the box next to it is checked. Hit Apply to finish the process.
Note: Keep in mind that the rule previously configured won’t be enforced if Outlook is closed. With this in mind, if you want to make sure that your emails are delivered after the delay period, make sure to leave Outlook open.
Wrap Up
Doesn’t matter which method you used, don’t forget to test it properly before relying on it for something important. It’s important to check if your email service provider uses the time when you originally clicked Send or the time when Outlook actually sends the message after the delay.
While I got your attention, you should know there are many add-ins that will help you delay email messages. SendLater, Email Scheduler and SetDeliveryTime are all good, free alternatives. But if you don’t want access to more customising options, using the native ways of delaying emails in Outlook should be more than enough.