What is UltraSearch Engine & 7 Ways to Remove It Safely
 Reviewed by Huzaifa Haroon
UltraSearch Engine is a notorious browser hijacker known for modifying browser settings, such as the default search engine and start page. This intrusive tool takes control of your internet browser, leading to unwanted page redirects and the display of inappropriate ads.
If you’ve detected UltraSearch Engine on your macOS computer, it is important that you take steps to immediately remove it from your Mac computer. In this guide, let’s go through the process of eliminating the UltraSearch Engine from your computer.
Table of Contents:
What is UltraSearch Engine?
UltraSearch Engine, for the unaware, is a malicious application that can alter the browser’s search settings on macOS computers, displaying unwanted advertisements and eating up memory.
In the majority of cases, a person doesn’t choose to manually install it, but it is typically installed without the user’s knowledge or consent and goes hidden for a long time without anyone noticing.
Is UltraSearch Engine a Virus?
UltraSearch Engine is not classified as a traditional virus; however, it falls under the category of malware, specifically a browser hijacker. Despite not being a virus in the conventional sense, UltraSearch Engine can pose a threat to your computer.
It can slow down your computer and make it difficult to use while collecting your personal information, such as your browsing history and search queries. If you think your computer is affected by UltraSearch Engine, it is important to immediately take action to promptly remove it.
Read More: Is Soap2Day a Virus? How to Remove It from Windows and Mac
Why Am I Being Forced to UltraSearch Engine?
Once UltraSearch Engine is installed, you might notice your default search engine changing in all the browsers, and thus every search redirects the user to the UltraSearch Engine’s website instead of their preferred search engine such as Google or Bing.
It is a harmful program that, apart from altering the default search engine, also injects advertisements such as pop-ups, banners, or even inline text ads into the websites that the user visits. In short, UltraSearch Engine is a browser hijacker, a form of malware designed to redirect users to unwanted websites.
How to Remove UltraSearch Engine from your Mac
Now that you’re up to speed on exactly what UltraSearch Engine is, how it works and why it’s so dangerous, let’s waste no time jumping into how to get rid of it.
1. Scan your PC using an Antivirus
For someone not tech-savvy, the simplest solution to try first is running a full PC scan using an antivirus application. Antivirus programs like Malwarebytes, Bitdefender, or Avast can search your PC for potential security threats and assist you in taking action against them.
This is one of the best solutions as it not only helps remove unwanted malware such as UltraSearch Engine but also identifies other security threats on your PC.
Depending on the software you choose to download, open the application, locate the Full PC scan option, and wait for the scan to complete. If any risks are found, it will notify you and recommend a course of action.
Read More: Antivirus vs. Windows Defender – Which one should you use?
2. Remove Suspicious Files
A lot of times, files are not usually visible to you under the Finder. These are known as hidden files. Malware usually hides under these. Here’s how you can remove suspicious-looking files from your computer.
Step 1: Reveal Hidden Files in Finder
Begin by launching the Finder app and press Cmd + Shift + . (dot) to reveal hidden files in Finder. Once you finish the process, you can press the same keys again to hide the files. Relaunch the Finder app and proceed to the next step.
Step 2: Navigate to LaunchAgents
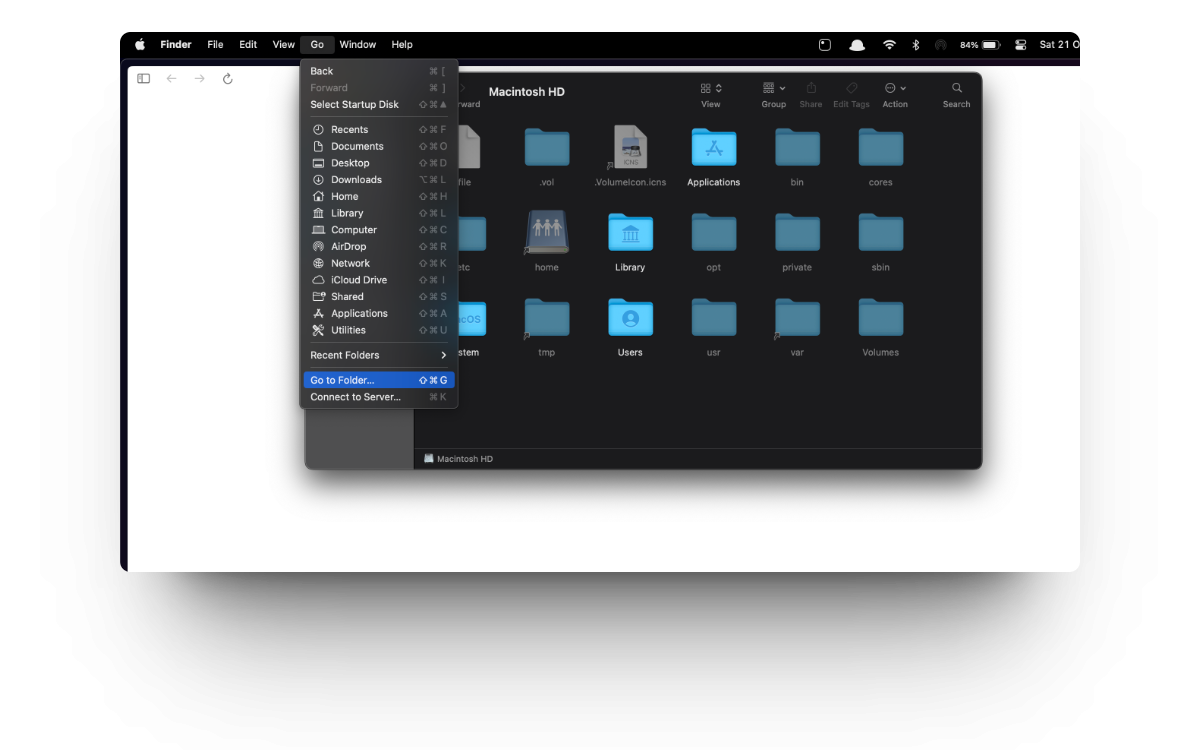
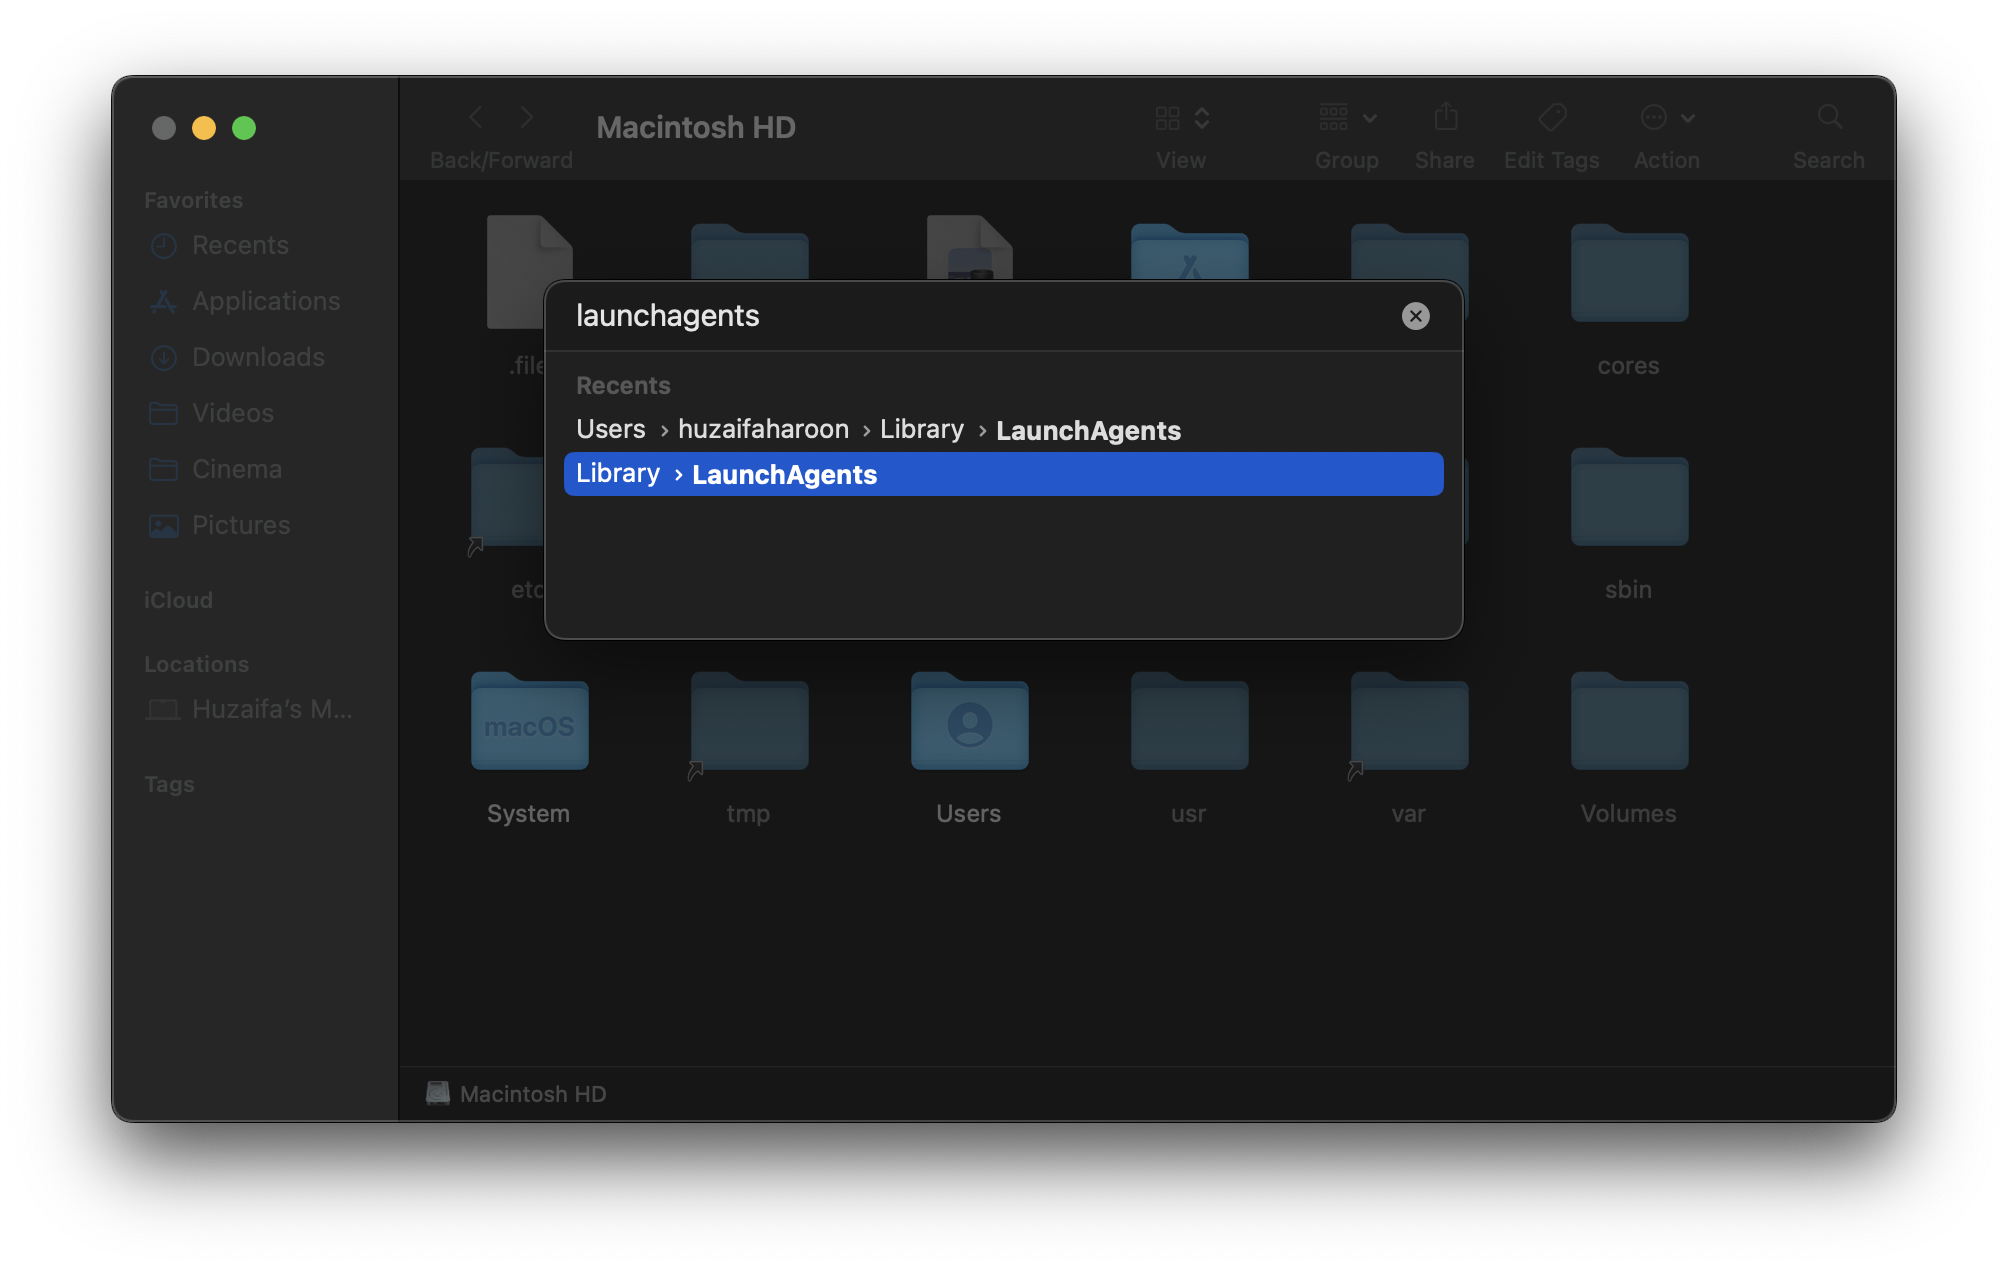
Next, from the top menu on your Mac, select Go and choose Go to Folder. Alternatively, you could also quickly press Cmd + Shift + G to go to a new folder.
Step 3: Access LaunchAgents Folder
On the Go to Folder screen, type in /Library/LaunchAgents and press Enter. This will quickly take you to the specified path, which is the LaunchAgents folder.
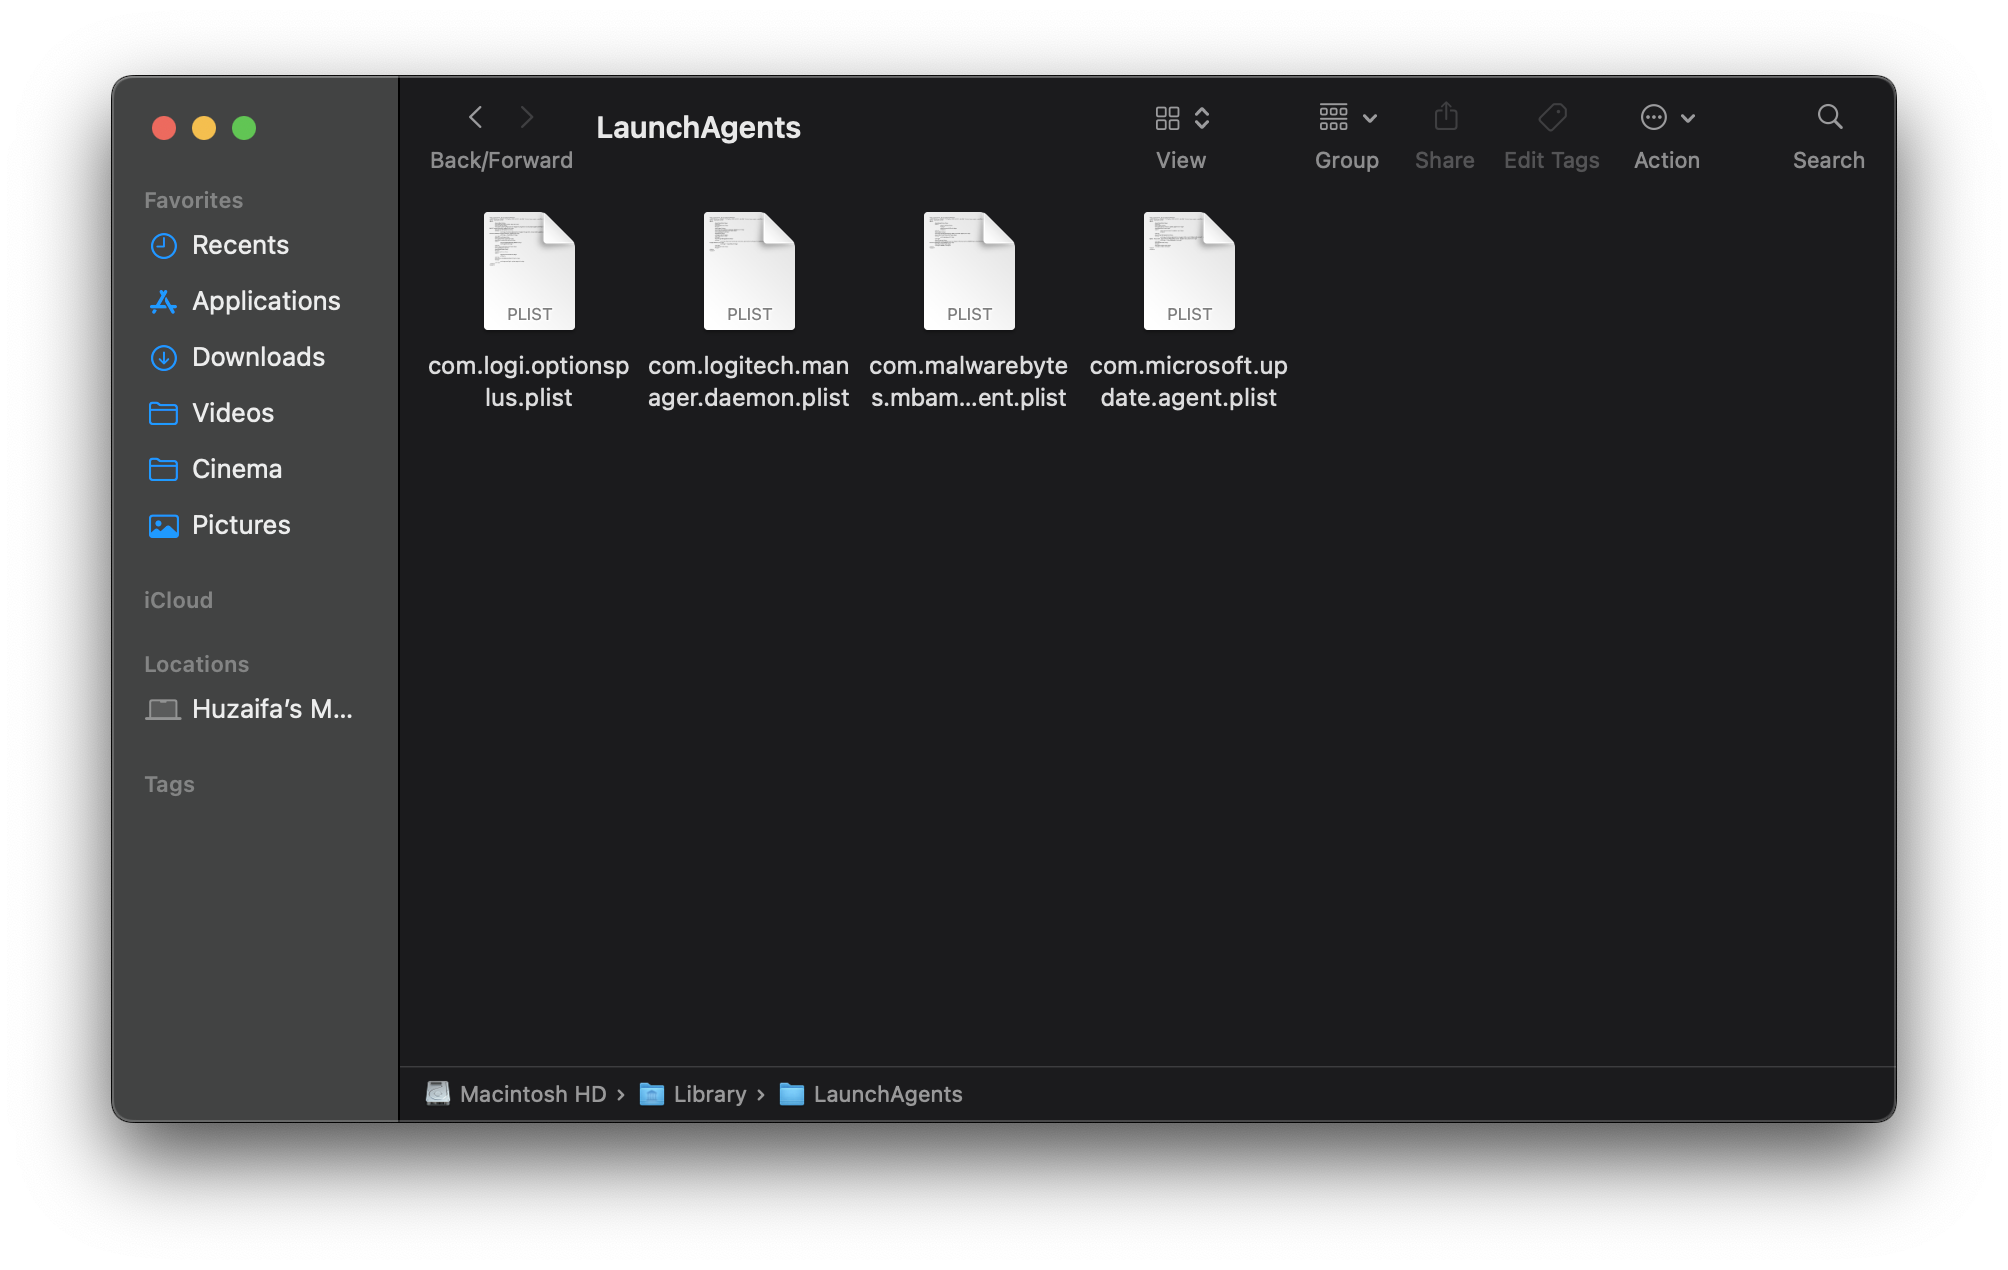
Step 4: Delete Suspicious Files
Under this folder, look for any unfamiliar and suspicious files. Select all the files that you are sure are not something you would have installed and delete/trash them. Ensure that you only select files that you are sure about since deleting important files could make your Mac unusable. Look for file names but not limited to:
- com.UltraSearch Engine
- mykotlerino.ltvbit.plist
- com.myppes.net-preferences.plist
- myppes.download.plist
- installmac.AppRemoval.plist
- com.AdditionalChannelSearchDaemon
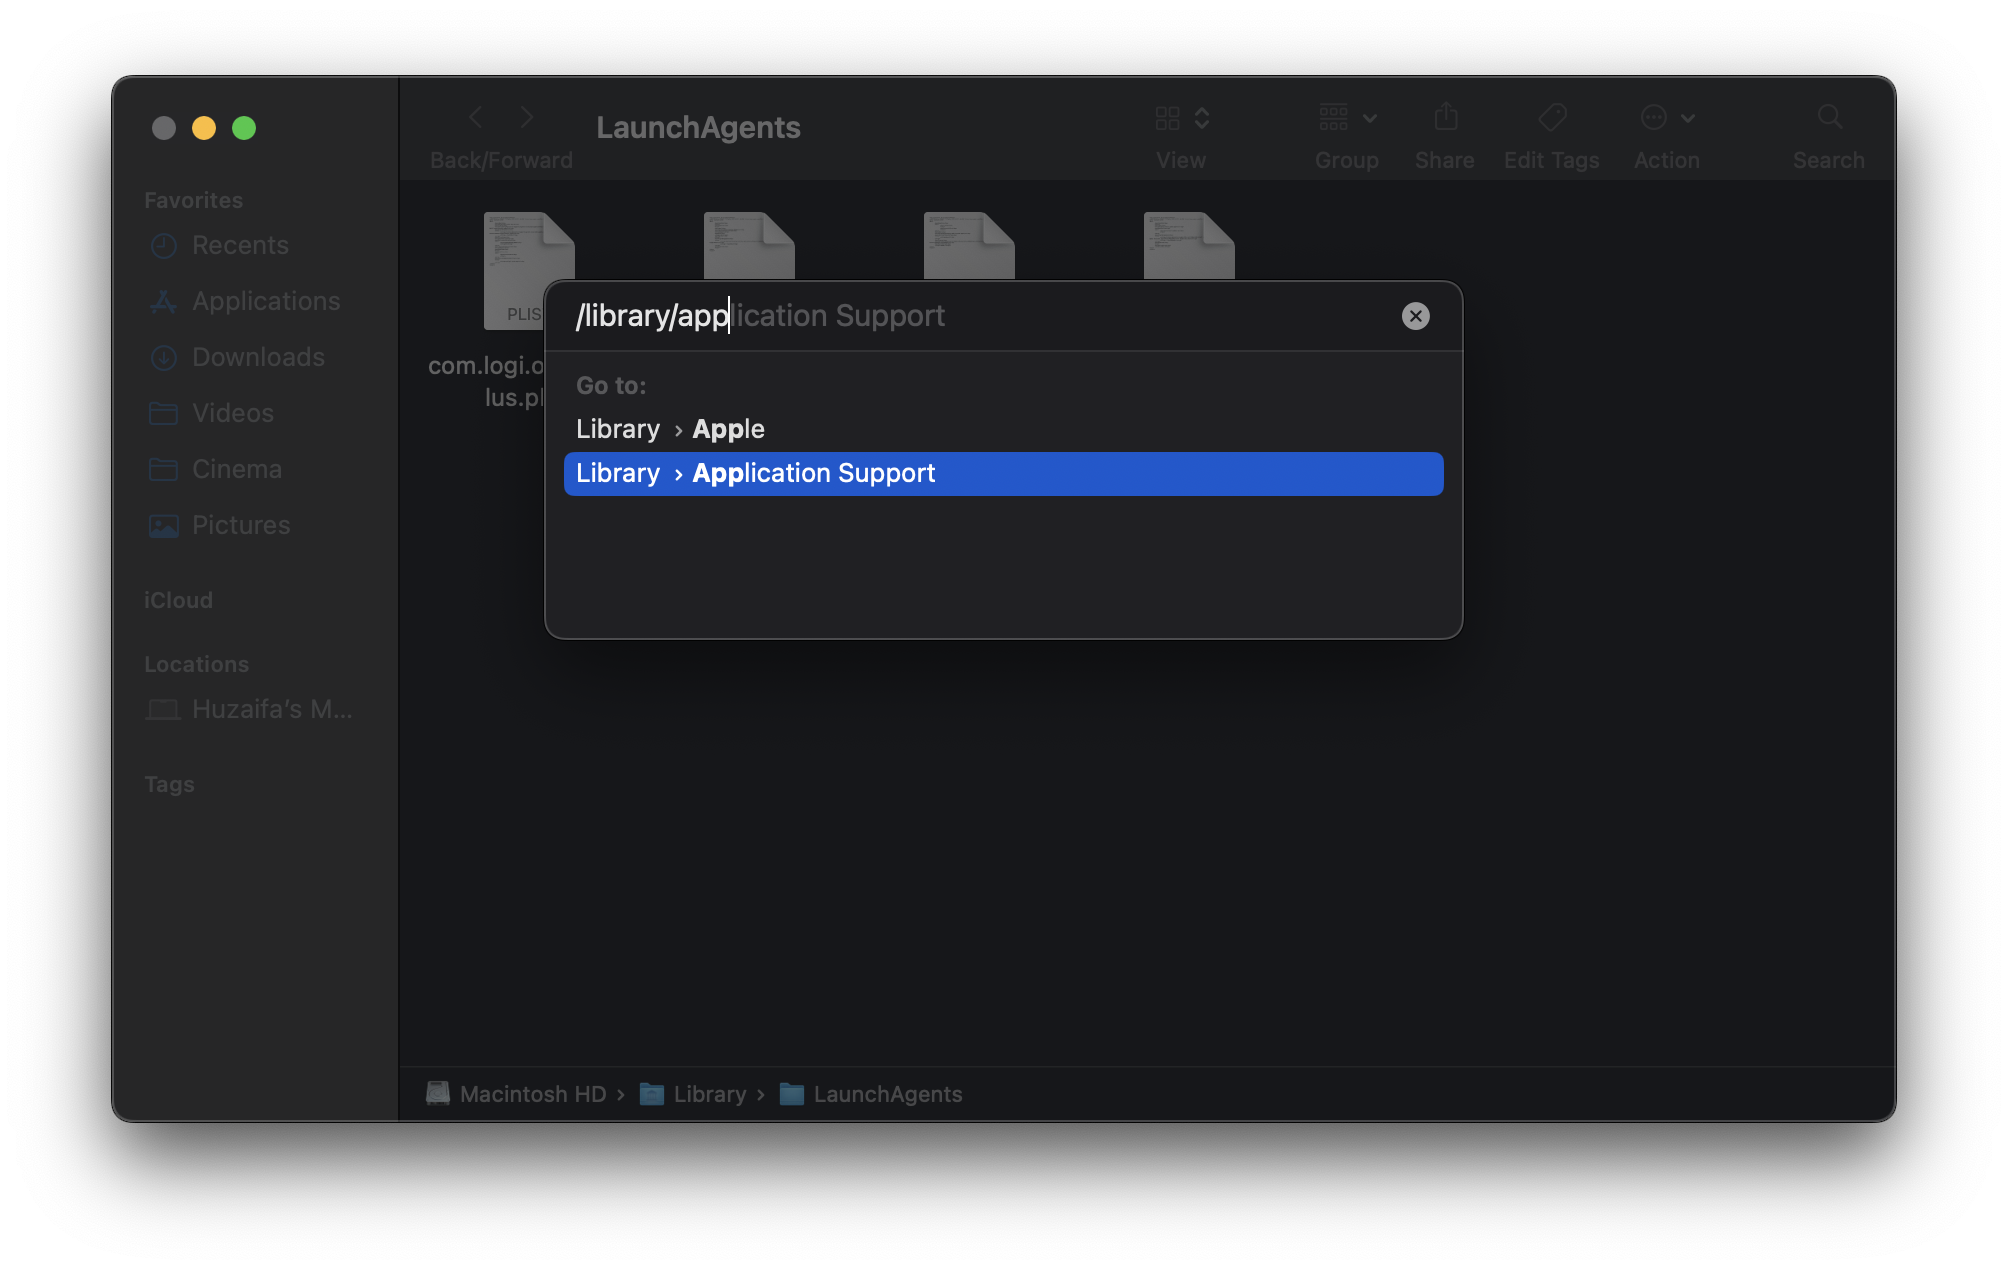
Step 5: Repeat for Application Support Folder
Repeat the process for the Application Support folder, with the specified path: ~/Library/Application Support. Delete any unfamiliar files or suspicious folders. You can quickly drag and drop the malicious folders into the Trash to remove them from your PC.
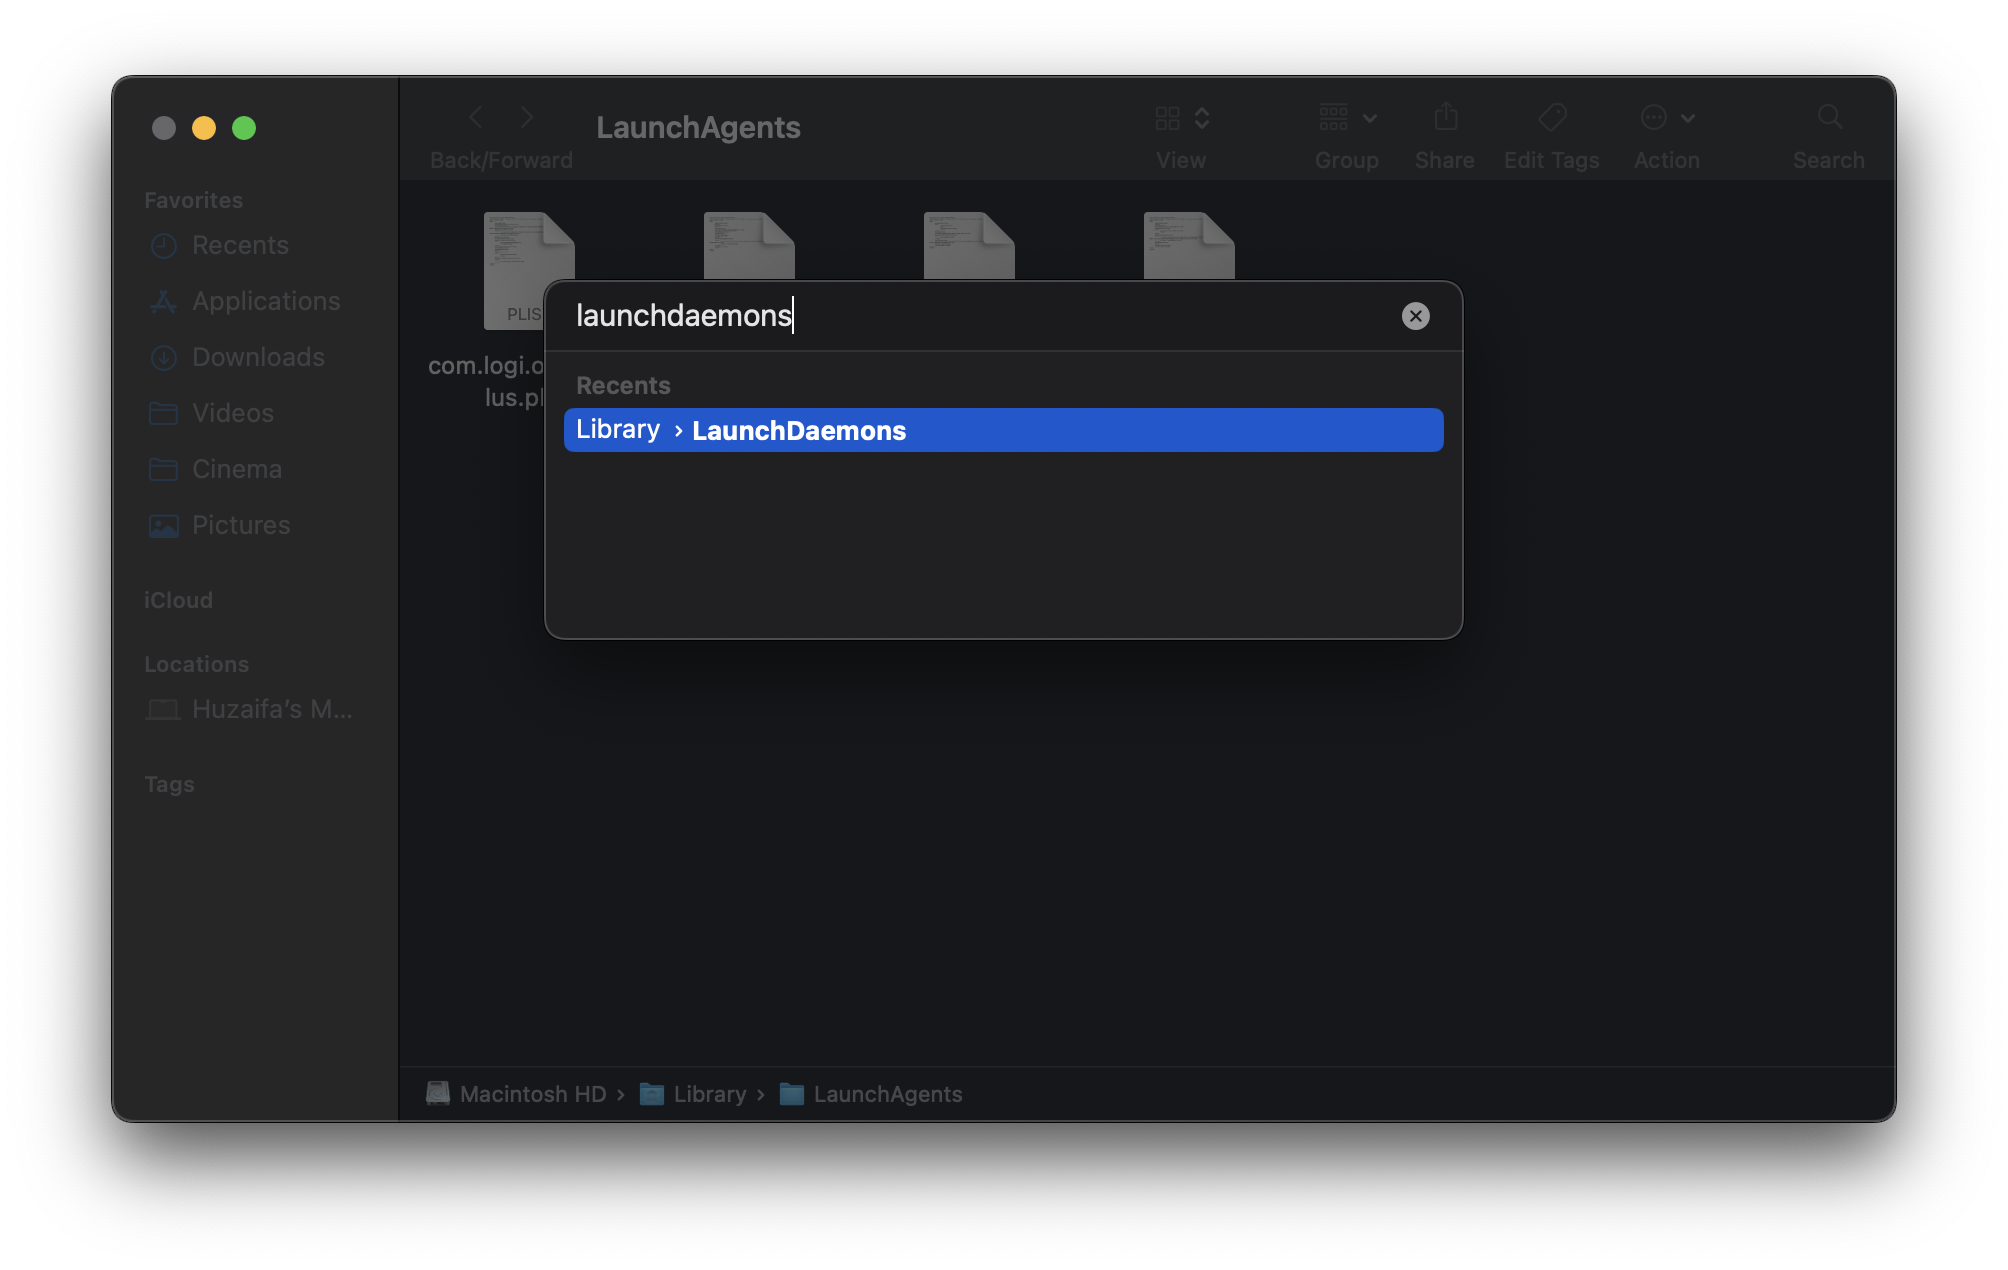
Step 6: Repeat for LaunchDaemons Folder
Next, repeat the same process for the LaunchDaemons folder, with the path: /Library/LaunchDaemons, and click Go, or just search for it and press Enter. Once done, you’ll be directed to the LaunchDaemons folder in your library. Here, as you did with the earlier two folders, delete any unfamiliar or suspicious files you find here.
Look for files that either have titles such as com.machelper.system.plist, com.search.system.plist, and com.UltraSearchEngine.system.plist.
In another case, if you encounter You do not have permission to do that error, launch the Activity Monitor, stop the process with the same name, and then try moving it to the trash.
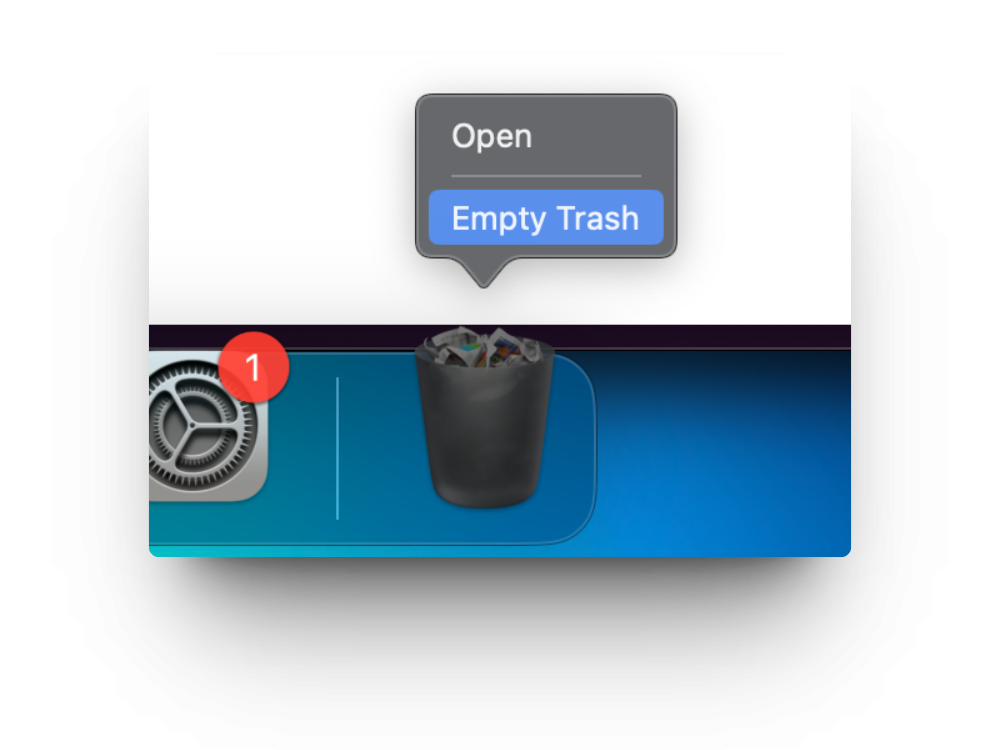
Step 7: Empty Trash
Finally, as the last step, right-click the Trash icon in your dock and select Empty Trash to permanently delete the files.
3. Deleting Suspicious Browser Extensions
Browser extensions often have the ability to view and edit the contents of the displayed webpage. They might be the cause of unwanted ads and pop-ups on random pages. Here’s how to remove suspicious browser extensions from your computer.
Step 1: Access Extension Settings
Head over to your web browser infected with malware, whether it’s Google Chrome, Safari, or Mozilla Firefox. Navigate to your extensions page; for Chrome, find it under the three-dotted icon > More tools > Extensions. For Safari, go to Safari in the Apple menu, then choose Extensions.
Step 2: Identify and Remove Suspicious Extensions
On this page, scrutinize for suspicious extensions that you haven’t installed, such as the UltraSearch Engine extension, and click Remove/Uninstall. This action helps ensure the removal of potentially harmful elements from your browser.

4. Removing Malicious Profiles
Administrators frequently use profiles to govern the behavior of their Macs. These profiles can configure a Mac to execute a variety of jobs, including some that are not otherwise possible. Browser hijackers like UltraSearch Engine often establish a profile in the Settings, restricting users from modifying specific settings.
Step 1: Access System Preferences
On the top navigation pane on your desktop, click on the Apple logo, then select System Preferences or System Settings based on your macOS version. Note that you’ll require admin privileges to remove malicious profiles.
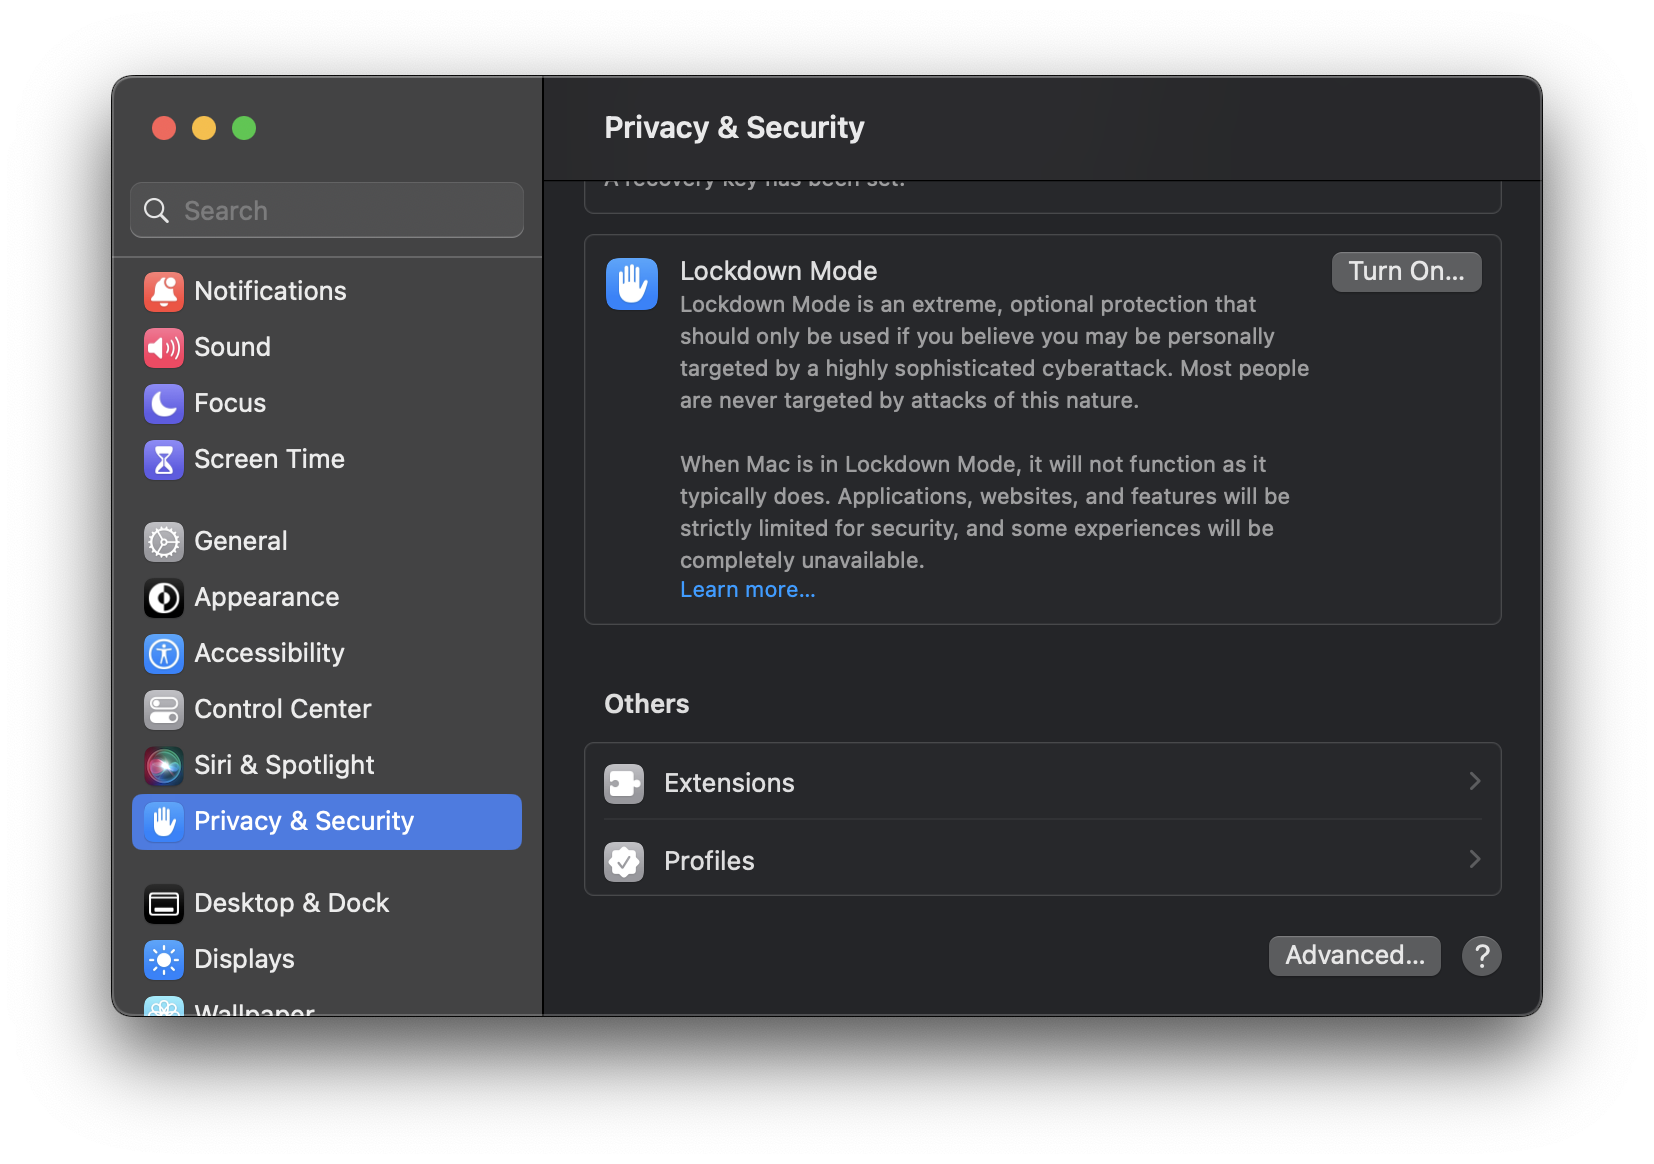
Step 2: Navigate to Profiles
Under settings, click on Privacy and Security and then select Profiles. If you don’t find such an option, skip this step, as your macOS computer probably doesn’t have profiles enabled. On the next screen, you’ll find all the different profiles created on your Mac.
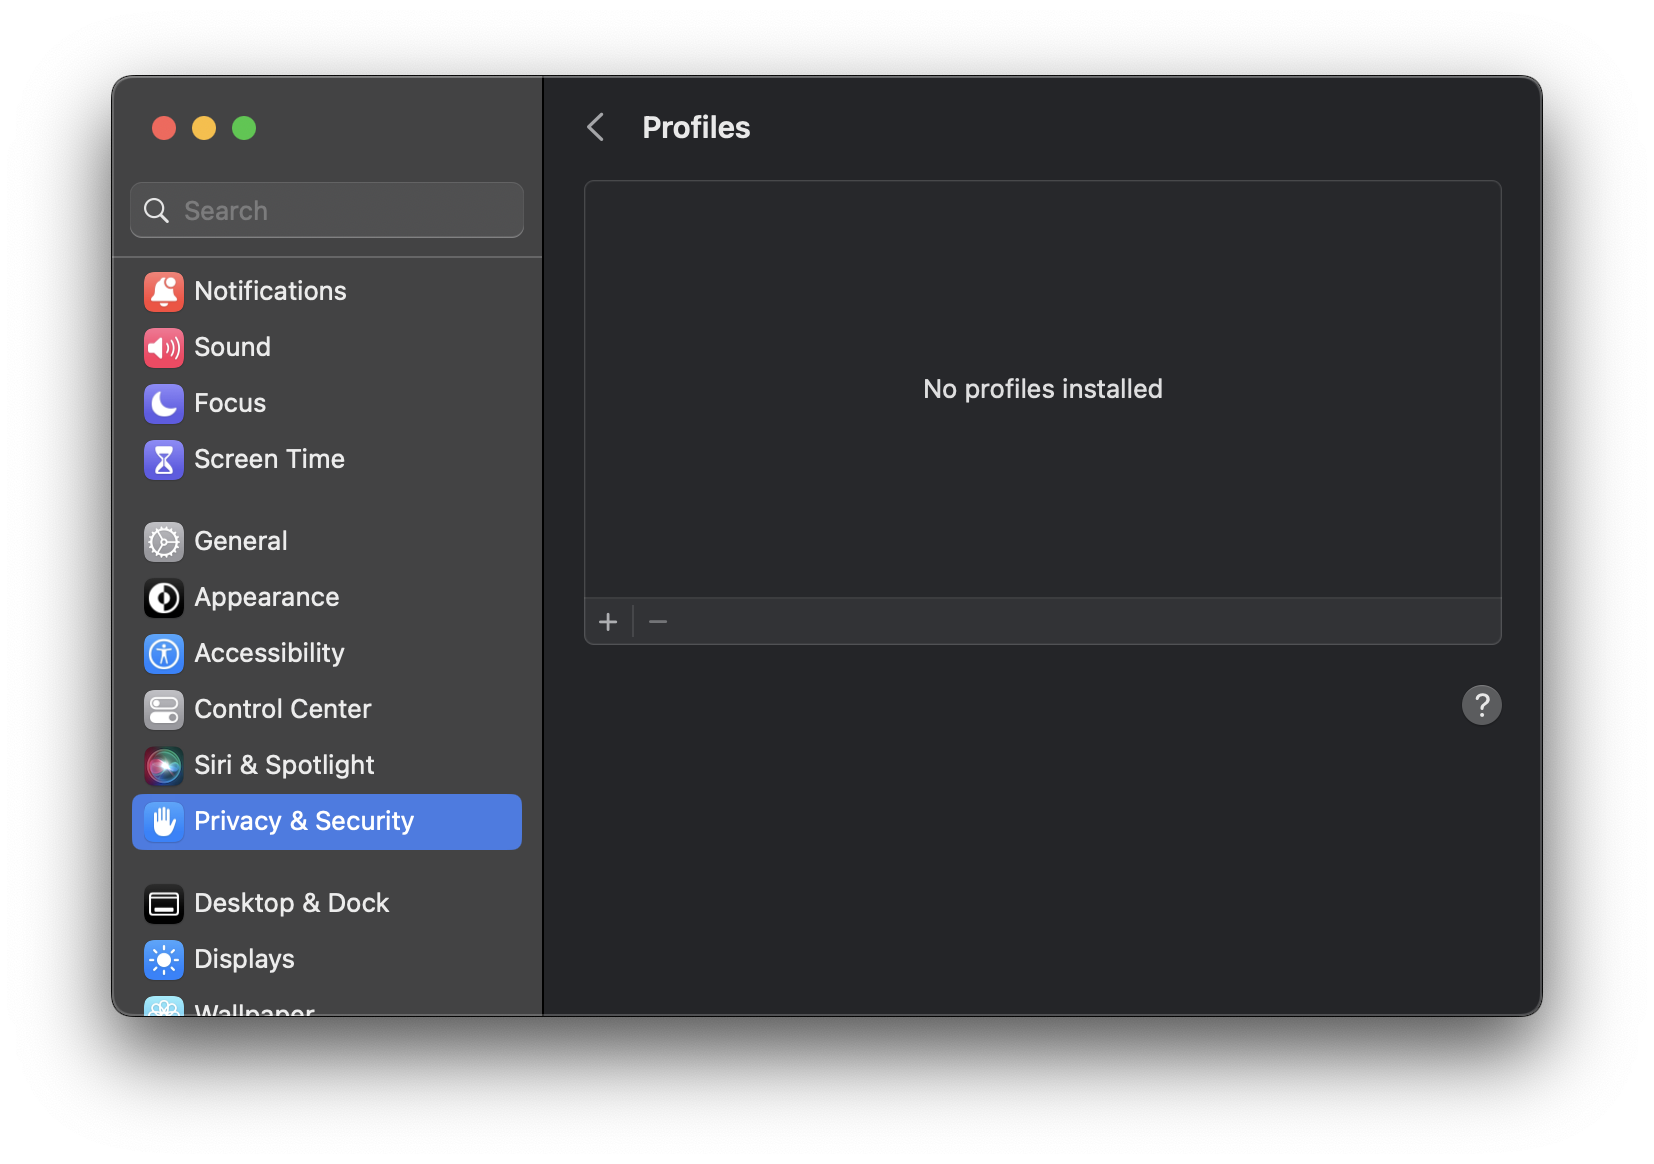
Step 3: Remove Suspicious Profiles
Finally, if you identify a suspicious profile, essentially a name you don’t recognize, it’s likely added by adware. To remove a profile, tap on the profile name and then choose the minus button located at the bottom of that panel. Repeat this process for all suspicious profiles. This helps ensure the removal of potentially harmful profiles from your system.
5. Removing UltraSearch Engine from Applications
Follow the steps below to locate and uninstall the UltraSearch Engine application from your Mac.
Step 1: Open Finder Window
To begin removing an application, quickly launch a new Finder Window by clicking on the Finder icon in the Dock.
Step 2: Navigate to Applications
Under the Finder window, navigate to Applications, which can be found on the left navigation pane.

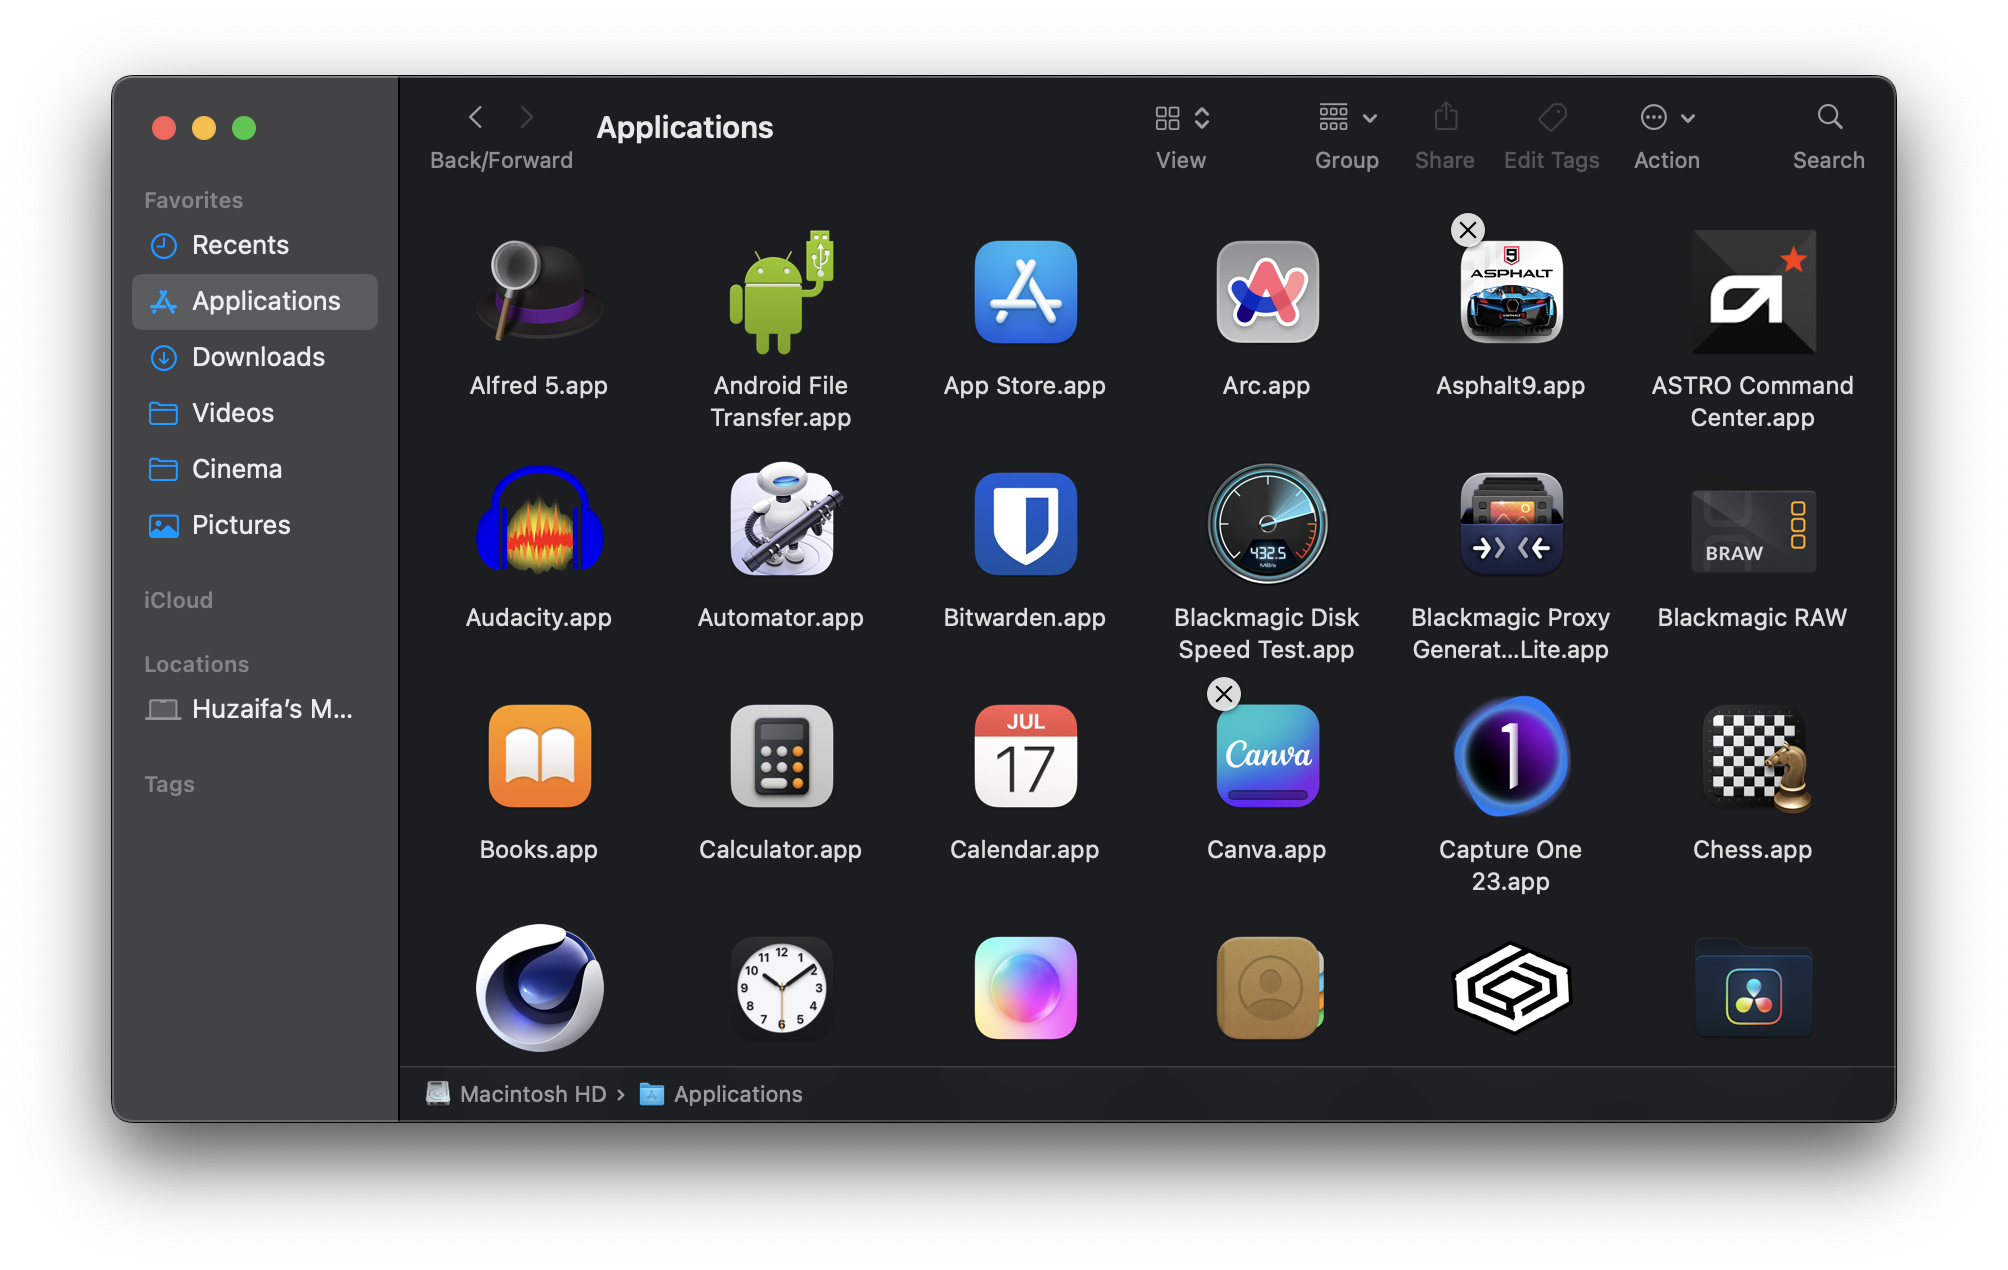
Step 3: Identify and Remove UltraSearch Engine
Here, look for an application titled UltraSearch Engine or any other suspicious files you deem as such. Click on the app name once and drag it from the Applications window to the Trash. Finally, empty the trash to delete the file from your PC permanently. This process helps ensure the complete removal of the potentially harmful application from your system.
6. Reset Your Default Search Engine
If your web browser automatically redirects to a different search engine upon launch, resetting the default search engine and startup page can resolve the issue. Here’s how to do it:
Step 1: Navigate to Default Search Engine Settings:
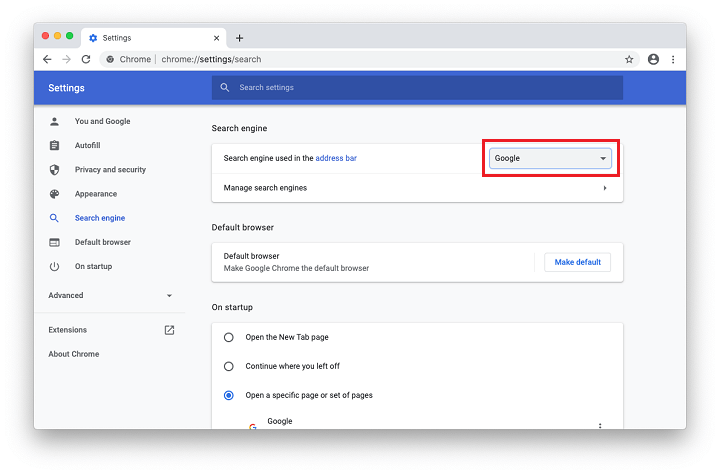
Launch your web browser. For Chrome users, click on the three-dotted icon (⋮) > Settings > Search engine. Click the drop-down next to “Search engine used in the address bar” and select your preferred search engine.
Step 2: Set Homepage Preferences:
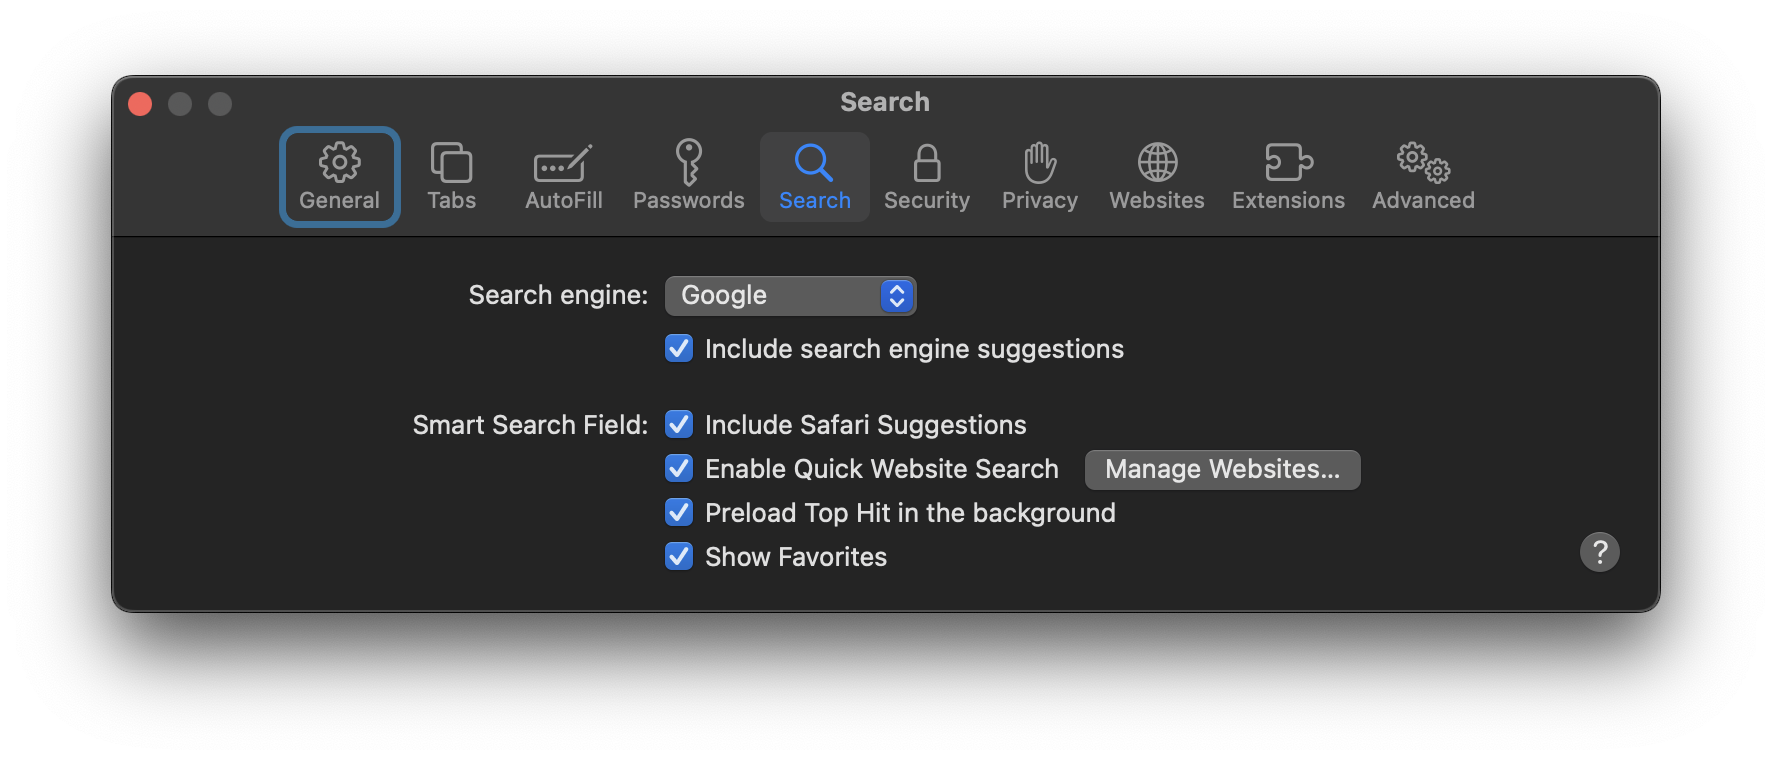
Head to the On Start-up section from the left navigation pane. Choose on a specific page or set of pages and set your preferred Homepage. Select Google, Bing, or your preferred startup page. For Safari users, go to File > Settings > Search and choose your preferred search engine. Adjust preferences and remove UltraSearch Engine under the Homepage section.
Step 3: Restart Your Browser and Computer:
Finally, restart your browser and computer to apply the changes.
7. Restore Backup from Time Machine
If the previously mentioned solutions haven’t been effective and you happen to have a Time Machine backup of your computer on a separate disk, restoring the backup could revert your MacOS to a point when the issue didn’t exist.
Step 1: Connect Your Backup Disk:
Connect your backup disk to your MacOS computer, the disk where you previously backed up your system.

Step 2: Boot Your Mac in Recovery Mode:
Restart your Mac, and while the system is turning on, press and hold down the Command + R keys until you see the Apple logo on the screen to boot your Mac in recovery mode.
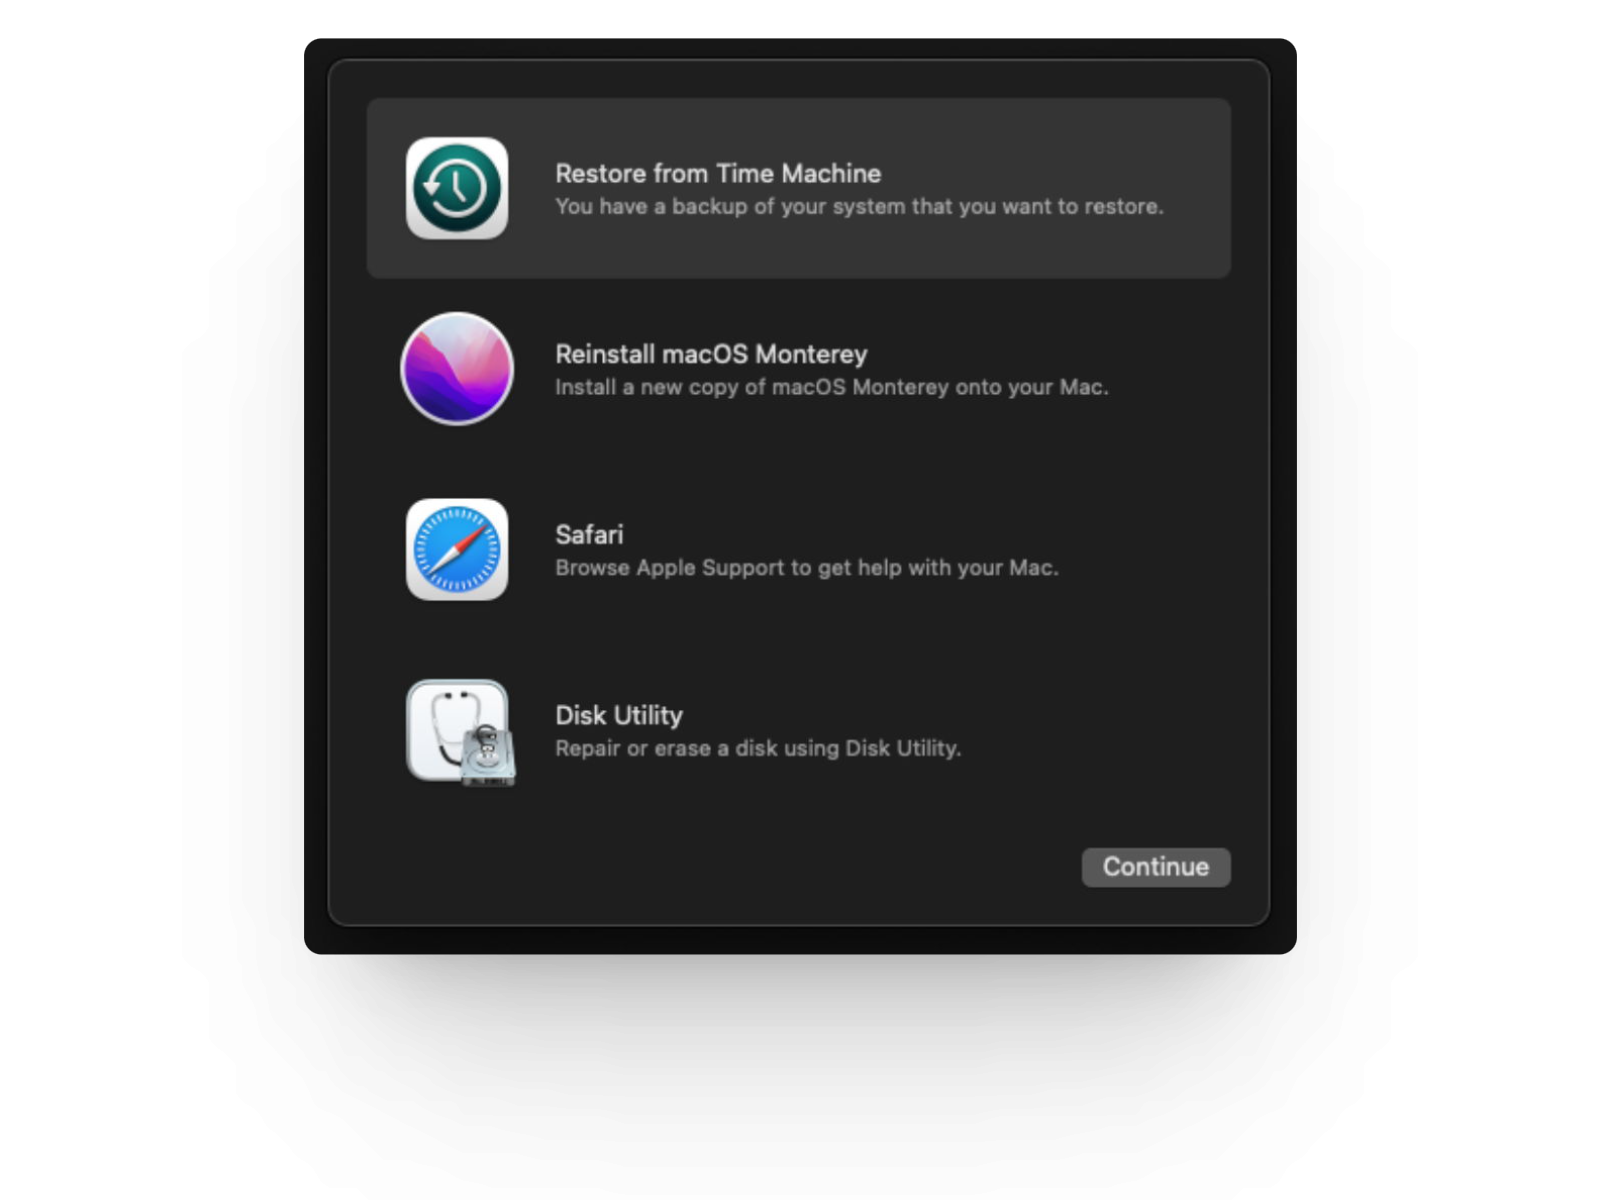
Step 3: Launch Disk Utility and Restore:
In the Disk Utility menu, select the Restore from Time Machine backup button, and click on Continue to proceed.
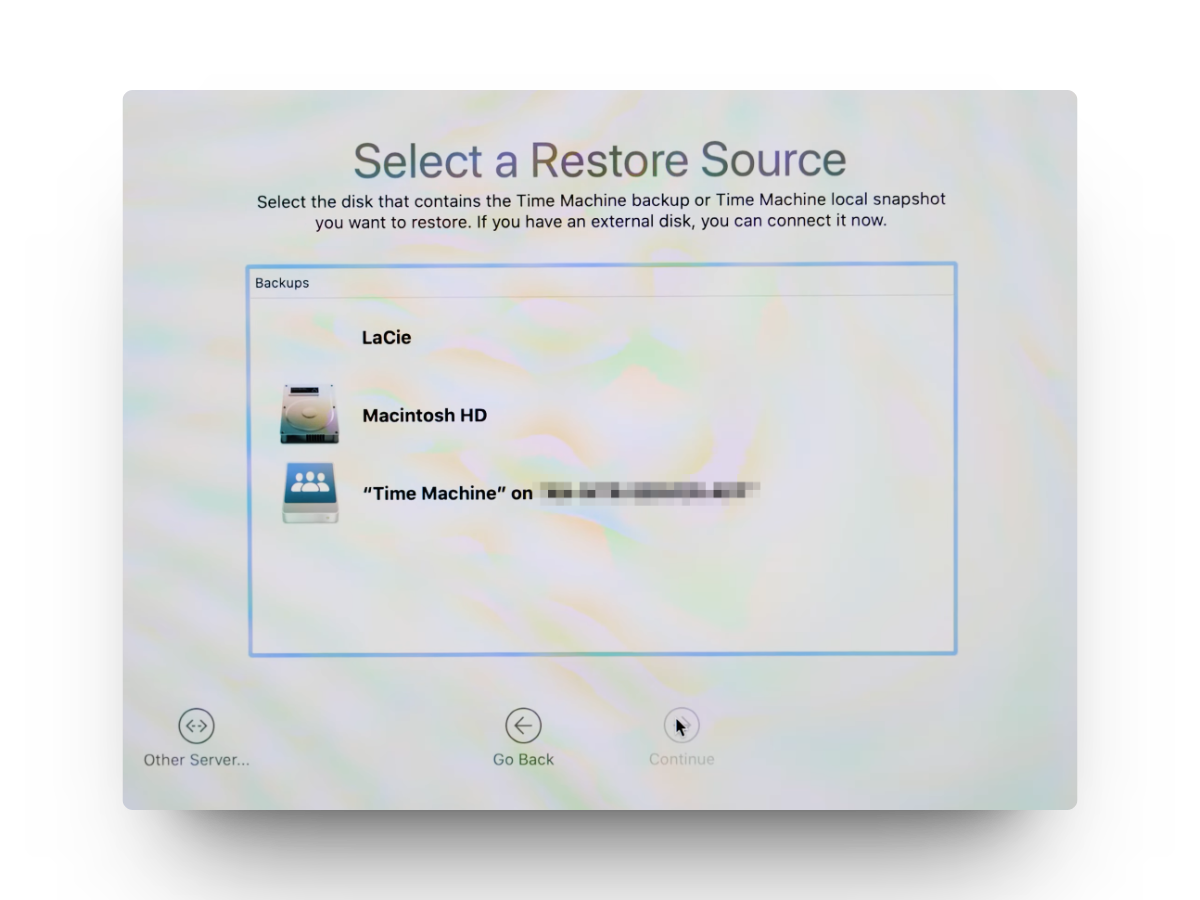
Step 4: Select Time Machine Restore Source:
On the next page, select Continue, then choose your Time Machine backup disk as the restore source. If your disk is password-protected, enter the administrator password to unlock the disk and click Continue.
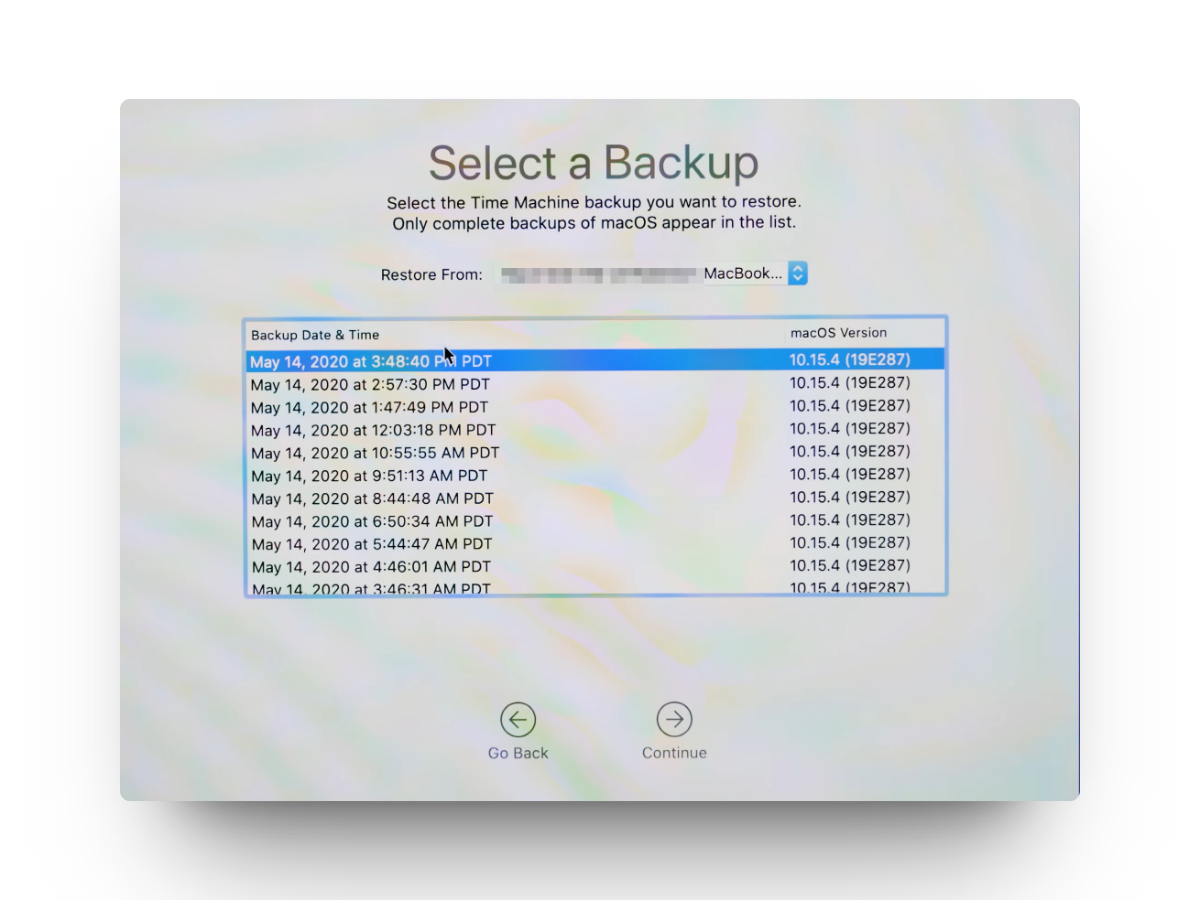
Step 5: Choose Backup Version:
If you have multiple backups, you’ll be shown a list of options. Select the backup version you want to restore and click Continue.
Step 6: Restore to Your Hard Disk:
Now, choose the hard disk on your computer where the contents will be restored and click Restore. Wait for the process to complete, and when done, restart your Mac for the changes to take effect.
Conclusion:
In conclusion, UltraSearch Engine is a form of malware that hijacks your browser, displaying unwanted web pages and ads. Methods to remove it include eliminating suspicious files and extensions, removing unwanted profiles, and restoring your computer to an older backup using Time Machine. If you have any other questions or encounter any issues, please let us know by leaving a comment below.
FAQs on UltraSearch Engine on MacOS
If you suspect your computer has been infected with UltraSearch Engine, examine your browser for unusual behavior, such as unexpected redirects or pop-ups. Additionally, review browser extensions and inspect system profiles for any unfamiliar entries.
To prevent future infections, ensure your software is regularly updated, download files only from trusted sources, use reliable antivirus software and maintain caution with email attachments. Don’t forget to back up your data regularly.
Browser hijackers not only redirect users to potentially harmful websites but can also collect personal information, degrade system performance, and expose the system to further malware threats. Prompt removal ensures online safety and optimal system performance.
UltraSearch Engine, like many other browser hijackers, often comes bundled with free software downloads, email attachments, or is installed through deceptive advertisements and websites. Always be cautious of what you’re downloading and from where.
Yes, be cautious when downloading software, especially freeware. Opt for custom installation to deselect unwanted components. Regularly update your software and OS, and use a reputable antivirus and anti-malware program to scan and protect your system.
Reviewed by Huzaifa Haroon

