How to Show Hidden Files in Windows?
The Windows 10 OS by default hides the essentials files/folders (having hidden attribute enabled) that are not meant to be used by the common users. Usually, the hidden files are not viewable and to show them you have to change Windows 10 settings (hidden files and folders are a bit greyed out when seen in the File Explorer). To unhide the hidden folders/files in Windows 10, you may try the methods below:
Use File Explorer Options
- Click Windows, type: File Explorer Options, and then open it.
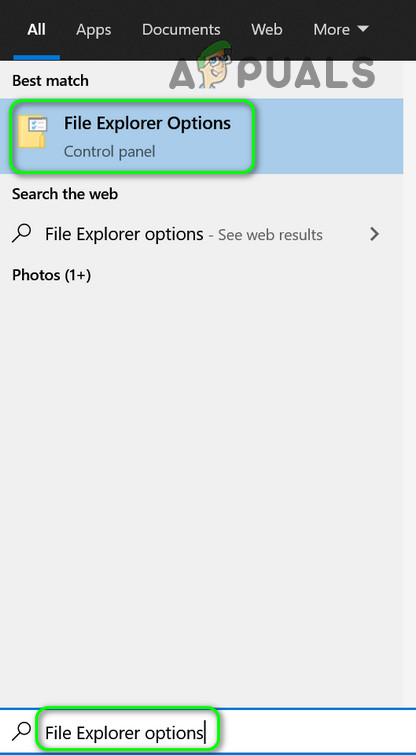
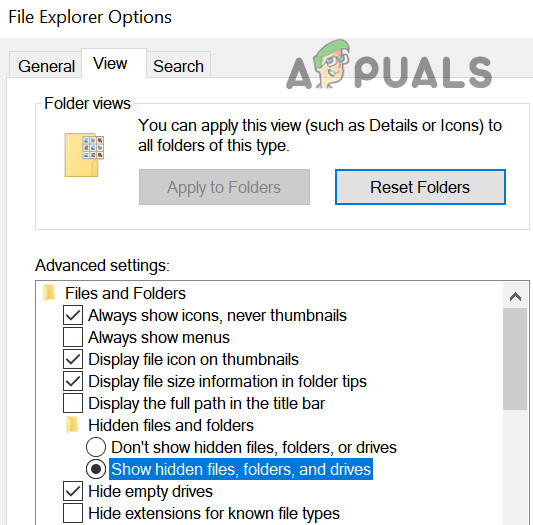
Open File Explorer Options - Now head to the View tab and under Show Hidden Files and Folders, select the radio button of Show Hidden Files, Folders, and Drives. If you want to show the system files, uncheck the option of ‘Hide Protected System Files’.

Show Hidden Files and Protected System Files - Now apply your changes and hopefully, you can view the hidden files.
Using the Top Panel in File Explorer
If you are in File Explorer, then using method 1 may be a bit odd for the user (especially, if the user repeatedly has to enable the viewing of the hidden files/folders for a short time).
Use the Hidden Items Option
- Right-click Windows and select File Explorer.
- Now head to the View tab and checkmark the Hidden Items (to show the hidden files).

Check/Uncheck the Hidden Items in the File Explorer
You can also add the Hidden Items to the quick access menu and use it to enable/disable viewing of the hidden files.
- Right-click on Hidden Items in the View tab of the File Explorer and select Add to Quick Access Toolbar.

Add Hidden Items to Quick Access Toolbar - Now, in the Quick Access Toolbar, click on the Hidden Items icon to enable/disable the viewing of the hidden files.

Check/Uncheck the Hidden Items Icon to Show/Hide the Hidden Files - You can also use the shortcut key by pressing the Alt key and then press the number shown with the Hidden icons (in my case, it is 3, so, my shortcut key is pressing Alt and then 3 to toggle between enabling/disabling the viewing of hidden files).

Press the Alt + 3 Keys to Show/Hide the Hidden Files
Use Folder Options
- Launch the File Explorer and head to the View tab.
- Now expand Options and select Change Folder and Search Options.
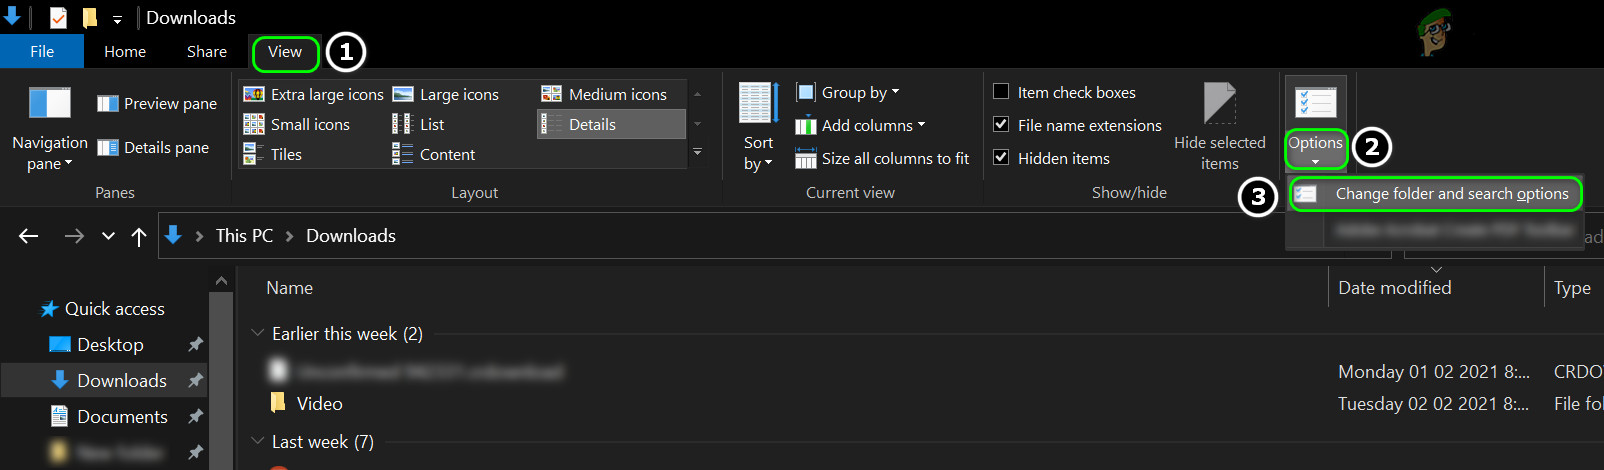
Open Change Folder and Search Options in the View tab - Then head to the View tab and select the radio button of Show Hidden Files, Folders, and Drives (and uncheck Hide Protected Operating System Files, if required).

Show Hidden Files and Protected System Files - Now apply your changes and check if you can view the hidden files.
Use the Shortcut Key
- Open the File Explorer and press the following keys one by one (if your system’s language is English, in other languages this shortcut key might not work):
Alt

V

H

H
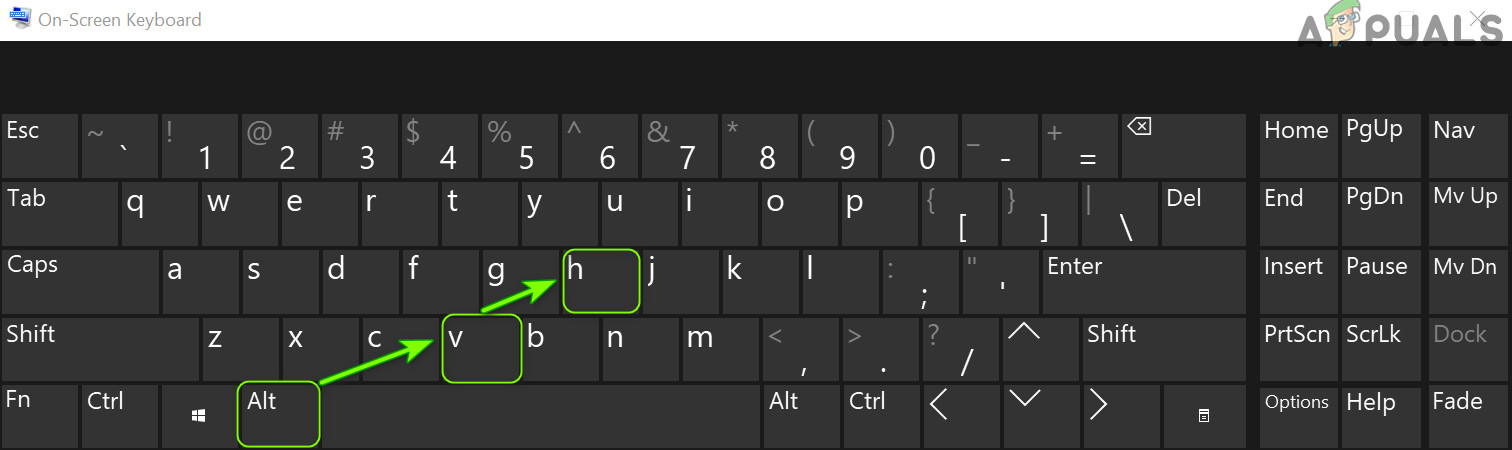
Press Alt, V, H, H Keys to Show/ Hide the Hidden Files - You can press the same combination to enable/disable the viewing of hidden files/folders.
If you want a quicker (or a one-click) way to show or hide the hidden files, then you may create a batch script that toggles on/off the registry value for viewing the hidden files but that is beyond the scope of this article (for that, the internet is your friend).