How to Remove Malwares Using Malwarebyte
Malwares now a days spread themselves through websites and internet mediums. There are three major forms of malwares which are classed as “Spywares, Adwares and Ransomwares”. In General; they are designed to use your computer to generate revenue – people behind them earn money in one of the following ways; by stealing your financial details; by showing and promoting ads on your system; and by demanding ransoms where they lock your system down in return of money. Antivirus softwares are not too good in detecting them; since their objective is entirely different and that is to protect you from Viruses; Viruses do not serve the purpose of making money; Malwares do. This is where; Malwarebyte comes. Over the years, i’ve used it on a couple of hundreds of computers to eliminate malwares and without a second thought; i now use it on every system. In this guide; i will walk you through the steps on how to use Malwarebytes (effectively).
Before we continue; let’s talk about Safe Mode. This is a sort of mode built into Windows which is different then the normal mode. In Safe Mode; services, programs and start-up items are disabled. As a result; the system runs with minimal load; and no third party softwares and un-necessary Windows services. Cleaning malwares becomes easy with this mode; because you are going to kill the malware when it’s sleeping; thereby not allowing it a chance to fight back.
How To Install and Use Malwarebytes for Windows
Go here and download Malwarebytes. There are two versions of Malwarebytes. The Paid one and the Free One; the only difference is that the paid one runs in real-time; kills and detects malwares as they come, whereas the free one has to run manually to detect and kill malwares. If you can spend $39.99, then id suggest getting the paid one from here
After it has been downloaded; install it. If at the time of reading this article you’re infected then you can bookmark this page; boot to safe mode (see above) and then go through the steps below. (assuming you’ve downloaded and installed it). After booting into safe mode, run the downloaded Malwarebytes setup file. Click yes if a UAC warning appears.
Select your language, accept the EULA agreement and go ahead with the installation. After setup finishes installation, Malwarebytes will launch, and start checking for updates. Once it has finished checking updates click the Scan Option and choose Custom Scan.
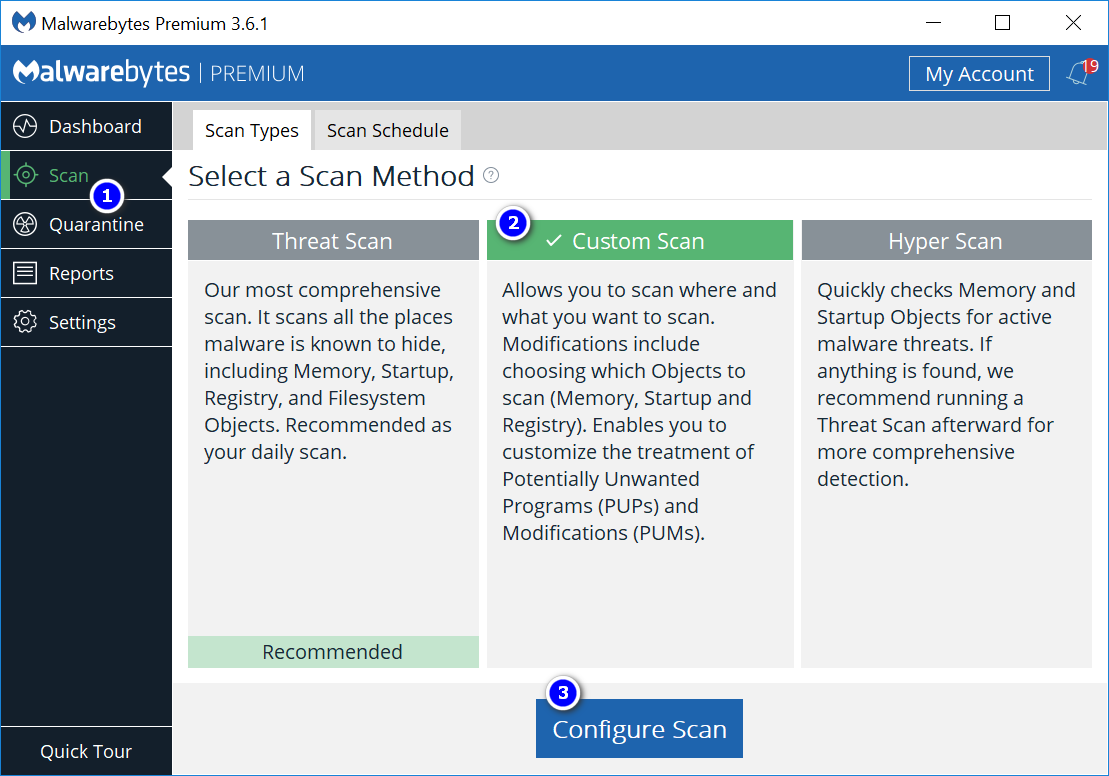
From the left pane:
Put a check mark on all the boxes; and choose your drives from the right pane. Then click Scan Now.

After the scan has finished; it will detect and list the malwares. You can then quarantine all from here to remove them. Reboot your PC back into Normal Mode; and you should be clean. If you bought a premium version of Malwarebytes; then your system is protected in real time otherwise you’ll need to run it manually.
Install and Use Malwarebytes for Mac
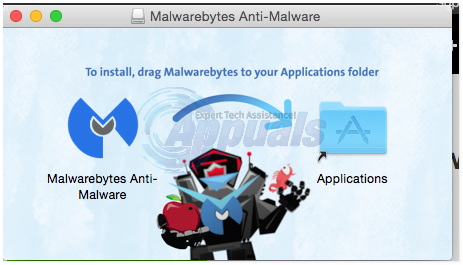
In this age, not even Macs are protected from malwares. So it is recommended that you run Malwarebytes scan once in a month or so. First you will have to download. To do so, go to this link. After the download is complete, open it. A window will prompt you to install Malwarebytes, confirm by dragging Malwarebytes Anti-malware into the Applications icon.
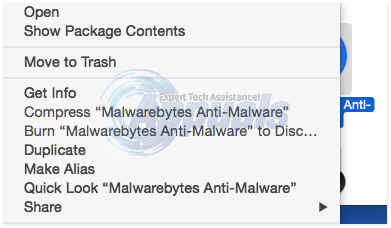
Now go to the Applications folder, and right click on Malwarebytes and click Open to run it. Confirm the message that appears to run it.
If you get the message that “’Malwarebytes Anti-malware’ can’t be opened because it was not downloaded from Mac App Store” then you will have to change your security settings to allow it to run. To do that, go to System preferences, and click Security and Privacy.
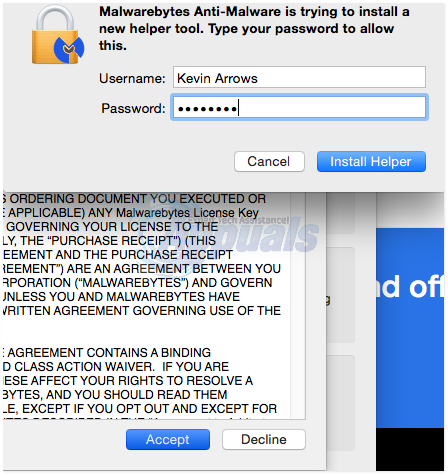
In the General tab, click Open Anyway. Enter the admin username and password required for Malwarebytes helper tool which is used to access sensitive areas of your system.
Malwarebytes will now open. Accept the EULA agreement, by clicking Agree. Malwarebytes may pause briefly while it checks for the latest signatures. Click Scan button to start scanning.
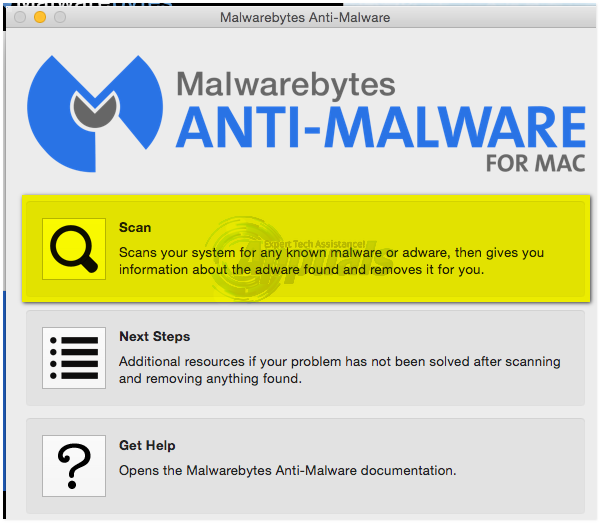
After the scan if there were no malware detected, you will get the Scan Complete windows stating the same. If there were any malwares detected, a window will appear showing you the results. Make sure all items are checked and click Remove Selected.
Nothing here for Google CHROME
This HP CHROMEBOOK is the worst computer EVER in 40 years of computer ownership —It is a total NIGHTMARE:
>Adobe FLASH vanished — Adobe Flash website *Not Responsive* all links dead, can’t download Adobe Flash, can’t contact Adobe: ALL Adobe pages dead, unresponsive.
>One Click Screenshot Tool >>> “Cannot contact reCAPTCHA: Check your connection and try again” that web page UNRESPONSIVE, all links dead.
>YOUTUBE: “Invalid Response Received” Search pages only in Arabic, Hindi or Bengali, nothing in ENGLISH.
AMAZON.COM: Clicking on link takes me to Amazon.in—In INDIA.
>Computer (HP CHROMEBOOK) is astonishingly, unbelievably S-L-O-W, in 40 years I have never had a computer *this slow*
There is more but I have to stop now — this catastrophe has made me physically ill.
Matthew Davidson
mhdantholz@gmail.com