Moving VMs from one location to another using Hyper-V 2019
You have probably realized that we really love to write about Hyper-V and virtual machines. But if you haven’t realized that fact, then you have missed all previous articles where we talked about Hyper-V, initial configuration and virtual machines. In order to be up-to-date, please check the articles below:
Part 1: How to install Hyper-V 2019 Server Core?
Part 2: Hyper-V 2019 Core Server – Initial Configuration
Part 3: Hyper-V 2019 Core Remote Management
Part 4: Create Your First Virtual Machine in Hyper-V 2019
Part 5: How to export and import virtual machine in Hyper-V 2019
In this article, we will walk you through the procedure of moving a virtual machine from one to another location. The location can be the same or different disk, partitions or network location. We will show you how to move a virtual machine from one to another directory, but the same procedure works if you are planning to move a virtual machine to other locations.
In our case, we will use Hyper-V 2019, but the same procedure works for previous Hyper-V servers.
- Log on Windows machine
- Right click on Start Menu and type Hyper-V Manager
- Open Hyper-V manager
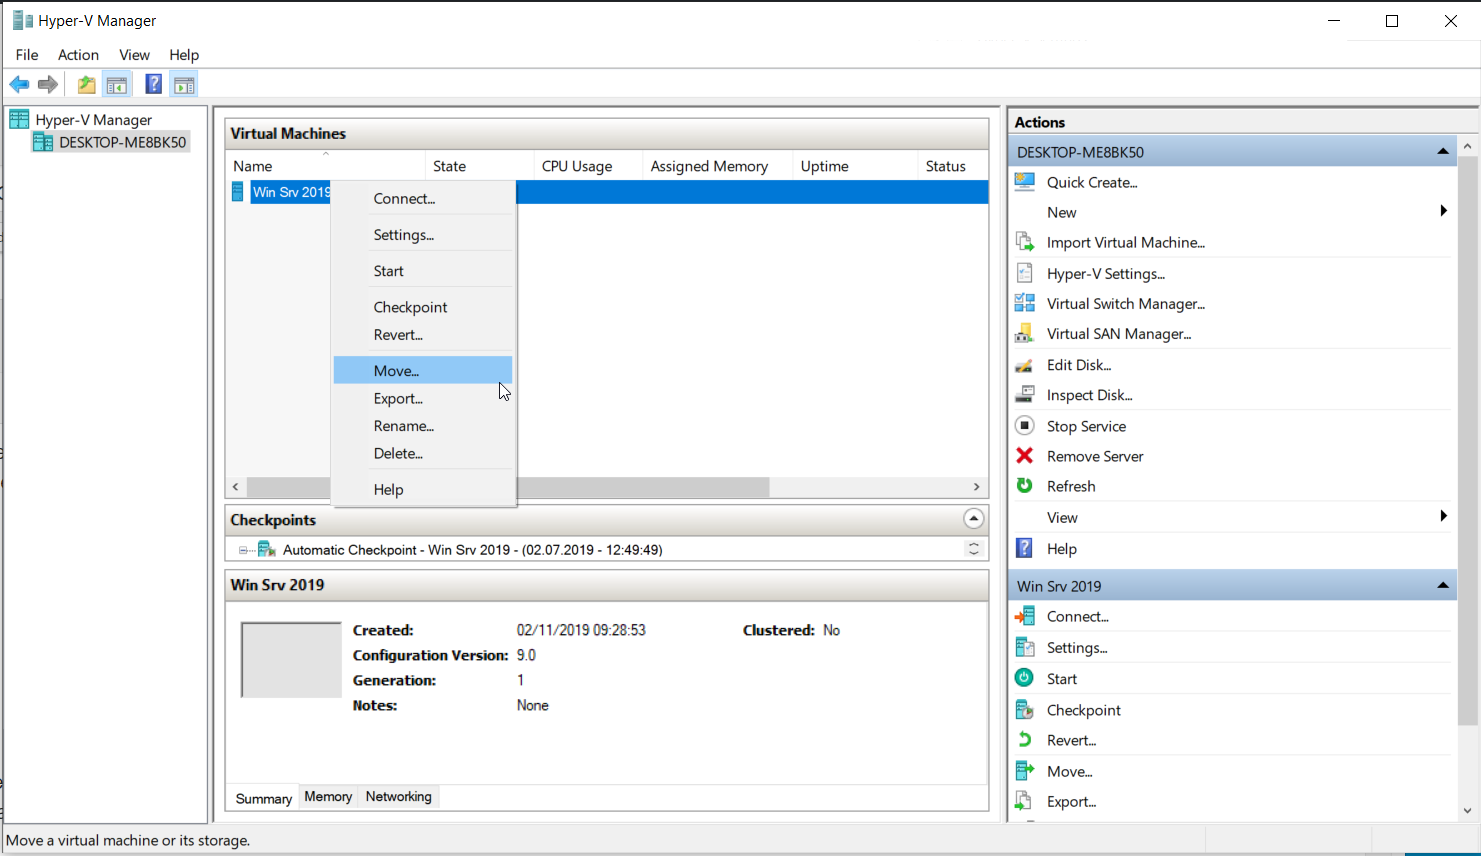
- Select the Hyper-V Server. In our case the name of the server is DESKTOP-ME8BK50.
- Navigate to the VM that you would like to move from one to another location
- Right click on a virtual machine
- Click on Move…
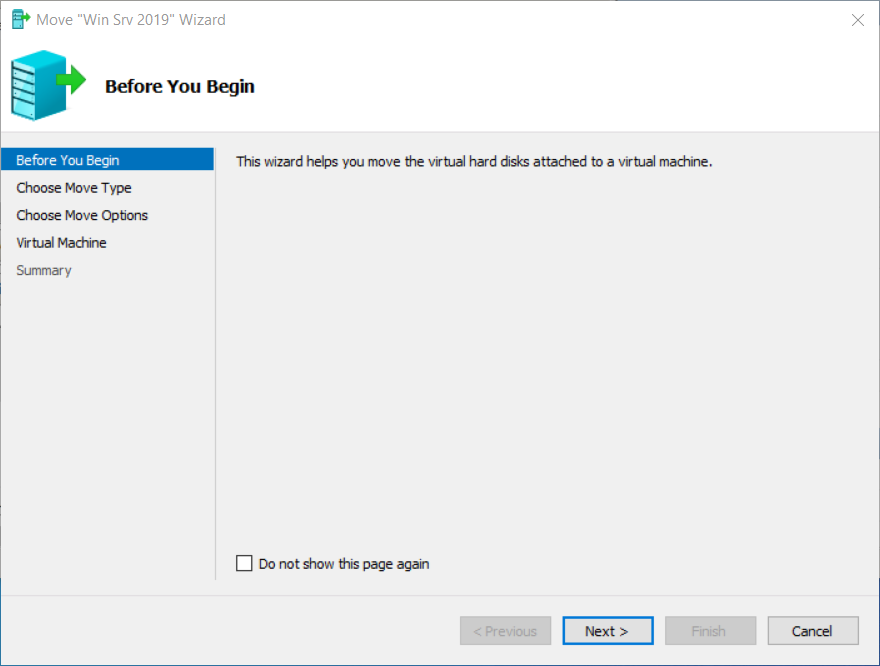
- Under Before You Begin click Next >
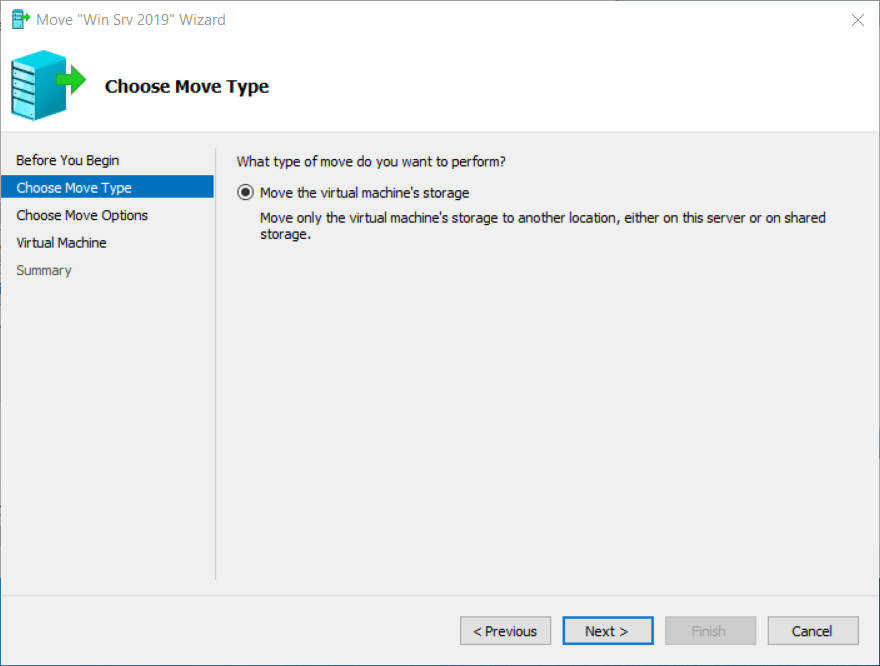
- Under Choose Move Type select Move the virtual machine´s storage and click Next
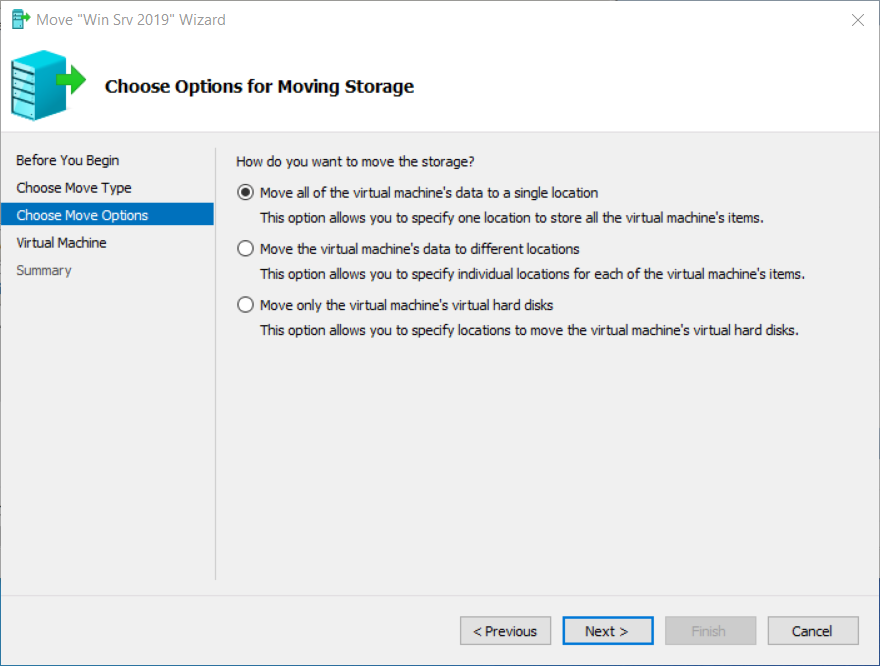
- Under Choose Options for Moving Storage choose what fits your best and then click Next. In our case we will choose the first options, in other words, we will move all virtual machine´s files to another location. But you as IT Administration will be able to choose on the following options:
- Move all of the virtual machine´s data storage to a single location
- This option allows you to specify one location to store all the virtual machine’s items
- Move the virtual machine´s data to different locations
- This option allows you to specify individual locations for each of the virtual machine´s items
- Move only the virtual machine´s virtual hard disks
- This option allows you to specify locations to move the virtual machine´s virtual hard disks.
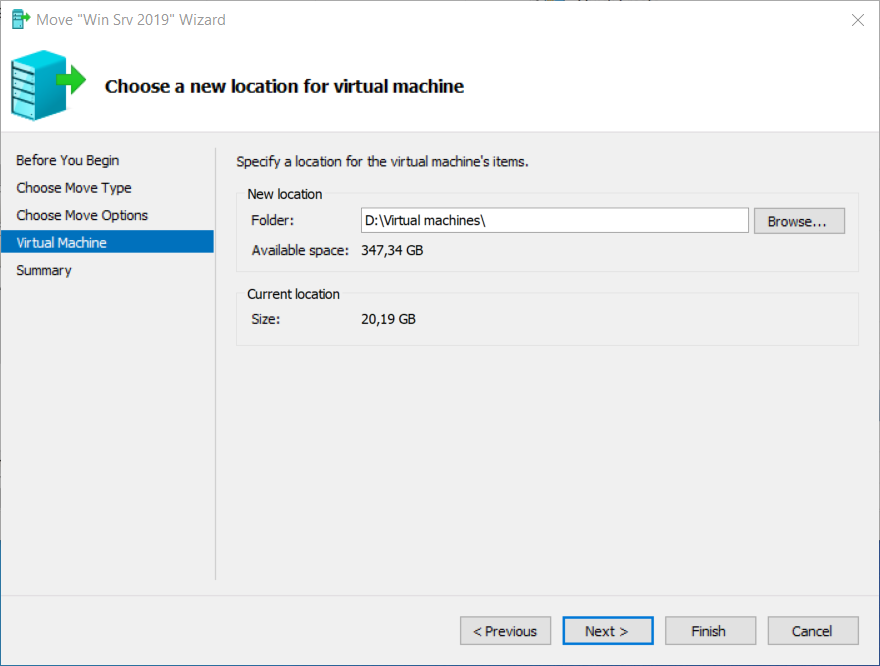
- Under Choose a new location for virtual machine click on the Browse… in order to select to the location where you would like to move the virtual machine. In our case, the location is D:\Virtual machines\. After you select the location, please click on Next.
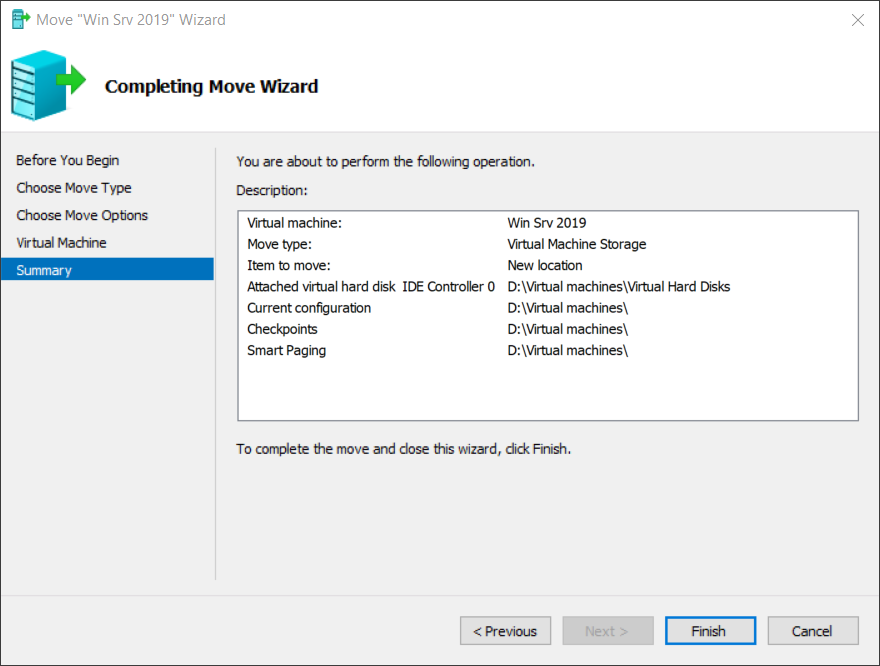
- Under Completing Move Wizard check if all settings are correct and then click Finish
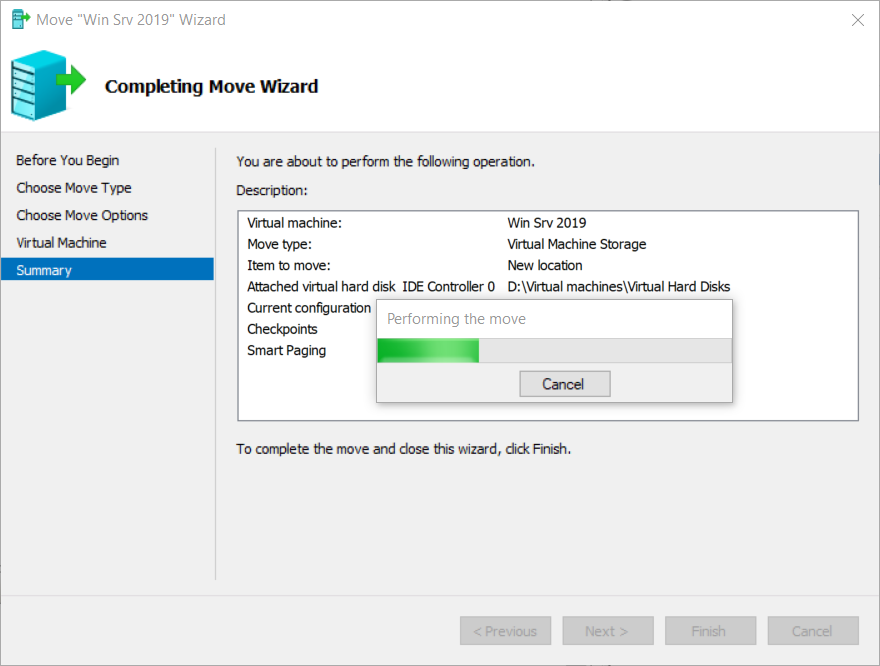
- Wait until Hyper-V moves a virtual machine to another location
- You have successfully moved your virtual machine. Turn on virtual machine and check if everything works properly.


Hi, thx a lot for your detailed descriptions here.
i started now with the move of a Hyper-V VM like described here.
After finishing i checked the old and new folder and recognized some markers which makes me think:
1.) the old folder of the moved machine still exists
2.) Furthermore, in the VirtualHardDisks Folder still exist a not copied Hard Drive
Do you can explain me this ? Why wasn’t this .vhdx File not copied over ?
In the New location there is the same Filename(1), but with a Nr.1 at the end + a .avhdx File.
I suppose it has something to do with Checkpoints, but even if -> why it’s not copied over ? Because now, is it possible that I can’t go back ? Or does it automatically a consolidation ?
Or, because I see that these files were generated 2 years before, so maybe I forgot something -> I messed around with this Hard Drive ?
Any Help is highly appreciated.
Regards, Peter