How to Fix Hyper V Error 0x80070539
 Reviewed by Muhammad Zubyan
The Hyper-V error (0x80070539) typically appears as “The security ID structure is invalid” when starting or importing a virtual machine, immediately halting the operation. This error code means that the system is attempting to use a malformed or unresolvable security identifier (SID).
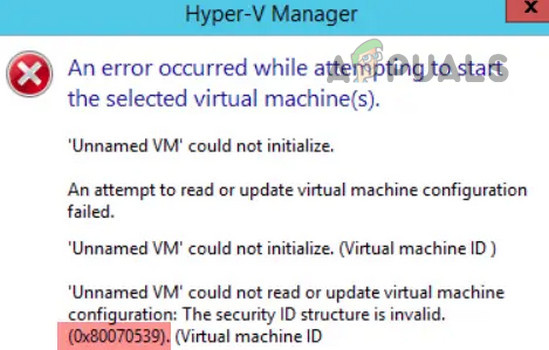
It usually occurs after moving virtual machines between hosts or domains, where the saved SID in the VM configuration no longer maps to a valid user or group. Another known cause is leftover or corrupted SID entries in the system registry, especially under the ProfileList key with .bak profiles.
When importing a virtual machine, Hyper-V may reference user or group permissions that no longer exist on the new host. If the associated SID doesn’t resolve to a valid account, the VM fails to start. Ensuring proper user permissions and cleaning up invalid registry entries usually resolves the issue.
1. Add a Valid User ID to the VM
This command grants VMConnect access to a specific user account, resolving permission issues that may occur after moving VMs between systems. It doesn’t fix SID-related errors in registry or VM configuration, but allows the current user to connect to the VM through Hyper-V Manager.
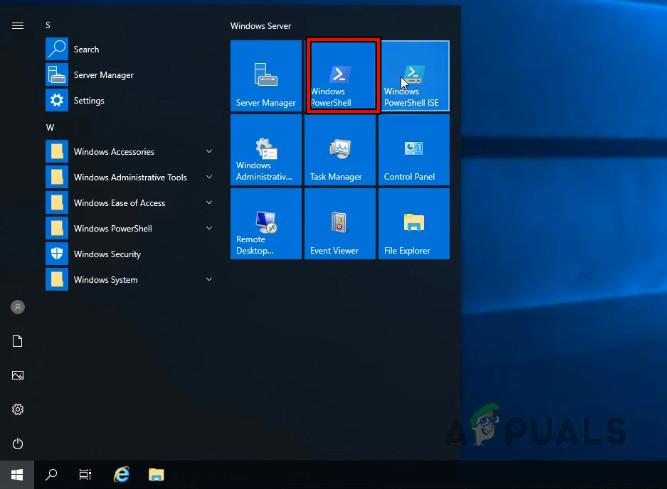
- Click on the Windows start menu and search for PowerShell.
- Right-click on PowerShell and select Run as Administrator.
Open Windows PowerShell - Run the following command in PowerShell. Make sure to replace the VM name, domain, and user name with the correct details for your setup:
Grant-VMConnectAccess -VMName <Name of VM that is not starting> -UserName <Domain and username of the current user>
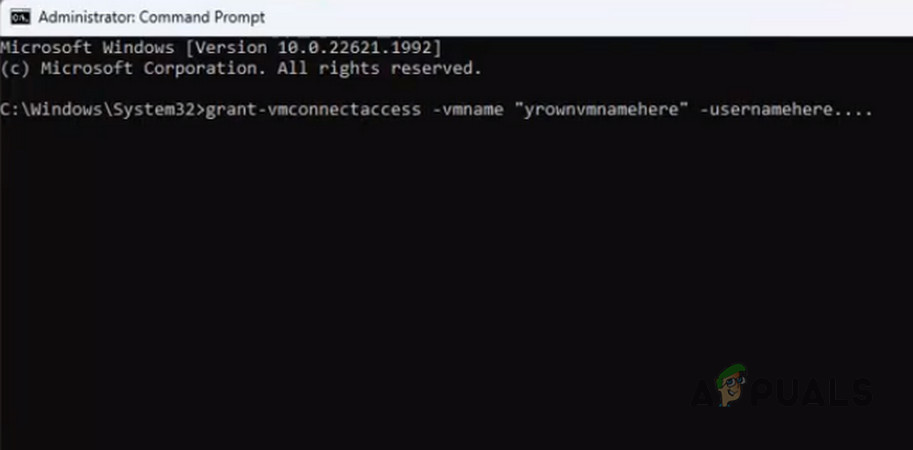
Run the VMConnectAccess Command - Try launching the VM and see if the access issue is resolved.
For example, if your VM is called “appuals”, you would use this command:
Grant-VMConnectAccess -VMName "appuals" -UserName ".\Administrator"
Avoiding the Error in the Future
To avoid this error from happening again, it’s essential to migrate or move Hyper-V VMs using supported and secure methods that preserve permissions and account mappings.
- Perform Hyper-V Live Migration
- Use PowerShell to Move the VM
- Export and Import the Hyper-V VM
- Use a third-party migration tool
1. Perform Hyper-V Live Migration
This method moves active workloads between machines without shutting them down. It retains all associated permissions and configurations, making it one of the safest ways to relocate resources without breaking security links.
- Open the Server Manager and go to Tools > Hyper-V Manager.
- Right-click on Hyper-V Manager and choose Connect to Server.

Connect to a Server in the Hyper-V Manager - Enter the name of the server you want to connect to and click OK.
- In the Virtual Machines pane, select the server.
- Right-click on the VM you want to move and select Move.
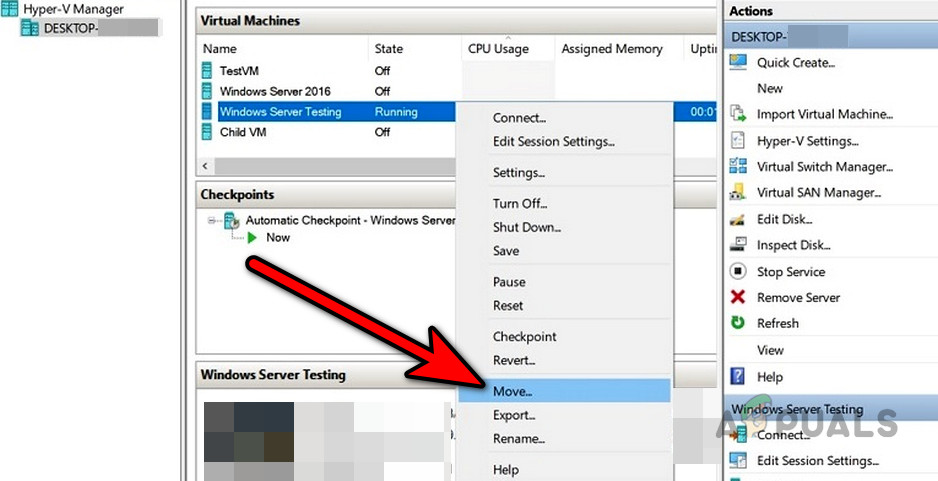
Move the VM in the Hyper-V Manager - Follow the Move wizard to complete the migration.
2. Use PowerShell to Move the VM
Moving the instance using scripting tools ensures that configuration data, permissions, and storage paths are preserved properly. This reduces the chances of permission conflicts during the transition.
- Open PowerShell as an administrator and run this command:
Move-VM VMTest TestServer -IncludeStorage -DestinationStoragePath D:\VMTest
- Be sure to replace “VMTest” with your VM’s name, and “TestServer” with your target server’s name.
3. Export and Import the VM
Exporting creates a complete backup that includes all necessary files and configuration data. Re-importing it on a different machine sets up the environment from scratch, bypassing many manual reconfiguration steps.
3.1. Export VM
- Open Hyper-V Manager and right-click on the desired VM.
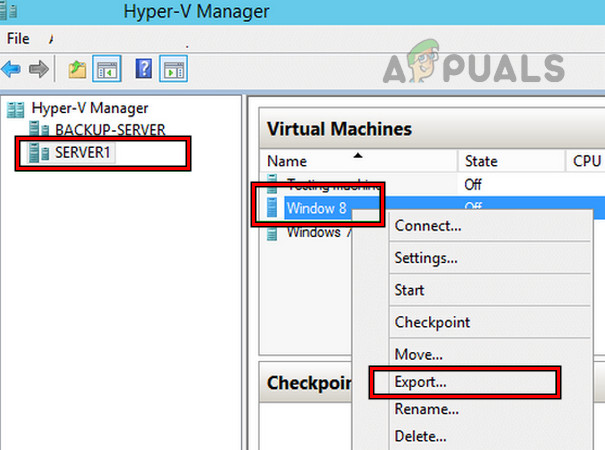
Export VM in the Hyper-V Manager - Select Export and choose where you want to save the exported VM files.
- Click Export and wait for the operation to finish.
3.2. Import VM
- Open Hyper-V Manager and right-click on the destination host.
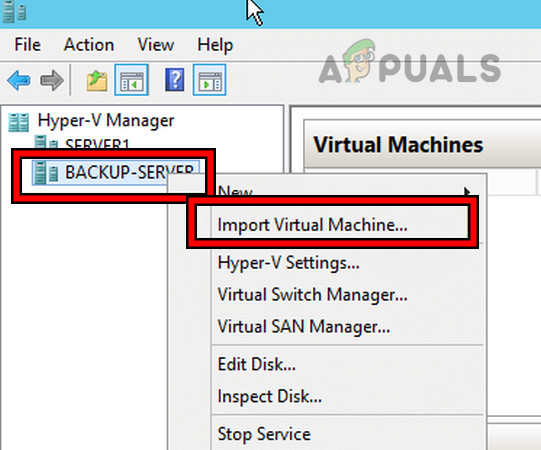
Import Virtual Machine in the Hyper-V Manager - Select Import VM and follow the instructions on the screen to complete the process.
4. Use a Third-Party Migration Tool
You can also use external apps or services to migrate Hyper-V VMs across systems or domains. Some of these tools handle permission mapping automatically and reduce the chance of SID mismatches. Examples include:
- Veeam Backup & Replication
- StarWind V2V Converter
- Altaro VM Backup
Reviewed by Muhammad Zubyan


