This PC can’t run Windows 11 [Try these Solutions]
Fixing TPM 2.0 and Secure Boot Issues to Install Windows 11
 Reviewed by Jasmin Kahriman
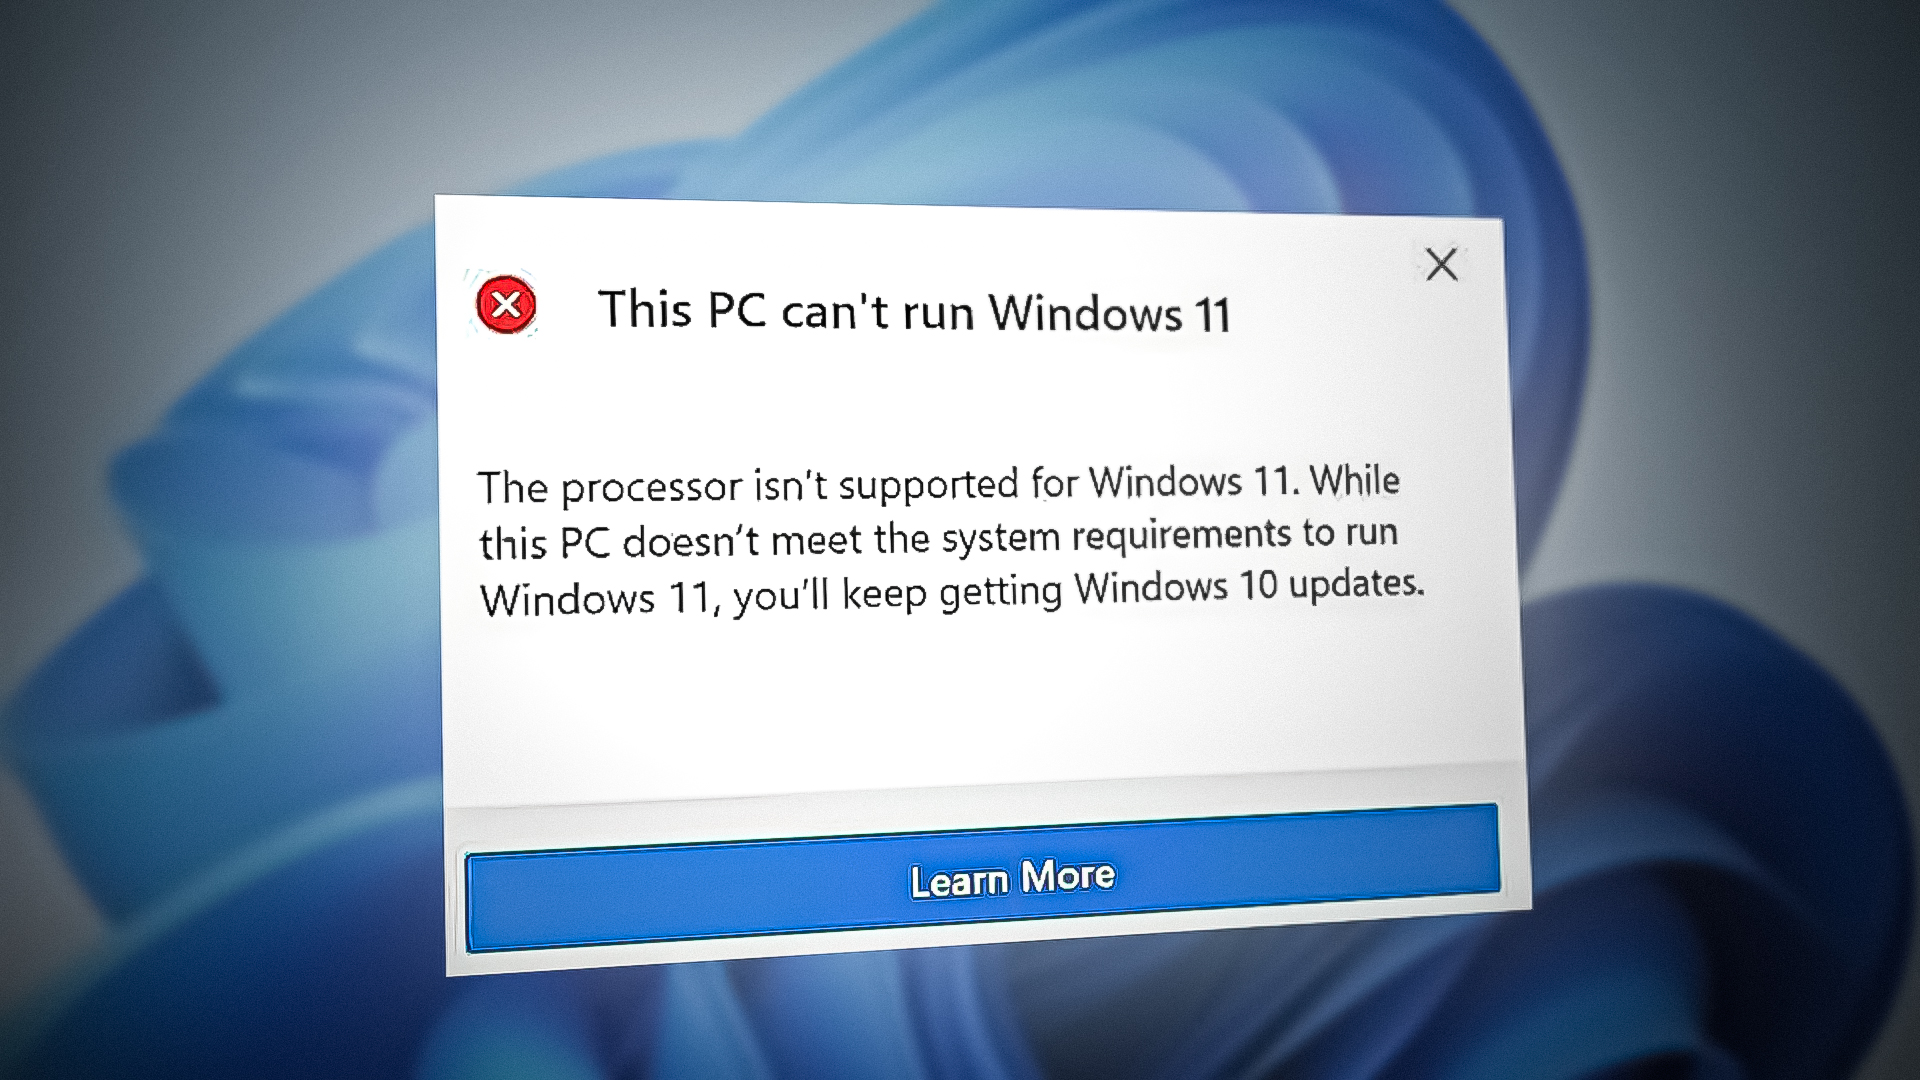
With the recent announcement that Windows 11 is coming later this year, a lot of Windows 10 users are using the PC Health Check app to see if their PC meets the minimum requirements to install Windows 11. Unfortunately for a lot of users, the PC Health Check app shows the error ‘This PC Can’t Run Windows 11′.
You might also see a short explanation on why the upgrade to Windows 11 is not possible:
- This PC must support secure Boot
- This PC must support TMP 2.0
While some users get a clear explanation from the PC Health Check app on why the new OS can’t be installed, others see an ambiguous message that doesn’t tell them anything on which requirement is not met.
But as it turns out, even if you see the ‘This PC can’t run Windows 11‘ error message, it doesn’t mean that you won’t be able to install Windows 11 – It’s likely that a software requirement needed to install Windows 11 is not enabled from your BIOS or UEFI settings menu.
After investigating this particular issue, we’ve compiled a list of possible reasons why this error message is shown:
- Hardware specifications are not met – Even though the hardware specifications of Windows 11 are comparable to Windows 10, older systems might have issues running it (especially specifications with low RAM). To make sure that’s not the case, compare the system requirements of Windows 10 against your own.
- Legacy Boot is preferred to UEFI – As it turns out, you might expect to get this error message if your current Windows 10 installation is wired to use legacy boot mode instead of UEFI (even if your system supports it). In this case, you can make the error message go away by accessing your BIOS settings and making the switch to UEFI.
- TMP 2.0 is not supported or Disabled – TPM 2.0 has become the industry standard by now and your computer should support it unless you have a legacy motherboard. You need to check if TMP 2.0 is supported on your rig and enable Trusted Platform 2.0 from your BIOS or UEFI settings to make the error go away.
- Secure Boot is not supported or Disabled – Secure boot is supported on the vast majority of motherboards released in the last 5 years, but you might find that this security feature is disabled from your BIOS or UEFI settings. if you previously confirmed that secure boot is supported on your hardware, all you need to do is enable it from your BIOS or UEFI settings.
Now that you are aware of every potential cause that might trigger the ‘This PC Can’t Run Windows 11’ error, start following the instructions below to troubleshoot the issue and potentially fix it if you deem that the system is actually equipped to support Windows 10.
1. Check the System Requirements of Windows 11
The system requirements of Windows 10 are by no means intensive and most modern systems should be able to support it right out of the box.
However, there are some upgrades from Windows 10 that you have to be aware of. Check the system requirement list below to see if your current system meets them:
- 1GHz 64-bit processor (32-bit is no longer supported)
- 4 GB of RAM
- 64 GB of storage space
- UEFI (Unified Extensible Firmware Interface) support
- Secure Boot Capable Machine
- Trusted Platform Module (TPM) 2.0 support
If you don’t know how to compare the required Windows 10 specs against your own, follow the instructions below:
- Press Windows key + R to open up a Run dialog box. Inside the text box. type ‘msinfo32’ and press Enter to open up the System Information screen.
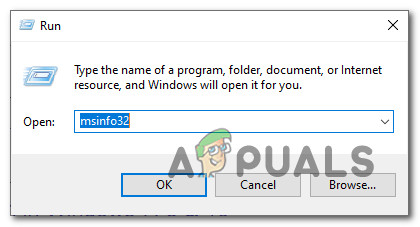
Checking Windows 11 System Rquirements Note: If you are prompted by the UAC (User Account Control) screen, click Yes to grant admin access.
- Once you’re inside the System Information screen, click on System Summary from the menu on the left.
- Next, move over to the right-hand section and check the System Type and Processor entries. If it says x64-based PC and the processor frequency is over 1 GHz, your CPU is strong enough to support Windows 10.

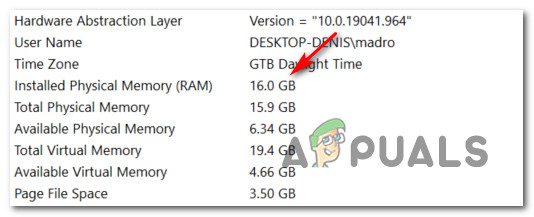
Check if the CPU will support Windows 11 - Next, scroll down to Installed Physical Memory (RAM) and check to see if the value is 4 GB or bigger. If that’s true, your current PC configuration has enough memory to support Windows 11.
Check if you have enough RAM for Windows 11 - Next, look for the BIOS Mode item and check if the value is UEFI or not. If it shows UEFI, you’re good to go. If the value of BIOS Mode is shown as Legacy, your PC will not be able to support Windows 11.
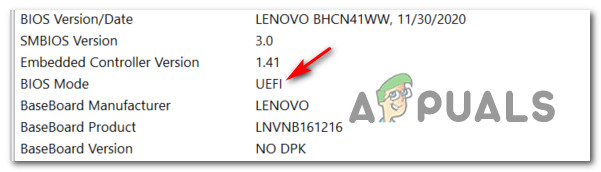
Checking if your computer supports UEFI Note: UEFI is the newer booting method designed to replace BIOS (Basic Input Output System). Windows 11 will no longer be able to boot solely from BIOS.
- Next, look for the entry named Secure Boot State and see if the value is labeled as On. Unless your system is Secure Boot capable, you will be unable to run Windows 11.
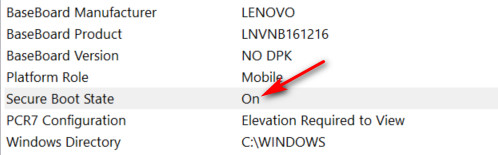
Checking if Secure Boot state is enabled - Finally, click on Memory from the left-hand side, then move over to the right and see if the Trusted Platform Module 2.0 status is shown as OK. If this is the case, TPM 2.0 is supported and enabled on your PC configuration.

Check if Trusted Platform Module is Supported
Once you went through the instructions above, you should have a pretty good idea if your PC is equipped to support Windows 11 or not.
If it fails the minimum specifications due to a hardware-related constraint (like insufficient RAM or CPU frequency), there’s nothing you can do other than upgrade it with more powerful hardware.
But on the other hand, if the PC Health Checkup scan fails because Secure Boot is Disabled or TPM 2.0 is not configured from your BIOS / UEFI settings or because Windows 10 was installed via legacy boot mode, the instructions below will show you how to enable them and resolve the ‘This PC Can’t Run Windows 11′ error.
2. Switch the Boot mode to UEFI
Keep in mind that if your current operating system (Windows 10) was installed via the legacy boot mode, the PC Health Check utility will not detect that your PC is actually equipped to support UEFI.
If this scenario is applicable and you’re current setup is wired to use legacy boot mode, you will need to change the Boot Mode to UEFI from your BIOS settings before the PC Health Check utility will detect that your PC is Windows 11 ready. Also, make sure to convert your disk from MBR to GPT before enabling UEFI Otherwise it won’t work. Make sure to create a backup before doing any changes to the partition, we won’t be responsible for any damage or data loss.
To make matters easier for you, we’ve put together a step-by-step guide that will show you how to switch the boot Mode to UEFI from your BIOS settings:
Note: The instructions below will only work IF your motherboard supports UEFI but it’s configured to use the legacy boot mode.
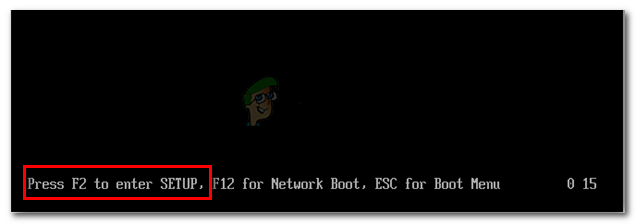
- Start your PC conventionally and press the Setup key (BIOS key) immediately after you see the first screen. You will typically be able to see the boot key in the bottom-right or bottom-left corner of the screen.
Press the Setup key during the booting sequence - Once you’re inside the main menu of BIOS, make your way to the Boot tab.
- From the Boot tab, change the UEFI / BIOS Boot Mode from Legacy to UEFI.
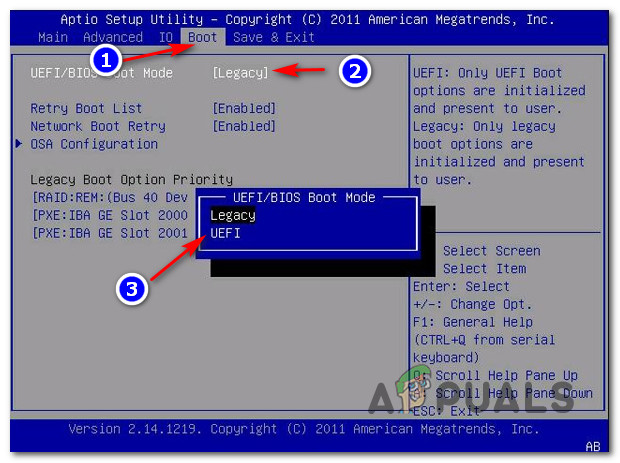
Changing the Boot Mode - Save the changes and allow your computer to boot normally before running another check with the PC Health Check utility.
Important: You might get a ‘No Boot Device Found’ error after making the switch to UEFI from Legacy. In this case, you can either adjust the Windows 10 installation for UEFI or you can change the Boot Mode back to Legacy until Windows 10 officially launches.
If your system is already configured to use UEFI by default, move down to the next guide where we show you how to enable secure boot.
3. Enable Secure Boot
As we already established above, Windows 11 will require a machine that is Secure Boot capable. But in some cases, the feature is supported but disabled from the BIOS or UEFI settings – As it turns out, the PC Health Check utility won’t know to make the difference between unsupported or disabled.
Note: Secure Boot is an industry-standard agreed upon by the biggest players in the PC industry in order to ensure that PCs ONLY use software trusted by Original Equipment Manufacturers (OEMs).
If you have a fairly modern motherboard, there’s a very big chance that Secure Boot is already supported. In this case, all you need to do is access your BIOS settings and enable Secure Boot so that the PC Health Check utility can detect it.
To do so, follow the instructions below:
- Power up your PC conventionally and repeatedly the Setup (boot) key during the bootup sequence. You can typically find it somewhere on the bottom section of the screen.
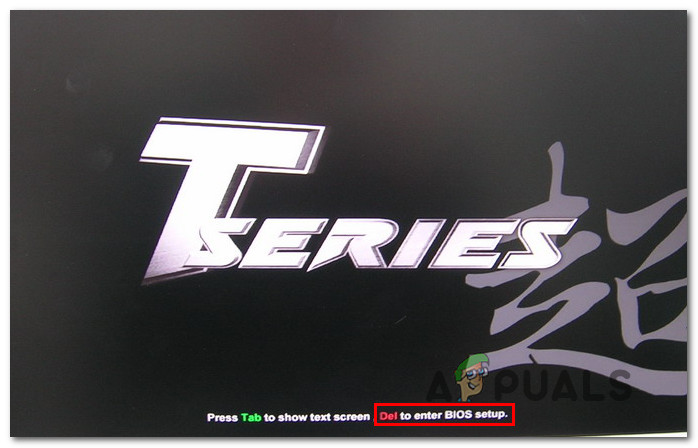
Enter BIOS setup Note: Keep in mind that depending on your motherboard manufacturer, the exact instructions for doing this will be different. In most cases, your setup key (BIOS Key) will be one of the following: F1, F2, F4, F8, F12, Esc, or Del key
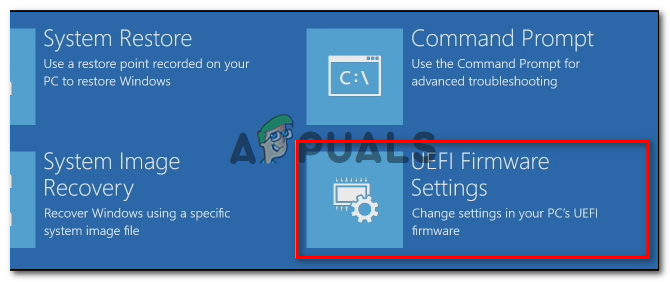
Note 2: In case your PC uses UEFI by default, hold the SHIFT key while clicking the Restart button at the initial login screen to force the computer to enter the Recovery Menu. Then, go to Troubleshoot > Advanced Options > UEFI Firmware Settings to reach the UEFI Menu.
Access the UEFI Firmware settings menu - Once you’re inside the BIOS or UEFI menu, look for an option named Secure Boot and enable it.
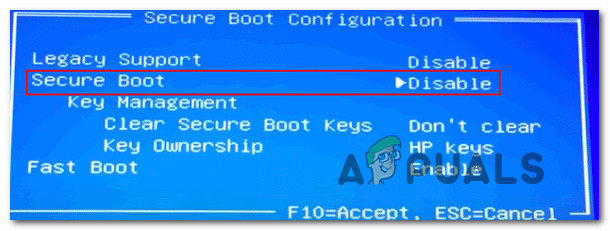
Disabling Secure boot Note: You’ll typically be able to find it inside the Security tab – The exact name and location will vary depending on your motherboard manufacturer.
- Once the Secure Boot feature is enabled, save the changes and boot your computer normally.
- After your computer boots back up, repeat the PC Health scan and see if the scan now reports that Secure Boot is supported on your PC Configuration.
If the error message you’re getting when running the scan is ambiguous or pointing towards an issue with TMP (Trusted Platform Module), move down to the next potential fix below.
4. Enable Trusted Platform Module 2.0
One of the Windows 11 requirements that are unique to this version is support for TPM 2.0. If the PC Health Check returns the ‘The PC must support TMP 2.0‘, one of the following scenarios is true:
- TPM (Trusted Platform Module) 2.0 is not supported by your hardware
- TPM 2.0 is disabled from your BIOS or UEFI settings.
To check whether TPM is supported on your system or not, do the following:
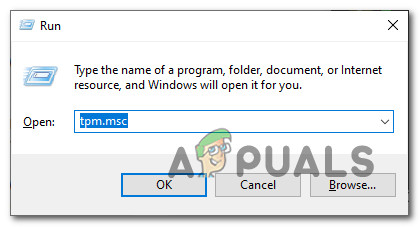
- Press Windows key + R to open up a Run dialog box. Next, type ‘tpm.msc” inside the text box and press Enter to open up the Trusted Platform Module (TPM) Management window on Windows 10.
Accessing the TPM module screen on Windows 10 - Once you’re inside the TPM module, check the Status from the right-hand section of the TPM menu.
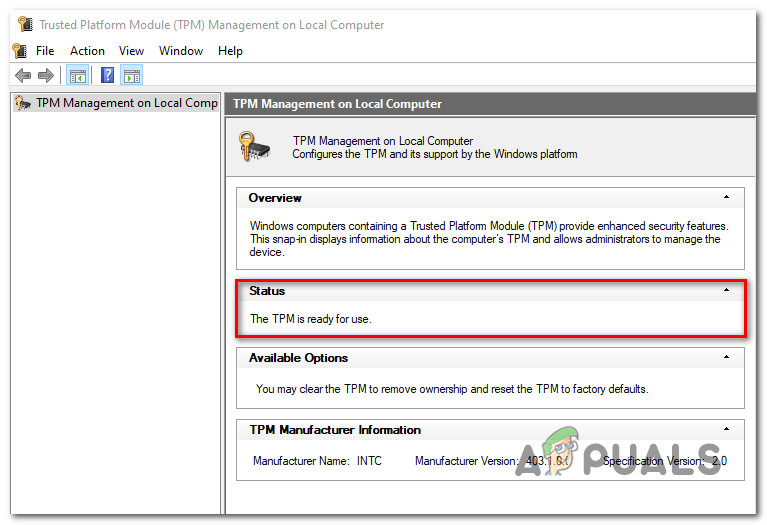
Status of TPM module
- If the status of TPM shows as ‘TPM is ready for use‘, it means that TPM 2.0 is already enabled, so no further action is required.
- If the status of TPM shows as ‘TPM is not supported‘, it means that your motherboard doesn’t support this technology. In this case, you will not be able to install Windows 11.
- If the status of TPM shows as ‘Compatible TPM cannot be found, it means that TPM is supported but not enabled from your BIOS or UEFI settings.
If the last scenario is true, follow the instructions below to enable TPM 2.0 from your BIOS or UEFI settings:
- Start your PC (or restart it if it’s already on) and press the Setup key (BIOS key) immediately after you see the first screen.
Press the Setup key during the booting sequence Note: You will typically be able to see the boot key in the bottom-right or bottom-left corner of the screen.
- Once you’re inside the main menu of BIOS, access the Security tab from the list of available options in the ribbon bar at the top.
- Next, look for an entry named Trusted Platform Module and ensure that it’s set to Enabled once you locate it.
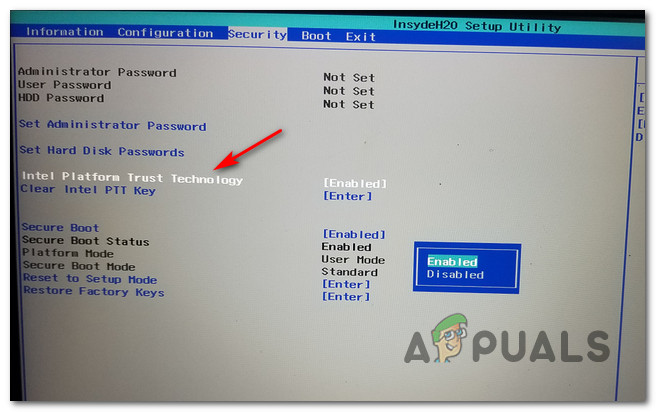
Enable TPM Note: The exact hame and location of this security feature will be different depending on your motherboard manufacturer. For example, on Intel hardware, you will find this option as Intel Platform Trust Technology.
- Once you’ve ensured that TPM is enabled, boot your computer normally and repeat the PC Health Check scan and see if the ‘This PC Can’t Run Windows 11′ error is now fixed.
Reviewed by Jasmin Kahriman