How to Convert MBR to GPT Without Data Loss
Depending on your PC age and specifications, it either uses a Master Boot Record (MBR) or a GUID Partition Table (GPT). If you want to migrate your drive type to the new and improved format (GPT), you’ll be pleased to know that you can do it without any data loss.
There are a lot of reasons why you’d want to switch between MBR to GPT. However, some of the most popular methods that will allow you to migrate a disk from MBR to GPT and translate from the legacy BIOS to the new and improved UEFI will actually end up erasing all the data present on the disk.
MBR VS GPT
Before you make the decision to switch from MBR to GPT, it’s important to understand the particularities of the two technologies and why you should choose one over another.
MBR
MBR (Master Boot Record) is an older partition structured that was first introduced in 1983. Frankly, the only advantage of using this technology is its compatibility with a wider array of systems – but this is changing. The MBR technology was first developed for IBM PCs.
The name Master Boot Record comes from the fact that it contains a location at the very beginning of the drive that stores the bootloader and other primitive information about the system and the drive partitions.
The main disadvantage of this technology is that it only works with drives up to 2TB. Even more, a drive that uses MBR can only be split into four primary partitions.
GPT
GPT (GUID Partition Table) is the newer technology. If you didn’t hear about it, you probably heard about UEFI (Unified Extensible Firmware Interface) – the speedier firmware solution that is slowly replacing the old alternative, BIOS (Basic Input Output System).
When comparing it to an MBR drive, a GPT drive has virtually no limitations. In addition to accommodating much larger drives (up to 256 TB), the GPT technology is capable of keeping track of up to 128 different partitions without having to use an extending technique.
Unlike an MBR drive that holds the boot data in a single place, a GPT drive will store multiple copies of the boot data in numerous different partitions, making the recovery process a lot more reliable.
Compatibility concerns
While the GPT technology is being embraced by all the major computer manufacturers, not all versions of Windows will be capable of booting from a GPT partition drive it the system is not UEFI-based.
For example, all the recent 64-bit Windows versions (Windows 10, Windows 8/8.1, Windows 7 and Windows Vista) will only boot from a GPT drive as long as UEFI is used (not BIOS).
Checking the disk partition type
Before you go ahead and follow the methods below to change your disk configuration from master boot record to GUID partition table, it’s important to make sure that the drive your targeting is actually MBR.
Here’s a quick guide to doing this:
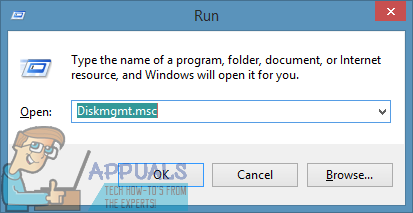
- Press Windows key + R to open up a Run command. Then, type in “diskmgmt.msc” and hit Enter to open Disk Management.
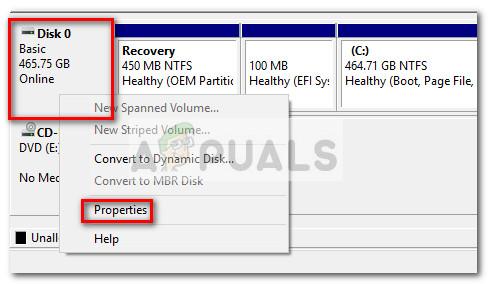
- Right-click on Disk 0 (or the one that holds the Windows installation) and choose Properties.
- In the Properties screen, click on the Volumes tab and check the Partition style under Disk Information.
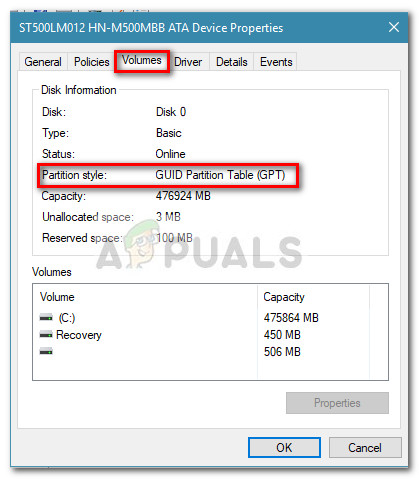
If the entry says GUID Partition Table (GPT), the methods below won’t be applicable since your partition is already GPT.
In the event that you see Master Boot Record (MBR) listed next to Disk Information, the methods below will allow you to convert a disk from MBR to GPT with no (or minimal information loss).
Converting an MBR Partition to GPT
If you have previously established that your current partition is of MBR-type and your system is capable of booting from UEFI, you are ready to convert your drive to the new GPT format.
But keep in mind that once you do this there is no going back. You won’t be able to convert a GPT format back to MBR without losing all your data.
Warning: There have been occurrences where the drive has been damaged during the conversion process. Even though the chance of this happening is extremely slim, we advise you to create a full system backup if you have any vital files that you are afraid of losing.
If you are computer savvy and confident in following a set of instruction that will have you input a series of commands into Command Prompt, follow Method 1 or Method 2.
If the event that you want a solution that will allow you to convert an MBR drive to GPT without too much hassle, follow Method 3 where we use a free third party tool to get the job done.
Method 1: Using MBR2GPT to convert a disk on Windows 10
MBR2GPT is a fairly new tool that was introduced with the launch of the Creators Update. Until then, there was no native way to convert a drive from MBR to GPT without losing the data present on the drive.
If you have Windows 10 with the Creators Update already applied, you can use the native MBR2GPT tool to change the partition style of your drive in minutes. And more importantly, you won’t lose any data in the process.
Note: Keep in mind that this method will not be applicable if you don’t have Windows 10 or if you haven’t applied the Creators update.
What this Microsoft tool does is add the GUID Partition Table components to your existing MBR disk without altering the existing partition contents and file system. This process is entirely undestructive and allows your data to remain unchanged.
If you decide to use Microsoft’s MBR2GPT tool to migrate your MBR drive to GPT and avoid data loss, follow the steps down below:
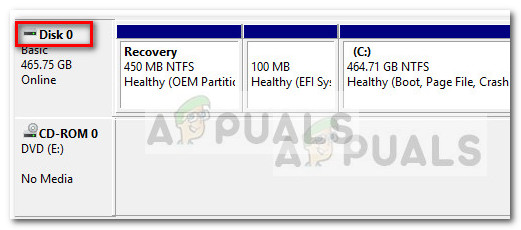
- First things first, we need to obtain the disk number. This will be used when imputing MBR2GPT commands, so it’s important to get this right. To obtain the disk number, press Windows key + R to open up a Run box, type “diskmgmt.msc” and hit Enter to open Disk Management.
- In Disk Management, locate the disk that you want to convert and note down the disk number. In our example, the targeted disk is Disk 0, which means that the disk number will be 0.
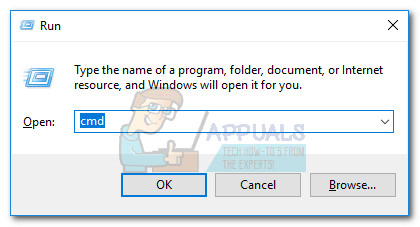
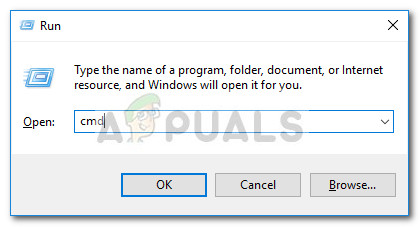
- Next, press Windows key + R to open up a Run box. Then, type “cmd” and press Ctrl + Shift + Enter to open up an Elevated Command Prompt.
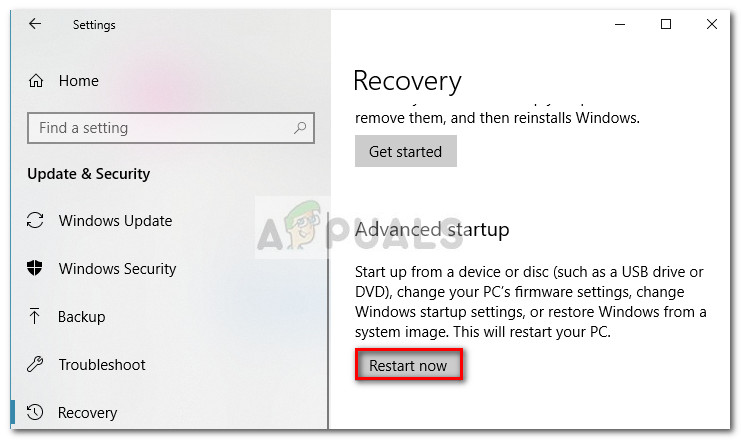
 Note: While the MBR2GPT.exe tool should run just fine from within the operating system, you can also insert the command below in an Elevated Command prompt opened from the Windows Preinstallation environment. To do this, open the Settings menu and navigate to Update & security > Recovery and click on the Restart now button (under Advanced Startup). Then, in the Advanced options, select Command Prompt.
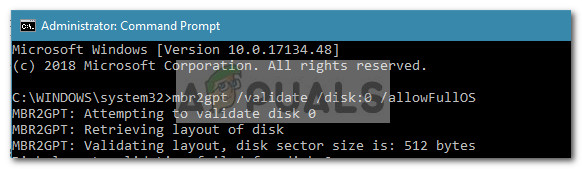
- In the Elevated Command Prompt, let’s validate the disk that needs converting by typing the following command and hitting Enter:
mbr2gpt /validate /disk:*enter previously noted disk number here* /allowFullOS
 Note 1: In case you’re doing this from Windows Preinstallation environment, typing “mbr2gpt /validate” is enough.
Note 2: This step is done in order to make sure that the disk meets the conversion requirements. If the disk is not fit to be migrated to the new GPT format, you’ll receive a disk error (Disk layout validation failed for disk:*your disk number*) - If the disk validation was successful, you can begin the conversion by typing out the following command and hitting Enter
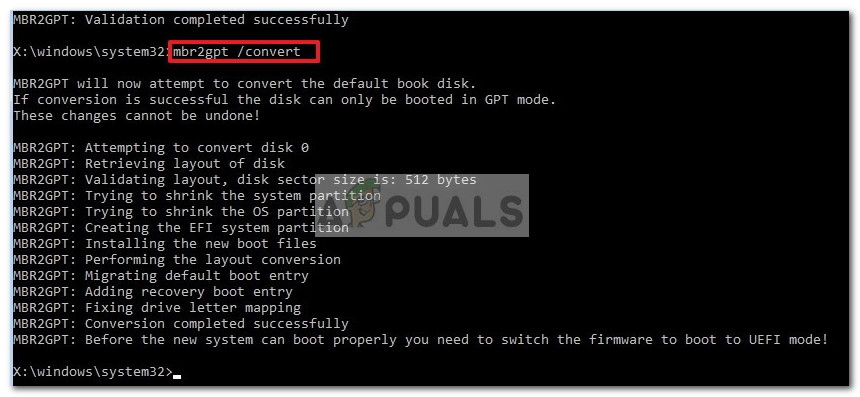
mbr2gpt /convert /disk:*enter previously noted disk number here* /allowFullOS
 Note 1: In case you’re doing this
from the Windows Preinstallation environment, typing “mbr2gpt /convert” is enough.
Note 2: The process might take some time, but it shouldn’t exceed one minute. - Once the conversion is successful, you will need to change your firmware to boot from UEFI instead of BIOS. The steps of doing this are dependent on your motherboard manufacturer, but generally, you’ll need to press the BIOS key right before the startup phase and look for a setting that allows you to change the boot type from Legacy Mode to UEFI.
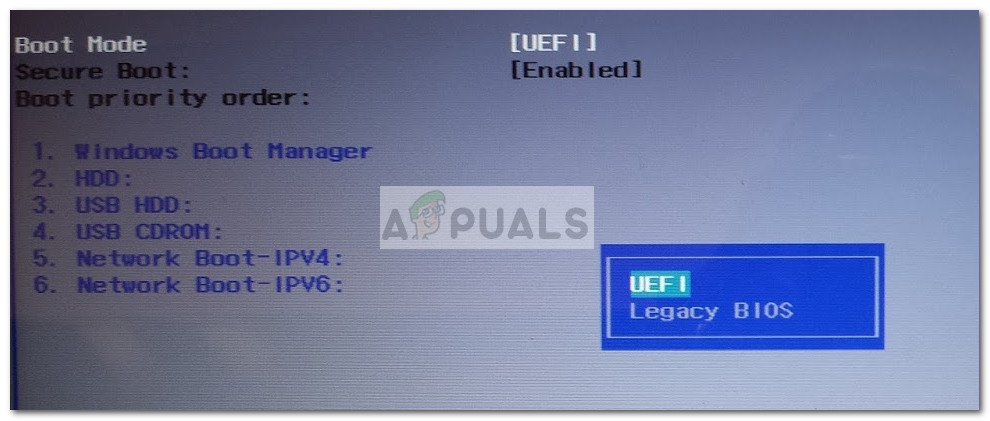 That’s it. Once your motherboard firmware is configured to boot to UEFI mode, you will be able to enjoy the benefits of using the new GPT format.
Method 2: Convert an MBR disk to GPT using the Gptgen tool
Another way to convert an MBR disk to GPT without losing data is to use a command line utility called Gptgen. Just like the MBR2GPT tool, Gptgen is capable to convert hard disk in a non-destructive way.
While the process is fairly quick with the Gptgen tool, the general consensus is that the MBR2GPT tool is superior in execution and has a higher success rate.
I admit it, the syntax is a little bit complicated, but you should be able to figure it out if you follow the instructions below. Here’s a quick guide on converting a MBR disk to GPT using the Gptgen utility in an Elevated Command Prompt:
- Press Windows key + R to open up a Run box. Then, type “cmd” and hit Ctrl + Shift + Enter to open up an elevated Command Prompt window.
- In the Elevated Command Prompt, type or paste the following commands in the same order and press Enter after each one:
gptgen.exe \.\physicaldriveX
gptgen.exe .physicaldriveX
gptgen.exe -w \.\physicaldriveX
gptgen.exe -w .physicaldriveX
Note: Keep in mind the X is just a placeholder. Replace X with your disk number. To find out your disk number, press Windows key + R to open up a Run box, type “diskmgmt.msc” and hit Enter to open Disk Management. In Disk Management, locate see which number was assigned to the disk that you’re trying to convert.
- Once all commands are successfully executed, your drive is converted to the new GPT format and your data left intact. Just make sure that you’re using the UEFI startup. If you do not change it by entering your motherboard firmware settings and change the boot type from Legacy mode (or similar) to UEFI.
Method 3: Using MiniTool Partition Wizard
If you fancy using a free third party application that will allow you to convert your drive from MBR to GPT from a graphical interface, you can use MiniTool Partition Wizard. Just as Method 1, converting your drive from MBR to GPT with MiniTool Partition Wizard will allow you to keep your OS and personal files.
MiniTool Partition Wizard is free and will allow you to migrate a drive from MBR to GPT in a matter of minutes. However, given the fact that it’s a third-party tool, we don’t recommend that you use it directly on your operating system drive if you don’t have a backup in place.
If you decide to use the MiniTool Partition Wizard tool to convert your drive from MBR to GPT, follow the steps down below:
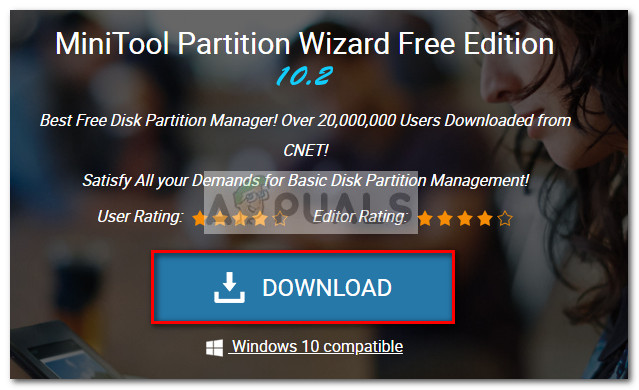
- Visit this link (here) and download the latest version of MiniTool Partition Wizard Free.
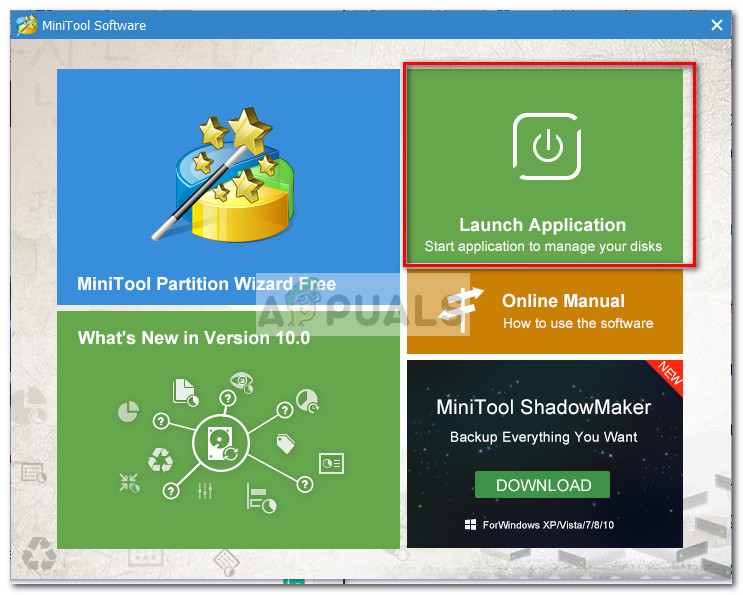
- Once the installer is downloaded, open the executable and follow the on-screen prompts to install MiniTool Partition Wizard on your system.
- Open MiniTool Partition Wizard and click on Launch application.
- Next, right-click on the disk that you want to convert and click on Convert MBR to GPT disk.
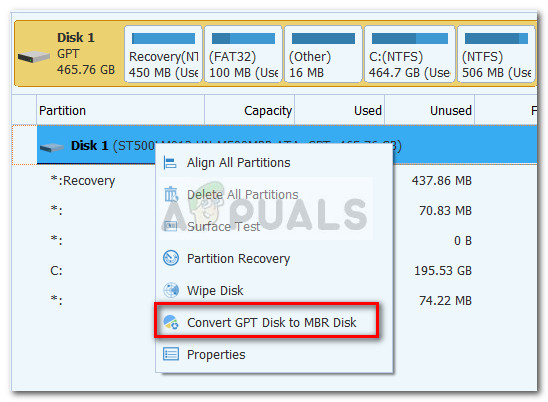 Note: Don’t be confused by the screenshot above. If your drive is MBR, the entry will say “Convert MBR to GPT disk“.
 - Then, hit Apply at the final prompt to begin the conversion process. When the process is complete, restart your computer by yourself if you’re not automatically prompted to do so.
- If your computer is unable to boot up at the next startup, access the firmware of your motherboard and change the boot type from Legacy Mode to UEFI.


Currently going to school for NSA, the course is a couple years old so it doesn’t cover this particular feature – MBR2GPT. I was having to manually go into boot manager to boot from my HDD, apparently when I reinstalled Windows 10 Pro, it installed as legacy and never made an EFI partition. I had previously rebuilt the store manually through command prompt in Windows Repair. I knew there had to be an easier way, a couple days of searching and I came across your article with MBR2GPT. You are a savior, it even rebuilds the EFI partition for you! I have passed this on to my IT friends for future reference in case they weren’t aware. Thank you.