How to See Wi-Fi Password on Every Android Device Regardless of Version
 Reviewed by Huzaifa Haroon
When Google rolled out Android 10, it added a feature that Android users had been wanting for a very long time. The feature in question is the ability to see saved Wi-Fi passwords. Although you have to go a little out of your way to see the password, it’s better than nothing.
However, for those of you still stuck in the dark ages of Android 9 and below, despite having a more than decent phone and wanting to see their saved Wi-Fi passwords, we’re pleased to tell you that you can do so with relative ease. So for anyone wondering how to view their WiFi password on their Android phone, this guide’s for you.

Why Would You Need to View Your WiFi Password?
Usually, your ISP sets the WiFi password the same as the one written on the back of the router they provide. The password on the back of the router is hard to memorize, to say the least. Everyone’s seen the memes targeting the password on the back of the router.
Also, not to mention how much of a pain it is to view the back of the router, as it somehow ends up being placed at the most obscure places, where the wires all get tangled up. So when a guest or someone who got a new phone, needs the WiFi and you don’t have it at hand, it can be a little awkward. Without further ado, let’s get started.
Ways to View Your WiFi Password
1. Generating a QR code and scanning it [Android 10 and above]
This is the feature that Google added that lets you view and share your WiFi password. First, you’ll need a QR code scanner. There are countless apps on the Google Play Store that allow you to scan QR codes. Here is the link to one such app, but you are free to choose whatever one you want. After installing a QR code scanning app, follow these instructions:
- Open the Settings on your phone. Select ‘Connections’
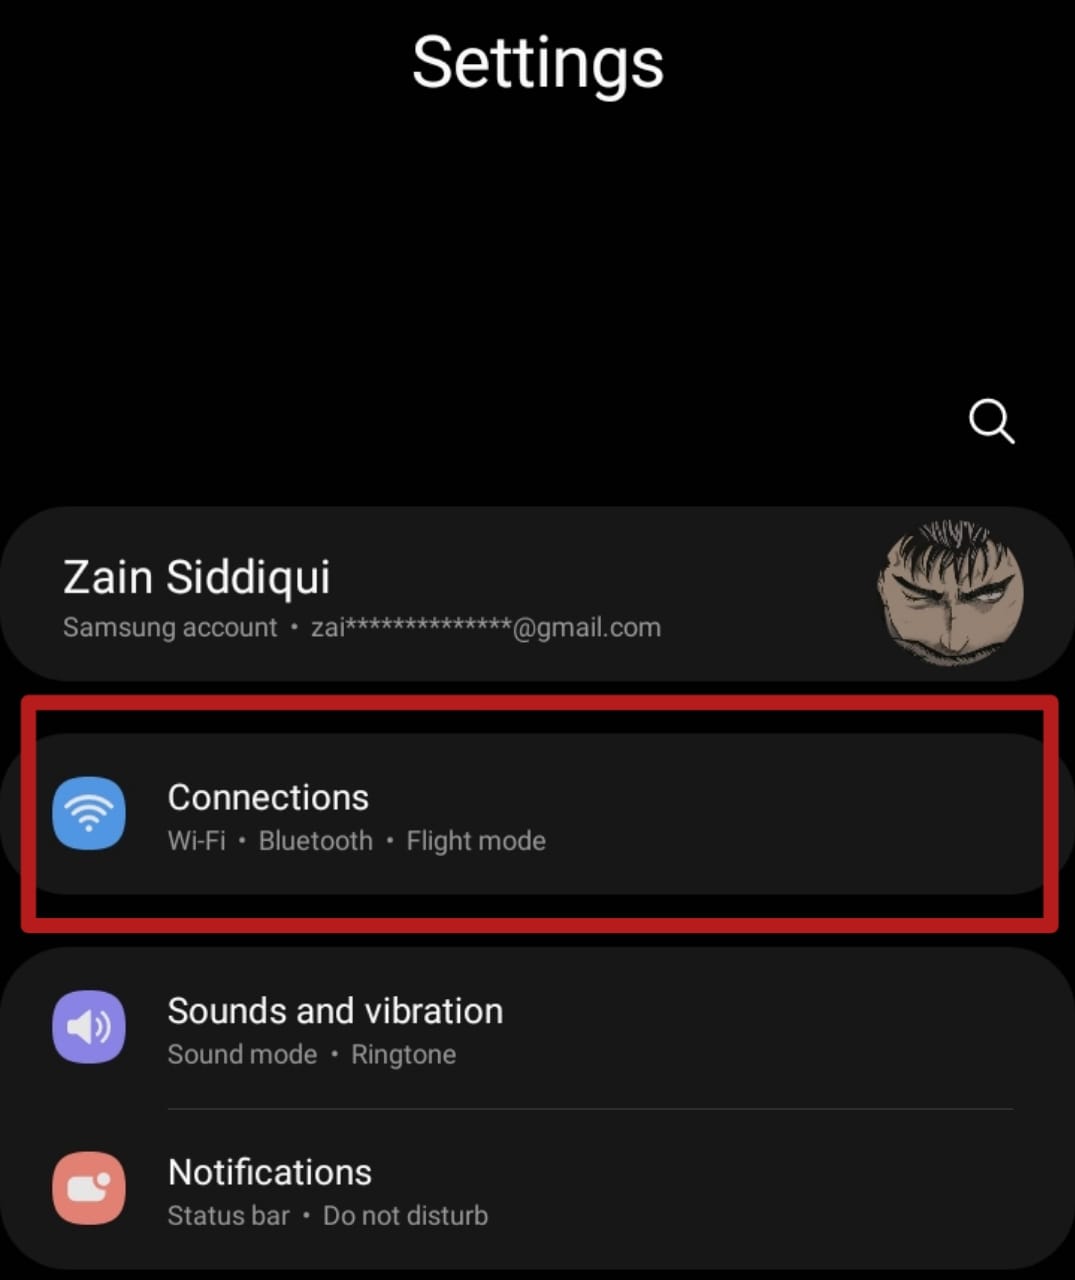
In Settings, select ‘Connections’ - Select ‘WiFi’. A list of WiFi networks will open and the network you’re currently connected to will be highlighted and at the top.
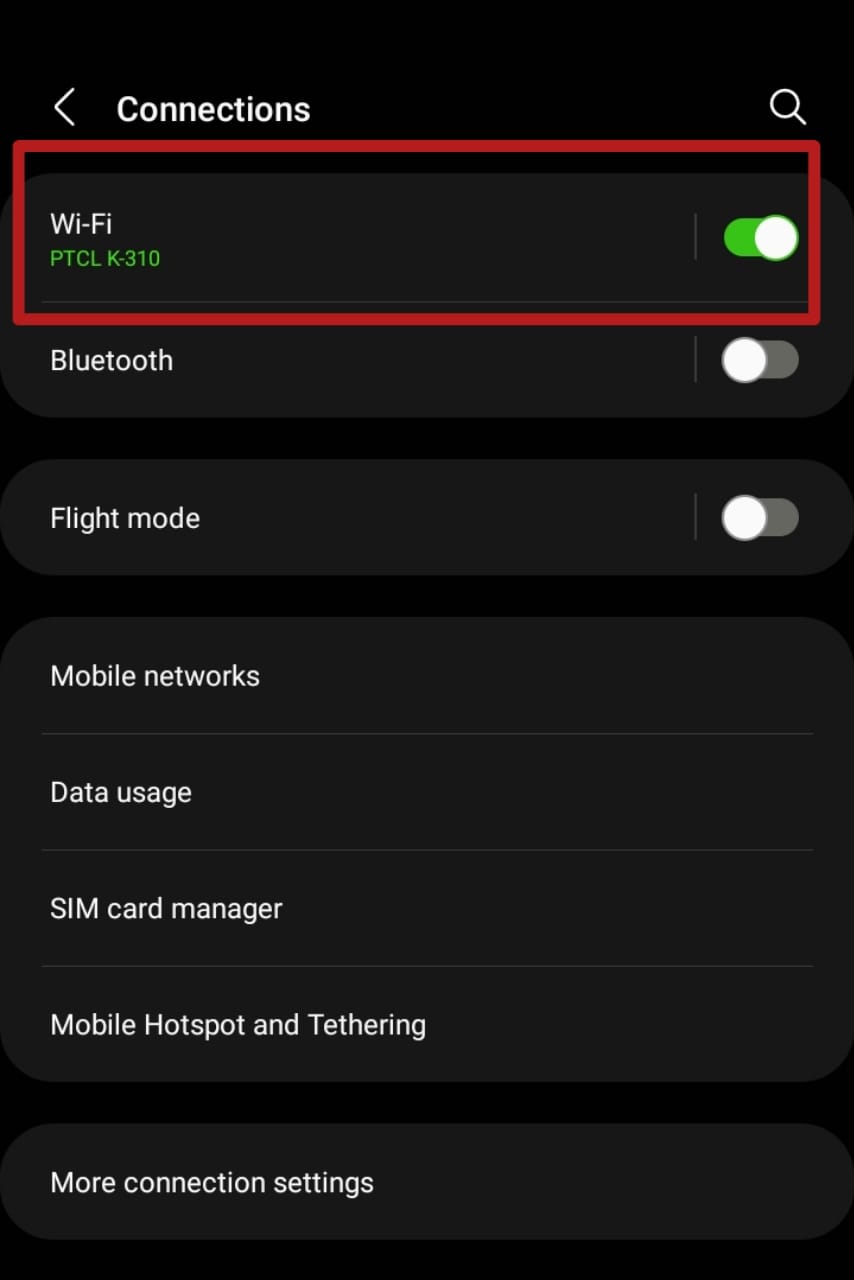
Select ‘WiFi’ in the ‘Connections’ panel Tap on the gear icon next to it.
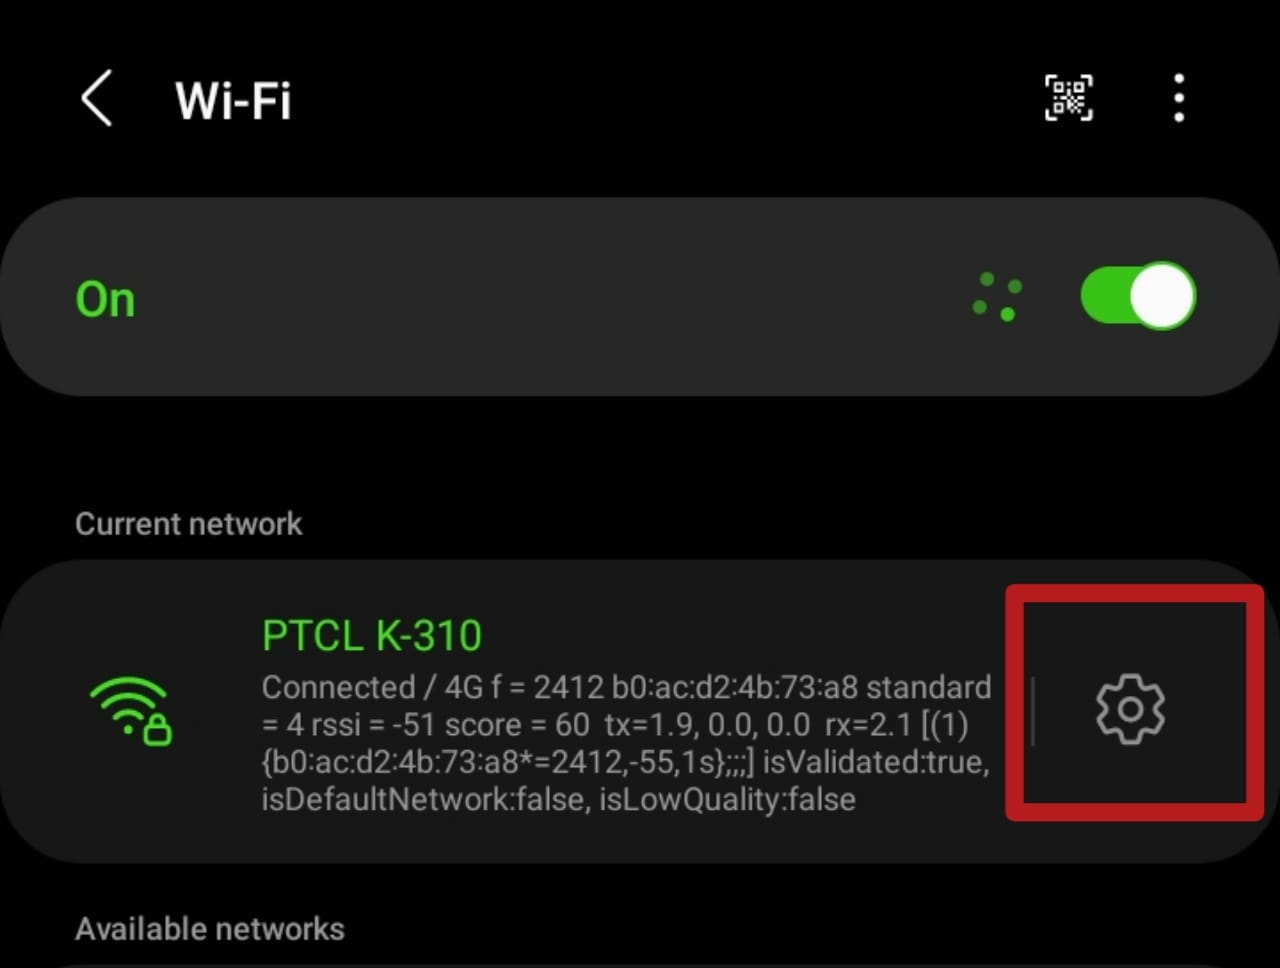
The gear icon represents ‘Advanced Settings’ - A menu with advanced options should open up. Select the ‘QR code’ option below.
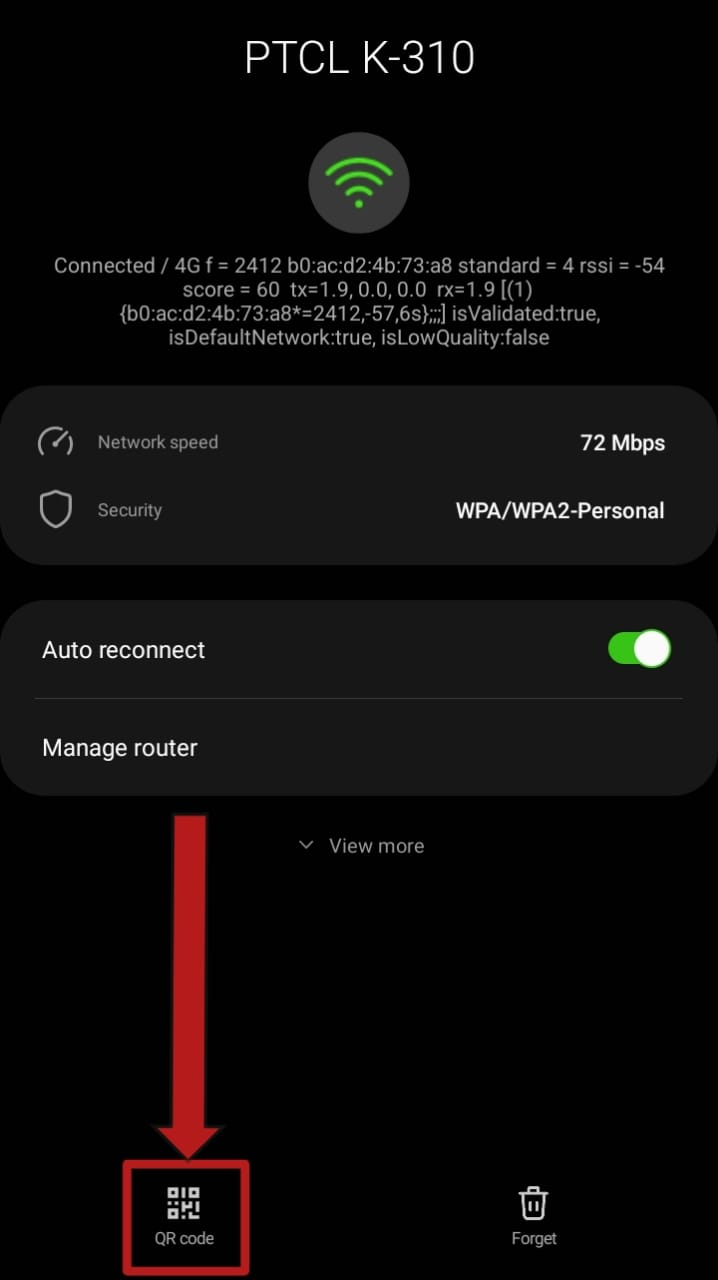
Select the ‘QR Code’ option found below - A QR code will be generated that contains the password of the WiFi you’re connected to. Take a screenshot of it. On some phones, depending on the manufacturer’s OS, an option to save the image of the QR code may also be available.
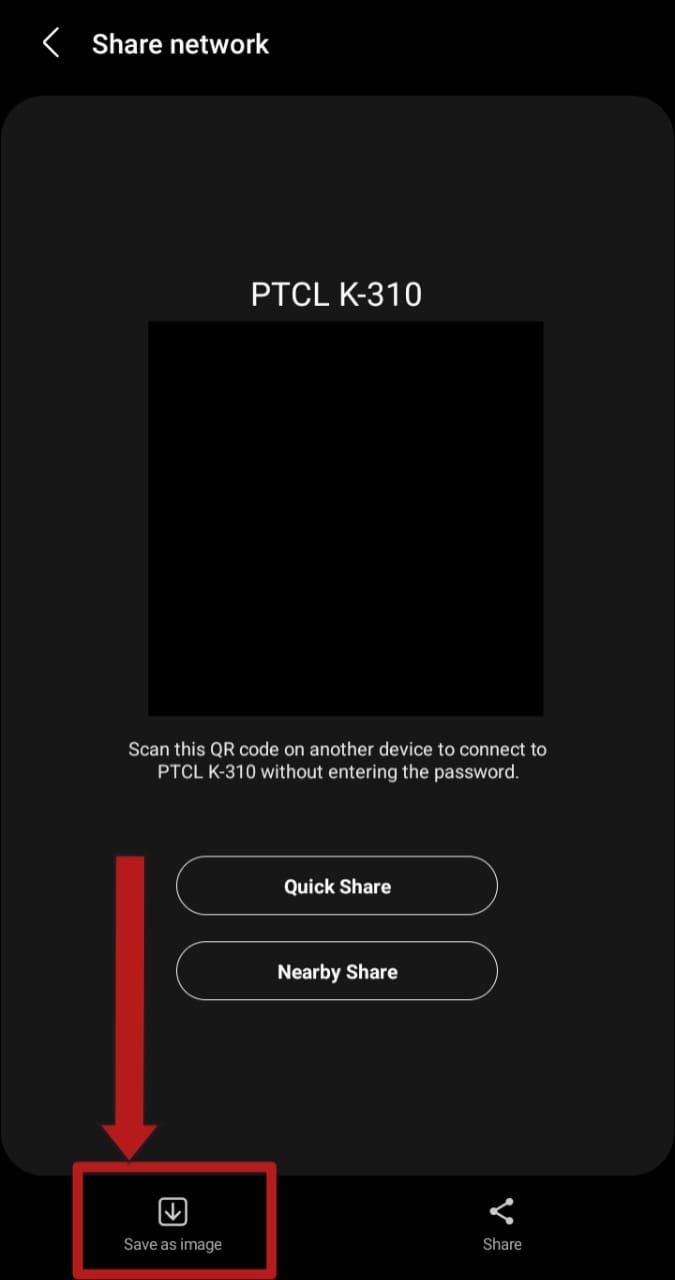
The option save the QR code as an image may be available on some devices Android devices running Android 10 and above can scan the QR code directly from the above menu using this option in the WiFi menu:
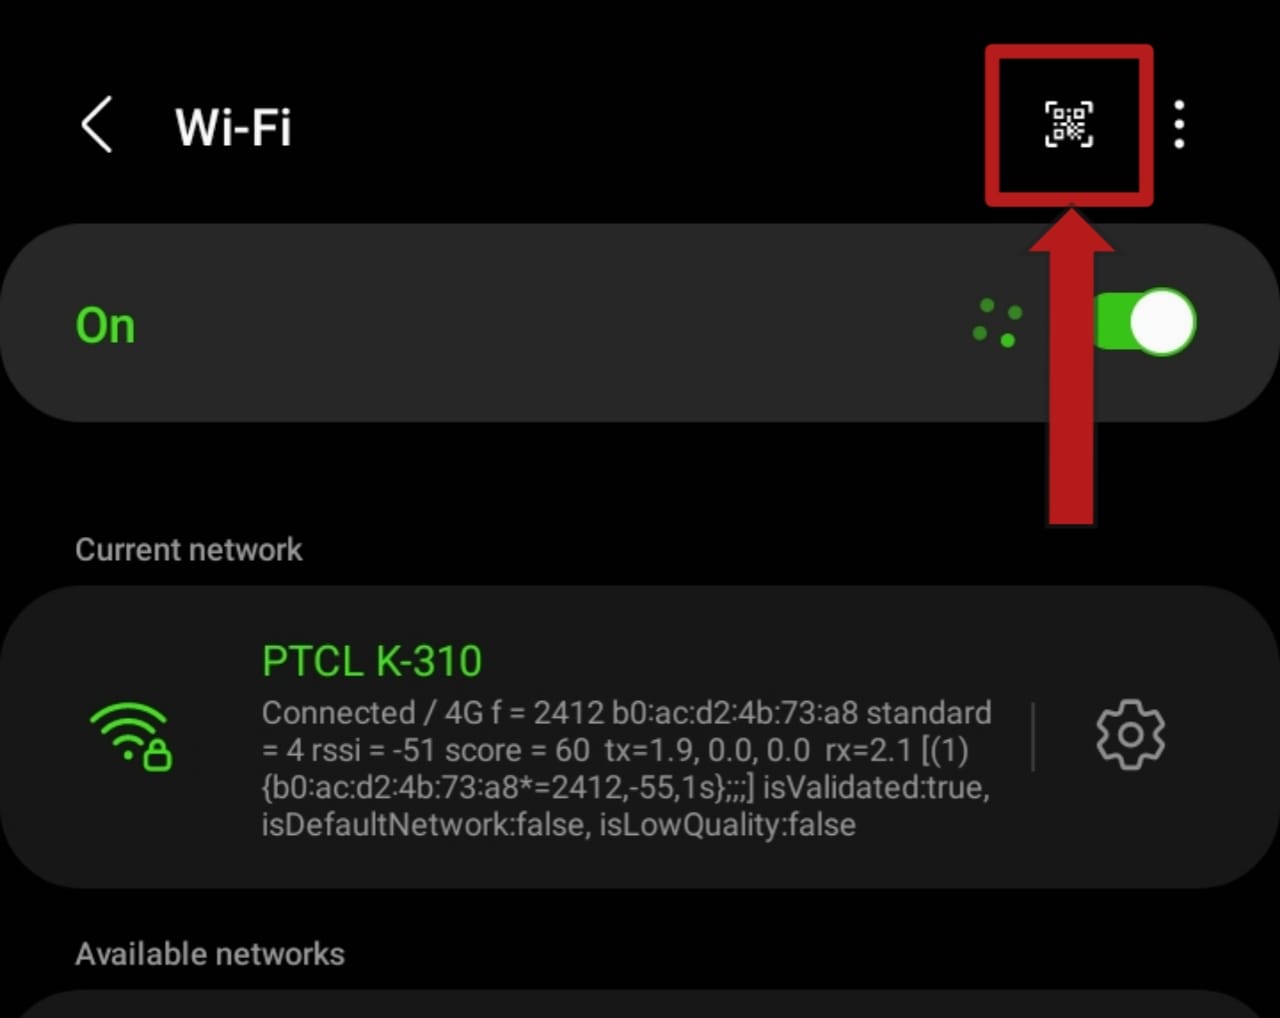
Select the ‘Scan QR code’ option in the WiFi menu to scan and instantly connect to the WiFi - After saving the QR code as in image or taking a screenshot of it, open up the QR code scanner app. For reference, the app linked above will be used here. Select the ‘Image’ option on the top.

Select the ‘Image’ option on top
2. Contact your ISP or visit your ISP’s website
For those of you that are deprived of Android 10 and above versions, the real solutions start from here. First, try contacting your ISP and asking them to tell you the password. Or simply hop on over to their site and navigate to your WiFi settings there to view your password. Use a password manager or note it down somewhere to keep a record of it.
3. Using a file manager [Root only]
This method requires your device to be rooted. If your phone is not rooted you can scroll down. If you’re unsure of how to root your phone, we got you covered here. But if you’re still not sure, head on over to the XDA Developer Forums, your one stop to know everything there is about rooting and, generally, the Android OS.
Anyhow, those who have rooted devices should have a file explorer with root privileges installed. An example of such file explorers include MiXplorer, Root Browser, etc. For the purpose of this guide, I will be using ES File Manager.
- Open your file manager. Check to see if it has root privileges enabled.
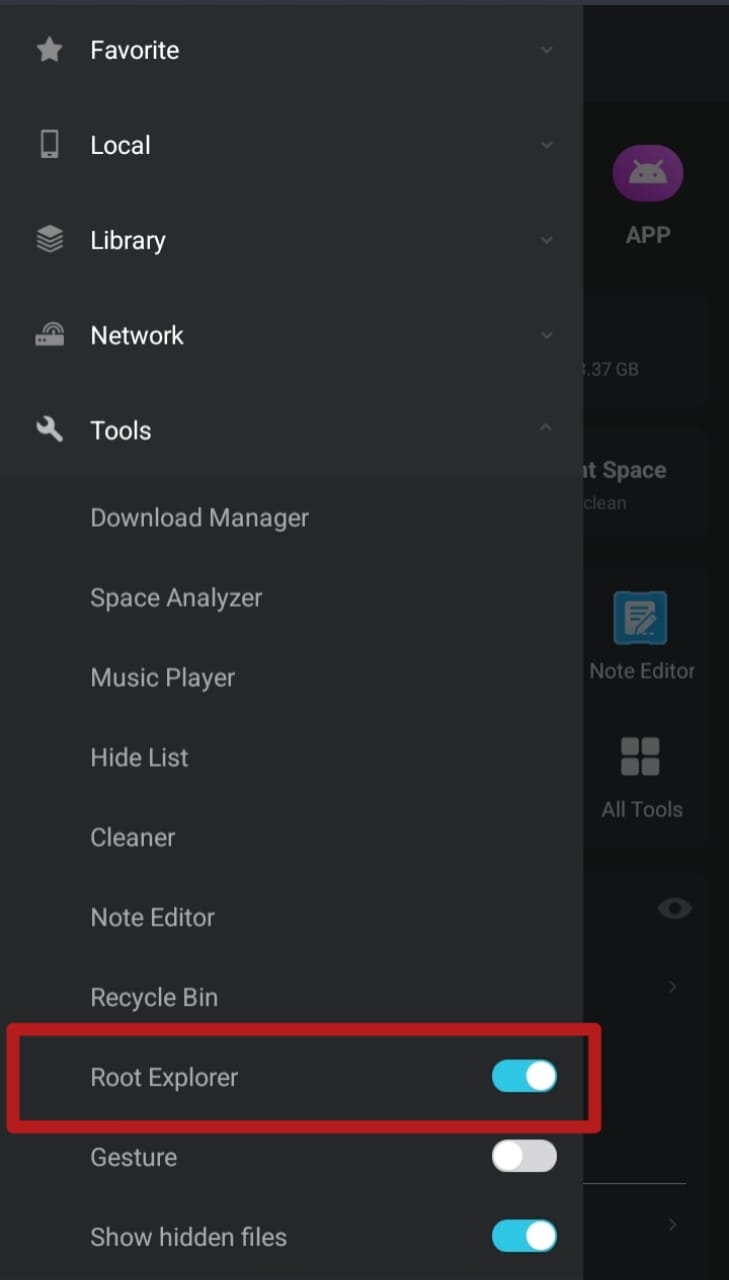
Check if root privileges are enabled - Navigate to the root directory of your device’s storage. Select the ‘data‘ folder.
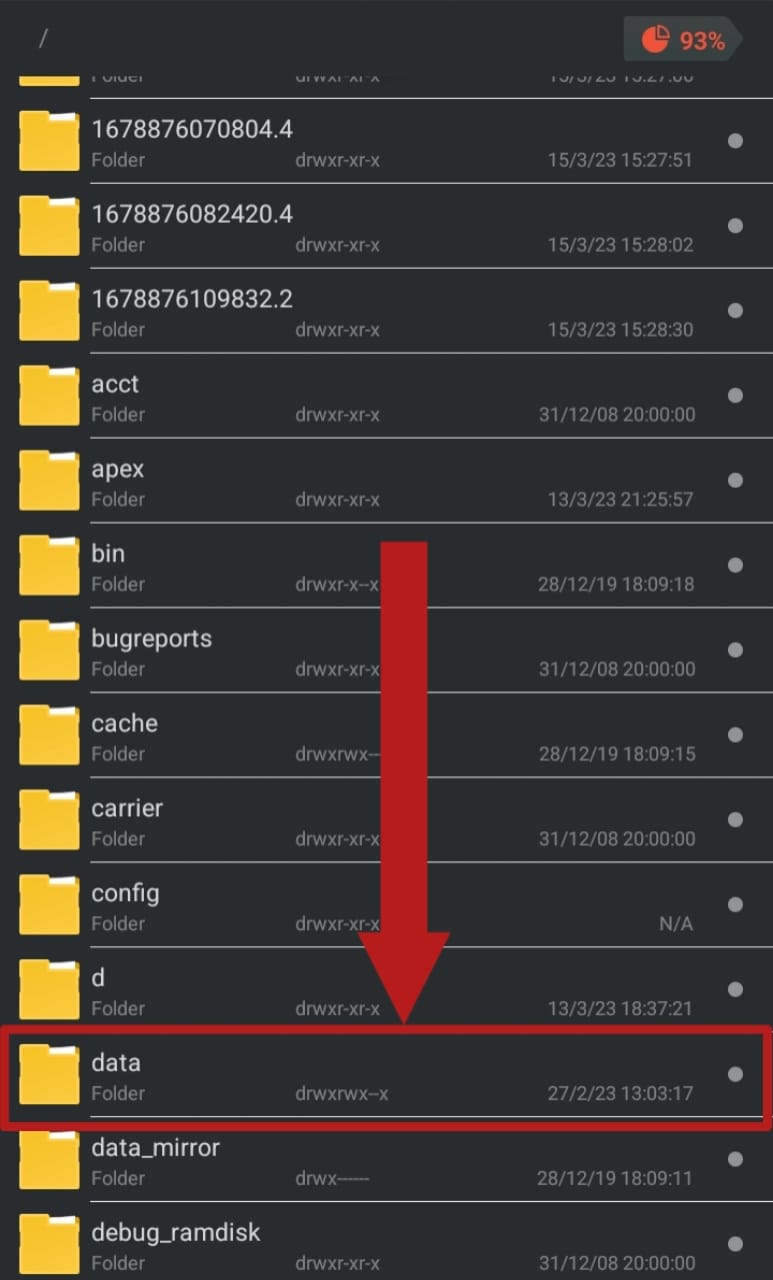
Select ‘data’ in the root directory of your device’s internal storage - Select the ‘misc‘ folder.
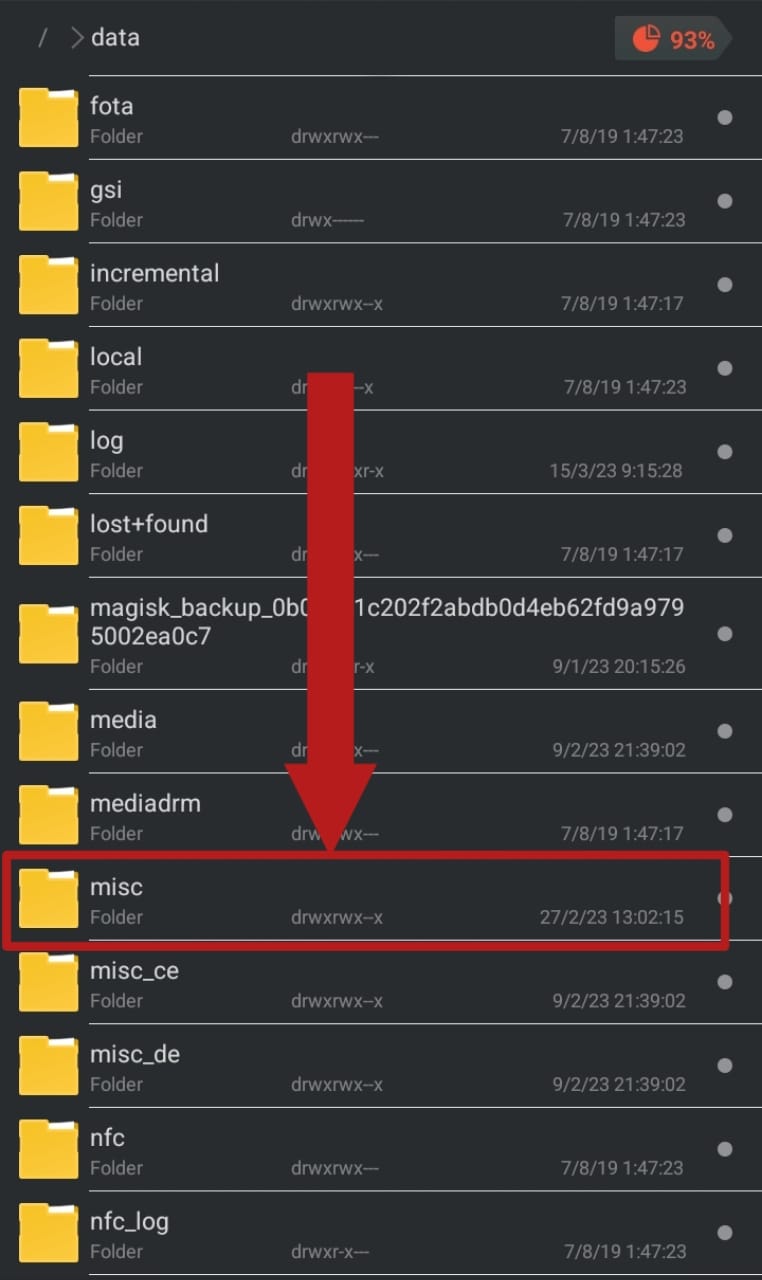
Select the ‘misc’ folder - Scroll down to find the ‘wifi‘ folder and press it to open it.
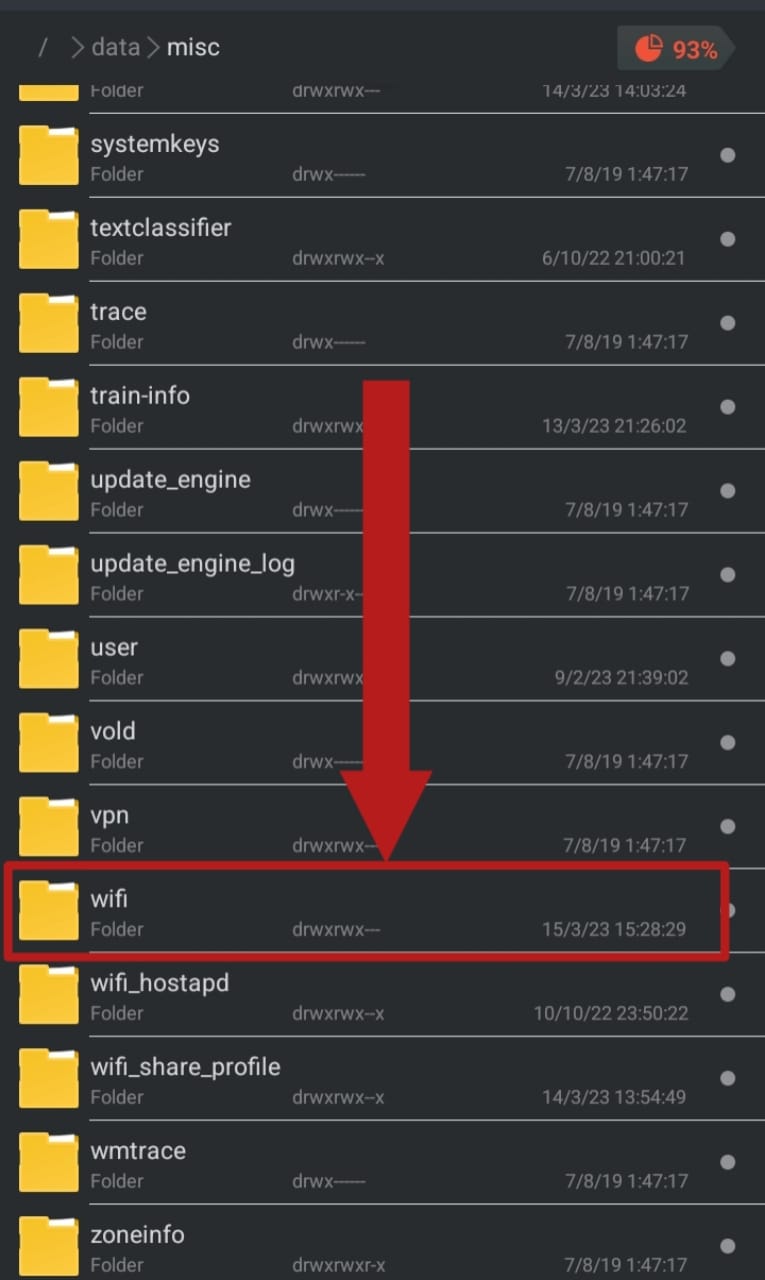
Select the ‘wifi’ folder - Upon opening the ‘wifi‘ folder, several files and folders should be present. Select the file labelled ‘wpa_supplicant.conf‘ and open it using a built-in text editor. On Android 8 and 9, this file will be named as ‘WifiConfigStore.xml’. You should focus on the ‘SSID‘ and ‘psk‘. The ‘SSID‘ represents the network name and the ‘psk‘ is the password.
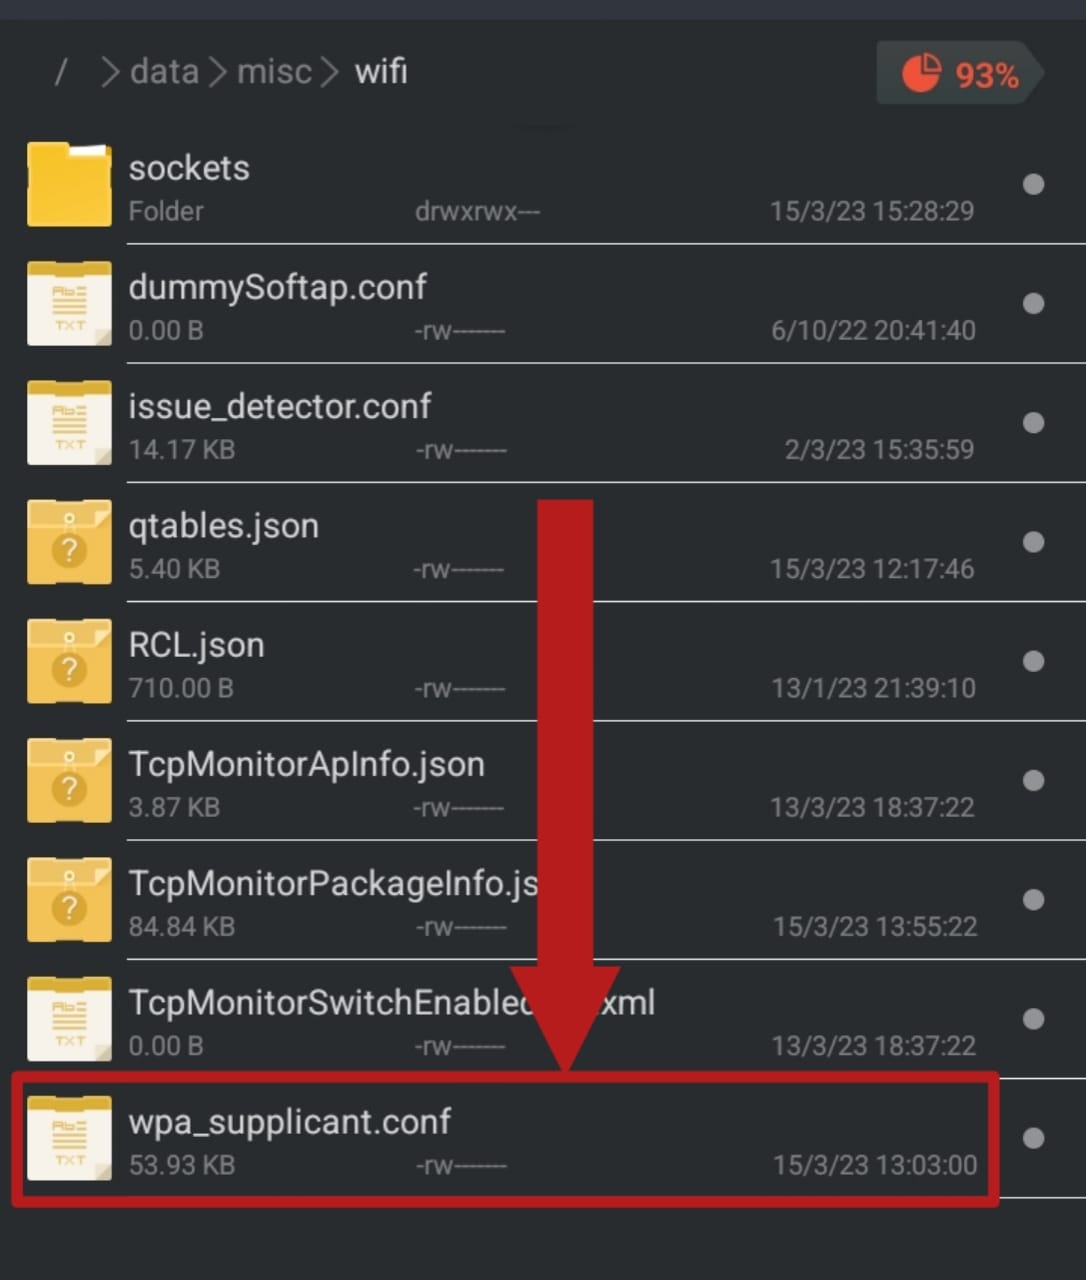
Select the file named ‘wpa_supplicant.conf’ or ‘WifiConfigStore.xml’ Note: These files should not be edited or altered with in any way. Doing so will result in serious connectivity issues.
4. Wi-Fi Password Recovery [Root Only]
Again, this method requires your device to be rooted. It also requires to download a third-party app from the Google Play Store. Look up ‘WiFi Password Recovery’. Select any app to your liking and install it. We will be using this app for the sake of this guide. Follow these steps:
-
- Open up the app and agree to the privacy policy. A pop-up should appear asking for root privileges for the app. Select ‘Grant‘.
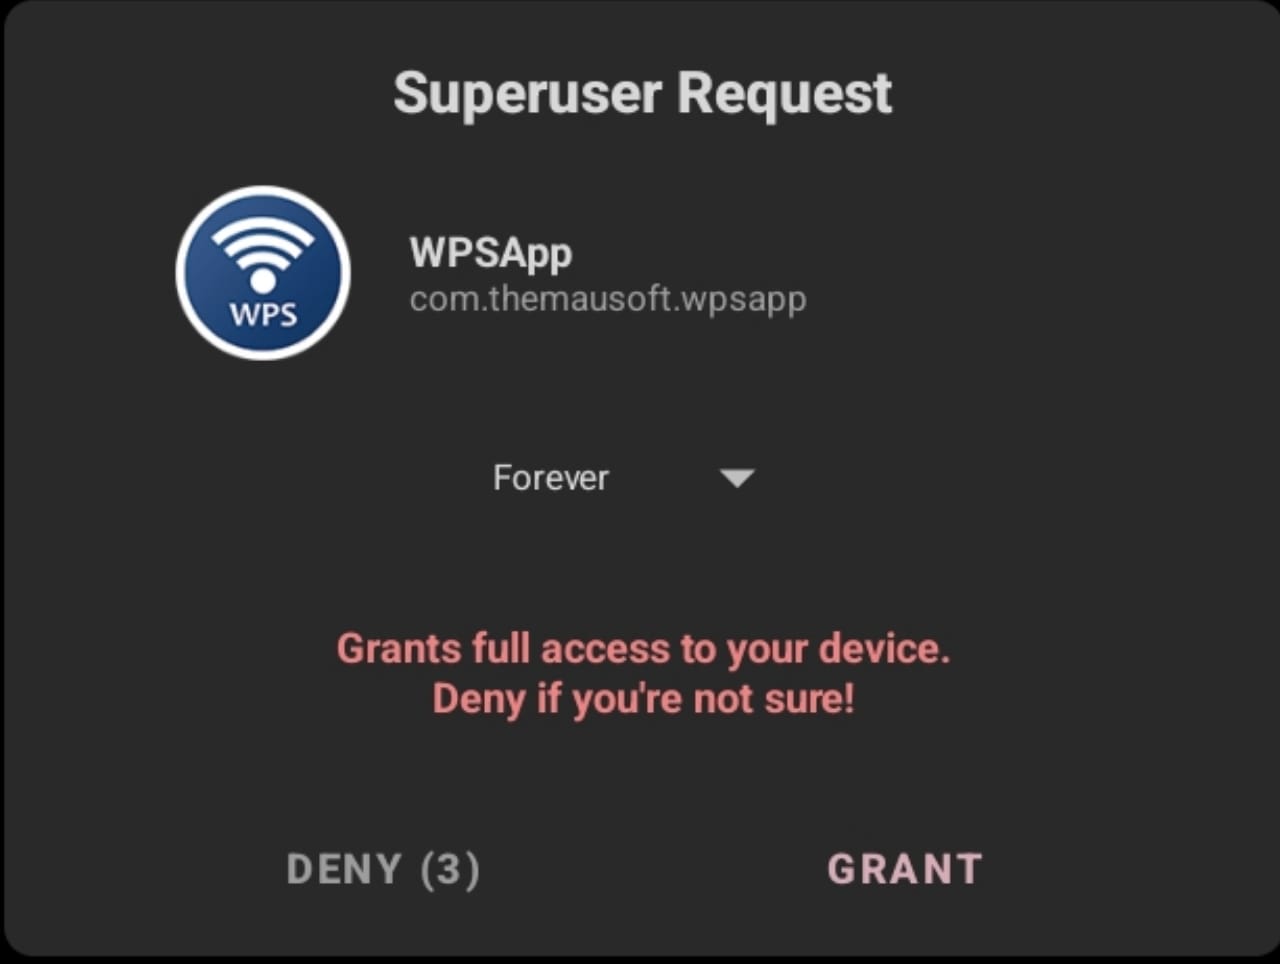
Select ‘Grant’ on the pop-up - On the app, select the three dots on the top corner. Select ‘Saved networks‘ in the drop-down menu.
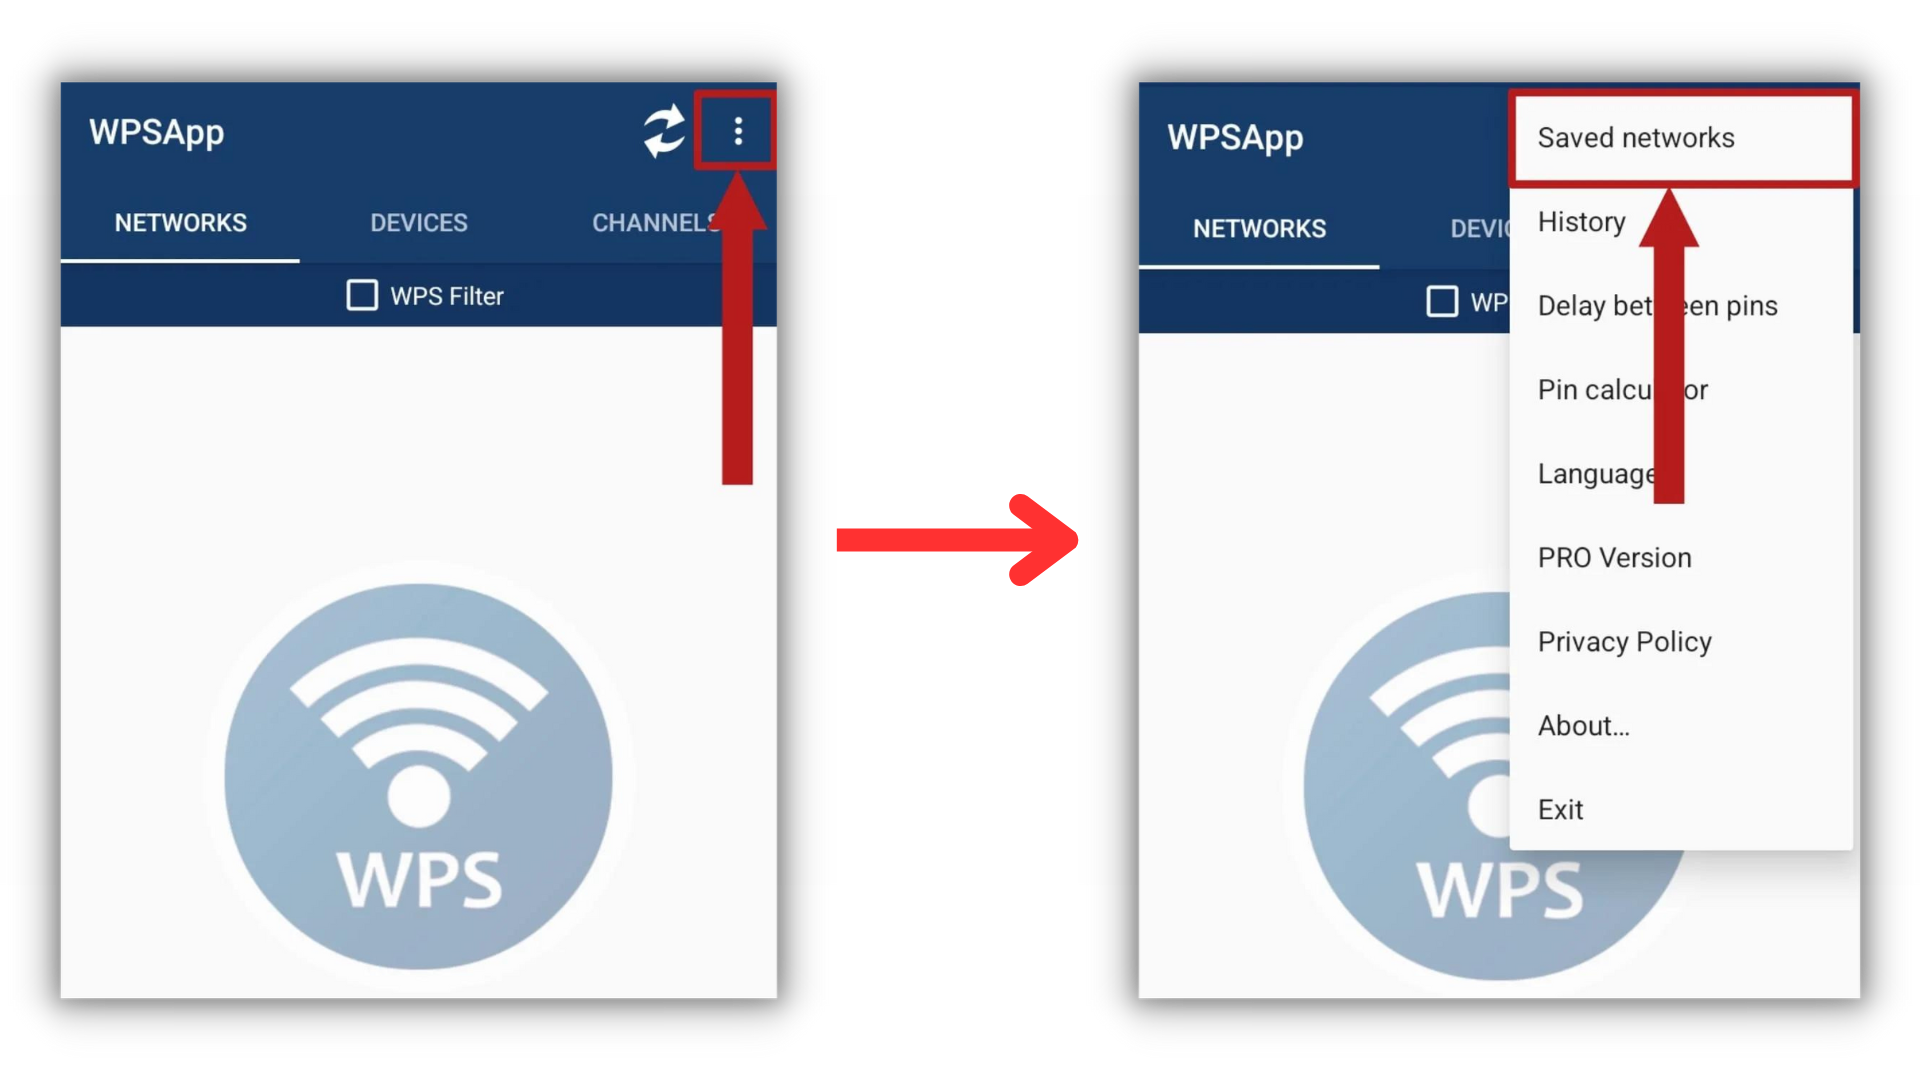
Tap on the three-dot menu and then select Saved Networks - You should find a complete list of all the WiFi networks that your device has been connected to, along with their passwords. Find your WiFi network and note the password.
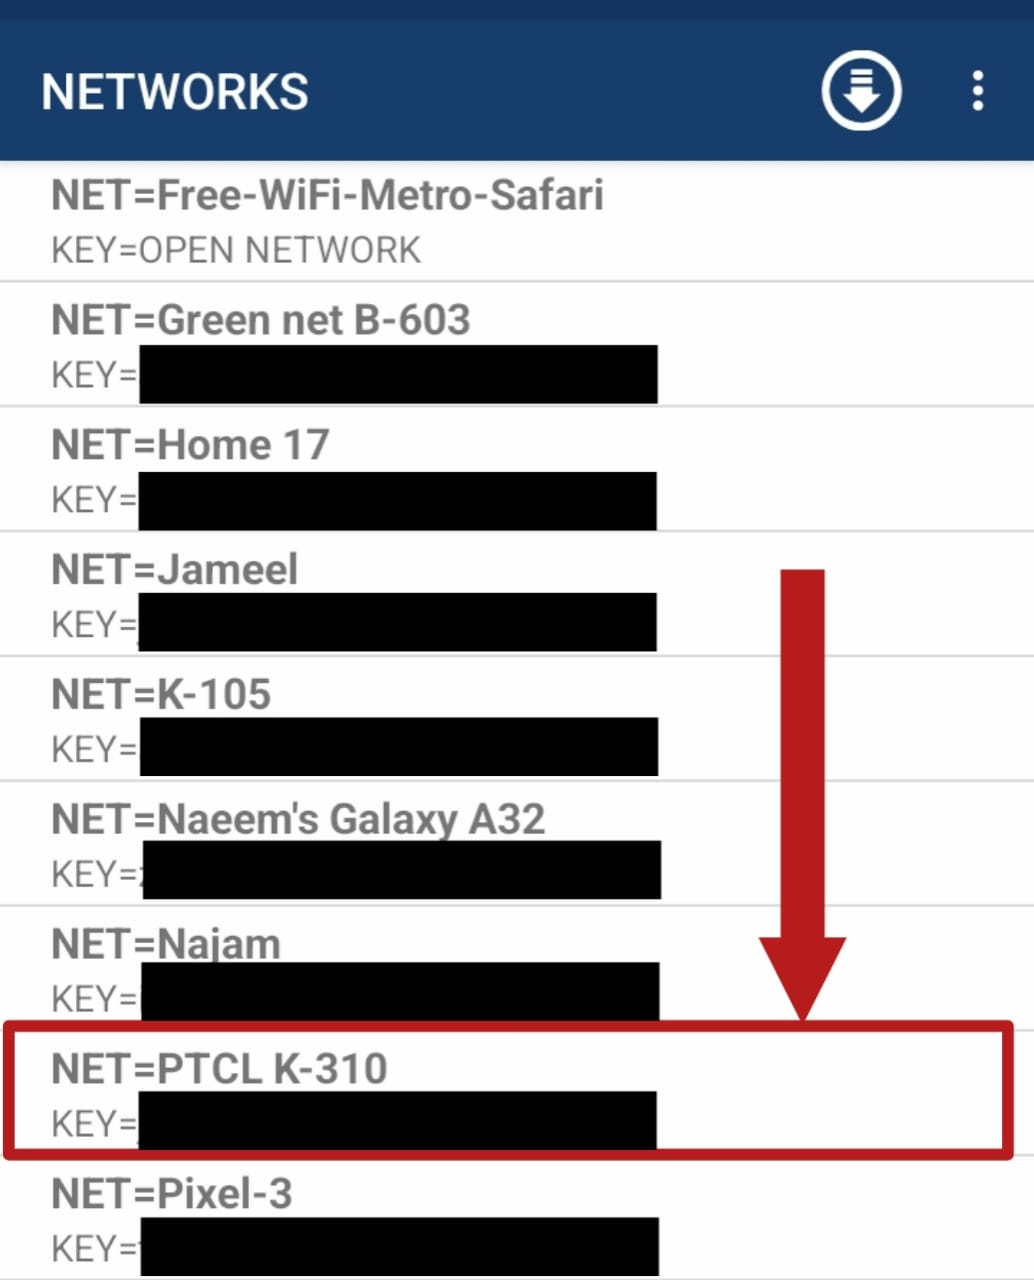
A list of all the WiFi networks your device has been connected to should appear along with each of their passwords
- Open up the app and agree to the privacy policy. A pop-up should appear asking for root privileges for the app. Select ‘Grant‘.
5. Using ADB
This is a method for those that are averse to rooting their phones. The Android Debug Bridge (ADB), is an extremely handy tool that allows you take control of your Android device to a great extent and carry out many essential processes, with or without root.
To set up ADB on your computer, follow this guide. Although this is a lengthy process, it gets the job done. You’re going to need a PC or laptop with Windows on it and several other apps which we will mention as we move onwards.
- First, ensure that your device has ‘USB Debugging‘ enabled in the Developer Options. To enable Developer Options, follow this guide.
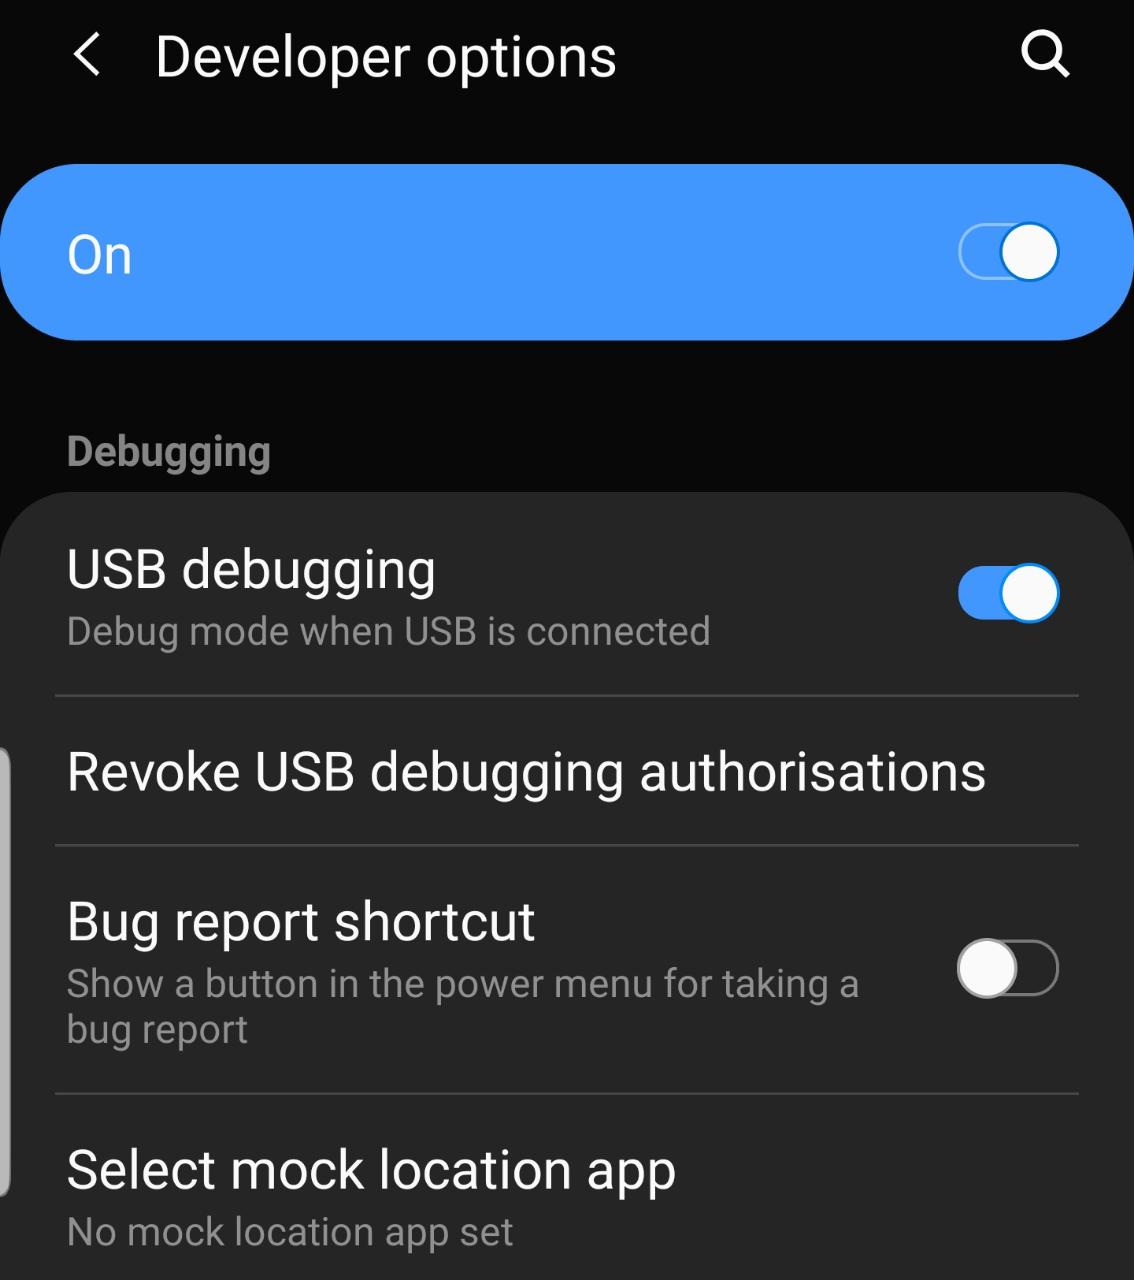
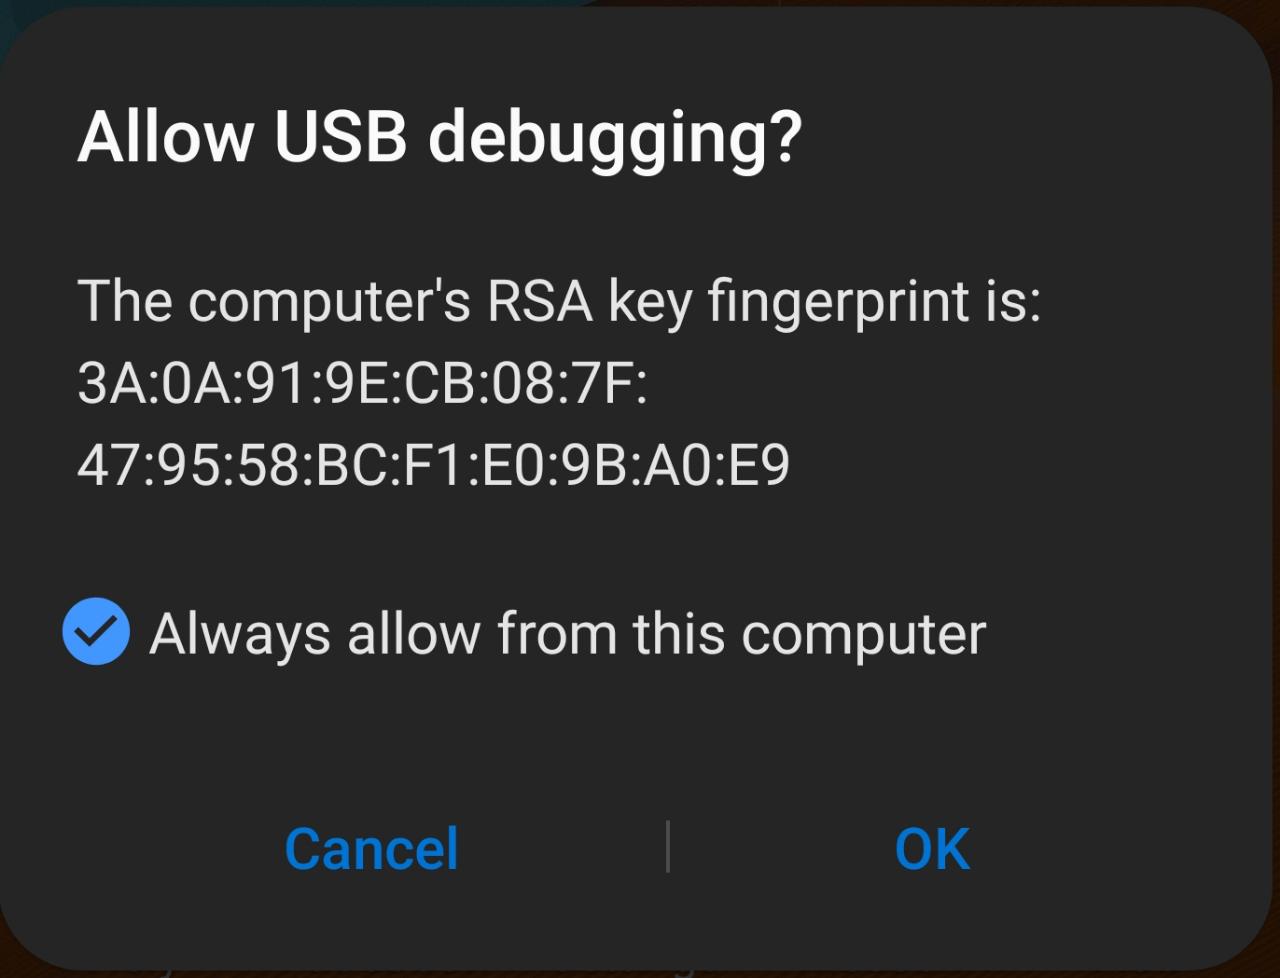
Check if ‘USB debugging’ is turned on. If it is disabled. enabled it. - Connect your phone to the computer using a charging cable. Allow the computer to access your files and allow USB debugging on the pop-up that appears.
Launch a Command Prompt window, preferably inside the ‘platform-tools’ folder by holding down the Shift key on the keyboard and right-clicking with the mouse.
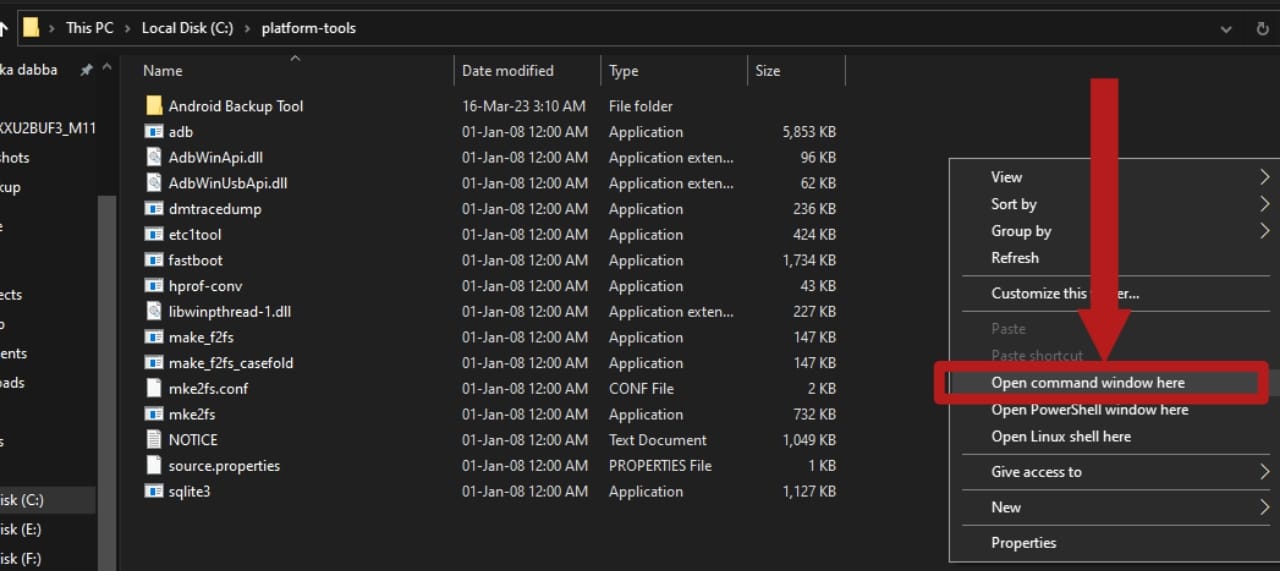
Hold down the Shift key and right-click to open an extended version of the right-click menu Enter this command to start ADB and check whether your device is connected properly to recieve access:
adb devices
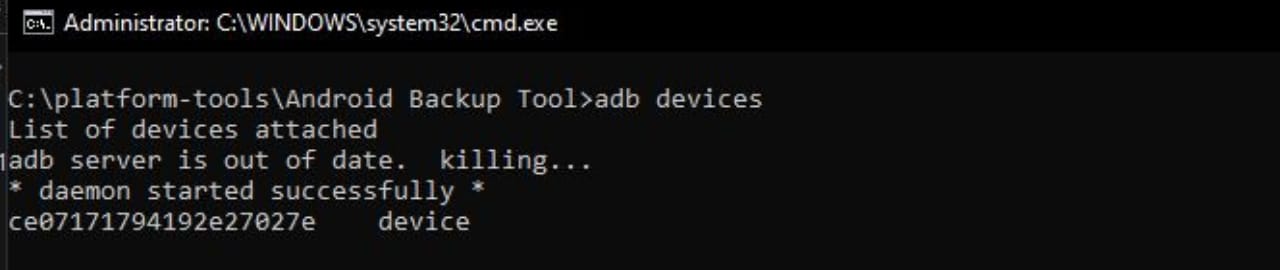
Entering the command should start the ADB service and list your device -
Enter this command to start generating a backup of your device:
adb backup -f backup.ab -noapk -noobb -noshared -all -system -keyvalue
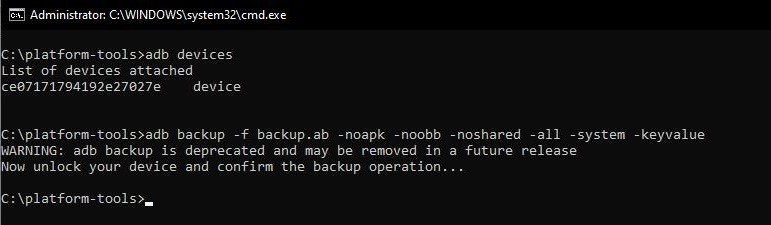
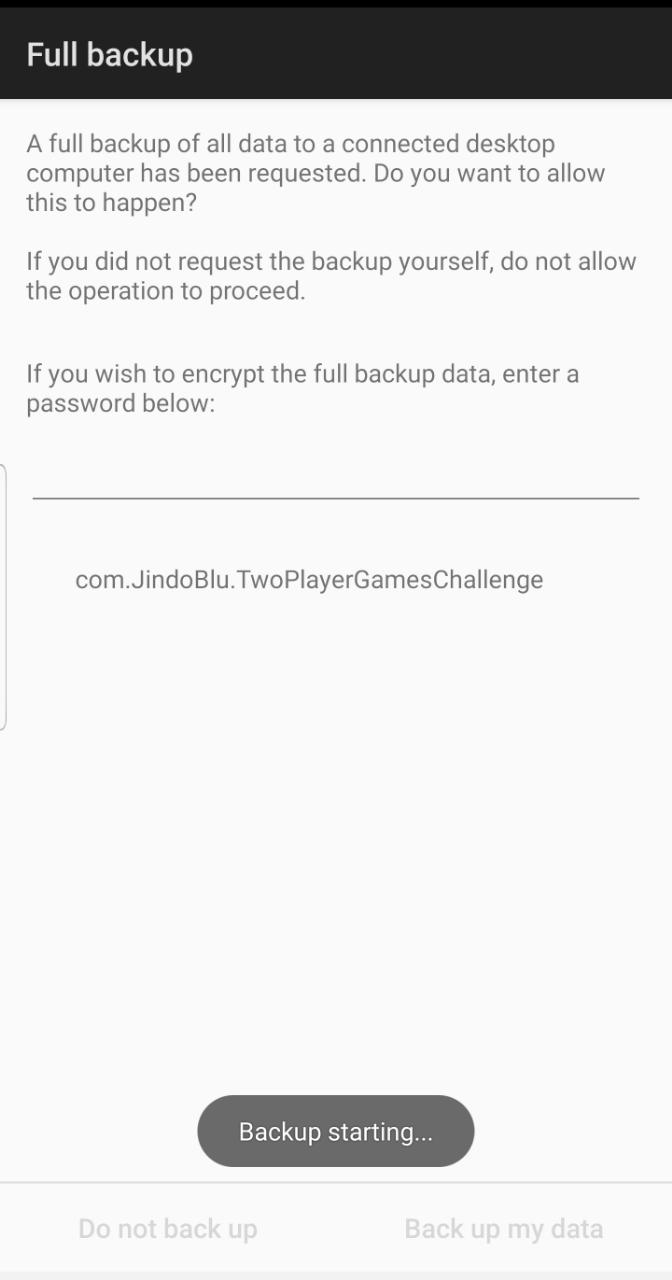
Enter the command to create a backup of your device A panel should appear on your device’s screen, asking for confirmation to create a backup. Select ‘Back up my data‘ to begin the backup process.
On the menu that appears on your device’s screen, select ‘Back up my data’ - While the backup process carries on, simply download Java and this backup extractor tool on your PC or laptop. When downloads are complete, simply install Java through the setup. Move the backup extractor tool to a folder within the ‘platform-tools’ folder.
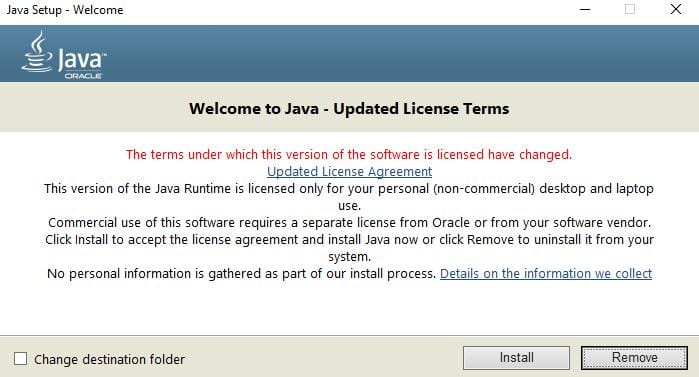
Install Java by following the simple setup -
Open the backup tool zip using 7Zip. You can download 7Zip from here. Navigate to the following path inside the zip file: android-backup-tookit-20221220.zip\android-backup-toolkit\android-backup-processor\executable\. There should be a file labelled ‘abp.jar‘. Extract this file from the zip. DO NOT extract the .jar file itself.

Extract this .jar file from inside the zip - Your backup should have completed by this time. If not, be patient as it takes only a few minutes. The backup should appear in your ‘platform-tools‘ folder labelled as ‘backup.ab‘. Move the backup to the same folder as the backup tool you downloaded and the ‘abp.jar‘ file.
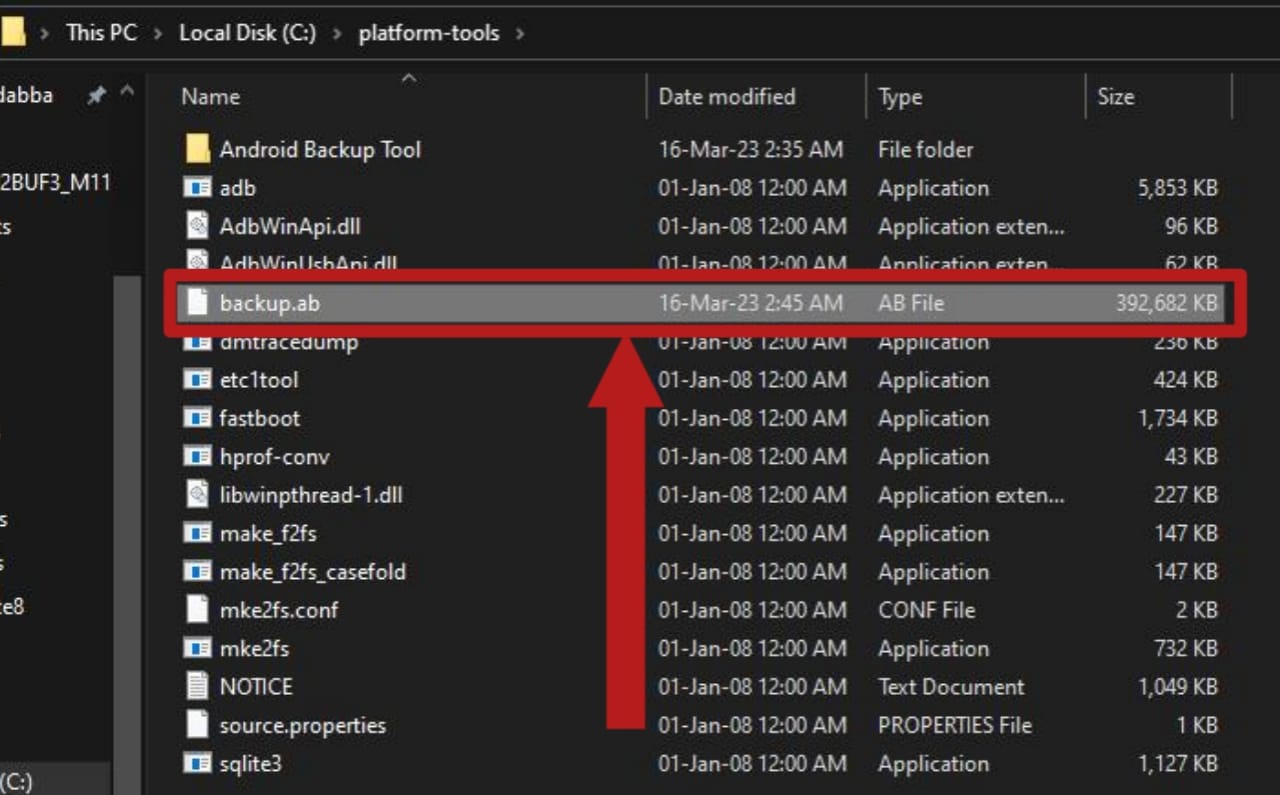
The backup should be present in your ‘platform-tools’ folder and should be named ‘backup.ab‘
- Now open a Command Window inside the folder where the ‘abp.jar’ file, the backup tool and backup are located. Run the following command:
java.exe -jar abp.jar unpack backup.ab backup.tar ""
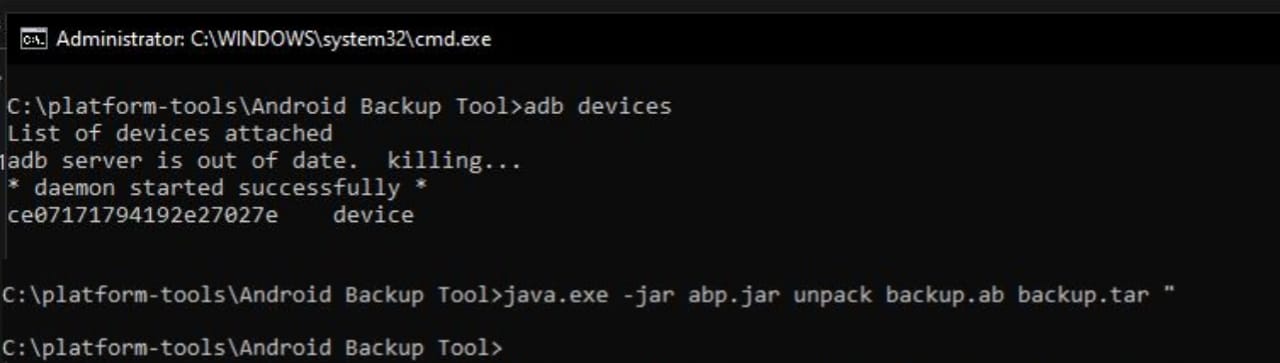
This command should begin converting the backup from a “.ab” file to a “.tar“ file. Wait for the process to complete - Once the backup is finished converting, open the converted backup using 7Zip. The new backup should be present in the same folder.
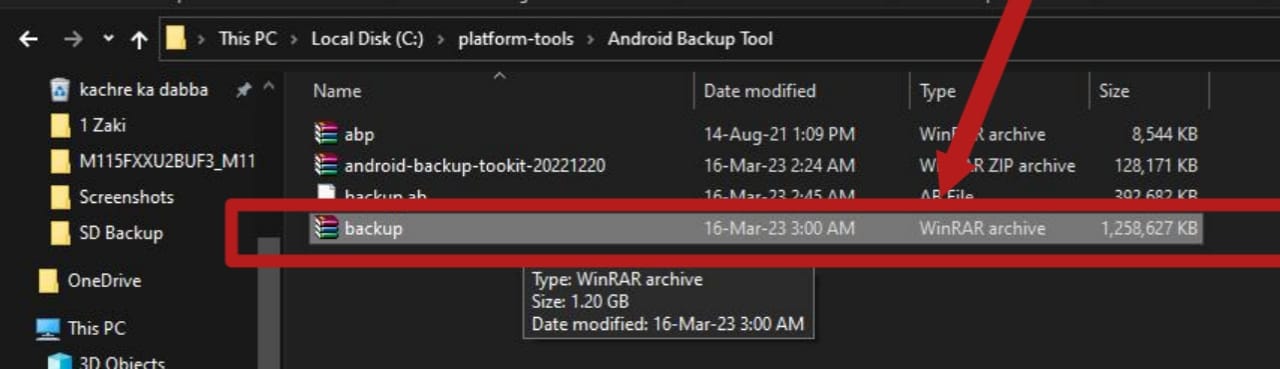
The new backup, named ‘backup.tar’, should be present in the same folder as the old backup -
Navigate to this path inside the archive: backup.tar\apps\com.android.providers.settings\k\. There should be a file named ‘com.android.providers.settings.data’. Extract this file.
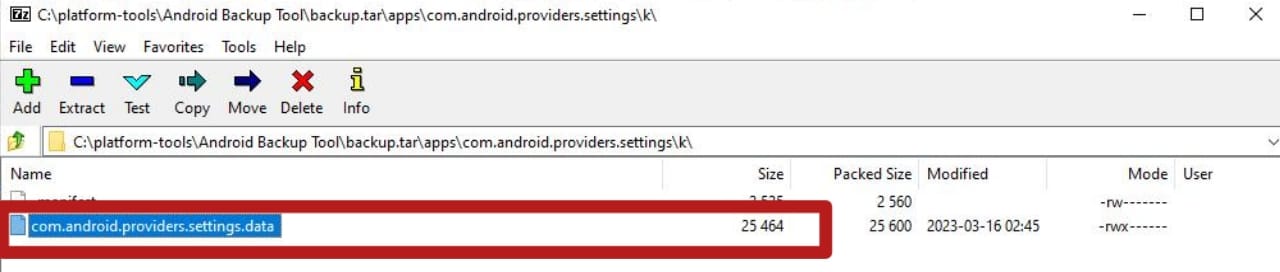
Extract this file from the backup -
Once the file has been extracted, use Notepad++ open the file. You can get Notepad++ from here.
When the file is opened, it will display a lot of codes and markers. This file is where a list of all your saved WiFi networks and their passwords, along with other information about them is stored.
-
To find your WiFi, press Ctrl+F on the keyboard to make use of the ‘Find’ function. Put in your network name in the search bar that appears and hit Enter. The search results should point you to the part of the file where information about your WiFi is stored. Focus on the lines where ‘SSID‘ and ‘PreSharedKey‘ are present. The ‘SSID’ represents the WiFi network’s name, while the ‘PreSharedKey’ represents its password.
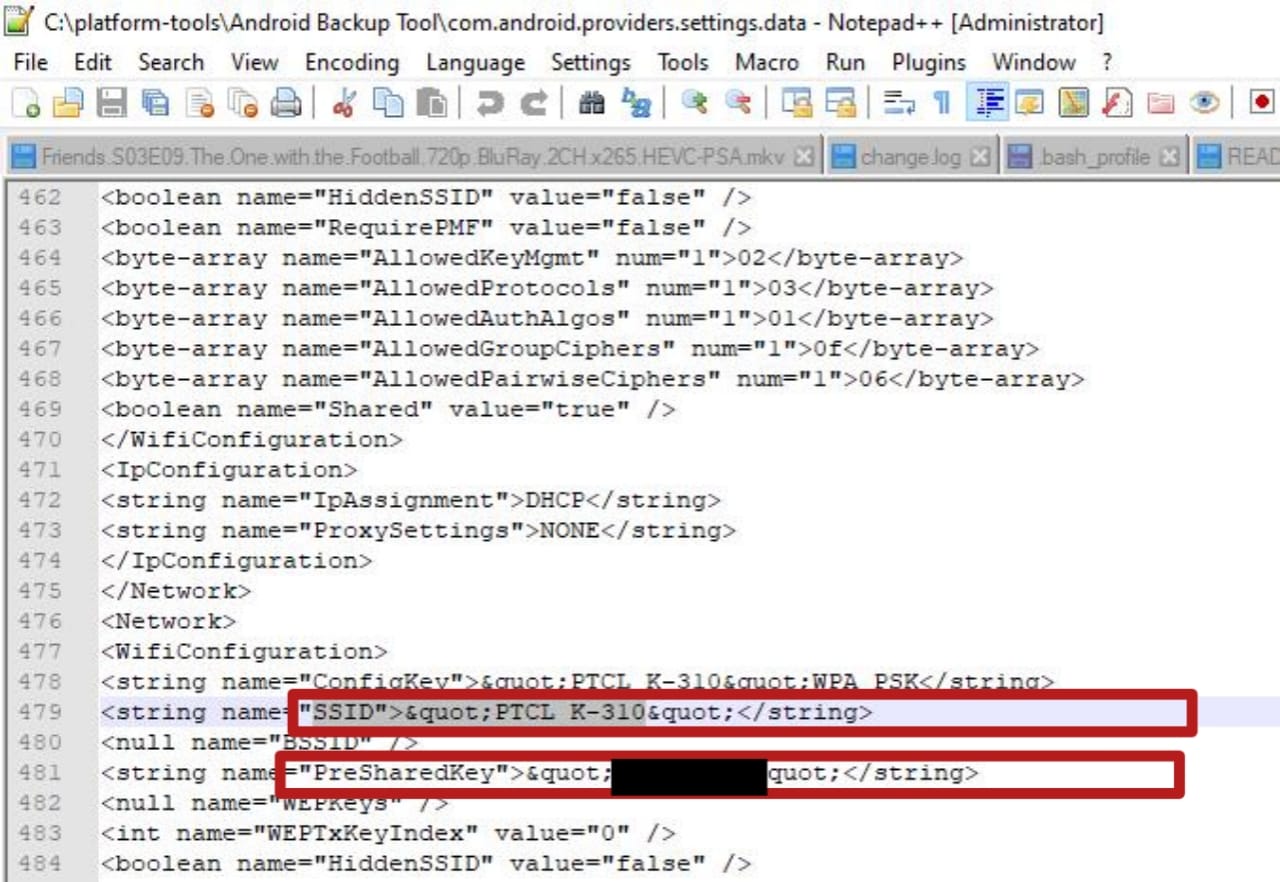
The ‘SSID’ is your network name and the ‘PreSharedKey’ is the network’s password (which is censored in this screenshot)
Winding Up
There you have it! This is the comprehensive guide to viewing your WiFi password on an Android device. Most of the methods require root privileges but there is one way that does not require root. Make sure to use a password manager to keep a record of the password after using this guide, or at least note it down somewhere safe; either on your phone or on a notepad.
Reviewed by Huzaifa Haroon


