Fix: VMware and Device/Credential Guard are not Compatible
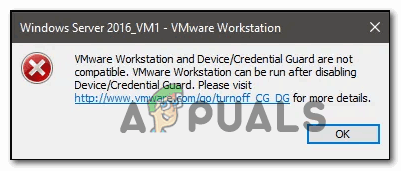
Some VMware Workstation and Vmware Player users are seeing the “VMware and DeviceCredential Guard are not Compatible” error when attempting to launch the application or when attempting to start a virtual machine. Most affected users have confirmed that the problem only started occurring after installing a pending Windows update.
When troubleshooting this particular issue, you should start this troubleshooting guide by disabling Hyper-V conventionally. You can do this either by disabling it via CMD or by relying on the GUI interface.
Another potential problem that might end up causing this issue is a local group policy called Virtualization Based Security that ends up blocking certain virtualization technologies. In this case, you can either use the Local Group Policy Editor to disable this policy or you can rely on Registry Editor to enforce this change.
However, if you’re encountering this issue on Windows 10, it’s likely that the problem is caused by inconsistency with the Boot Configuration Data. If this scenario is applicable, you can fix this problem by modifying the BCD file to eliminate any reference of Hyper-V.
In the event that you’re using Windows Defender, keep in mind that this WMware error can also occur due to a security feature called Core isolation. In this case, you can fix the issue by disabling Core Isolation from the Settings app or you can do it using Registry Editor.
Method 1: Disabling Hyper-V
According to various user reports, one of the most common causes that will trigger the “VMware and DeviceCredential Guard are not Compatible” error is a conflict between Hyper-V (Microsoft’s proprietary virtualization technology) and VMware. Keep in mind that both VMware and VirtualBox will pick their own virtualization technologies by default.
However, there is one Windows Update (KB4515871) that is known to force certain 3rd party applications to use Hyper-V – in VMware, this will end up producing the “VMware and DeviceCredential Guard are not Compatible” error.
If this scenario is applicable and you recently installed a Windows update that you think might be responsible for the newly appeared error, follow one of the guides below to disable Hyper-V in order to clear the way for VMware to use its own virtualization technology.
A. Disabling Hyper-V via CMD
- Open up a Run dialog box by pressing Windows key + R. Next, type ‘cmd’ inside the text box and press Ctrl + Shift + Enter to open up an elevated Command Prompt.

Running the Command Prompt Note: Once you see the UAC (User Account Control), click Yes to grant admin access.
- Once you’re inside the elevated CMD prompt, type the following command and press Enter to disable the Hyper-V function on a system level:
dism.exe /Online /Disable-Feature:Microsoft-Hyper-V
- After the command is successfully processed, close the elevated Command Prompt window and reboot your computer.
- Once the next startup is complete, open VMware and repeat the action that was previously causing the error.
B. Disabling Hyper-V via Powershell
There is also another way to enable or disable Hyper-V in Windows 10. To do it, please run PowerShell as administrator and then type the following commands:
bcdedit /set hypervisorlaunchtype off (disable Hyper-V)

bcdedit /set hypervisorlaunchtype on (enable Hyper-V)
C. Disabling Hyper-V via GUI
- Press Windows key + R to open up a Run dialog box. Inside the text box, type ‘appwiz.cpl’ and press Enter to open up the Programs and Features menu.

Type appwiz.cpl and Press Enter to Open Installed Programs List - Once you’re inside the Programs and Files menu, use the menu on the left-hand side to click on Turn Windows features on or off.

Accessing the Windows features menu - When prompted by the UAC (User Account Control), click Yes to grant administrative privileges.
- From the insides of the Windows Features menu, expand the drop-down menu associated with the Hyper-V folder. Next, uncheck the box associated with Hyper-V Management tools and Hyper-V platform before clicking Ok to save the changes.
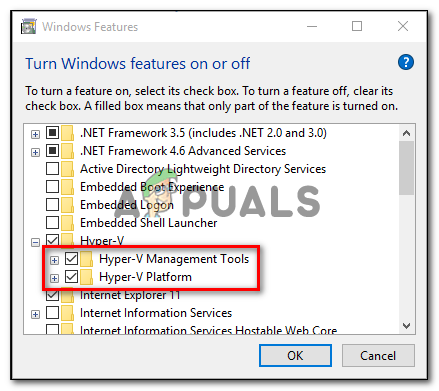
Disabling Hyper-V via the Windows Features screen - Once you manage to disable Hyper-V from the GUI menu, restart your computer and see if the issue is resolved at the next computer startup.
If you still end up seeing the “VMware and DeviceCredential Guard are not Compatible” error when launching WMware Player / WMware Workshatiaon or when trying to mount a virtual machine, move down to the next potential fix below.
Method 2: Disabling Virtualization Based Security
If you followed the instructions above and you already confirmed that you’re not actually dealing with a conflict between Hyper-V and Vmware, it’s possible that you’re seeing the “VMware and DeviceCredential Guard are not Compatible” error due to the fact that your machine is enforced with Virtualization Based Security -This is required with certain virtual machine types.
This Virtualization Based Security is enforced through a policy via the Local Group Policy Editor. But keep in mind that by default, this utility is only available for Windows 10 PRO and older PRO equivalents.
Note: If you have a Home version, you can manually install the gpedit utility on Windows 10 home.
If the Local Group Policy Editor (gpedit) is available on your Windows version and you want to deploy this potential fix, follow the instructions below (sub guide A) to disable Virtualization Based security on via it’s dedicated policy.
In case you’re using a Home version and you don’t want to side-load the Local Group Policy Editor, follow the second guide (sub guide B) to disable Virtualization Based Security via Registry Editor.
A. Disable Virtualization Based Security via Gpedit
- Press Windows key + R to open up a Run dialog box. Next, type ‘gpedit.msc’ inside the text box and press Enter to open up the Local Group Policy Editor.

Running the Local Group Policy Editor Note: When you are prompted by the UAC (User Account Control) window, click on Yes to grant admin access.
- Once you’re inside the Local Group Policy Editor, navigate to the following location using the menu on the left-hand side:
Computer Configuration - Administrative Templates - System - Device Guard
- After you get to this location, move over to the right-hand side menu and double-click on Turn on Virtualization Based Security.

Turning On Virtualization Based Security - Once you’re inside the settings menu of the Turn On Virtualization Based Security policy, set it’s a toggle to Disabled and click Ok to save the changes.
- Once this security has been enabled, restart your computer and see if the issue is resolved at the next computer startup.
B. Disable Virtualization Based Security via Registry Editor
- Press Windows key + R to open up a Run dialog box. Inside the text box type ‘regedit’ and press Enter to open up the Registry Editor. When prompted by the UAC (User Account Control), click Yes to grant admin access.

Running the Registry Editor - Once you’re inside the Registry Editor, use the left-hand menu to navigate to the following location:
HKEY_LOCAL_MACHINE\System\CurrentControlSet\Control\DeviceGuard
Note: You can either navigate here manually or you can paste the location directly into the navigation bar and press Enter to get there instantly.
- After you arrive at the correct location, move to the right-hand section, right-click on an empty space, and chose New > DWORD (32-bit) value from the newly appeared context menu.

Creating a new DWORD (32) bit value - Name the newly created DWORD to EnableVirtualizationBasedSecurity, then double-click on it and set the Base to Hexadecimal and the value to 0 in order to disable Virtualization Based Security.

Configuring the EnableVirtualizationBasedSecurity value - Hit Ok to save the changes, then close the Registry Editor and restart your computer to see if the problem is now fixed.
In case you’re still encountering the same problem even after you’ve enabled virtualization-based security, move down to the next potential fix below.
Method 3: Modifying the BCD File
As it turns out, this particular issue can also be caused by inconsistency with the BCD (Boot Configuration Data) that ends up interfering with the 3rd party virtualization technology. Several affected users that were having the same problem have reported that the issue was suddenly resolved after they ran a couple of commands in an elevated command prompt.
These commands will ensure that the remnant of Hyper-V is not conflicting with the virtualization technology that VMware uses. Here’s what you need to do:
- Press Windows key + R to open up a Run dialog box. Next, type ‘cmd’ inside the text box and press Ctrl + Shift + Enter to open up an elevated Command Prompt.
Running the Command Prompt Note: When you are prompted by the UAC (User Account Control), click Yes to grant administrative privileges.
- Once you’re inside the elevated Command Prompt window, type the following command in this exact order, and press Enter after each command to delete Hyper-V references from your BCD data:
bcdedit /set {0cb3b571-2f2e-4343-a879-d86a476d7215} path "\EFI\Microsoft\Boot\SecConfig.efi" bcdedit /set {bootmgr} bootsequence {0cb3b571-2f2e-4343-a879-d86a476d7215} bcdedit /set {0cb3b571-2f2e-4343-a879-d86a476d7215} loadoptions DISABLE-LSA-ISO,DISABLE-VBS bcdedit /set hypervisorlaunchtype off - Once every command has been processed successfully, restart your computer and see if the problem is now fixed.
In case you’re still seeing the same “VMware and DeviceCredential Guard are not Compatible” error, move down to the final fix below.
Method 4: Disabling Core Isolation
If none of the fixes above have worked for you, there is one final potential culprit that we haven’t taken care of until now. If you’re using Windows Defender, it’s possible that a security feature called Core Isolation is actually triggering the “VMware and DeviceCredential Guard are not Compatible” error.
Core isolation is essentially an extra layer of security that Windows Defender deploys in order to protect against sophisticated malware attacks that operate at a Kernel level.
Several affected users that followed through with the disablement of this security feature have confirmed that the problem went away entirely. But there is a disadvantage – you will be leaving your system exposed to some security exploits.
If you want to give this method a try, follow the first guide below (sub guide A) to disable Core isolation from the settings menu of Windows Security. If the Core isolation entry is greyed out, you can also do this via Registry Editor (sub guide B).
A. Disabling Core Isolation via GUI
- Open up a Run dialog box by pressing Windows key + R. Next, type ‘ms-settings:windowsdefender’ inside the text box and press Enter to open up the Windows Security tab (from Windows Defender) of the Settings app.
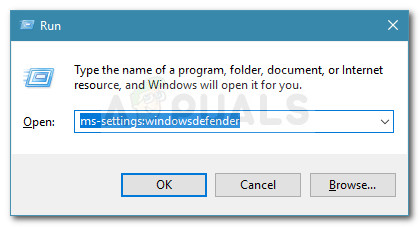
Run dialog: ms-settings:windowsdefender - Once you finally arrive inside the Windows Security menu, move over to the right-hand section and click on Device Security (under Protection areas).
- Next, scroll down through the list of available options and click on Core isolation details (under Core isolation).
- Once you’re finally inside the Core isolation menu, disable the toggle associated with Memory integrity (set to Off).
- After this modification is established, reboot your computer and see if the problem is fixed at the next computer startup by launching a virtual VMware machine once again.

B. Disabling Core Isolation via Registry Editor
- Press Windows key + R to open up a Run dialog box. Next, type ‘regedit‘ inside the dialog box and press Enter to open up the Registry Editor. When you’re prompted by the UAC (User Account Control), click Yes to grant admin access.

Running the Registry Editor - Once you manage to get inside the Registry Editor, use the left-hand menu to navigate to the following location:
Computer\HKEY_LOCAL_MACHINE\SYSTEM\CurrentControlSet\Control\DeviceGuard\Scenarios\CredentialGuard
Note: If you want to save yourself some time, you can paste the entire location directly into the navigation bar and press Enter to get there instantly.
- When you arrive at the correct location, turn your attention to the right-hand menu and double-click on the Enabled key.
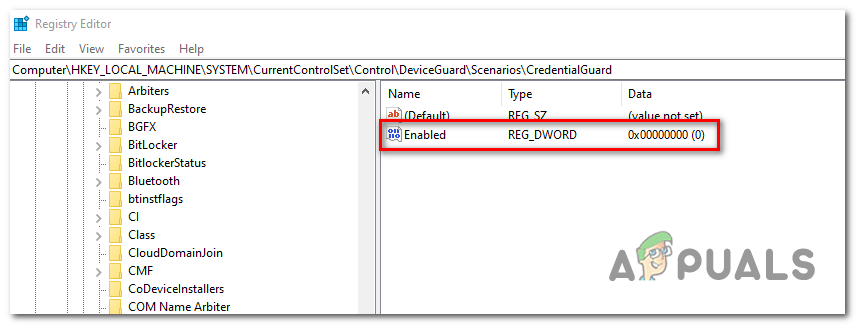
Accessing the Enabled key - Inside the Enabled value window, set the base to Hexadecimal and set the Value data to 0. Next, click Ok to save the changes.

Setting the value data of Enabled to 0 - Once this modification is enforced, restart your computer and see if the problem is fixed at the next system startup.


