How to Rotate the Screen on ChromeBook?
The OS (Chrome OS) present on ChromeBook will be familiar to anyone that has used macOS or Windows in the past. But when it comes to screen orientation, Chromebooks work very similarly to how Android devices work.

You might be looking for an easy way to rotate the screen on your Chrome OS, or you might have accidentally pressed some random keys and this caused your screen to swung out of order.
If any of these scenarios are applicable, this article will help. In what follows, we’ll show you two different ways of changing the orientation of your Chromebook screen:
- You can change the orientation of your Chrome OS screen by using the built-in shortcut.
- You can change the orientation of your Chrome OS screen from the Settings menu.
PRO TIP: At the bottom of the article, we’ve also included some steps that will show you how to rotate the screen of an external device connected to a Chromebook.
Keep in mind that when you change the orientation of your Chromebook, the trackpad will follow the orientation of the screen.
All of the methods presented below will help you achieve the same thing with small differences, so feel free to follow whichever method you feel more comfortable with.
Rotate Chromebook Screen using Shortcut
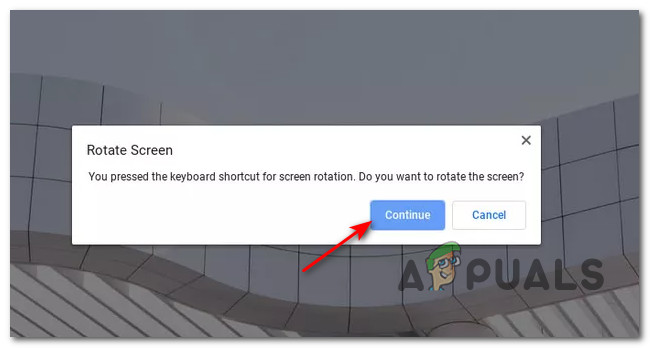
If you’re using it for the easiest and painless way of rotating your Chromebook screen, you should use the Ctrl + Shift + Refresh (F3) shortcut.
Upon pressing these buttons at the same time, you will be prompted by a pop-up – Only after clicking Continue on this pop-up, you will see your screen rotating by 90 degrees. You will only see this prompt the first time you attempt to rotate your screen via this shortcut.
Note: The only drawback of this method is that it will only the screen clockwise by 90 degrees. If you’re looking to finetune the orientation of your screen on Chromebook, move down to the next potential fix below.
If you use this shortcut, the custom screen orientation will be preserved even after you restart your Chromebook device (until you press the key combination again). The exception to this rule is if you’re using a 2-in-1 device that has Auto-Rotation enabled.
Important: You might be unable to use this shortcut if the Function key feature is disabled on your Chrome OS settings. To fix this issue, follow the instructions below:
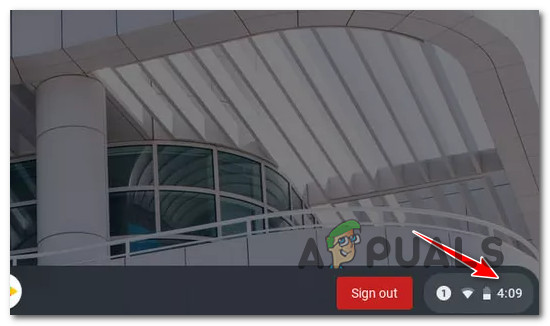
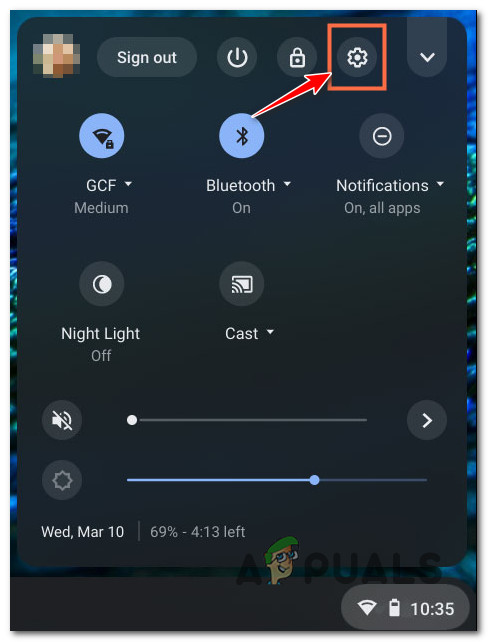
- Start by clicking on the System Clock (bottom-right corner), then click on the gear icon from the pop-up menu that just appeared.
Accessing the Settings screen - Once you’re inside the settings menu, click on Device from the tab on the left.
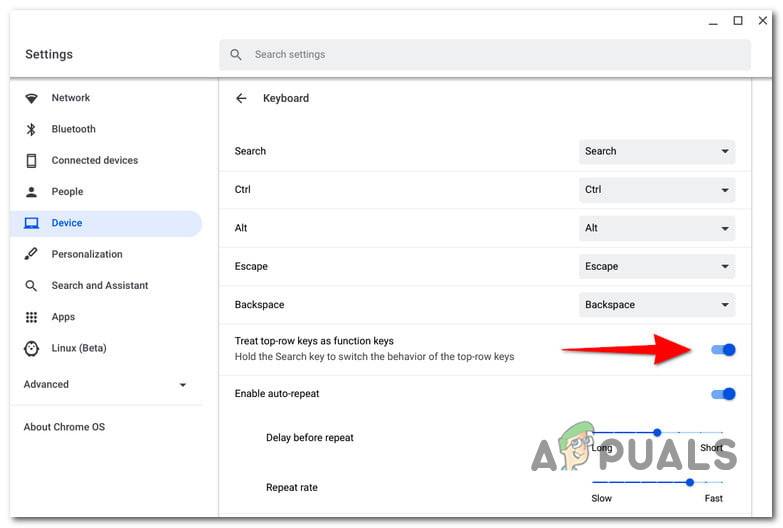
- Next, move over to the right-hand side tab and select Keyboard.
- From the collection of options under Keyboard, enable the toggle associated with Treat top-row keys as function keys.
Enable function keys on Chrome OS
Rotate screen from Chromebook’s Settings
This is the longer route out of the two, but also the one that gives you more control over the screen orientation of your Chrome OS. By using the Chromebook Settings menu, you can jump the screen orientation by 270 degrees without having to press any key combination.
This should be your preferred approach if you would like to set a screen orientation that you would like to use from now on.
If this scenario is applicable and you don’t mind taking the longer route, follow the instructions below:
- From the desktop screen of your Chromebook device, click on the clock (bottom-right corner).
- Next, from the action pop-up that just appeared, click on the gear icon to access the Settings menu.
Accessing the Settings screen on Chromebook - Once you’re inside the Settings screen, select Device from the vertical tab on the left, then move over to the right-hand menu and click on Display from the list of available options.
- Inside the Display cluster of options, use the drop-down menu associated with Orientation (under Built-in Display) to adjust the screen orientation according to your preferences.
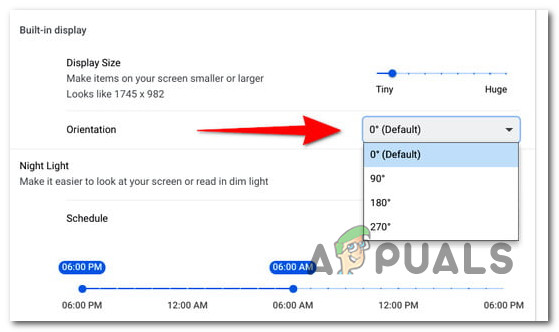
Adjusting the Chromebook screen orientation Note: You can choose from the Default (0°), 90°, 180° and 270°, but keep in mind that this menu will be inaccessible if you’re using a 2-in-1 Chromebook in Tablet Mode. In this case, you can make the menu accessible by disabling Auto-Rotation from the Chrome OS pop-up menu.
Rotate the Screen of an External Display Connected to Chromebook
If you have a second display hooked up to your Chromebook device, Chrome OS also gives you the option to change the orientation of your secondary devices.
Pro Tip: You can also use the Ctrl + Shift + Refresh (F3) shortcut to change the screen orientation of your secondary display, but your Chromebook cursor must be on the display you want to change the orientation of.
In case you want more control when rotating the screen of your external display, follow the instructions below to learn how to do it from the Settings screen:
- On the desktop screen of your Chromebook, click on the clock button to bring up the action menu of Chrome OS.
- From the context menu that just appeared, click or tap on the gear (Settings icon).
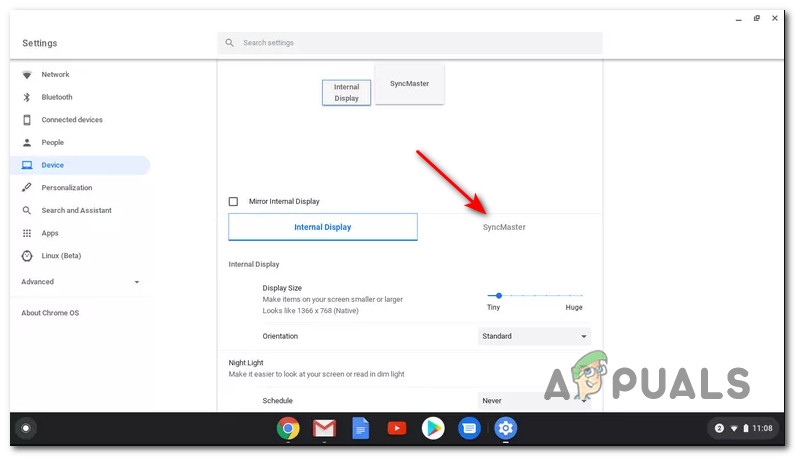
Accessing the Settings screen on Chromebook - Once you’re inside the Settings menu, use the menu on the left to click on Devices, then select Displays from the menu on the right.
- Inside the Display tab, select your external display by clicking or tapping on the dedicated button.
Accessing the external display options - Finally, use the drop-down menu associated with Orientation to rotate the screen according to your own preferences.
Adjusting the Chromebook screen orientation