Fix: DHCP Lookup Failed in Chromebook
The “DHCP lookup failed” error on a Chromebook stops network access because the device can’t get an IP address from the DHCP server. This usually happens due to wrong network settings, outdated Chrome OS versions, or certain router setups.
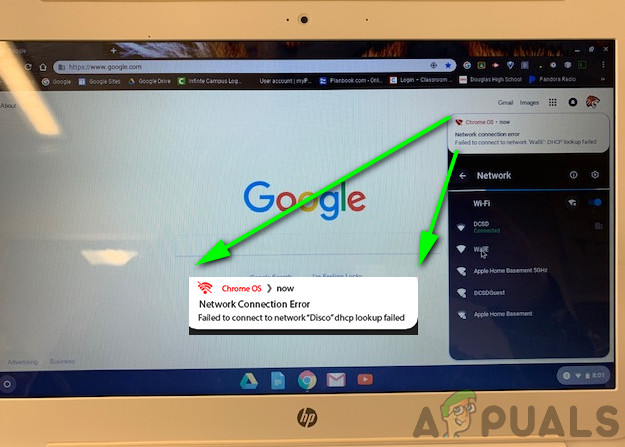
Other factors like network congestion, firewall restrictions, or Wi-Fi channel conflicts can also cause this issue.
In this article, we will discuss different ways to solve this error.
1. Restart Your Networking Equipment and Chrome
Turning your networking equipment and Chromebook off and on again can fix the “DHCP lookup failed” error by establishing a new connection and resolving IP address issues.
- Completely Shut Down your Chromebook (not just sleep mode).
- Turn off your modem/router and unplug it from the power source.
- Wait 30 seconds, then plug everything back in and power on the router/modem.
- Ensure the modem/router’s lights have stabilized.
- Switch on the Chromebook and connect it to the Wi-Fi to verify if the error is resolved.
2. Change the Sleep Settings of Chromebook
Changing your Chromebook’s sleep settings stops it from disconnecting when idle, helping to avoid DHCP issues. This reduces IP conflicts and network problems after sleep, supporting a stable connection.
- Open the Quick Settings panel on your Chromebook.
- Click the Power icon.
- Set When Idle to Turn off Display but Stay Awake.
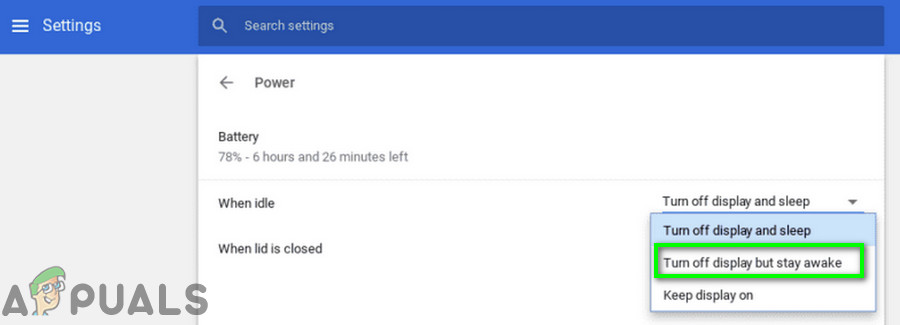
Turn Off Display But Stay Awake - Set When Lid is Closed to Stay Awake.

Select the Option of Stay Awake - Exit settings, then restart your Chromebook and connect to the network to check if the error is resolved.
Note: Do note that this will prevent your Chromebook from completely sleeping when you close the lid. Only the screen will turn off. This is a workaround, not a fix.
3. Reconnect to the Wi-Fi Network
Disconnecting and reconnecting to the Wi-Fi network makes the Chromebook request a new IP address from the DHCP server. This reset can fix temporary connectivity issues or conflicts that caused the DHCP lookup to fail.
- In the bottom right corner of the screen, click the Wi-Fi icon, then click the name of the network.
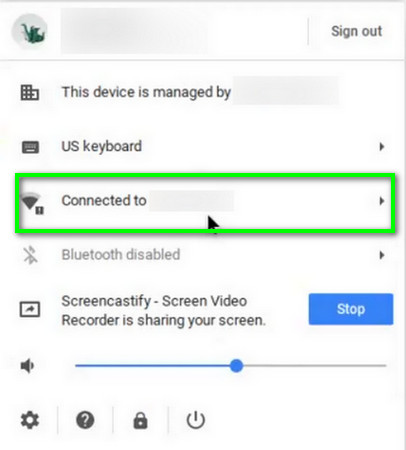
Click on the Name of the Network - Click the gear icon to open the Network Settings window.
- Click on Wi-Fi.

Click on Wi-Fi - Disconnect from the network (if connected), then click the right arrow of the network you want to forget.
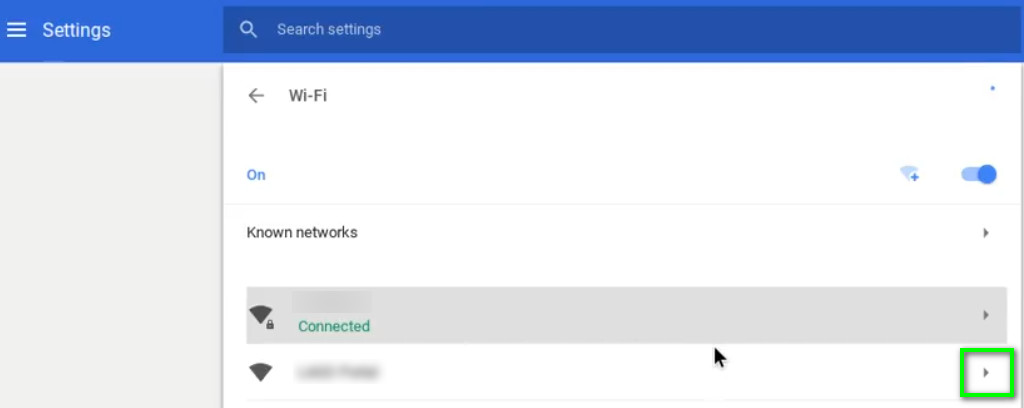
Click on the Right Arrow of the Network - Click the Forget button.

Click on the Forget Button - Restart your device, then connect to the network to see if it is working correctly.
4. Use Google Name Servers for the Network
Using Google’s name servers can help your Chromebook connect better by avoiding issues with your network’s settings. This change provides a faster, more stable connection, reducing “DHCP lookup failed” errors.
- Open the Settings of your Chromebook.
- Under Network, click on Wi-Fi.
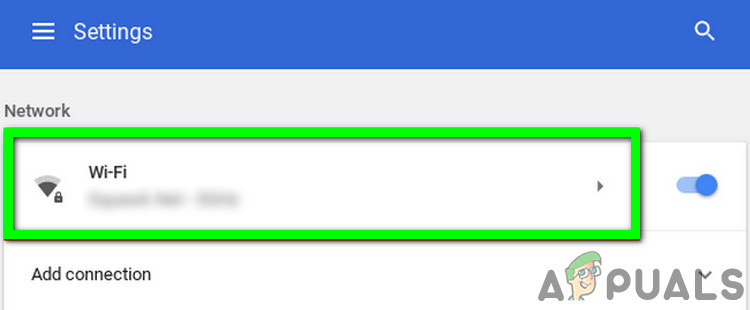
Click on Wi-Fi Option - Click on the right-arrow of the problematic network.
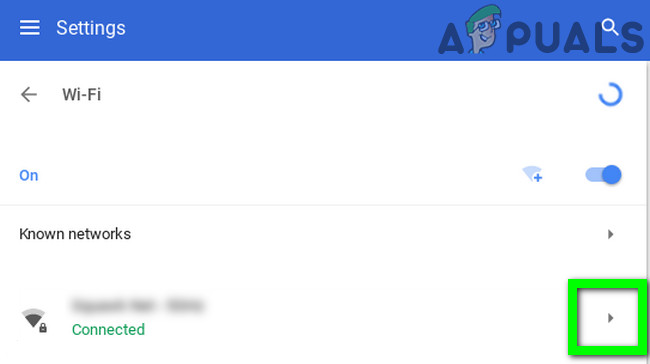
Click on the Right Arrow of the Network - Scroll down and open the dropdown for “Name Servers.”
- Select “Google Name Servers.”
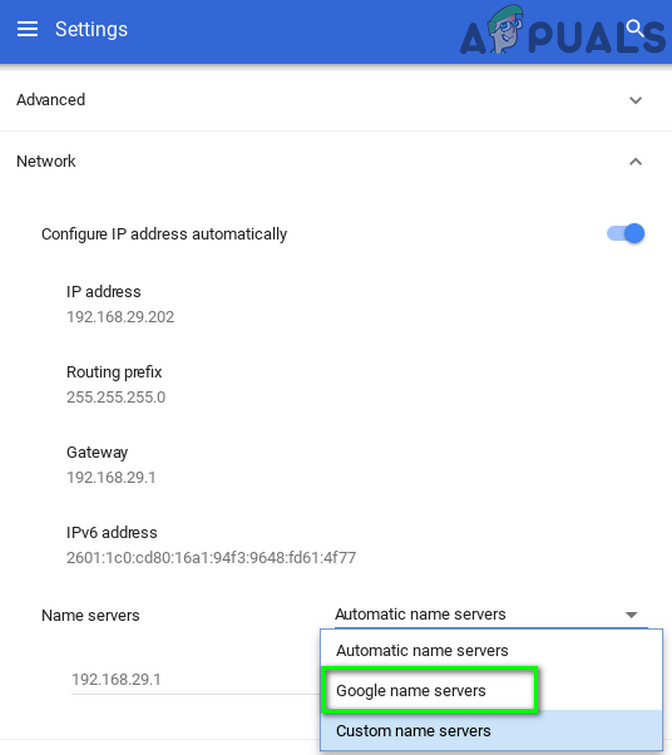
Use Google Name Servers - Connect to the network and check if the DHCP issue is resolved.
- If not, restart your system, repeat the process, and in the network settings, select “Automatic Name Servers” (where Google Name Servers were chosen previously).
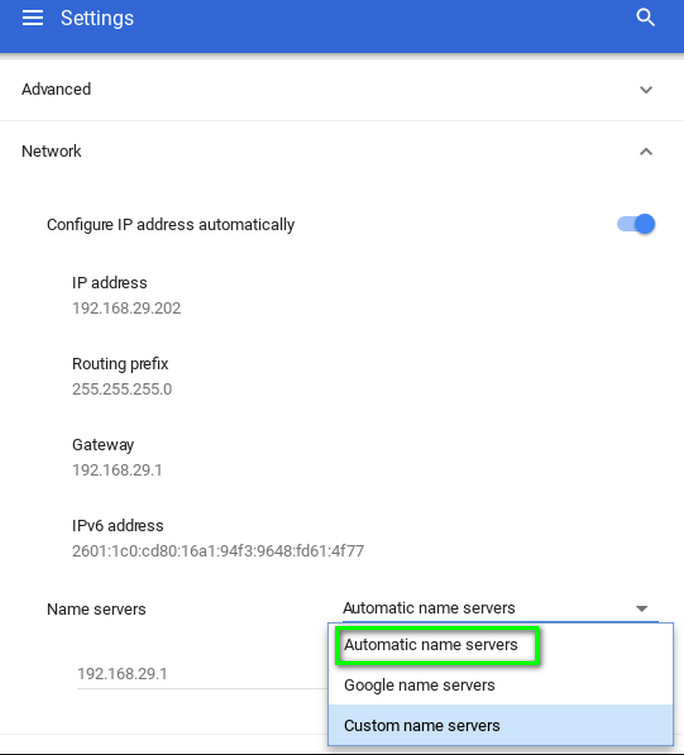
Use Automatic Name Servers - Connect to the network again and check if the Chromebook is clear of the error.
- If not, open the Network Settings of your connection and disable the option “Configure IP Address Automatically.”
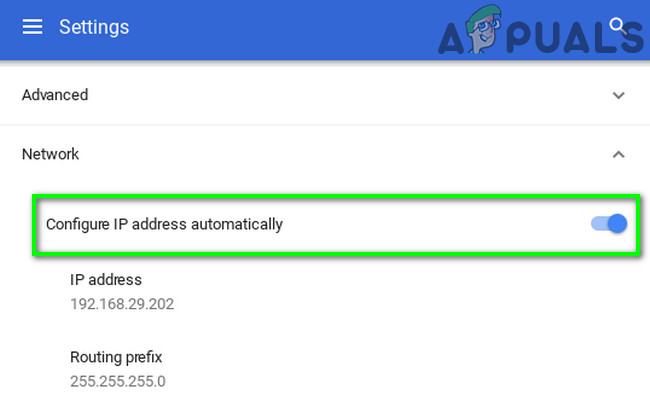
Disable Automatic IP Address - Set a manual IP address for your device according to the IP scheme and restart the Chromebook.
- Upon restart, check if your device is free of the DHCP error.
5. Extend the DHCP Range of Addresses of the Network
Increasing the DHCP range offers more IP addresses, helping all devices connect without running out. This reduces connectivity issues, ensuring each device gets a unique IP for a stable connection.
- Open your router’s web portal in a browser and log in using your credentials.
- Navigate to the DHCP tab of the settings.
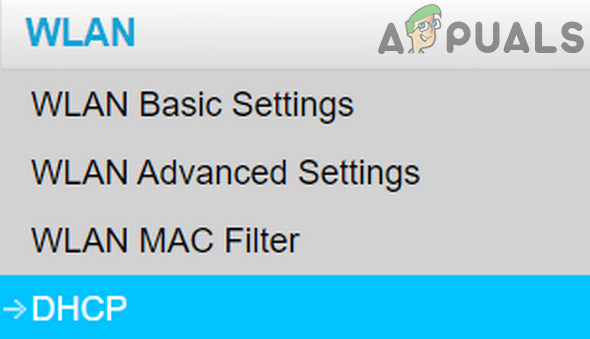
Open DHCP Tab in the Router’s Settings - Increase the DHCP IP range. For example, if the upper range is 192.168.1.200, increase it to 192.168.1.253. Some routers also allow you to specify the number of devices that can connect to the Wi-Fi network.
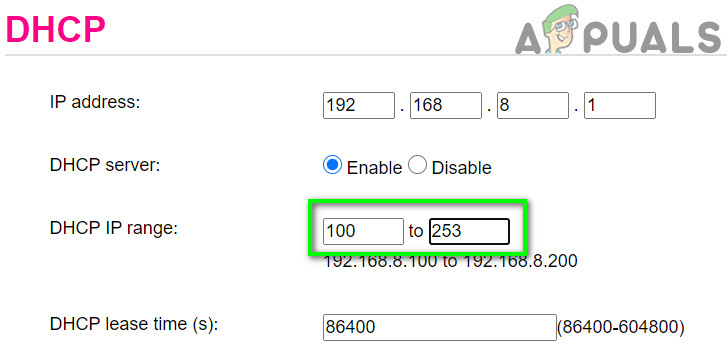
Increase IP Range in the DHCP Settings - Save your changes and exit the portal.
- Try to connect to the network to see if it is free of the DHCP failed error.
6. Change the Frequency Band of Your Wi-Fi Network
Changing your Wi-Fi network’s frequency band can improve connectivity on your Chromebook. The 2.4 GHz band is crowded and slower, while the 5 GHz band offers less interference and faster, more stable connections, which can help keep the network running smoothly.
- Open your router’s web portal and log in with your credentials.
- Navigate to the Wireless settings tab.
- Change the band: if 2.4 GHz is selected, switch to 5 GHz, and vice versa.
- Save your changes and exit the portal.
- Restart your system and connect to the network to see if it is operating normally.
7. Update Chrome OS of Your Chromebook
Sometimes, updating your Chromebook’s OS is all it takes to improve network stability, with important fixes and improvements for smoother connectivity. This simple step can resolve hidden issues and ensure a more reliable Wi-Fi experience.
- Connect your device to the internet using an ethernet cable or Wi-Fi.
- Open the Settings of your Chromebook.
- In the left pane, click on About Chrome OS.
- Click on Check for Updates.
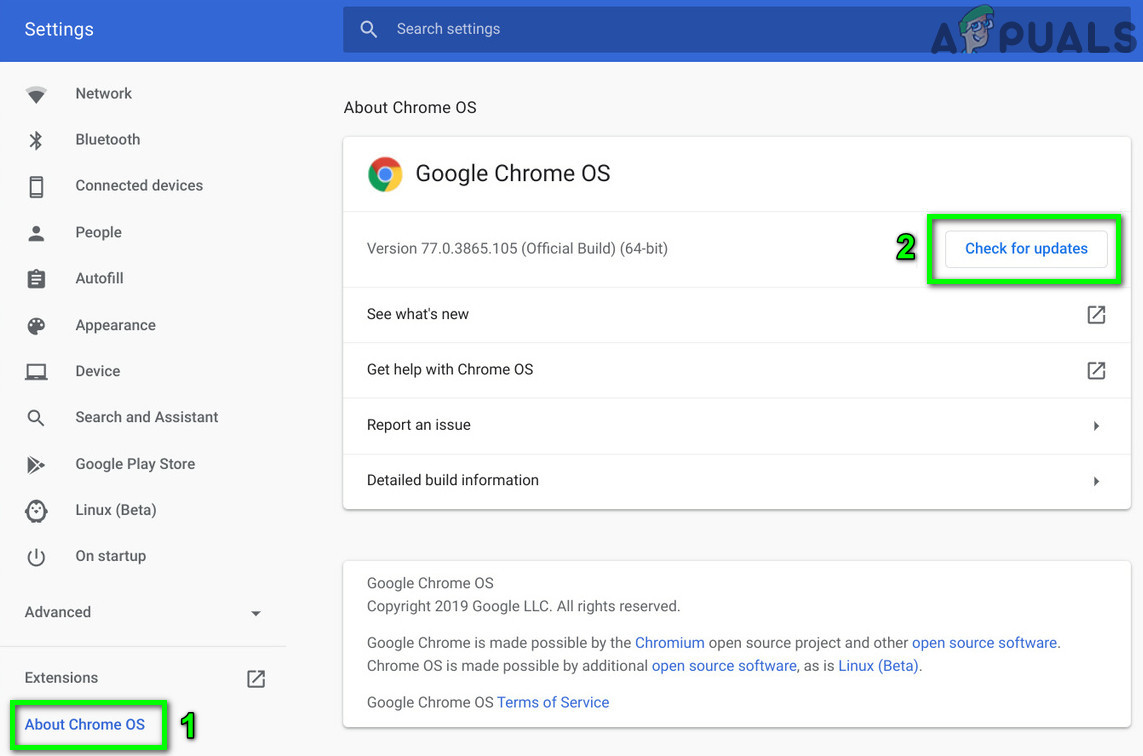
Check for Update of Chromebook - After updating the OS, restart your device.
- Try to connect to the network and check if the device is free of the error.
8. Reset Your Router/Modem to Default Settings
This issue can be caused by wrong settings in your router or modem, stopping your Chromebook from getting an IP address. Resetting the device to default settings removes any problems, restoring stable configurations for a smoother DHCP process.
- Power on your router/modem if it is not already on.
- Find the Reset button, typically on the bottom or back of the device.
- Press the reset button for at least 30 seconds. You may need something like a paperclip.
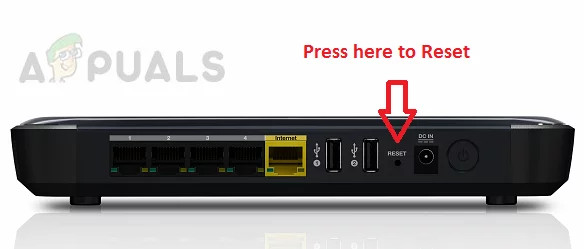
Reset Your Router - Release the button and wait for the router to reset and fully power on, which usually takes 30 to 60 seconds.
- If there is no reset button, check your device’s manual to see if the power button can be used to reset the device.
You can also use the web portal of your device to perform the reset operation of your device
- Open a web browser and enter the default gateway address (find it using IPConfig in Command Prompt or on the router’s back).
- Enter your credentials to access the web portal (default login and password are ‘admin’).
- Locate the reset option in the General or System tab. Click on Reset Settings (or Restore Defaults) and confirm to reset. Wait for the reset process to finish.

Restore Your Router to Default Settings - After resetting, restart your system and connect to the network to see if the DHCP error is resolved.


