How to Root Bluestacks on Windows Easily?
In Android, rooting is a process to gain administrative privileges on the phone and have access to the Android system files. This allows the user to perform different operations (that a normal user cannot like changing the boot animation etc.) and install applications that require root access (like Wi-Fi sniffer). As one of the top Android Emulators, there is always a requirement from some advanced users to root the BlueStacks application.
There can be many methods both, automatic or manual to root BlueStacks, but we will try to use a simple approach so that a common user can follow the instructions.
Warning:
Proceed at your own risk as rooting BlueStacks can cause it to become unstable and it may fail to launch. Also, it may harm data or your system. Moreover, in some cases, third-party applications are used, which are generally safe but may harm your system/data. Additionally, rooted BlueStacks can be used for some illegal activities, so, proceed with extreme caution and stay within the legal boundaries.
Create a New BlueStacks Instance
As you are going to try to root the BlueStacks, this comes with some risks, and trying it on a BlueStacks installation that has some essential data on it, may render the installation useless. In such a case, creating a new BlueStacks instance in the BlueStacks Multi-instance Manager will be a safe approach.
- Launch the BlueStacks Multi-Instance Manager and click New Instance (near the bottom right).
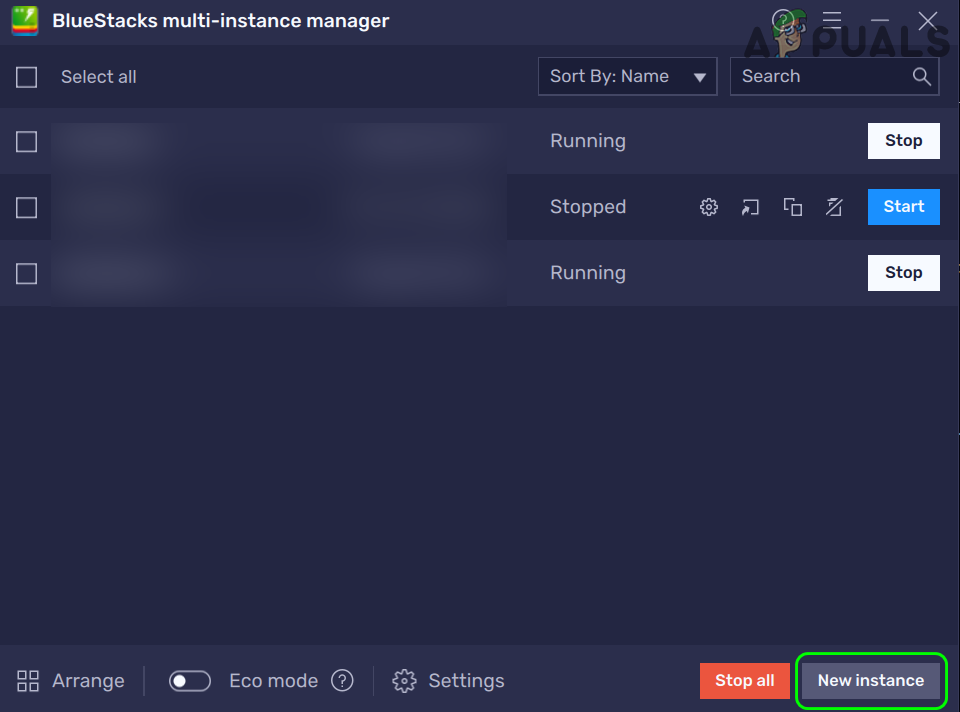
Click on New Instance in BlueStacks Multi-Instance Manager - Now select Fresh Instance and choose an Android version but it will be better to select Nougat 32-bit (the default BlueStacks installation at the time of writing this article).
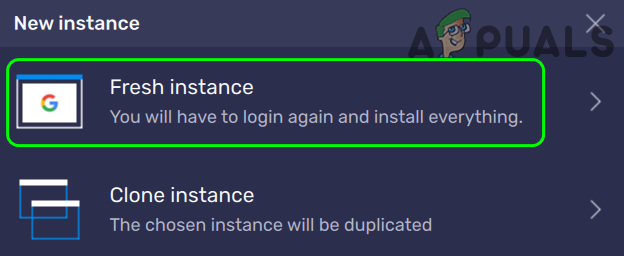
Select Fresh Instance in the BlueStacks New Instance Window - Then click Next and set the CPU Cores dropdown box to at least Medium (2 Cores).
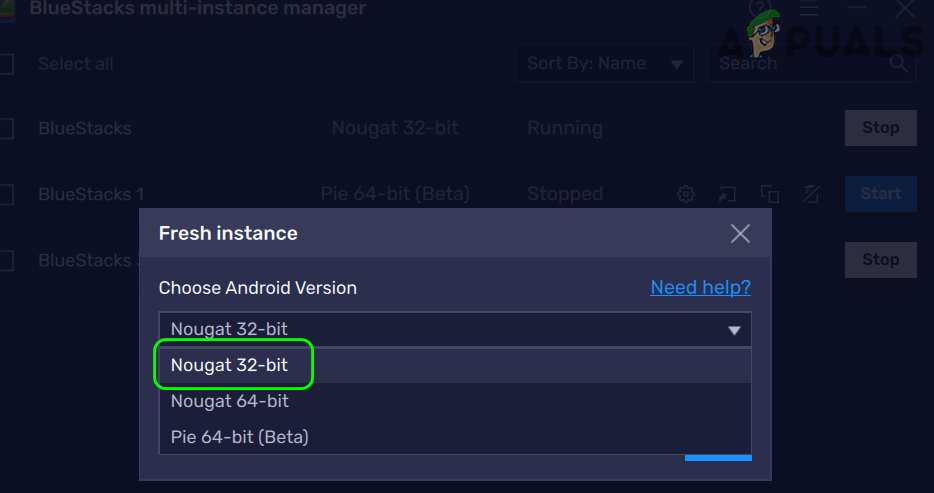
Select the Android Version of Nougat 32-Bit in the BlueStacks Fresh Instance Window - Now set the RAM dropdown to Medium 2GB and leave other options on the default values.
- Then click on the Create button and wait till the BlueStacks instance is created.
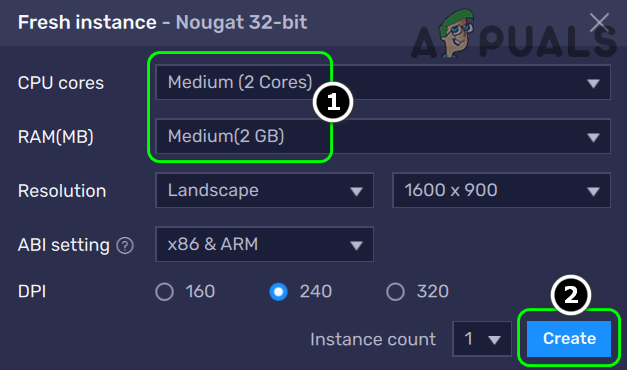
Create a New BlueStacks Instance with 2 Cores and 2 GB RAM - Now in the Multi-Instance Manager, select the newly created instance and click on Start.
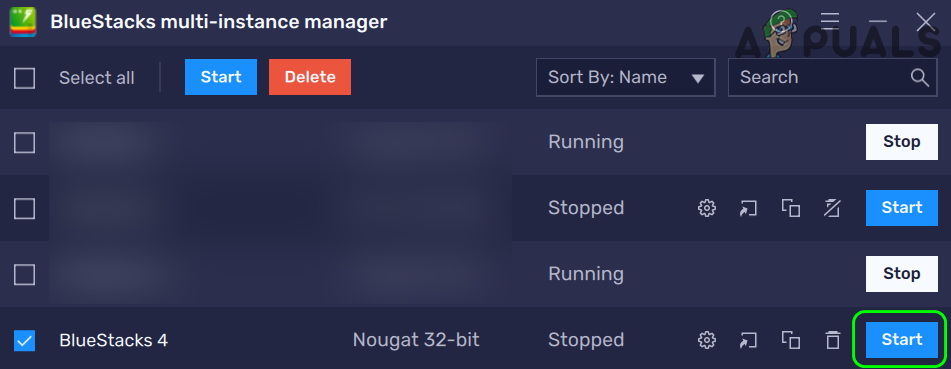
Start the Newly Created BlueStacks Instance from the BlueStacks Multi-Instance Manager - Then, sign into the Play Store and then you can go ahead with the rooting process as discussed below.
Install a Root Checking Application from the Google Play Store
Whichever method is used to Root BlueStacks, you may need a root checking app to confirm if the process was successful.
- Launch the Google Play Store in BlueStacks and search for Root Check.
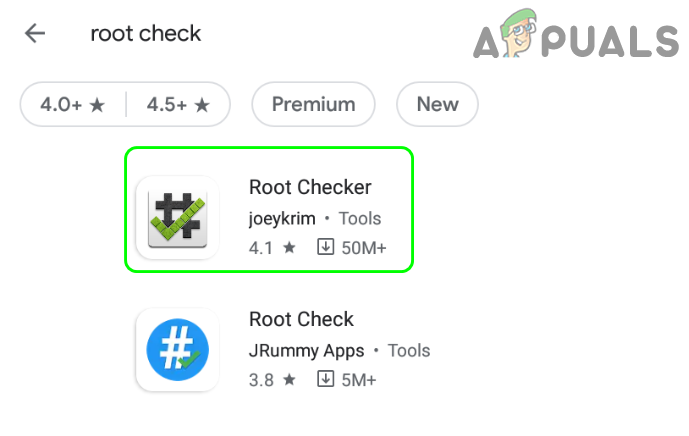
Install Root Checker from the Google Play Store - Now open Root Checker (or any other application of your choice) and click Install.
- Then launch Root Checker and click on Agree (if you accept the T&Cs).
- Now click on Get Started and under Verify Root Status, click on Verify Root.
- Then you will be shown that the device is not rooted. Do not worry, when the BlueStacks installation is rooted, it will say the device is rooted.
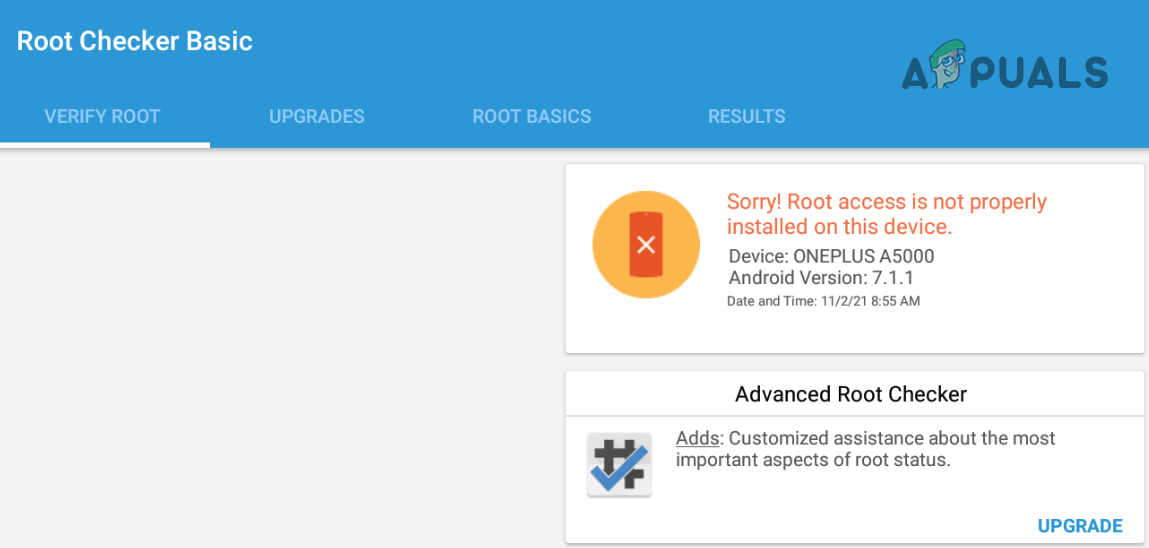
The Root is Not Properly Installed
Method 1: Root BlueStacks by Editing its Configuration File
This method is probably the easiest one as nothing has to be downloaded and installed. Also, the user will be using the tools he is quite familiar with.
- Firstly, close BlueStacks, and in case of a version less than 5, make sure to exit BlueStacks from the system’s tray.
- Then right-click Windows and select Run.
Open the Run Command Box from the Quick Access Menu - Now navigate to the installation path of BlueStacks, usually, the following (some users might have to enable viewing of hidden and protected operating system files):
%programdata%
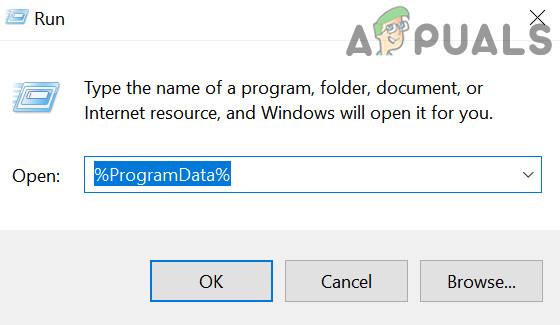
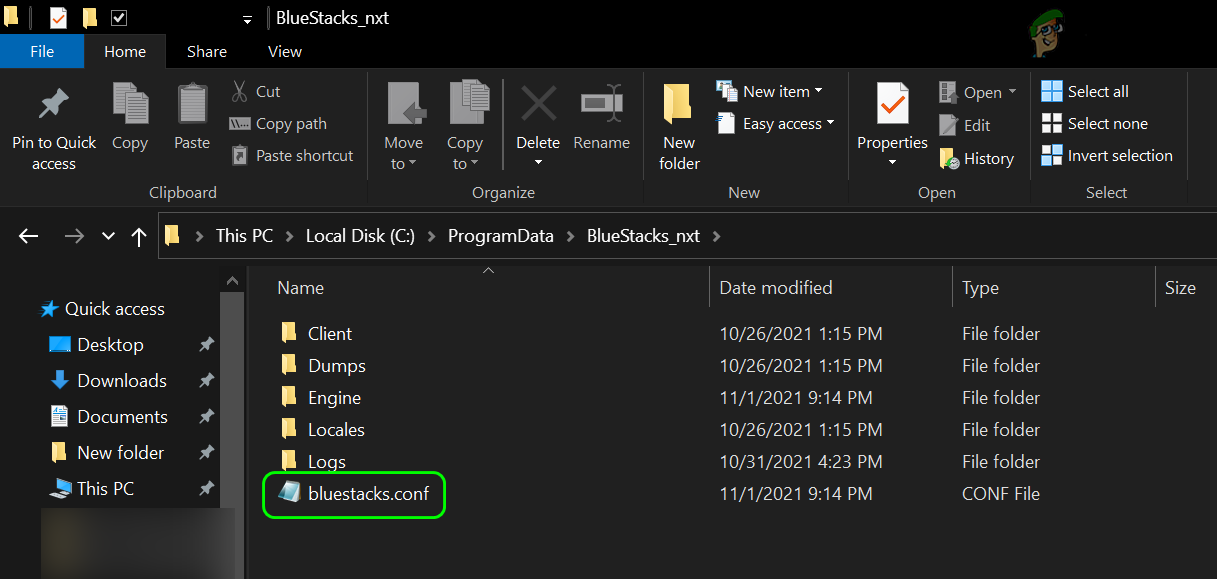
Open the ProgramData Folder Through the Run Command Box - Now open the BlueStacks or BlueStacks_nxt folder and right-click on the Bluestacks.config file.

Open the BlueStacks_NXT Folder in the ProgramData Directory - Then select Open With and expand More Apps.
- Now select Notepad and when the Notepad window is shown, expand Edit and select Find.
Open the BlueStacks.config File with the Notepad - Then search for root and change the value of bst.feature.rooting to 1.
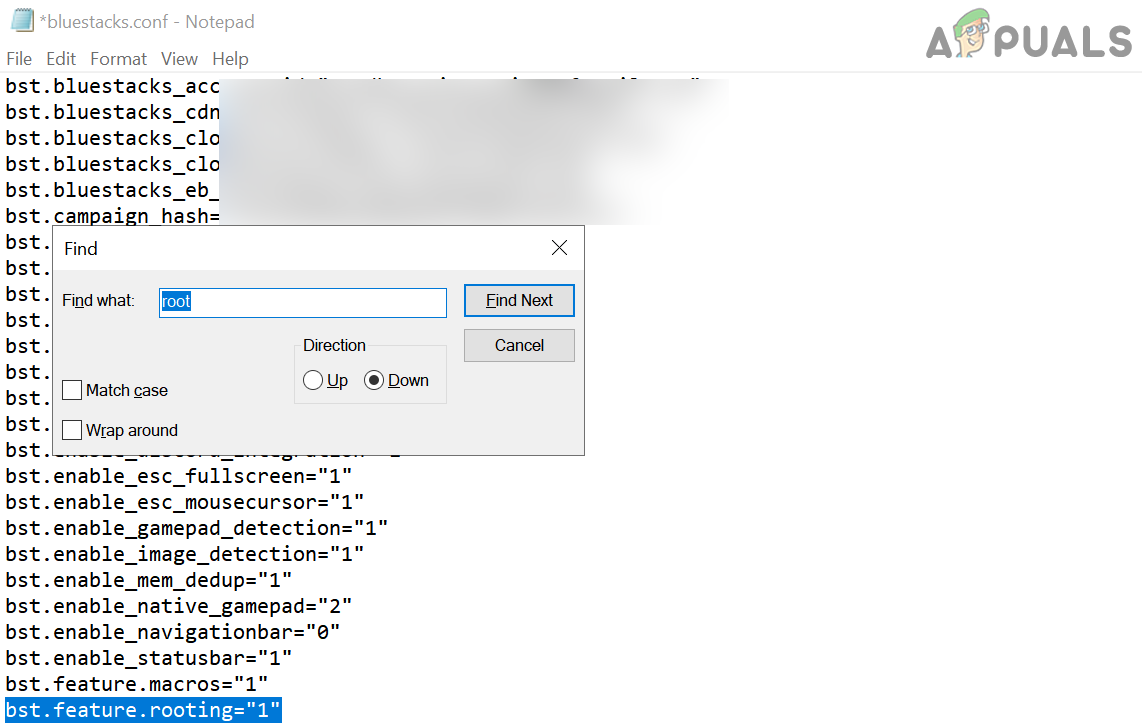
Set the bst.feature.rooting Value to 1 - Again, search for root and change the value of bst.instance.Nougat32.enable_root_access to 1.
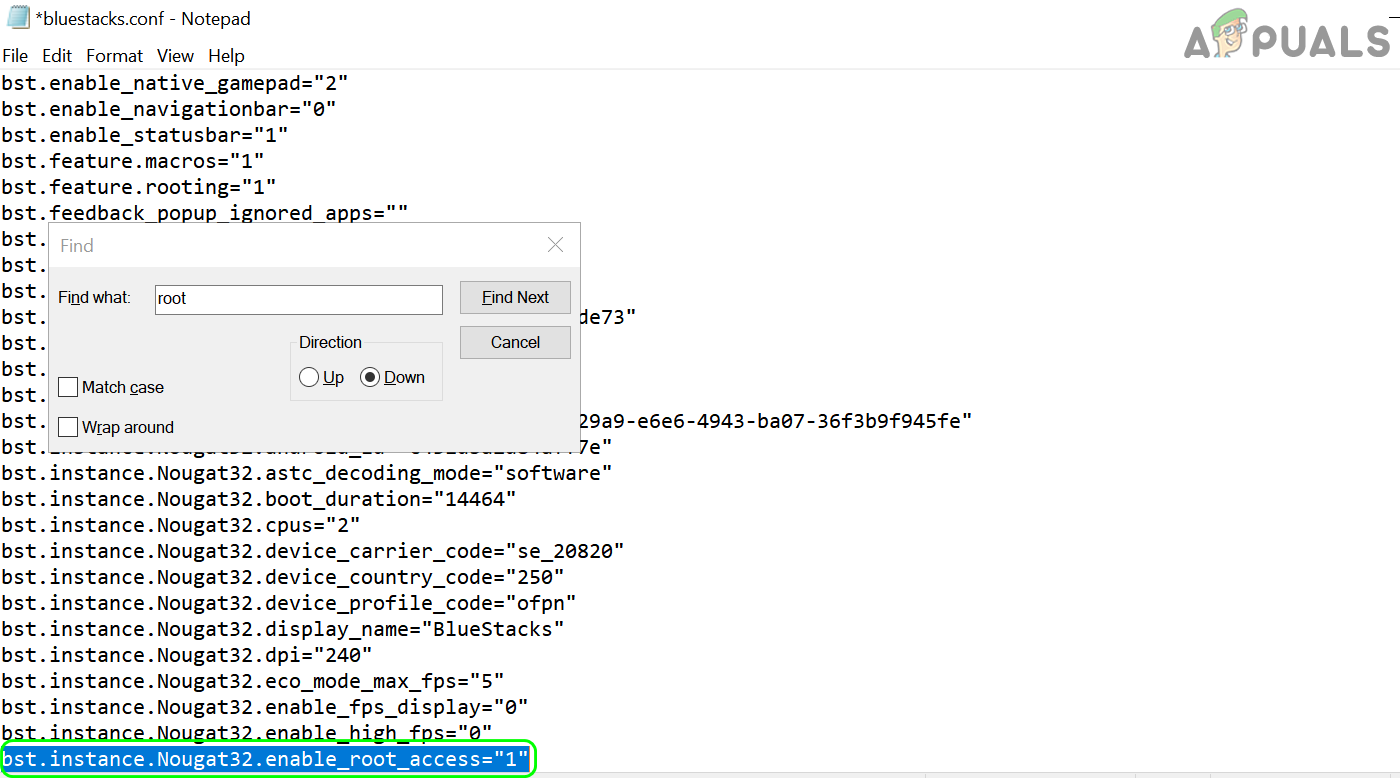
Set the Value of bst.instance.Nougat32.enable_root_access to 1 - If you have more than one instance of BlueStacks, change the value of all the values related to root to 1 from 0.
- Now save your changes and launch BlueStacks.
- Once booted, launch the Root Checker application and click on Verify Root.
- Hopefully, it will show a successful root message.
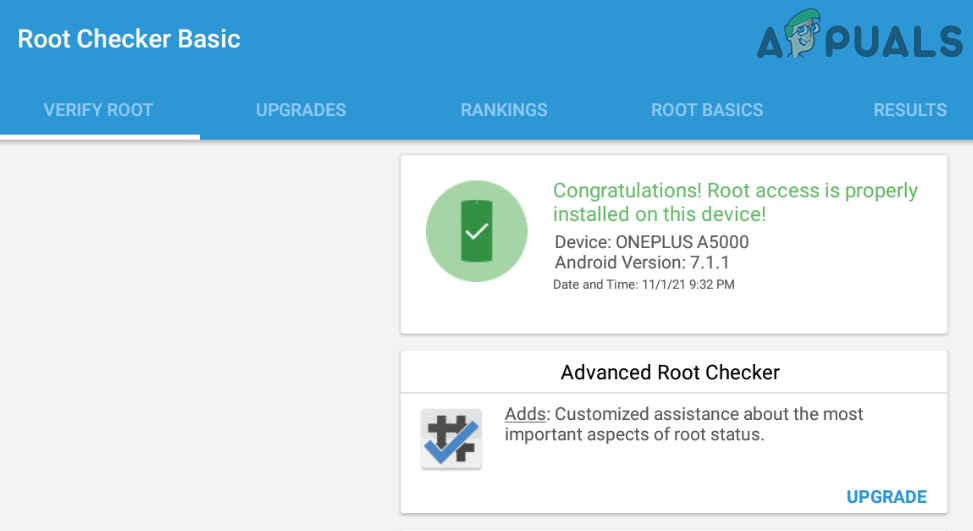
Root Checker Basic is Showing BlueStacks is Rooted
Once the BlueStacks are rooted, you can try startup managers, custom animations, script managers, etc. (e.g., System Tools Android app) to customize the BlueStacks installation. For best uses, you may search the web for the best apps for rooted Android.
Method 2: Root BlueStacks by One Click Root Applications
For many users, who just want to use root privileges for just a single app, the method discussed above will suffice. If you do not want to edit the Config file, then you may use a one-click rooting application like OneClickRoot or KingRoot. That process is very simple, so, we are not discussing it deeply.
- Download APK files of any of the one-click root apps like King Root or OneClickRoot from their websites and install the APK file in BlueStacks.
- Then launch the installed app and use the on-screen instructions to Root BlueStacks.
Method 3: Use the BS Tweaker Application to Root BlueStacks
For some of the advanced users, especially those users who need SuperSU, the above methods may not fulfill their requirements, although, the root may work, the installation of the SuperSU binary might require some extensive tweaking. The SuperSU can manually be installed but that will require quite a work, even for some experienced folks. If you are interested in manually installing SuperSU, then you may look into the XDA-developer forum post for more details. But there are other tools like the BS Tweaker that make this process very easy. Keep in mind SuperSU manages the root permissions for the apps by showing the user a prompt to either permit the root access for an application or not.
Install the BS Tweaker Application
- Launch a web browser and navigate to the BS Tweaker website.
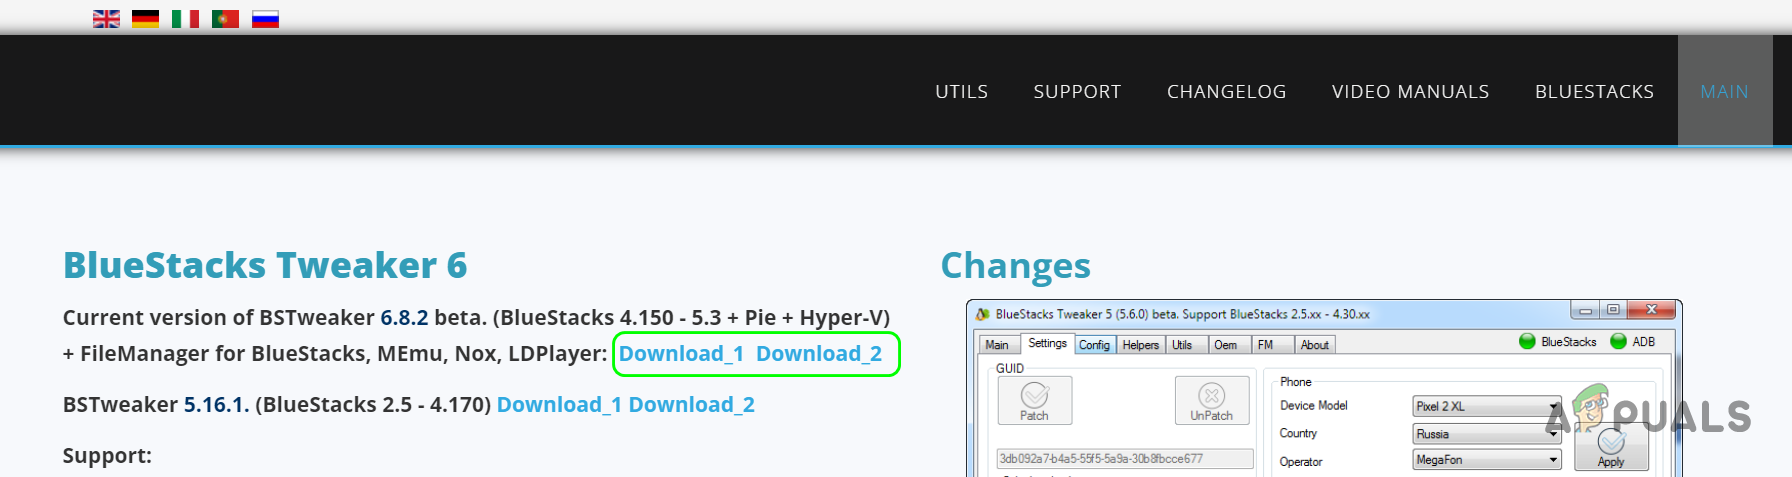
Download BS Tweaker - Now download the latest version of BS Tweaker and once downloaded, extract the downloaded zip.
- Then open the extracted zip folder and right-click on BlueStacksTweaker.exe.
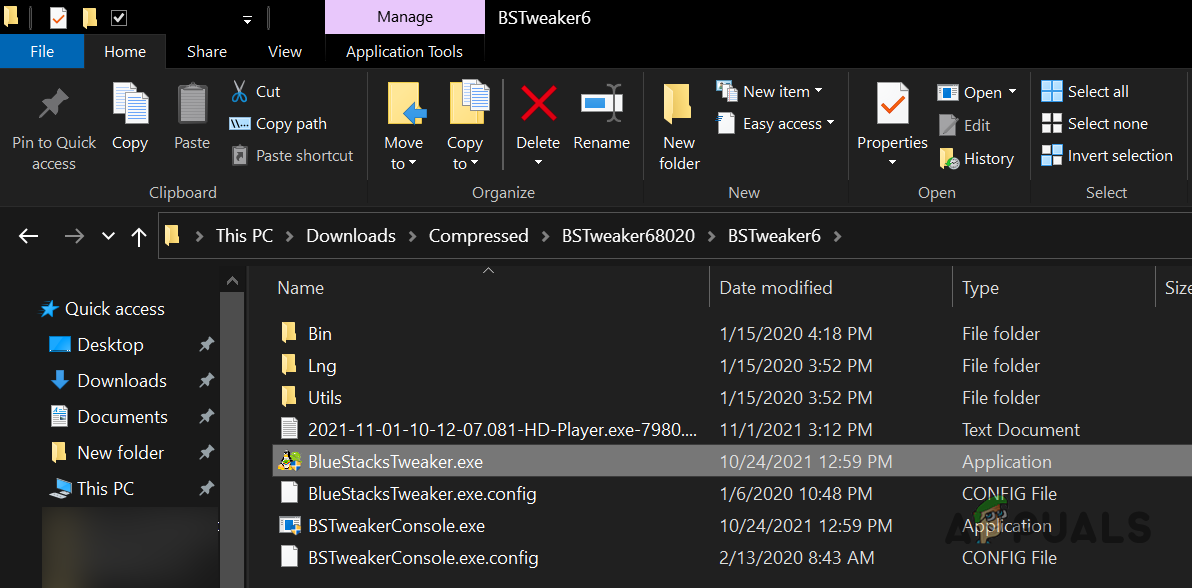
Open the BlueStackTweaker.exe as Administrator - Now select Run as Administrator and click Yes, if a UAC prompt is received.
Install the Root Checker Pro Application
The Root Checker Basic may work with the above methods, but for the BS Tweaker, the user may have to use Root Checker Pro.
- Now, at the right bottom of the BS Tweaker, click on the BS Tweaker website URL.
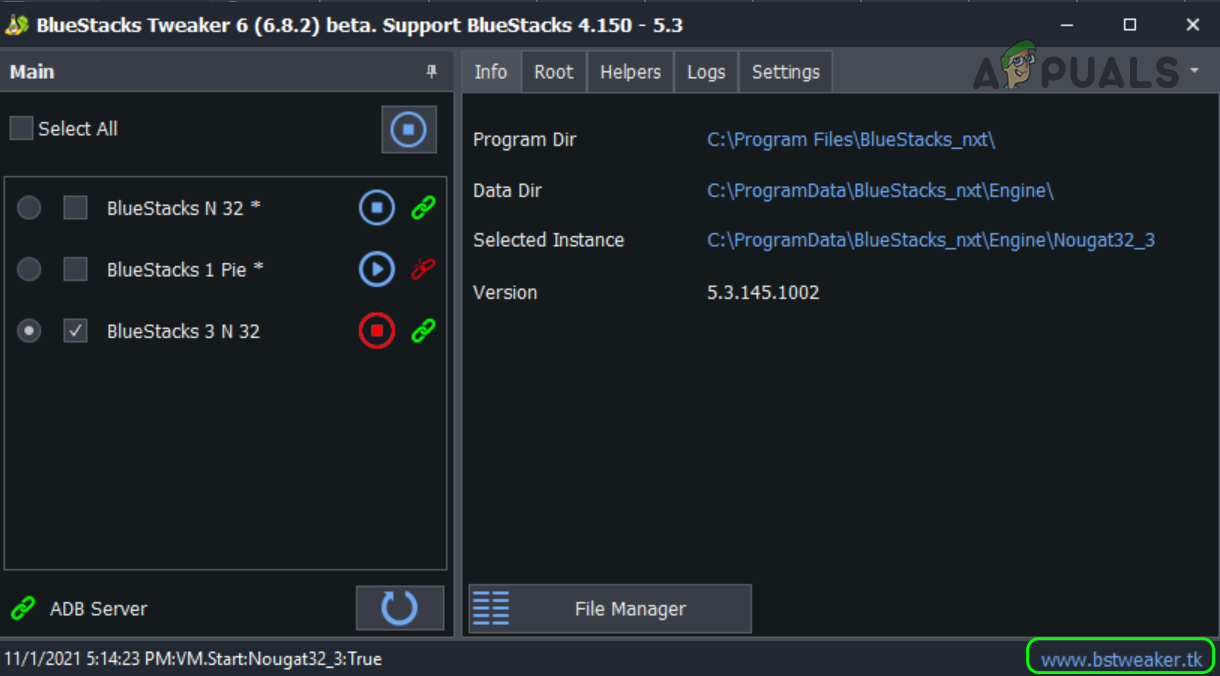
Open the BS Tweaker Website - A new browser window will open and the BS Tweaker website will be shown.
- Then, in the top bar, click on Utils, and under Manage and Check Root section, in front of Root Checker Pro, click on Download.
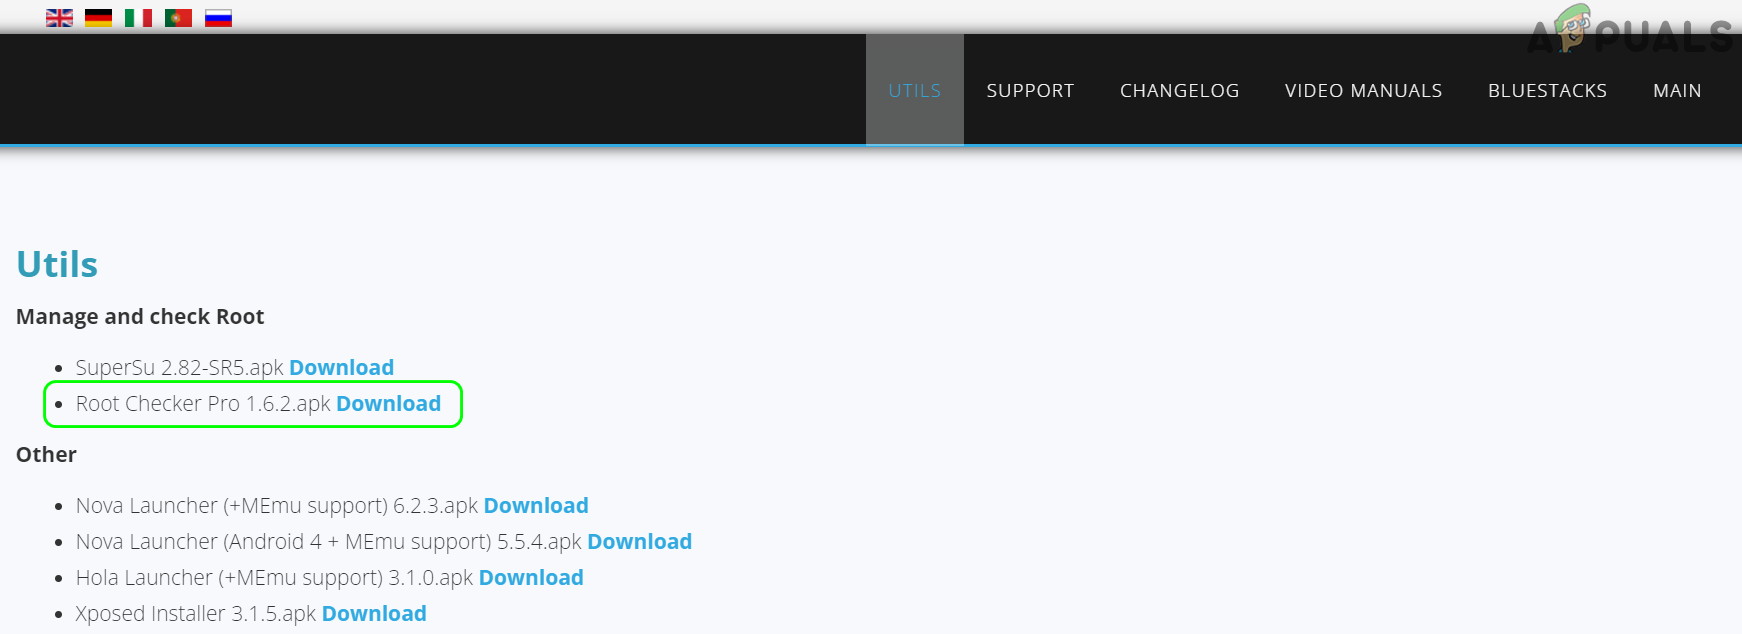
Download the Root Checker Pro from the BS Tweaker Website - Now save the file on your desktop and switch to the BlueStacks instance window.
- Then click on the Install APK button in the right bar. You may also use try the shortcut key combination of Ctrl + Shift + B.

Click on the Install APK Icon in BlueStacks - Now double-click Root Checker Pro and wait till the Root Checker Pro icon is shown in BlueStacks. Do not launch the Root Check Pro application yet.
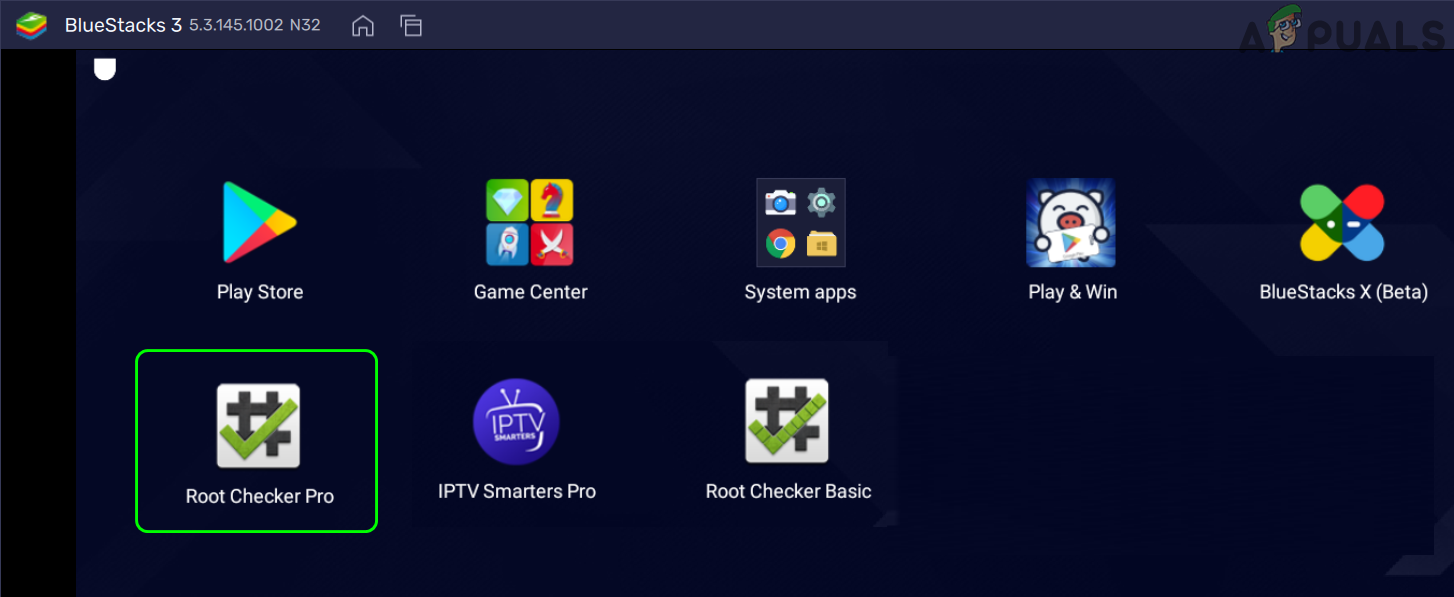
Root Checker Pro is Installed on BlueStacks
Root BlueStacks by Using the BS Tweaker Application
- Afterward, switch to the BS Tweaker window and click on the stop button in front of the BlueStacks instance (if started) that you want to root.
- Then, in the left pane of the BS Tweaker, select the BlueStacks instance that you want to root by selecting the relevant checkbox.
- Now, in the right pane, head to the Root tab and click on the Unlock button.
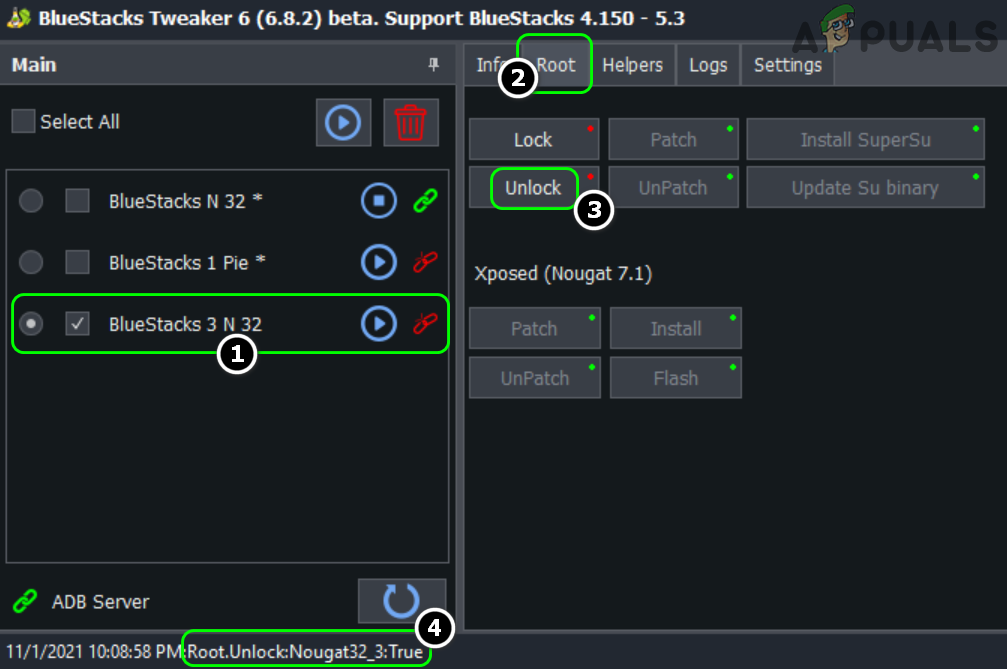
Unlock the BlueStacks Instance - Then confirm the warning and wait till the bottom bar shows the instance name with unlocking true message.
- Afterward, start the BlueStacks instance by clicking the Play button and wait till the BlueStacks instance is launched.
Install and Update the SuperSu Binary
- Now, switch to the BS Tweaker window and click on Install SuperSU.
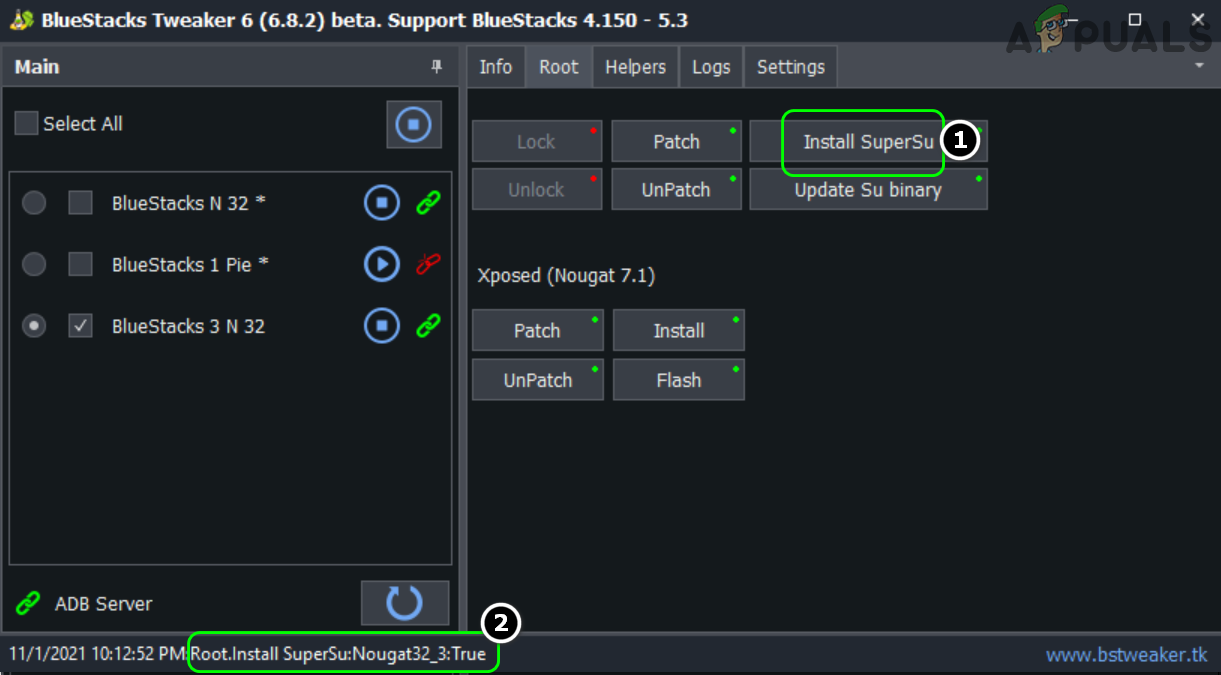
Install SuperSu on BlueStacks - Then switch to the BlueStack window and wait till the SuperSU app icon is shown on the window but do not launch it.
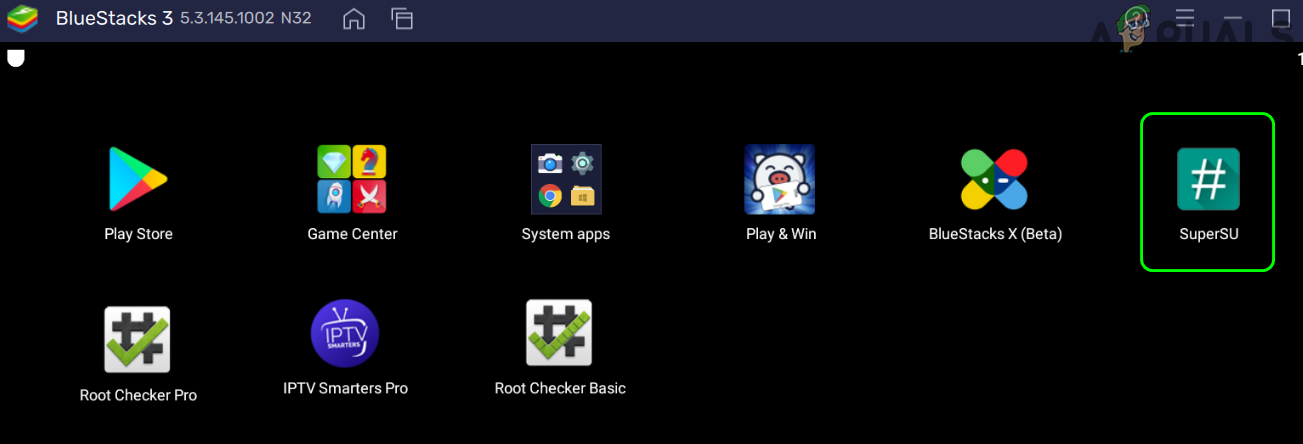
SuperSU Icon is Shown in BlueStacks - Now, switch back to the BS Tweaker window and check the lower status bar for a message stating the installation of SuperSu is true.
- Then click on Update SU Binary and wait till the status bar shows the Updates SU Binary is true. The BlueStacks instance might close automatically.
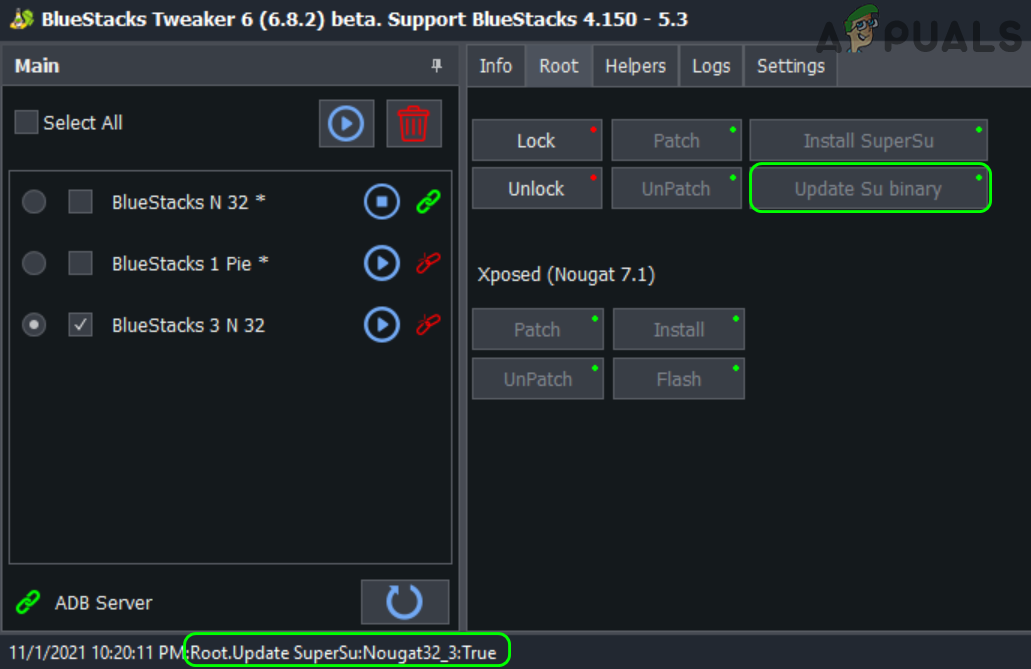
Update SU Binary Through the BS Tweaker - Again, click on the Play button in front of the BlueStacks instance being rooted and let it completely boot.
Verify BlueStacks Rooting by Using the Root Check Pro
- Now, in the BlueStacks window, launch the Root Checker Pro and accept the agreement (if agreed to).
- Now click on Verify Root and if asked to, accept to Grant the root permissions to the Root Checker Pro.
- Then hopefully, the BlueStacks instance is completely rooted status will be shown

Root Checker Pro Shows Successful Root
Update the SuperSU Through the Latest APK
- Now, switch to the BS Tweaker window and click on the BS Tweaker URL near the bottom right.
- Then, on the Tweaker website, head to the Utils tab and download the latest SuperSu APK file.
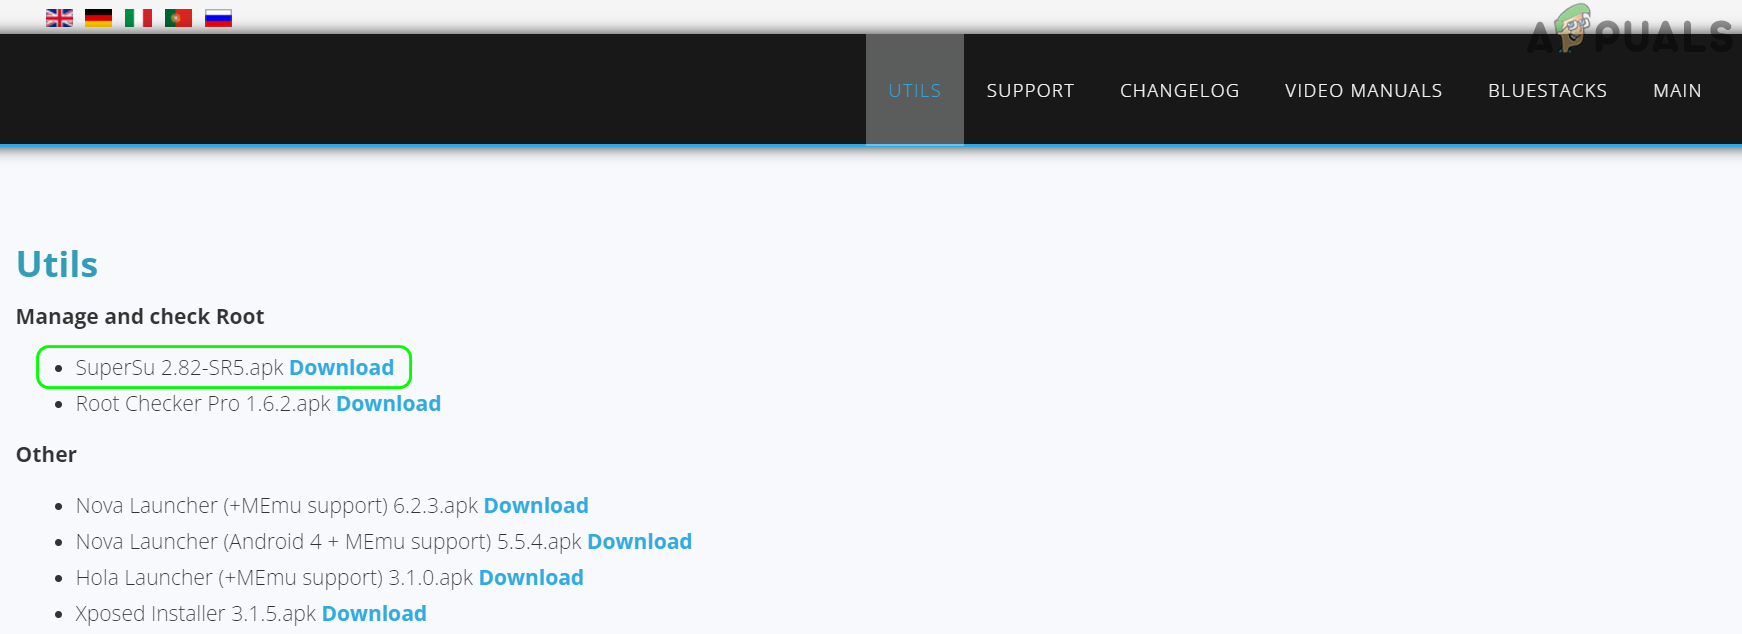
Download SuperSU from the BS Tweaker Website - Now save the file on your desktop and switch to the BlueStacks window.
- Then click on the Install APK icon in the right bar and double-click on SuperSU APK.
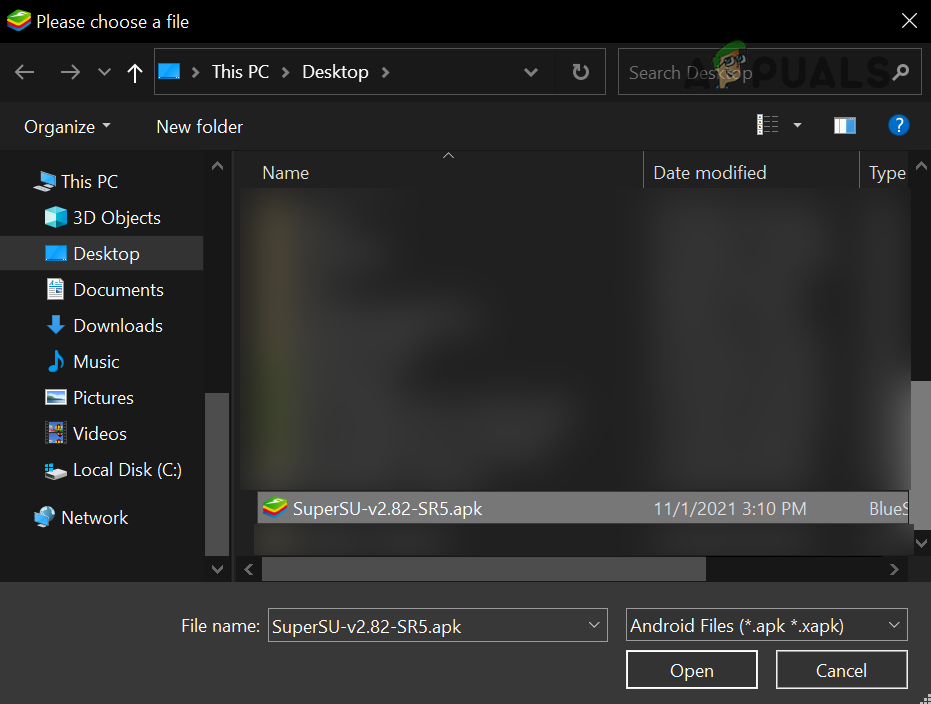
Install SuperSU in BlueStacks - Now click on the SuperSU icon on the Home screen if it asks to be updated, click Continue.
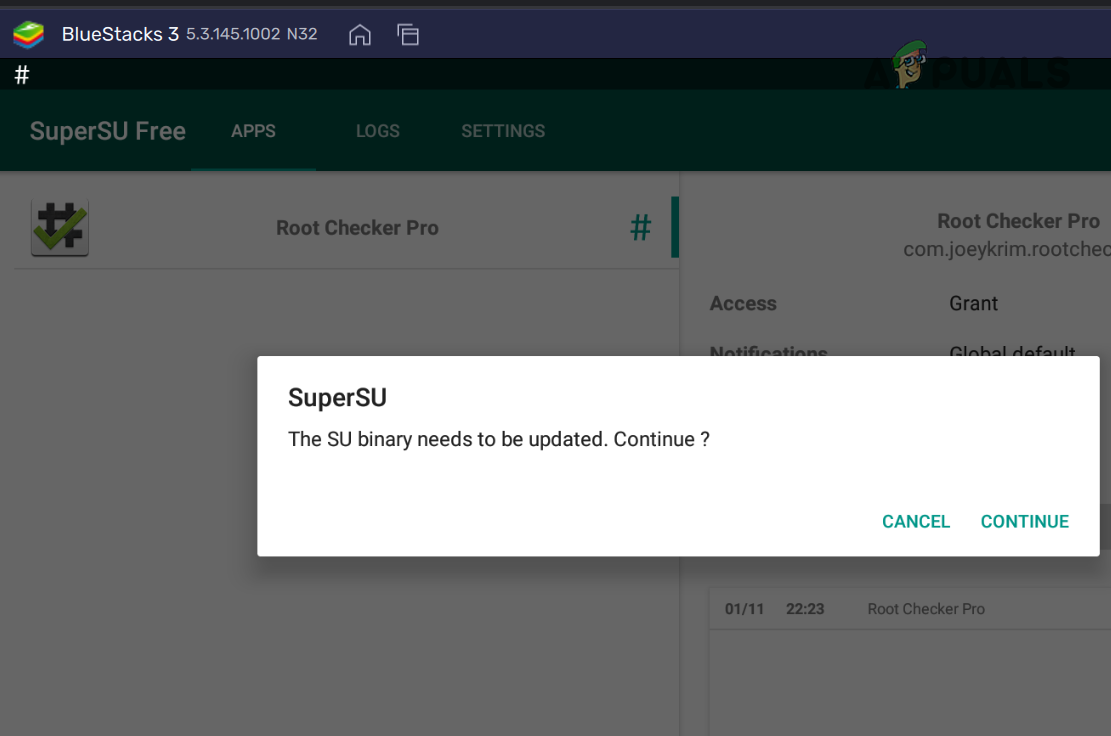
Click Continue to Update SuperSU Binary - Then select Normal (if using non-custom ROM) and when the SuperSU app is updated, click OK.
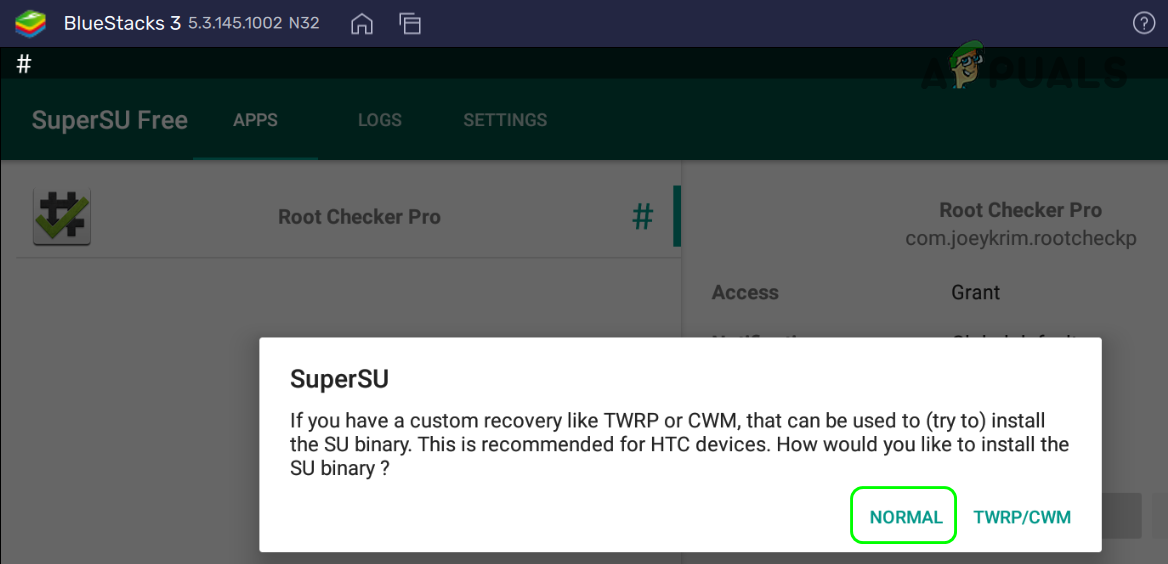
Install Normal SuperSU Binary - Then select Reboot and wait till the BlueStackks instance is closed.
- Now initialize the BlueStacks instance from the BS Tweaker window.
- Once the BlueStacks instance is launched, open the SuperSU application and check its different settings.
Install the Xposed Framework
The Xposed Framework provides a user with different modules that can give a user a lot of utilities to customize the Android and BlueStacks.
- Switch to the BS Tweakers application and start the BlueStacks instance that was rooted earlier.
- Now, select the BlueStacks instance in BS Tweaker and head to the Root tab.
- Then, in the Xposed section, click on Patch and wait till the status bar shows the Xposed patch is true.

Patch Xposed in BlueStacks - Now click on Install and wait till the status bar shows the Xposed installed message.
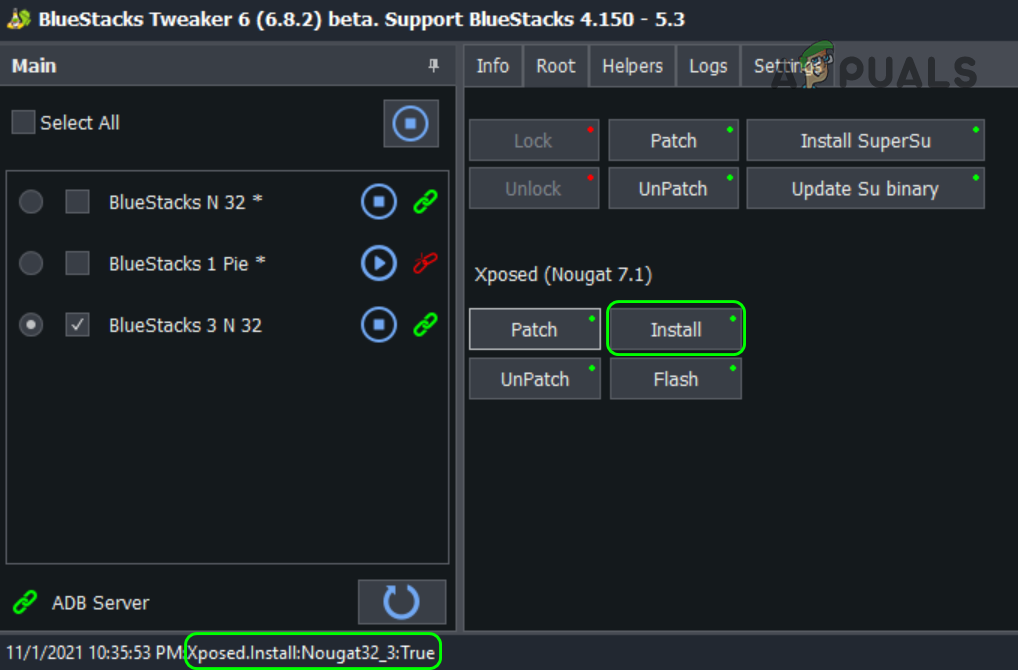
Install Xposed in BlueStacks - Then click on Flash and wait till the Xposed flash True message is shown.
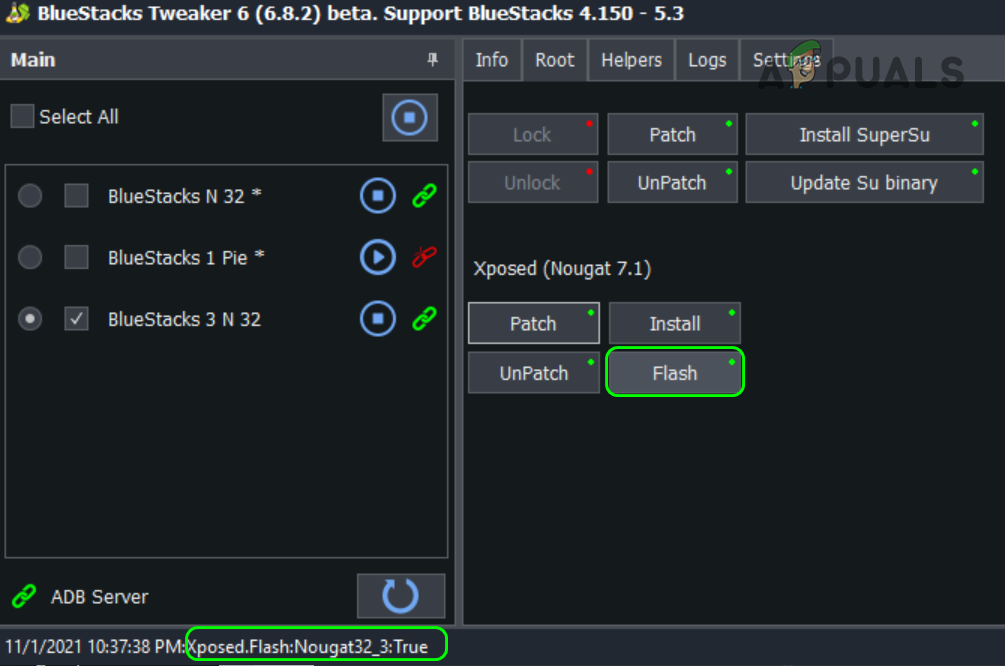
Flash Xposed in BlueStacks - Now switch to the BlueStacks window and hopefully, you will note the Xposed Installer icon but do not launch it.
- Then close the BlueStacks instance and afterward, launch it from the BS Tweaker application.
Use the Xposed Installer to Take Advantage of Rooted BlueStacks
- Once the BlueStacks instance is launched, open Xposed Installer and click OK on the warning dialogue box.
- Now make sure the Xposed Status is set to Xposed Framework is active.
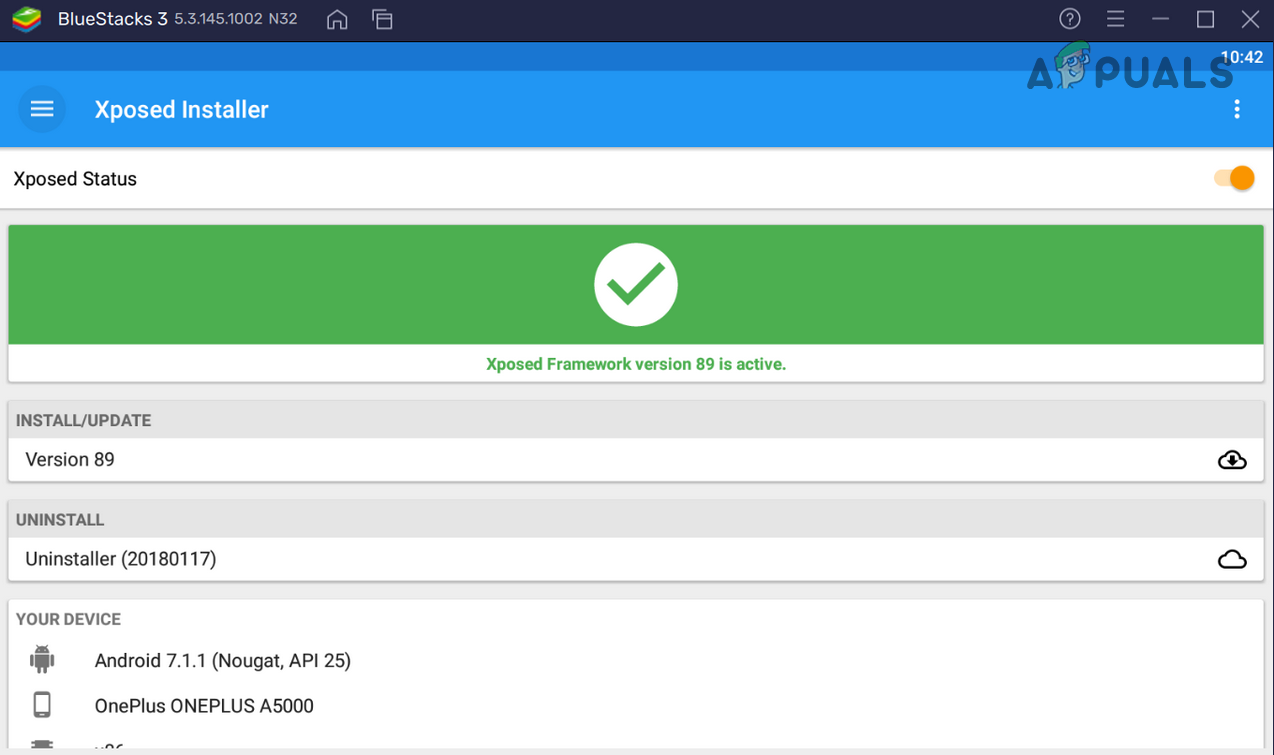
Xposed Status is Active - Then click on the hamburger menu in the top left and select Download.
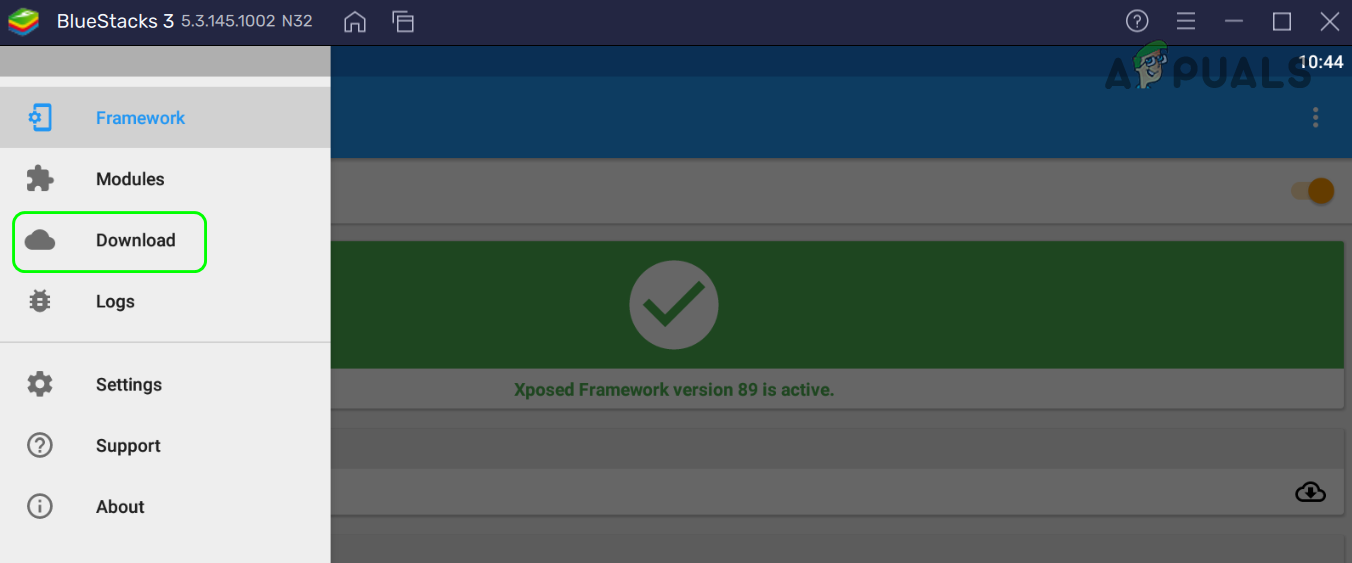
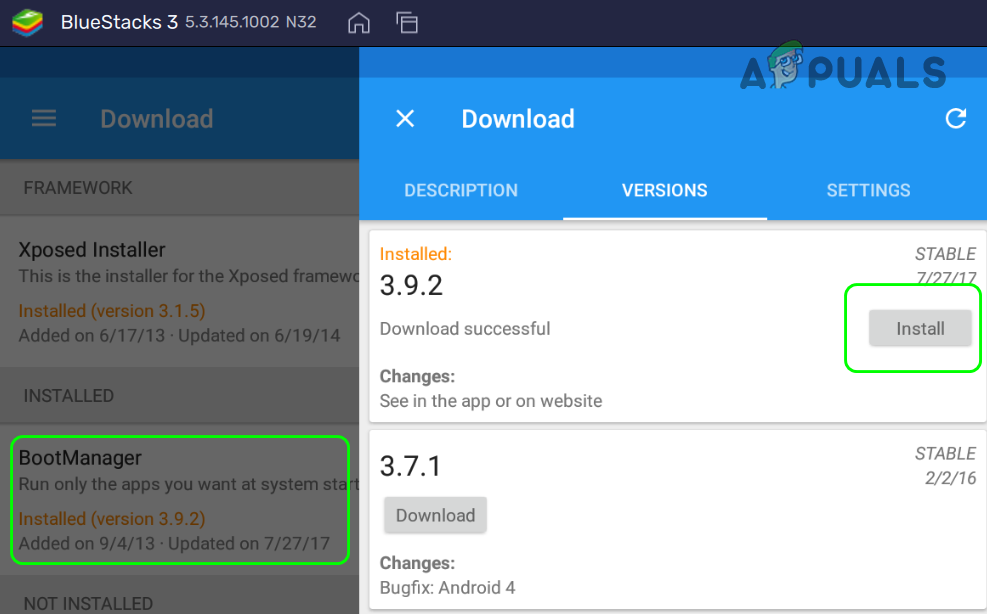
Head to Download in Xposed Menu - Now click on the search icon and search for BootManager (without space).
- Then select BootManager and head to the versions tab.
- Now in the box of the most recent version, click on Download, and once downloaded, click on Install. Then Confirm to Install BootManager.
Install BootManager in Xposed Framework - Once installed, close the BlueStacks instance and start it from BS Tweaker.
- Once the BlueStack instance is launched, open the Xposed Installer and expand its Menu.
- Now navigate to the Modules tab and checkmark the BootManager app.
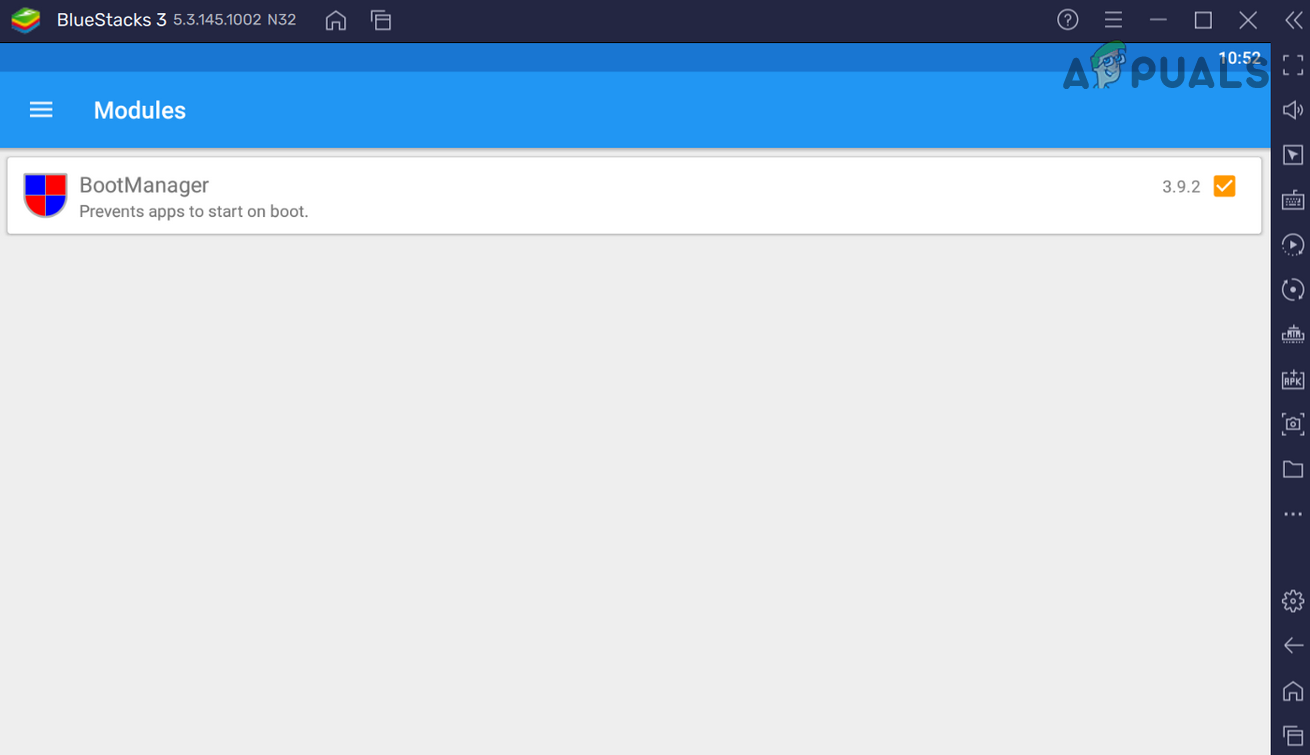
Activate BootManager in Xposed Framework of BlueStacks - Then restart the BlueStack instance and upon restart, open BootManager.
- Now select the apps that you do not want to start at the BlueStacks startup (like IPTV Smarters Pro).
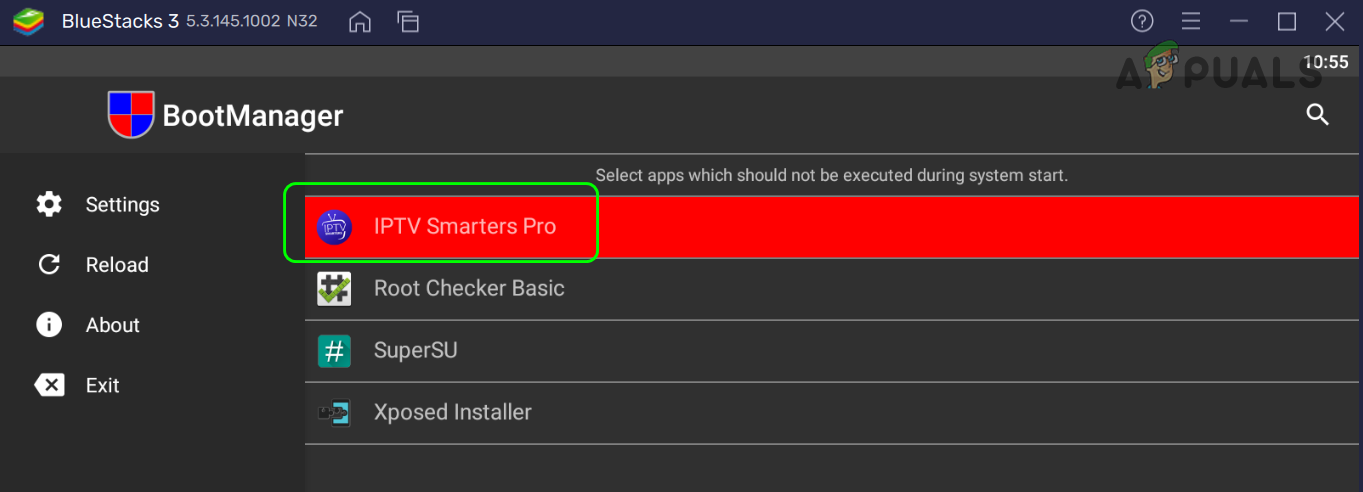
Select IPTV Smarteres Pro in BootManager to Stop it at the BlueStacks Startup - Now restart BlueStacks and the selected app will not start with BlueStacks.
So dear readers, in this way, you can use different modules of the Xposed installer to tweak the BlueStacks instance. Also, there are plenty of other apps for rooted BlueStacks (the Internet is your best friend) to take full advantage of the rooting process.


https://uploads.disquscdn.c… Hey Kevin, thanks for the great tutorial.
However, I’m stuck at the Xposed Installer (see picture). It says that it can’t find the necessary zip-files. I also can’t find any downloads or modules. Do you know a way to fix this?