How to Fix Premiere Pro Unsupported Video Drivers Compatibility Report?
Premiere Pro’s “Unsupported Video Driver” warning can appear at startup even if the computer edited normally before an update. Its System Compatibility Report identifies a graphics driver or device that the installed Premiere release does not support.
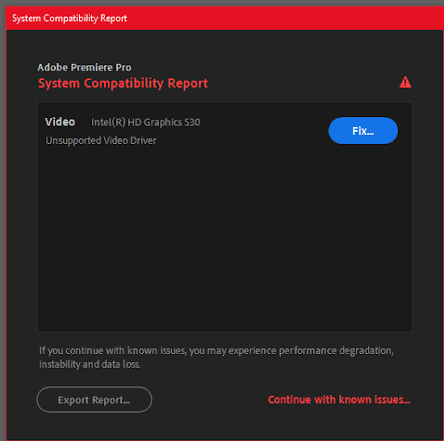
The warning does not necessarily mean the graphics card has failed. On laptops with two GPUs, it can refer to Intel integrated graphics while the NVIDIA or AMD driver is already current. Updating the dedicated card alone will leave that warning unresolved.
1. Identify the GPU Named in the Report
The report gives you the device name and the reason Premiere objects to it. Save those details before changing anything so you can tell whether an update actually addressed the warning.
- Open Help > System Compatibility Report if it is not already on screen.
- Select Info beside each flagged item. Note the GPU model, driver version, and issue text.
- Select Fix, if offered, to open Adobe’s instructions. This button opens guidance; it does not install a driver automatically.
- Choose Export Report and save the text file.
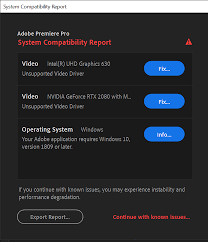
Exporting the report gives you the exact GPU names driver versions and issue text before you guess.
Check every listed issue, not just the first adapter. The older Windows and driver numbers in the screenshots are examples, not requirements for every Premiere version.
2. Update the Flagged Graphics Driver
A suitable driver update can clear the warning without reinstalling Premiere. Windows reporting that the “best drivers” are installed only describes the packages it found; the manufacturer may offer a newer compatible one.
Windows
- Right-click Start, open Device Manager > Display adapters, and match the device to your report.
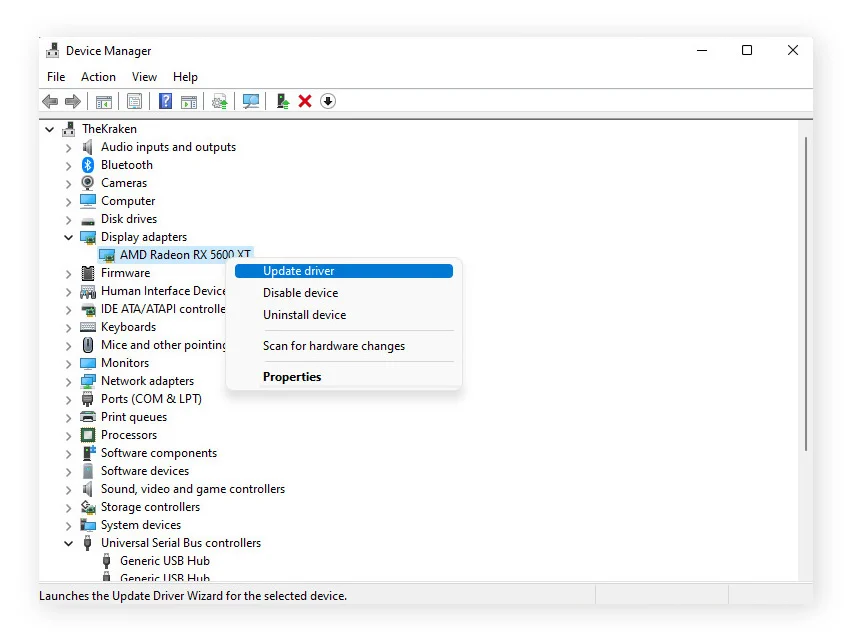
Premiere can keep warning until every GPU it sees is on a supported driver version. - Download a package for your GPU and Windows version from your PC maker or the official links in Adobe’s GPU driver guidance. For supported NVIDIA cards, choose a Studio Driver where available.
- Install the package, restart Windows, and reopen the compatibility report. Repeat for another flagged adapter if necessary.
A flagged entry disappearing from the report confirms that update addressed it. Keep integrated graphics enabled: Premiere can use it for video decoding even when the dedicated GPU handles other processing.
Mac
Mac graphics drivers arrive with macOS updates, not separate Windows-style driver installers. Install an available macOS update supported by your Premiere version, then check the report again.
3. Check Intel and Laptop-Specific Driver Updates
An Intel update may be missing even after you update the dedicated card. Laptop manufacturers can also customize graphics drivers, so a generic Intel package is not always the right replacement.
- Find the support page for your exact laptop or motherboard model. Install its compatible Intel graphics update first, if available.
- If the manufacturer offers no suitable update, use Intel Driver & Support Assistant to check the detected GPU for an available package.
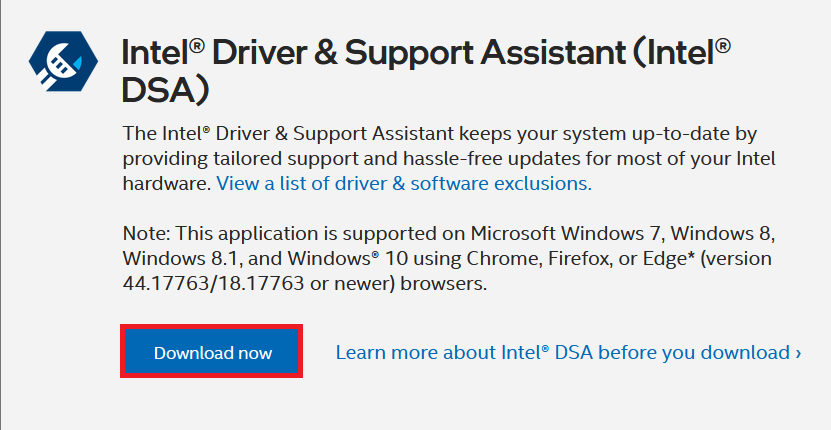
Laptop warnings often stay until the Intel driver itself is corrected. - Read any warning about replacing manufacturer customizations. If the installer refuses the package, check with the PC maker rather than forcing it.
- Restart and compare the report with the saved copy. For legacy hardware, consult Adobe’s older-Intel guidance; a legacy driver does not make the GPU compatible with every newer Premiere release.
A warning that returns after Windows Update deserves a version check: Windows may have restored an older manufacturer driver. Compare the installed version with your exported report and ask the PC maker or IT about the appropriate package, rather than disabling all driver updates.
4. Check Whether the Hardware Supports Your Premiere Version
Repeated driver installs will not help a GPU that no longer meets Premiere’s requirements. An upgrade can raise those requirements even though the same computer ran an earlier release.
- Find the installed Premiere version under Help > About Premiere on Windows, or Premiere > About Premiere on Mac. Older releases may include “Pro” in the menu label.
- On Windows, check the CPU and OS under Settings > System > About. Task Manager’s Performance tab also identifies the CPU, as illustrated below. On Mac, use Apple menu > About This Mac.
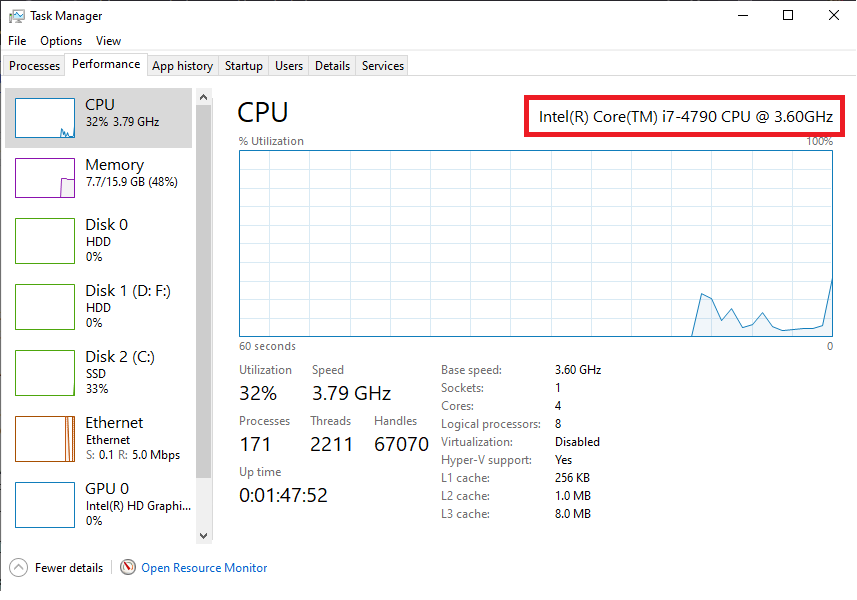
Some warnings persist because the machine has aged out of current Premiere support. - Get both GPU models from the report or Device Manager. On Windows, Task Manager > Performance > GPU shows memory details; total available graphics memory is not the same as dedicated video memory.
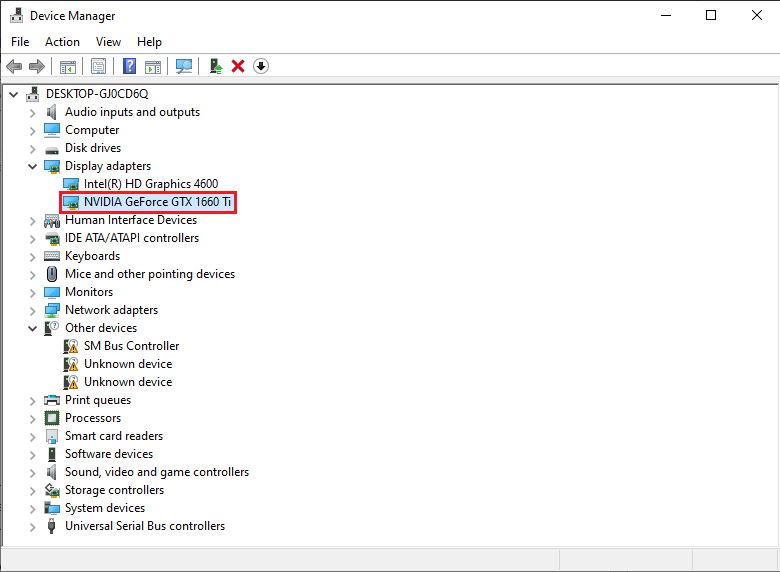
- Compare the details with Adobe’s requirements for your Premiere release. That page also links to previous-version requirements. Check the OS, CPU, GPU features, and graphics memory.
No Studio Driver is not the same as no compatible driver. Some older NVIDIA cards have a different supported driver option; others, including certain legacy mobile GPUs, receive no suitable update. Check Adobe’s GPU guidance and the manufacturer’s support list before ruling out the card.
5. Consider an Earlier Premiere Release After an Upgrade
If the warning began with a Premiere upgrade, an earlier supported release may still suit the computer. Creative Cloud offers only certain versions, and newer project files may not open in an older app.
- In the Creative Cloud desktop app, find Premiere under Apps. Open More actions > Other versions.
- Choose an available release whose published requirements match your computer. The screenshot’s older version numbers do not guarantee those builds are still offered.
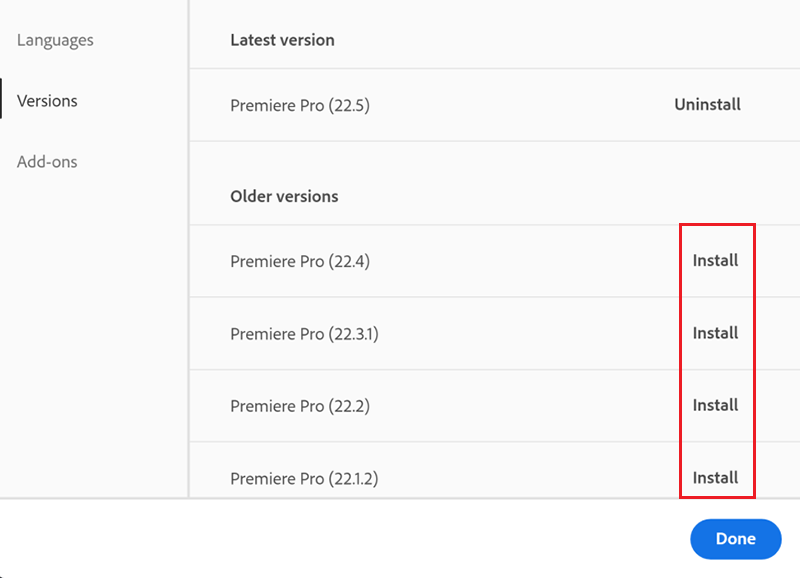
Older hardware sometimes needs an older Premiere build instead of another driver reinstall. - Follow Adobe’s instructions for installing earlier versions. Keep the existing installation if the offered options allow it; do not assume both builds can remain installed.
- Test a copy of the project. If it cannot open, keep the original and review Adobe’s project compatibility guidance before converting it.
If the earlier release works, review Premiere’s individual auto-update setting under Creative Cloud Preferences > Apps. Staying on an old release is a compatibility compromise, not a permanent substitute for supported hardware and software.
6. Check Playback and Export Before Continuing Work
Continue with known issues allows Premiere to open without fixing the driver. A short test can reveal immediate problems, but a successful export does not guarantee stability on a long or effects-heavy project.
- Select Continue with known issues and create a blank project on a local drive.
- Import a short clip in a format you normally edit. Play it, scrub the timeline, apply a typical effect, and render a short preview.
- Export a short H.264 file and watch the result.
- If H.264 or HEVC export fails, test Export > Video > Encoding Settings > Performance > Software Encoding, if available. Restore the original setting if it makes no difference.
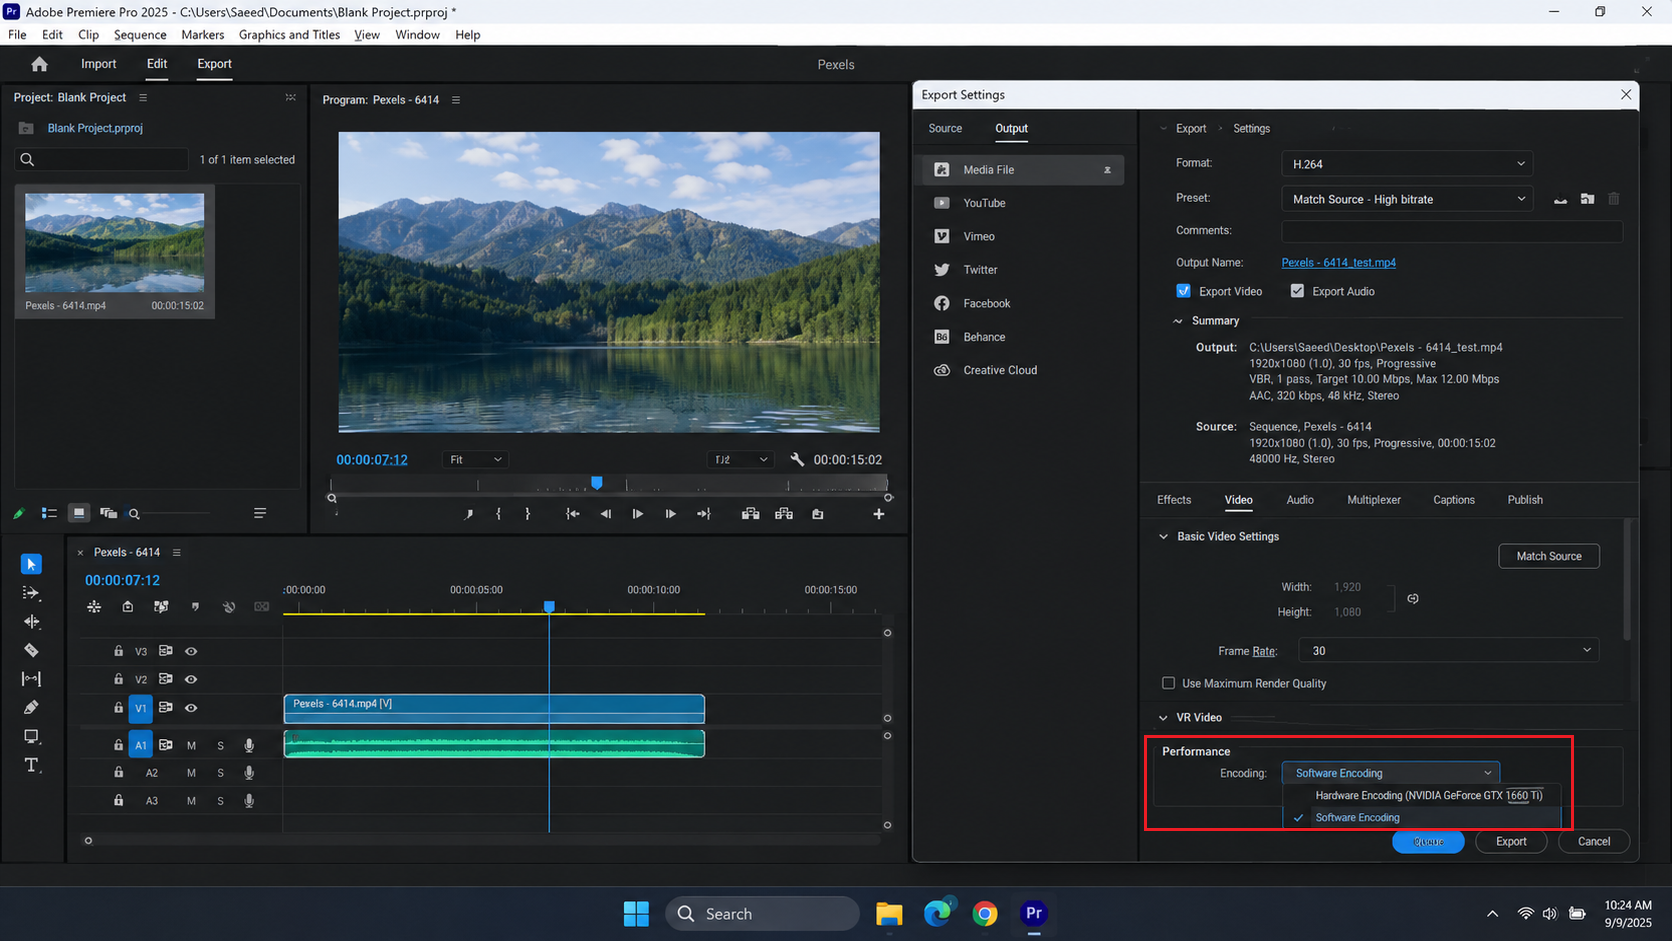
A blank-project test is safer than assuming the warning is harmless.
| Test result | What it tells you |
|---|---|
| Playback stutters, but export finishes correctly. | The warning alone does not identify the slowdown. Check the footage and playback settings in our Premiere playback guide. |
| Software Encoding exports successfully. | You have an export workaround, not a repaired driver. The compatibility warning can remain. |
| Export shows Error Code 39. | Follow the checks for that specific Premiere export error, rather than treating it as the same warning. |
Software Encoding does not replace the timeline renderer. Premiere 25.2 and later removed Mercury Playback Engine Software Only; Apple silicon never offered it. Adobe’s rendering notice explains the change.
A grayed-out Renderer control can be normal when only one GPU type is available. It does not, by itself, mean GPU acceleration is off.
If the test crashes, shows corrupted frames, or produces an unusable export, avoid important edits on that setup.
Give Adobe Support the exported report, Premiere version, driver versions, and test result. Remove personal or project details before posting reports publicly.


