How To Play Windows Games on Mac – Detailed Guide
 Reviewed by Huzaifa Haroon
Anyone would tell you that you’d be better off gaming on Windows than on macOS. While this is true, it doesn’t mean that it’s impossible to play fan-favorite titles on a Mac.
Due to the restrictive nature of macOS, playing your favorite games can be, quite honestly, very annoying. But no need to fret, as we’re here today to talk and guide you about the various ways one can enjoy PC games on a Mac.
Table of Contents:
Through Game Stores
You can access a wide variety of games made for Mac through different marketplaces. Most of these games are compiled natively in ARM which means they run great on Apple silicon.
Official Ports via App Store
The App Store itself has a great number of games that have been ported officially but managed to go under the radar. Disco Elysium, one of the best games of 2019 is available to purchase on the App Store. Other notable titles include Mafia III, the rebooted Tomb Raider trilogy, XCOM 2, a bunch of games from the Warhammer series, etc.

Steam, Epic and other popular game stores
Due to the growing demand of games on macOS, many popular game stores have launched official macOS clients. Steam, Epic Games Store and GOG Galaxy are some of the most popular and well-known stores in PC gaming. You’ll be pleased to know that all the above-mentioned stores have official macOS clients available on their individual websites.
Although these stores are available on Mac, not every game available on these stores is available to play on macOS. You can browse around the stores and look up the game’s requirements before downloading and running it.
Streaming and Cloud Gaming
Cloud gaming might as much be the future of games as the metaverse is for VR, but there’re some real gems on offer here. With all the different services in the market, we think NVIDIA’s GeForce Now makes the most sense overall for everyone, though another great option is Microsoft’s xCloud if you can get access to that.
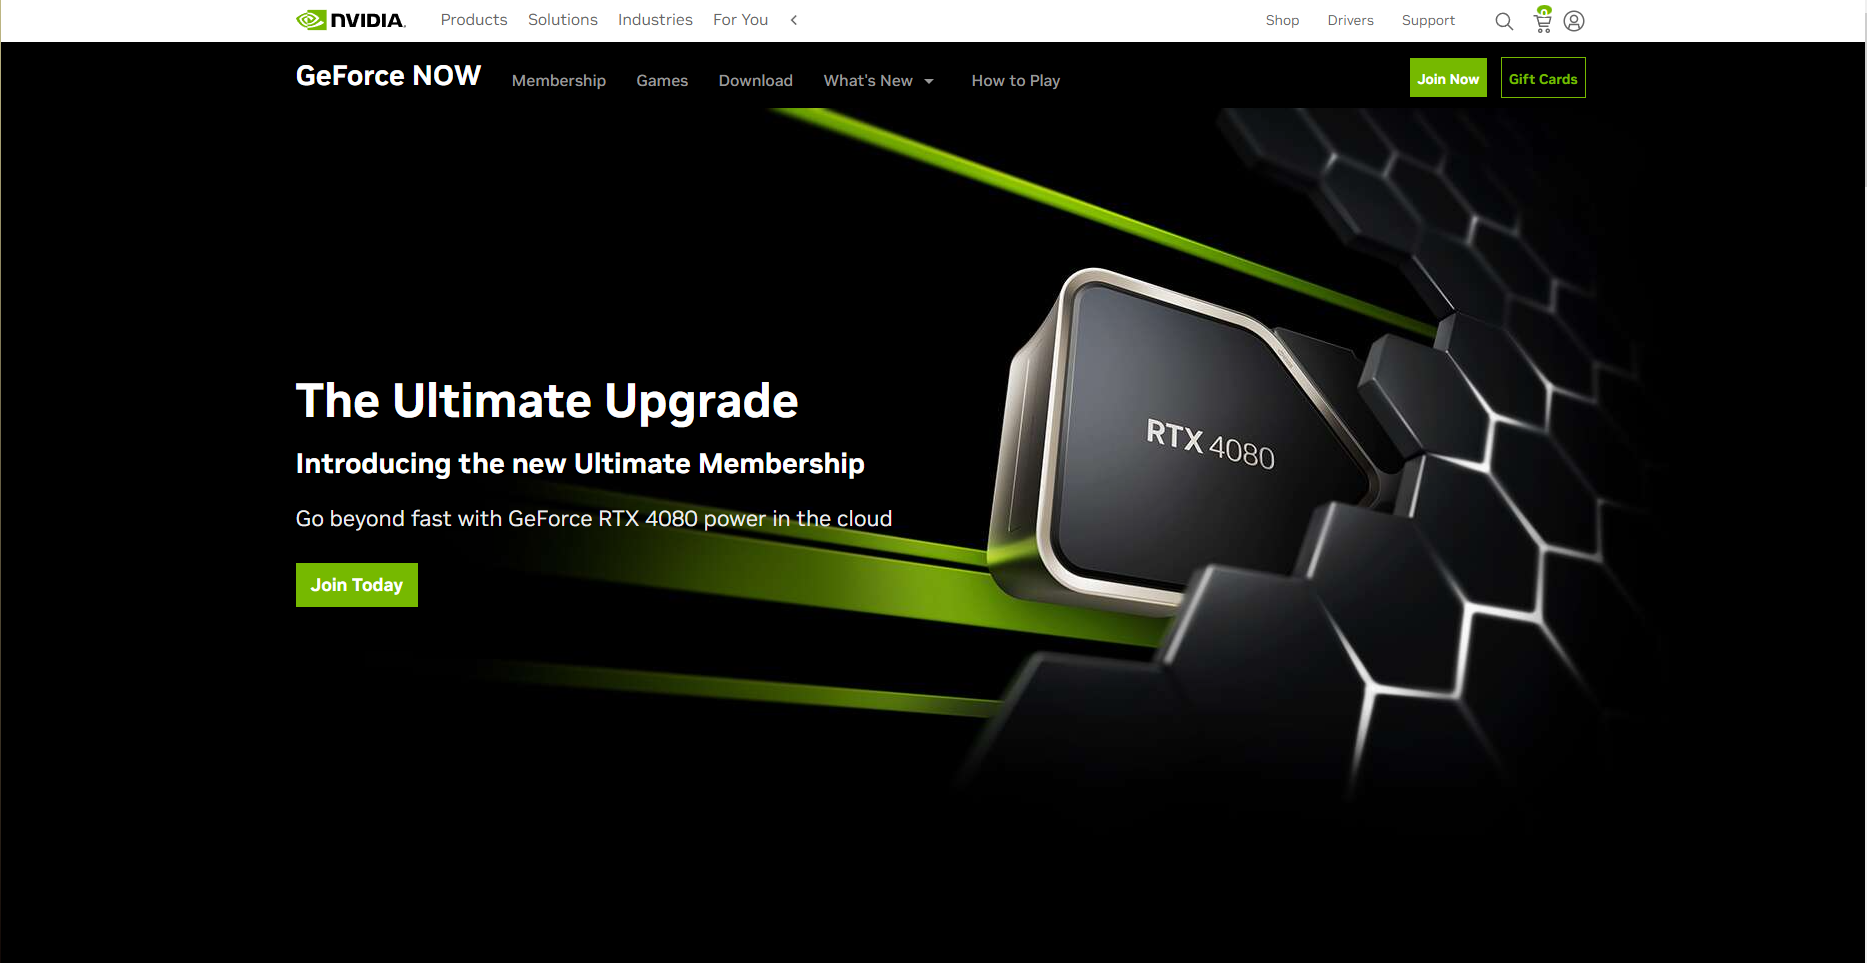
NVIDIA GeForce NOW
NVIDIA’s GeForce NOW is a great service that allows you to stream and play games that are being run on a remote device. Because GeForce NOW is a cloud-streaming service, you don’t need to worry about the specs of your Mac (not that you ever did) in order to enjoy some great games. Heck, you can even play PC games on an Android device using this service!
GeForce NOW is a free service, although the free version is limited to a 1-hour session, which is preceded by a long queue as servers are usually busy. Free members experience decent graphics at best, while the paid versions allow you experience high quality graphics, jump ahead of queues and have unlimited session length.
To play games via GeForce NOW, you need to own those games. GeForce NOW works by linking your NVIDIA account with your store accounts such as Steam, Epic, etc. In this way, your game library is carried over and you can play any game you’d like from your library.
NVIDIA GeForce Now is limited to specific countries and requires a high-speed internet connection. Also, a controller is recommended for a smoother gameplay experience. See Nvidia’s documentation to learn more.
Setting up GeForce NOW on Mac
To set up GeForce NOW on your Mac, follow these steps:
- Download and install the GeForce NOW app.
- Once the app is installed, start it up. Click on Agree and Continue on the terms of use and privacy policy pop-up.
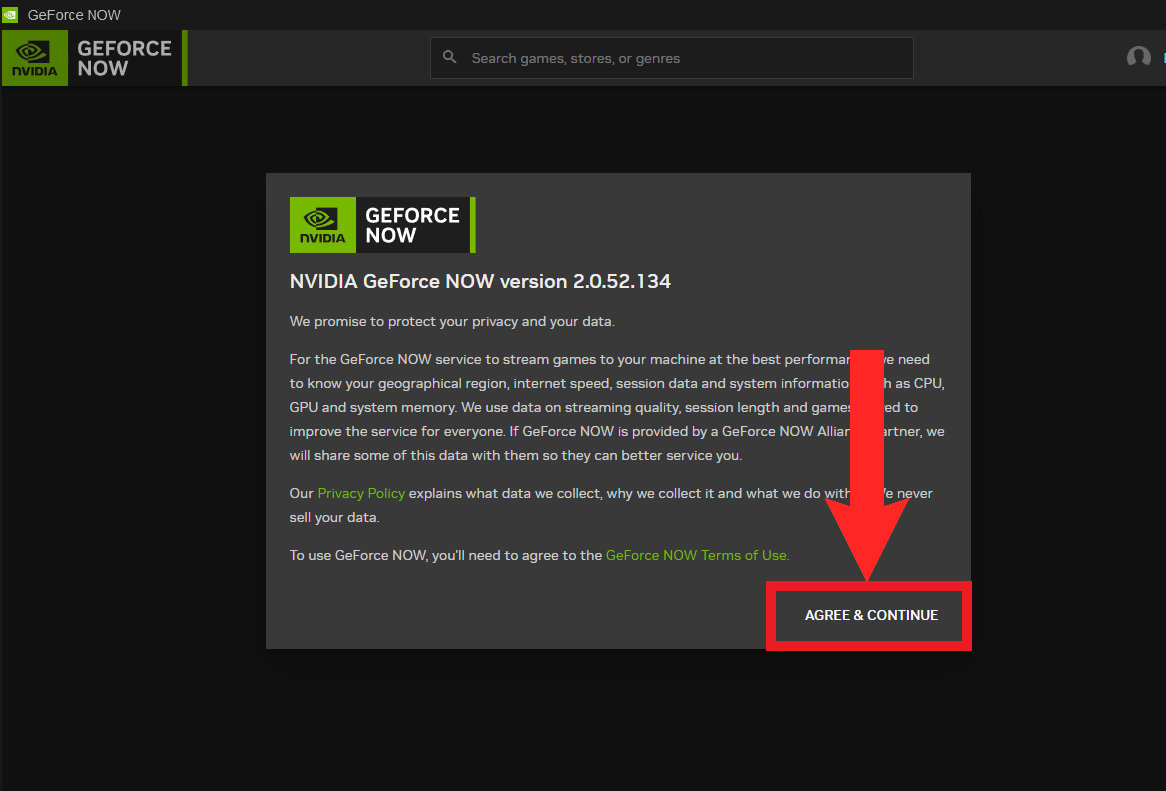
Click on “Agree and Continue” - Next, click on Log In on the top right corner.
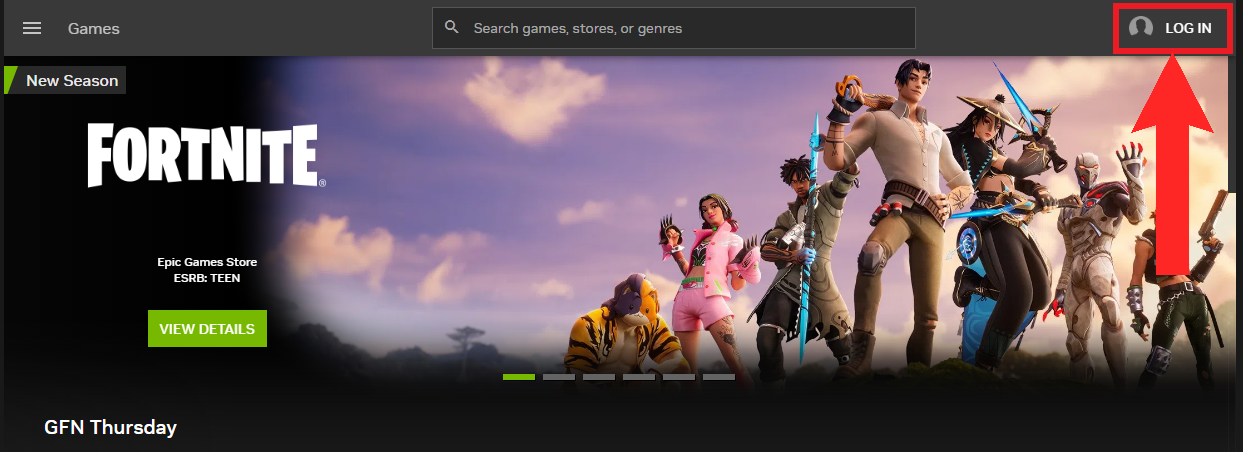
Click “Log In” - Upon clicking, you’ll now be redirected to the NVIDIA log in page on Safari. Enter your NVIDIA account credentials and verify your login to finish signing in.
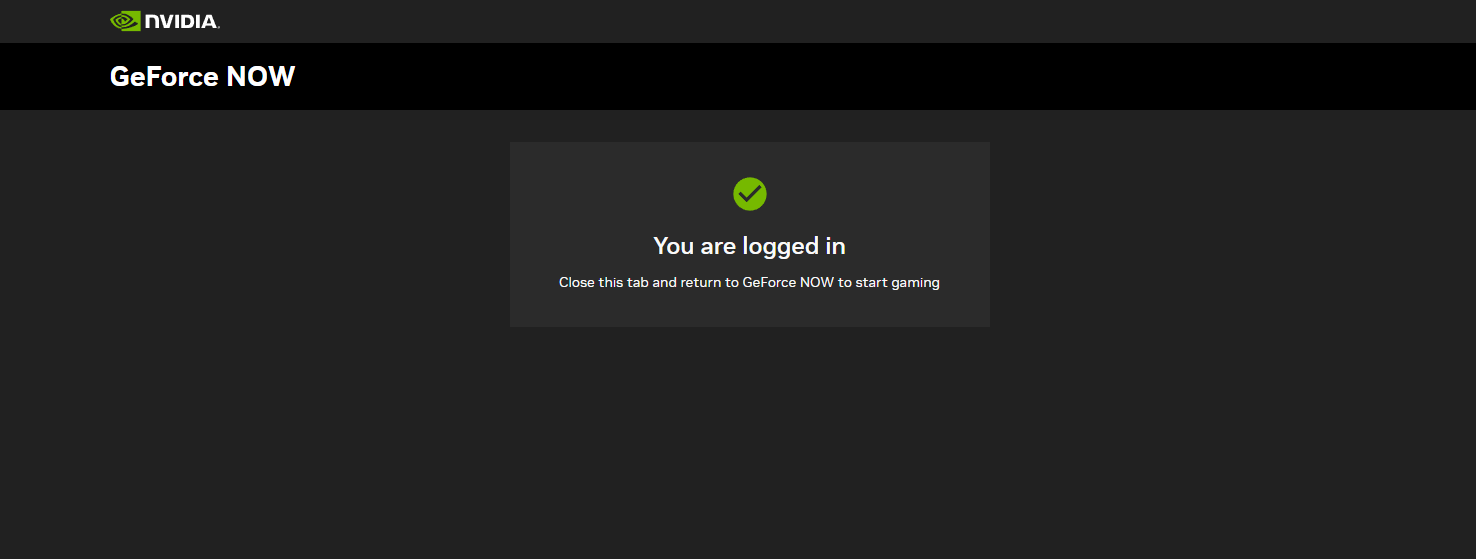
A similar message should be displayed on Safari on successful login - Now, head back over to the GeForce NOW app. Click on the three horizontal lines stacked together with spaces on the top left corner to open the sidebar. Select Settings from the sidebar.
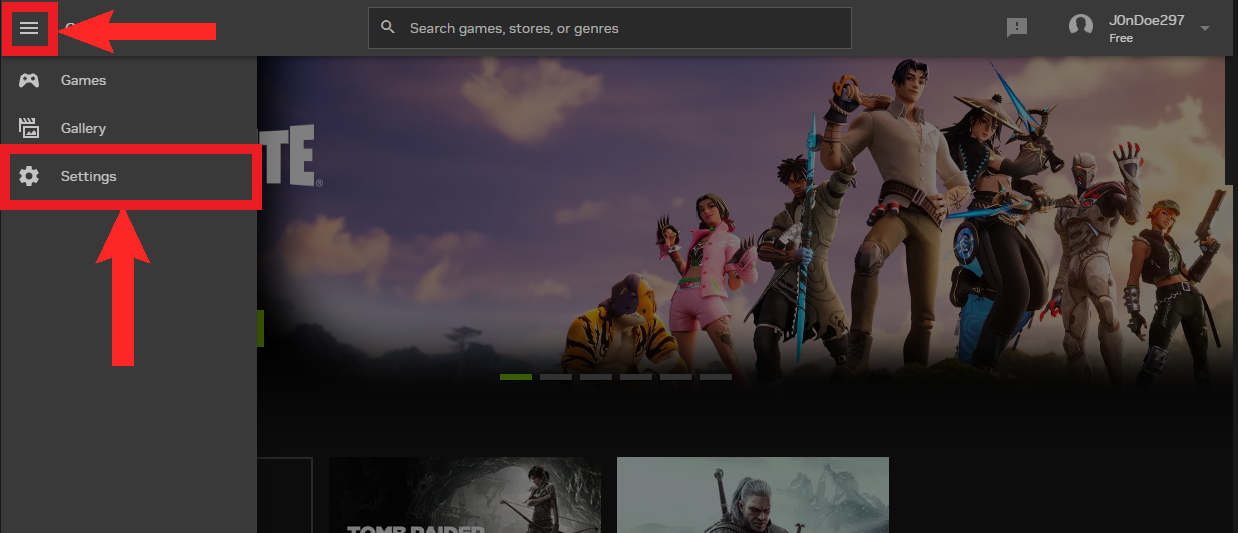
Open the sidebar and select “Settings” - In Settings, a Connections sections should be present. From here, choose your desired store and click Connect.
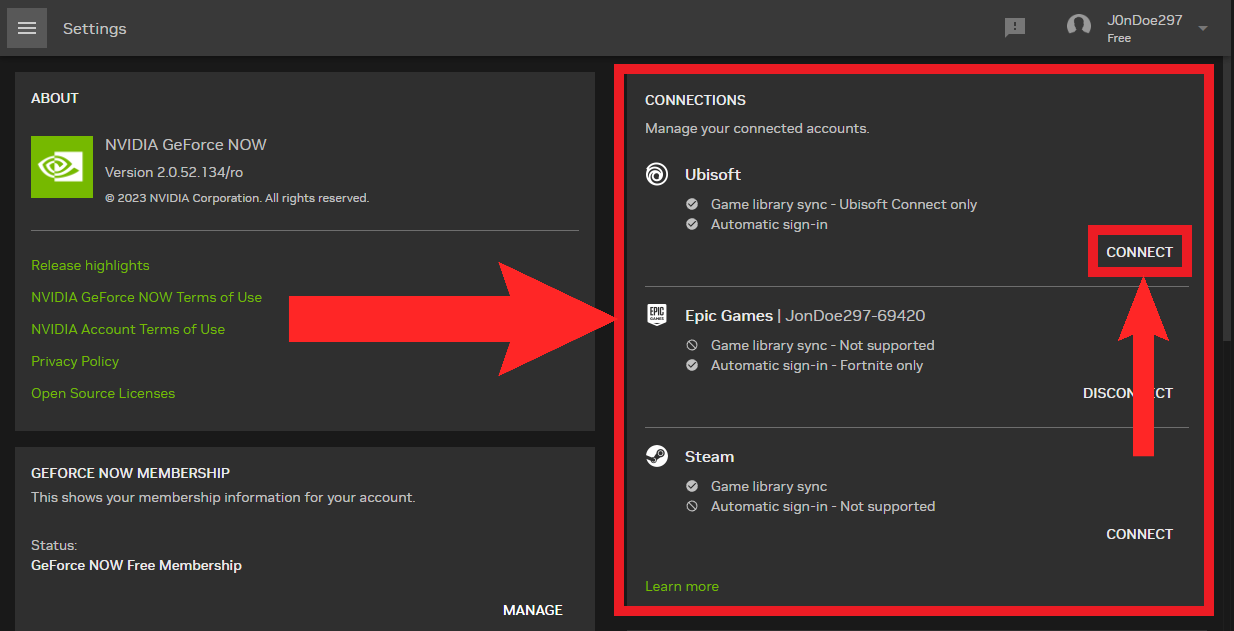
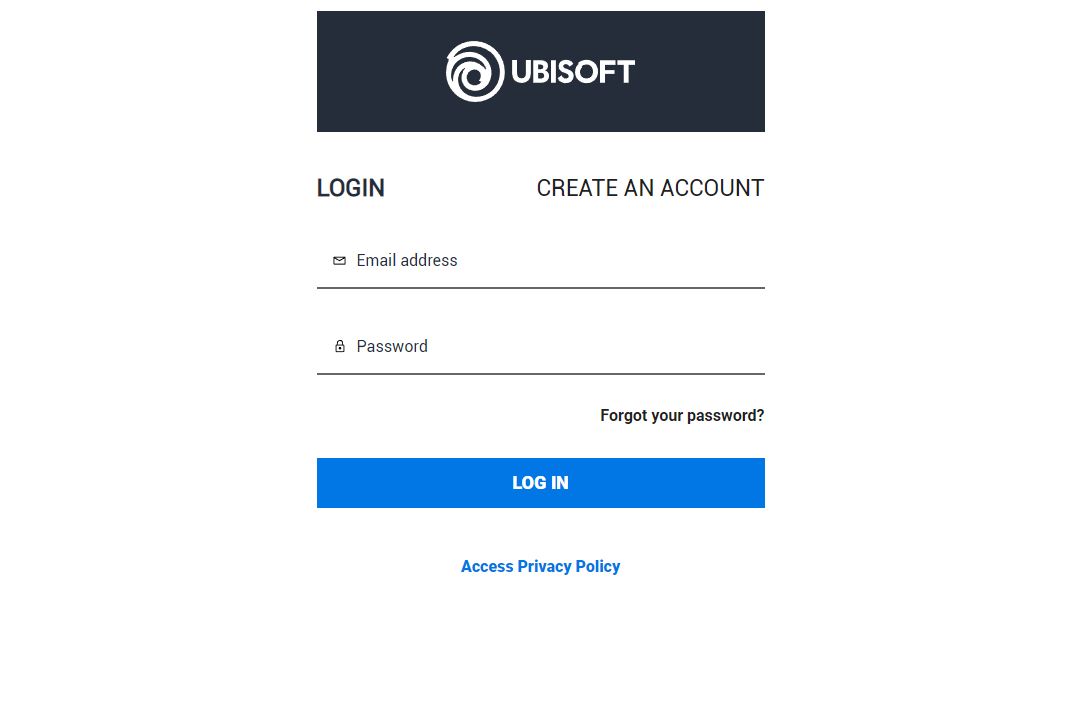
Click on “Connect” next to the desired store - Once more, you’ll be redirected; this time to your chosen store’s login page. Enter your credentials and allow the store permission to sync your library with GeForce NOW.
Enter your credentials - Again, head back over to the app. It should say Disconnect on the store if a successful connection has been established.
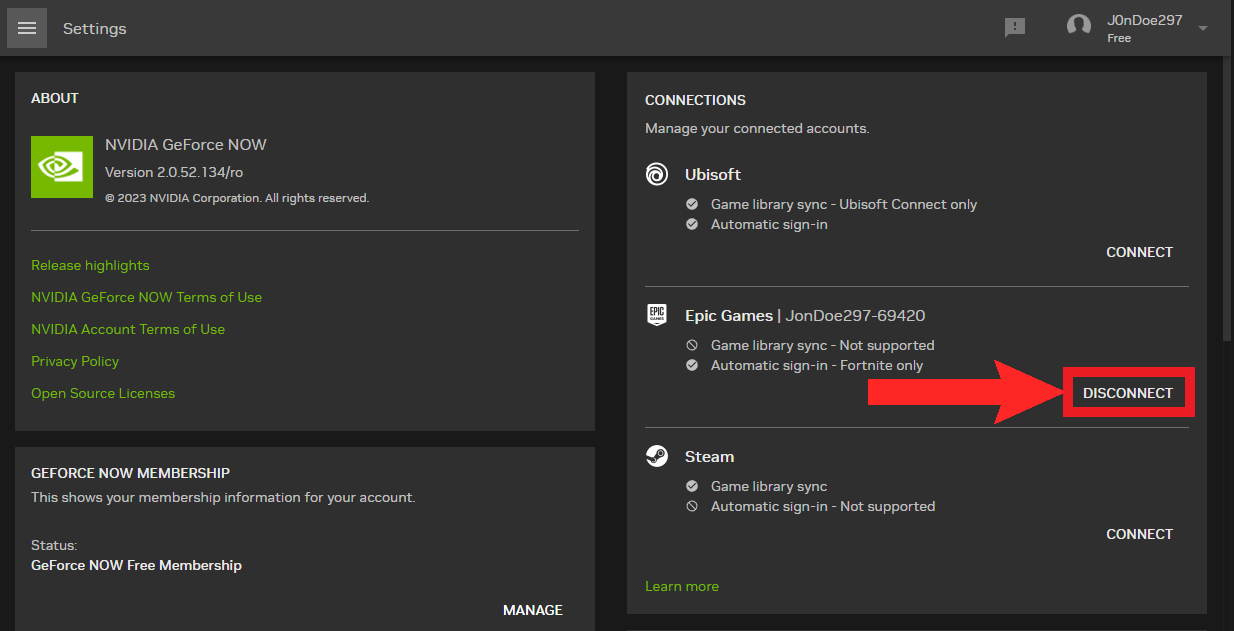
“Disconnect” means that the connection has been established successfully
Playing games via GeForce NOW
- Now, open the sidebar again and select Games.
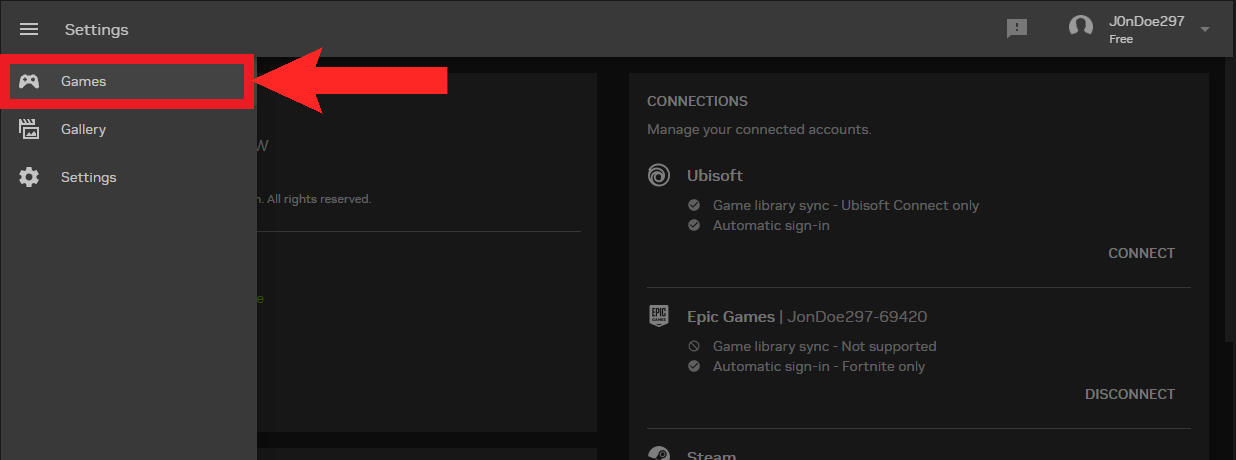
Select “Games” from the sidebar - On the “Games” page, scroll down or search for a game that you have in your library. When you’ve found it, click on it.
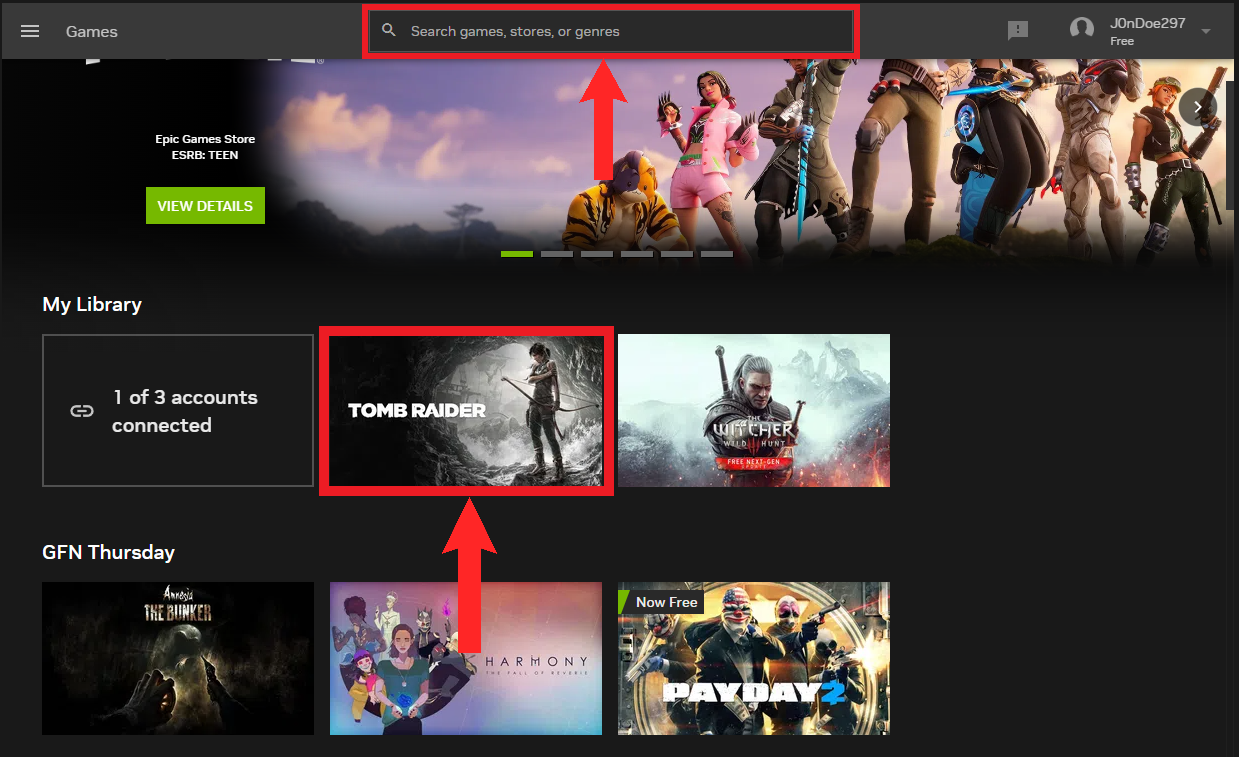
We’ll be testing out Tomb Raider here. Use the Search bar on the top to find your choice of games - From the drop-down, click Play.
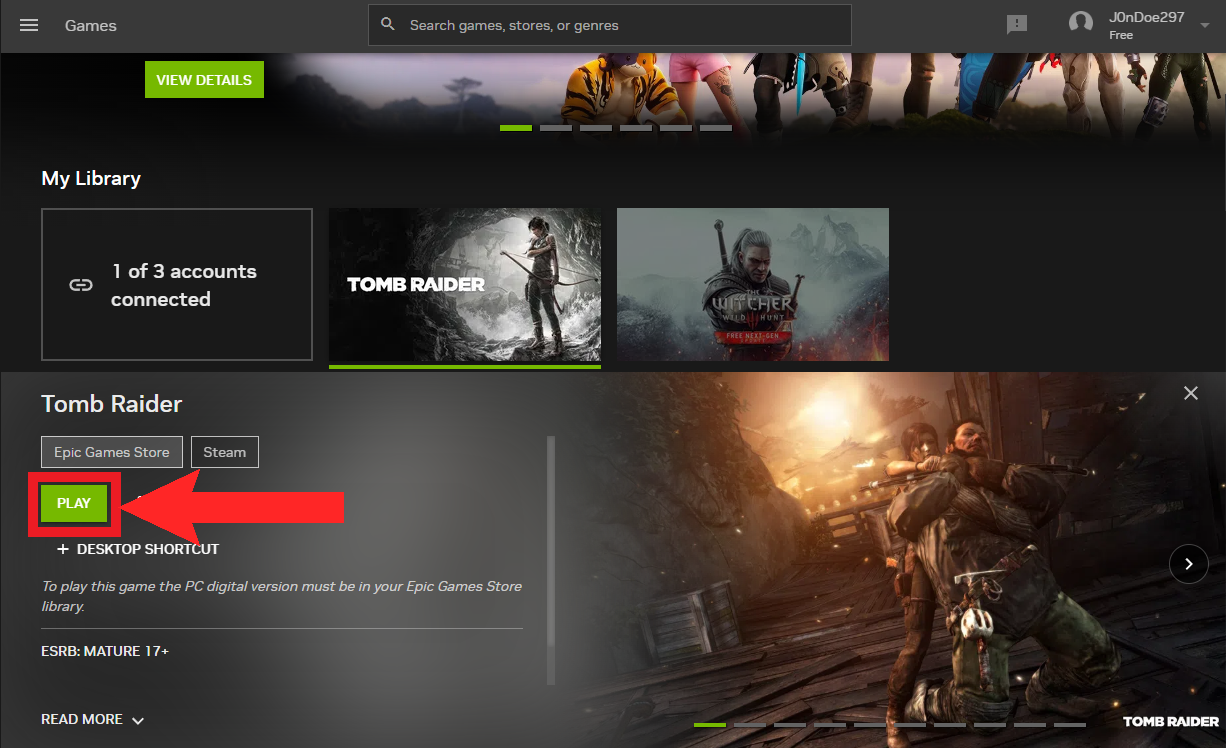
Click “Play” - Upon clicking “Play”, the app will begin to check whether your network passes the set criteria. Next, if you’re on the free membership, you’ll be placed in queue. If not, then you’ll find your Mac screen displaying the opening credits of the game you chose.

Wait for GeForce NOW to confirm whether your network is suitable
Xbox Game Pass Ultimate
Xbox’s Game Pass is one of the best gaming subscription services out there. With over 200 games, and several more being added each month, Game Pass has a diverse range of games catering to all kinds of tastes. Additionally, Xbox has a separate service catering to PC gamers known as the PC Game Pass. The PC Game Pass is only applicable for PCs running Windows.
Like most subscription services, Game Pass has different plans depending on your needs. However, to turn your Mac into a gaming beast, you’ll need the Game Pass Ultimate subscription. This is the premium plan and what gives it the edge over the others, is the fact that it allows cloud gaming. Game Pass Ultimate costs $14.99 per month.

Similar to the aforementioned GeForce NOW, cloud gaming allows you to play the game on your device while the game’s workload is handled by a remote device. Through cloud gaming, you can enjoy any available game on the Game Pass on your Mac. However, it should be made known that cloud gaming is available in only a select number of regions and countries. Refer to Xbox’s regions list for more info.
Setting up Cloud Gaming on Mac
Cloud gaming with Game Pass requires a high-speed internet connection and a device running macOS 14.1.2 or above. A controller is recommended for a smoother gameplay experience. Additionally, there’s no need to download any app through the App Store. Follow these steps and you’re good to go:
- Open up Safari and head on to the XCloud Homepage.
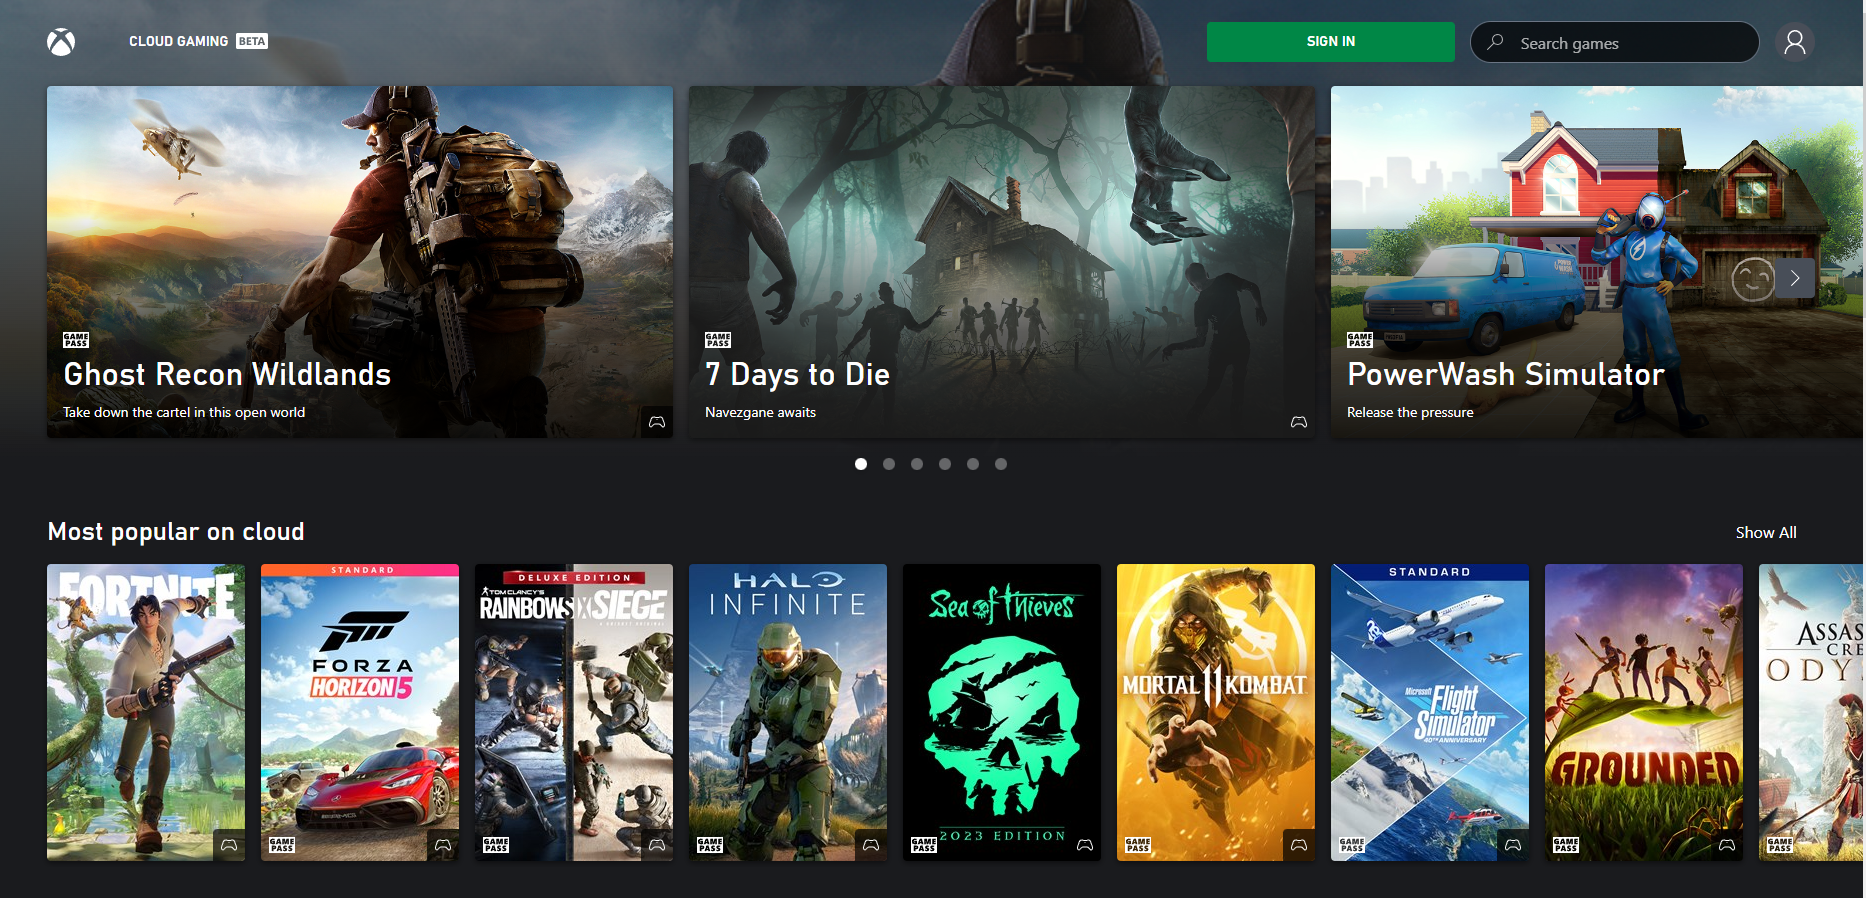
The homepage for Xbox Cloud Gaming - Click on Sign In on the top-right of the screen.
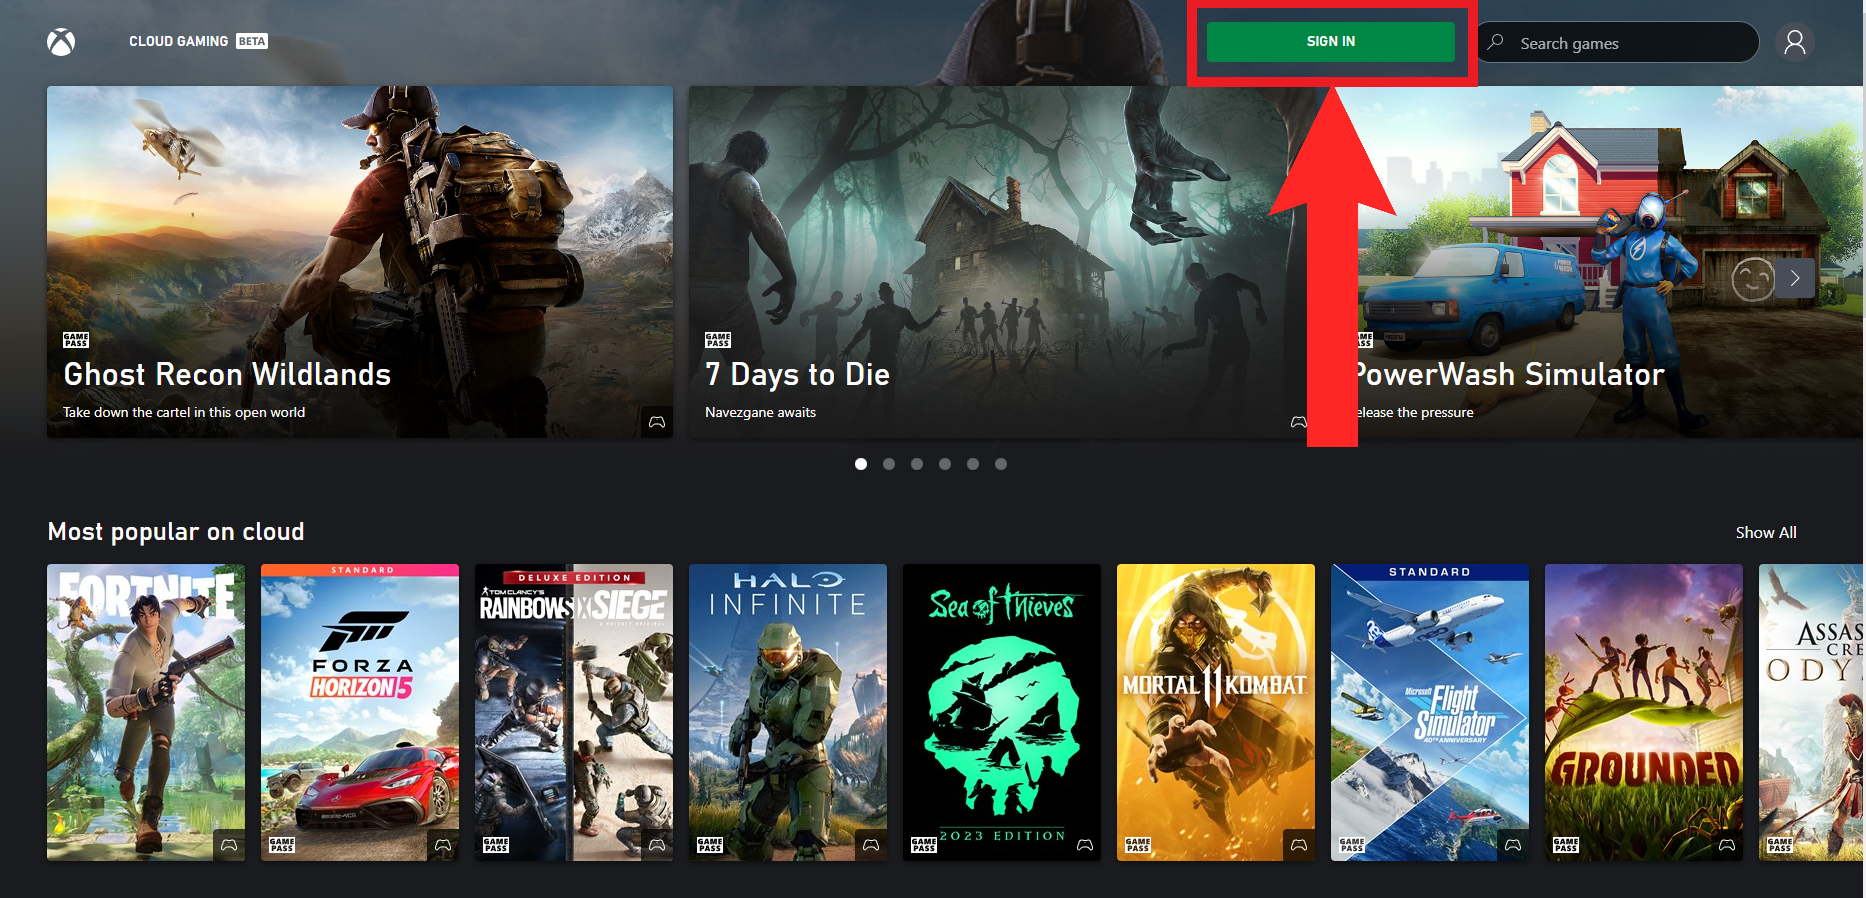
Click on “Sign In” - On the next page, enter your Microsoft account credentials and log in.
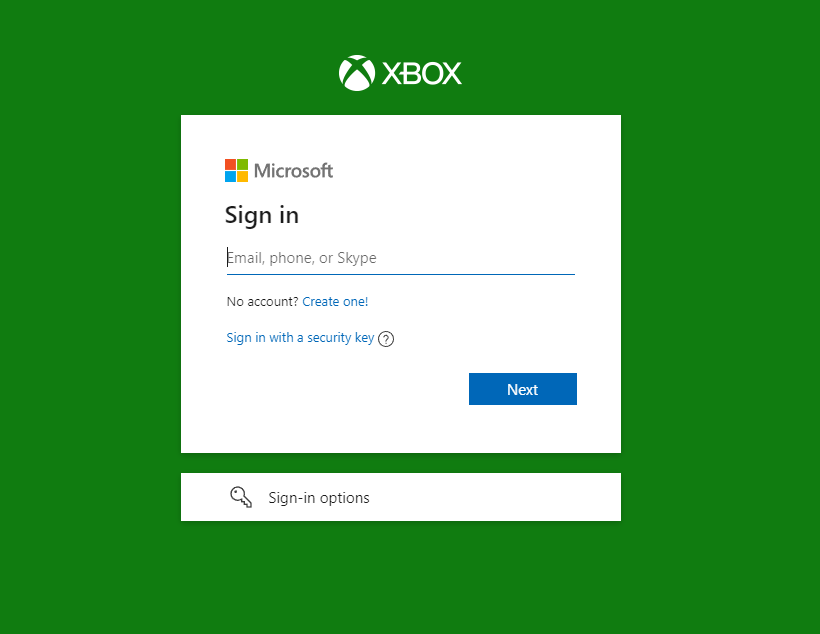
Enter your email and password and log in - After successfully logging in, you’ll be redirected back to the homepage. From the homepage, choose any game that you like and click on it.
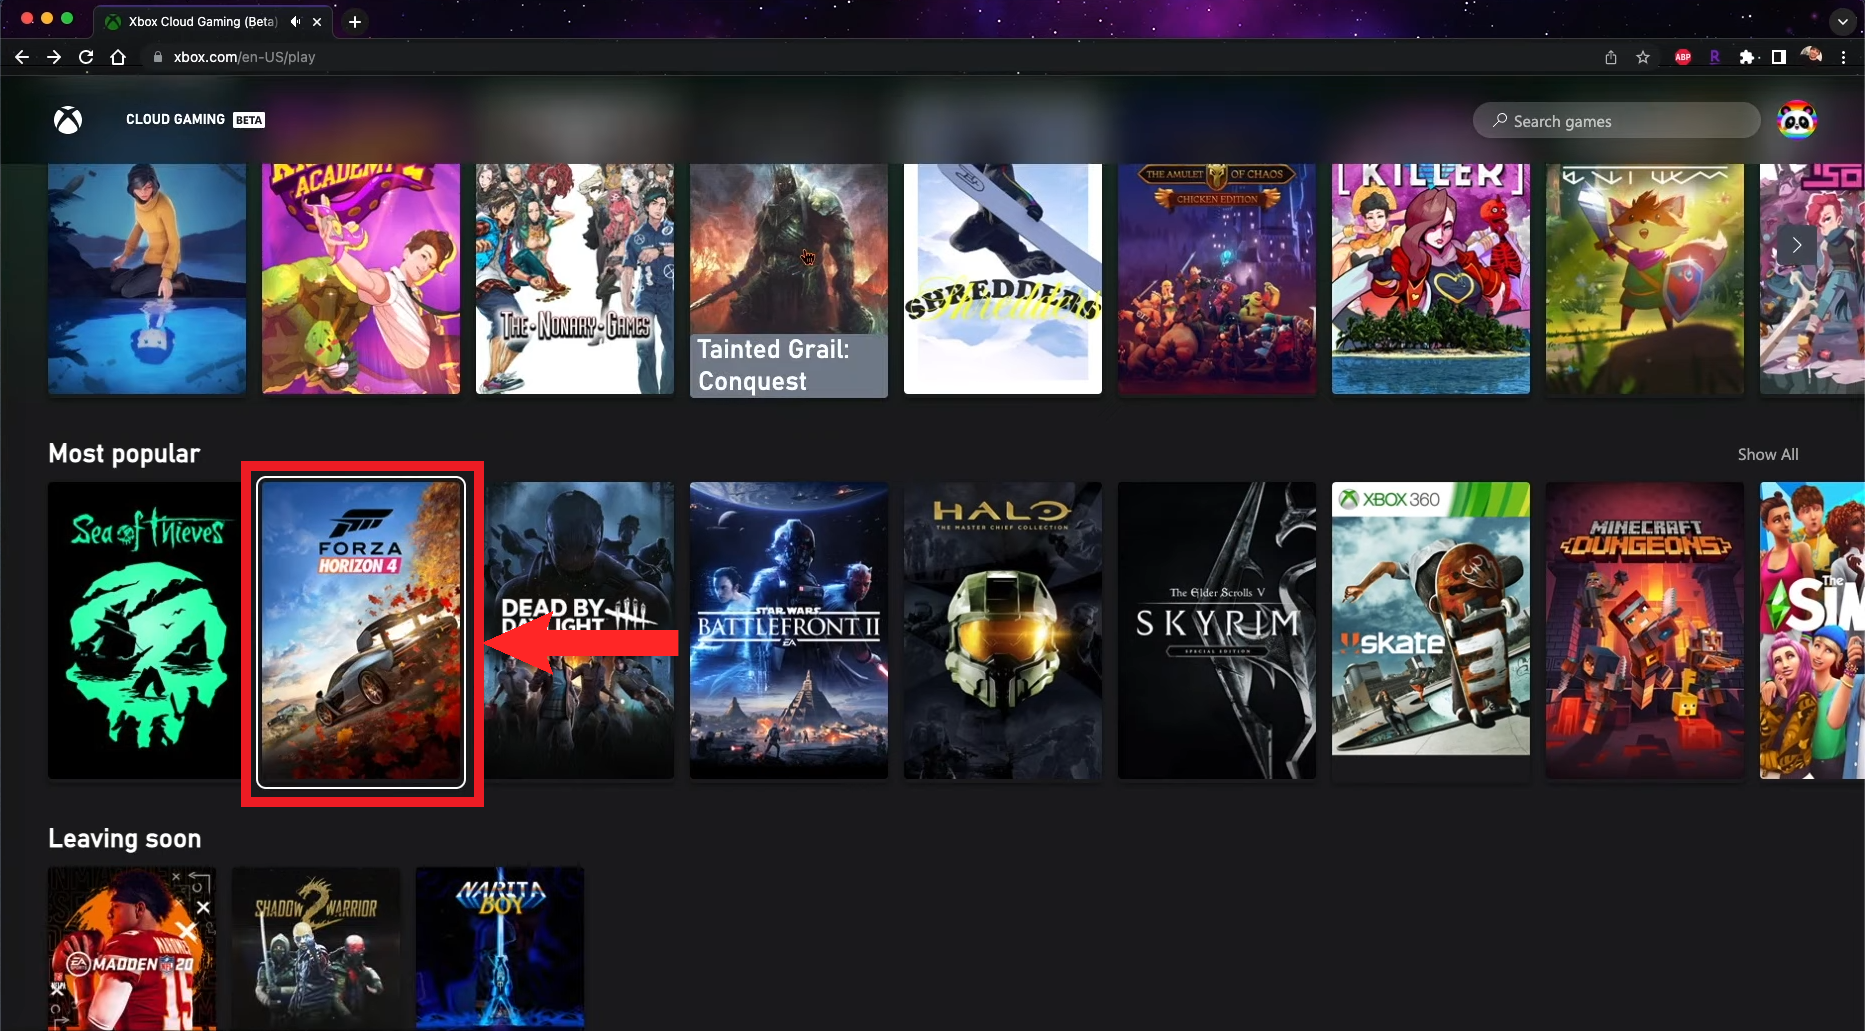
Testing out Forza Horizon 4 | Milo B. on YouTube - Lastly, click on Play to start up the game.

Click on “Play” to start up the game | Milo B. on YouTube
You can create a bookmark of the page for your desktop to increase accessibility.
Installing Windows through Boot Camp (Intel-based Macs only)
Boot Camp is an app that helps you install Windows 10 on your Intel-based Macs. Boot Camp allows you to choose which operating system you want to boot into when starting up the Mac, aka dualboot. Hence, you can’t switch back to macOS in real-time. But this allows you to devote Windows completely to gaming. Note that you’ll still need to satisfy the requirements of the game you’ll play.
To install Windows via Boot Camp, you’ll need at least 64GB of free space. Follow the steps below to install Windows on your Mac:
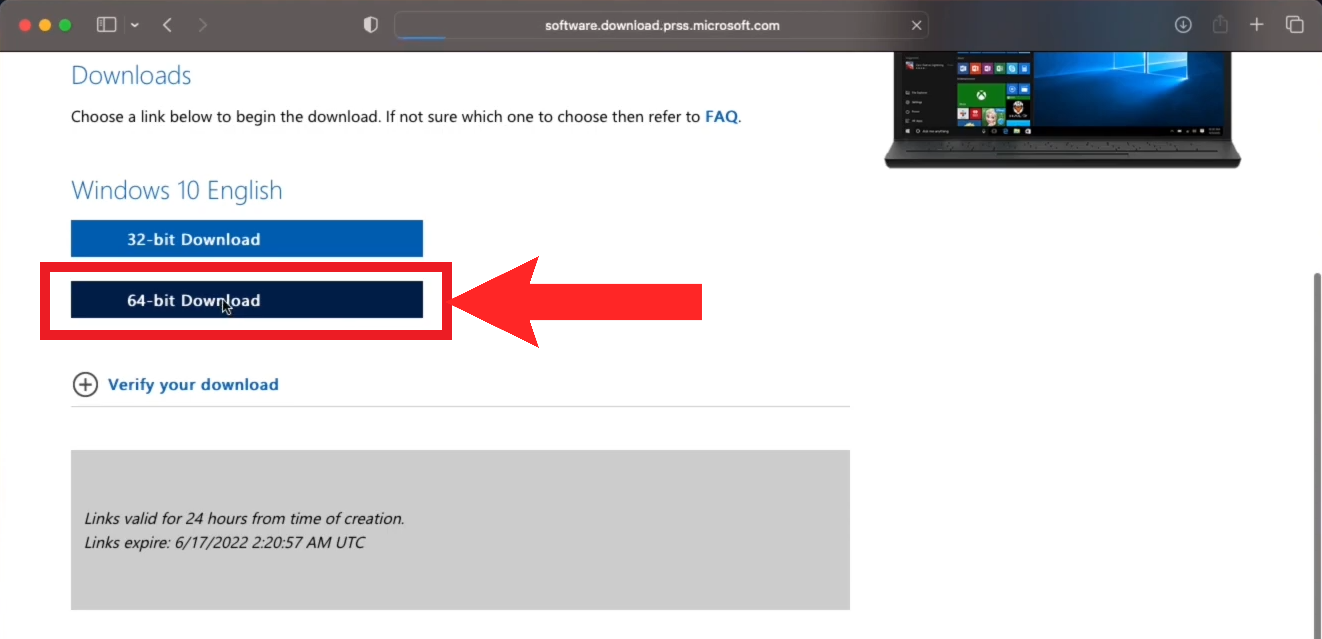
- Download the Windows 10 ISO from Microsoft. It’s free and you don’t need a license key for it. Choose your language and the 64-bit version of Windows.
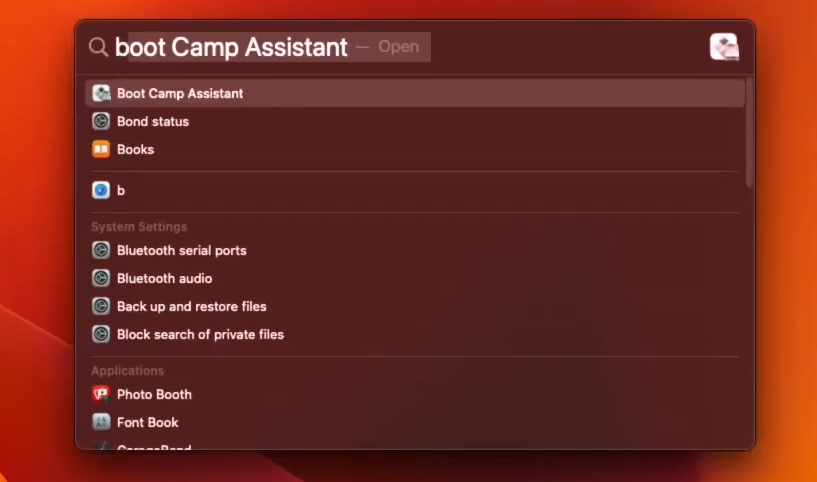
Download the 64-bit version of Windows - Next, use Spotlight and open up Boot Camp.
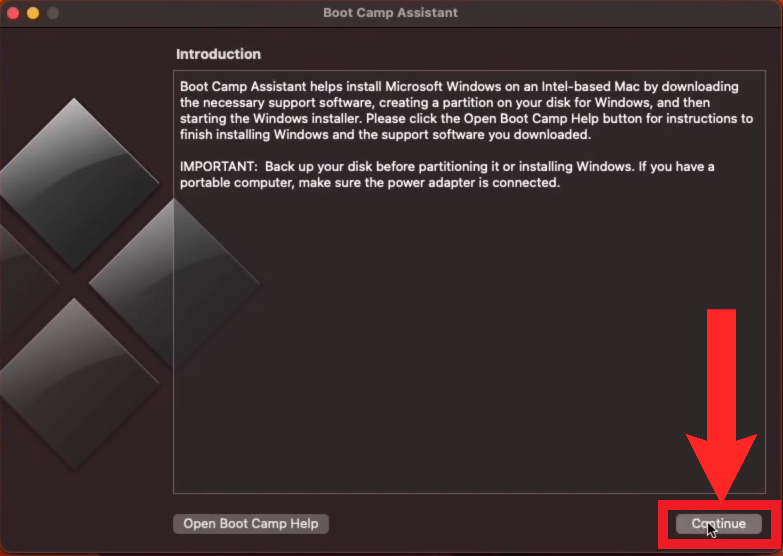
Use Spotlight to launch Boot Camp - The Boot Camp homepage will open up. Click on Continue to proceed.
Click on “Continue” to proceed - Next, Boot Camp will automatically pick up the ISO you downloaded. Drag the dot slider to allot space to Windows. Then, click Install.
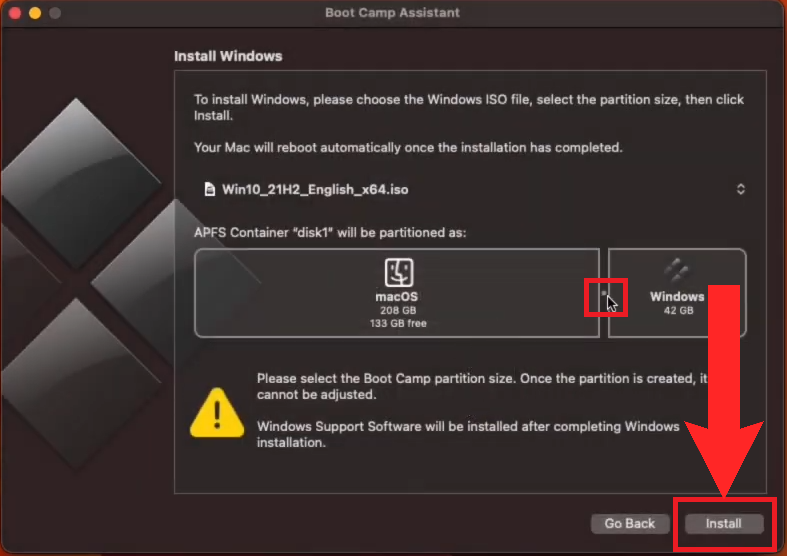
Drag the slider to allot space to the Windows partition and then click “Install” - Boot Camp will begin installing Windows on your Mac.
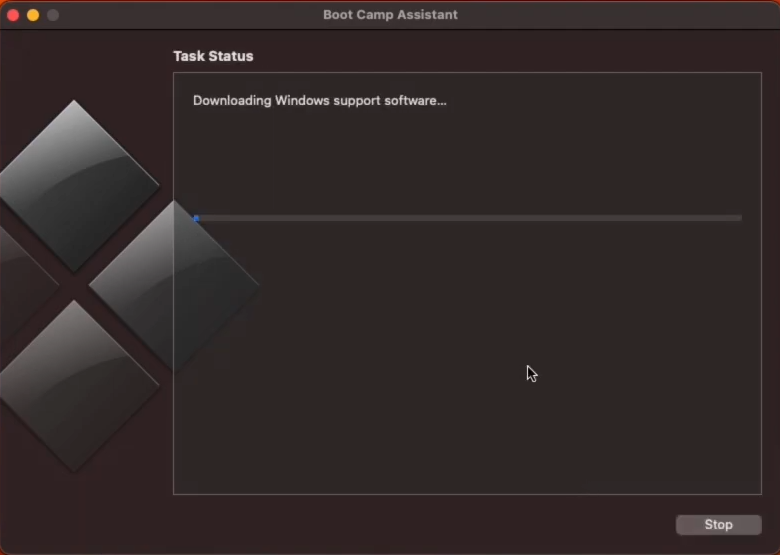
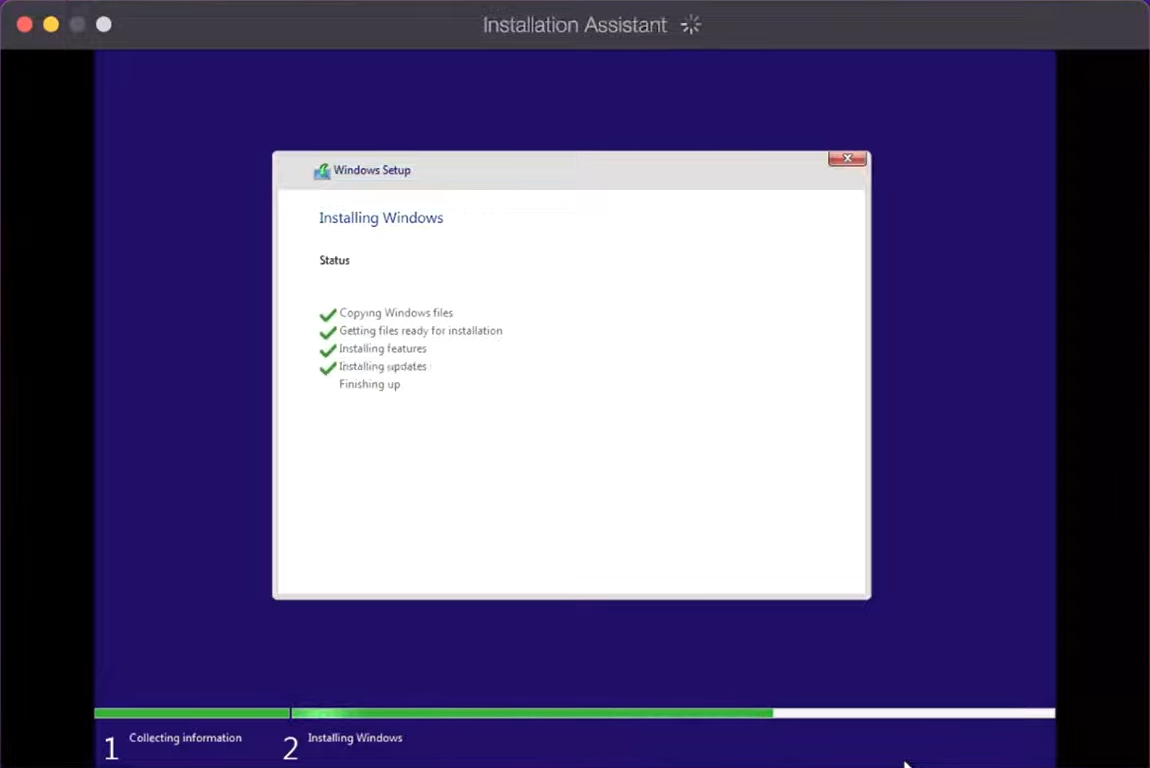
Boot Camp will begin installing Windows - At some point, your Mac will reboot, and the Windows installation program will appear. Follow the instructions and Windows will begin installing.
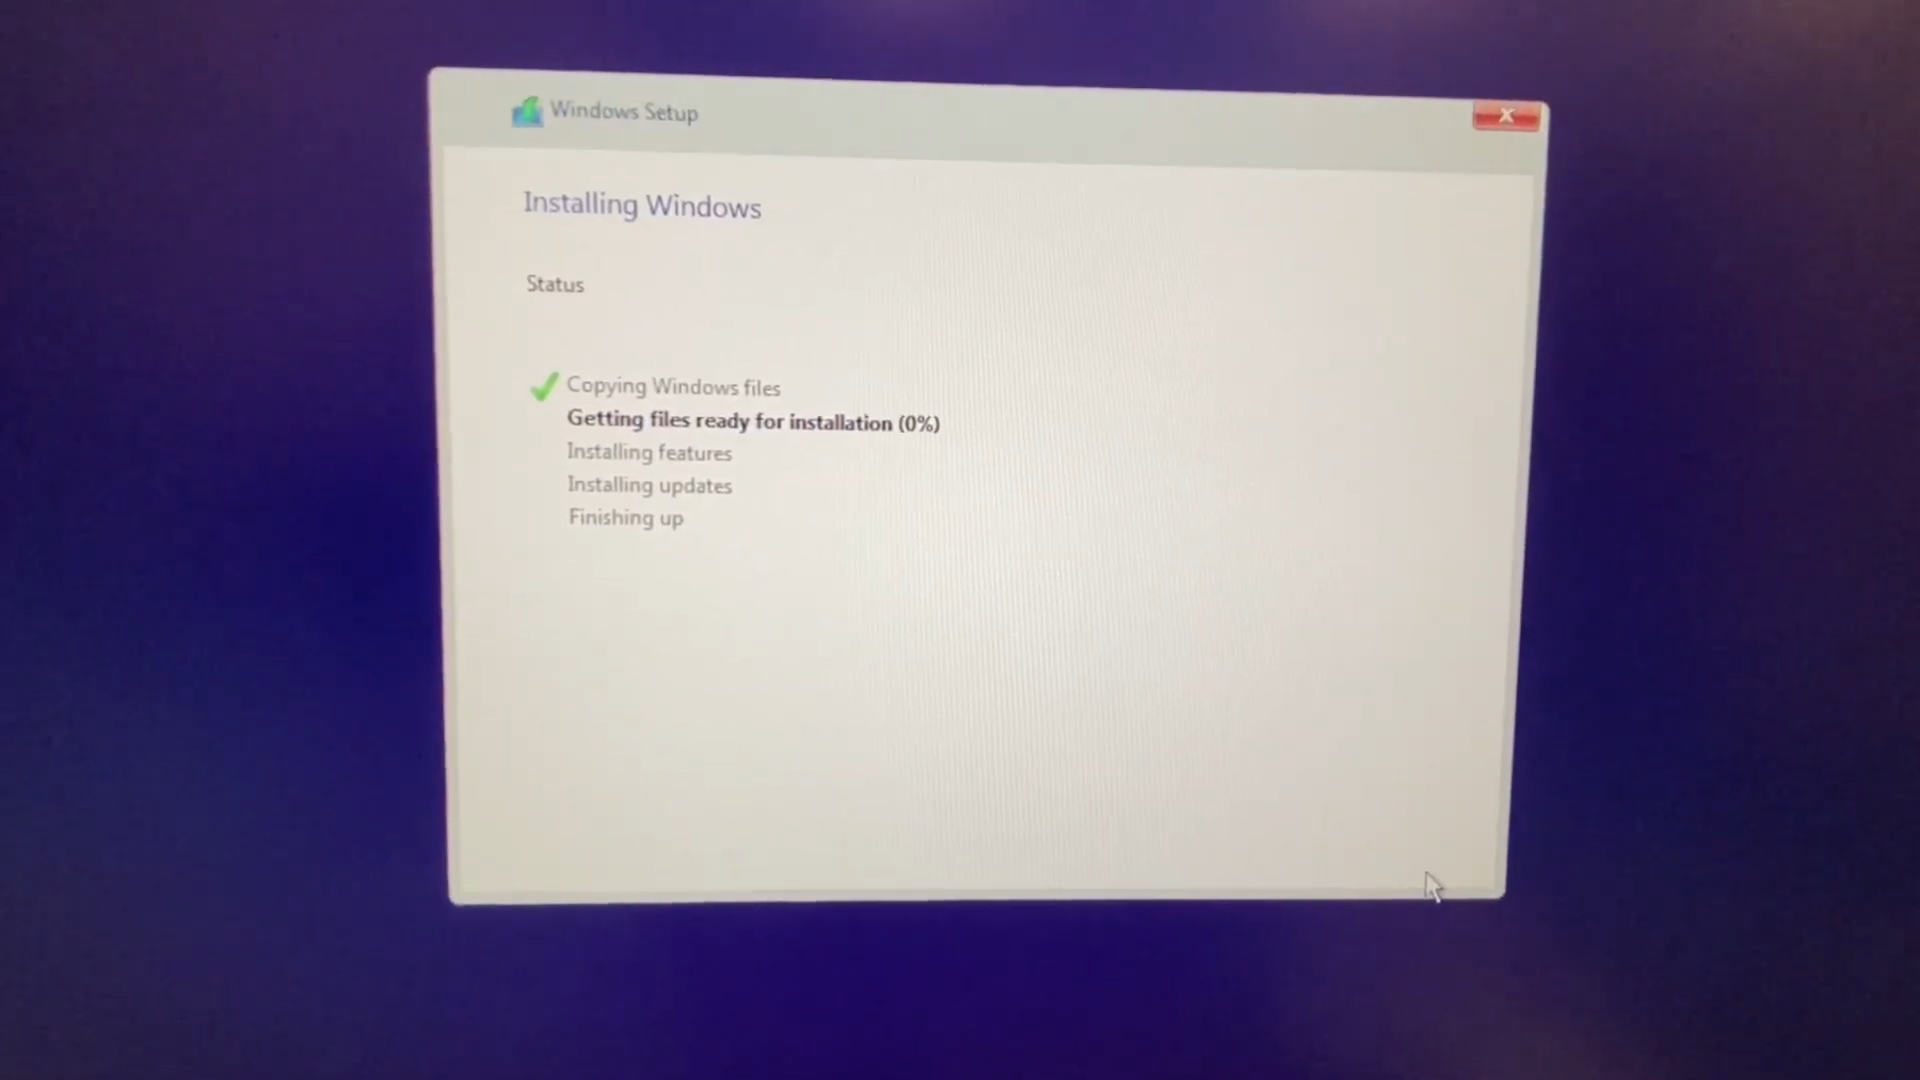
Windows will begin installing on your Mac after rebooting - Now, once Windows has been installed, it will take you through the setup process.
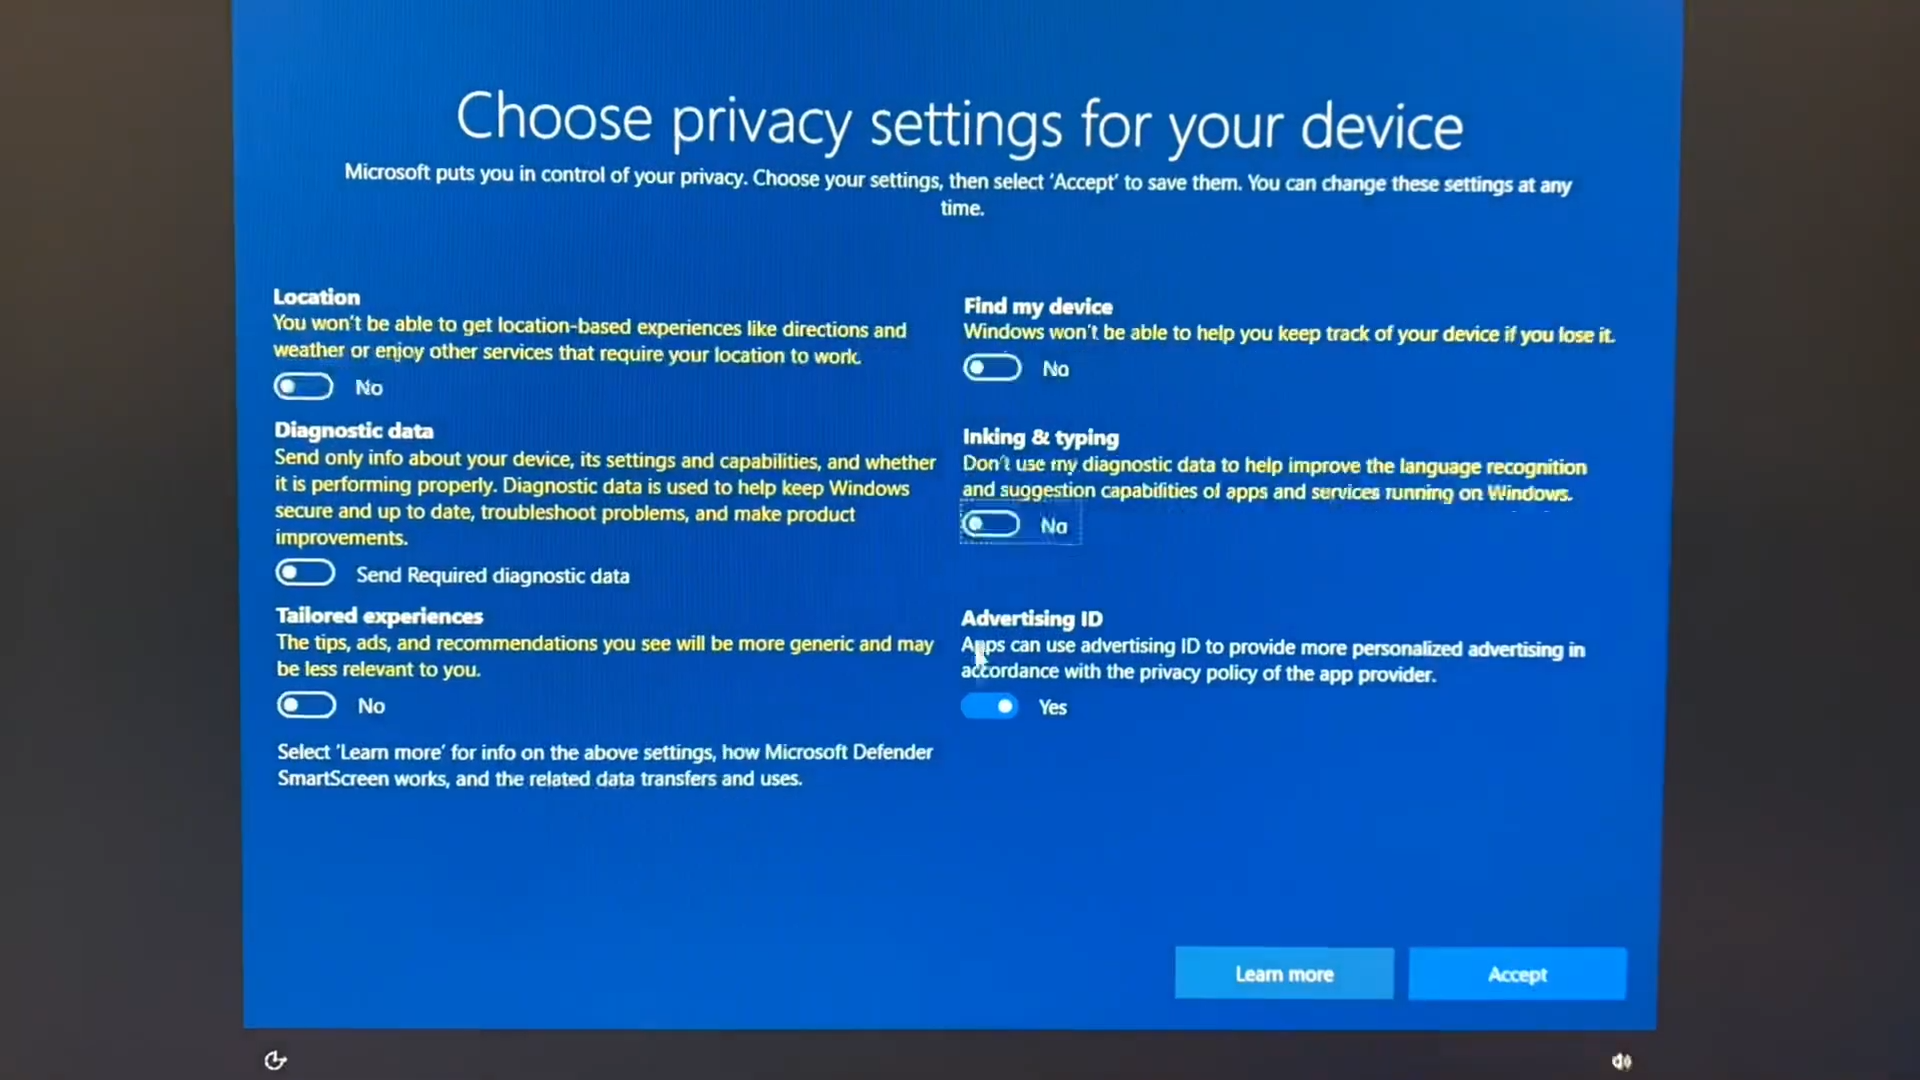
Choosing privacy settings in Windows - Once done with the whole setup process, Boot Camp will launch to proceed with the installation of some essential drivers. Click on Next.
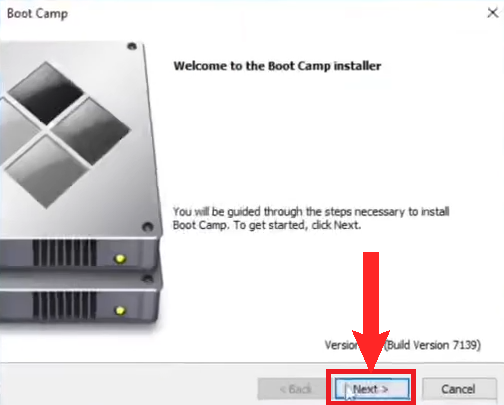
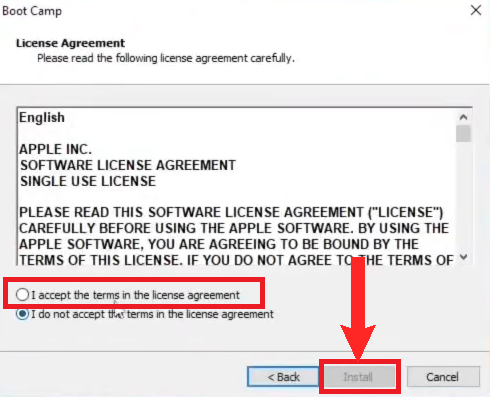
Click on “Next” - Next, Agree to the license agreement, then click Install.
- Boot Camp will begin installing some essential drivers. Wait for the installation to complete.
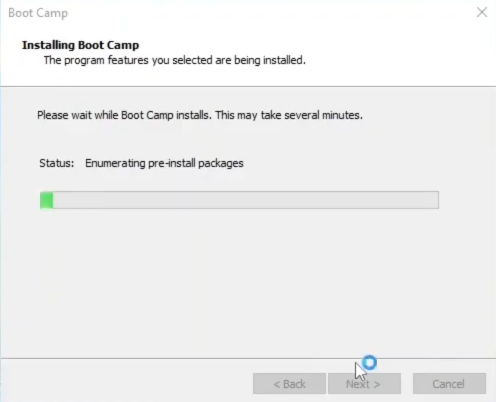
Wait for the drivers to install - When the drivers are installed, you’re all set. Just download Steam, Epic Game Store or any other store and grind away.
All images sourced from eryk kret on YouTube.
Virtual Environments
Virtual environments are resources that allow you to run programs and apps through software. In the case of macOS, they allow you to run Windows on your Mac. What separates it from Boot Camp, and makes it better, is that you can switch back to Mac in real-time. Although, it does come at the cost of more processing power being used.
The best option for a virtual environment is Parallels. Parallels is compatible with Apple chipsets, simple to use and easy to set up. It’s also highly recommended by many Mac users. Parallels is not free however; the basic plan starts from $99.99 annually. They do offer a free trial of 14 days.
It should be noted that Parallels uses the ARM version of Windows.
Setting up Parallels
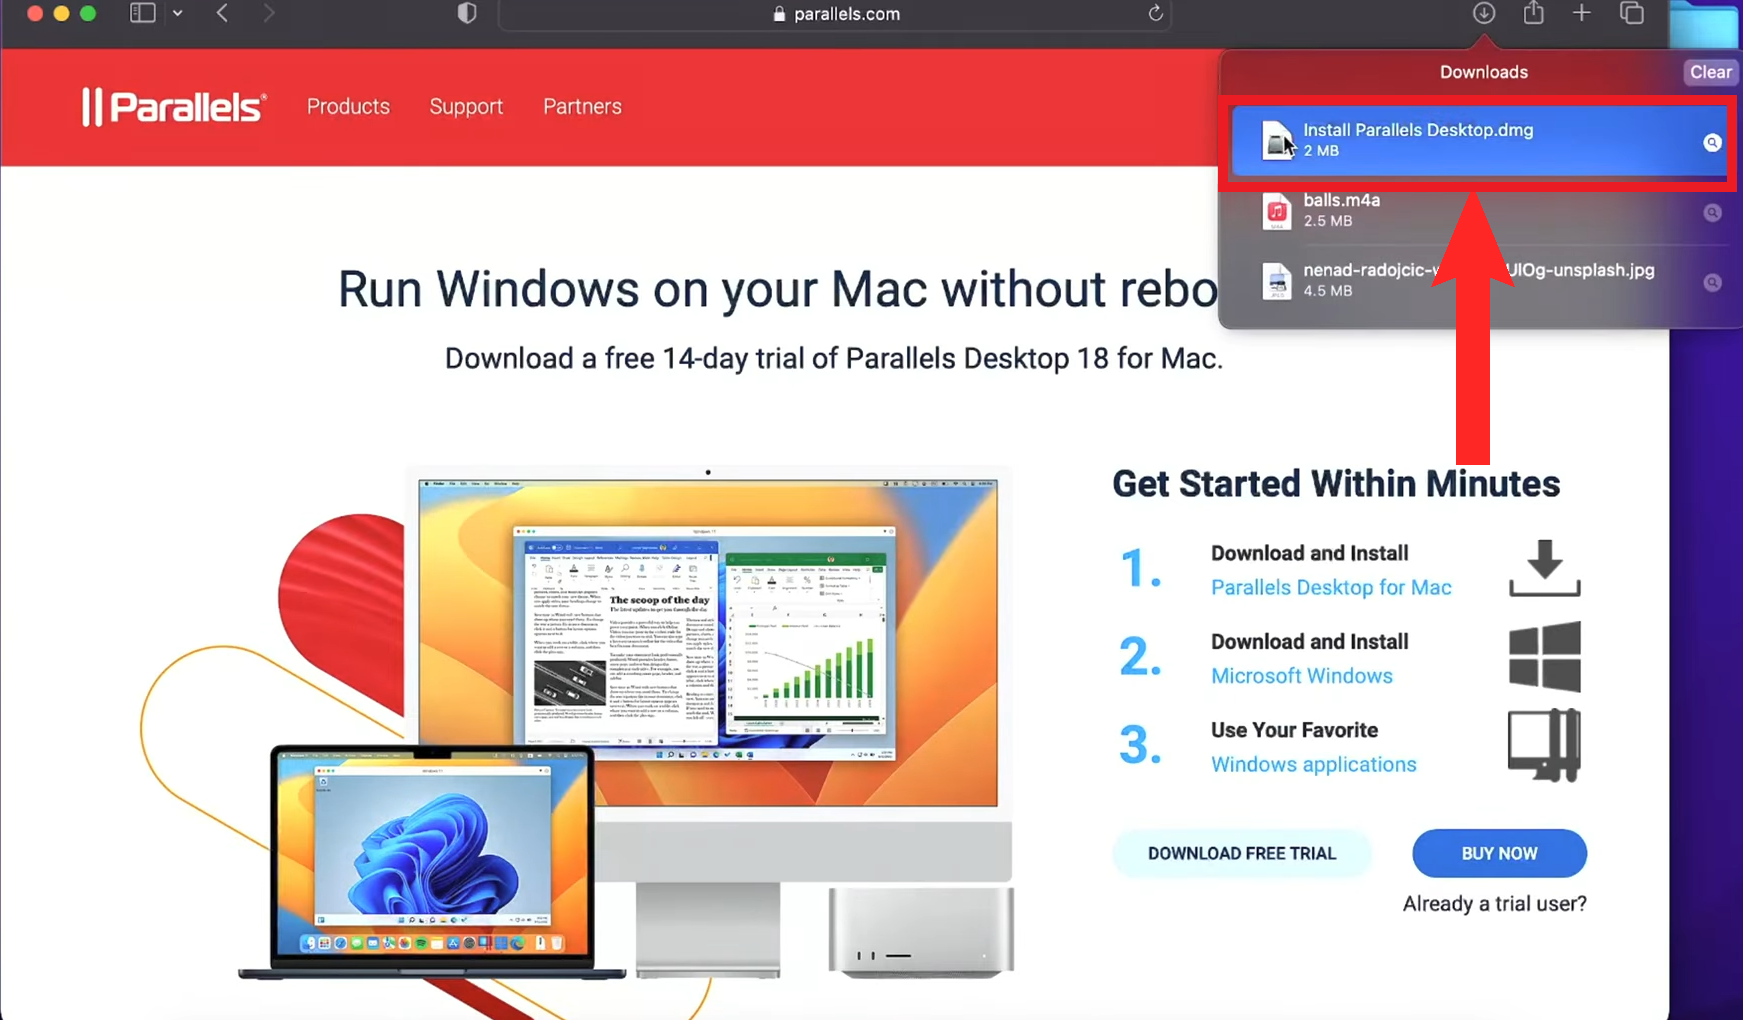
- Download the Parallels installer and run it.
Run the downloaded installer - Next, click on Install Parallels Desktop.

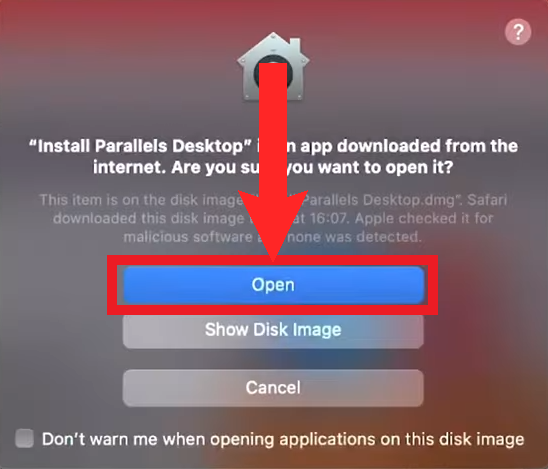
Click on “Install Parallels Desktop” - A warning may pop-up that will remind you of the third-party nature of the app. Ignore it and proceed by clicking on Open.
Click on “Open” - Then, allow Parallels access to your Downloads folder.
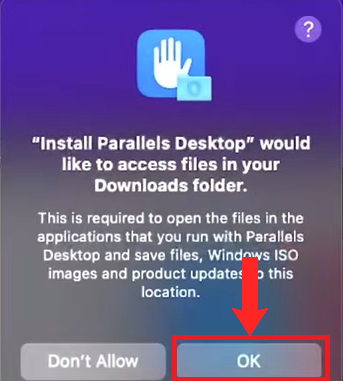
Click on OK to grant access - After that, the Parallels setup will start initializing. In a few moments, the setup will appear and ask for the required permissions. Click Next and grant them all.
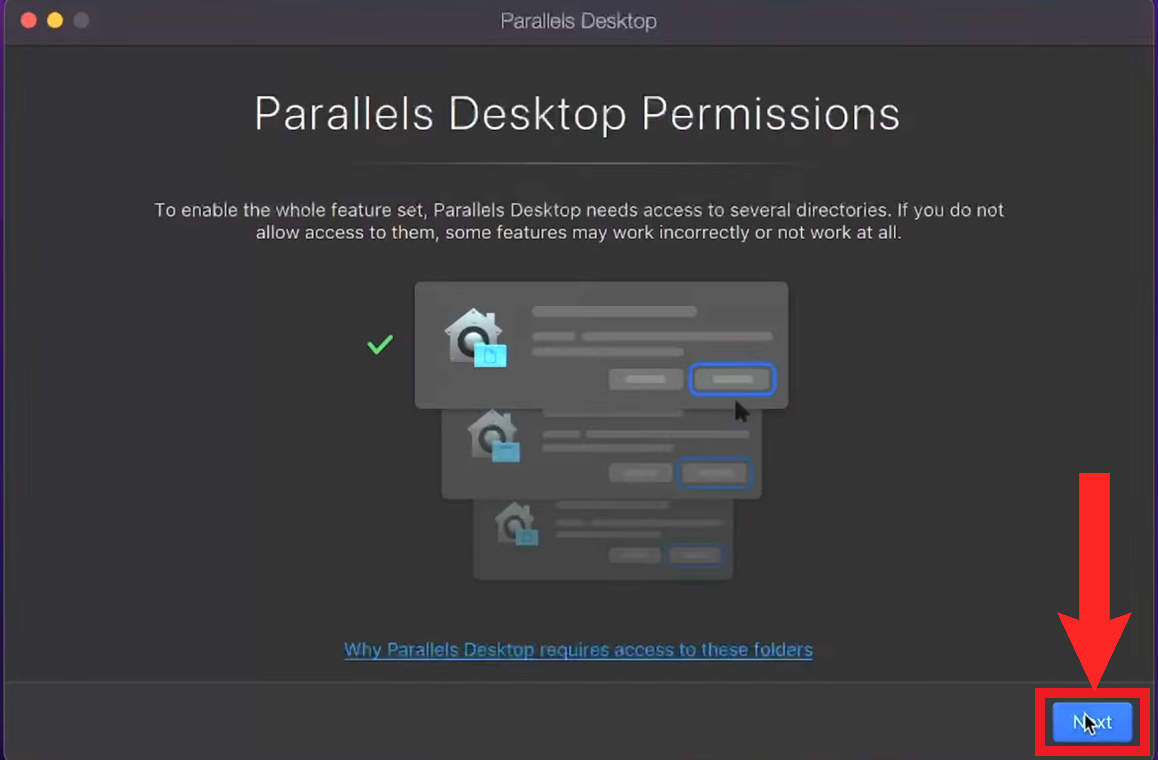
Click “Next” to start granting permissions - Next, the setup will want to install Windows. Click on Install Windows to begin the process.

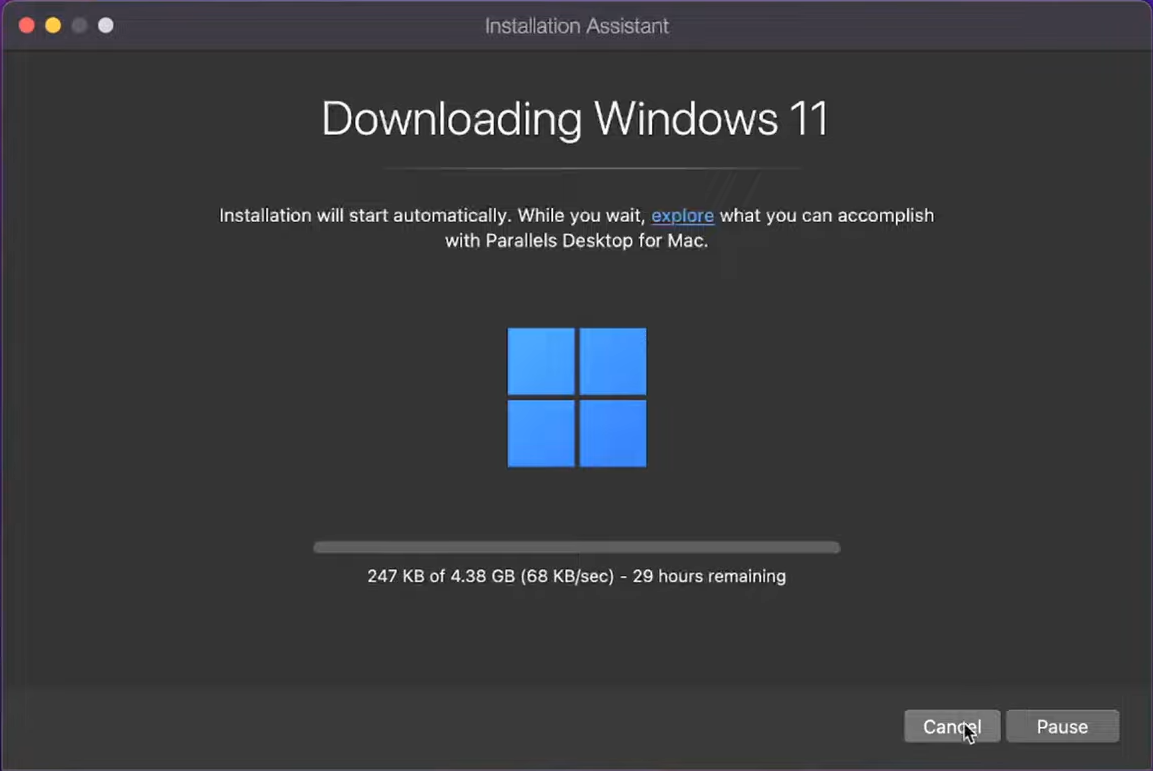
Click on “Install Windows” - After that, the Parallels setup will begin downloading Windows 11 by default. Patiently wait for download to complete.
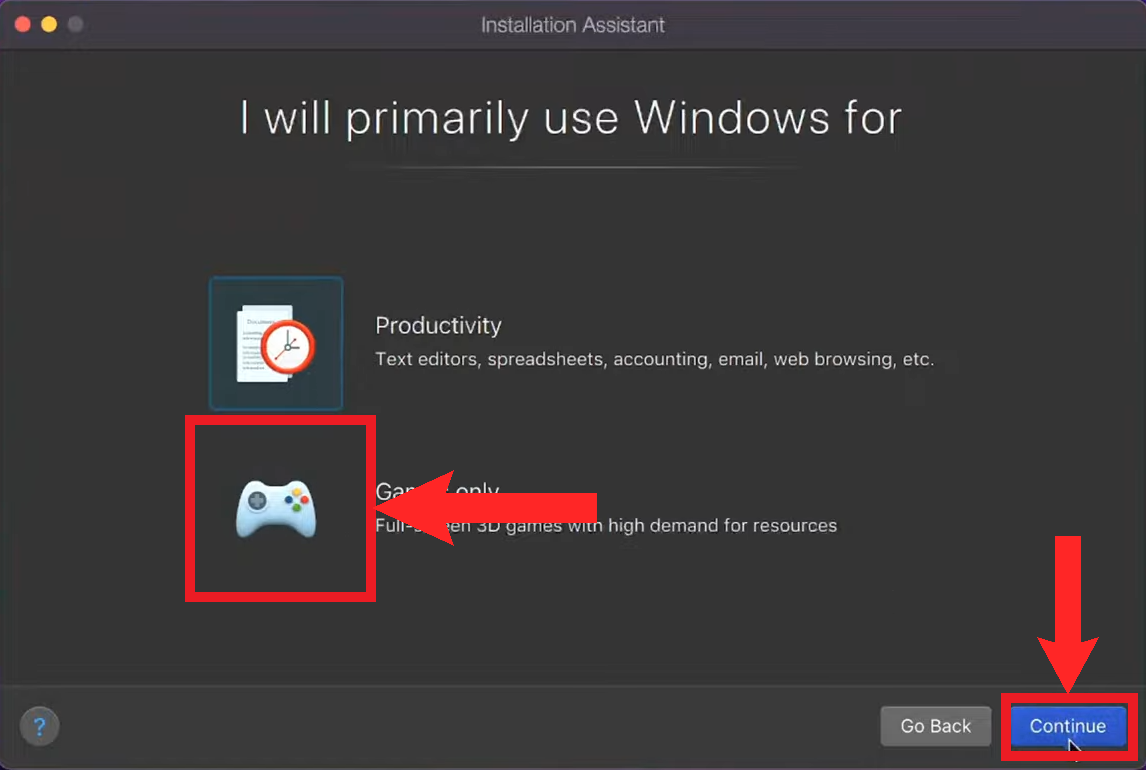
Wait for Parallels to finish downloading Windows - Once done, Parallels will ask you whether you’ll be using Windows for productivity or gaming. Since, we’re installing Parallels for gaming purposes we’ll choose Gaming. Click Continue.
Click on the joystick to select Gaming - After that, Parallels will load the virtual environment and begin installing Windows 11 on it. Again, patiently wait, as this may take some time.
Wait for Windows to finish installing - After the installation completes, Parallels will ask you to sign in with your Parallels account or create one, in order to proceed to the next step. If you purchased a plan, enter the authentication key which it gives you upon a purchase.
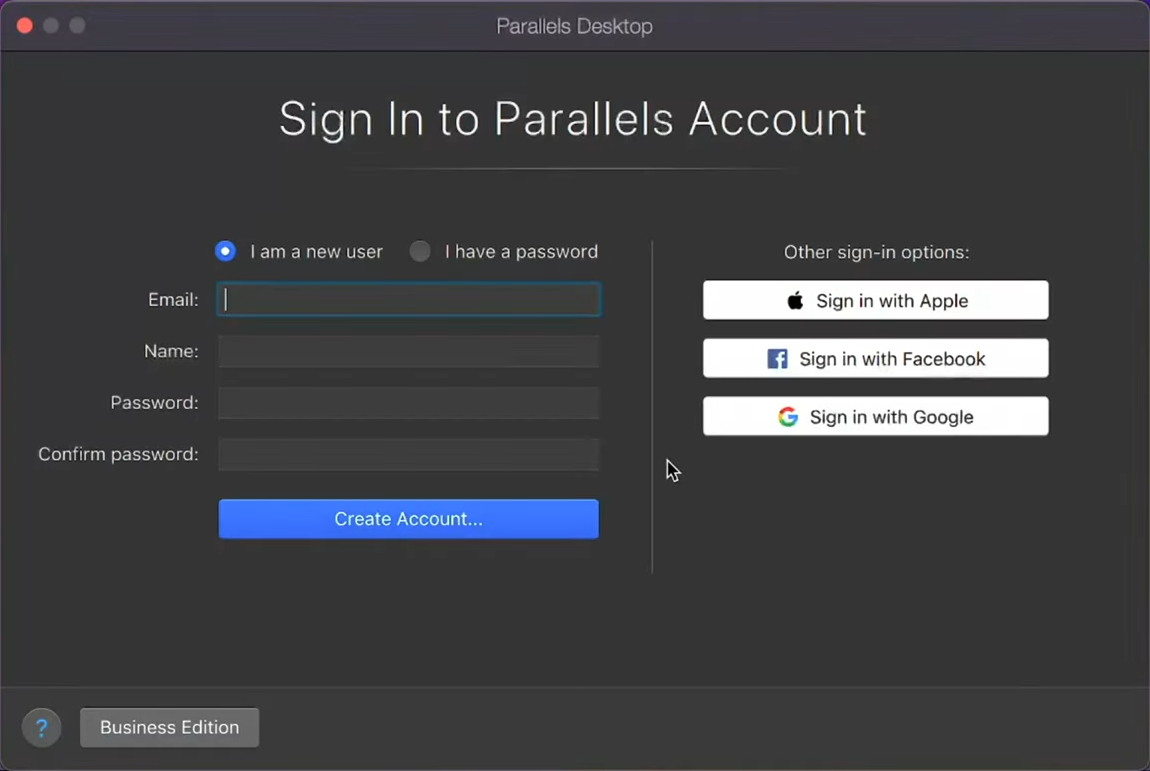
Create a Parallels account or sign in to proceed to the next step - Finally, you can use Windows. Download Steam, Epic Games Store and other stores and install your choice of games and start grinding away.
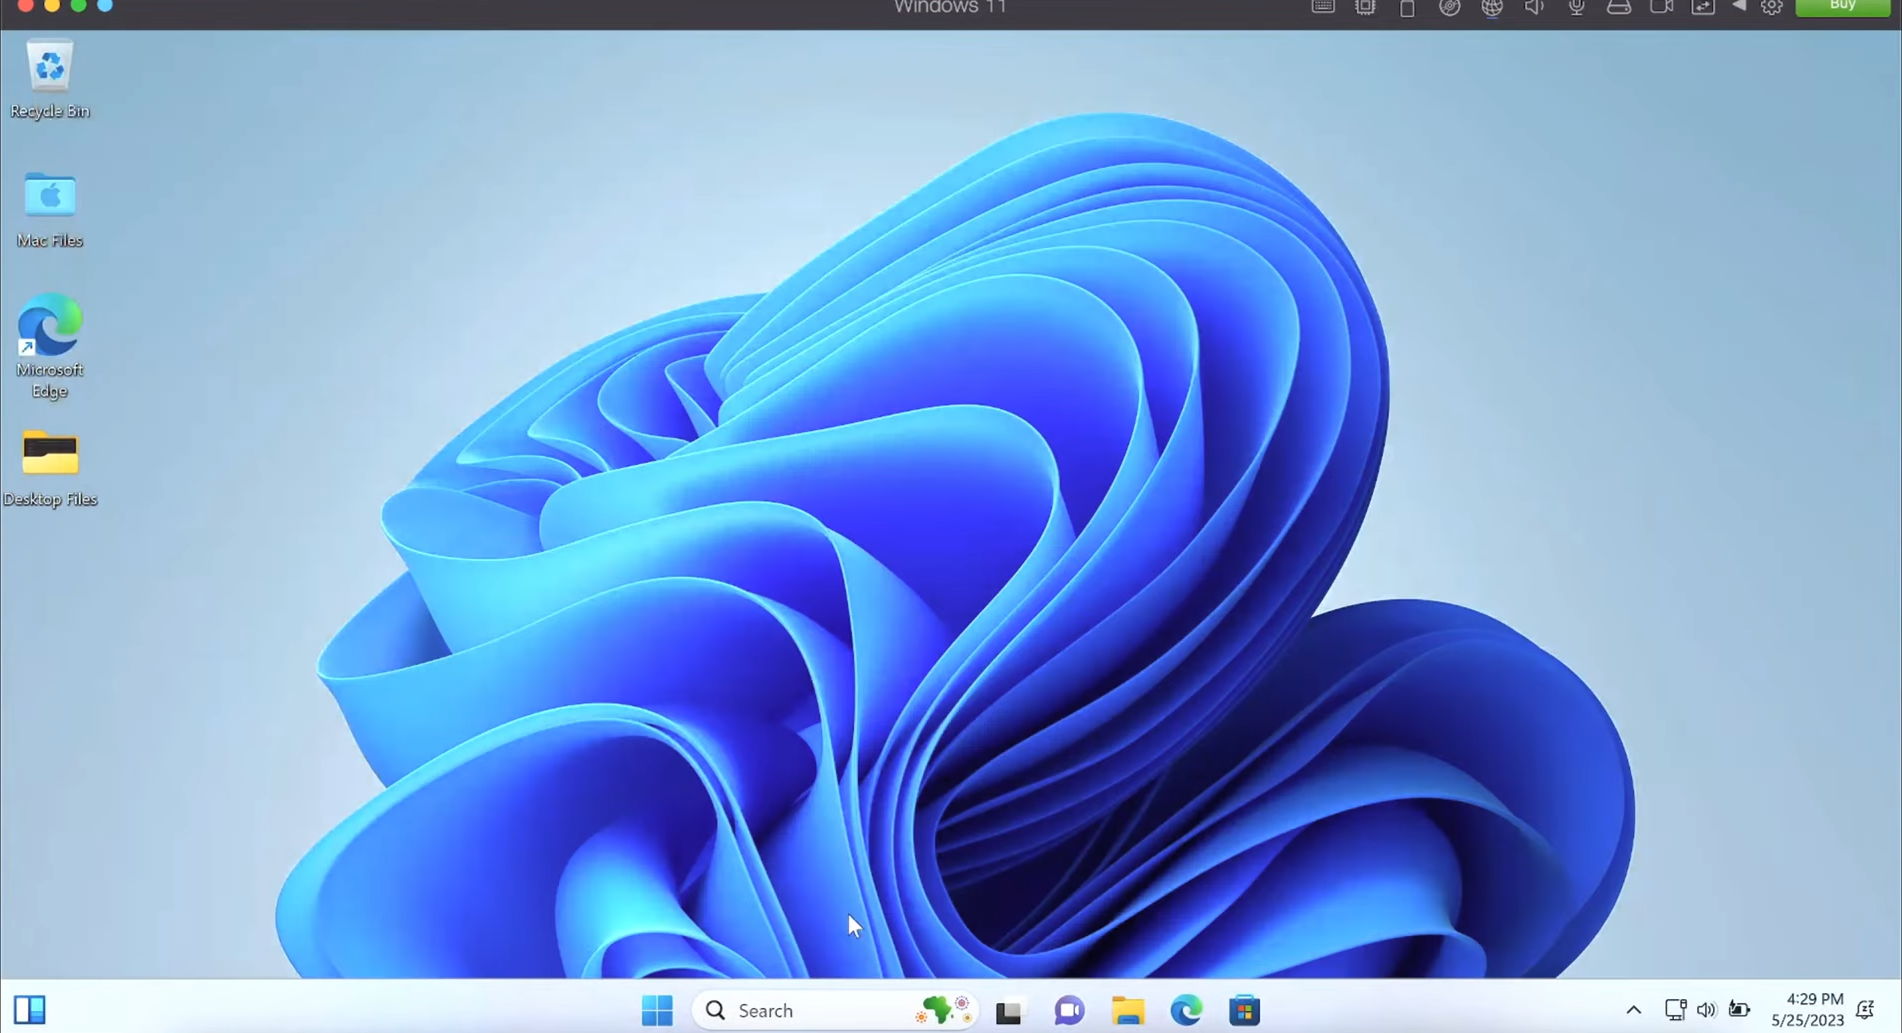
Running Windows 11 in real-time in macOS on Parallels
All images sourced from iHaadi on YouTube.
Exploring Wine
Wine is a compatibility layer that allows you run Windows apps on macOS, without installing Windows. Wine has been integrated into a number of projects for playing Windows games on macOS. These include WineBottler, CrossOver, PlayOnMac, etc.
While regular Wine gets the job done, these apps are more user-friendly and CrossOver is supported on M1 chipsets too, while Wine is only supported on Intel-based Macs. Interestingly enough, Crossover employs the help of Rosetta 2 (more on this later) to translate Wine’s x86 code to ARM that will work on Apple silicon. That’s why we’ll be taking a slightly more detailed look at CrossOver.
CrossOver
CrossOver is an app that allows you to run Windows apps and games without installing Windows on your Mac. Because, CrossOver works on the Wine compatibility layer framework, not all games are expected to perform well. While Wine and some of its other projects are free, CrossOver is paid; $24 per year, while the lifetime plan costs $494. CrossOver also offers a 14-day free trial.
Setting up CrossOver
- First, head on over to the Crossover Homepage and choose whether to purchase CrossOver or apply for a free trial.
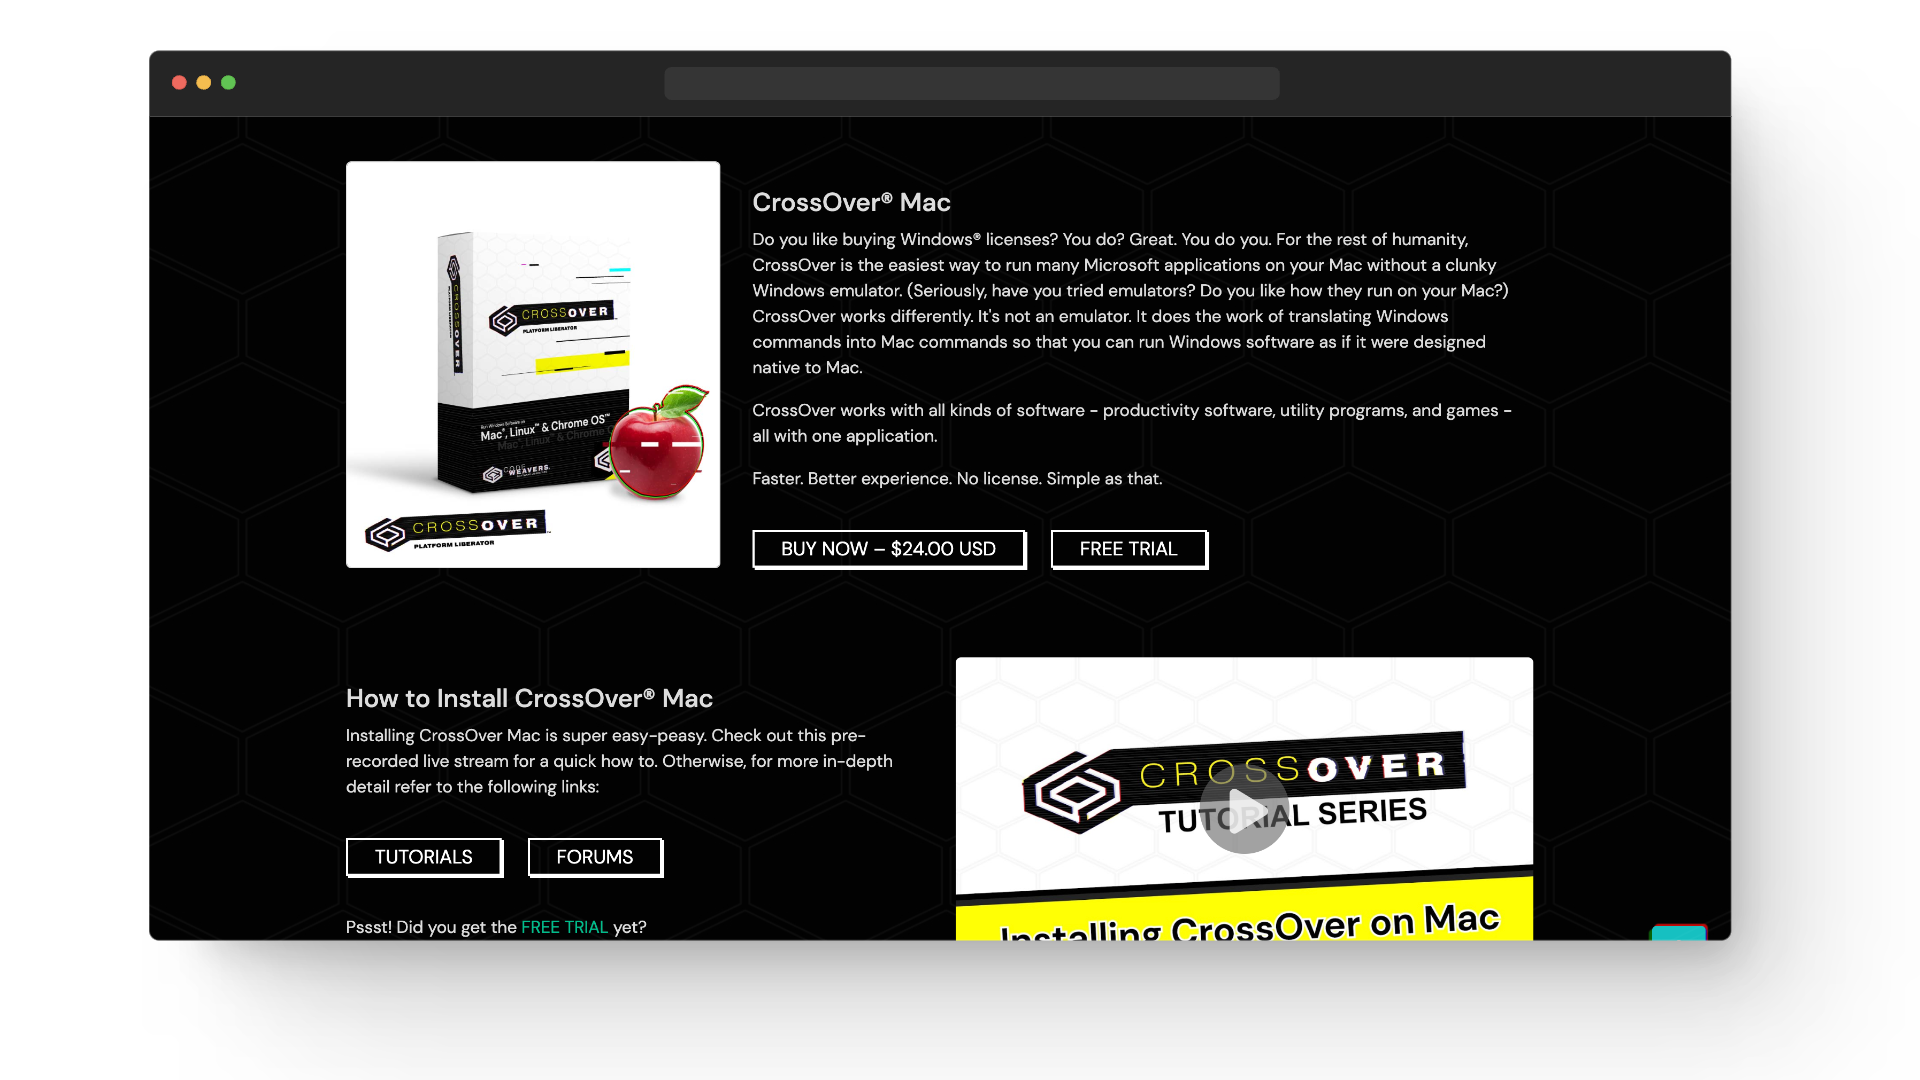
Crossover Homepage showing MacOS downloads - Next, create a CrossOver account, or if you’ve opted for the free trial, enter your name and email and download the CrossOver package.
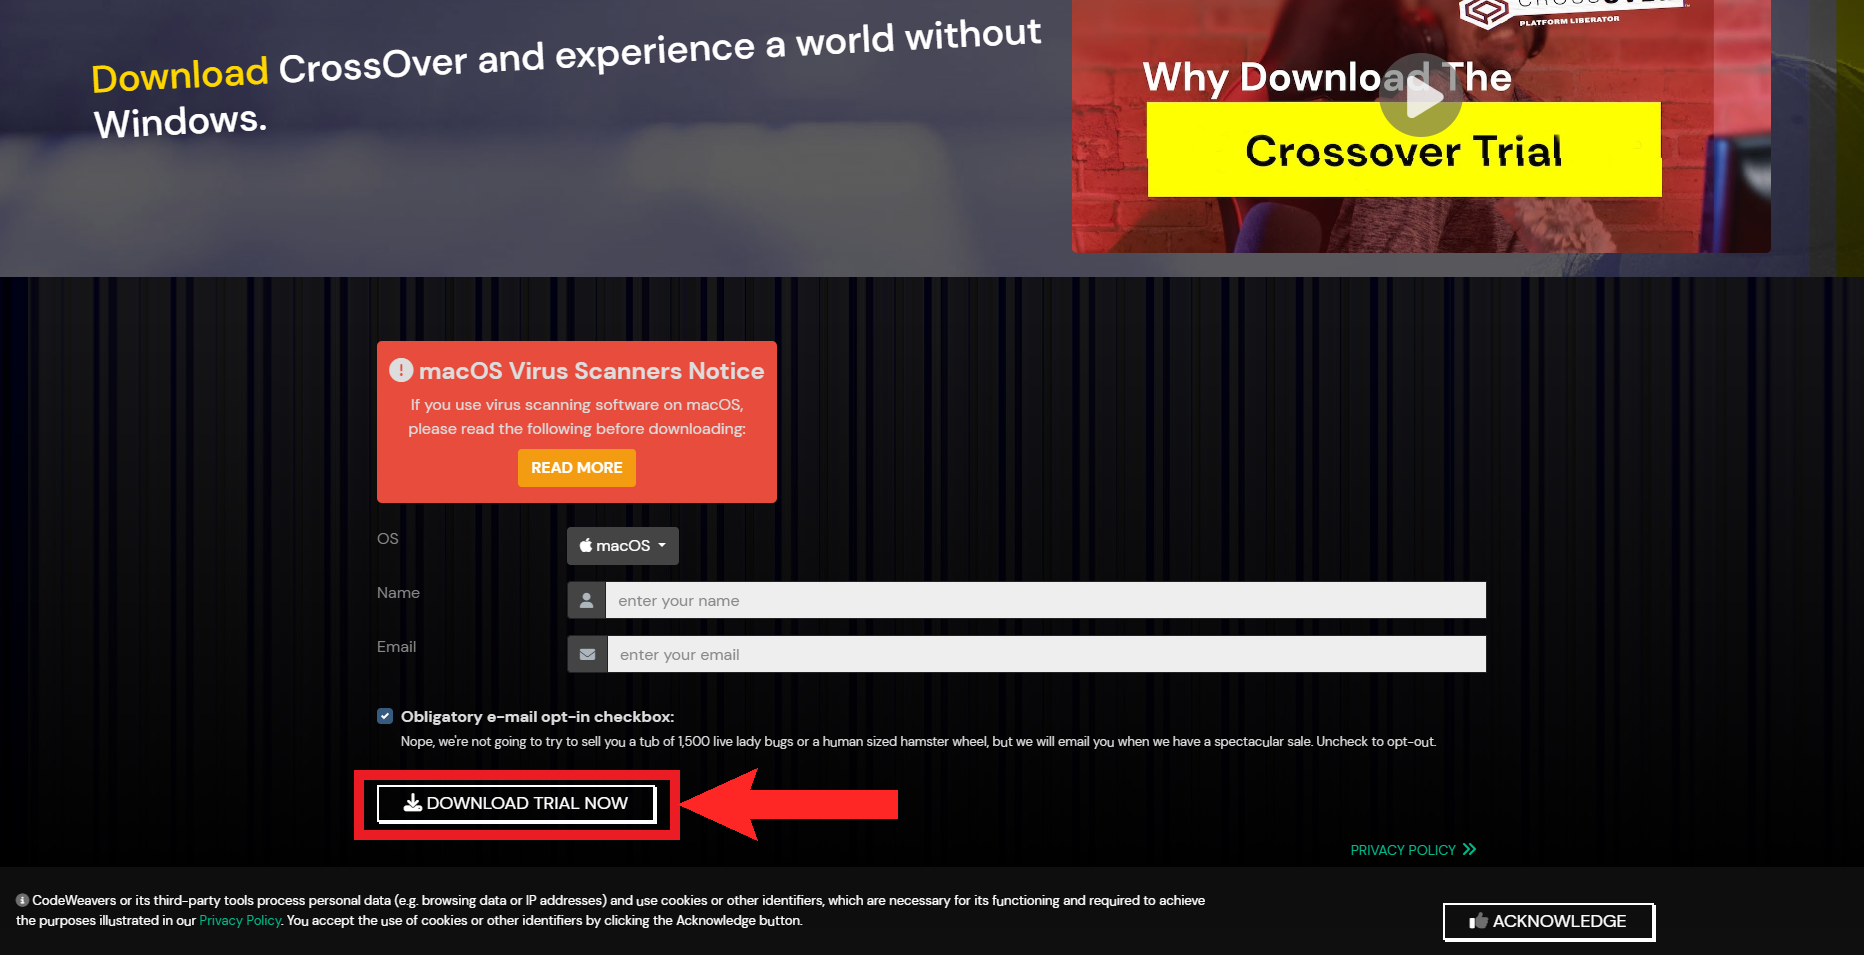
Applying for a CrossOver trial. Enter your name and email and click on “Download Trial” - When it finishes downloading, extract the app from the zip file.
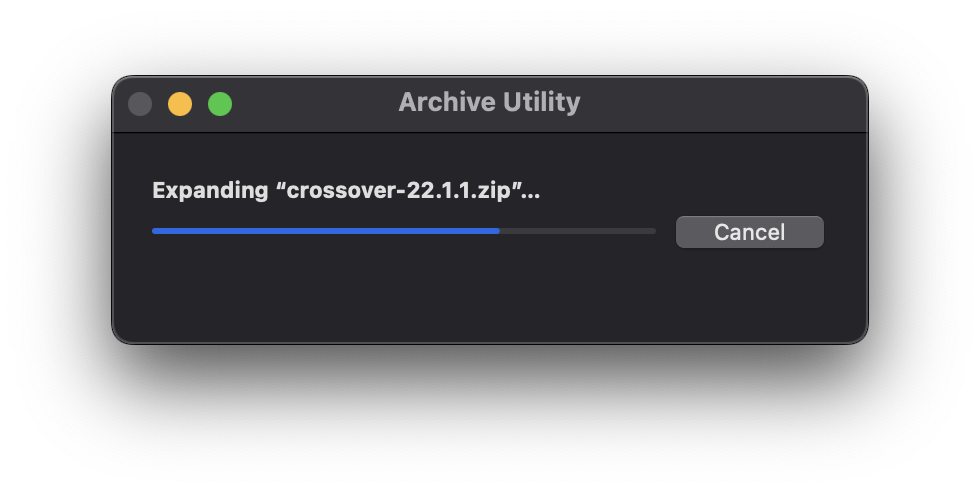
Extract the app from the zip file - Next, move the package to the Applications folder.
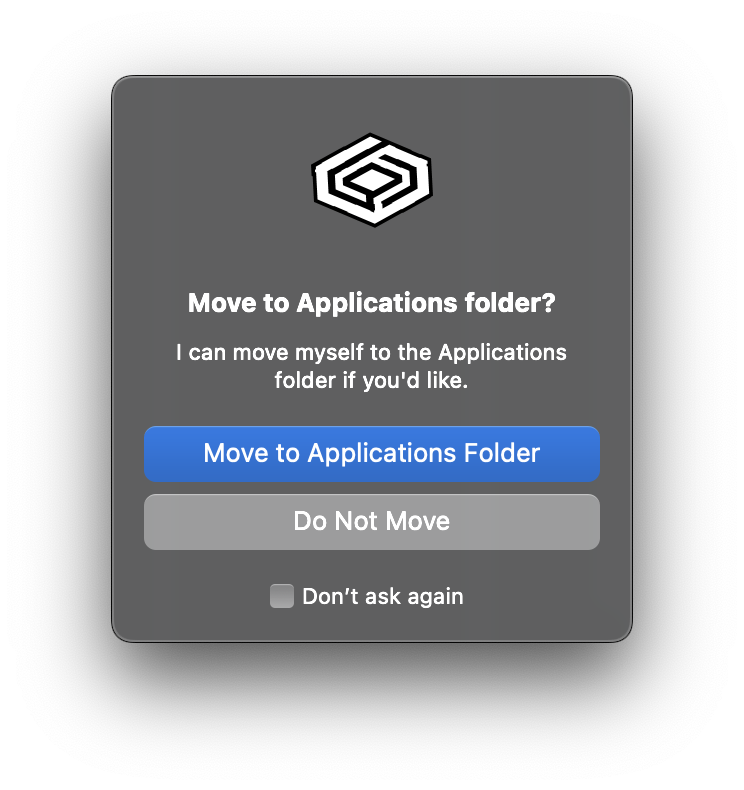
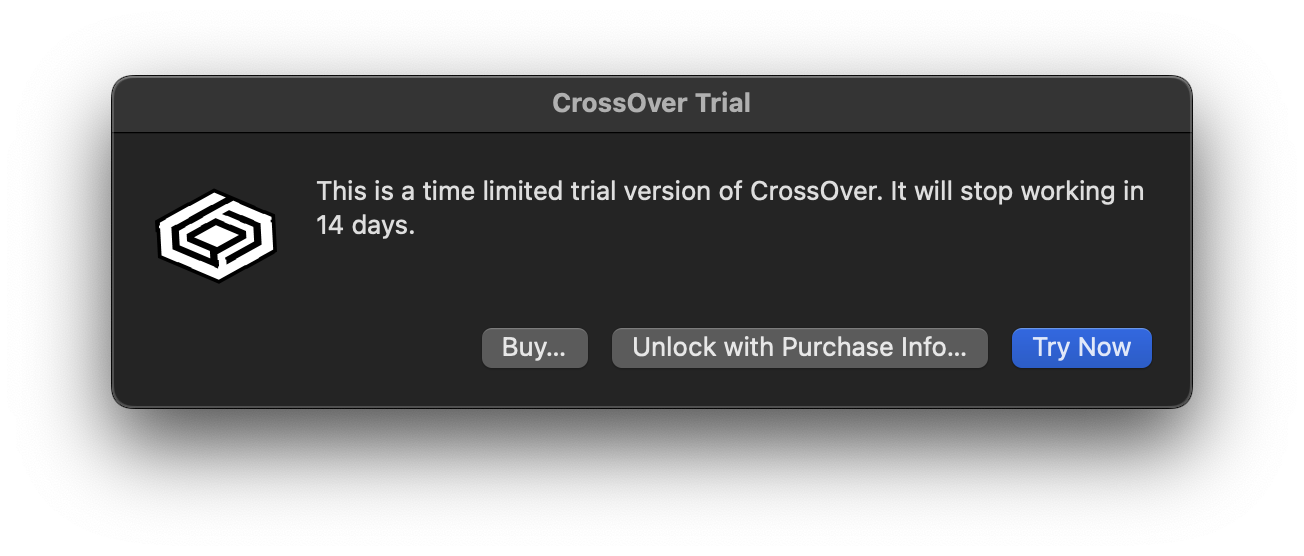
Move CrossOver to your Applications folder - Next, launch the CrossOver app. Ignore the warning message and proceed.
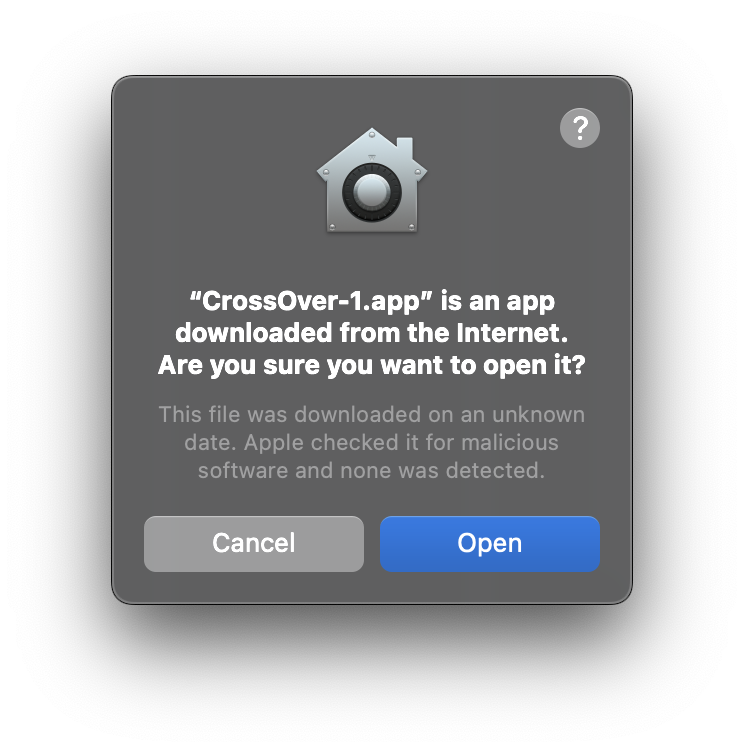
Open the app and ignore the warning - The app will warn you if you’re on a trial version. Register if you have bought the license. If you have not bought a license, then proceed.
Opt for the free trial if you haven’t purchased a license - On the CrossOver homepage, select Steam.
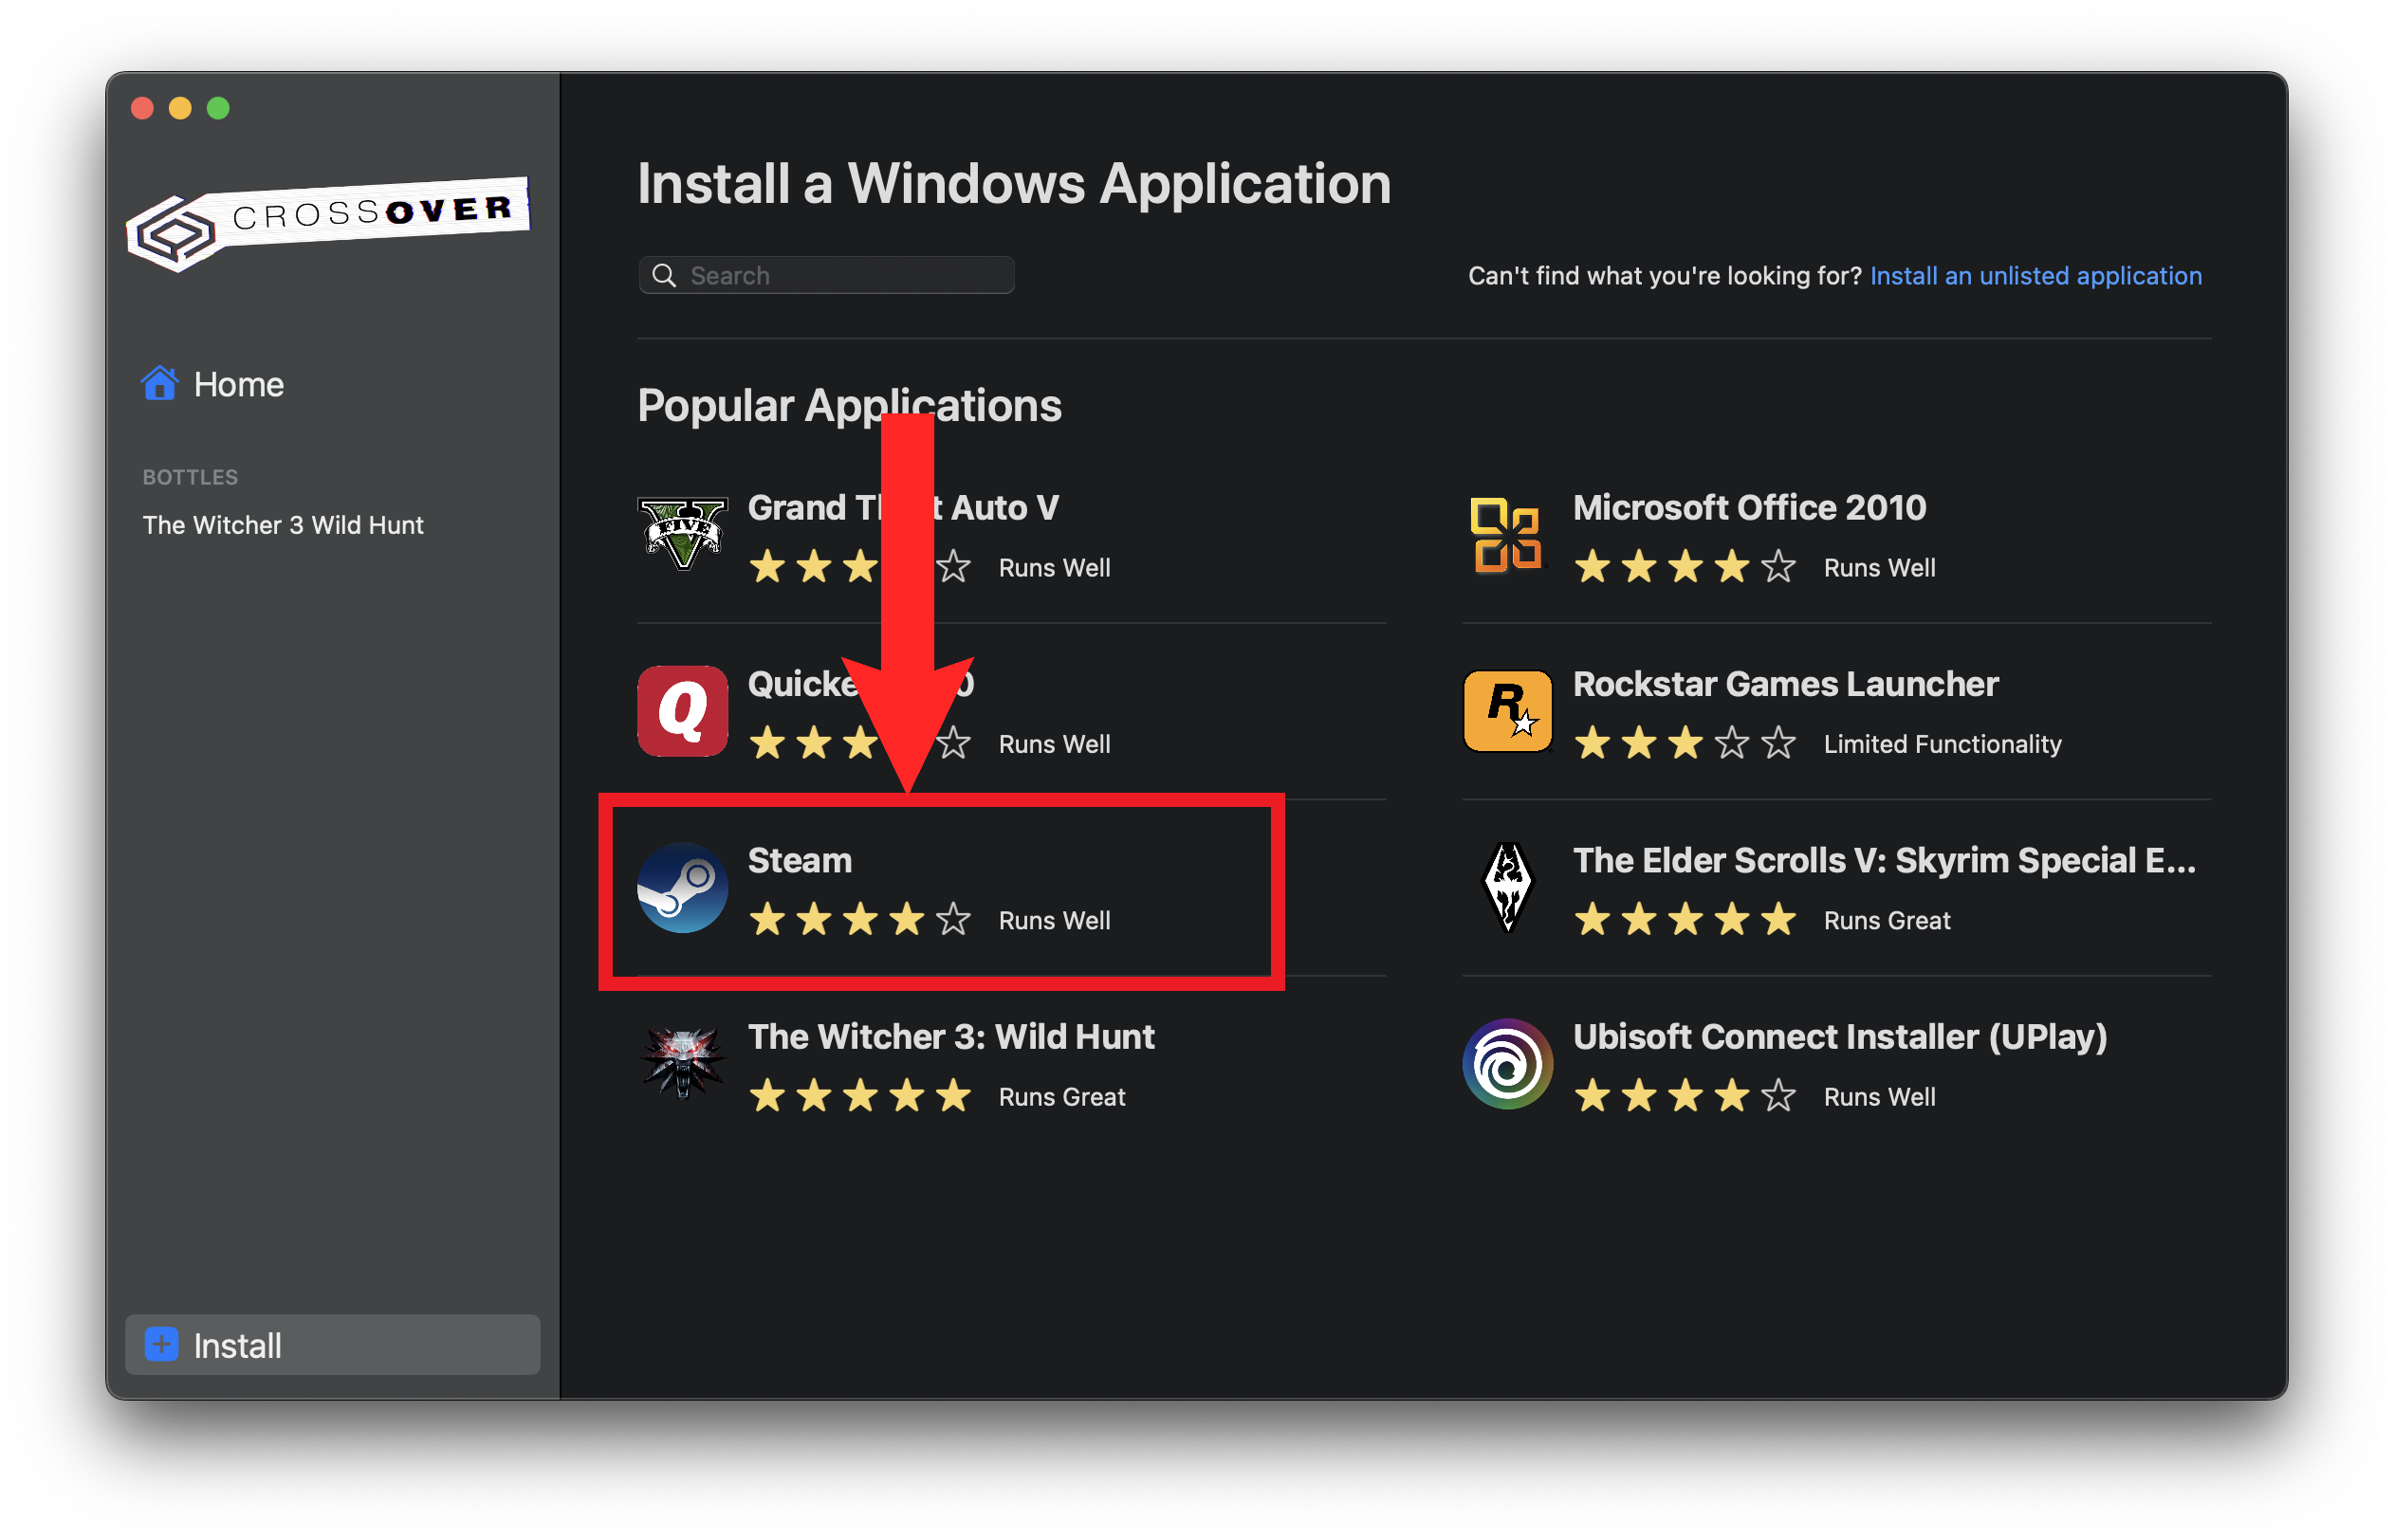
Select Steam - Then, begin installing Steam on CrossOver.
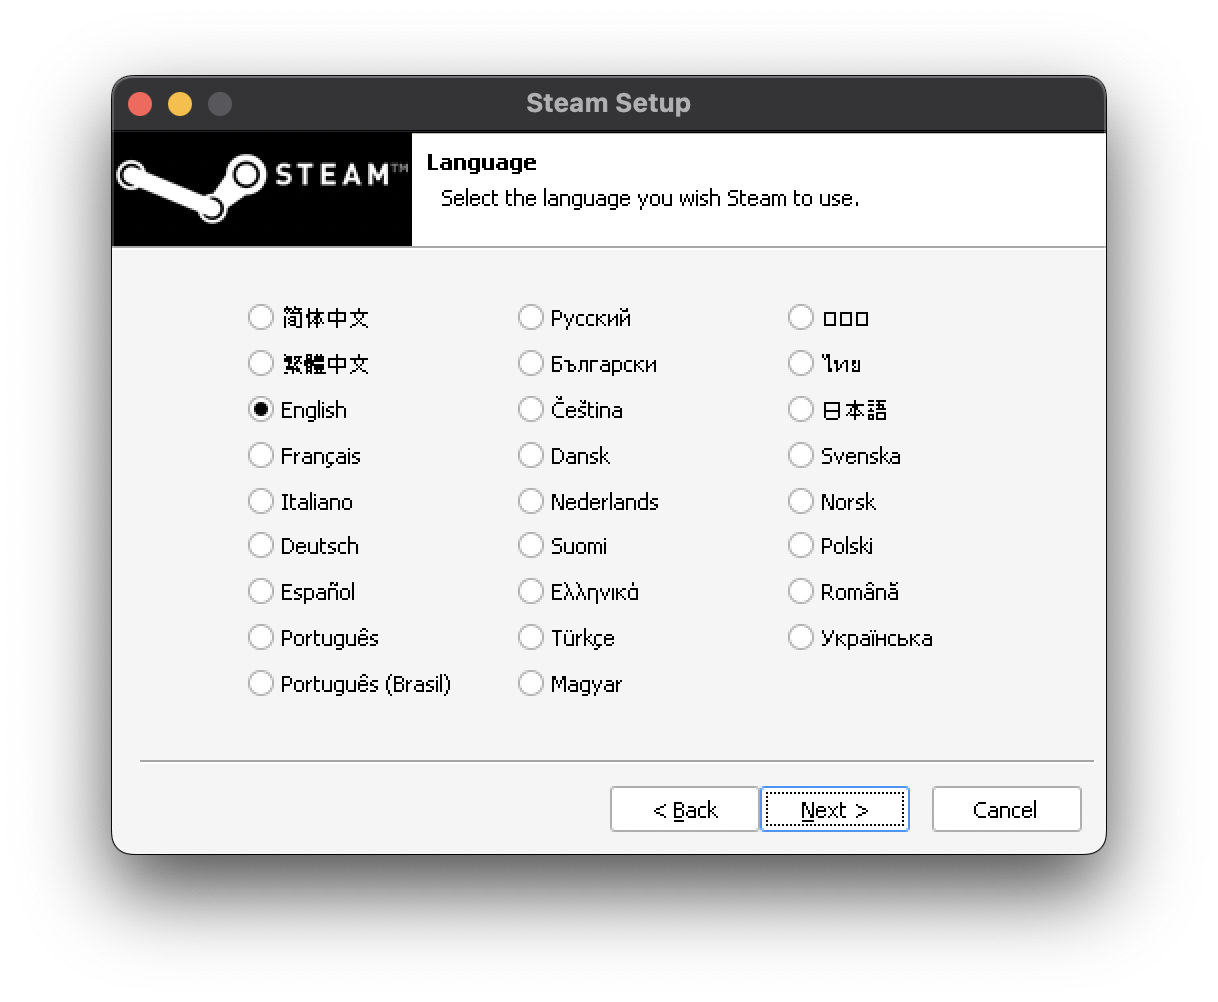
Installing Steam on CrossOver - Finally, now you can install your favorite games through Steam on CrossOver. CrossOver shows what type of performance one can expect from a game. You can use the search bar at the top corner to look up your favorite game and see if it’s compatible.

Installing The Witcher 3: The Wild Hunt on CrossOver
Emulators
Emulators are another way through which one can enjoy retro roguelikes on their Macs just like gamers like to do on their Windows PCs. Since these games are very old, there’s usually no problem emulating them. However, in rare cases with specific titles, one may encounter some issues. Regardless, EmuBox and DOSBox are the best emulators you can get and are bound to fulfill all your needs.
Since most emulators are compiled for x86 architecture and because Macs were x86 for the longest time, it is recommended to install Rosetta if you have a newer, Apple silicon Mac. Rosetta is a translation layer that allows apps made for Intel-based (x86) Macs to work on Apple silicon (ARM) Macs. To manually install Rosetta, run this command on the Terminal:
softwareupdate --install-rosetta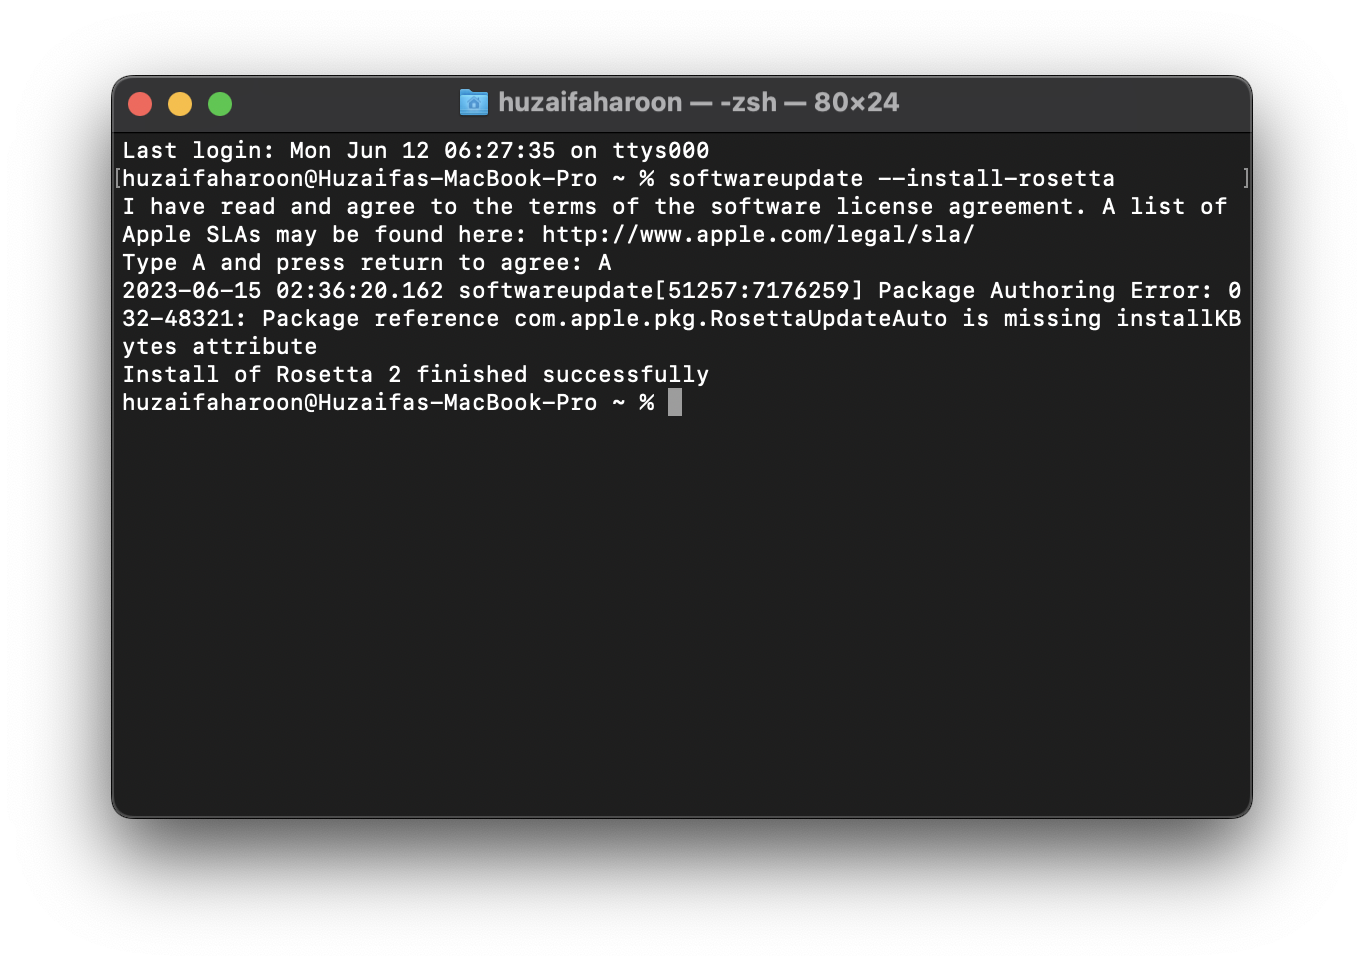
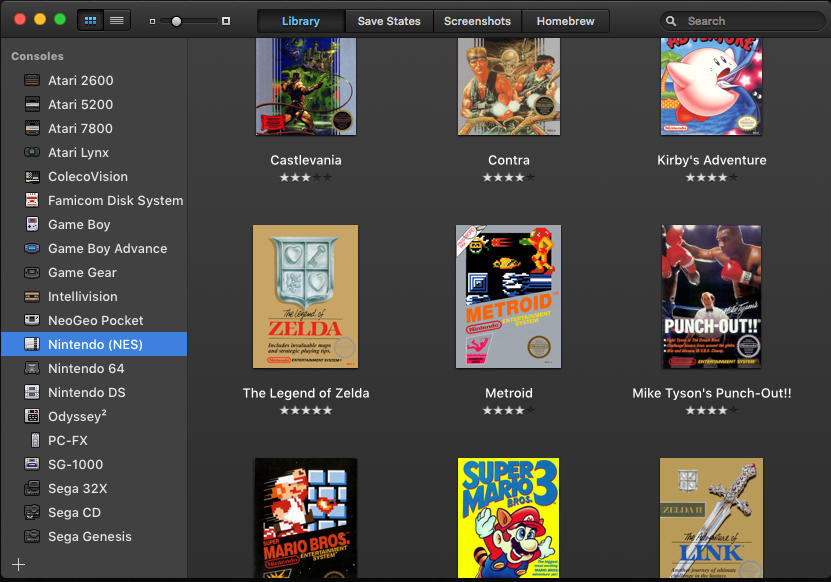
EmuBox
EmuBox is an all-in-one emulator that offers a wide range of devices to emulate. The GameBoy Advance, Nintendo DS, SEGA Genesis, Atari 7800; you name it and EmuBox is likely to have it. The interface user-friendly and the app itself is quite simple to use.
Regardless, it should be kept in mind that EmuBox is only an emulator and provides no games within the app. The ROMs, or game files, can be extracted from a physical copy of the games or, if that is not possible, one can resort to more underhanded methods.
DOSBox
DOSBox is an emulator for emulating old DOS games. Besides being available on macOS, DOSBox is available on a number of operating systems. DOSBox has a CLI (Command Line Interface), meaning that it works through the Terminal. Again, DOSBox is only an emulator and the ROMs are not provided with the app.
Not every game is completely compatible with DOSBox. You can check the official compatibility list to see which ones are supported. At any rate, to start up a game with DOSBox, follow these steps:
- Make a separate folder for the DOS games in Finder and note the directory of the folder. For instance, /Downloads/DOS.
- Next, open up the DOSBox app and enter the following command:
mount c ~/Downloads/DOS

Enter the command on DOSBox - Next, change the location from where the DOSBox app is operating from by typing in the following command:
C:
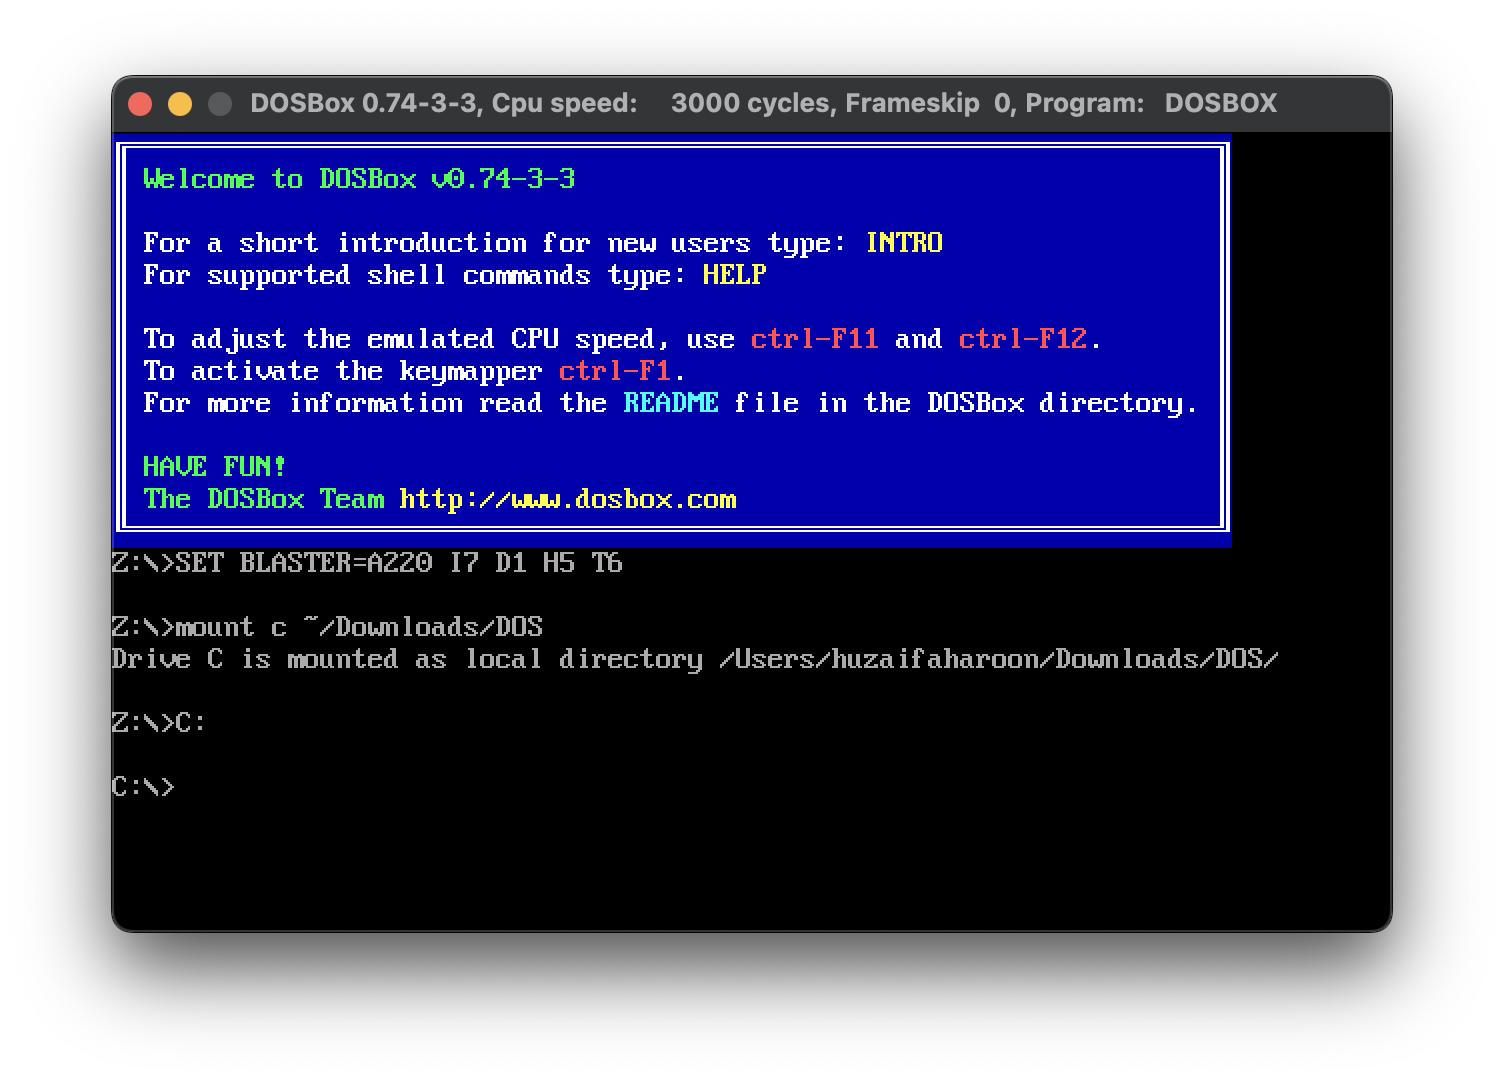
Change the directory of where the DOSBox app is operating from - Lastly, launch a game by entering its file name, with or without the .exe extension (either way works). We typed:
wolf3d
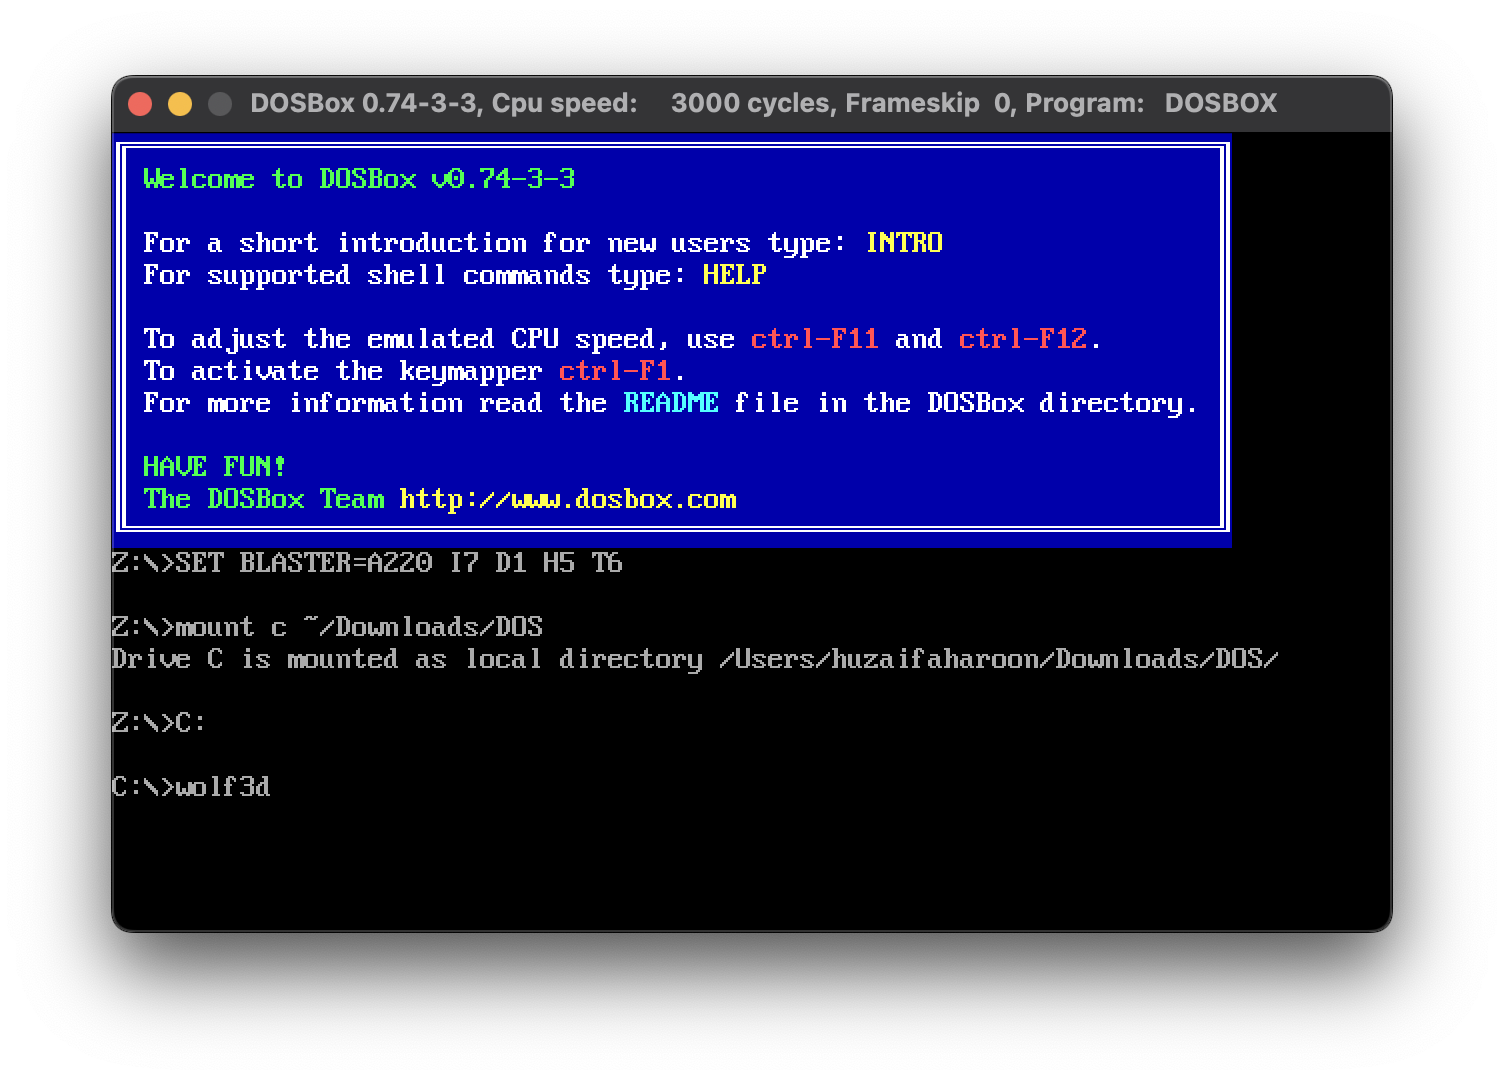
Enter the game file name on DOSBox - Finally, you’ll be able to play nostalgic retro hits from your childhood.
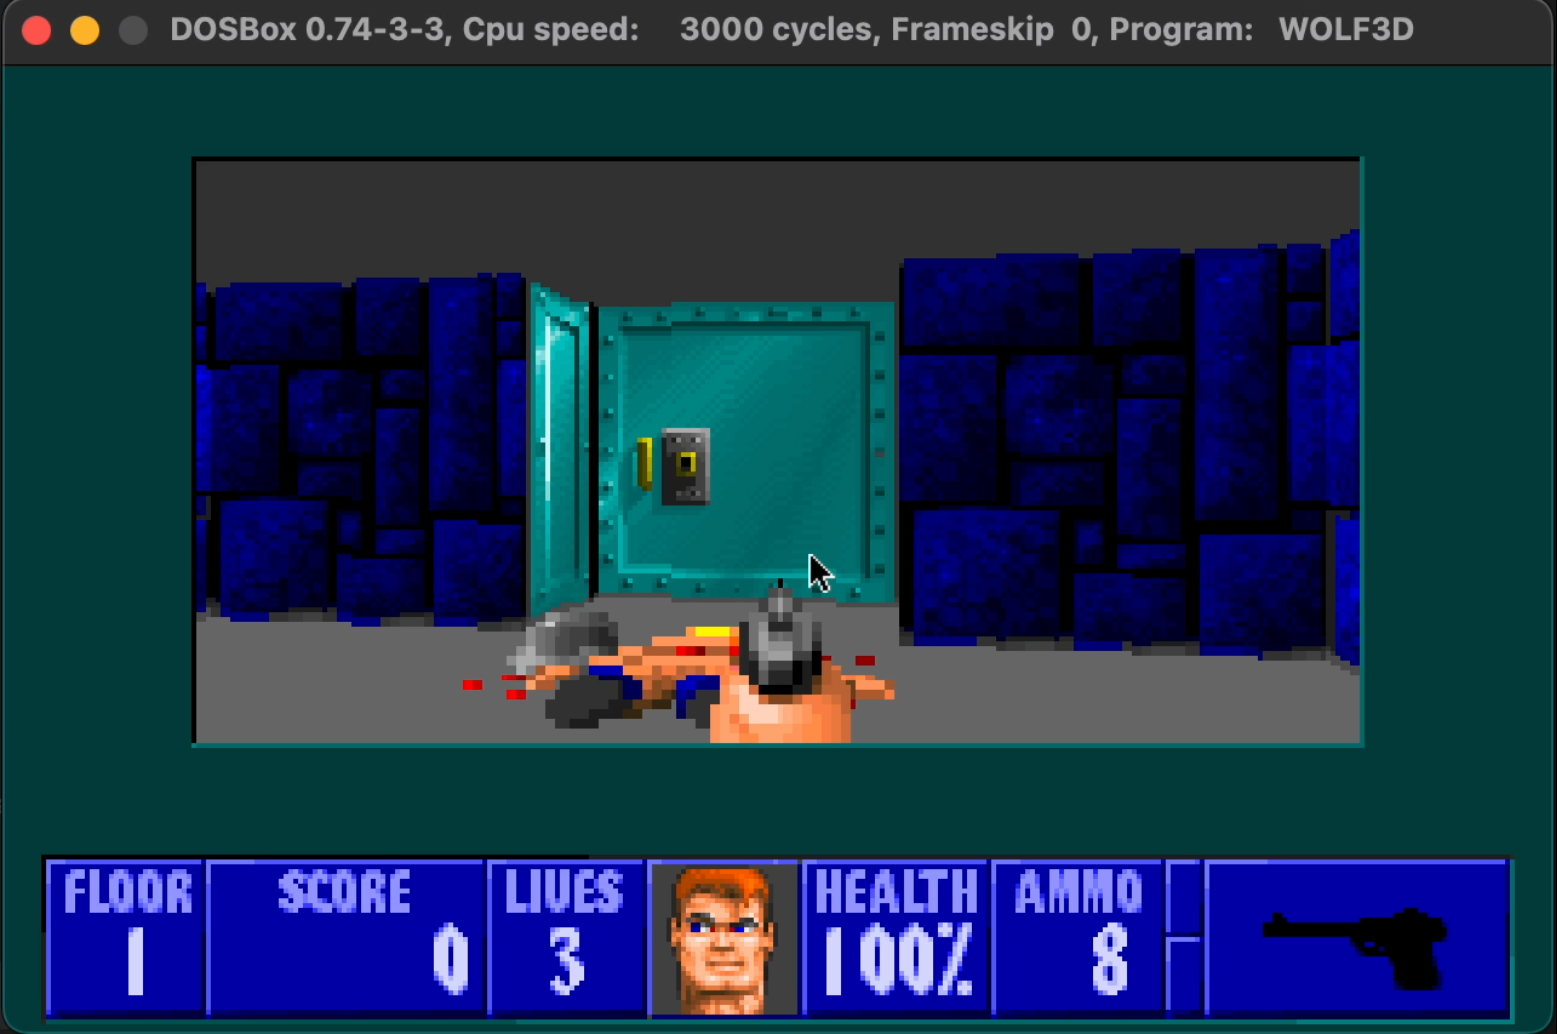
Playing Wolfenstein 3D on DOSBox
Where to Get Retro Games:
Since these games are so old and there is no proper system of buying them anymore, you’ll only find these online on different websites, where you can also play them in right in your browser for free. Some of the best sites include DOS Games Archive, Classic Reload, Internet Archive, and Abandonware DOS.
Porting Games by Yourself?
Recently, at WWDC 2023, Apple made several significant announcements regarding its upcoming technologies. One of the most exciting was the reveal of the Game Porting Toolkit. With the release of this tool, developers can now easily gauge whether their games can be ported to Mac.
Furthermore, this toolkit offers DirectX12 support on Mac for the first time ever, meaning most modern games can be successfully ported. It’s important to remember that this tool is not meant for the general public and is only aimed at developers who want to test potential performance.
But the silver lining in this toolkit is that it is open-source and available on Apple’s official GitHub. Therefore, if you’re a developer and have the proper knowledge, you can design ports all by yourself. Even if you don’t, there are already guides out there that walk you through how to get GPT running on your own Mac.
So far, people have played Cyberpunk 2077, the new Diablo IV, Final Fantasy 7 Remake, and more, at genuinely respectable framerates. You can check out AppleGamingWiki for a great detailed guide on how to install and use the toolkit yourself.
Conclusion
In conclusion, the difficulties of porting games to macOS due to architectural differences and lack of DirectX support are finally being addressed by Apple in a serious way. With a foundation already laid thanks to Apple Arcade, the new Game Porting Toolkit has the potential to completely change the tide of Mac Gaming.
The introduction of high-profile games like Death Stranding and The Medium emphasizes Apple’s renewed commitment to Mac gaming. Given these developments, there’s a promising future for gaming on macOS. A future that could perhaps, one day, turn Apple Arcade from a mobile games service to a proper hub for PC titles as well.
Reviewed by Huzaifa Haroon


