How to Increase Internet Speed in Windows 10/11?
Having a slow internet connection is always frustrating and no one wants it. While the internet speed provided by your internet service provider certainly has a huge impact on your internet connection, experiencing slow internet may not always be associated with it.
This is because there are other factors that can degrade your internet speed on your computer which can include your Windows internet settings and more. In addition to that, in this modern era, a slow internet connection can seriously affect your productivity and mood. As such, in this article, we are going to show you how to increase your internet speed in Windows.
As it turns out, the main question that comes to mind is how? When you are using your computer, your internet connection is a resource that is distributed throughout the system across different processes. This happens even when you are not actively using certain processes as they take away some of the speed, secretly in the background.
On top of that, there is a certain Windows policy that keeps 20% of your internet speed for its own purposes. This means that you are actually using 80% of the speed provided by your internet service provider. We are going to go through that and much more options down below that will help you in increasing your internet speed. So, with that said, let us get started and jump right into it without any further ado.
Remove Limit Reservable Bandwidth
The first thing that you should do in order to increase your internet speed in Windows is to remove the default bandwidth limit that is set by Windows. As we have mentioned above as well, when you are using Windows, you are essentially using 80% of your total internet speed as the remaining 20% is reserved for Windows purposes. This includes Windows updates and other stuff.
However, fortunately, you can easily remove this limit from your computer so that you are able to use all of your internet speed. To do this, follow the instructions that are given down below:
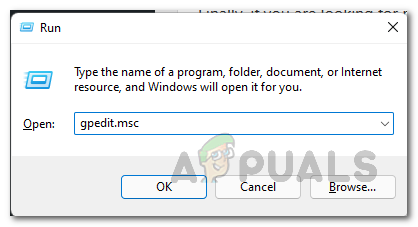
- First of all, open up the Run dialog box by pressing Windows key + R on your keyboard.
- In the Run dialog box, type in gpedit.msc and then hit Enter. This will open up the Local Group Policy Editor window.
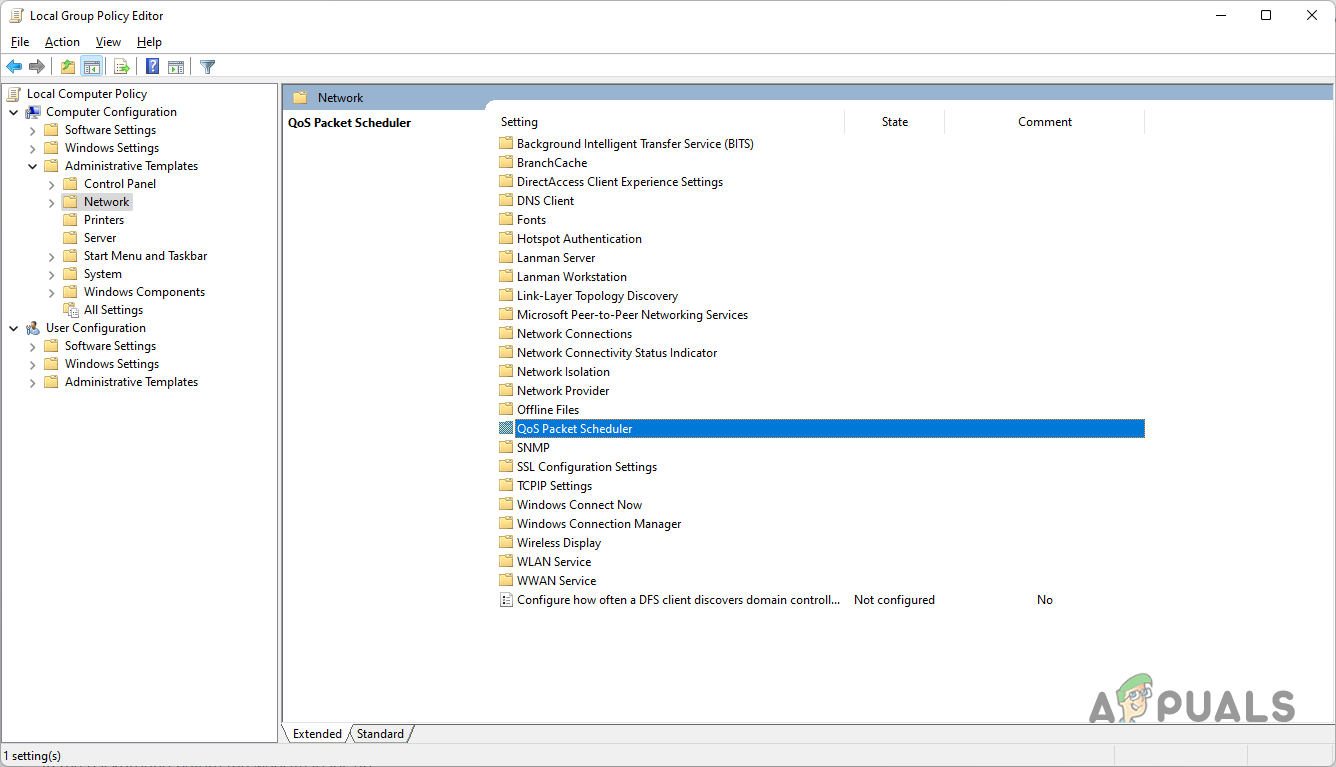
Opening up Local Group Policy Editor - On the Local Group Policy Editor window, make your way to Computer Configuration > Administrative Templates > Network.
- Then, on the right-hand side, scroll down and then double click on QoS Packet Scheduler.
QoS Packet Scheduler - Once you have done that, double click on the Limit reservable bandwidth policy.
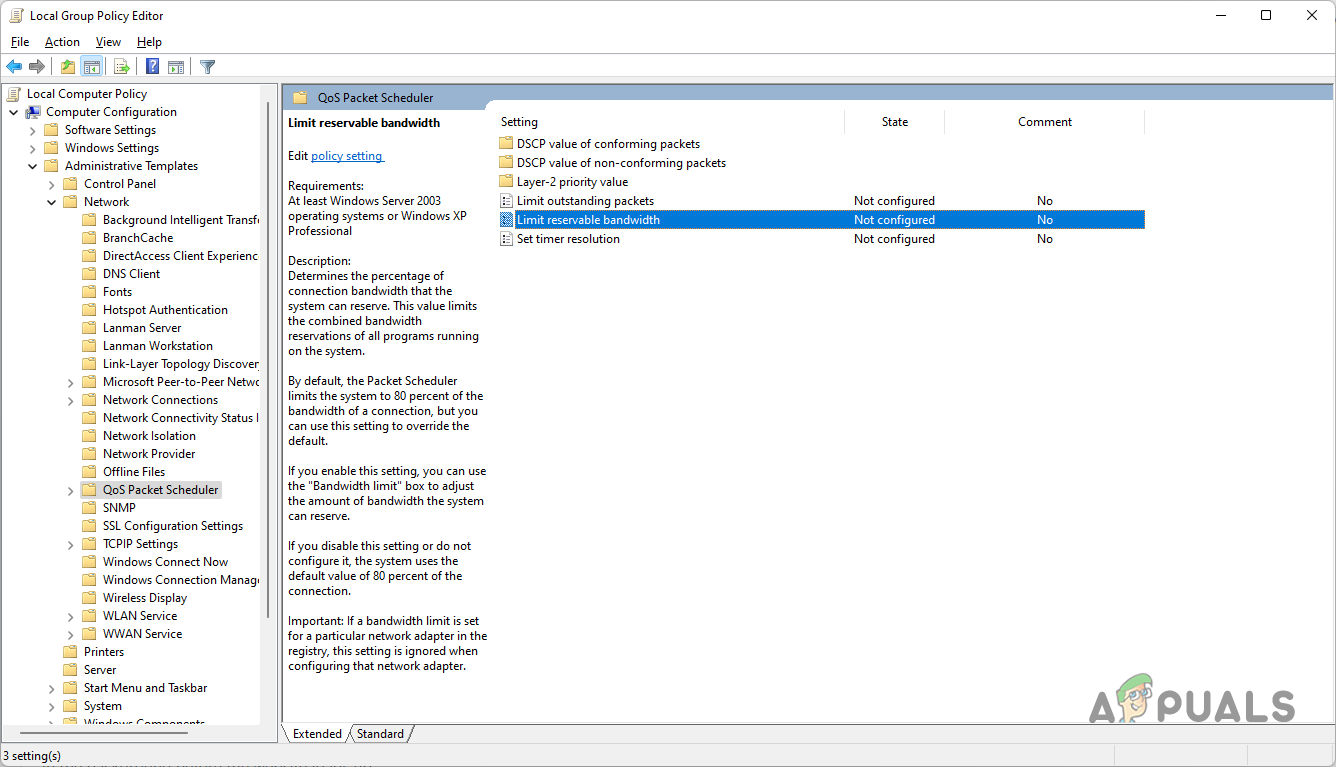
Limit Reservable Bandwidth Policy - On the follow-up window that opens up, first of all, choose the Enabled option. Then, change the Bandwidth limit from 80% to 0.
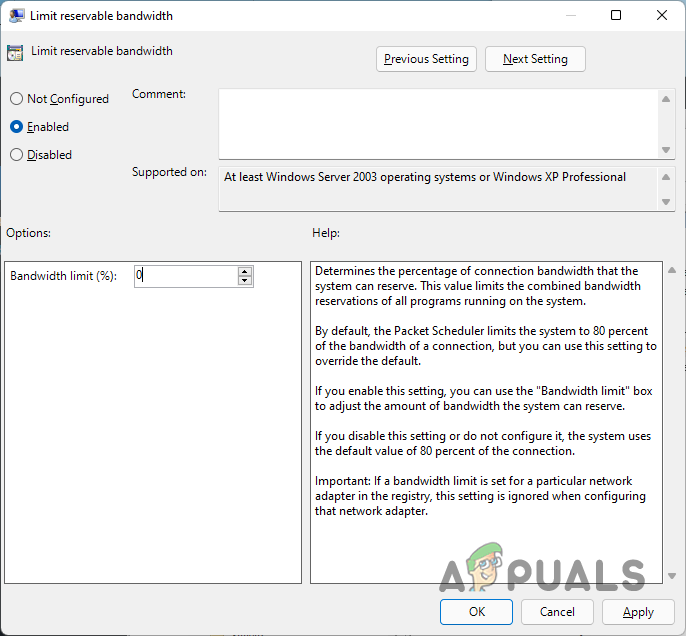
Removing Reserved Bandwidth Limit - After doing that, click Apply and then hit OK. This will allow you to use the precious 20% that was reserved by Windows.
Change DNS Server
Domain Name System or DNS indirectly impacts your internet speed. This is because DNS servers impact how quickly a website loads on your computer. As such, if you are using a DNS server that is being slow or not good enough, browsing can become quite troublesome.
As it turns out, when you install Windows, a DNS server is automatically set up for you that is provided by your internet service provider or ISP. DNS is essentially the address book of the internet. This is because it knows which domain name is linked to which IP address. When you are trying to open a website, a DNS lookup is done in the background before the website loads up.
As such, if you use a faster DNS server that performs these lookups quickly, your internet speed will be impacted, albeit indirectly. Instead of the default DNS server, we would recommend using the public DNS server provided by Google and it is quite safe to do so. To change your DNS server, follow the instructions that have been given down below:
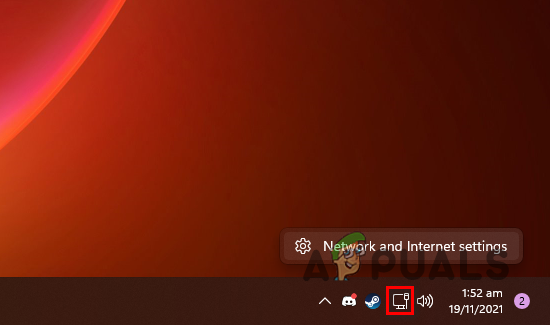
- First of all, right-click on the network icon on your taskbar and choose the Network and Internet settings option from the menu that comes up.
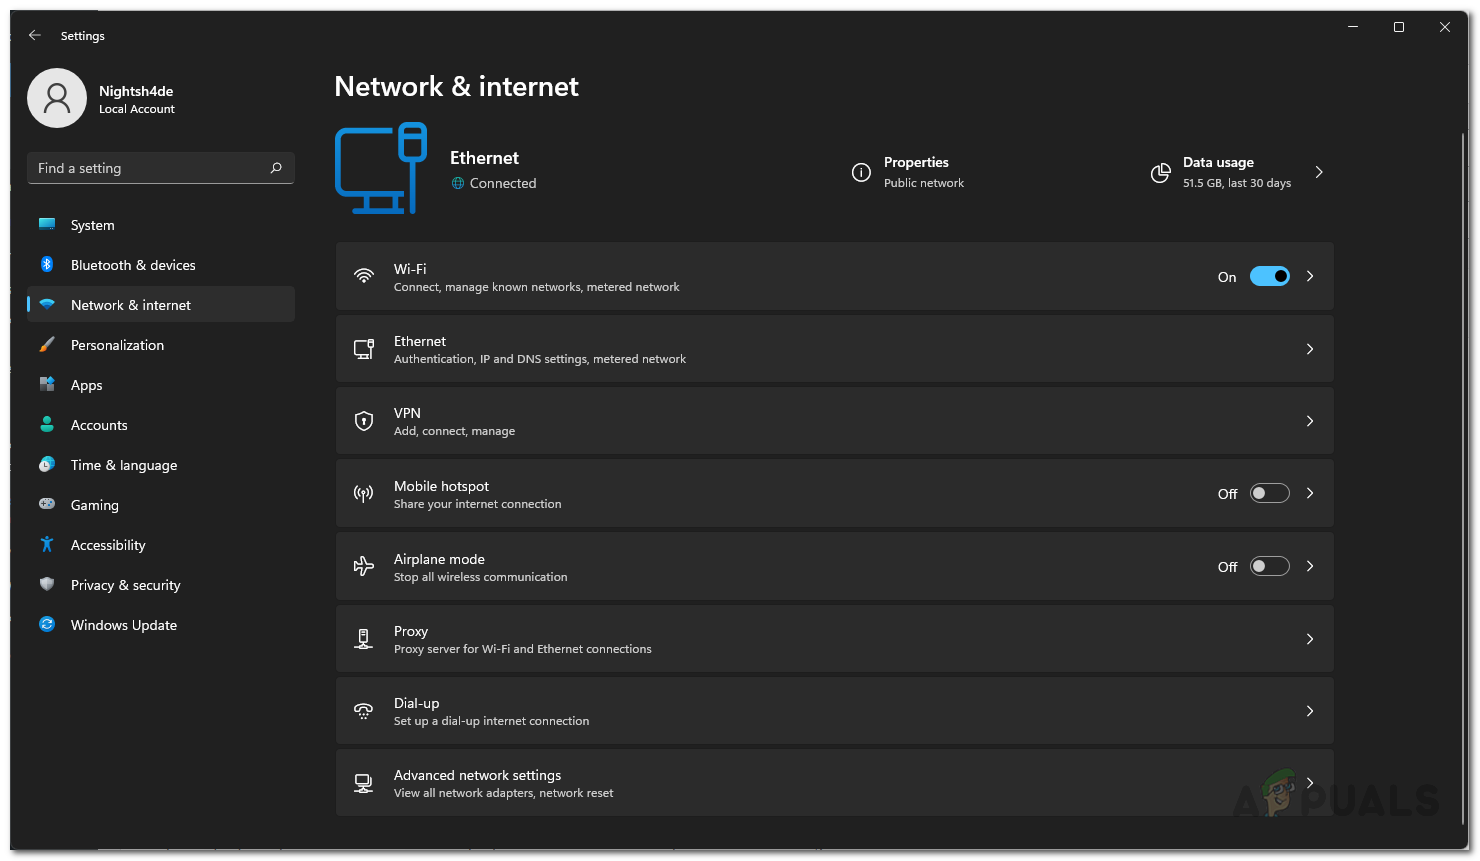
Opening up Network Settings - On the Network and Internet settings window, make your way to Advanced network settings.
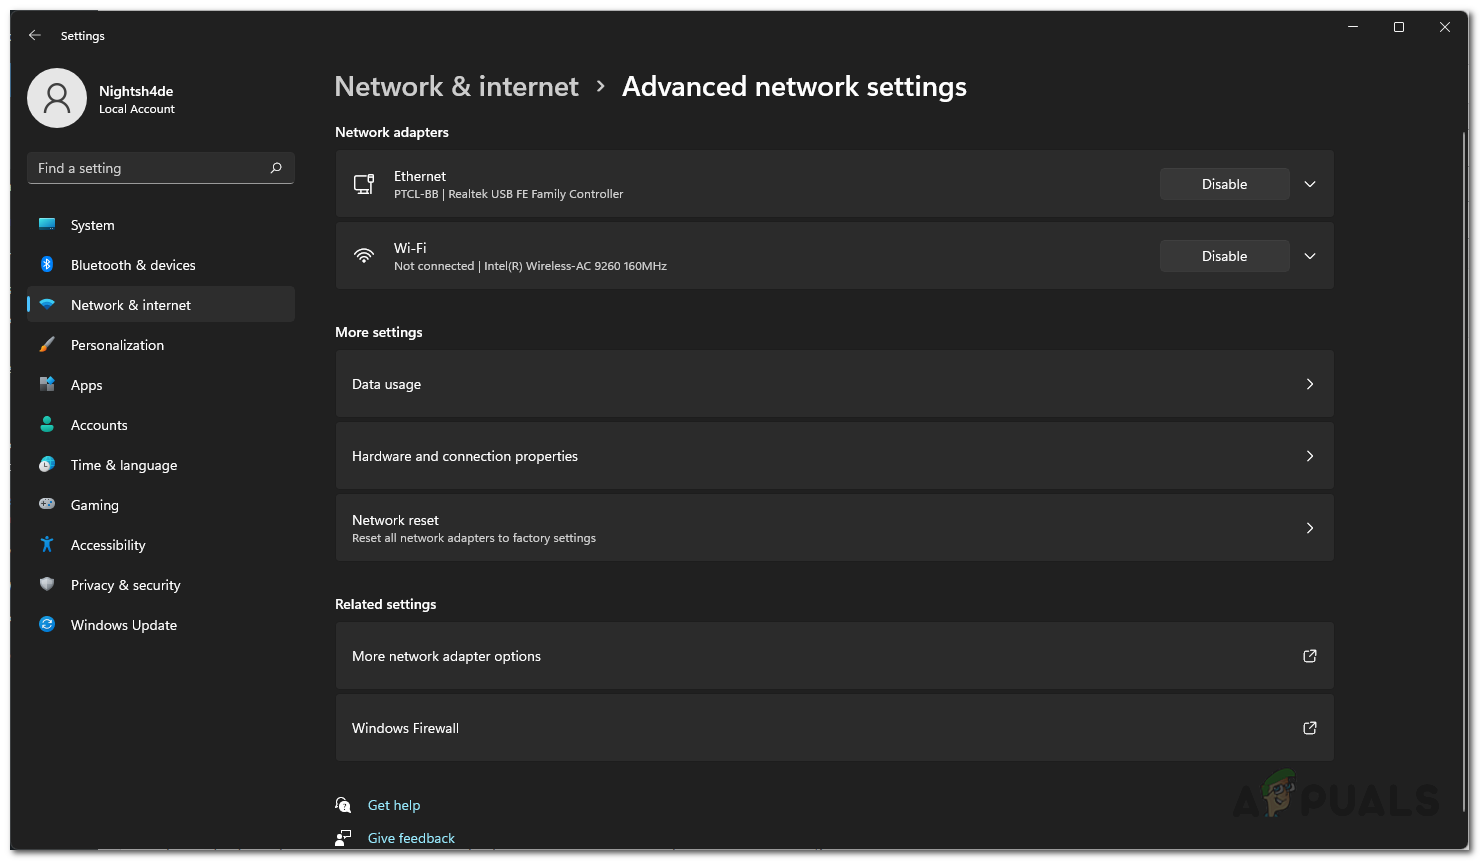
Network Settings - Then, on the Advanced network settings, click on the More adapter options option.
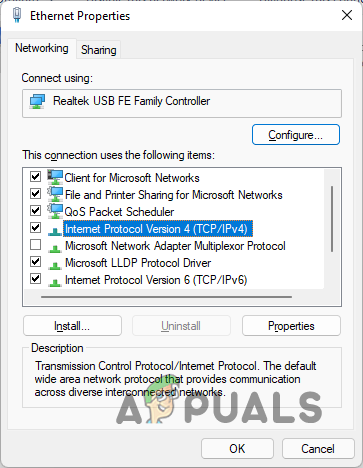
Advanced Network Settings - This will bring up a new window where you can see your ethernet adapters. Right-click on your ethernet adapter and choose Properties from the drop down menu.
- On the Properties window, double click on the Internet Protocol Version 4 (TCP/IPv4) option.
Opening up IPv4 Properties - Then, choose the Use the following DNS server addresses option.
- After that, provided the following IP addresses respectively of Google’s public DNS server:
8.8.8.8
8.8.4.4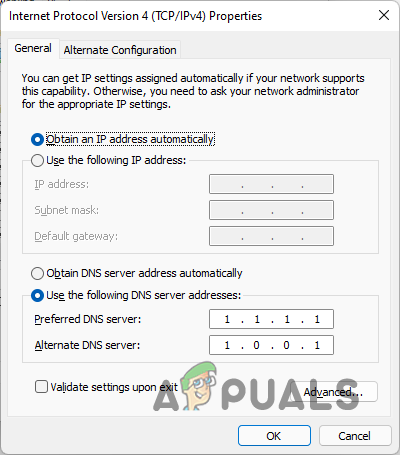
Changing DNS Server - With that done, click OK. You have successfully changed your DNS server.
Turn off Background Apps
As it turns out, the background apps running on your computer often use your internet for their own purposes. As such, this can affect your internet speed especially when an update is being downloaded. Therefore, in order to overcome this, you can disable the background apps on your computer and save up the internet bandwidth that is being used. This is pretty easy to do, follow the instructions that have been provided down below:
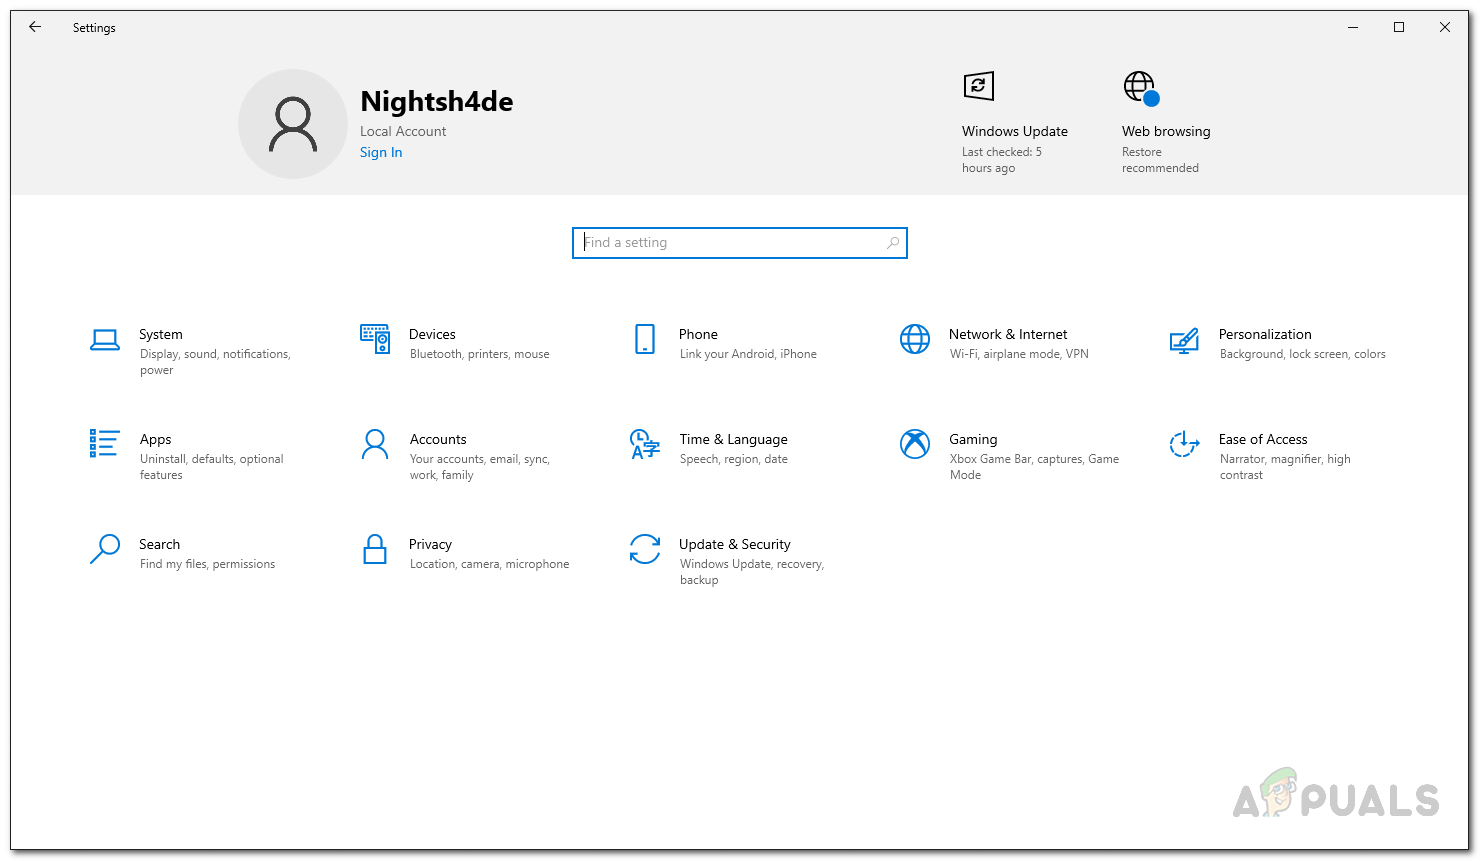
- To start off, open up the Windows Settings app by pressing Windows key + I on your keyboard.
- Then, make your way to Privacy.
Windows Settings - On the Privacy settings screen, navigate to the Background apps tab.
- There, you can choose to disable all the background apps. Otherwise, you can be selective about it and only allow certain apps to run in the background which is what we recommend as well.
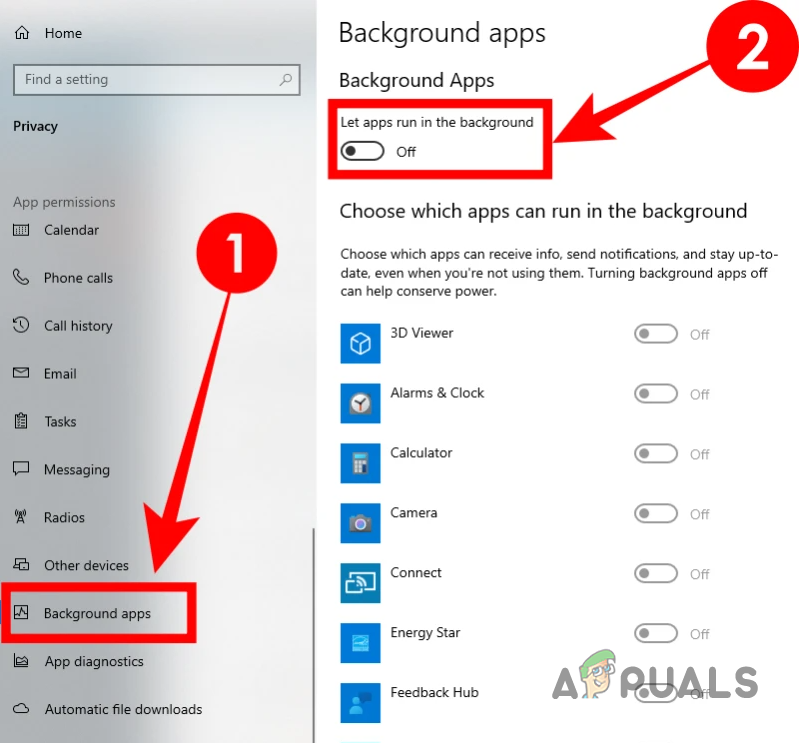
Disabling Background Apps - Should you choose the latter option, go through the list of apps provided and disable every app that you don’t want to run in the background.
- This is only for Windows 10 as this feature has been removed in Windows 11.
- In case you are using Windows 11, you will have to the Task Manager window to close out any background apps manually. Alternatively, you can also follow our guide on disabling background apps in Windows 11 to go through the exact process.
In case you are not sure about which background apps to close since you are not aware which application is hogging your bandwidth, there is a way using which you can find out the data hogging apps. Follow the instructions down below to find them:
- On the Windows Settings window, make your way to Network and Internet settings.
- Then, on Windows 10, navigate to the Data usage tab on the left hand side.
- After that, click the View usage per app option to view the apps that are using the most data.

Opening up App Data Usage - On Windows 11, you will have to navigate to Advanced network settings.
- There, click on the Data usage option provided.
Advanced Network Settings - You will be shown the apps that use the most bandwidth at this point.

Data Usage by Windows Apps
Disable Metered Connection
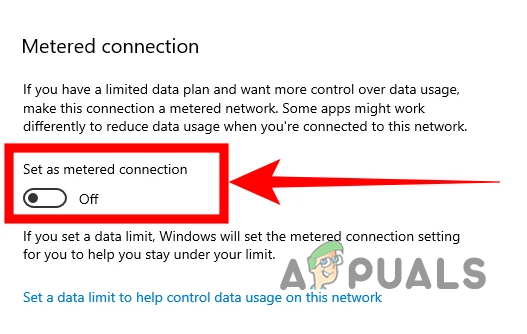
A metered connection is essentially an internet connection that has a data limit placed on it. Due to this limit, if your internet connection is set as a metered connection, your download and upload speed will be affected. As such, it is important to ensure that your internet connection is not set as metered connection. Follow the instructions down below to do this:
- First of all, bring up the Windows Settings app again by pressing Windows key + I.
- After that, make your way to Network and Internet settings.
Windows Settings - Now, on Windows 10, simply click the Change connection properties option provided.
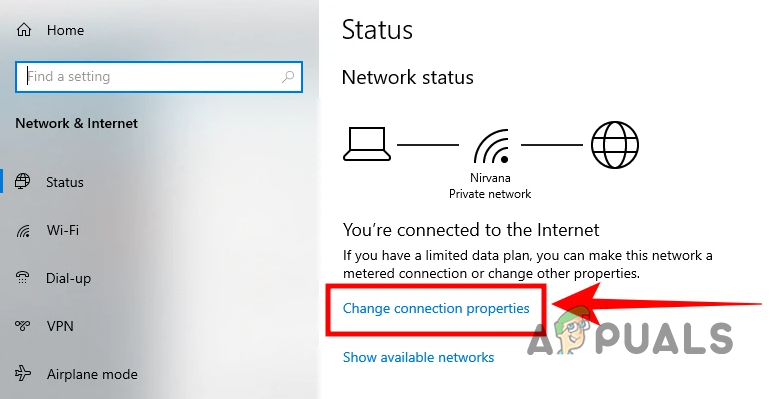
Navigating to Connection Properties - There, locate Metered connection and make sure it is turned off.
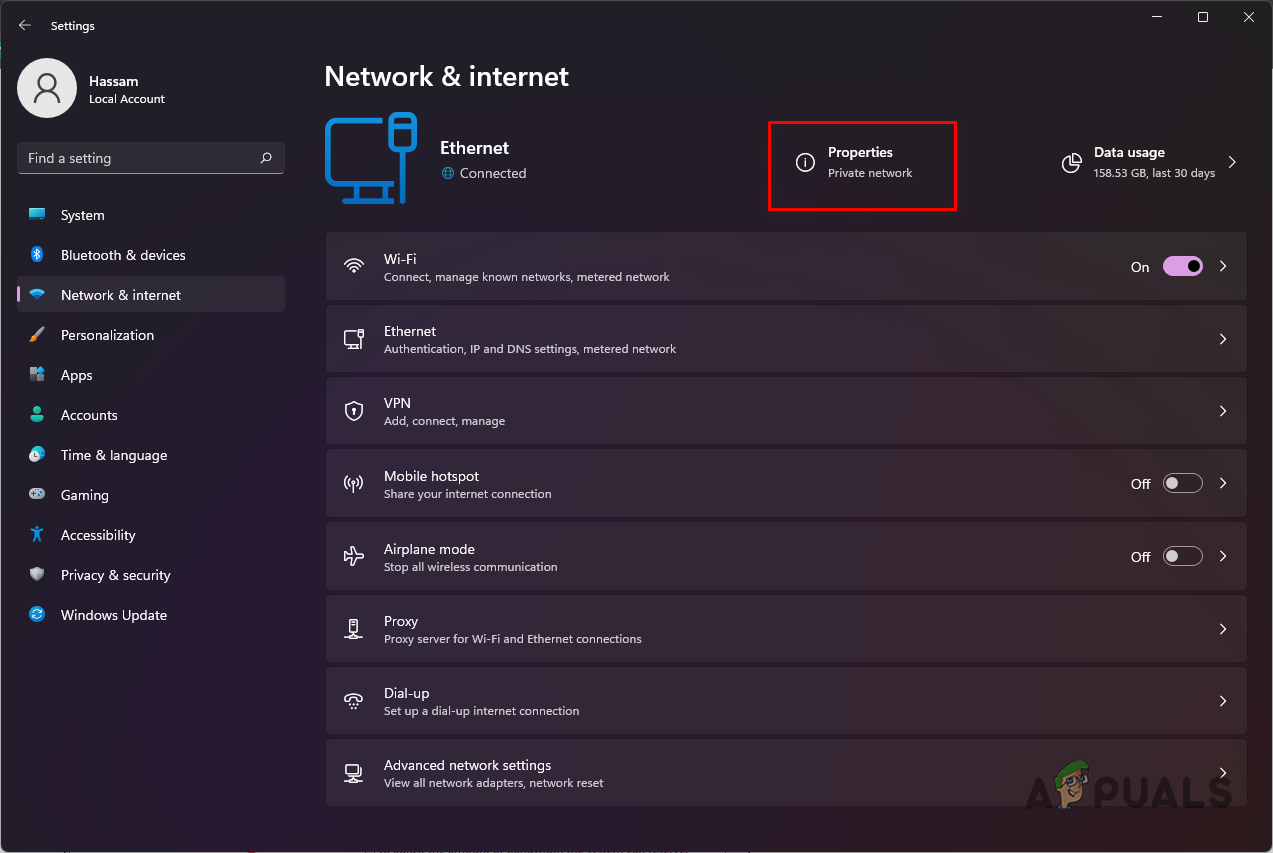
Disabling Metered Connection - In the case of Windows 11, simply click the Properties option provided at the top.
Navigating to Network Properties - On the Properties screen, make sure the Metered connection slider is turned off.
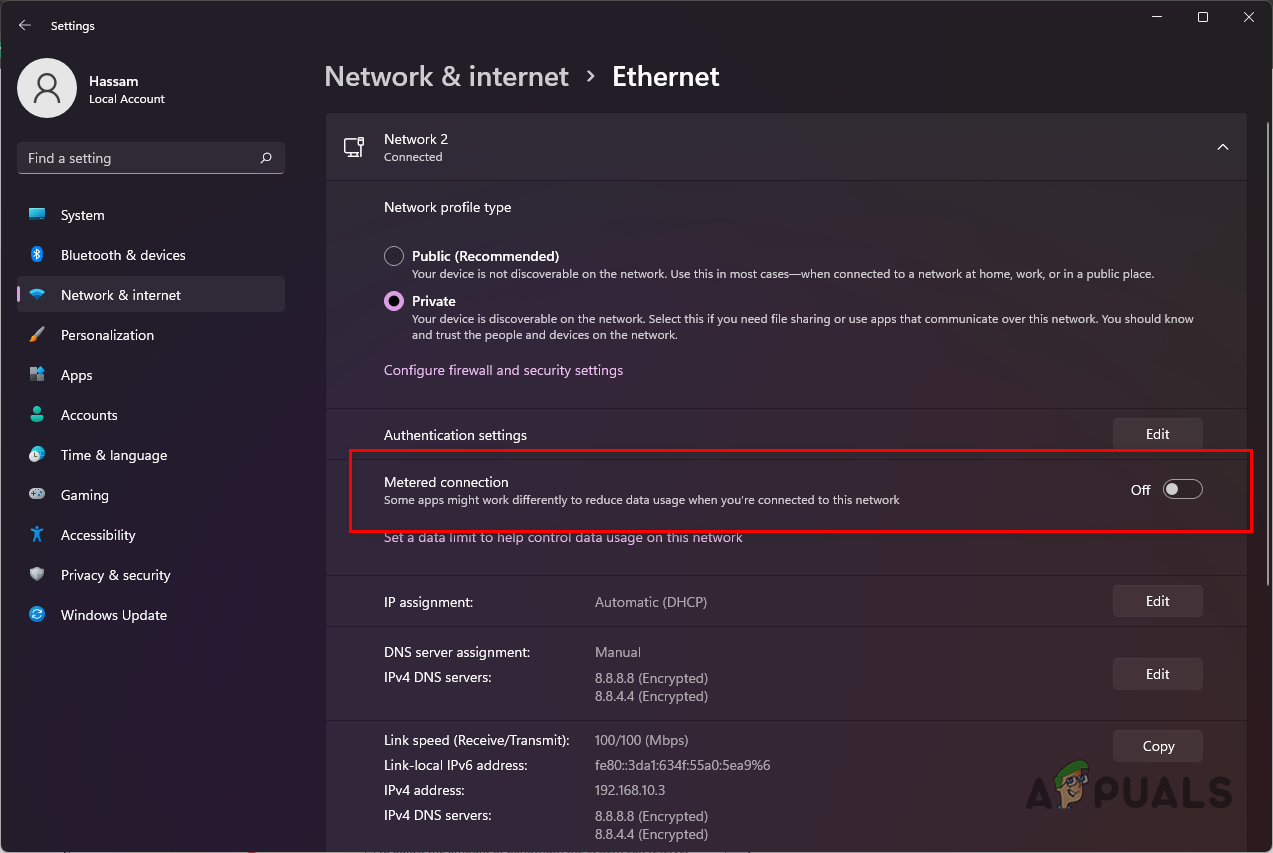
Disabling Metered Connection


