How to Fix the “Dependency Service or Group Failed to Start” Error in Windows?
The “Dependency Service or Group Failed to Start” error is exceedingly common among Windows users. It has surfaced on systems from Windows 7 and continues to affect users on Windows 10 and Windows 11.
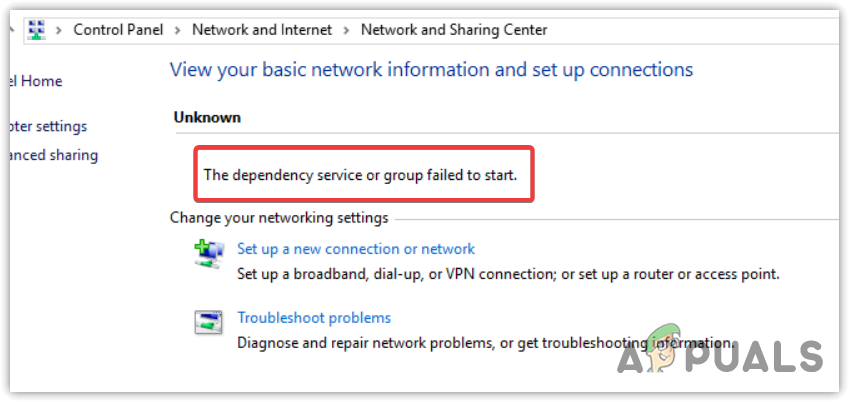
This error predominantly occurs for those who utilize selective startup to speed-up Windows boot-up process. While this mode is effective at preventing third-party services and drivers from loading during startup, it may inadvertently obstruct the essential network services required for establishing an internet connection, ultimately leading to this error.
Since the error is displayed within the Network and Sharing Center, many attempt to resolve it by initiating the network troubleshooting utility. This approach occasionally fixes the error. Therefore, if you haven’t tried the troubleshooting utility yet, it’s worth using it before diving into more technical solutions.
Moreover, issues with the stored DNS cache have been known to trigger this error. Bearing these potential causes in mind, let us proceed to explore the solutions for this troublesome error.
1. Load All Services and Drivers at Startup
As we previously mentioned, your PC may be failing to run some essential network services that are vital to internet connectivity, which might explain why you’re encountering this error.
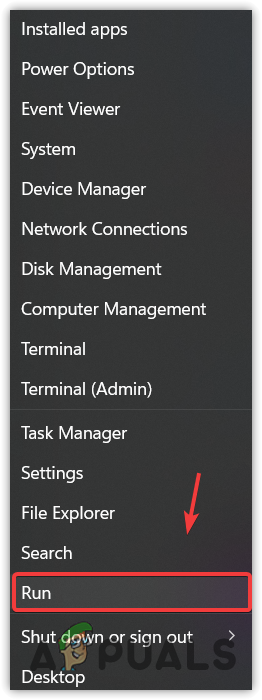
To verify whether this is the case, adjust the system configurations to enable a normal startup, which ensures all device drivers and services configured to run at startup are loaded, be they third-party or Windows-specific services.
- Right-click the Start Menu and select the Run option.
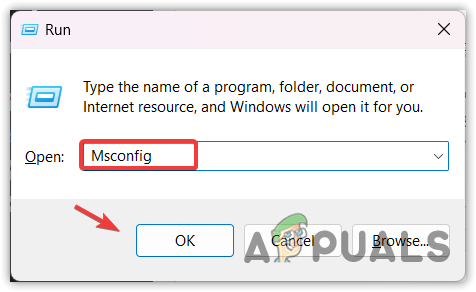
- In the Run dialog, type msconfig and press Enter to open the System Configuration tool.
- Select Normal startup if selective startup is currently chosen.
- Click Apply and then OK.
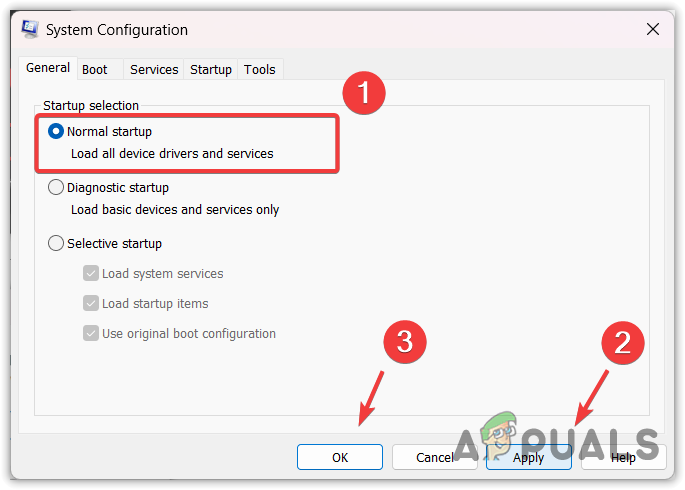
- Restart your computer for all services to load, which should rectify the error.
2. Add Network Service/Local Service to the Administrator’s Local Group
In Windows, the Network and Local Service accounts are used by the service control manager to present credentials across the network. Assigning administrator privileges to these accounts often resolves the “The Dependency Service or Group Failed to Start” error. To do this, you must add both the Network and Local Service accounts to the administrator’s local group.
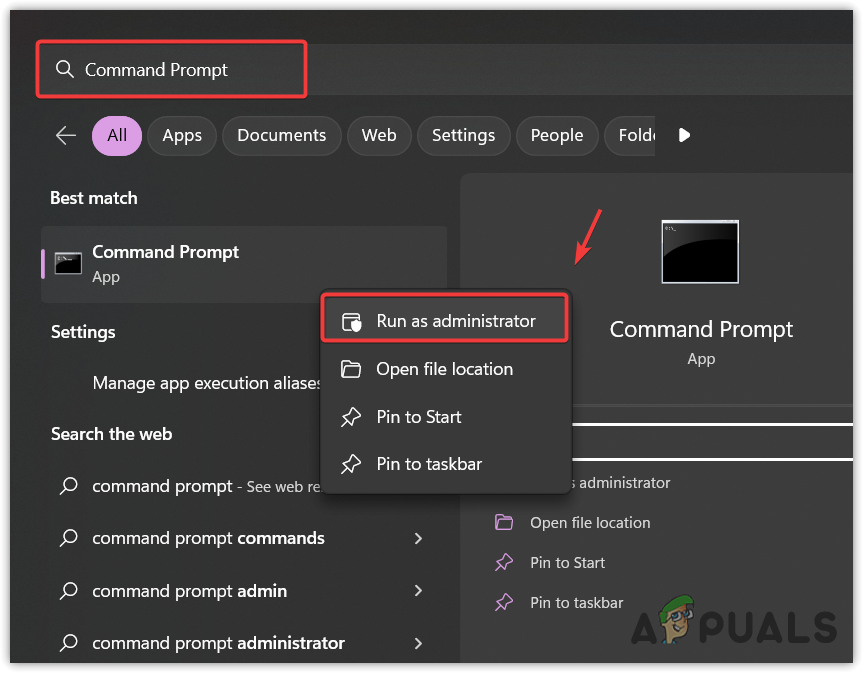
- Press the Win key to bring up the Start Menu.
- Type Command Prompt in the search box.
- Right-click on it and select Run as administrator.
- In the elevated Command Prompt, execute the following commands one at a time, pressing Enter after each:
net localgroup administrators localservice /add
net localgroup administrators networkservice /add
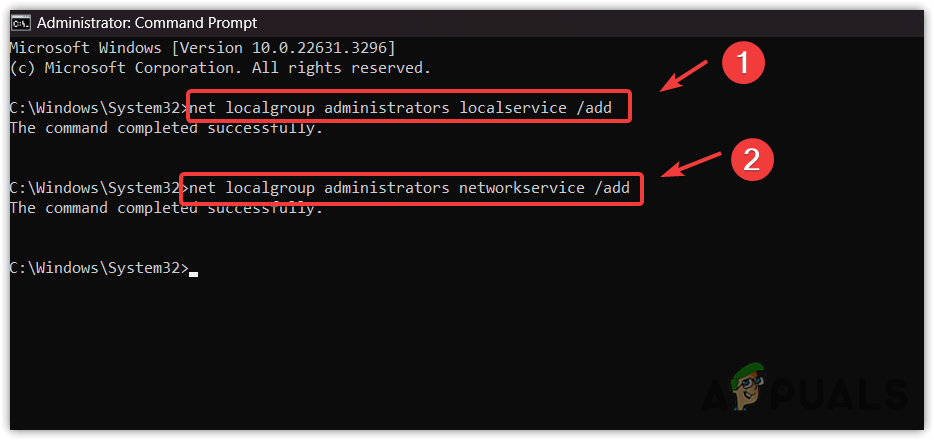
- After completing the commands, restart your computer.
- Navigate to the Network & Sharing Center and run the troubleshooting utility.
- Should you receive the error “The Diagnostic Policy Service is not running,” simply select Try these repairs as an administrator. This action should resolve the error and allow for internet connectivity.
3. Flush Your DNS
Your DNS cache may possess outdated or incorrect information leading to this error. To correct this, you can flush the DNS, which prompts the system to refresh its DNS information.
- Access the Start Menu by pressing the Win key.
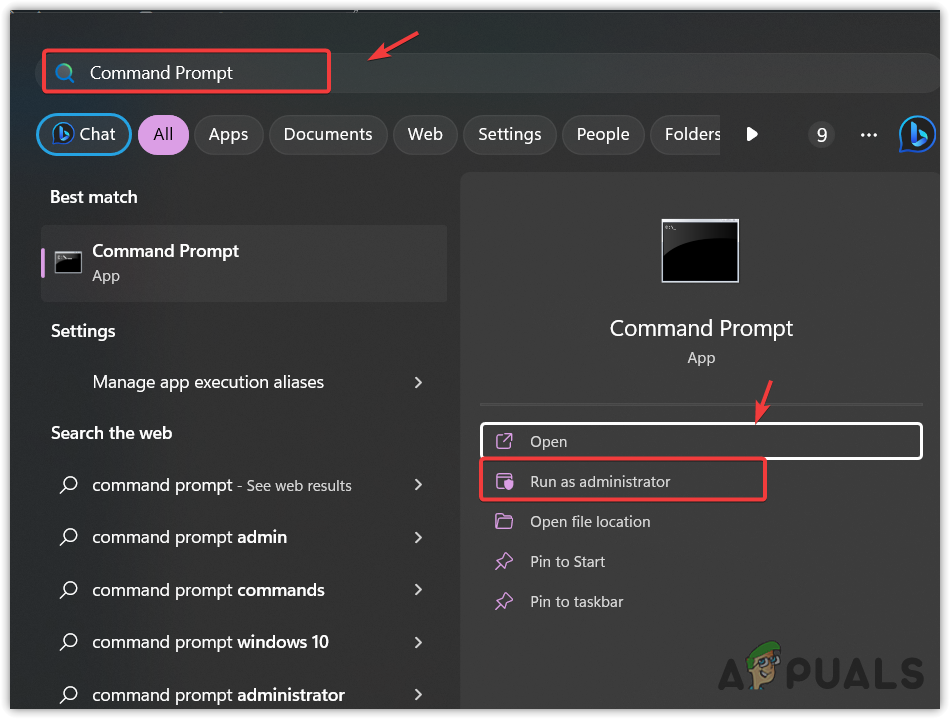
- Type Command Prompt in the search box, then press Ctrl + Shift + Enter to launch it with administrative rights. Once opened, enter the command:
ipconfig /flushdns
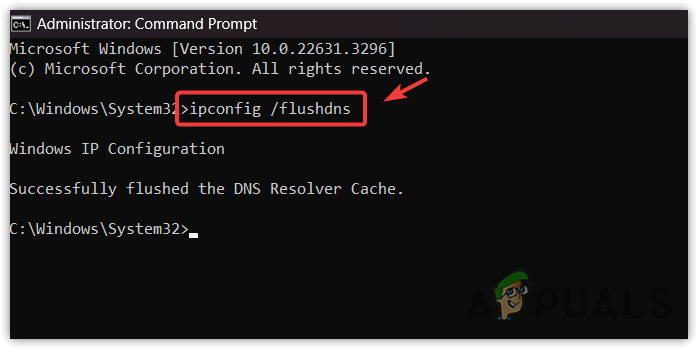
- Close the Command Prompt after execution and verify if the issue has been resolved.
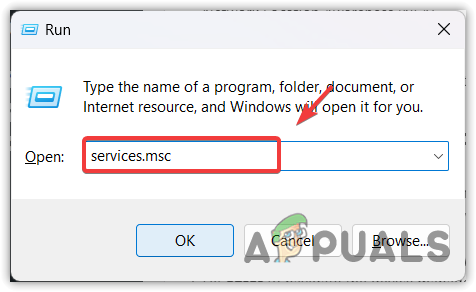
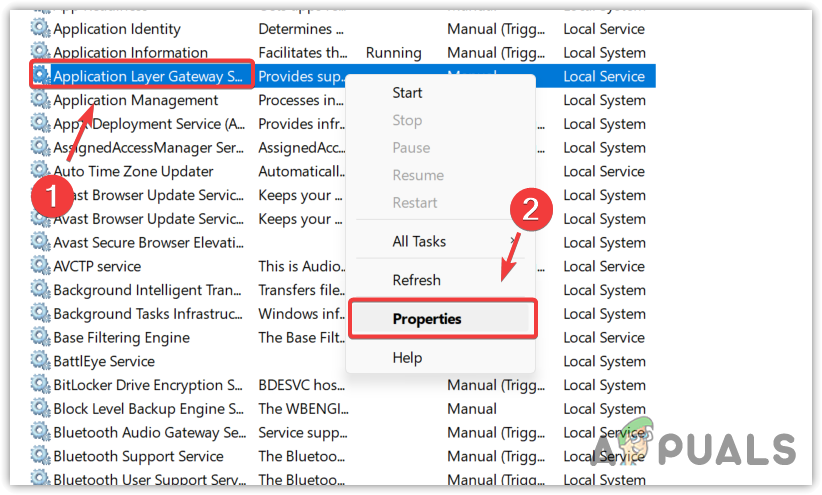
4. Restart Essential Network Services
Your Windows system may not be running the crucial network services required for internet access. By setting up essential network services to start automatically with PC boot-up, you can ensure no necessary service is being overlooked.
- Press the Win + R keys at the same time to open the Run dialog.
- Enter services.msc and hit OK to launch the Services window.
- Locate the Application Layer Gateway Service in the list.
- Right-click it and select Properties.
- If its startup type is set to Manual, change it to Automatic.
- Click Apply followed by OK.
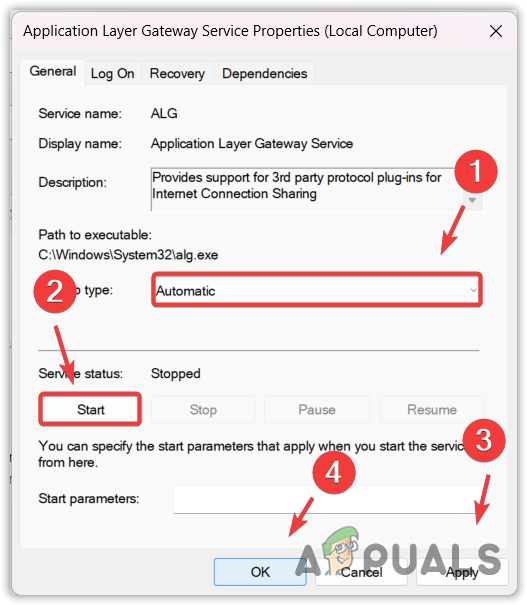
- Repeat these steps for each of the following services:
Remote Access Connection Manager
Remote Procedure Call (RPC)
Remote Access Auto Connection Manager
Telephony
Network Location Awareness (NLA)
Network Connections
Plug and Play - Restart your PC after making these changes and check if the error has been resolved.
5. Reinstall the Network Adapter
Your network adapter facilitates internet connectivity. If the above methods have not resolved the issue, the problem might lie within the network adapter itself. Reinstalling the network adapter could determine whether it is the source of the problem.
- Open the Start Menu and search for Device Manager.
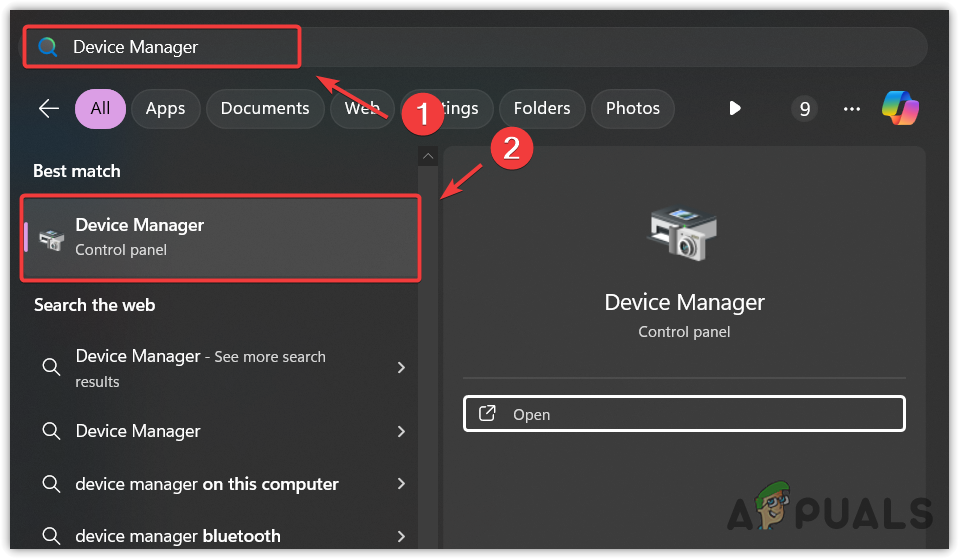
- Press Enter to navigate to the Device Manager.
- Expand the Network adapters section and right-click on your specific network adapter.
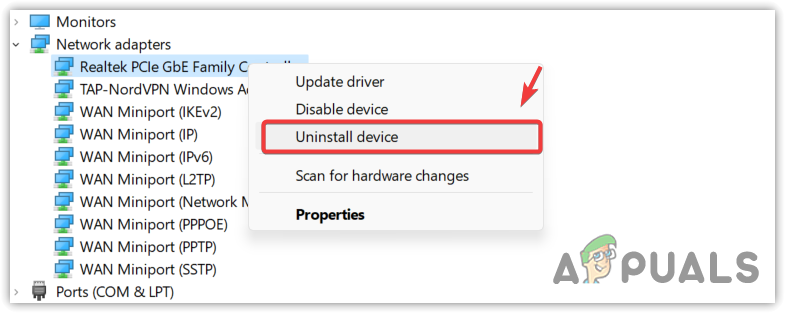
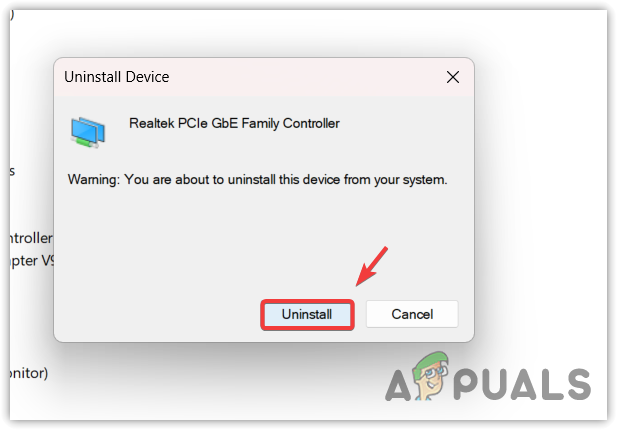
- Select Uninstall Device.
- Confirm the action by clicking on Uninstall again.
- Restart your computer, which will lead to the reinstallation of the adapter.
- Verify if the issue still persists post-reinstallation.
6. Reset the Network Settings
If none of the previously mentioned methods resolve the issue, consider resetting the network settings. This can fix errors caused by any misconfigured settings causing the problem.
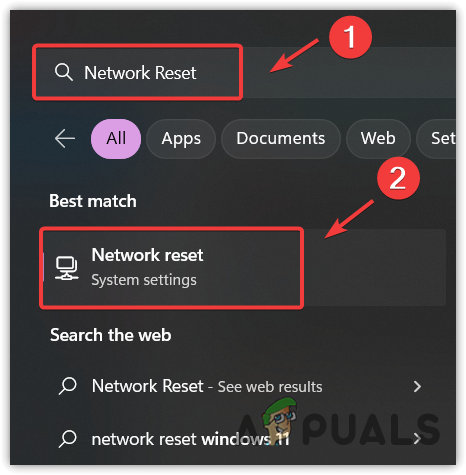
- Press the Win key, type Network Reset, and press Enter to access the appropriate settings.
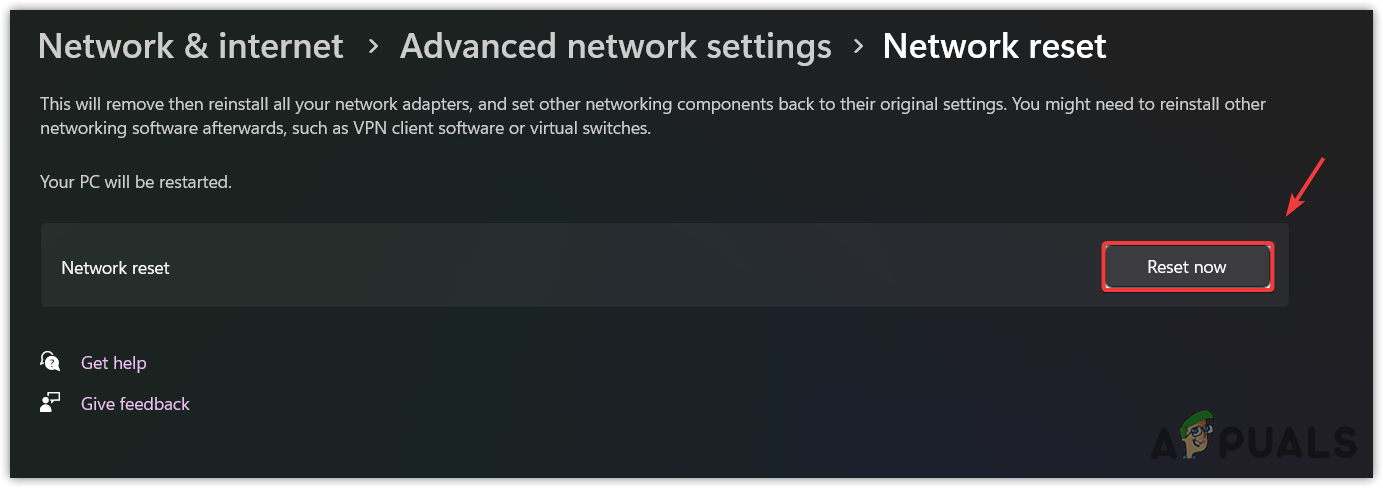
- Click on Reset now. Your PC will restart with default network settings, which should resolve the error.
7. Restore Your Windows to a Previous Point
This solution is intended for individuals who have created a system restore point. For those unacquainted with the system restore utility, it’s important to note that the Windows update utility routinely creates a restore point in case of complications arising during updates.
System restore allows users to roll back their system to a previous state if a restore point was created. A restore point contains a snapshot of system files, drivers, and registry settings. This can be invaluable if the need arises to revert to a past system state due to issues.
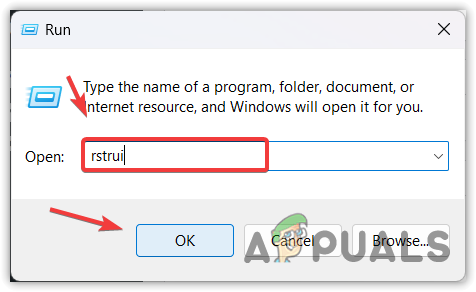
- Right-click the Start Menu and select Run.
- Type the command rstrui in the run dialog and click OK to launch the System Restore utility.
- Click Next, choose a restore point, and then click Next again.
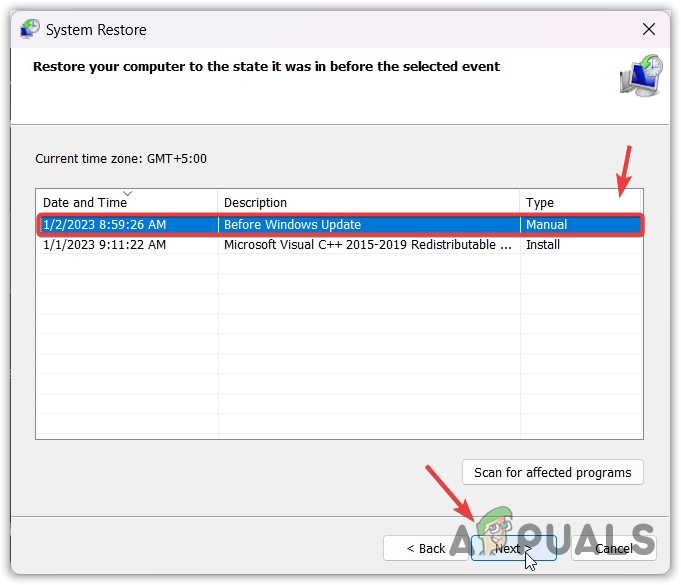
- Press Finish to commence the restoration process.
- Once the process is complete, check to ensure the error no longer appears in the Network and Sharing Center.


