7 Fixes to Try If Your PC Won’t Stop Stuttering
Stuttering on a PC is a frustrating problem that can be caused by a variety of factors. It can result in choppy and unresponsive performance, making it difficult to use your computer effectively. The issue can occur in a variety of scenarios, such as when playing games, watching videos, or simply navigating the desktop.
If your computer’s performance is temporarily interrupted by small pauses or freezes, it might be caused due to insufficient RAM, outdated or damaged graphics card driver, overheating of the CPU/GPU, and running too many programs at once.

In this guide, we have discussed the troubleshooting methods that will help you fix this issue once and for all. Proceed with the method that fits your situation the best.
1. Disable Unnecessary Programs
Too many programs running at once can cause a PC to stutter because all the programs compete for system resources, such as CPU, RAM, and hard drive space.
If a program uses up too many system resources, other programs may stutter and slow down. This is especially evident in programs with high resource usage, such as games or video editing software.
To resolve the issue, try closing unused programs or upgrading the PC’s hardware to increase its capacity to handle multiple tasks.
Here is how you can disable the unneeded programs:
- Press Ctrl + Shift + Esc to open the Task Manager.
- In the Processes tab, look for the programs you do not need at the moment.
- Right-click on them and choose End task.
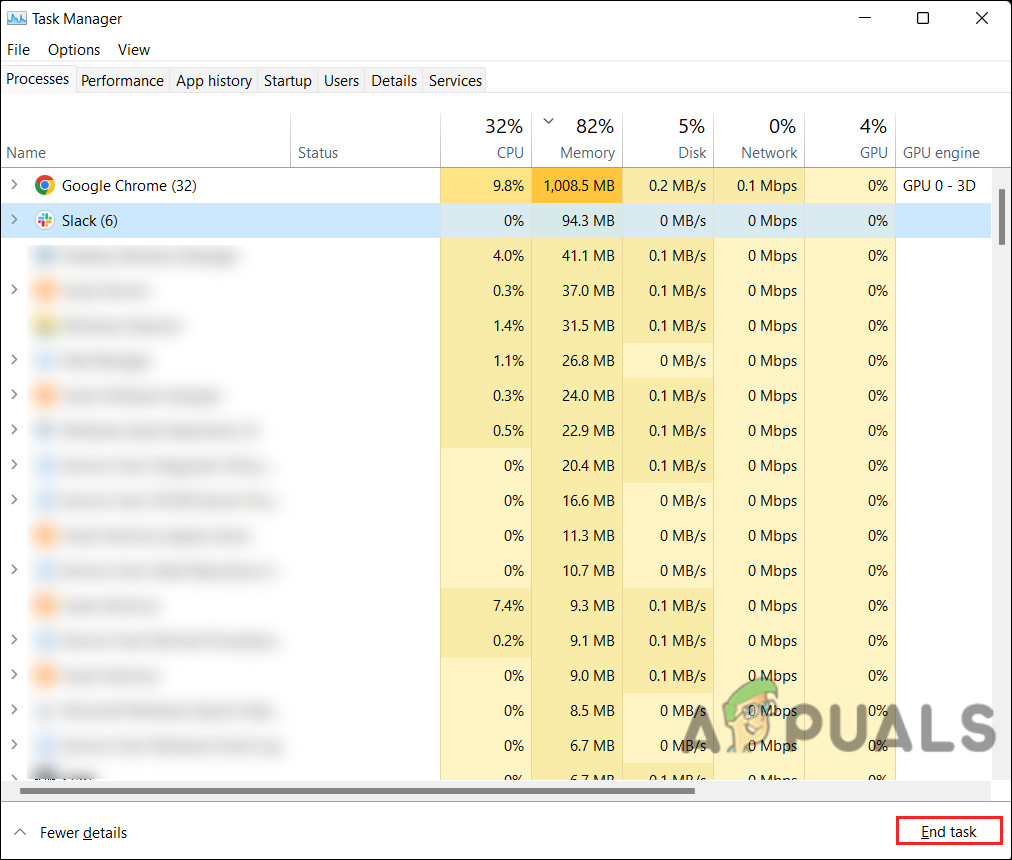
End the task in the Task Manager - Do this with all the unnecessary programs and check if the issue is resolved.
2. Increase RAM
Insufficient RAM can also cause stuttering in Windows. As soon as a computer runs out of RAM, it begins to use hard drive space as virtual memory, which is much slower than actual RAM, which can lead to stuttering.
If this scenario is applicable, you can try increasing the RAM.
You will need to determine what kind of RAM your computer utilizes and how much RAM it can support. Usually, you can find this information in your computer’s manual or online if you search for the make and model of your computer. Then buy RAM modules that are compatible with your computer.
Locate the RAM slots on your motherboard and release any latches that secure the old RAM modules in place. Replace the old modules with the new ones and secure them in place.
To check if the new RAM has been recognized by the computer, open the Task Manager and head over to the Performance tab.
Be aware that this is a fairly technical process that should only be attempted if you have experience working inside computers. Hire a professional if you’re not sure you can install RAM on your own.
Proceed to next method if this doesn’t work for you.
3. Check the Power Settings
You might also be facing the issue due to misconfigured power settings. When power settings are configured for energy efficiency rather than performance, it can result in the CPU running at a lower frequency, which can lead to stuttering.
To resolve the issue, try restoring the default settings via Control Panel.
Here is how you can do that:
- Press the Win + R keys together to open Run.
- Type control in text field of Run and click Enter.
- Expand the View by category and choose Large icons.
- Click on Power Options.
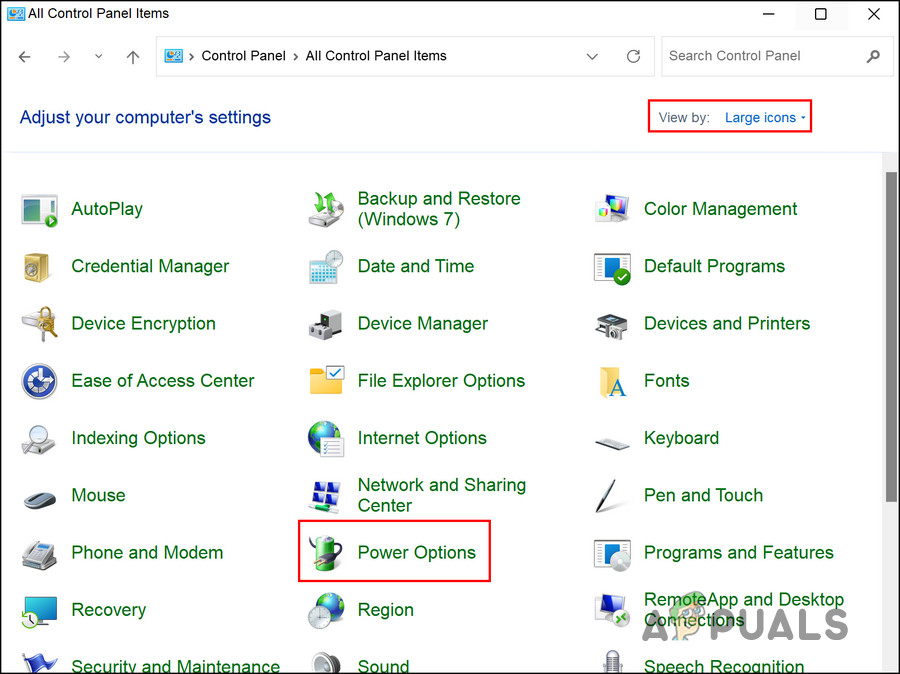
Access the Power Options - Select Change plan settings and choose Change advanced power settings.
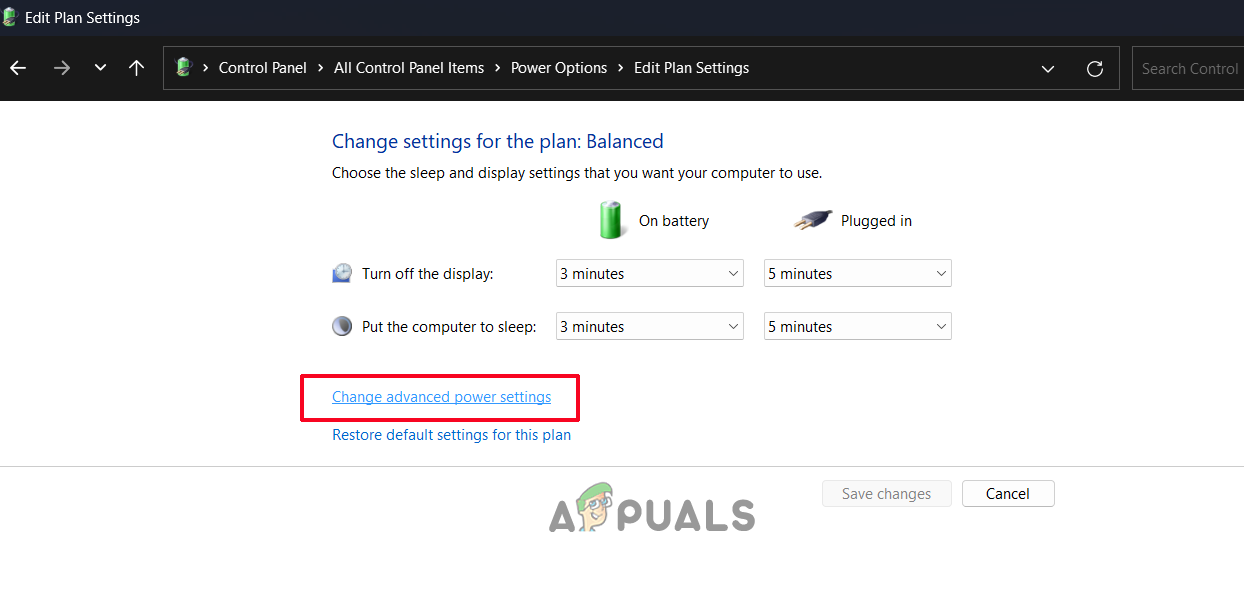
Click on change advanced power settings - Select each plan and hit the Restore plan defaults button.
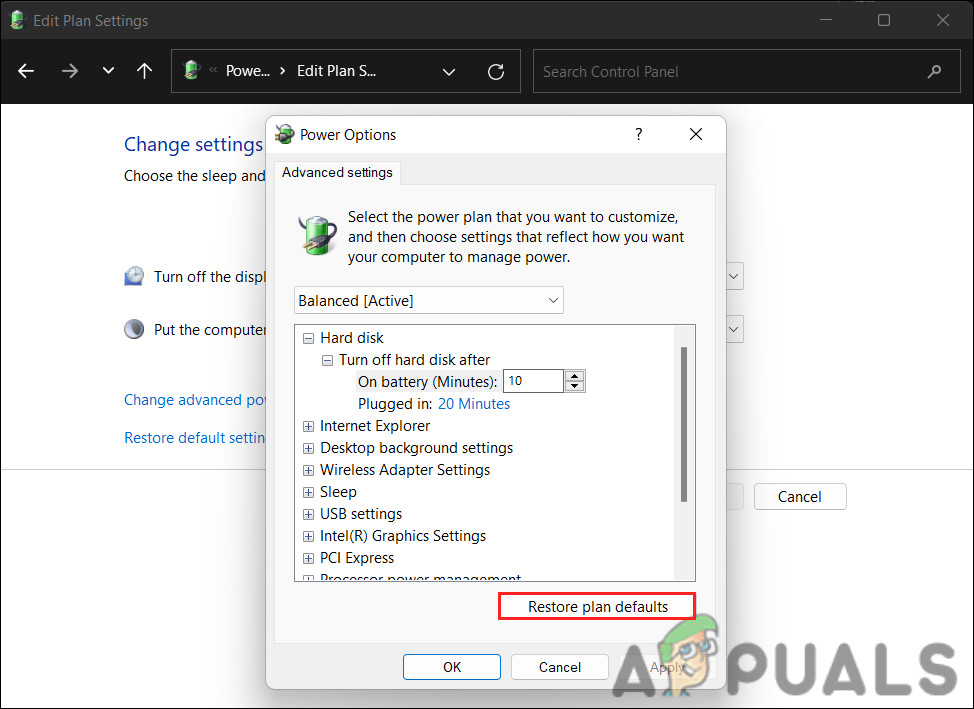
Hit the Restore plan defaults button - Click Yes in the confirmation prompt.
4. Update Display Driver
Another reason why you might be facing the problem can be because of an outdated display driver.
Display drivers enable your operating system to communicate with your graphics card and display images. If the driver is outdated or incompatible with the graphics card, it can cause graphical errors, slow performance, and stuttering.
To resolve the issue, we will update the display driver using the Device Manager utility.
Here is what you need to do:
- Type Device Manager in the search area of the taskbar and click Open.
- Expand the Display Adapters section and right-click on your graphics driver.
- Choose Update driver from the context menu.
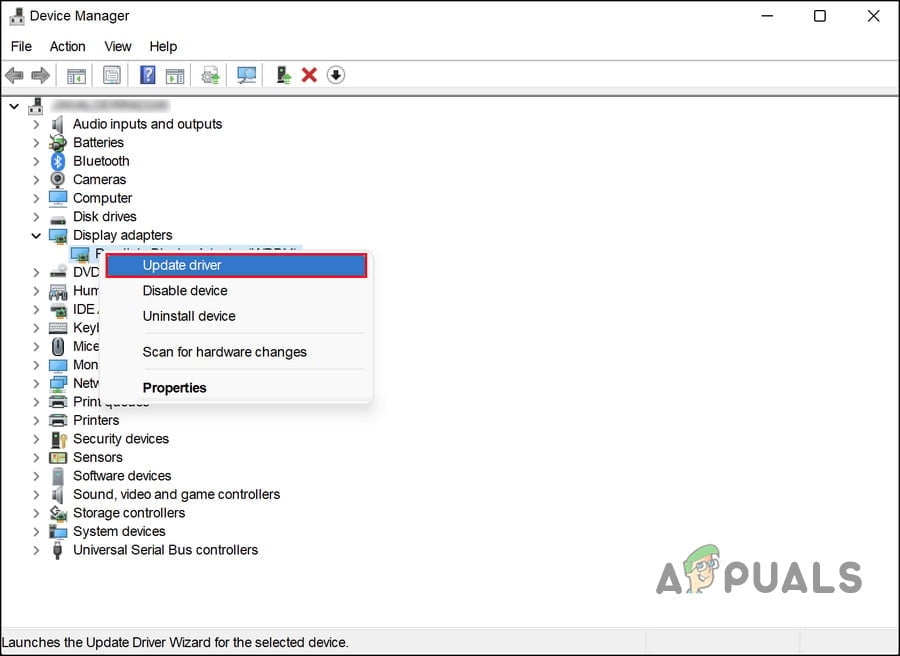
Update the graphics driver - Hit the Search automatically for drivers option. Windows will now look for updated drivers and install them.
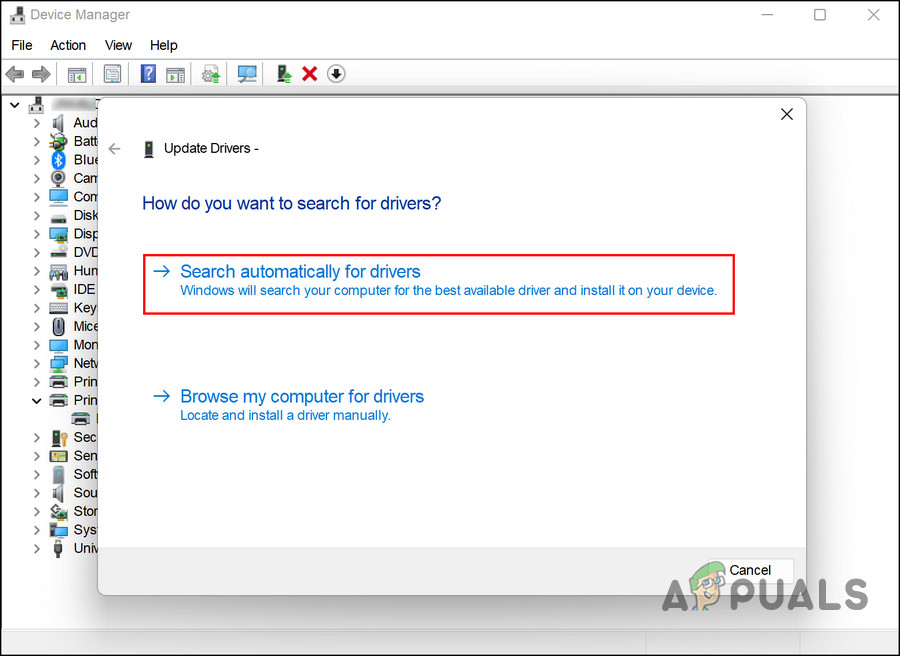
Update the driver - Follow the on-screen instructions to proceed and then restart your computer.
If this does not work, then try manually installing another driver by following these steps:
- Follow steps 1-3 from above again.
- Navigate to Browse my computer for drivers > Let me pick from the list of available drivers on my computers.
- Choose the Microsoft Basic Display Adapter driver and follow the on-screen instructions to install it.
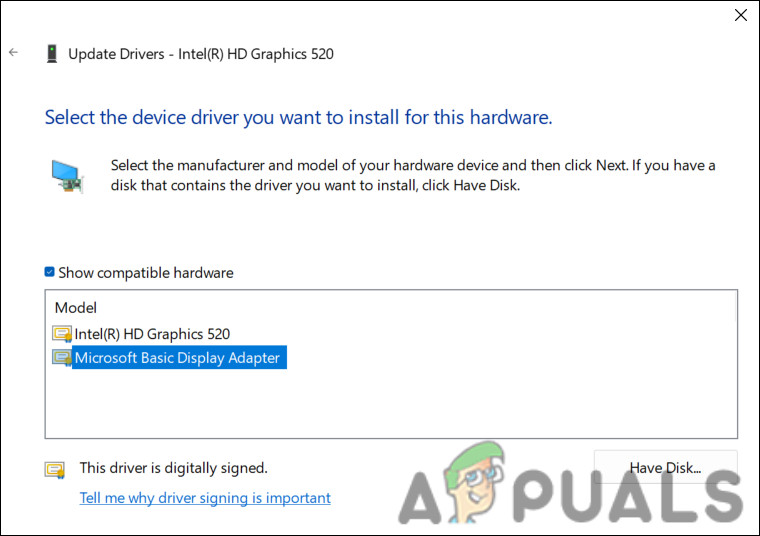
Install the Microsoft basic driver - Finally, reboot and check if the issue is resolved.
5. Disable CD/DVD Drive
In some cases, the CD/DVD drive can cause interruptions, leading to the stuttering problem. Since disabling the CD/DVD drive worked for several other affected users, we suggest you give it a try too.
Here is what you need to do:
- Type Device Manager in the search area of the taskbar and click Open.
- Expand the CD/DVD ROM drives node and right-click on the driver.
- Choose Properties from the context menu.
- Now, head over to the Driver tab and click on the Disable Device button.
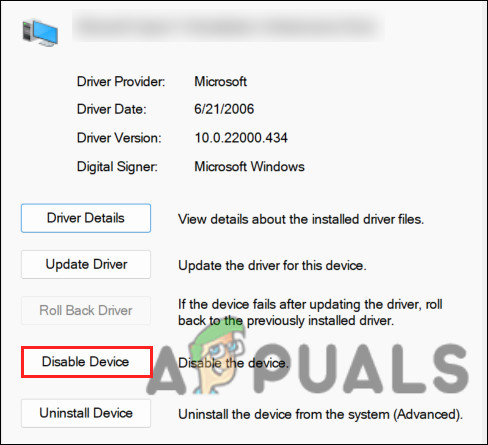
Disable the driver - Click Yes in the confirmation prompt.
- Hit OK in the Properties dialog to save the changes.
6. Scan for Malware
Malware can consume system resources, slow down or disrupt normal processes, and interfere with system performance. This can result in stuttering or lag while using the PC.
To scan for malware, install a reputable antivirus program and run a full system scan to check all files and processes for malware. Follow the instructions provided by your antivirus or anti-malware program to remove detected threats. We have a detailed guide on how to scan for malware using Malwarebytes which you can check out to understand the process.
7. Perform a Clean Install
Finally, if the troubleshooting methods above have not worked for you, you can proceed with clean installing Windows. This will fix the PC stuttering problem if the root cause is related to software issues.
In a clean install of Windows, the operating system is reinstalled from scratch on a computer. All data and software on the hard drive, including installed applications, personal files, and system settings, will be erased. During the initial setup, Windows will guide you through creating a user account, setting up security settings, and personalizing the settings.


