Fix: 100% Disk Usage by System and Compressed Memory in Windows
High disk usage by the System and Compressed Memory process is commonly caused by misconfigurations in the paging file, memory leaks from third-party applications, or issues related to the Superfetch (SysMain) service in Windows.
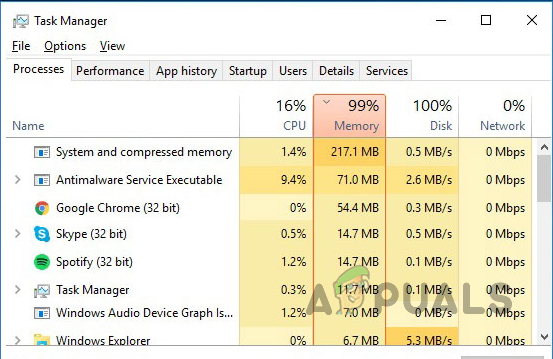
This process is designed to optimize your computer’s RAM and disk space usage by compressing memory. However, any software incompatibility or configuration issue can prevent it from functioning efficiently.
Follow the step-by-step solutions provided in this guide to effectively resolve the 100% disk usage issue caused by the System and Compressed Memory process.
1. Reset Paging File Settings
Start by resetting your computer’s paging file settings. Incorrect paging file configurations can cause the System and Compressed Memory process to utilize an excessive amount of disk resources.
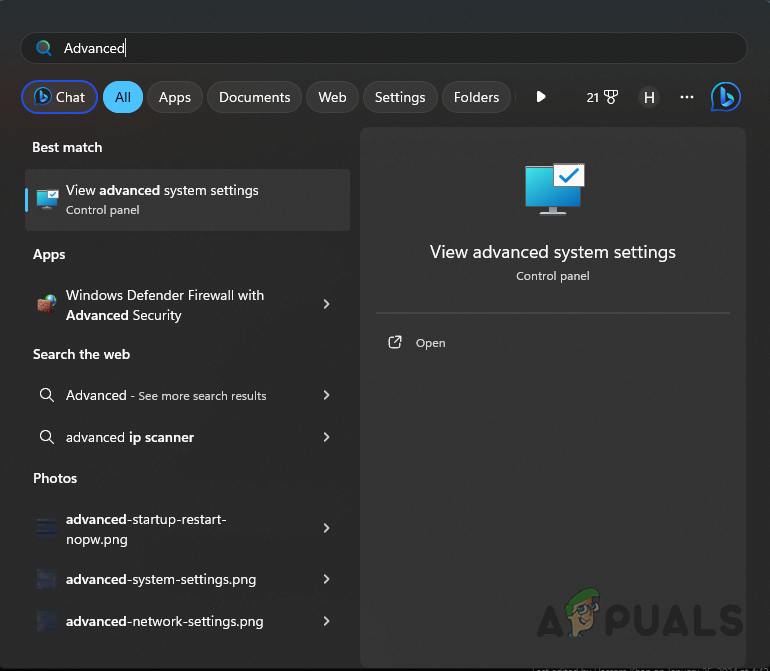
- Open the Start Menu, search for Advanced System Settings, and select it.
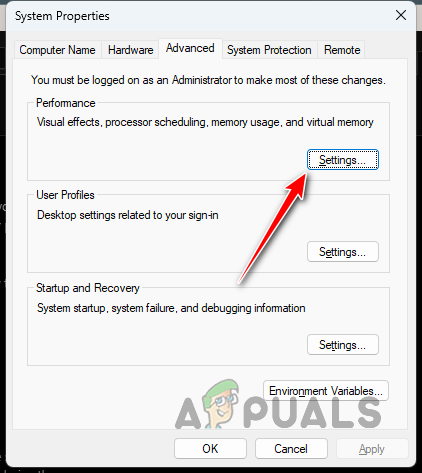
Opening Advanced System Settings - In the Performance section, click the Settings button.
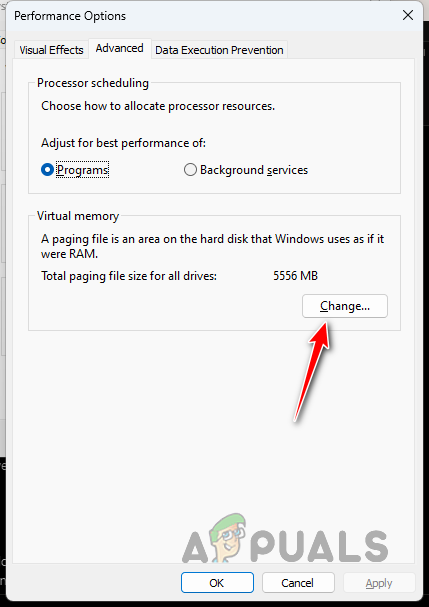
Navigating to Performance Settings - Navigate to the Advanced tab and click Change under Virtual Memory.
Navigating to Virtual Memory Settings - Ensure the box for Automatically manage paging file size for all drives is checked.
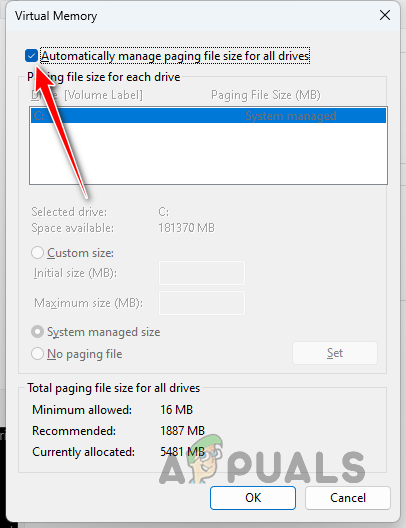
Automatically Manage Paging - Click OK and restart your computer.
- Verify whether the issue has been resolved.
Note: If the automatic management option was already enabled, consider configuring a custom paging file size. Set the minimum and maximum sizes between 1.5 to 3 times your computer’s installed RAM. This allows Windows to manage memory more efficiently and helps prevent disk usage spikes.
2. Adjust Windows for Best Performance
Excessive disk usage by the System and Compressed Memory process can result from the visual effects settings in Windows, especially when these effects are not properly optimized in the background.
You can reduce the strain on system resources by optimizing Windows for best performance.
- Open the Start Menu, search for Advanced System Settings, and select it.
Opening Advanced System Settings - Click on the Settings button under the Performance section.
Navigating to Performance Settings - Navigate to the Visual Effects tab. Select Adjust for best performance.
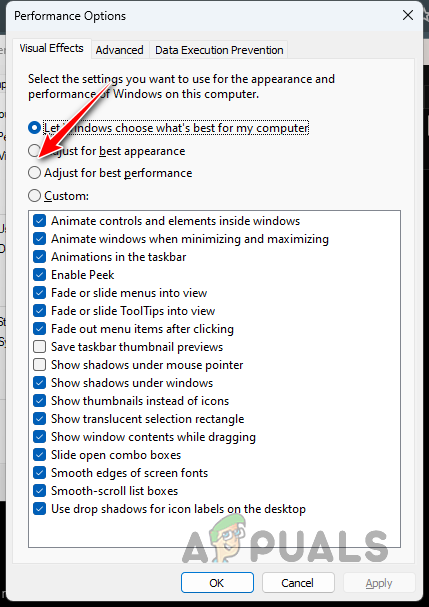
Adjusting Visual Effects for Best Performance - Click Apply, then click OK.
- Check if the disk usage issue has improved.
This adjustment minimizes unnecessary effects, freeing up resources for core operations and reducing the demand on your system disk.
3. Run an SFC Scan
Corruption or damage to Windows system components can cause the System and Compressed Memory process to consume excessive disk resources. Running an SFC scan allows you to verify the integrity of your Windows files and repair them if necessary.
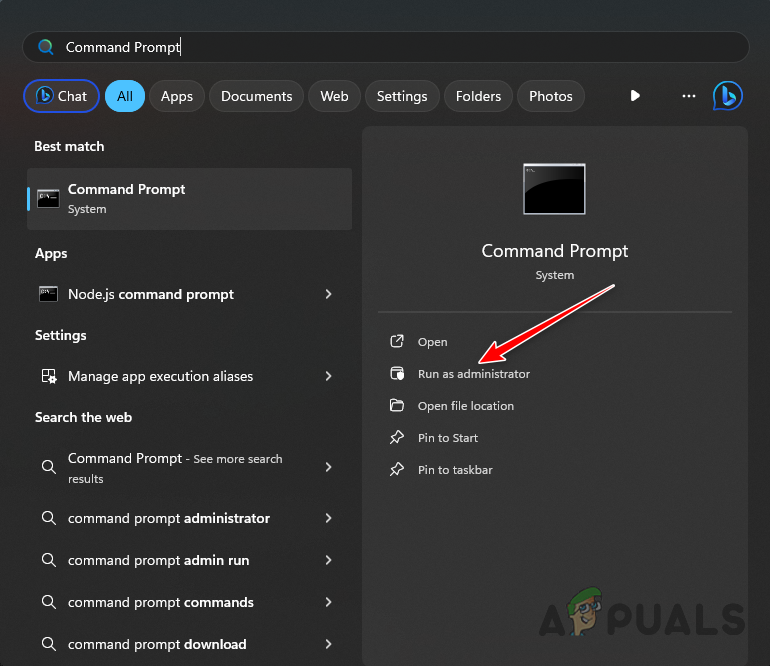
- Open the Start Menu, search for Command Prompt, and choose Run as Administrator.
Opening Command Prompt as Admin - Enter the following command and press Enter:
sfc /scannow
- Allow the scan to finish. This will check and repair corrupted system files.
- After the SFC scan, run the following command for deeper repair:
DISM /Online /Cleanup-Image /RestoreHealth
- Wait until the process completes.
- Restart your PC and check to see if disk usage is normalized.
This sequence addresses potential file corruption, ensuring your Windows resources are functioning correctly.
4. Check Drive Health
Underlying drive issues can also contribute to persistent high disk usage. If your hard drive or SSD health is compromised, it can slow down or interrupt essential system processes.
Use diagnostic tools such as Hard Disk Sentinel, which you can download from the official website here. Install and run the utility to receive a detailed health report, and follow any recommendations provided to maintain optimal drive performance.
5. Disable Superfetch (SysMain)
Superfetch, now known as SysMain, is intended to optimize application startup by preloading frequently used programs into memory. However, if it malfunctions, it may significantly increase disk usage.
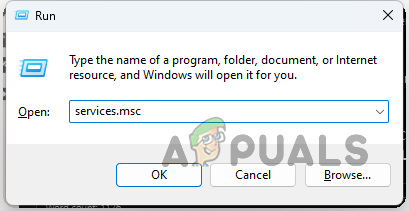
- Press Win key + R to open the Run dialog.
- Type services.msc and press Enter.
Opening Services Window - In the Services window, locate the SysMain service.
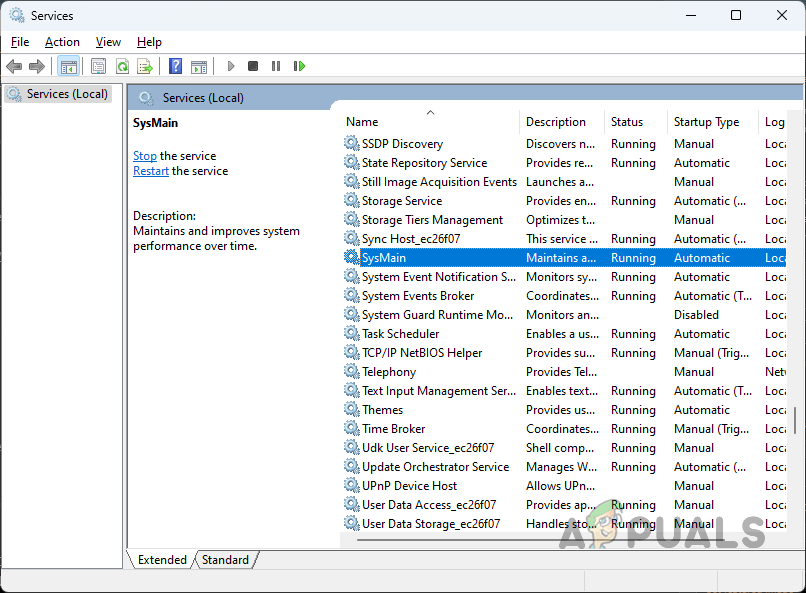
SysMain Service - Right-click SysMain and select Properties.
- Set Startup type to Disabled, and if the service is running, click Stop.
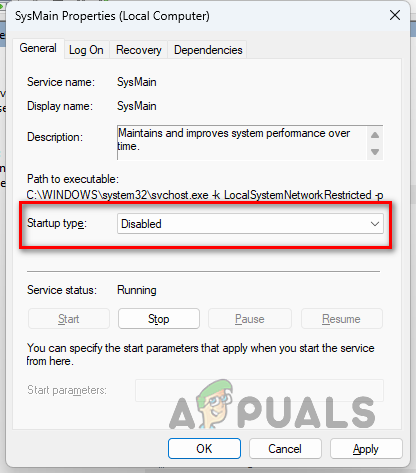
Changing SysMain Startup Type to Disabled - Click Apply and OK.
- Observe if this resolves the high disk usage issue.
6. Disable Memory Diagnostic
The Memory Diagnostic service can sometimes cause excessive disk usage if it is running frequently in the background. Disabling it may alleviate the issue.
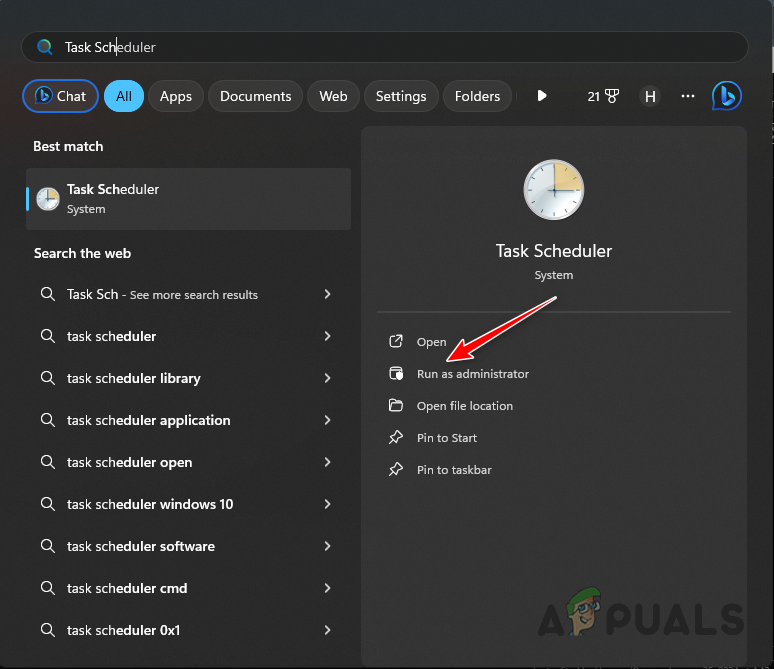
- Open the Start Menu, search for Task Scheduler, and select Run as administrator.
Running Task Scheduler as Admin - Navigate through Task Scheduler Library > Microsoft > Windows > MemoryDiagnostic.
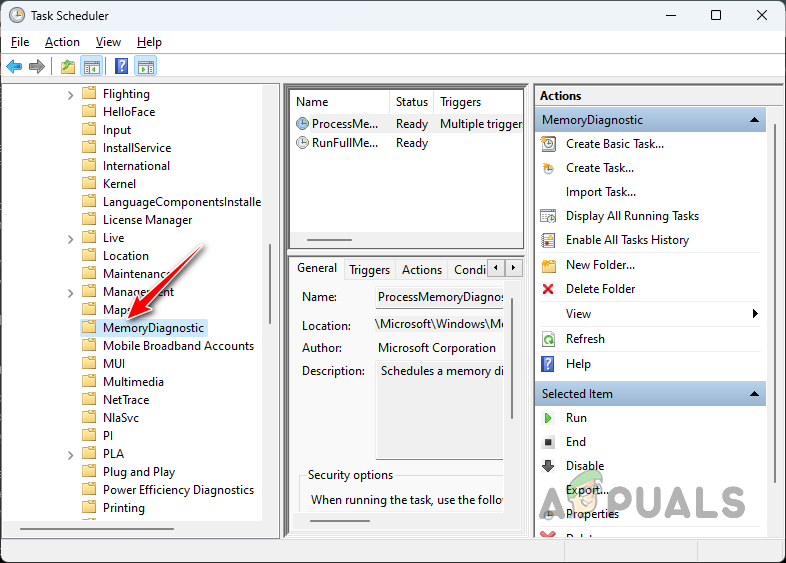
Navigating to MemoryDiagnostic - Select RunFullMemoryDiagnostic and click Disable on the right panel.
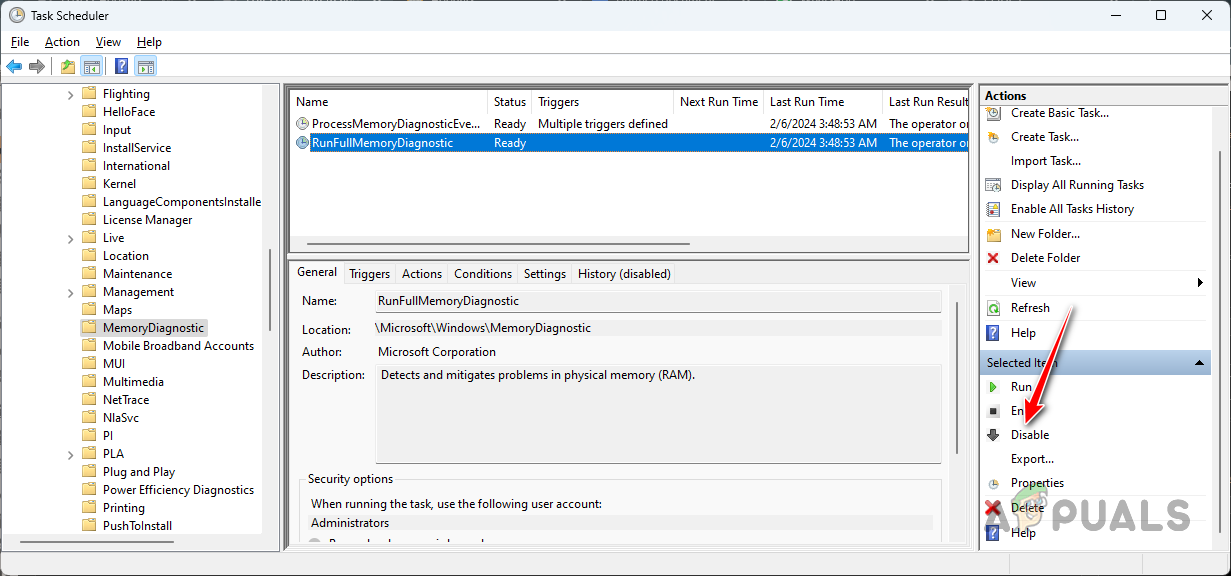
Disabling Memory Diagnostics
Disabling this scheduled task ensures it does not interfere unnecessarily with your system’s disks during regular operation.
7. Perform a Clean Boot
Background applications, especially those with memory leaks, can contribute to high disk usage by the System and Compressed Memory process. Performing a clean boot helps identify if a third-party service is responsible.
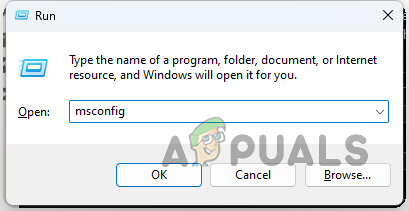
- Press Win key + R to open the Run dialog.
- Type msconfig and press Enter.
Opening System Configuration - In the System Configuration window, go to the Services tab, and select Hide all Microsoft services.
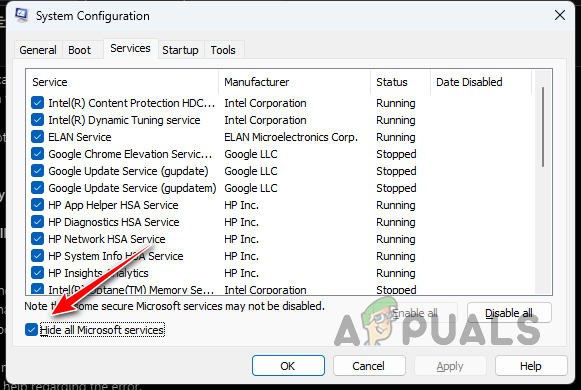
Hiding Windows Services from the List - Click Disable all, then Apply.
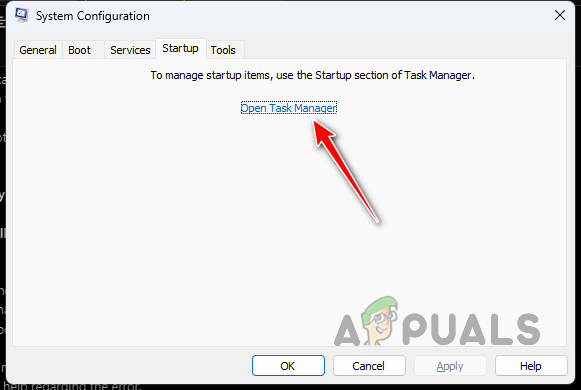
- Navigate to the Startup tab and select Open Task Manager.
Opening Task Manager - In Task Manager, disable all unnecessary third-party applications from starting with Windows.
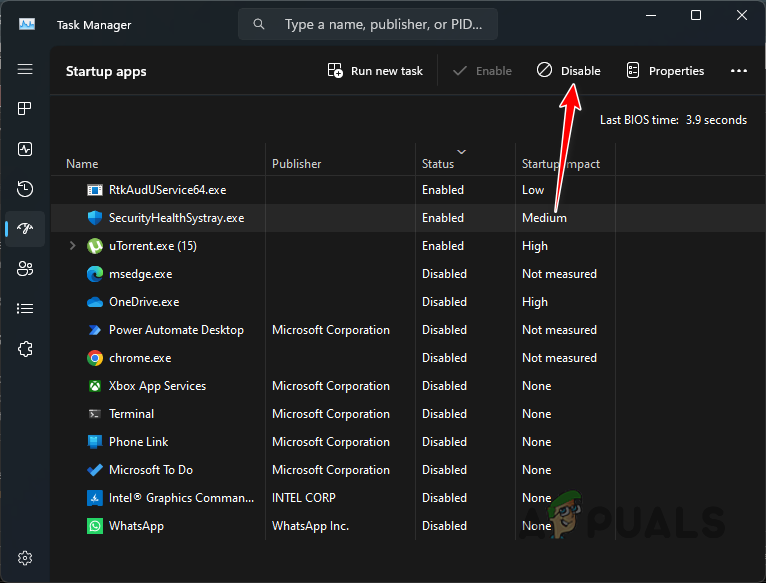
Disabling Startup Apps - Restart your computer to initiate a clean boot environment. Observe whether the disk usage issue persists.
If disk usage is normal in a clean boot, gradually re-enable services to isolate the application causing the problem. This approach is effective for troubleshooting software conflicts and memory leaks.
8. Reinstall Windows
If none of the solutions above resolve the issue, consider performing a clean installation of Windows. This step will address any severe system or software corruption that cannot be fixed through regular troubleshooting.
For a step-by-step walkthrough, refer to our detailed guide on clean installing Windows.
Before proceeding, ensure you back up all important files, as this process will erase data from your system partition.
I disabled the option in the walkthrough. But the process is still running? It is taking up over 1GB of ram usage. I want the option off.