Megapersonal Error 701: How to Fix it? What Causes it?
 Reviewed by Muhammad Zubyan
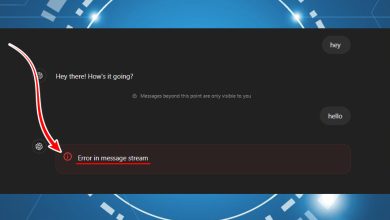
If you encounter the Megapersonal Error code 701 while trying to access your personal data and information on the Internet, it means that your Windows machine is experiencing a common issue that affects proper internet browsing. The error can be caused by various factors, including:
- Corrupted system files are present on your computer.
- Install multiple applications simultaneously.
- Improper installation of certain applications
- Presence of malware or viruses on your system.
- Accidental deletion of important files or essential system entries.
- Corruption in your registry.
- Insufficient storage space on your system.
Once you encounter this error, your computer can become unresponsive, and you will be unable to access your personal information. Moreover, more severe issues, such as BSODs (Blue Screen of Death), data loss, and unexpected system crashes, can occur as well.
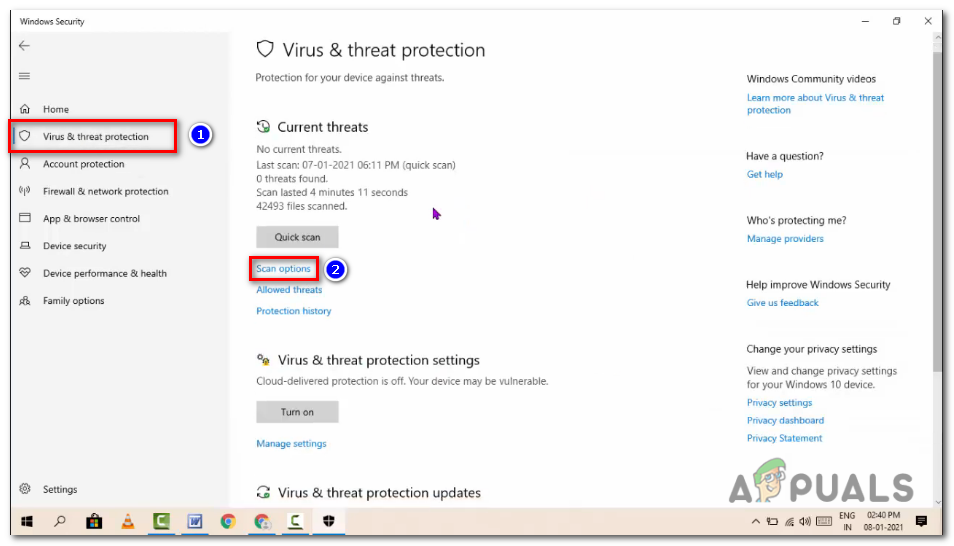
Fix 1: Scan for Viruses
If your computer is infected with malware or viruses, it can trigger the Megapersonal error code 701. To address this issue, follow the steps below to perform a scan using Windows Defender, which will identify and remove any malicious software on your PC.
- Press the Windows key + I to open the Settings menu, then select “Update & Security.”

Press the Windows key + I to open the Settings menu, then select “Update & Security.” - Navigate to “Windows Security” and click on “Virus & threat protection” from the options on the right.
- In the pop-up window, click on “Scan options” to expand the available scanning choices.
In the pop-up window, click on “Scan options” to expand the available scanning choices. - For a comprehensive scan of all files and applications on your computer, select “Full scan.” Click on “Scan now” to initiate the scanning process. Please note that this scan may take a long amount of time to complete.
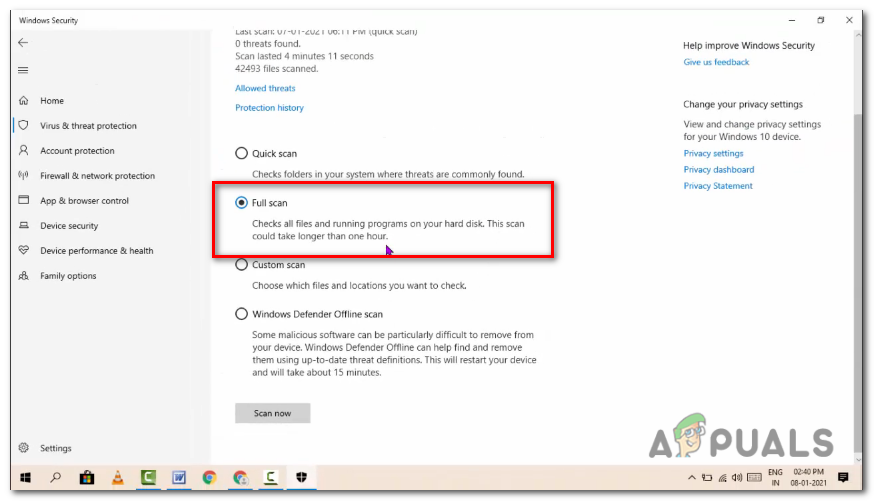
select “Full scan.” Click on “Scan now” to initiate the scanning process - Wait patiently until the scanning process finishes. If the message “No Current Threats” is displayed, it indicates that your system is free from malware. However, if any threats are detected, click the “Start actions” button to allow Windows Defender to remove the identified malicious files or programs.
After completing the scan, check if the error code has been resolved. If the issue persists, proceed to the next solutions.
Fix 2: Perform DISM and SFC Scans
In certain cases, megapersonal error code 701 can be caused by corrupted system files on your Windows PC. To fix this issue, you can attempt to resolve the error by running SFC (System File Checker) and DISM (Deployment Image Servicing and Management) scans.
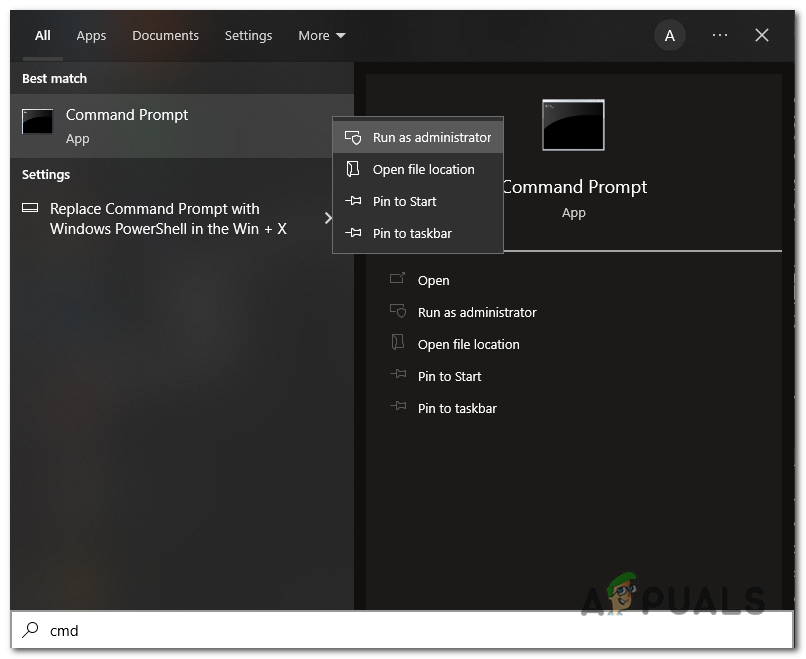
- Press the Windows key + S to open the search option, then type “cmd” and select Command Prompt from the results.
- Right-click on the Command Prompt icon and choose “Run as administrator” from the drop-down menu. This will open an elevated Command Prompt window.
Right-click on the Command Prompt icon and choose “Run as administrator” - In the Command Prompt window, type “sfc /scannow” and press Enter. Note: Do not interrupt the scanning process, as it may result in encountering additional errors.
sfc /scannow
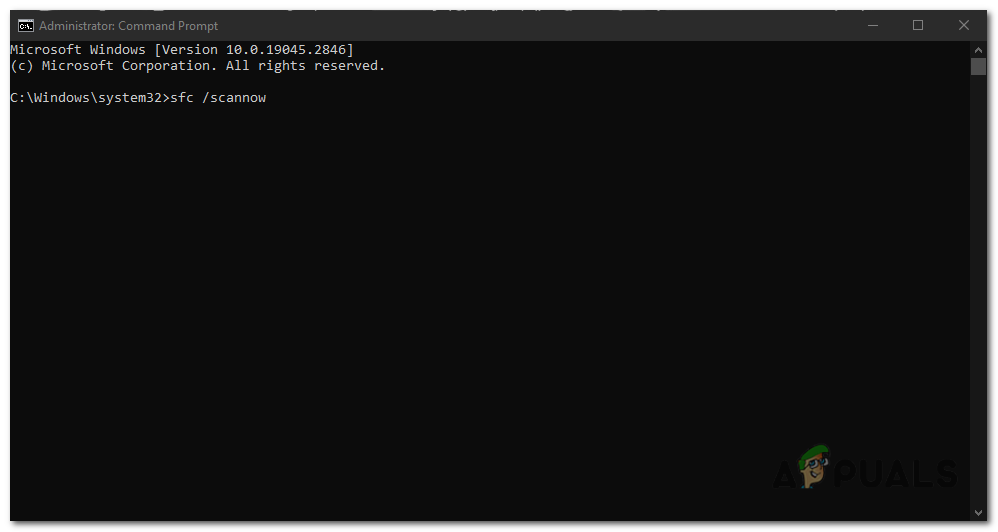
In the Command Prompt window, type “sfc /scannow” and press Enter. - After the scan completes, restart your computer. Then, open Command Prompt as an administrator once again.
- In the Command Prompt window, type “DISM /Online /Cleanup-Image /RestoreHealth” and press Enter to initiate the scan.
DISM /Online /Cleanup-Image /RestoreHealth
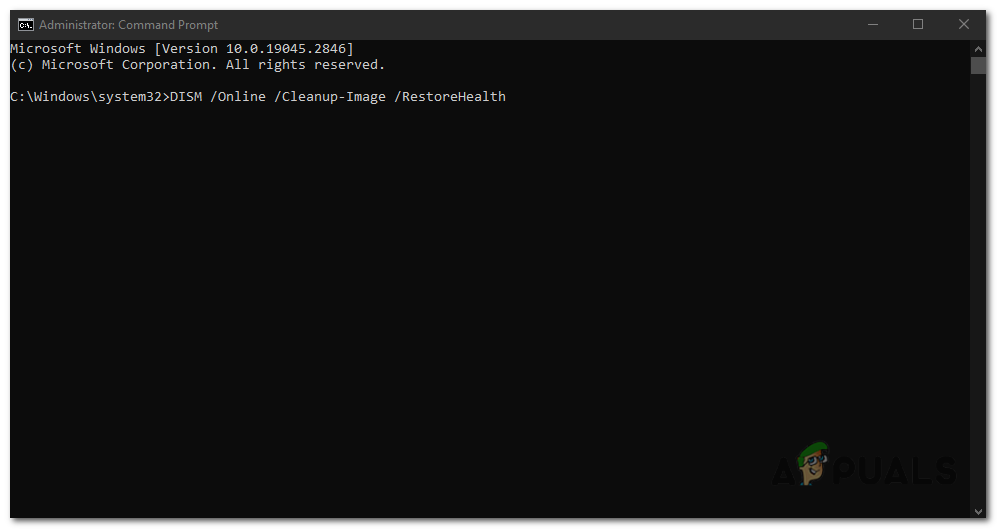
In the Command Prompt window, type “DISM /Online /Cleanup-Image /RestoreHealth” and press Enter - Once the DISM scan has finished, restart your computer once again.
Fix 3: Perform a Clean Boot
Background programs and services can sometimes interfere and cause this error, to diagnose and find out if this is the cause of the issue, A clean boot will help you in identifying the faulty service or program that needs to be disabled or uninstalled; to do so, follow these steps:
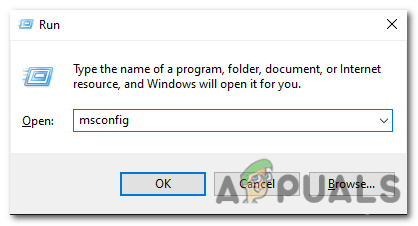
- Press the Windows key + R to open the Run dialog box.
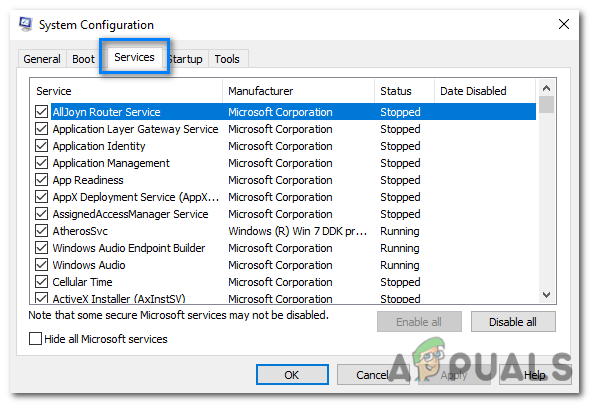
- Type “msconfig” and press Enter to open the System Configuration window.
Type “msconfig” and press Enter - In the System Configuration window, go to the “Services” tab.
In the System Configuration window, go to the “Services” tab. - Check the box next to “Hide all Microsoft services” to exclude Microsoft services from the list.
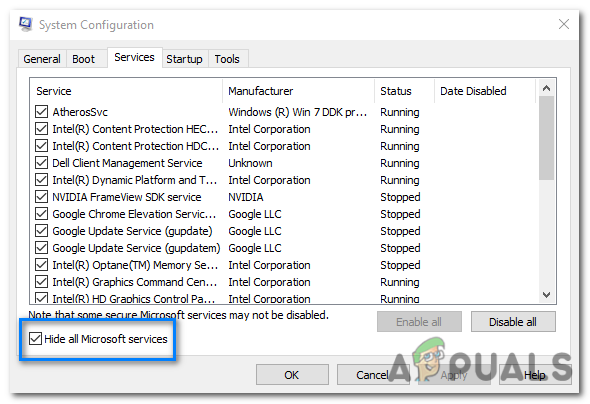
Check the box next to “Hide all Microsoft services” to exclude Microsoft services from the list - Click on the “Disable all” button to disable all non-Microsoft services.
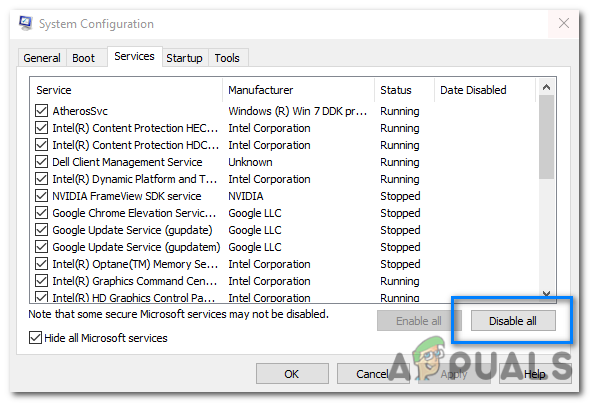
Click on the “Disable all” button to disable all non-Microsoft services - Next, go to the “Startup” tab in the System Configuration window.
- Click on the “Open Task Manager” link to open the Task Manager.
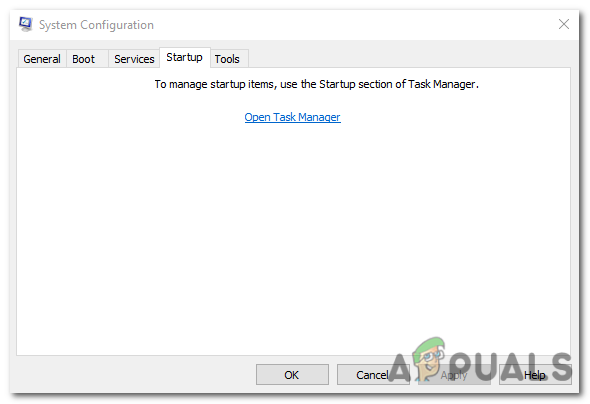
Click on the “Open Task Manager” link to open the Task Manager. - In the Task Manager, navigate to the “Startup” tab.
- Disable all the startup programs by right clicking on each entry and selecting “Disable.”
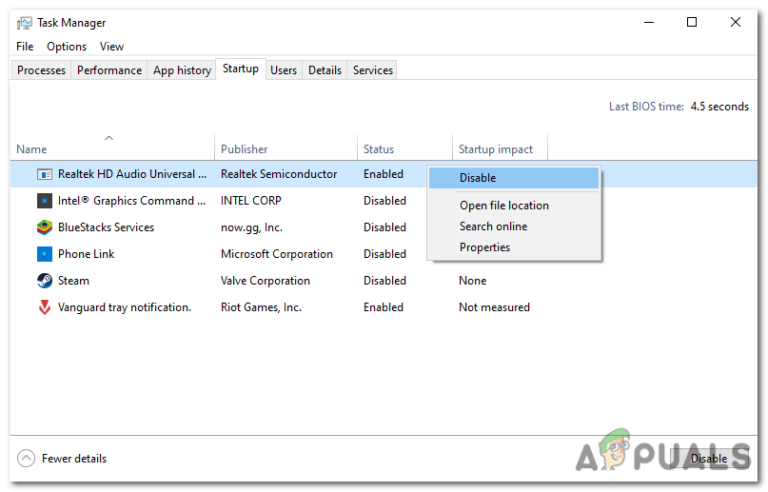
Disable all the startup programs by right clicking on each entry and selecting “Disable. - Close the Task Manager and go back to the System Configuration window.
- Click “Apply” and then “OK” to save the changes.
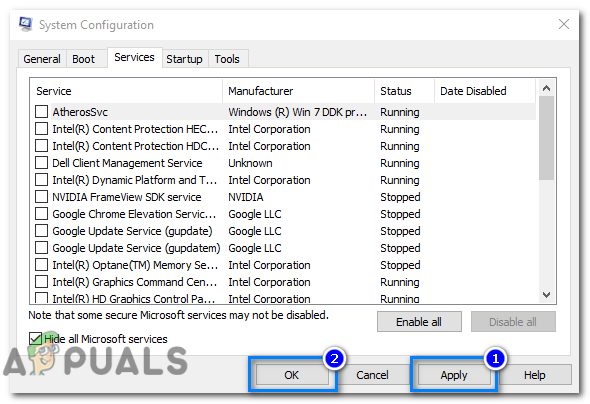
Click “Apply” and then “OK” to save the changes. - Restart your computer to start in a clean boot state.
After restarting your computer, you should be in a clean boot environment. If the problem is no longer present, you can begin activating startup programs and services one at a time until the problem reappears. When the problem returns, you’ll know which startup program or service is to blame.
Once you’ve found the startup program or service that’s causing the issue, you can either disable it permanently or uninstall it.
FIx 4: Freeing up Disk Space
When your system is running low on storage space, freeing up some disk space can help in fixing this error. Here are two ways you can do this:
Delete Unnecessary Files Using Windows Settings
You can remove unnecessary files via Windows Settings to reclaim disk space.
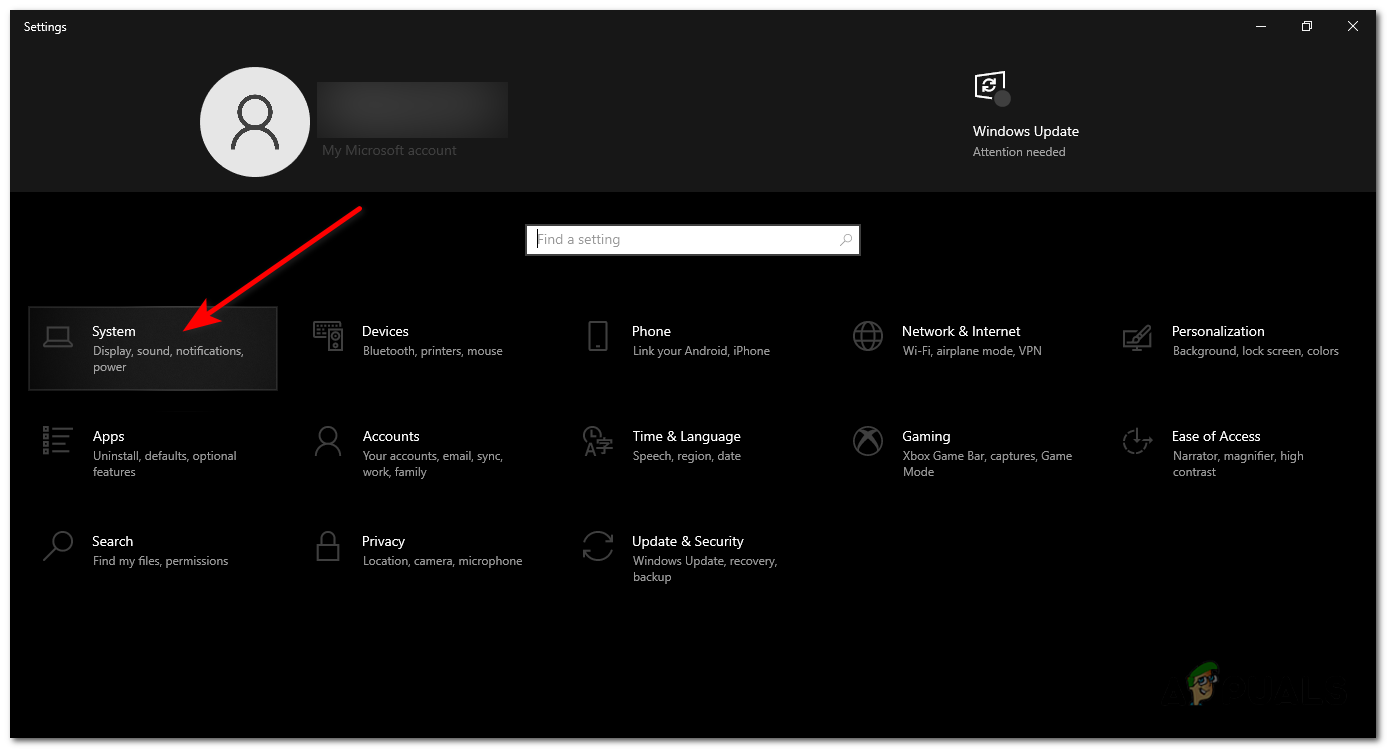
- Open Settings on your computer and select “System.”
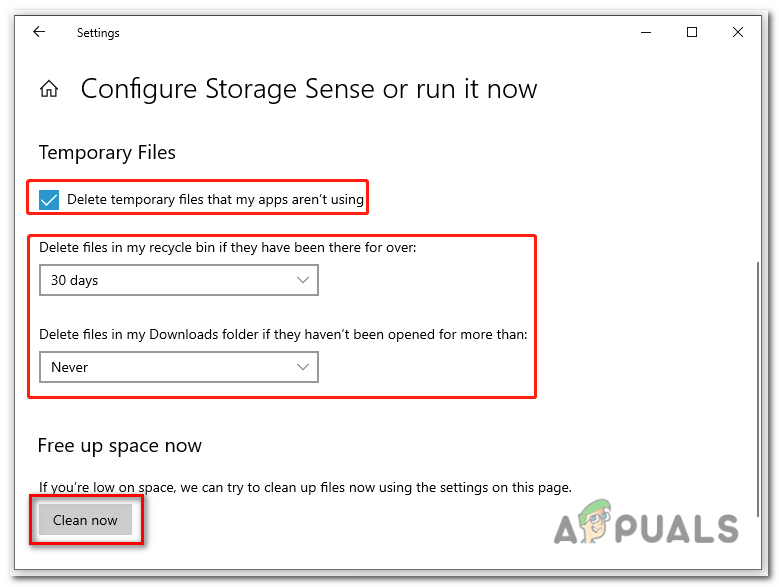
Open Settings on your computer and select “System.” - Go to “Storage.” Enable the toggle switch in the right pane and click on “Configure Storage Sense” or “run it now.”
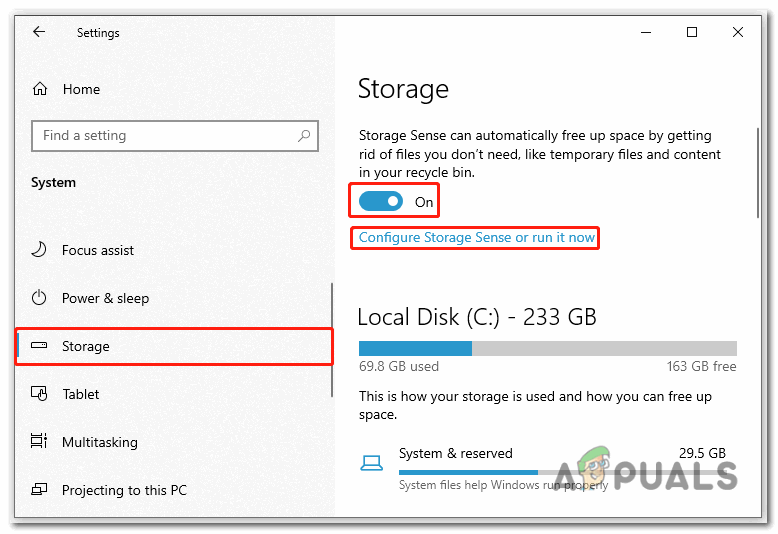
Open Settings on your computer and select “System.” - In the subsequent window, check the box next to “Delete temporary files that my apps aren’t using.” Adjust the other deletion settings as per your requirements.
- Finally, click on “Clean now” to initiate the process of freeing up disk space.
click on “Clean now” to initiate the process of freeing up disk space
Delete Unnecessary Files Using Disk Cleanup
Disk Cleanup is a built-in Windows tool that helps remove temporary and unused files.
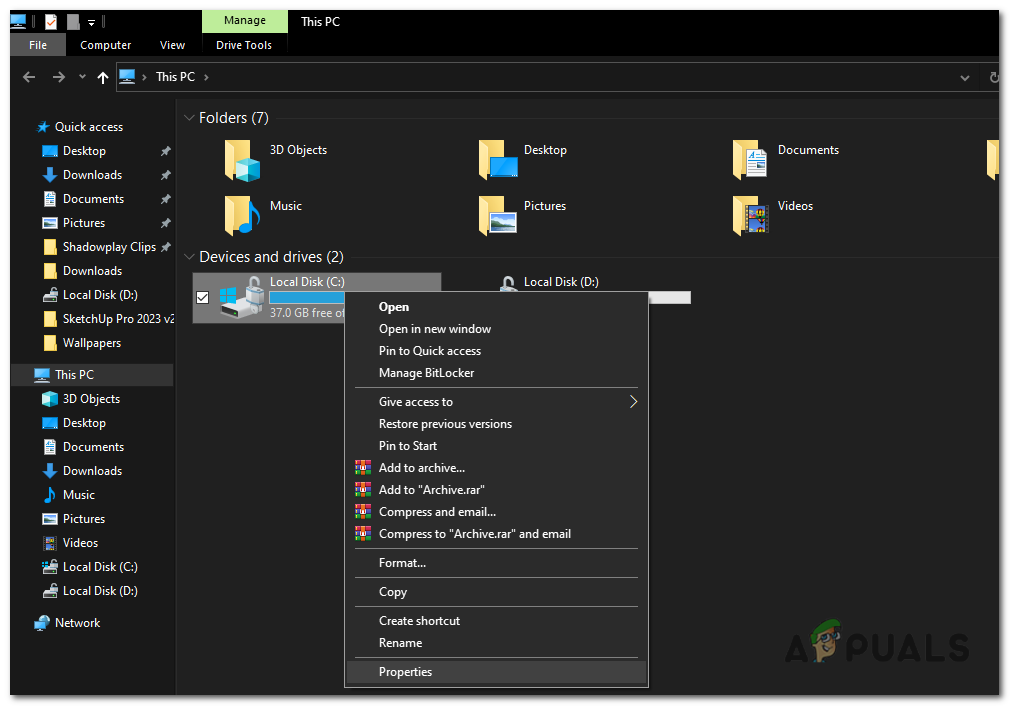
- Press the Windows key + E to open File Explorer.
- Click on “This PC.” Then right-click on the target drive and select “Properties.”
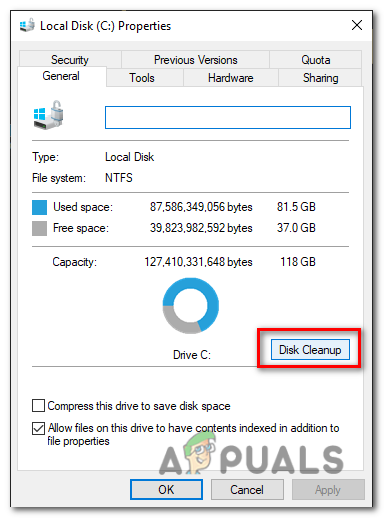
right-click on the target drive and select “Properties.” - In the General tab, click on “Disk Cleanup” to launch the Disk Cleanup tool.
click on “Disk Cleanup” to launch the Disk Cleanup too - Check the files you wish to delete from the provided list.
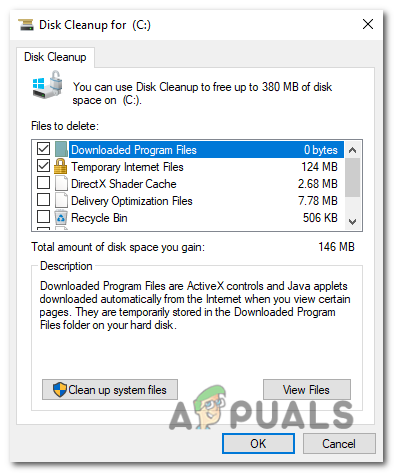
Check the files you wish to delete from the provided list - After selecting the files, click “OK” and then “Delete Files” to permanently remove them.
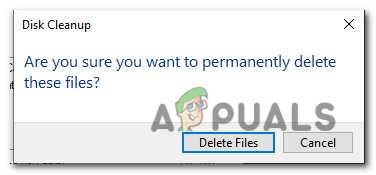
After selecting the files, click “OK” and then “Delete Files” to permanently remove them
Fix 5: Repairing Corrupted Registry
Corrupted registry entries can potentially lead for this error code to occur. The registry is a crucial database in the Windows operating system that stores important settings, configurations, and information about installed software, hardware, and system components.
To access the Advanced Startup Options and perform a Startup Repair to fix Corrupted Registry on your Computer, follow these steps:
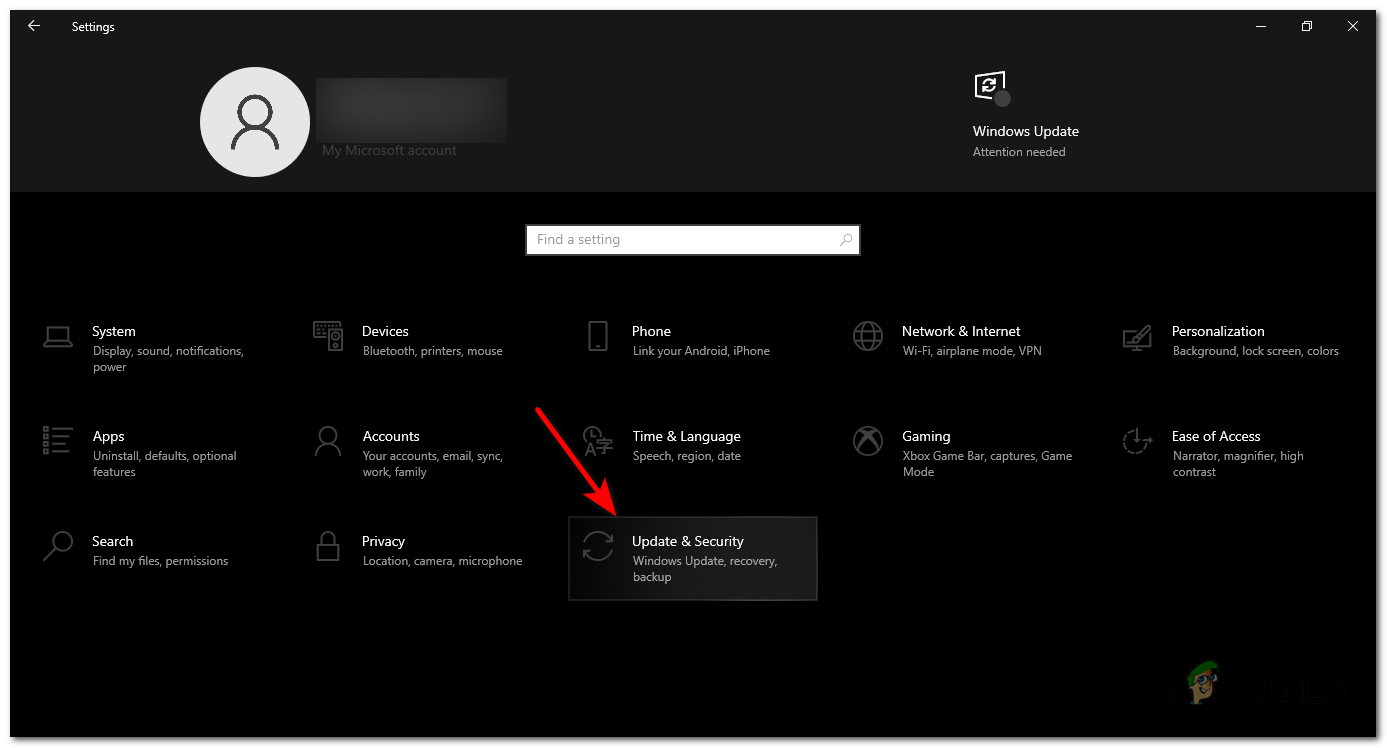
- Press the Windows key + I key together to open the Settings app.
- In the Settings app, select the “Update & Security.”
In the Settings app, select the “Update & Security. - On the right side, select “Recovery.”
- In the Recovery section, click on the “Restart now” button under the “Advanced startup” option.
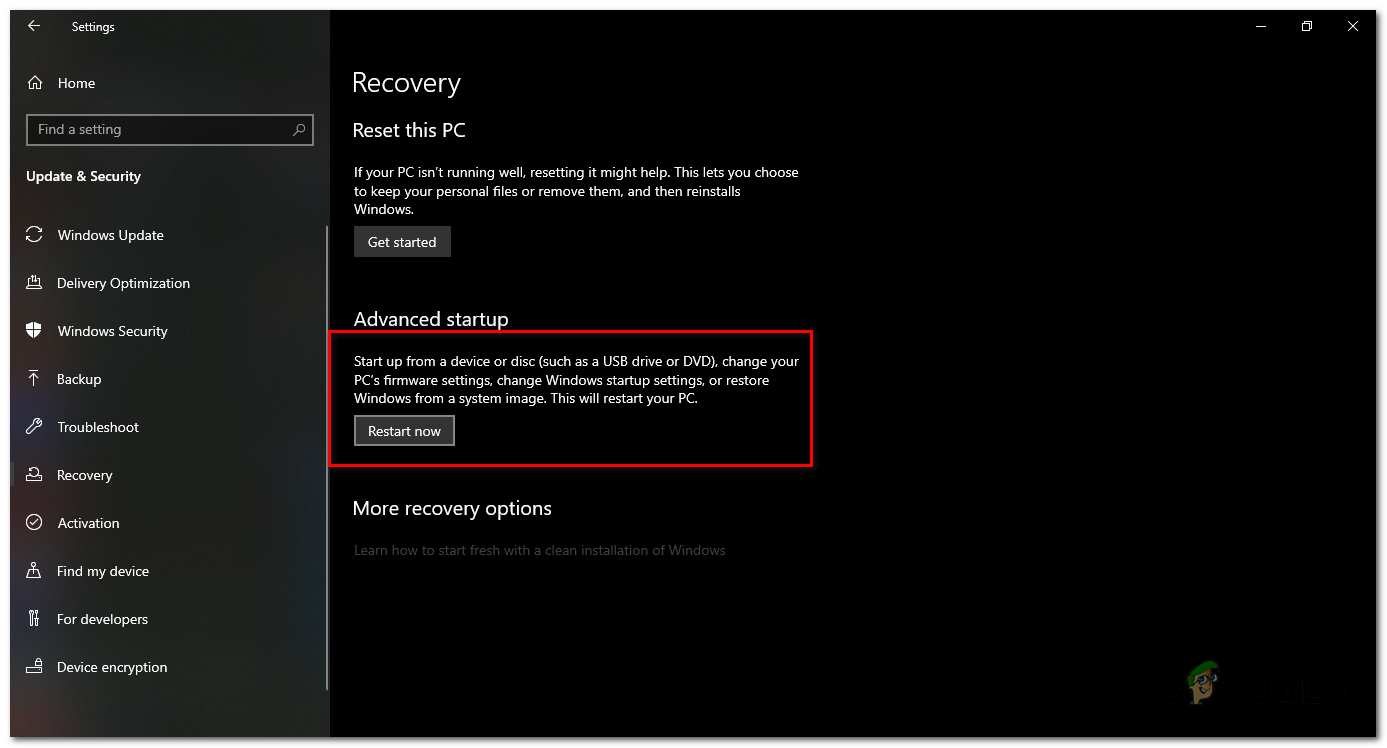
In the Recovery section, click on the “Restart now” button under the “Advanced startup” option - Your system will restart, and you will see the “Choose an option” page displayed on a blue screen. Select the “Troubleshoot” option from the available choices.
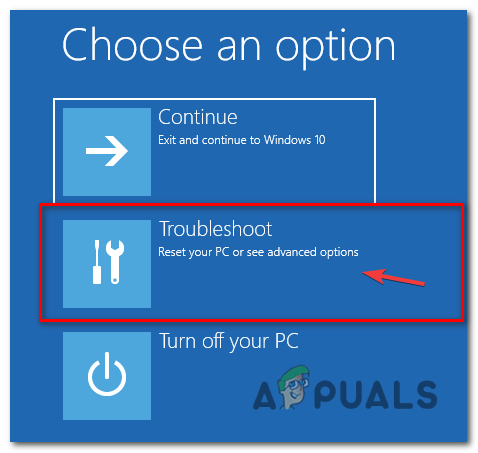
select the “Troubleshoot” option from the available choices. - On the Troubleshoot page, choose “Advanced options.”
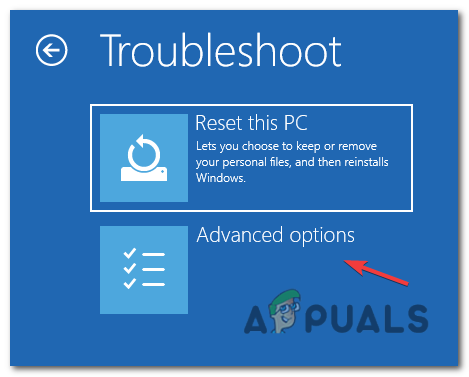
On the Troubleshoot page, choose “Advanced options.” - Next, click on the “Startup repair” option from the Advanced options page.
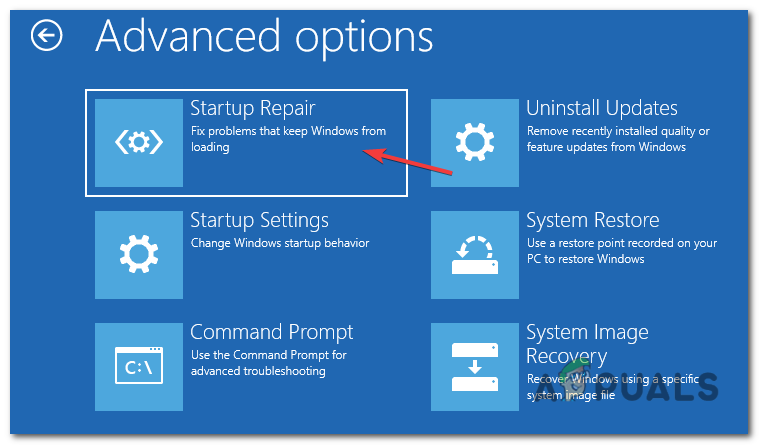
click on the “Startup repair” option from the Advanced options page - The system will start the troubleshooting process to identify and repair any errors or problems.
- Wait until the process is complete, and then restart your system once.
Reviewed by Muhammad Zubyan