Fix: Logon Failure when Starting Virtual Machine
Starting the virtual machine in Hyper-V Manager is a one-click action. Unfortunately, sometimes it is not possible to start it due to the wrong configuration inside of the virtual machines or the issues with user rights.
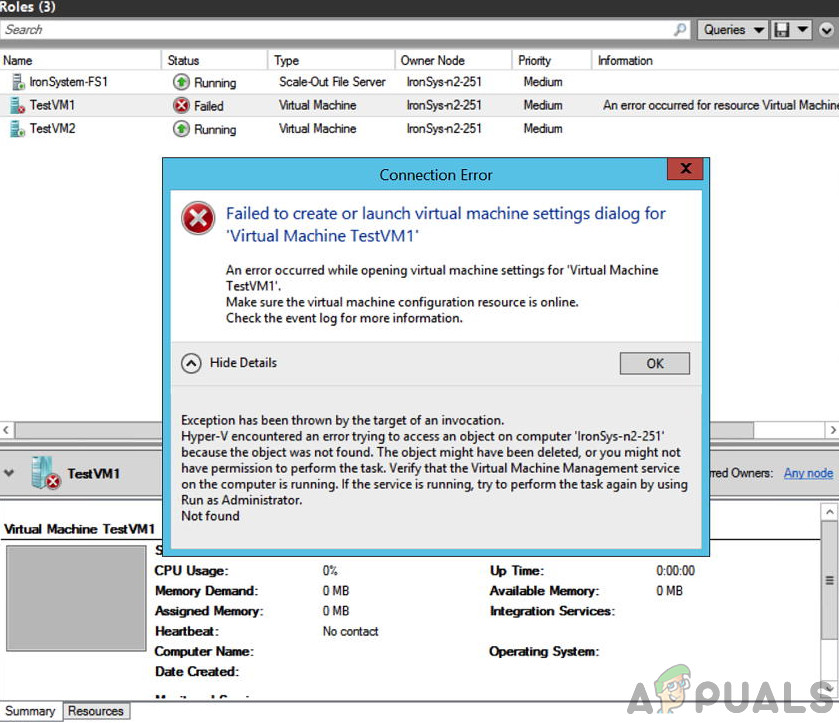
The full error message is:
Error 0x80070569 (‘VM_NAME’ failed to start worker process: Logon Failure: The user has not been granted the requested logon type at this computer or for Live migration Failed to create Planned Virtual Machine at migration destination: Logon failure: the user has not been granted the requested logon type at this computer. (0x80070569).
This issue occurs on Windows Servers from 2012 to 2019, but also on Windows 8 and Windows 10. Make sure to back up your configurations before proceeding.
Solution 1: Restart services
The first solution is related to the services that are responsible for functioning Hyper-V. Even if the services are started, that doesn’t always mean they are working properly. A few users solved the problem by restarting the following two services:
Hyper-V Host Compute Service
Windows Management Instrumentation
The services can be restarted in the tool Services. We do recommend rebooting the Hyper-V host which will also reboot all services related to Hyper-V.
Solution 2: Verify if the problem is related to group policy
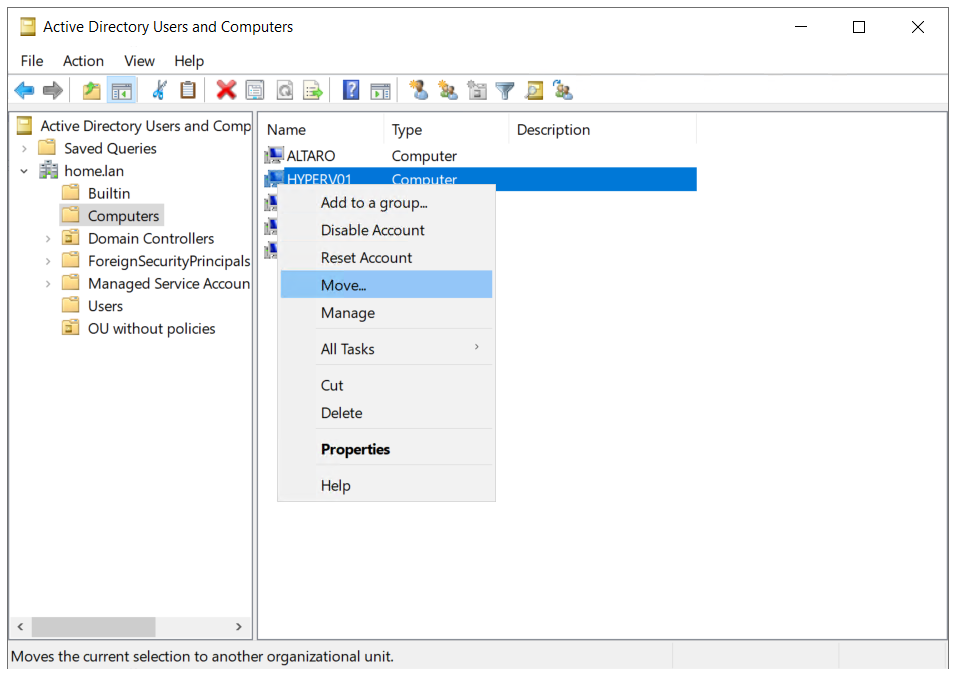
If the first solution wasn’t helpful, the next step would be to identify if the problem is related to the group policy configuration. We can do it by moving the Hyper-V computer object to OU (Organizational Unit) that does not have any policies applied.
If you can start the virtual machine or perform live migration after this step, the problem would be confirmed to be related to group policy. If you don’t have an Organization Unit without applied policies, please create it. (Right-click on the domain > New > Organization Unit).
- Login into Active Directory machine and open Active Directory Users and Computers
- Navigate to the Computers and then select the computer object that is related to the Hyper-V machine.
- Right-click on the computer object and then click Move. Move computer objects to the organizational unit that does not have policies applied and then click OK.
- Run PowerShell or Command prompt as an administrator and run the following command:
gpupdate /force
- Reboot your Windows machine and Start the virtual machine or perform the live migration
Solution 3: Modify user rights
In this solution, we will modify the user rights for running the virtual machine. This solution consists of two steps; in the first step we will install Group Policy Management on Hyper-V host and then in the second step, we will modify the policy accordingly.
Step 1: Install Group Policy Management
- Login as Domain Administrator in the Hyper-V host.
- Open Server Manager and under Configure the local server, click on Add roles and features.
- Now under Select installation type, select Role-based or feature-based installation.
- In the next step, select the server and also its roles.
- Select Group Policy Management under Select features option and click Next.
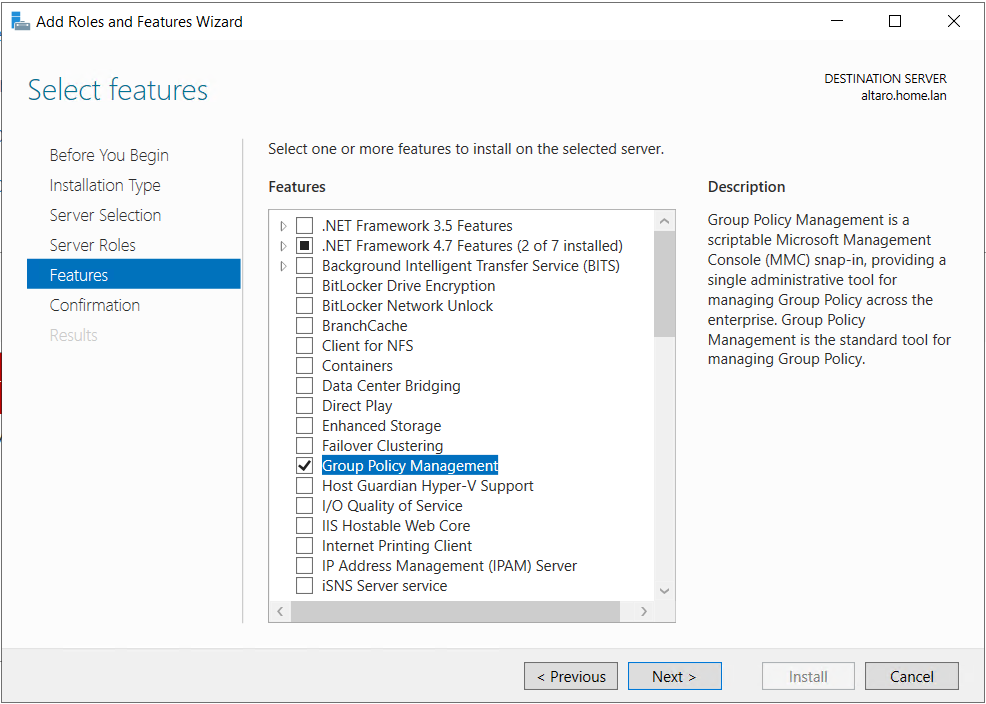
- Install and wait till the feature is successfully installed and then click Close
- After it is installed, click on Tools at the top right and then select Group Policy Management
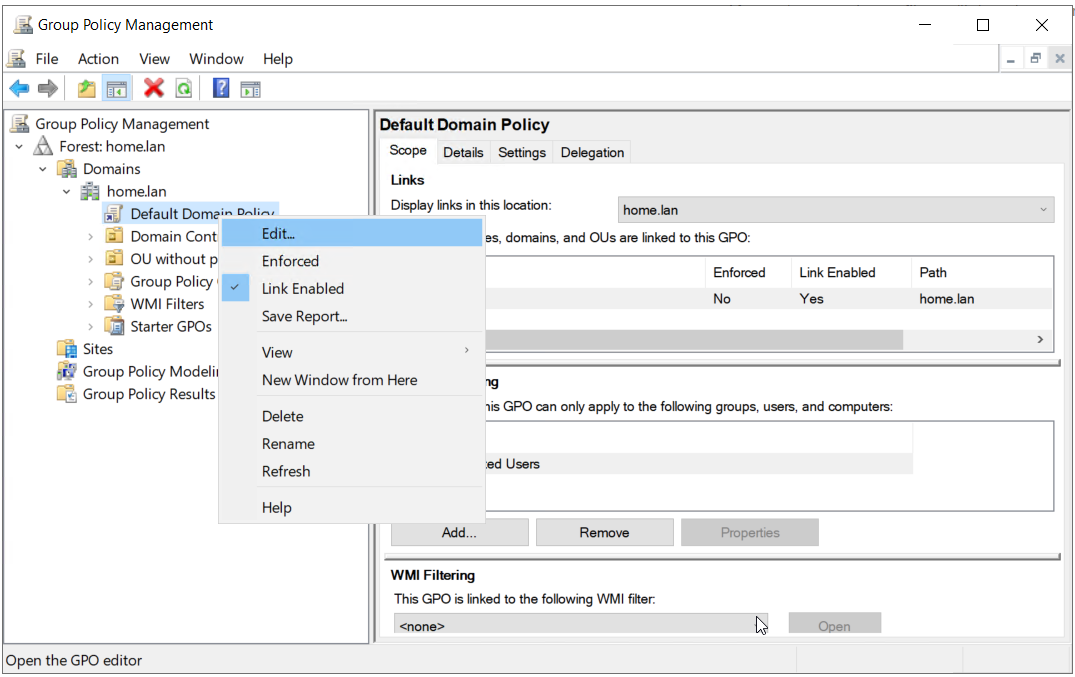
Step 2: Change User rights
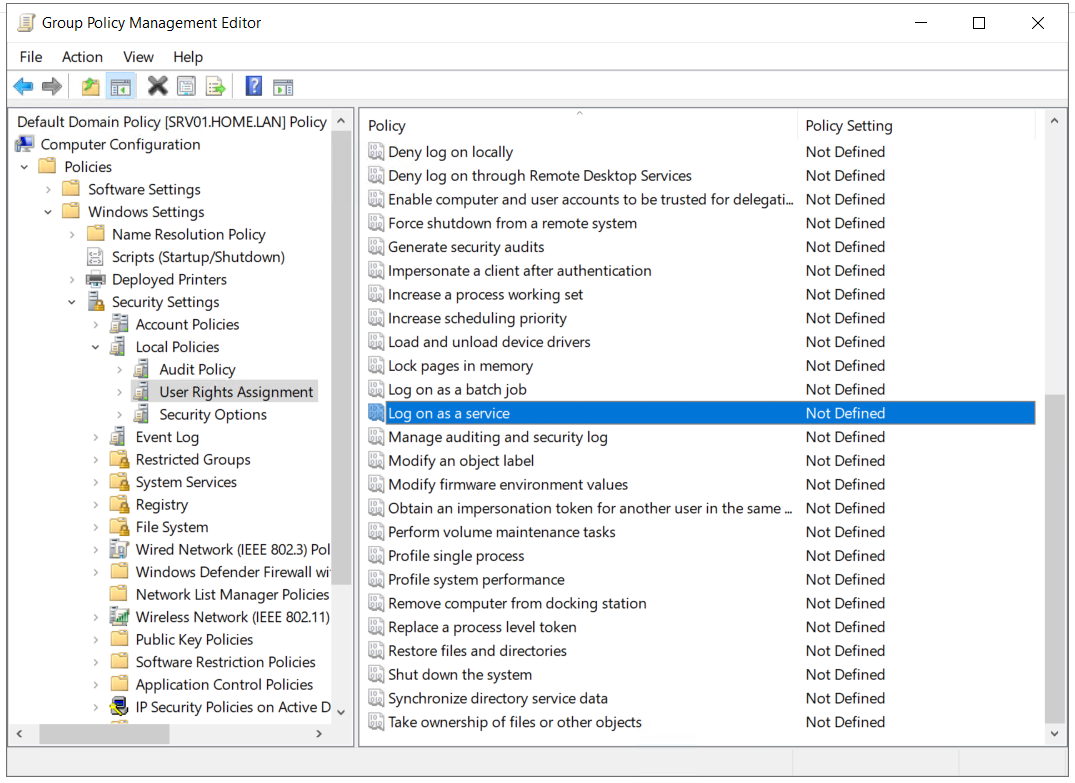
- Open the Server Manager and click on Tools at the top right and then select Group Policy Management.
- Expand the domain and navigate to the group policy applied on the Hyper-V server. We will modify the default policy called Default Domain. Right-click on the policy and click Edit
- Expand to the following path:
Computer Configuration > Windows Settings > Security Settings > Local Policies > User Rights Assignment > Log on as a service
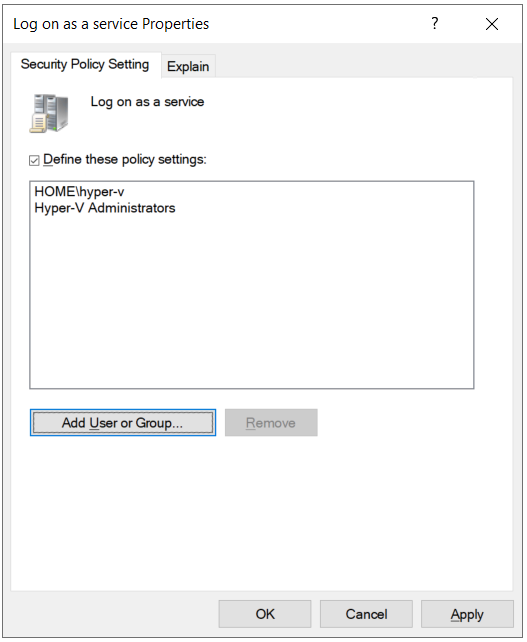
- Right-click on Log on as a service and click Properties. Now select Define these policy settings
- Add User or Group and then browse.
- Click Advanced and then click Find Now
- Add the user account that is used on the Hyper-V host. In our case, it is a user account Hyper-V.
- Now check if the issue is resolved for good.


