How to Uninstall and Remove Avast Completely in Windows?
Avast develops one of the best antivirus software in the business. It provides regular updates to keep your security up to date. With the paid version, you get more features including web and email scanners among others. However, some people have found a better antivirus, or find that windows defender is quite reliable on its own. This prompts them to uninstall the Avast antivirus from their system.
The correct procedure is to uninstall Avast from the program and features window. This launches the Avast uninstaller which then proceeds with the uninstallation. However, uninstalling an antivirus is not as simple as uninstalling any other app. Antivirus files are protected by digital signatures that allow only the ‘trusted installer’ (in this case Avast) to edit them. During the uninstall procedure, you will have to provide the signatures in order to complete the uninstallation.
Avast installs a mock operating system in order to complete the uninstallation. It will then force the user to reboot the computer in safe mode. Since Avast was the last operating system to install, it becomes the default OS. When the computer restarts, the Avast OS loads and opens windows in safe mode. Avast then proceed to completely uninstall, leaving behind the uninstaller and the registry keys and a few files. Though your antivirus will no longer work, you will need to complete the uninstallation by removing residual files.

Avast has mostly uninstalled from the system, but it has left some files behind. Users have complained that these files seem to still make the antivirus active. Pop-ups of the antivirus can still be seen asking for upgrades and this annoys the users that thought that they had completed the uninstallation of Avast antivirus. How can one get rid of all the antivirus residual files once and for all? We will give you some of the known ways in which you can complete the uninstallation of the antivirus and get rid of the pop-ups.
4 Ways to Remove and Uninstall Avast Completely
1. Remove Avast as the default operating system and delete the Temporary Avast OS
During uninstalling, Avast creates a small operating system that it uses to uninstall files. After it is done, the operating system does not seem to uninstall itself after you restart your computer. The reason behind this is that you cannot uninstall the default operating system. You might notice the Avast OS option when starting your computer. Leaving it as the default OS might keep booting your computer into the safe mode every time you restart it.
This option will let you switch your default operating system back to Windows. This will then allow the Avast antivirus to uninstall its residual files after you are done.
- Press Start/Windows Key + R to open the Run window
- Type sysdm.cpl in the Run textbox and hit enter to open the advanced system properties window.
- Go to Advanced tab. Tap on Settings under Startup and Recovery.
- Under the Default Operating System, you will find the dropdown box for choosing the default operating system. Choose the desired option and save the changes by clicking OK
- Press windows key + R to open run
- Type msconfig and hit enter
- In the system configuration window, open the Boot tab
- Choose the Avast operating system by clicking on it and then click delete. Allow the deletion
- Restart your computer
- Your computer will now start normally and Avast has will complete the uninstallation of residual files successfully.
You can also set the default operating system by pressing esc or F10 or F12 (depending on your computer) during startup. This gives you the list of all installed operating systems and the option of setting the default OS. You can find the Avast uninstall utility if yours does not work correctly.
2. Use Avast Clear
Avastclear is an intuitive tool from the creators of Avast itself that is designed specifically to uninstall any and all Avast products installed on a computer.
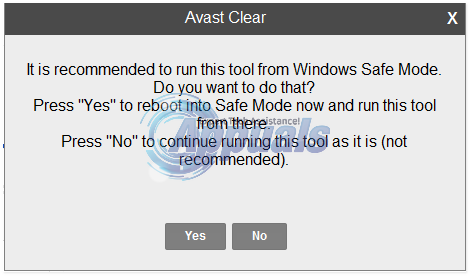
Click here to download Avastclear. It will automatically prompt you to run the tool in Safe Mode. Run the executable Avastclear.

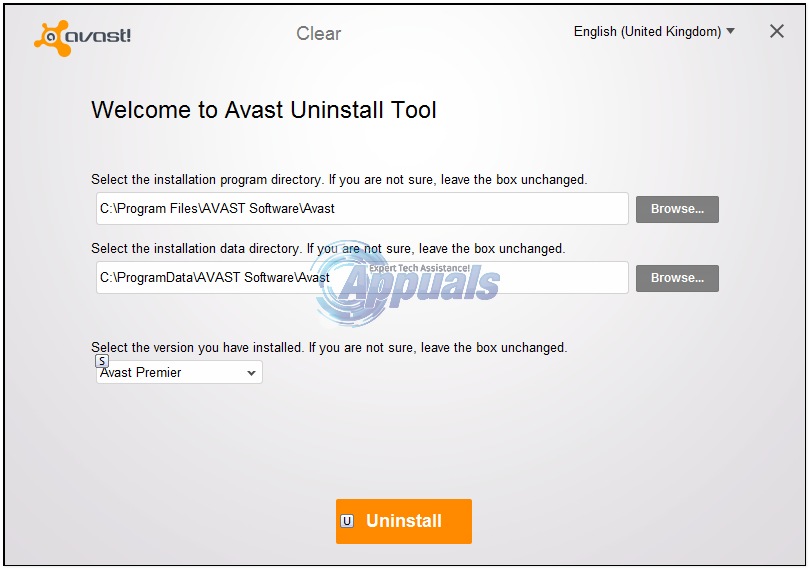
Follow the onscreen instructions and browse to the folder in which you have installed the Avast product you want to uninstall. (If you’ve not used a custom folder, then leave it to defaults). Click on Remove. Restart your computer, and Avastclear will finalize the uninstallation when your computer boots up.

Once you have no more use for Avastclear, you can uninstall it from your computer.
3. Use the ESET Antivirus Remover tool
If Avastclear fails to successfully uninstall Avast from your computer (which is quite unlikely) or if you simply don’t want to use Avastclear, you can use the ESET Antivirus Remover tool instead. The ESET Antivirus Remover tool is designed to be able to uninstall almost every single antivirus or anti-malware program out there, and that includes all Avast programs.
Go here and download an appropriate version (32-bit or 64-bit) of the ESET Antivirus Remover
Install and run the utility. Click on Continue and allow the ESET Antivirus Remover tool to scan your computer for all previously installed security programs. When provided with the results of the scan, select all of the Avast applications that you want to be removed from your computer and click on Remove.
Confirm the action by clicking on Remove in the warning window that pops up. Wait until the tool displays a message stating “Applications successfully removed”. At this point, the applications you selected will have been removed and you can close down the utility.
Once you have uninstalled Avast from your computer, you can go ahead and uninstall the ESET Antivirus Remover
Note: You may need to restart your computer during or after the uninstallation process.
To make sure that whatever method you used actually managed to completely uninstall Avast from your computer, simply go to Start > Control Panel > Add or Remove Programs (Windows XP, Vista or 7), Control Panel > Programs and features (Windows 8 and 8.1) or Control Panel > Programs > Programs and features (Windows 10) and make sure that there aren’t any Avast programs left in the list.
4. Delete trusted installer files manually
If method 1 does not clear the Avast pop-ups, you will need to delete the Avast files manually. This method will allow you to take control of trusted installer files and the ability to delete those files
- Go to the following location ‘C:\ProgramData\AVAST Software\Avast\’
- Right-click on the file or folder you want to delete and choose Properties.
- Next, click on the Security tab and then click on the Advanced button at the bottom
- Next, click on the Owner tab and you’ll now see that the current owner is TrustedInstaller.
- Now click on the Edit button and choose who you would like to change the owner to, either your account or the Administrators. If your account is an Administrator account, we suggest just picking Administrators.
- Click OK to save the new owner. Keep clicking OK until the file/folder properties windows is closed.
- Go back and delete these folder/files
- Repeat the same for other files and folders
- Go to this location (copy-paste it into your address bar and press enter) %windir%\WinSxS\ find all files associated with Avast and delete them using procedure steps 2 – 7
- Go to this location %windir%\WinSxS\Manifests\ find all files associated with Avast and delete them using procedure steps 2 – 7
- Restart your computer.
It is not recommended to take ownership of trusted owner files, but if you are sure you are not going to use them again, you can just delete them. Use this as a last resort method.