Fix: You Require Permission from TrustedInstaller
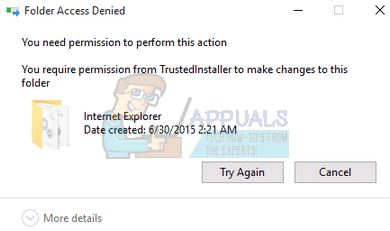
Windows has an NTService\TrustedInstaller account in Windows 10. This account owns important files and prevents them from being removed. Therefore, if you try to modify any of these files, you will get a prompt “You require permission from TrustedInstaller” and you will be stopped from proceeding.
The only way to still modify these files is to change ownership. Ownership guarantees that you can read/write/execute files and folders without any hindrance. If you have completed the action you are performing, it is strongly recommended that you change the ownership back to TrustedInstaller to prevent it from modified again.
Taking Ownership from TrustedInstaller
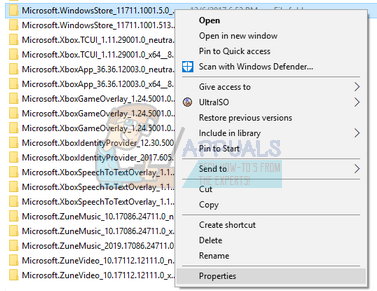
- Right-click on the file/folder and select “Properties” from the drop-down menu.
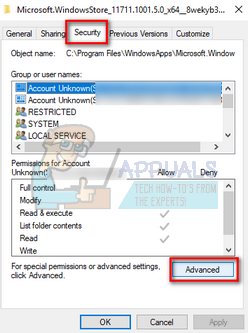
- Navigate to the “Security” tab and click on “Advanced” present at the near bottom of the screen. As you can see there are no proper permissions for your account in this case.
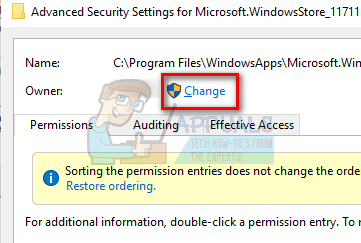
- Click on the “Change” button present on the preceding screen. It will be right in front of the owner’s value. Here we will change the owner of this folder from TrustedInstaller to your computer account. Make sure that you are logged in as an administrator.
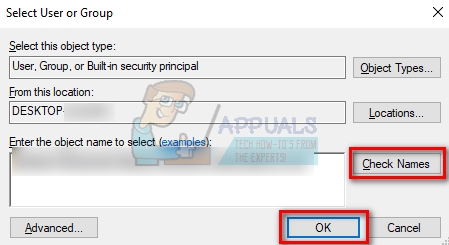
- Now enter your user account name in the empty space present and click on “Check Names”. Windows will automatically list all the accounts which are a hit with this name.
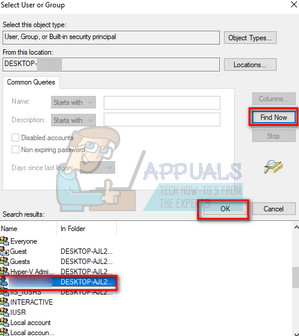
If you can’t find your account name using this method, you can try selecting it manually from the list of user groups available. Click on “Advanced” and when the new window comes forth, click on “Find Now”. A list will be populated at the bottom of the screen consisting of all the user groups on your computer. Select your account and press “OK”. When you are back to the smaller window, press “OK” again.
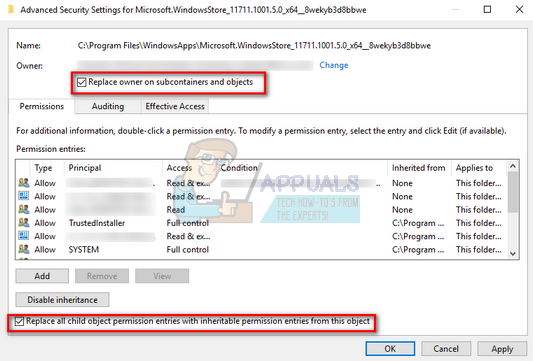
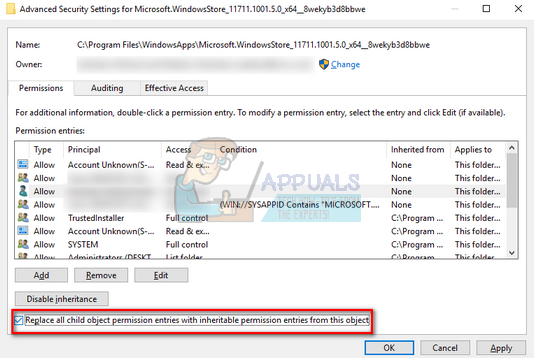
- Now check the line “Replace owner on sub containers and objects”. This will ensure that all the folders/files within the folder also change their ownership. This way you won’t have to proceed with all the processes again and again for any sub-directories present. You can also check “Replace all child object permission entries with inheritable permission entries from this object” according to your preference.
- Now close the Properties window after clicking “Apply” and open it again afterward. Navigate to the security tab and click “Advanced”.
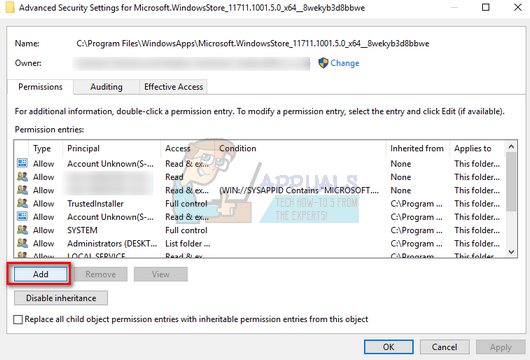
- On the permissions window, click on “Add” present at the near bottom of the screen.
- Click on “Select principle”. A similar window will pop up like it did in step 4. Repeat step 4 again when it does. Now check all the permission (giving full control) and press “OK”.
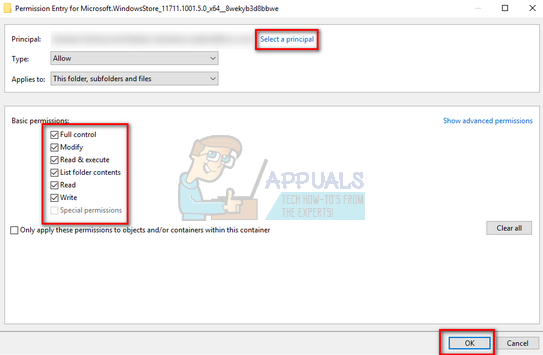
- Check the line “Replace all child object permission entries with inheritable permission entries from this object” and press Apply.
- Now you can safely modify/delete the object without any hindrance. If you get an error that it is open in another location, you can open your task manager and end all processes related to it.
Note: It is advised that you only perform this operation on the files you know about. Deleting system files can damage your PC. Also after modifying or implementing changes, you should change the ownership back to ensure that your PC is more secure.