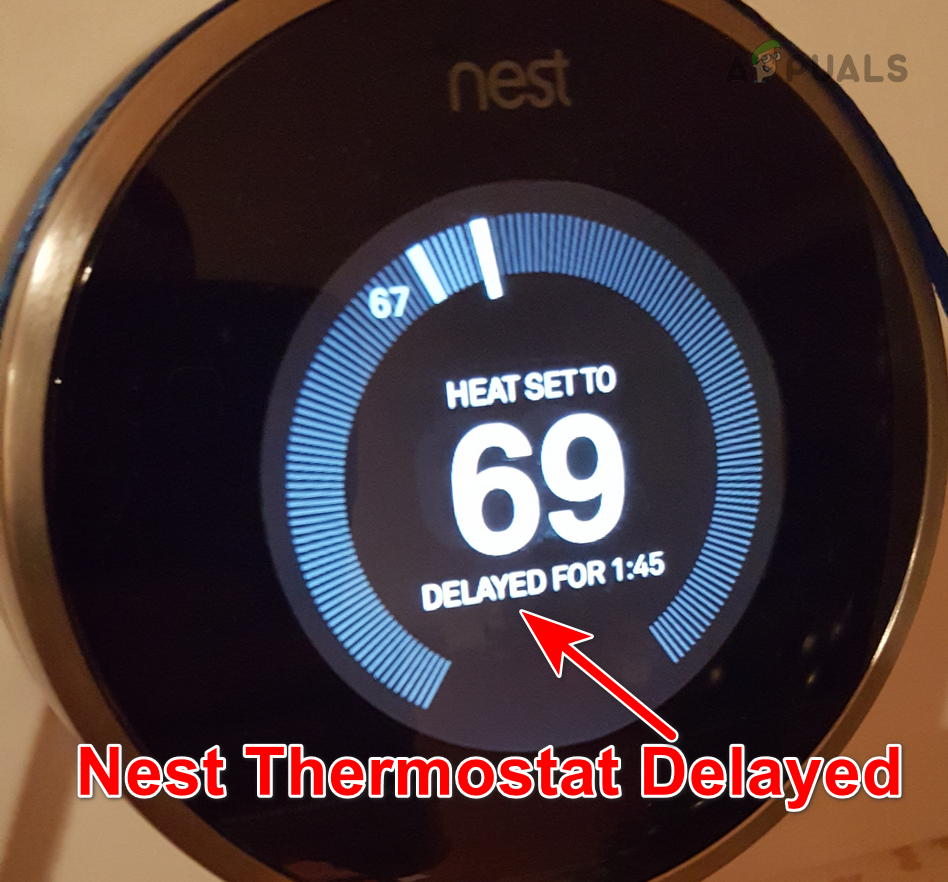
“Delayed” Message in Nest Thermostat (Explained & Fixed)
 Reviewed by Muhammad Zubyan
Every thermostat, not exclusively the Nest thermostat, includes a built-in delay. When you try to quickly turn on a heating or cooling system right after powering it off, a delay is triggered. The primary objective of this delay is to protect the heating or cooling system from potential damage. Generally, this delay lasts between two to five minutes, allowing the system to stabilize before being powered on again.
The Nest thermostat uses these delays even when you change the temperature quickly. This delay is called a maintenance band, differential, dead band, or temperature swing.
Common Scenarios
Apart from the previously mentioned delay, if the thermostat shows the delayed message for hours or the message is shown more frequently, then another factor is triggering this message. This problem is reported on different variants or generations of Nest thermostats with different heating or cooling systems.
In some cases, when the delayed message will disappear from the thermostat and the heating or cooling unit will try to power on. However, the unit will turn off and again, the delayed message will be shown on the thermostat.
Additionally, there are cases when the issue only occurs on heating or cooling but not on both. At times, you will constantly see a delayed message on the thermostat whereas, the heating or cooling system will not start. If by any means, the system powers on, it fails to provide the required heating or cooling.
Troubleshooting Prerequisites
- Check if you are not part of a peak-reducing plan or smart assistance with your energy company. If so, they will cut your energy demand at the peak time and cause delays in heating or cooling at peak times.
- There are reports where people got to the required temperature by increasing or decreasing the temperature one degree at a time from the room temperature. Do not use this method as this will cause permanent damage to your heating or cooling unit and its repair can be very heavy on your pocket.
How to Fix the Delayed Message on your Nest Thermostat?
We will start with the most basic troubleshooting methods and work our way down to more complex ones. Make sure you follow this guide step-by-step.
1. Force Close the Nest App on Your Devices
The constant pinging of the thermostat by the Nest app may overload the device’s battery which might be running low. The app might be in the background on your devices but it can still send commands to the IoT device. This can especially be true if a C wire is not available to charge the battery.
In such a case, closing the Nest app, on all of your devices will solve the problem.
- On your mobile phone, open the app switcher and swipe up the Nest or Home app.
- For Android, go to Settings > Applications > Google Nest or Google Home and force close the app.
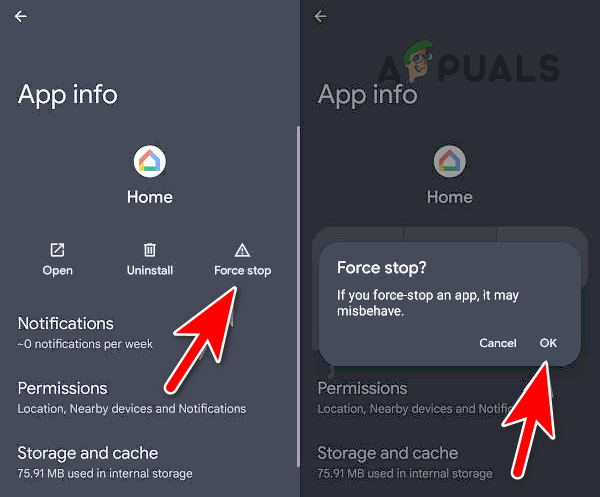
Force Stop the Google Home App - Close the app on other linked devices or systems, in the form of a browser or an app.
- See if the thermostat is clear of the delayed message.
2. Restart the Nest Thermostat and Equipment
A malfunction in the core firmware components of the Nest thermostat can result in heating or cooling delays. Additionally, if the heating or cooling system is not in the state required by the thermostat, the IoT device will show delays.
In any case, restarting both i.e., the Nest thermostat and your heating/cooling equipment will resolve the issue, as it resets the necessary modules to their default startup state.
- On the Nest thermostat, go to Settings > Reset.
- Select Restart and once fully powered on, cut the power to the entire heating or cooling unit by turning off the respective circuit breakers.
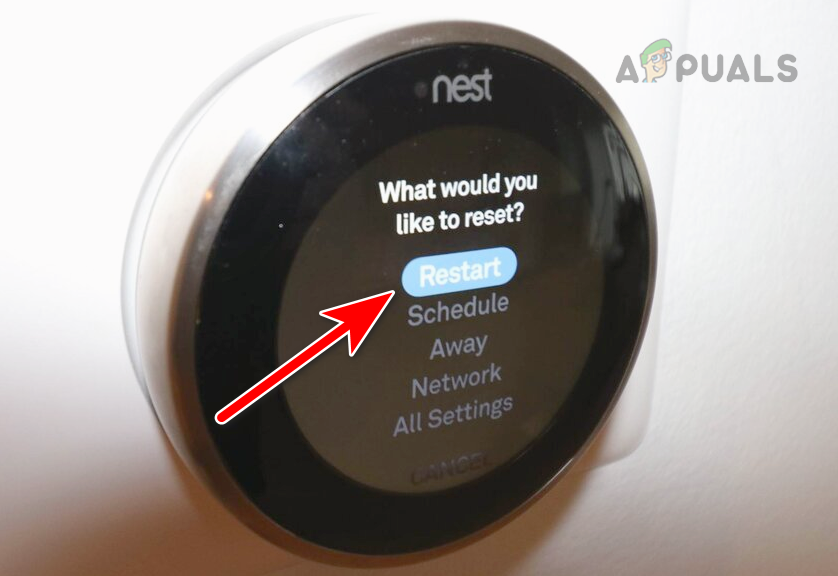
Restart the Nest Thermostat - Wait for a minute and power back everything. Check if the delay issue is resolved.
3. Use Heat Mode or Cool Mode
In a Heat – Cool mode, the Nest thermostat will try to keep your system within the specified temperature range. The range will sometimes need heating and sometimes, cooling. This mode is useful for hotter climates where cooling may be required during the day and heating may be required at night.
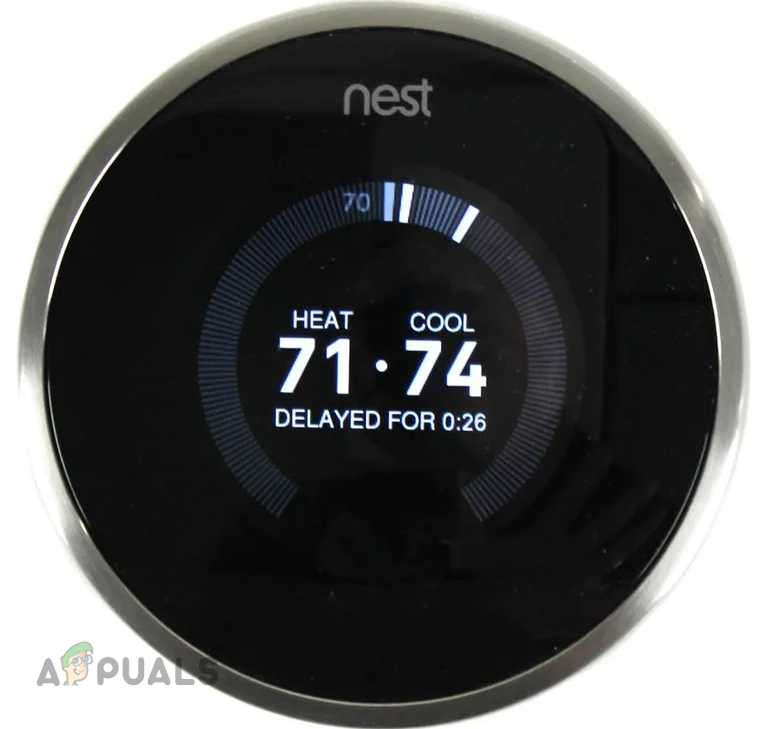
If there is frequent switching between the heat or cool mode, the thermostat will put a delay to avoid any potential damage to your heating or cooling unit. Here, switching to a single mode and then manually changing the mode will do the trick.
You can also increase the gap between your temperature range to avoid frequent switching between the modes.
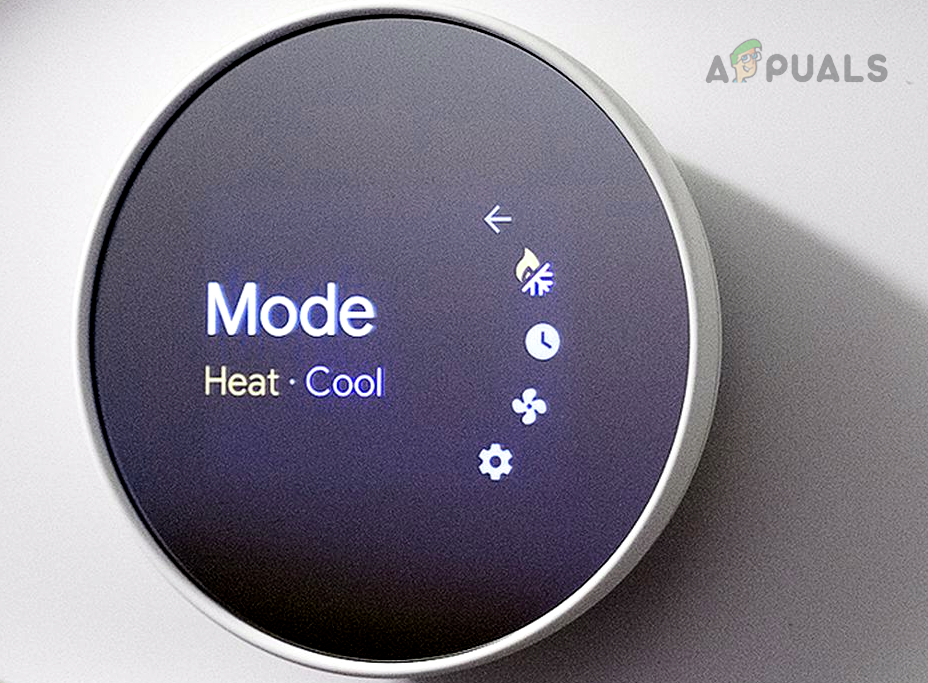
- On the Nest app, select the problematic thermostat and open Mode. You can also do these steps on the thermostat itself.
- Select Heat mode or Cool mode (but not Heat Cool mode) and check if the issue is resolved.
Change the Mode on the Nest Thermostat
4. Disable Home/Away Assist
The Home/Away assist feature makes the Nest thermostat energy efficient. Through this feature, the thermostat detects that you are not home and as a result, it lowers the cooling or heating till you are back.
You will see a delay on the Nest thermostat if it is failing to detect your presence. This might have occurred due to a malfunction in the device’s firmware modules or due to a misconfiguration of the feature. In such cases, disabling the Home/Away Assist feature will do the trick.
- On the thermostat, go to Settings > Home/Away Assist. You can also change these settings on the Nest or Google Home app.
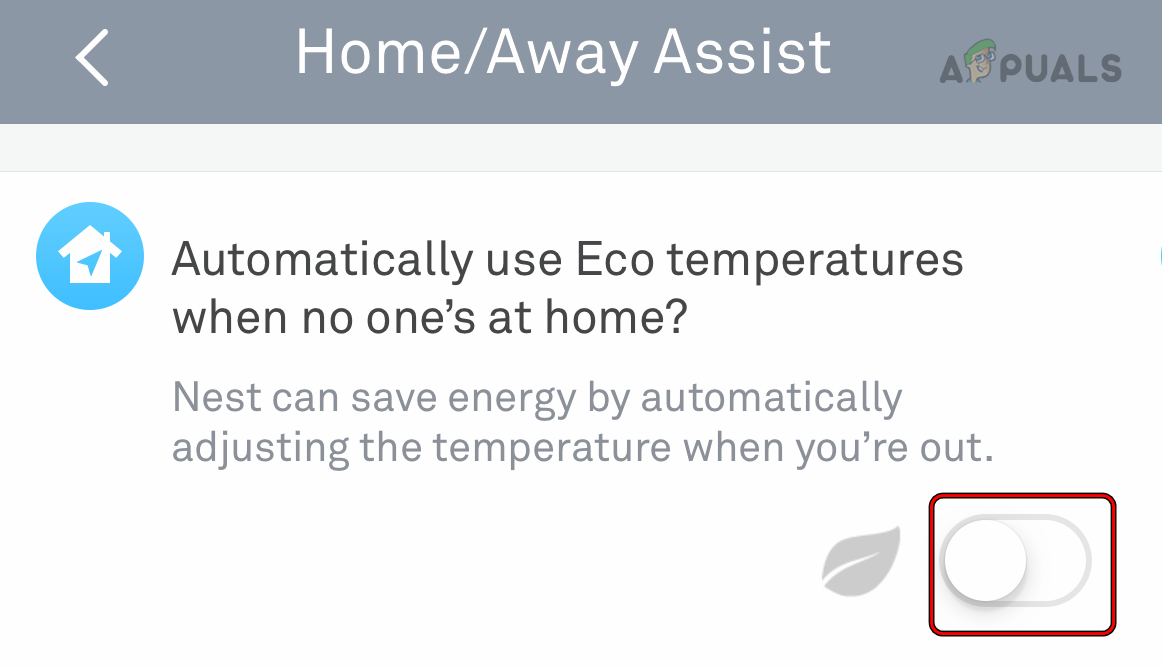
Disable Home-Away Assist in the Nest App - Disable it and check if the delay issue is resolved.
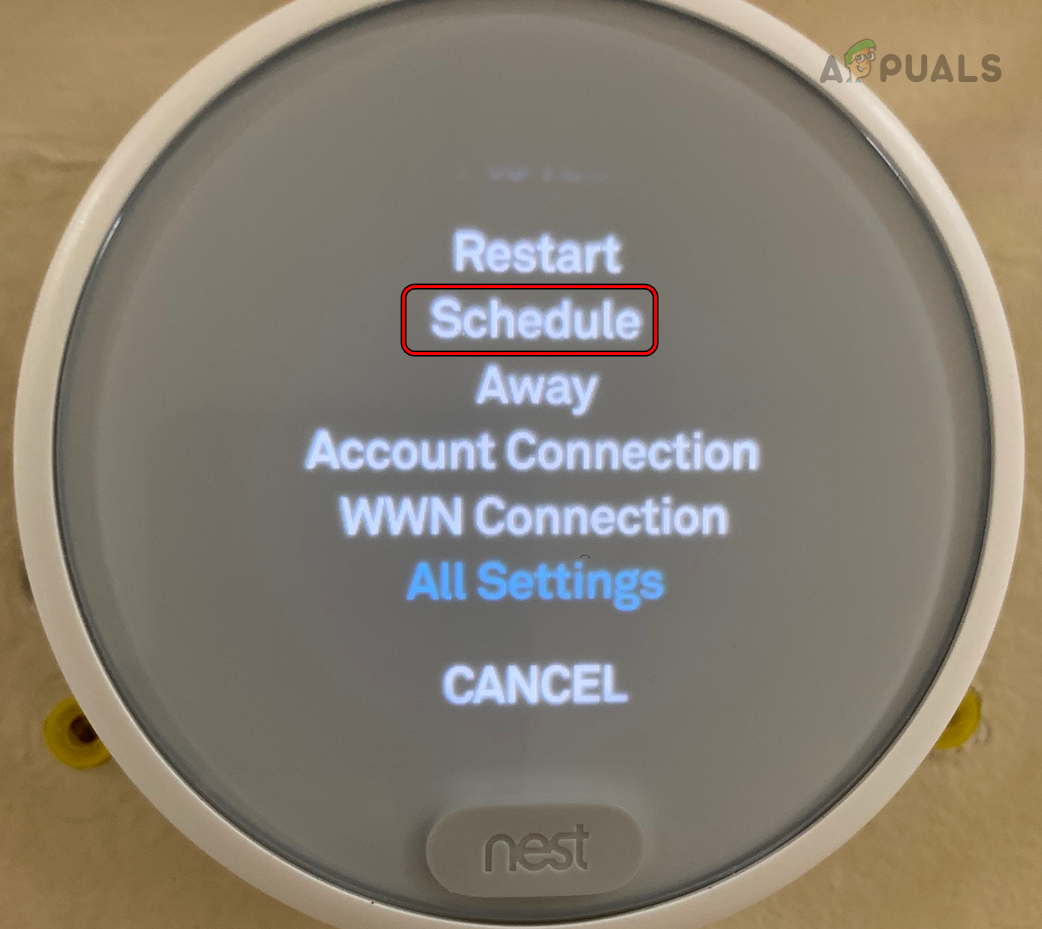
5. Disable Auto-Schedule or Reset Schedules
You will see a delay on the Nest thermostat if Auto-Schedule or manual schedules are holding the thermostat to start heating or cooling, till the scheduled time comes. To address this, disable Auto-Schedule or reset schedules on the thermostat.
Disable Auto-Schedule
- On the problematic thermostat, navigate to Settings > Auto-Schedule.

Disable Auto Schedule on the Nest Thermostat - Disable it and check if the delay issue is resolved.
Reset Schedules
- On the thermostat, go to Settings > Reset > Schedules.
Reset the Schedule on the Nest Thermostat - Confirm to reset the schedules and once done, verify if the delayed message has disappeared from the IoT device.
6. Disable Smart Features on the Nest Thermostat
The delayed message can also be shown on the Nest thermostat if any of its smart features are hindering the normal heating or cooling of the IoT device. To solve this, disable the thermostat’s smart features.
- On the thermostat, go to Settings and disable the undermentioned. The availability of these features may vary depending on the thermostat model. If your particular thermostat includes any extra smart features, make sure to disable those as well. You can also do this in the Nest app
Home/Away Assist

Auto-Schedule

Early on

Cool to Dry

Sunblock

Eco Temperatures

Leaf

Motion Sense

Learning Features

Disable Smart Features on the Nest Thermostat - Once done, check if the thermostat is clear of the delayed message. If so, you may enable the smart features one by one and check which one is causing the problem.
7. Reset the Nest Thermostat to the Factory Defaults
The Nest Thermostat will not be able to turn on heating or cooling instantly and will show a delay if its firmware modules are damaged. This might have occurred when the latest firmware update could not properly be applied to the previous installation.
Here, resetting the Nest Thermostat to the factory defaults will solve the problem.
Remember that resetting the thermostat will erase any learned or manually created schedules. You can note the current wiring or configurations under the thermostat’s Settings > Equipment.
- On the Nest app, go to Settings > Security.
- Remove the problematic Nest thermostat from the app.
- On the thermostat, navigate to Settings > Reset > All Settings.
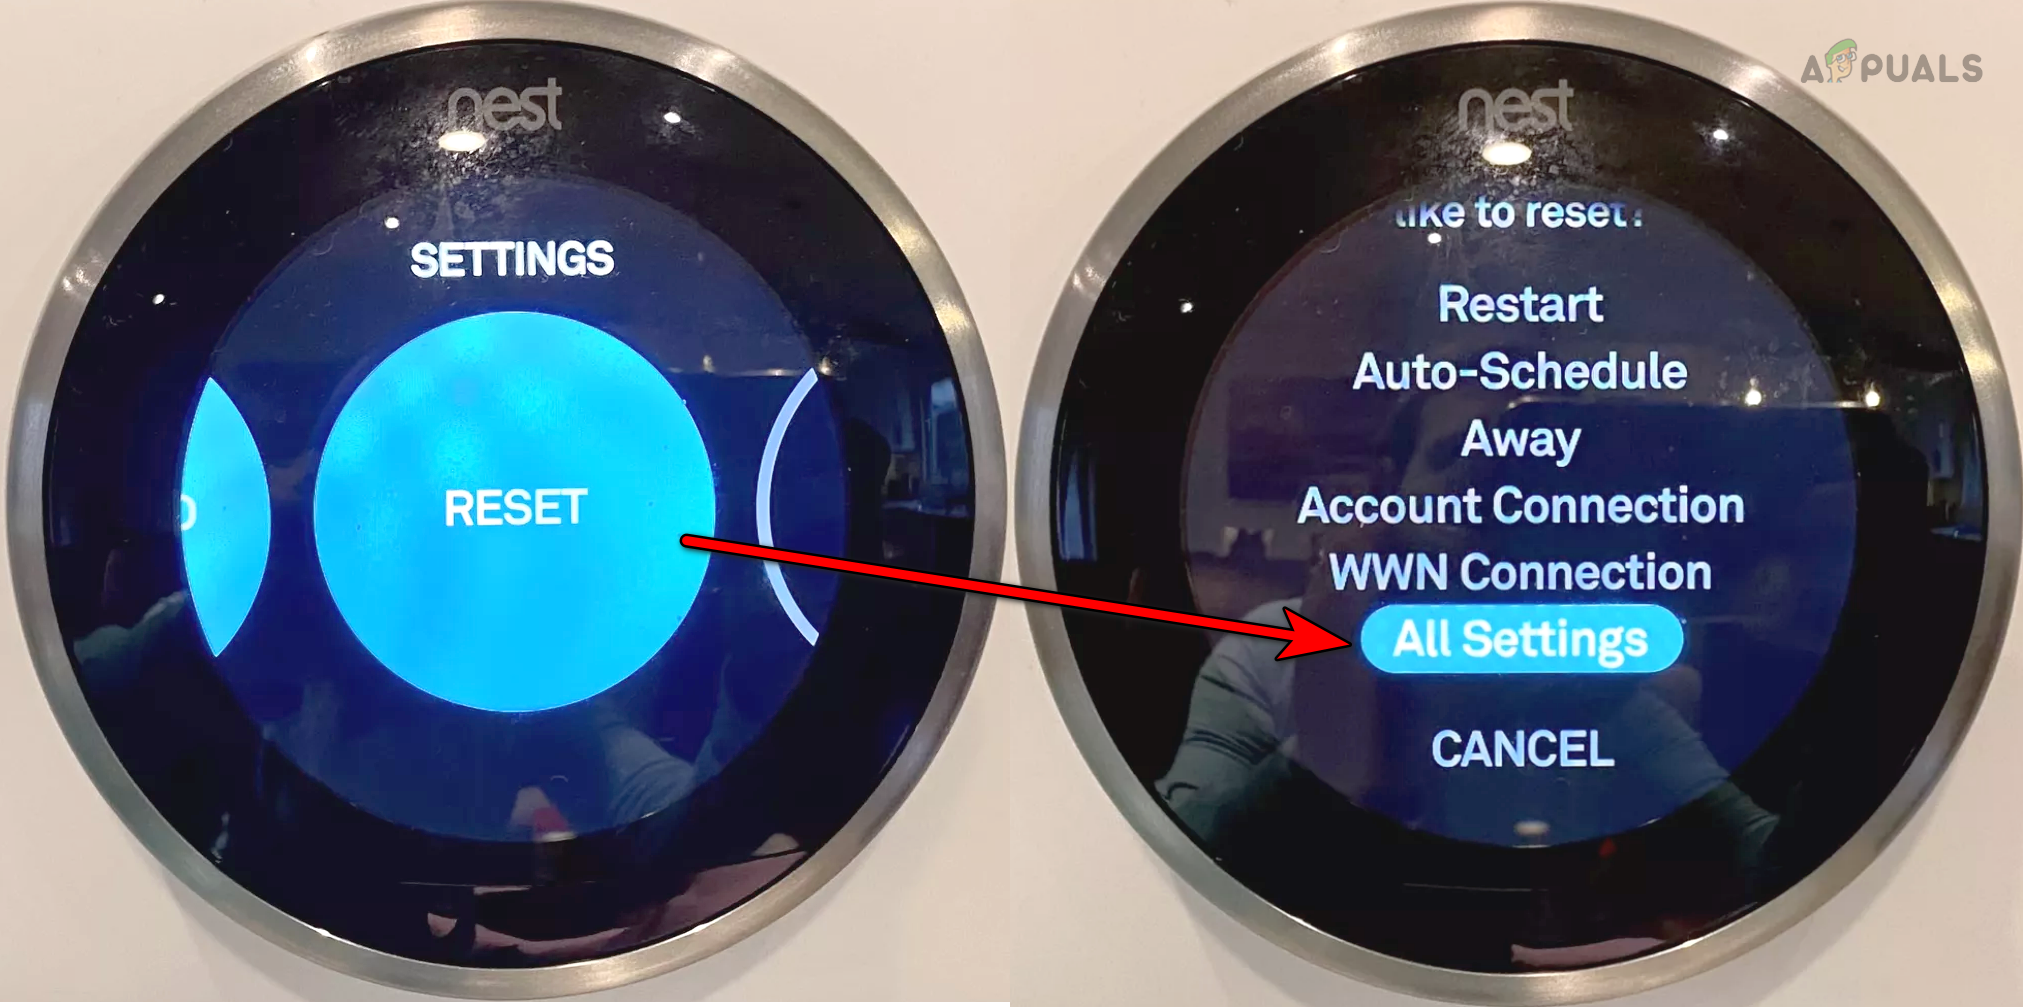
Reset All Settings on the Nest Thermostat - Confirm to reset the thermostat and wait till the process completes.
- Once done, set it up as per your requirements, and hopefully, that will make the delay go away.
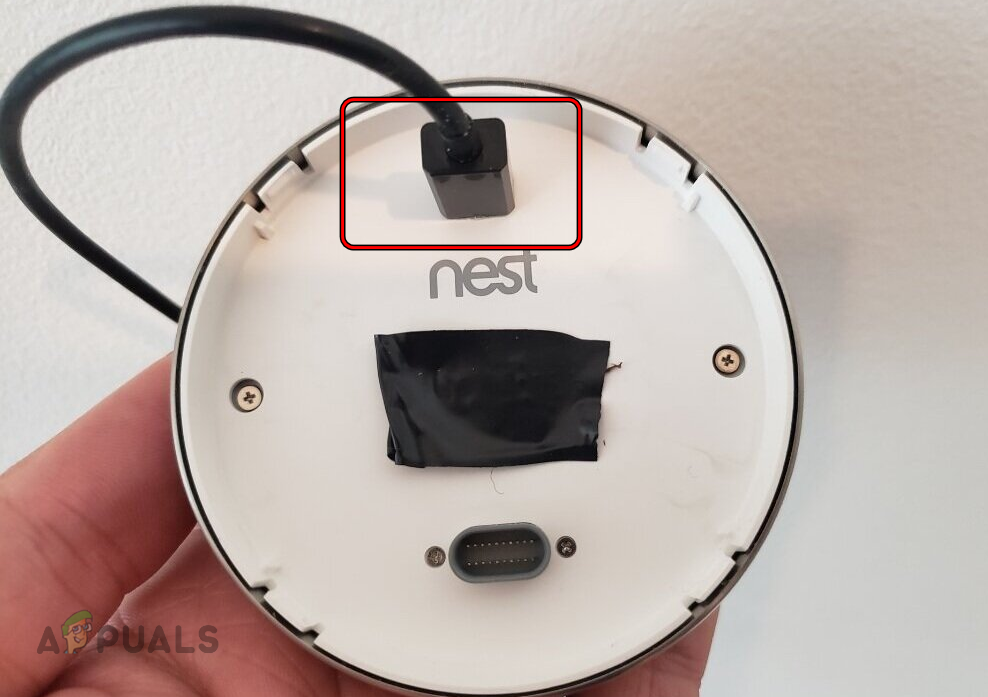
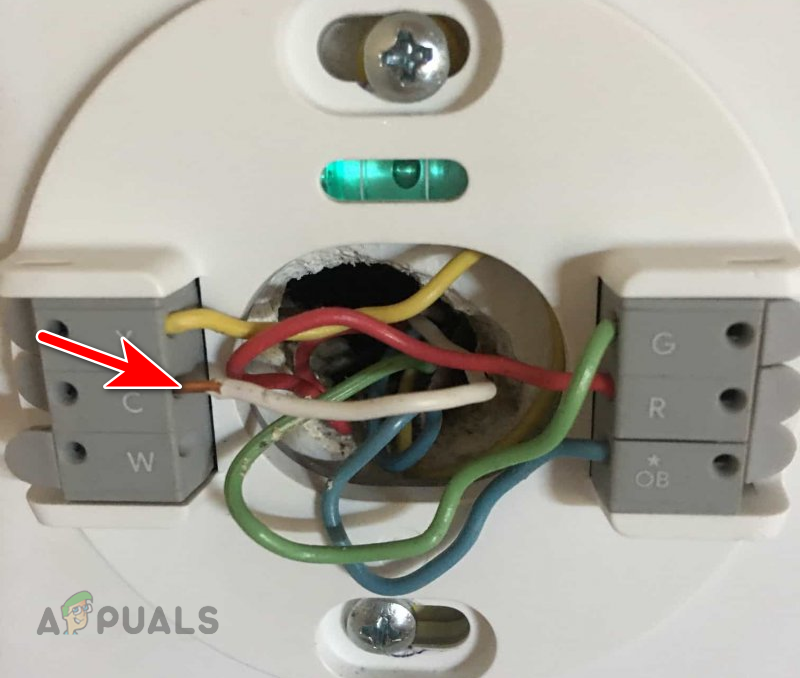
8. Connect or Remove C or Common Wire
The Nest thermostat relies on the C or Common wire for charging its battery and if this wire is not connected, it will use other wires for charging. When a heating or cooling session is in process, the thermostat cannot charge through other wires.
If there is no break during the heating or cooling process, the thermostat will not be able to charge itself. Hence it will add a delay in the heating or cooling process to get itself charged. This can be fixed by connecting a C or common wire at both ends.
If the C wire is already connected but not correctly grounded, it will fail to charge the thermostat and the thermostat will also not charge through other wires, thus it will show a delay. Here, removing the wire will solve the problem.
Our primary focus will be on providing general guidelines for connecting the C wire, considering that the specific products and equipment involved can vary. For a successful implementation in your particular scenario, it may be necessary to conduct further research and delve deeper into the details. You can check the battery health under thermostat Settings > Technical Info > Power.
Connect the C wire
- Connect the C wire to the Nest thermostat and your equipment. Your equipment may have a C or common wire written on the place where it has to connect. The circuit board near the thermostat may also have a point for the C or common wire.
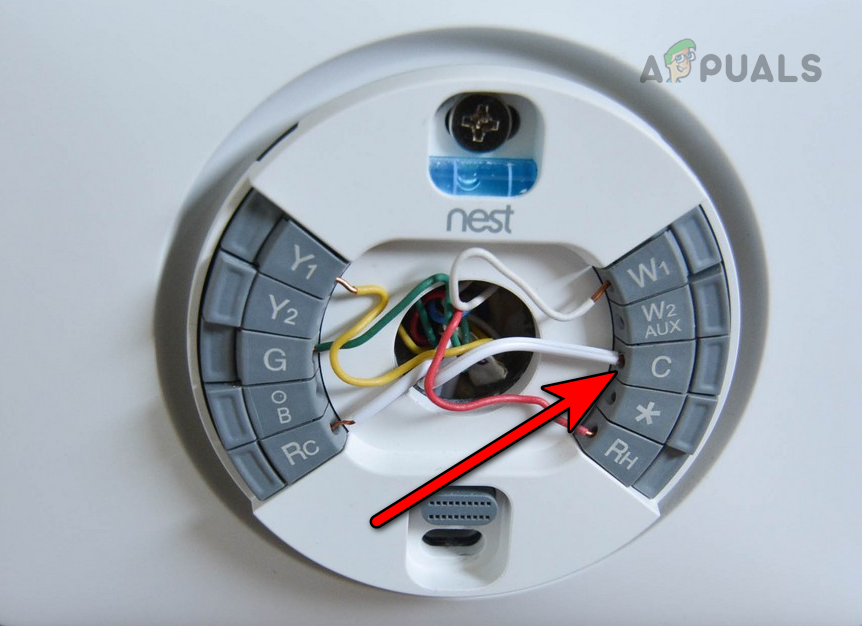
Connect C Wire in the Nest Thermostat - Once done, check if the delayed issue is resolved.
Put the Thermostat on Charging
If you are not confident to attach a C wire, then
- Remove the Nest thermostat from the wall and put it on charging by using a micro USB charger.
Put the Nest Thermostat on Charging - Wait for at least an hour and connect back the thermostat. See if it is working correctly. If so, then a C wire is required to keep the IoT device charged.
Disconnect the C Wire
If the Common or C wire is already attached:
- Disconnect it from the thermostat and your equipment.
Disconnect the C Wire from the Nest Thermostat - Verify if the delayed message is removed from the thermostat.
9. Clean the Heating or Cooling System
If a filter is choked or a drainage pipe is blocked, an equipment sensor will trip. Resultantly, when a power-on signal is received by the equipment from the thermostat, the equipment will report that it is not in a ready condition.
Hence, the thermostat will show a delayed message and will wait for the equipment to be back in working condition. In such cases, cleaning the heating or cooling system will solve the problem.
We will discuss some general guidelines and you may need to make them work in your particular scenario.
- Clean the filters of your heating or cooling equipment.

Clean Air Filters of Your Heating and Cooling Equipment - Check the condensate drainage pipe for any blockage. If the flow is slow, the unit will trip whenever the reservoir will get filled.
- In the case of heating equipment, clean the flame sensor of the heating equipment
- After cleaning the heating or cooling equipment, power back the setup, and hopefully, the thermostat will be clear of the delayed message.
If the problem persists after trying the above-mentioned solutions, replace the Nest thermostat with another thermostat (if available) and check if there is no delay. If there is no delay with the other thermostat, the Nest IoT device is faulty. Otherwise, the issue lies within your heating or cooling equipment.
If the problem is in the thermostat, contact Google Support and ask for help in verifying the wiring of your setup. If the wiring is proper, ask the support to guide you to power on the equipment directly, without the thermostat. If the equipment powers on directly, the issue lies in the thermostat.
You can claim a replacement thermostat from the support if it is still under warranty. Otherwise, contact a repair service and get your heating/cooling system checked.
Reviewed by Muhammad Zubyan