How to Fix Crunchyroll Beta Black Screen Issue?
 Reviewed by Muhammad Zubyan
Are you a Crunchyroll Beta user facing the frustrating issue of a black screen? several factors can lead to the occurrence of a black screen while using Crunchyroll Beta. We will explore some of the most common reasons behind this issue and provide potential fixes to address them.
One of the most frequent reason for a black screen on Crunchyroll Beta is an outdated or incompatible graphics card driver. In addition, black screens on Crunchyroll Beta can also be triggered by browser related problems or incompatible add-ons. If you are using a browser that Crunchyroll does not support or have browser extensions that interfere with the site’s performance, you may encounter this issue. To get rid of this issue, follow and apply each fix one by one until your problem has been fixed.
1. Troubleshooting Network Issues
When your internet connection is poor or inconsistent, it can fail to load the video content, leading to a black screen. This is where checking your internet connection comes into play. By ensuring your connection is stable and robust, you are setting the groundwork for seamless streaming.
Moreover, network congestion often occurs when your router handles multiple devices or large downloads over an extended period. This congestion can slow down your internet speed and affect the streaming quality, possibly causing the issue. Restarting your router is a straight forward and effective method to clear this network congestion.
2. Reinstall Crunchyroll Beta (If applicable)
If you are using the Crunchyroll app, uninstalling and reinstalling can be an effective solution. When you uninstall the app, it removes all the app’s files and settings from your device.
When you reinstall the app, you are essentially downloading and setting up a fresh copy of the Crunchyroll Beta app on your device. This process includes installing the latest version of the app, which may contain bug fixes and improvements that address the black screen issue specifically.
Uninstalling the App:
- Click on the “Start” button in the bottom left corner of your screen.
- Go to “Settings” (gear icon) from the Start menu.
- In the Settings window, select “Apps” option.
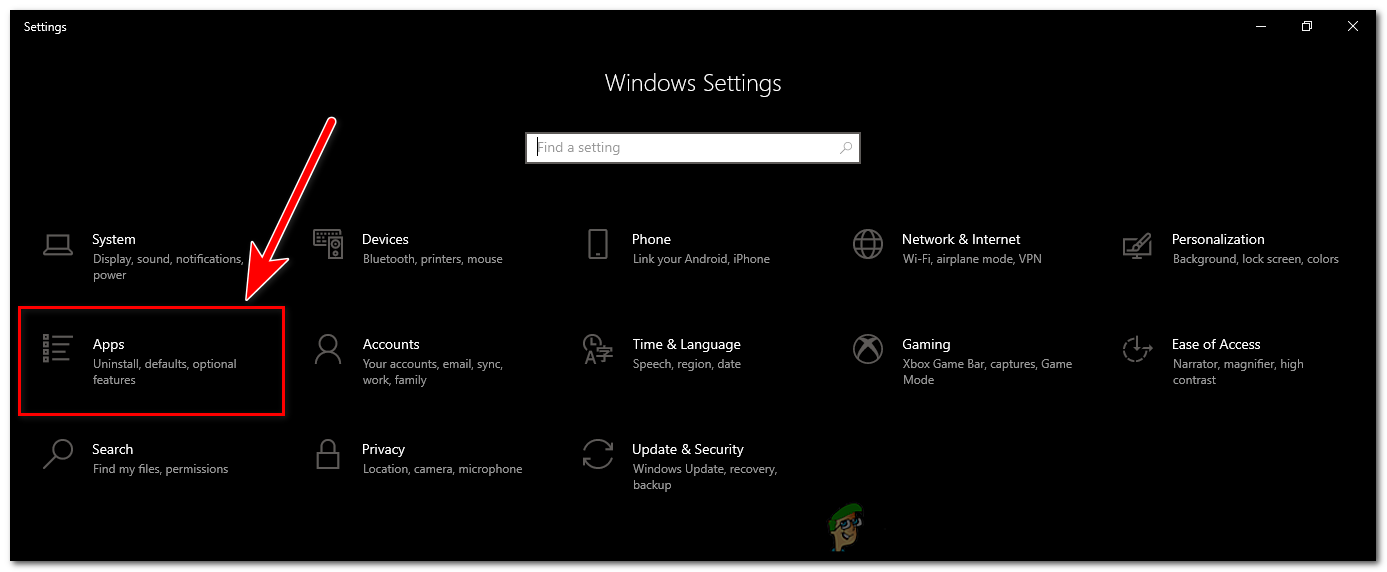
In the Settings window, select “Apps” option - A list of installed apps will appear. Scroll down or search for “Crunchyroll”.
- Click on the Crunchyroll app and then click on the “Uninstall” button.
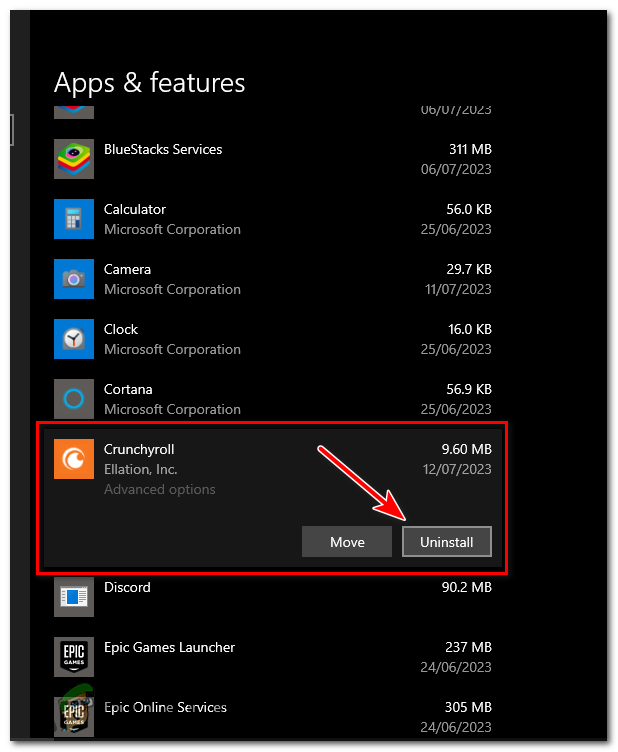
Click on the Crunchyroll app and then click on the “Uninstall” button. - Follow the on-screen prompts to complete the uninstallation process.
Reinstalling the App:
- Open a web browser on your Windows computer.
- Go to the official Crunchyroll Beta website (www.crunchyroll.com) or a trusted app store like Microsoft Store.
- Look for the option to download the Crunchyroll app for Windows.
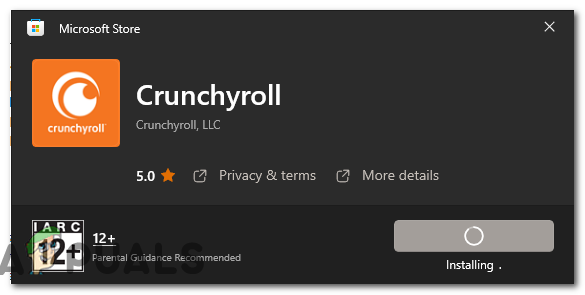
- After the installation is complete, you can launch the app and log in with your Crunchyroll account to start using it.
3. Clearing Your Browser’s Cache and Cookies
Web browsers store small files called cookies to remember your preferences and improve your browsing experience. They also cache web page data to load those pages faster during future visits.
However, over time, the cache might hold outdated or incorrect versions of web elements, causing them to display improperly. This could be one of the reasons for the black screen issue on Crunchyroll. Clearing cache and cookies removes these outdated elements, enabling the webpage to load the most recent and correct data.
- Click on the Chrome icon on your desktop or taskbar to open the browser.
- Click on the three-dot icon at the top right corner of the browser. This will open a drop-down menu. From this menu, click on “Settings.”
- In the settings panel, scroll down to the “Privacy and Security” section.
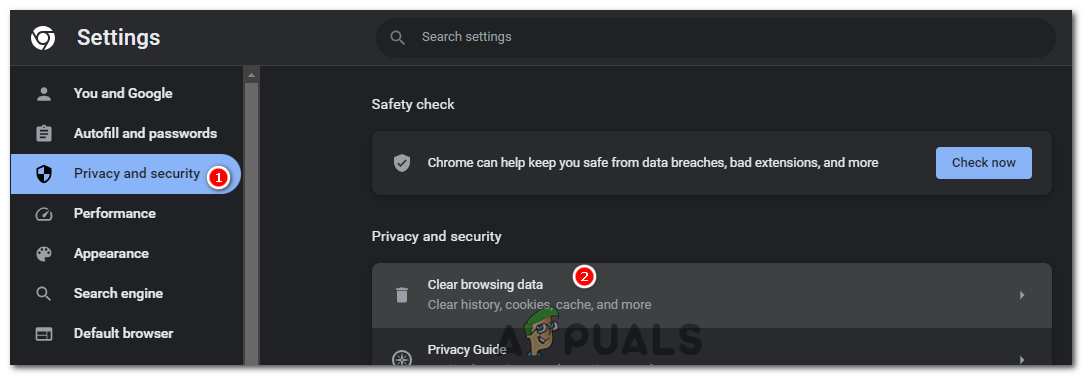
In the settings panel, scroll down to the “Privacy and Security” section. - Click on “Clear browsing data.” This will open a new window.
- In the “Clear browsing data” window. To clear all cookies and cache, choose “All time” from the drop-down menu. Then, check the boxes for “Cookies and other site data” and “Cached images and files.”
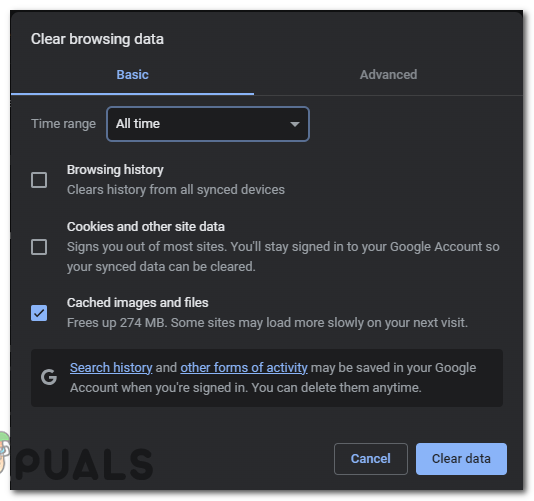
Select “All time”, “Cookies and other site data”, and “Cached images and files” and press the “Clear data” button. - Once you’ve selected the desired options, click on the “Clear data” button. Chrome will then delete all the selected data from your browser.
4. Updating Your Nvidia Driver
Graphics drivers play a crucial role in video playback and streaming on your device. If these drivers are outdated, they might not be fully compatible with the latest software applications, leading to problems. By updating your GPU driver, you ensure that your system has the most recent improvements and bug fixes. This update can enhance the compatibility between your graphics card and software applications, thereby resolving graphical issues.
- Open your web browser and visit the Nvidia Driver Download page. Here’s the link for your convenience: https://www.nvidia.com/Download/index.aspx
- Use the drop-down menus on the page to specify your Nvidia product details, including the product series, product name, operating system, and language. This ensures you download the correct driver for your specific graphics card and system.
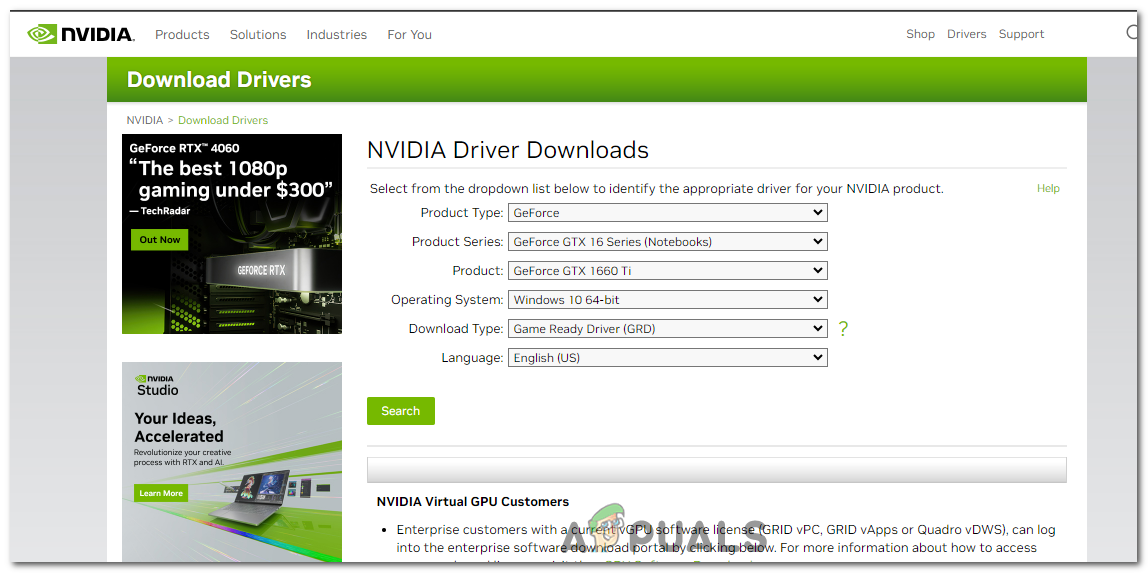
- Click the “Search” button. The website will then look for the appropriate driver based on the details you’ve provided.
- If there’s a newer driver available for your system, you’ll be directed to a page with a “Download” button. Click on this button to start downloading the driver.
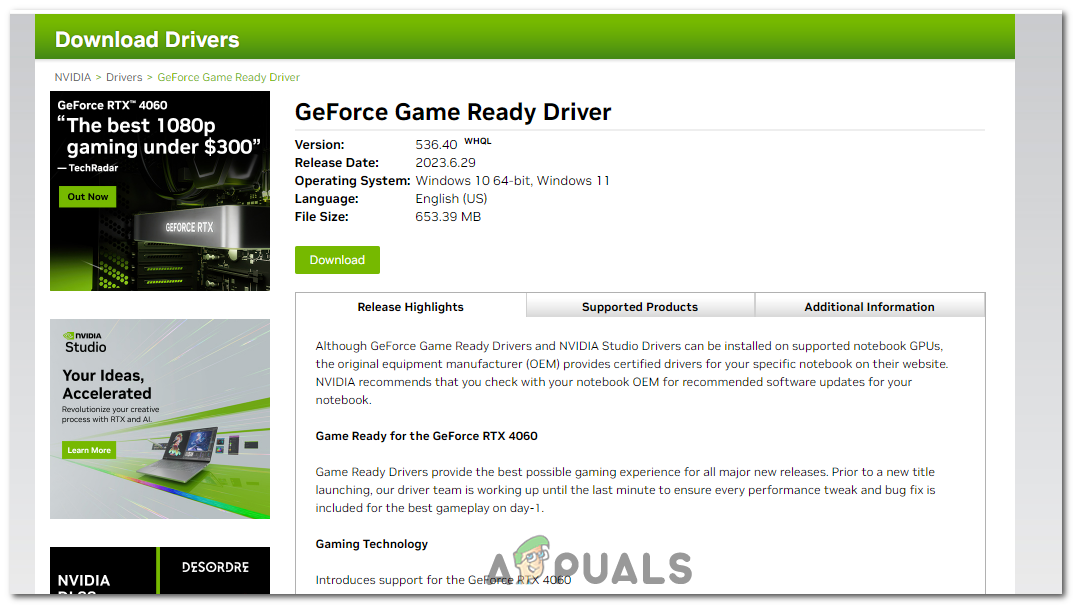
Click on the “Download” button to start downloading the driver. - Once the download is complete, locate the downloaded file on your computer and double-click it to run the installer. Follow the on-screen instructions to install the driver.
- After the installation is complete, ensure you restart your computer for the changes to take effect fully.
5. Disabling Browser Extensions
Some Browser extensions, especially those related to video downloading or ad-blocking, might interfere with the video streaming capabilities of websites like Crunchyroll. Also some extensions that modify website content, like themes or style editors, might inadvertently change some elements in Crunchyroll, leading to display issues.
By disabling your browser extensions, you can check if any of them are causing the Crunchyroll Beta Black Screen issue. If the problem is resolved after disabling them, you can then enable the extensions one by one to identify the culprit.
- Click on the three-dot icon at the top right corner of the browser. This will open a drop-down menu. Hover over “Extensions” to open a side menu, and then click on “Manage Extensions.”
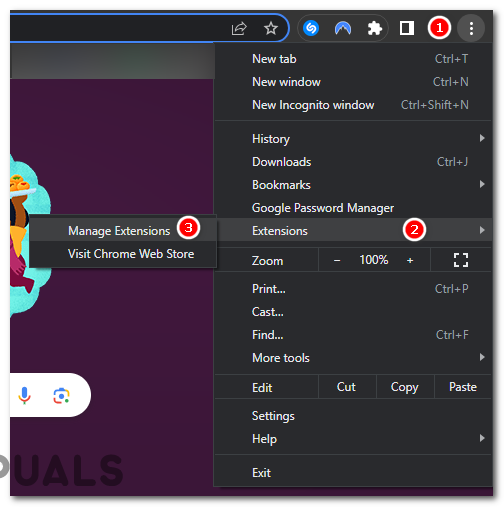
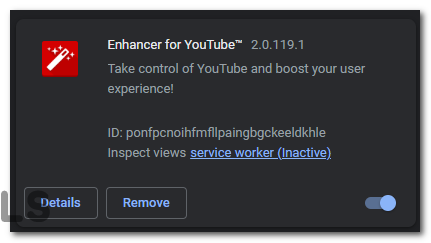
Hover over “Extensions” to open a side menu, and then click on “Manage Extensions.” - You will see a list of all your installed extensions. To disable an extension, find it in the list and toggle the switch at the bottom right of its box to the “Off” position.
6. Disabling Hardware Acceleration
Hardware acceleration is a feature in many browsers that offloads certain types of processing to your system’s hardware, freeing up resources for the browser to use elsewhere. This feature can improve performance, but it can also cause compatibility issues with certain applications or websites.
Some graphics hardware or drivers may not fully support hardware acceleration, leading to issues like the black screen. Disabling it can avoid these compatibility issues.
Hardware acceleration heavily relies on your GPU. If your GPU is overstressed or has insufficient resources, it may cause video playback issues. Disabling hardware acceleration may lighten the load on the GPU and resolve the issue.
- Open Google Chrome and head to it’s “Settings.”
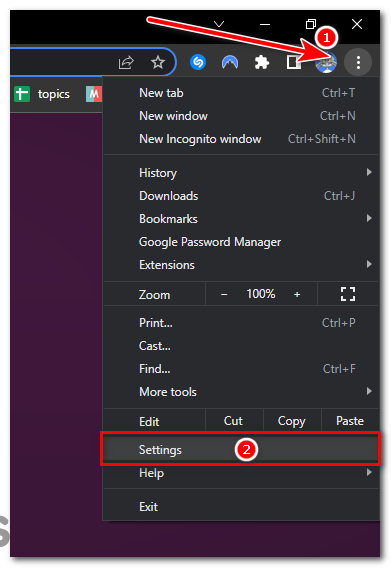
Open Google Chrome and head to it’s “Settings.” - Scroll to the bottom of the settings page and click on “System.”
- Under the “System” section, find the option that says “Use hardware acceleration when available.”
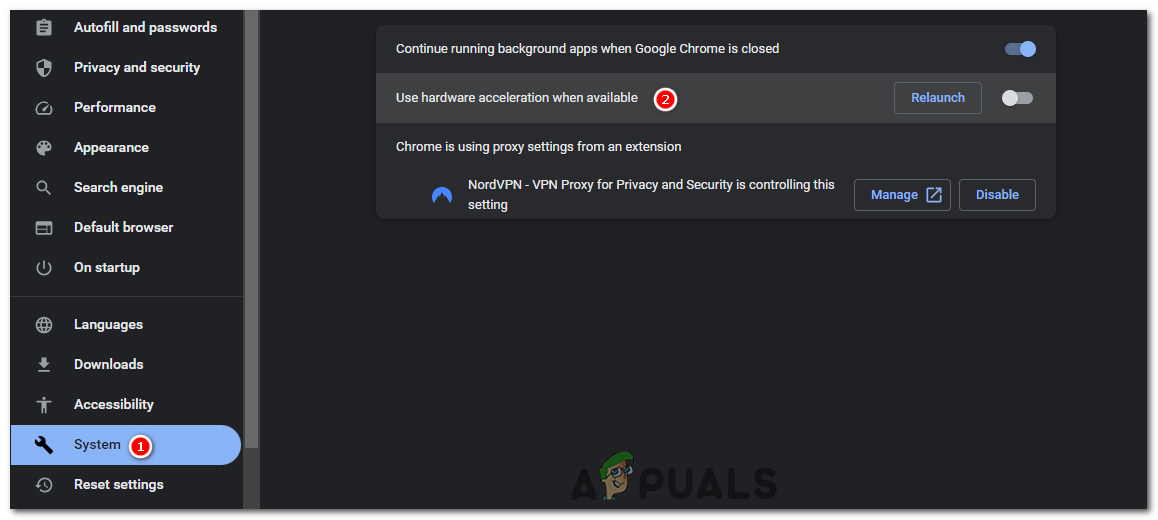
Under the “System” section, find the option that says “Use hardware acceleration when available.” - Toggle the switch to the “Off” position. This will disable hardware acceleration.
- A button will appear that says “Relaunch.” Click it to restart Chrome with hardware acceleration disabled.
7. Changing DNS Server on Your Device
The Domain Name System (DNS) translates the website URLs you type into your browser into IP addresses that your computer can understand. Sometimes, the DNS servers set by your Internet Service Provider (ISP) can cause problems with loading certain sites or services.
Google’s and Cloudflare’s DNS servers can often resolve domain names faster than your ISP’s DNS servers, improving your overall internet speed and possibly resolving loading issues. Google’s and Cloudflare’s DNS servers are highly reliable and less likely to go down compared to some ISP’s DNS servers, ensuring consistent access to Websites.
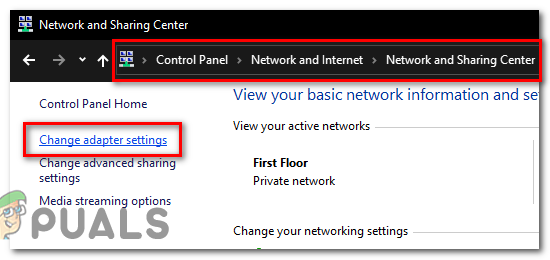
- Click on the “Start” button and search for “Control Panel,” then open it.
- Go to Network Settings: Click on “Network and Internet” > “Network and Sharing Center” > “Change adapter settings.”
- Right-click on the connection you want to configure (either your Wi-Fi or Ethernet connection) and click on “Properties.”
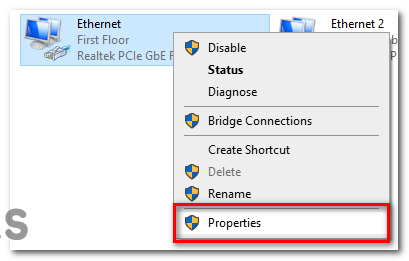
Right-click on the connection and click on “Properties.” - In the properties window, find and double click on “Internet Protocol Version 4 (TCP/IPv4).”

- In the new window, select “Use the following DNS server addresses.” Enter Google’s DNS addresses (8.8.8.8 and 8.8.4.4) or Cloudflare’s DNS addresses (1.1.1.1 and 1.0.0.1) in the fields provided.
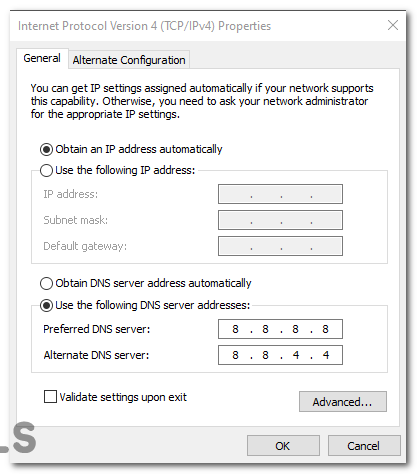
- Click “OK” to save your settings.
By changing your DNS server to Google’s or Cloudflare’s, you can improve your device’s ability to connect with Crunchyroll.
8. Allowing Pop-ups for Crunchyroll Beta
Pop-up windows can be a crucial component of a website’s functionality. Some websites, including Crunchyroll, may use pop-up windows for various features, such as video playback. If your browser is blocking these pop-ups, it could potentially lead to problems like the black screen issue.
By allowing pop-ups for Crunchyroll Beta, you ensure that the site can fully deliver its content and functionality without any restrictions from the browser.
- Click on the three-dot icon at the top right corner of the browser. This will open a drop-down menu. From this menu, click on “Settings.”
- In the settings panel, scroll down to the “Privacy and Security” section and click on “Site Settings.”
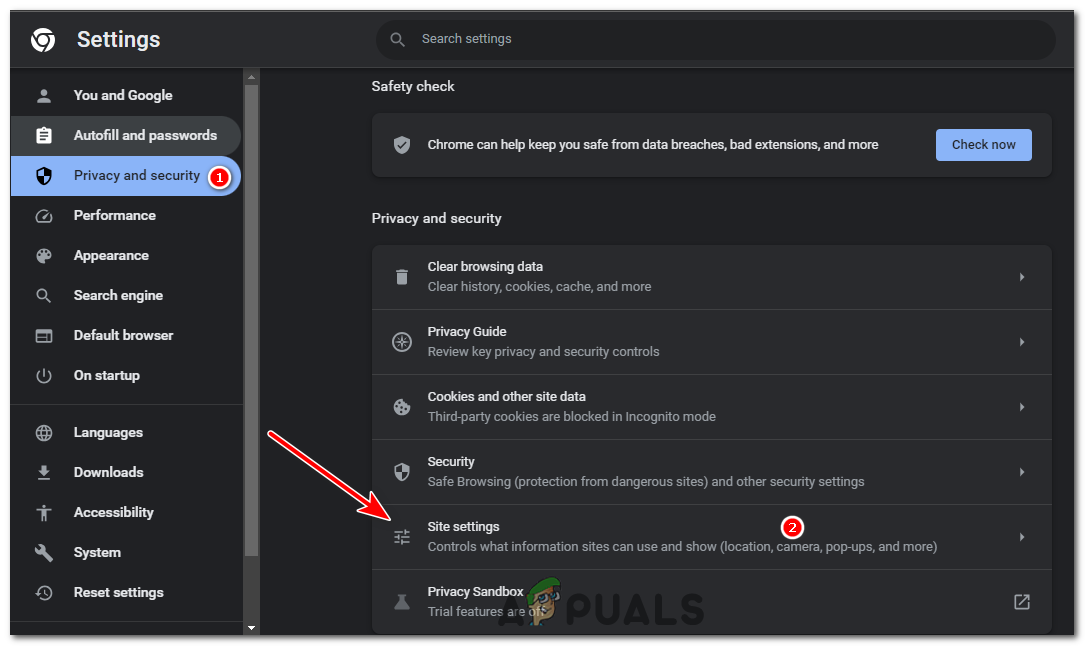
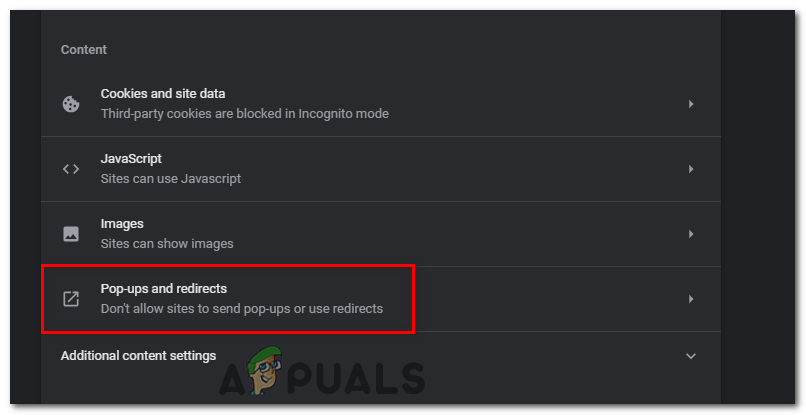
In the settings panel, scroll down to the “Privacy and Security” section and click on “Site Settings.” - Scroll down to the “Content” section and click on “Pop-ups and redirects.”
Scroll down to the “Content” section and click on “Pop-ups and redirects.” - Click on the “Add” button next to the “Allow” section. In the text box that appears, type in “https://www.crunchyroll.com” (or the specific Crunchyroll Beta URL) and click “Add.”
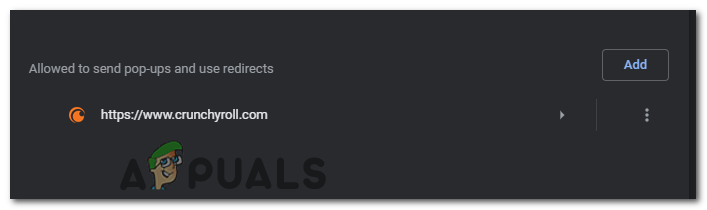
Click on the “Add” button next to the “Allow” section.
By allowing pop-ups for Crunchyroll Beta, you let the website fully express its content and features, potentially resolving the black screen issue and improving your anime viewing experience.
9. Using a Different Browser
Browser compatibility can sometimes be the root cause of certain issues regarding video playback. Each browser has its own way of interpreting and rendering web pages, and sometimes these differences can lead to issues like the black screen problem. Switching to a different browser can help resolve the issue in several ways:
However, it’s important to note that switching browsers is generally a last resort and should be considered after other potential fixes have been tried. Popular alternatives to Google Chrome include Mozilla Firefox, Microsoft Edge, Safari (for Apple users), and Opera GX. All these browsers have good support for modern web standards and could provide a smoother Crunchyroll experience if Chrome is causing problems.
Crunchyroll Beta Black Screen - FAQs
If you’ve tried all the fixes and the issue persists, it could be a problem on Crunchyroll’s end. Try reaching out to Crunchyroll’s customer service for assistance, or wait a while and try again later, as the issue might be temporary and resolve itself.
The easiest way to determine if an extension is causing the problem is to disable all your extensions and see if the issue resolves. If it does, you can then enable your extensions one by one until the problem recurs, which will help you identify the culprit.
Changing your DNS servers can improve your overall internet speed and reliability, benefiting all your online activities. However, note that DNS settings apply to your entire device, so any changes will affect all your internet traffic, not just Crunchyroll Beta.
If disabling hardware acceleration doesn’t solve the problem, you should try the other fixes mentioned in this guide. The issue might not be related to hardware acceleration but to other factors like browser extensions, DNS settings, or even Crunchyroll itself.
If allowing pop-ups for Crunchyroll Beta resolves the black screen issue, you should keep the setting enabled for as long as you want to use Crunchyroll Beta without problems. If you’re concerned about pop-ups from other sites, remember that this setting only applies to Crunchyroll Beta and won’t affect other sites.
Reviewed by Muhammad Zubyan