[FIX] Can’t Create Folders in Windows Explorer on Windows 11
There’s a weird issue on Windows 11 where some users are suddenly unable to create a new folder regardless of the method they use. This problem seems to happen with every edition of Windows 11, including Windows 11 Home, Windows 11 Pro, Windows 11 Enterprise, and every N version of Windows 11.
After thoroughly investigating this issue, we realized several underlying causes might trigger this error on Windows 11. Here’s a list of potential culprits that you should be aware of:
- Broken GUI – Before you start troubleshooting the root cause of the issue, you can most likely get around it by running a CMD or Powershell terminal command. This will not fix the root cause of the error, but it might allow you to create a folder in case you’re short on time.
- Common permission inconsistency – If none of the methods described in the instructions above have allowed you to create a new folder on your Windows 11 computer, you are probably encountering a permission issue. If this scenario applies, you might try using the File & Folder troubleshooter (if you’re using Windows 11).
- You don’t have complete control over the parent folder – If the primary folder where you try to create the sub-folder doesn’t have proper rights, it might also result in this kind of problem. If this situation applies, you should be able to resolve the issue by right-clicking on the main folder and changing the rights such that you have Full Control and Read permissions from the Properties page.
- Custom folder views – You should also check is whether the problem is connected to a folder configuration issue. Several impacted users have reported that they were able to resolve it by going to the File Explorer Options area and clicking the option to reset each folder configuration.
- Corrupted windows account – Your Windows profile may have been corrupt, which would explain this issue. After switching to a local Microsoft account, users who were experiencing issues creating new folders on Windows 11 have reported that the issue has been fixed.
- System file corruption – This kind of folder creation issue in Windows 11 is likewise verified to be brought on by system file corruption. Using SFC and DISM scan in fast succession will allow you to try to resolve the problem in this situation. However, the only way to resolve this issue under more extreme conditions is by executing a clean install or repair install procedure.
- Registry inconsistency – It turns out that this issue can also be brought on by a registry inconsistency that has an impact on Windows 11’s folder creation. To address this issue, you must create a new key under ContextMenuHandlers named New Key and modify its Default value.
- Controlled Folder Access is Enabled – An AV feature called “Controlled folder access” might make it difficult for you to create new folders since it forbids you from doing so in specific locations. Access Windows Defender settings and turn off Controlled Folder Access to resolve this problem.
- 3rd party program interference – Your inability to create new folders may be indirectly caused by software you previously installed. Reach a clean boot state and observe whether the issue disappears to verify if this assumption is accurate.
Now that we went over every potential reason why you might be experiencing this problem, let’s visit every confirmed fix that other affected users have successfully used to get to the bottom of this issue:
1. Create a new folder via CMD
If you’re in a rush and you don’t have the time to spend troubleshooting the root cause that prevents you from creating new folders on Windows 11, one quick workaround is to create the folder from an elevated CMD prompt.
IMPORTANT: This will not allow you to fix the root cause of the issue. Only use this fix if you’re in a hurry. If you want to fix the issue permanently, try the other methods below.
If you want to use this workaround, follow the instructions below:
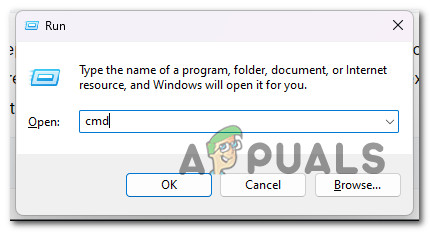
- Press the Windows key + R to open up a Run dialog box.
- Next, type ‘cmd’ inside the text box, then press Ctrl + Shift + Enter to open up an elevated Command Prompt window.
Open a CMD window - Click Yes to grant admin access when the User Account Control (UAC) is prompted.
- Once you’re inside the elevated Command Prompt, start by using the following command to navigate to the location where you want to create the folder:
cd "PATH"
Note: Keep in mind that PATH is simply a placeholder for that actual location where you need to create the folder.
- Type (or paste) the following command and press Enter:
mkdir "FOLDER-NAME"
Note: Keep in mind that FOLDER-NAME is simply a placeholder for the actual name of the folder you wish to create.
- After you complete these steps, open File Explorer and see if the new folder has been created.
- If the CMD command didn’t work for you, you could also try running a powershell command from the same window:
powershell New-Item -Path "PATH-TO-FOLDER" -Name "FOLDER-NAME" -ItemType "directory"
Note: Keep in mind that PATH-TO-FOLDER and FOLDER-NAME are two placeholders that you need to replace with the actual location and name of the folder.
If this terminal workaround didn’t fix the issue in your case, move down to the following method below.
2. Run the File & Folder Troubleshooter
You are likely dealing with a permission problem if none of the techniques mentioned in the guide above have enabled you to create a new folder on your Windows 11 computer.
You should try running the File & Folder troubleshooter (if you’re using Windows 11) if this scenario seems like it could be relevant.
Note: This troubleshooting tool has several automatic repair techniques that may be able to resolve the strange problem that prevents you from creating new folders on your Windows system. The utility will automatically try to fix any issues already addressed by a repair plan if they are discovered.
Follow the steps outlined below to give this strategy a try:
- Go to the Windows File & Folder troubleshooter download page and click the download button to start the utility download.
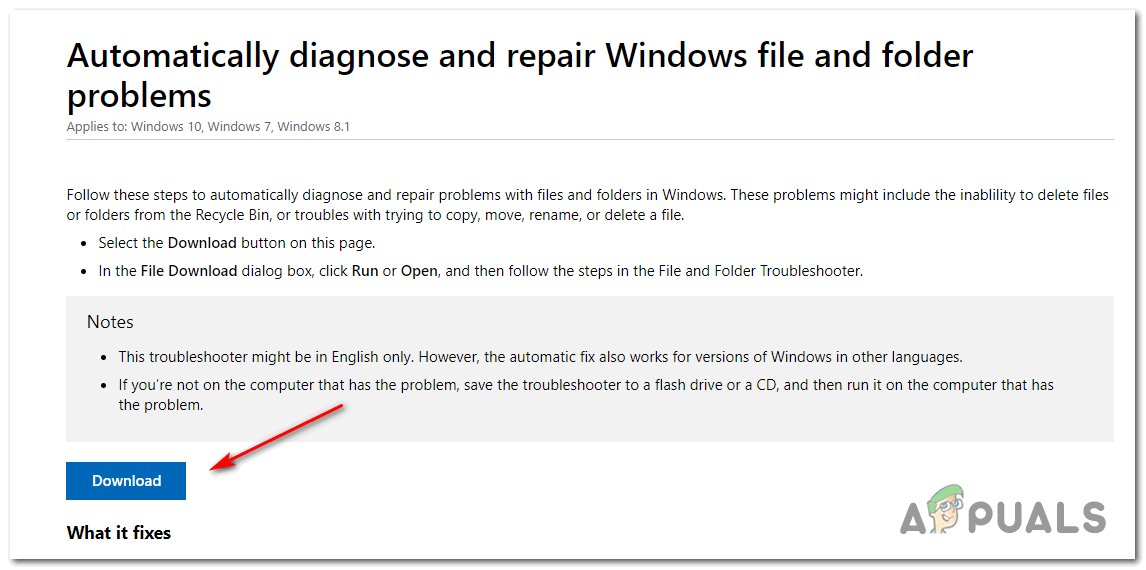
Download the file & folder troubleshooter - After the .diagCab file has been downloaded successfully, double-click it and select Yes when User Account Control (UAC) is prompted to provide administrator rights.
- After entering the File and Folder Troubleshooter’s initial screen, click the Advanced option and select the box next to Apply repairs automatically. After that, click Next to launch a troubleshooter scan.
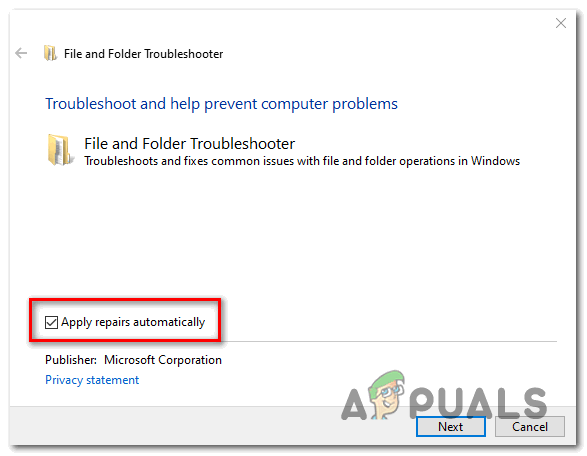
Applying repairs automatically - After the first scan is finished, tick the boxes next to the kinds of issues you’re now experiencing.
- After the procedure, check to see if the troubleshooter successfully identifies and resolves any problems. Whether it did, restart your computer and check to see if the issue is resolved when it starts up again.
If the problem is still not fixed, move to the following method below.
3. Make sure that you have Full Control over the parent folder
As it turns out, another scenario that might cause this type of issue is when the main folder where you try to create the sub-folder doesn’t have enough permissions.
If this scenario is applicable, you should be able to fix the problem by right-clicking on the main folder and modifying the permissions from the Properties screen so that you have Full Control and Read permissions.
Note: This method will be practical ins situations where you only experience this issue with specific locations, and you can create folders generally in the remaining directories.
Follow the instructions below to make sure you have complete control over the parent folder:
- Open File Explorer (Windows key + E) and navigate to the location where you’re having issues creating new folders.
- Right-click on the parent folder and choose Properties from the context menu that just appeared.
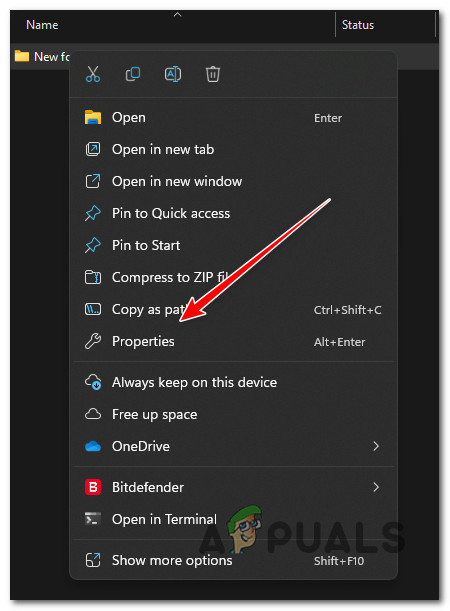
Access the Properties screen - Once you’re inside the Properties screen, use the horizontal menu at the top to click on Security, then click the Edit button associated with ‘To change permissions, click Edit.
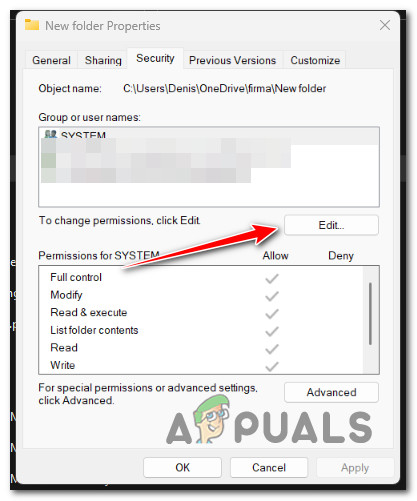
Changing Permissions - Finally, check the Allow boxes associated with Full Control and Read, then click on Apply to save the changes.
- Reboot your PC and see if the problem is now fixed.
If the same problem is still occurring, move to the following method below.
4. Reset the current folder view
If modifying the permissions didn’t fix the issue in your case, the next thing you should do is see if this problem is related to a Folder setting that you previously established for your OS.
Several affected users that we’re dealing with the same kind of issue have confirmed that they managed to fix the issue by accessing the File Explorer Options section and resetting every folder setting via the associated button.
For step-by-step instruction on how to do this, follow the steps below:
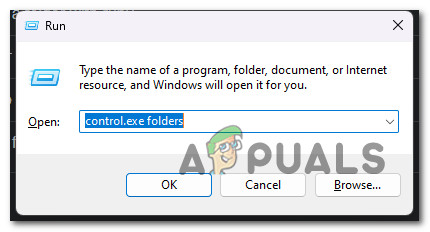
- Press the Windows key + R to open up a Run dialog box.
- Next, type ‘control.exe folders’ inside the text box that just appeared, then press Ctrl + Shift + Enter to open the File Explorer Options with admin access.
Access the File Explorer Options - Click Yes to grant admin access at the User Account Control (UAC).
- Once inside the File Explorer Options menu, click on the View tab and Reset Folders (under Folder Views.
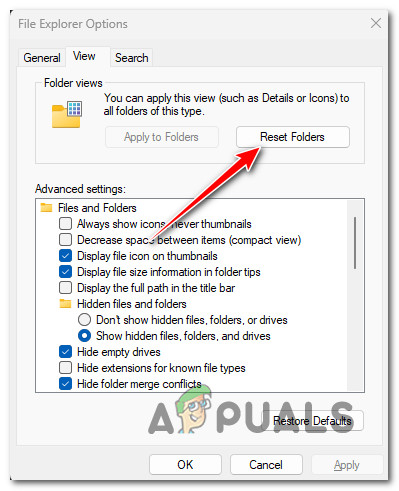
Reset Folders - At the confirmation prompt, click on Yes to confirm the operation.
- Reboot your PC and see if the problem is now fixed.
If you cannot create new folders on Windows 11, try the following fix below.
5. Create a New User Account
The corruption in your Windows profile might also be the root of this problem. Users who were having trouble creating new folders on Windows 11 have reported that the issue has been resolved after switching to a local Microsoft account.
It should be noted that applying this strategy will ultimately lead to the deletion of any contaminated dependencies connected to your active user profile.
As soon as you open a native Windows application, sign in using the newly created local user account for your Windows installation by following the steps below:
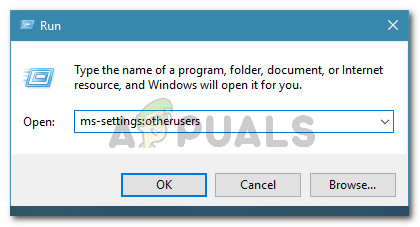
- Press the Windows key + R to open the run dialog box.
- Type “ms-settings:otherusers” into the text box that just appeared, then press Enter to get to the Family & other people tab of the Settings app.
Access the Other Users tab - Scroll down to the Other user’s option on the Family & other users page and click Add someone else to this PC.
- Select “I don’t know this person’s sign-in information” from the following menu to create a local account.
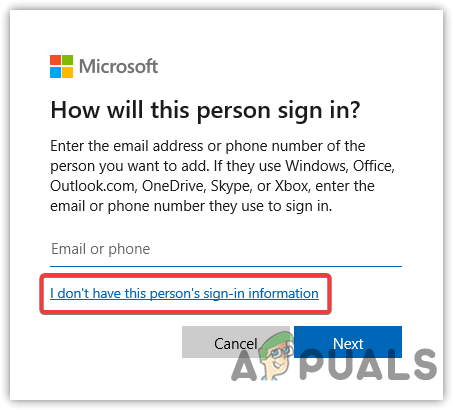
Don’t have this persons sign in information - Select Add a user without a Microsoft account on the following screen after signing in with your Microsoft account.
- Set up the new account’s username, password, and security questions.
- After that, restart your computer and sign in using the newly created account the next time it boots up.
- Create a new folder and see if the problem is now fixed.
If the same issue is still occurring, move down to the following method below.
6. Deploy SFC and DISM scan
System file corruption is also confirmed to cause this type of folder creation problem on Windows 11. Most of the time, Windows 11 users with low-end PCs and limited system resources experience issues with folder creation.
System file checker (SFC) and Deployment Image Servicing and Management (DISM) can be used to find the damaged files at the root of the problem and replace them with functioning copies.
Even though these two tools have many traits, they approach corruption removal in distinct ways.
SFC utilizes a locally stored archive, while DISM needs to use a Windows Update sub-component.
Our recommendation is to start with an SFC scan.
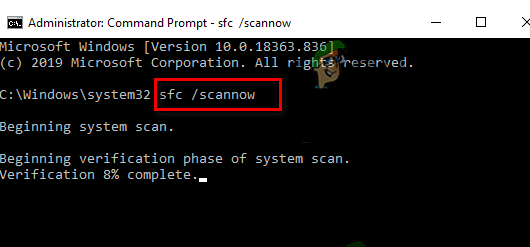
Restart your machine when the initial SFC scan is complete, then do a DISM scan.
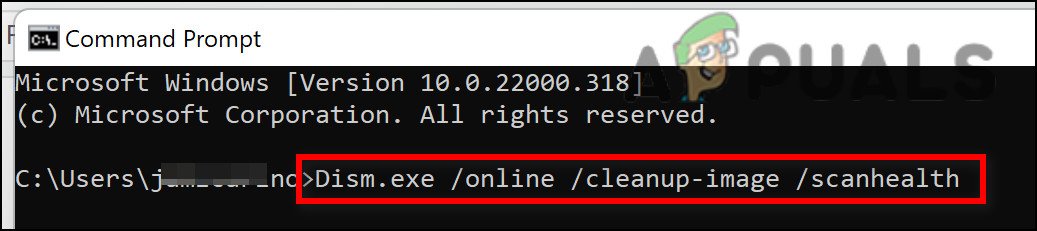
Note: Ensure your Internet connection is consistent before starting the DISM procedure.
If any of these tools effectively identify and resolve an underlying corrupt issue, replace corrupted files by following the on-screen instructions.
Restart your computer after completing the DISM scan to see if the issue has been resolved.
Continue to the suggested solution below if the same issue is still present.
7. Fix the Registry Inconsistency
If you’ve come this far without a viable fix, you should consider enforcing a registry fix that many affected users have successfully used to fix the folder creation on Windows 11.
This method involves creating a new key under ContextMenuHandlers named New Key and modifying the Default value with custom Value data that effectively resets the folder creation functionality.
Note: Our recommendation is to back up your registry in advance before following the instructions below. This will allow you to revert back to the previous state in case you make a mistake during this procedure.
Follow the instructions below to apply the registry fix:
- Press the Windows key + R to open up a Run dialog box.
- Next, type ‘regedit’ and press Ctrl + Shift + Enter to open up Registry Editor with admin access.
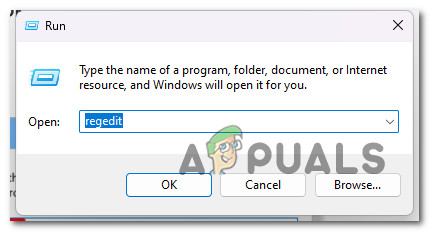
Open Registry Editor - Click Yes to grant admin access at the User Account Control (UAC).
- Once you’re inside the Registry Editor, use the menu on the right to navigate to the following location:
HKEY_CLASSES_ROOT\Directory\Background\shellex\ContextMenuHandlers
Note: You can either navigate to this location manually or paste the full path directly into the nav bar up top and press Enter to get there instantly.
- Once you arrive in the correct location, right-click on ContextMenuHandles and choose New > Key from the context menu that just appeared.
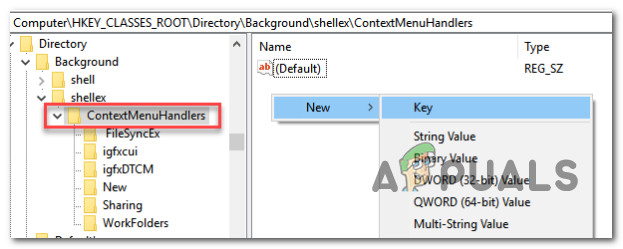
Access the Context Menu handles - Name the newly created key as New Key and press Enter to save the changes.
- Select the newly created New Key from the menu on the left, then move over to the right-hand side menu and choose Modify.
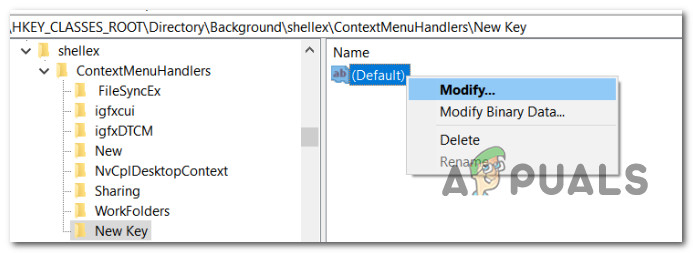
Modify the Default key - Inside the Edit String menu, change the current value data {D969A300-E7FF-11d0-A93B-00A0C90F2719} and click Ok to save the changes.
- Once the modification has been performed, reboot your PC and see if the problem is fixed once the next startup is complete.
If you cannot create new folders, move down to the following method below.
8. Disable Controlled Folder Access
As it turns out, you can also have trouble creating new folders due to an AV setting (Controlled folder access) preventing you from creating folders in specific locations.
Note: Your data is safeguarded by controlled folder access, which compares programs to a database of well-known, dependable apps.
While this setting is good in theory, it sometimes hinders Windows 11 users from creating folders in specific ‘sensitive’ locations.
If you only have problems creating new folders in specific locations and you’re using Windows Defender (Windows Security), follow the instructions below to disable Controlled Folder Access in your AV settings:
- Press the Windows key to bring up the Start menu.
- Type ‘controlled folder access’ inside the search bar at the top, then click on Controlled folder access from the results list.
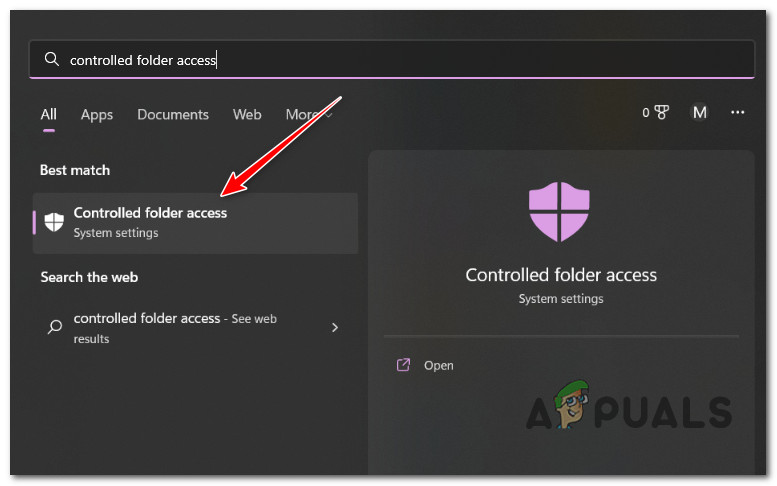
Access the Controlled folder access - Once you’re inside, turn off the Controlled folder access toggle.
- Reboot your PC and see if the problem is now resolved.
If the same problem is still occurring, move down to the following method below.
9. Perform a Clean Boot
Whether third-party programs and services are configured to run at every startup on your Windows 11 PC, your inability to create new folders may be indirectly caused by software you previously installed. To check whether this notion is correct, reach a clean boot state and see if the problem goes away.
It’s conceivable that a third party is tampering with your computer and generating this behavior if you only sometimes experience this problem.
The best course of action is to conduct a clean boot and then gradually activate each service, initial item, or process until you locate the perpetrator – it’s virtually impossible to compile an exhaustive list of all likely offenders.
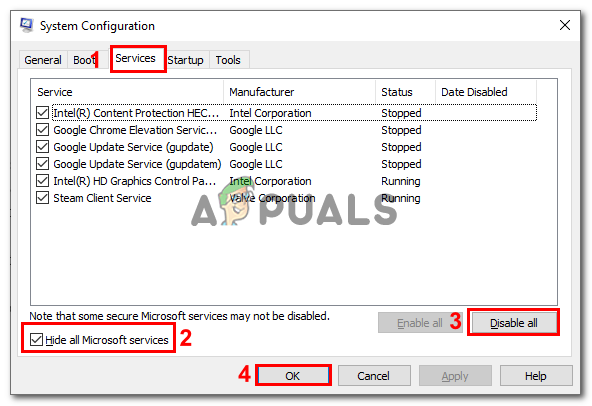
In this situation, starting in clean boot mode and going through a series of steps to look for a software conflict and locate the problematic service or process should be able to resolve the problem.
Note: Your computer will launch without any third-party services, processes, or starting items to offer a clean boot state and perhaps prevent the formation of this issue.
To achieve this clean boot condition, follow the step-by-step directions in this article.
If obtaining a clean boot state didn’t improve your situation, go to the technique afterward.
10. Perform a repair install or clean install
If none of the above-mentioned potential fixes were successful for you, it’s almost certain that the folder creation problem may result from system file corruption.
If you find yourself in this circumstance, you have two alternatives for going forward:
- Repair install – If you have the means, we suggest beginning here. You may update your system files using this method without harming your individual files or installations.
- Clean install – Complete a clean install is the best choice if you wish to start again. However, keep in mind that if you take this action, you should be prepared to lose any private information on the OS disk (including media, games, documents, and applications)


