Can’t Boot Into Windows 11? Here’s the FIX
A completely black screen with no desktop or taskbar, sometimes with only Task Manager available, shows Windows 11 can’t load past the login or shell stage. This means the operating system can’t start correctly, often stopping at a black screen, going into a boot loop, or showing errors like “Inaccessible Boot Device.”

The most common cause is damaged or missing boot files such as a bad boot sector or incorrect shell registry entry, with other causes including driver conflicts, BIOS setup mistakes, and hardware problems.
Now that you know what can cause this error, here’s a list of methods you can use to boot into Windows 11.
1. Perform a Startup Repair
The first thing you should try is a Startup Repair. This issue might be caused by corrupted files affecting the boot process, so it’s a good idea to run this tool and see if it fixes the problem.
Startup Repair is a Windows troubleshooter designed to fix problems related to the boot process. It scans your system and attempts to repair what it finds.
To run this, you need to access the Advanced options in the Recovery Menu.
- The first thing you should do is access the Recovery Menu. To do this, press the F11 key while the PC is booting into Windows 11. Press the key a few times until you get in.
Note: On some PCs, the Recovery Menu may be accessed with the F9 or F12 keys. If needed, check the specific instructions for your motherboard or laptop model. - Once you are inside the Recovery Menu, go to the Troubleshoot section. You can navigate using the keyboard or use the mouse to click on it.
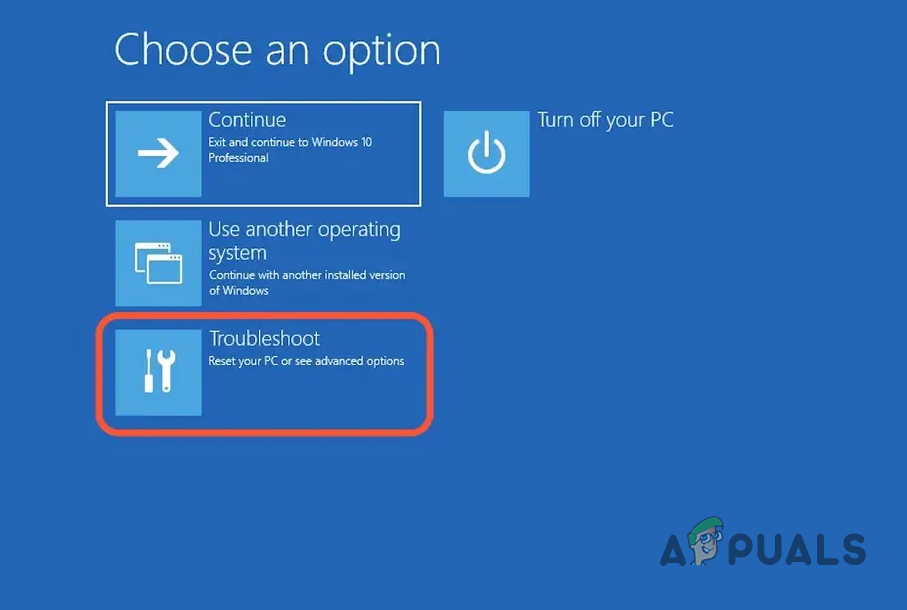
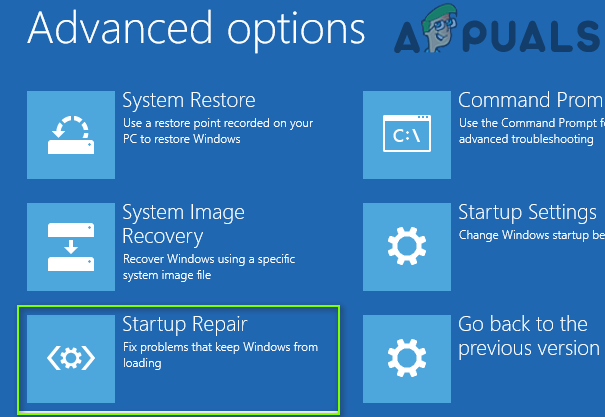
Inside the Recovery Menu, access the Troubleshoot section - After you enter the Troubleshoot menu, look for Startup Repair in the list of options and select it.

Starting the Startup Repair process - On the Startup Repair page, follow the on-screen instructions to begin and complete the process.
- Restart your computer when it finishes to see if the problem is fixed.
If this method didn’t help, try the next one.
2. Uninstall the latest update
If you can’t boot into Windows 11, try uninstalling the latest update installed on your PC. Some users fixed the issue by reverting the most recent update.
You can do this from the Recovery Menu, in the Uninstall Updates section. Start by uninstalling the latest quality update because it’s quicker and often enough. If that doesn’t help, you can also uninstall the latest feature update, but that process takes longer.
- Enter the Recovery Menu by pressing the F11 key right after you power on the computer.
- Inside the Recovery Menu, go to the Uninstall Updates section and select it.
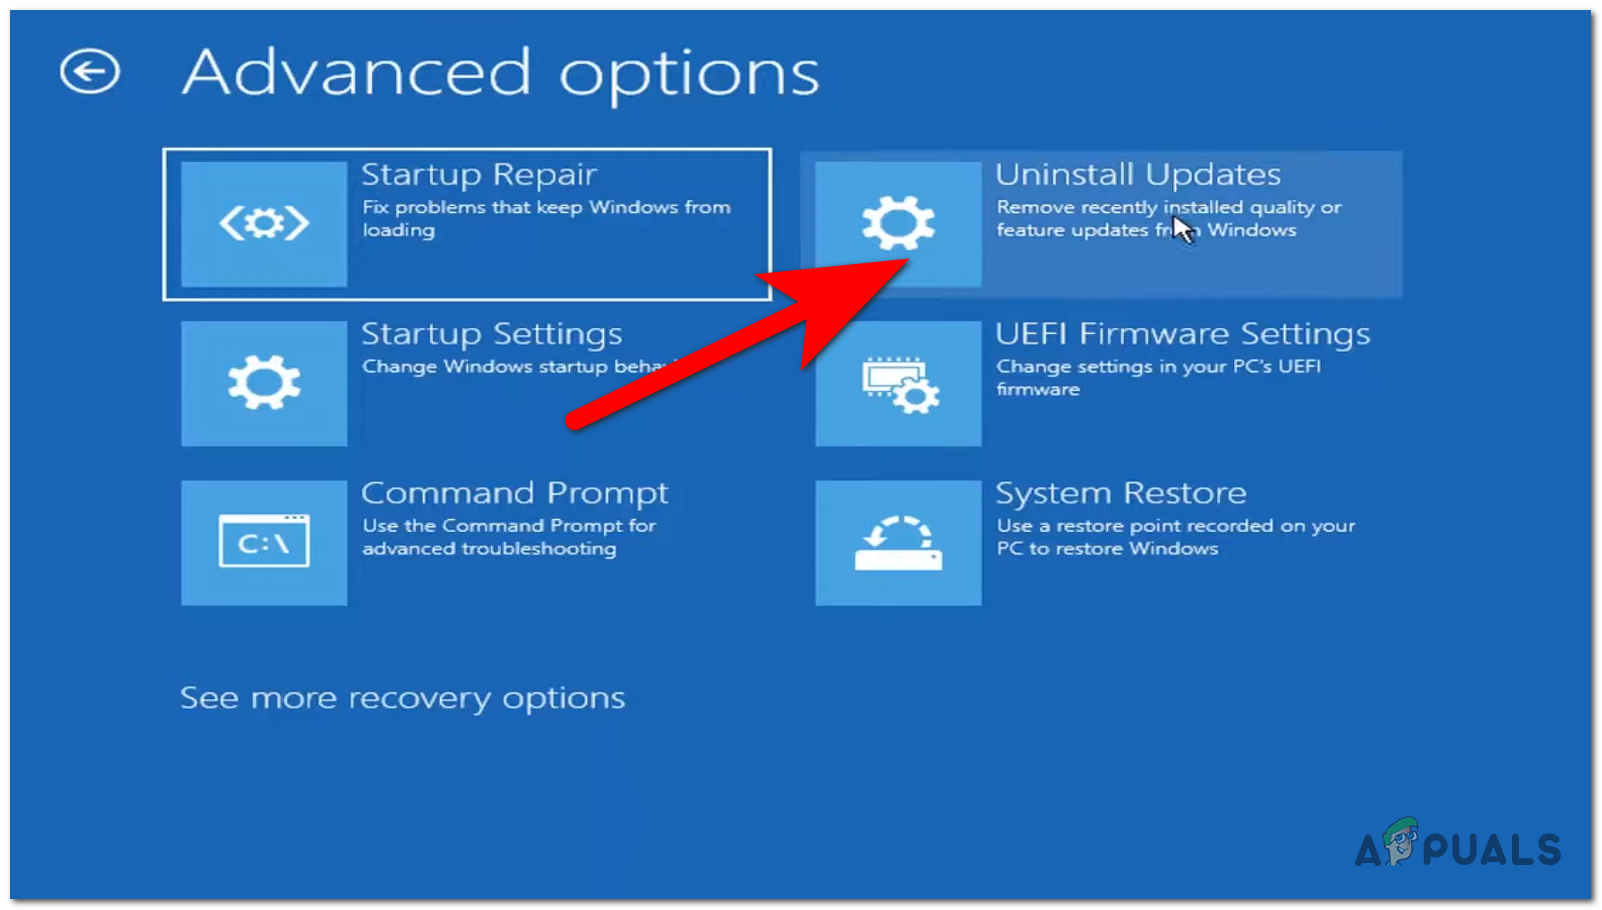
Accessing the Uninstall Updates section inside the Recovery Menu - Choose between the two options. Start with Uninstall latest quality update to see if that’s enough.
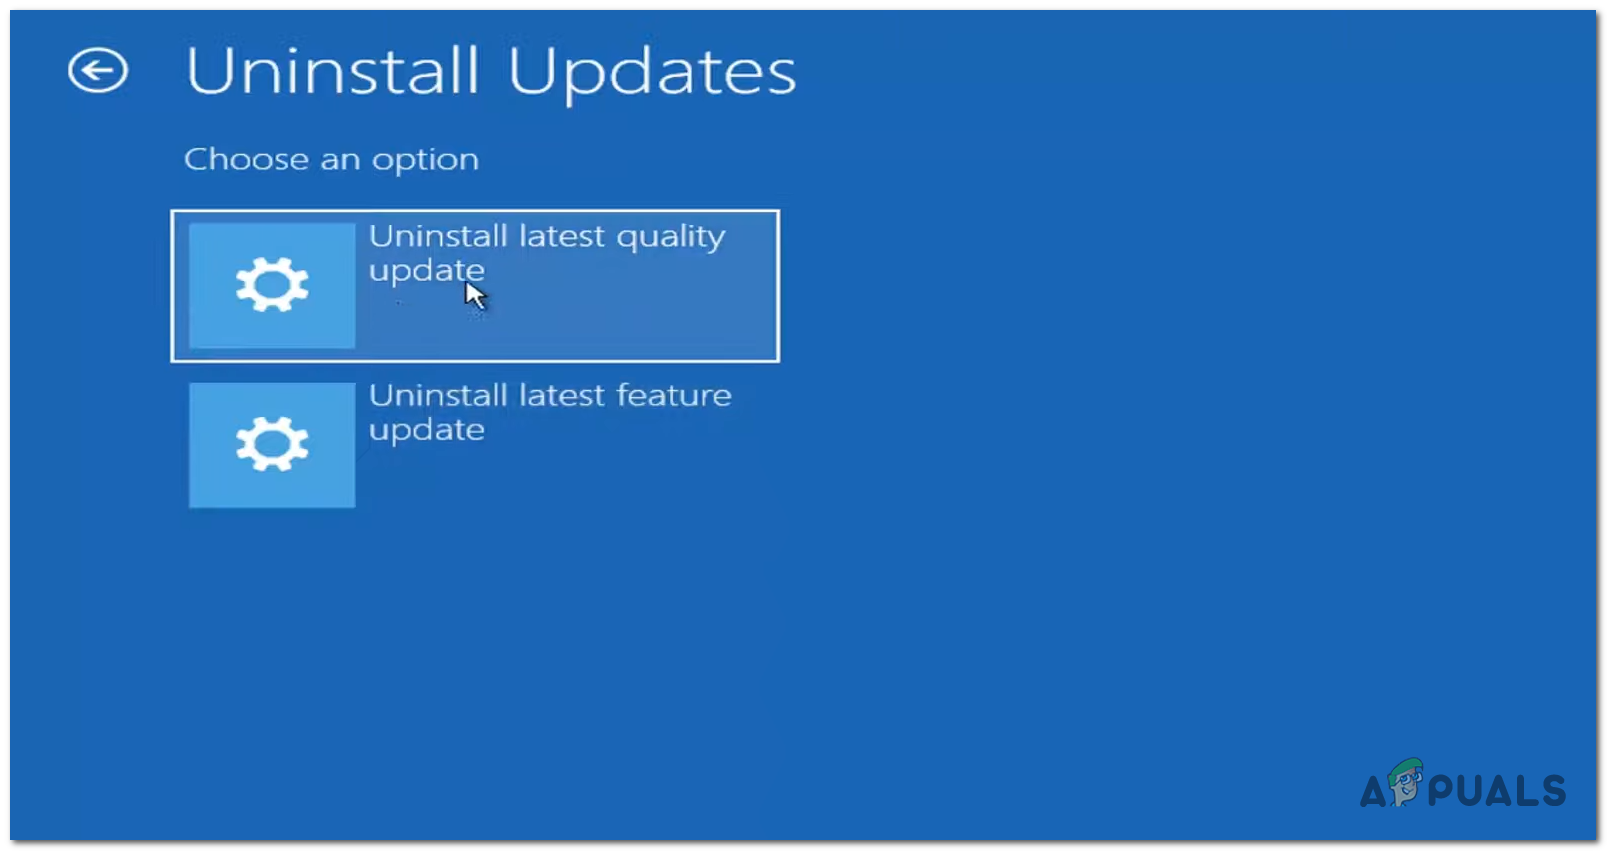
Starting the uninstall process of the latest quality update - When the process completes, check if you can now boot into Windows 11.
- If the problem persists, you can also choose Uninstall latest feature update. This takes longer because the update is larger. If your PC still doesn’t boot after uninstalling updates, move to the next method below.
3. Perform a System Restore
Another fix users have tried is using System Restore to roll back to the last restore point created automatically by Windows. In many cases, this was enough to resolve the boot issue.
This utility lets you put your Windows installation back to a stable state from before the problem started. To use it, your system must have previously created a restore point (Windows does this automatically after many updates unless disabled).
Before proceeding, note that System Restore will undo any changes made after the restore point was created. This includes app installs, game downloads, and system settings changed since then.
- Access the Recovery Menu. Boot your computer and press the F11 key (or the key used by your motherboard/laptop).
- When the Recovery Menu appears, select System Restore.
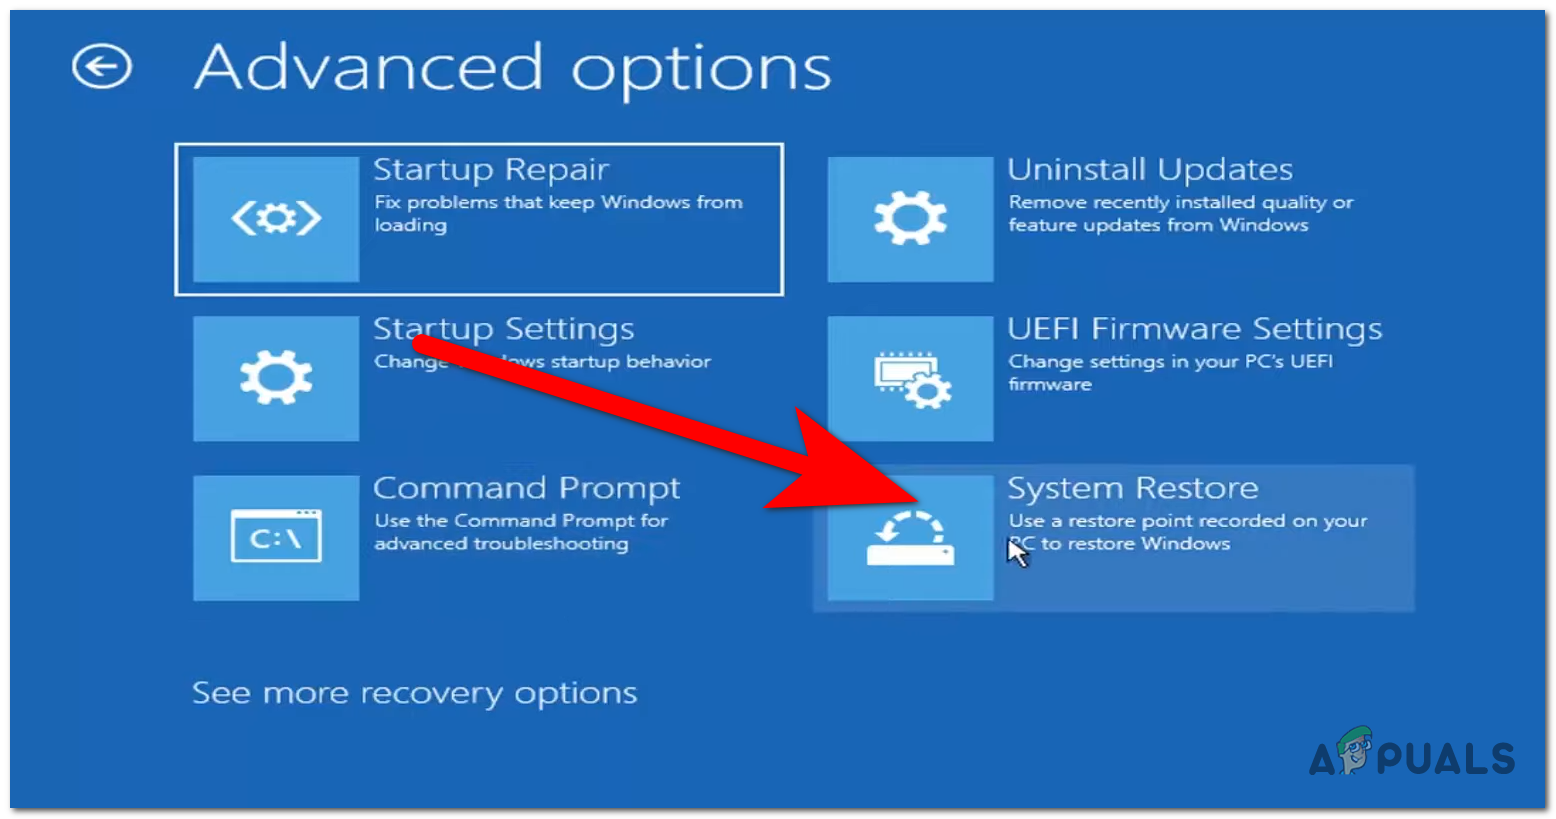
Accessing the System Restore menu inside the Recovery Menu - In the System Restore window, click Next, then select the latest restore point available.
- Click Finish to start the System Restore process, then confirm to continue.

Confirming that you want to start the System Restore process - Wait a few minutes for the process to complete.
- After your system is restored to the latest restore point, test your PC to see if you can now boot into Windows 11.
If your PC still won’t boot into Windows 11, go to the next method.
4. Use the Command Prompt
Some users fixed this by running a few scans from Command Prompt. These scans look for disk problems and corrupted system files, then try to repair them.
You’ll open Command Prompt from the Recovery Menu, then run the commands below. Each scan can take some time—wait for each one to finish before moving on.
- Open the Recovery Menu by pressing F11 while your PC is booting.
- Inside the Recovery Menu, go to Command Prompt and select it.
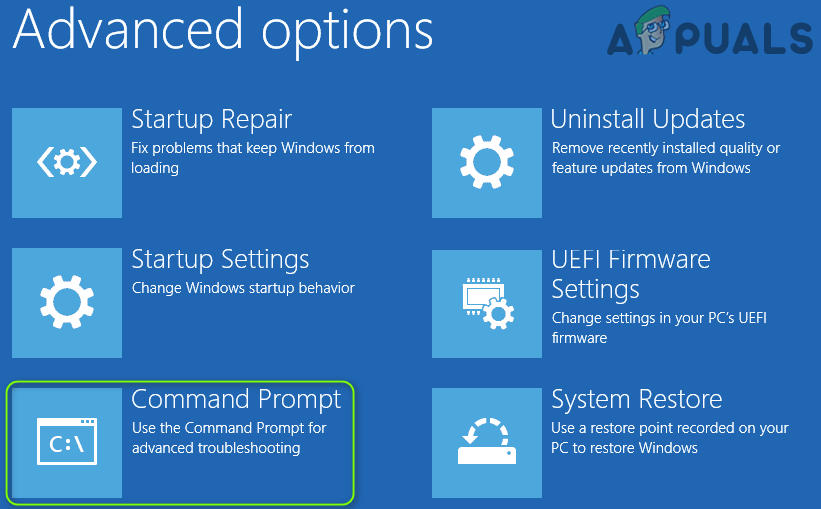
Accessing the Command Prompt section inside the Recovery Menu - When Command Prompt opens, type BCDEdit and press Enter. Scroll until you find osdevice and note the drive letter of the system volume (in the screenshot it’s C).
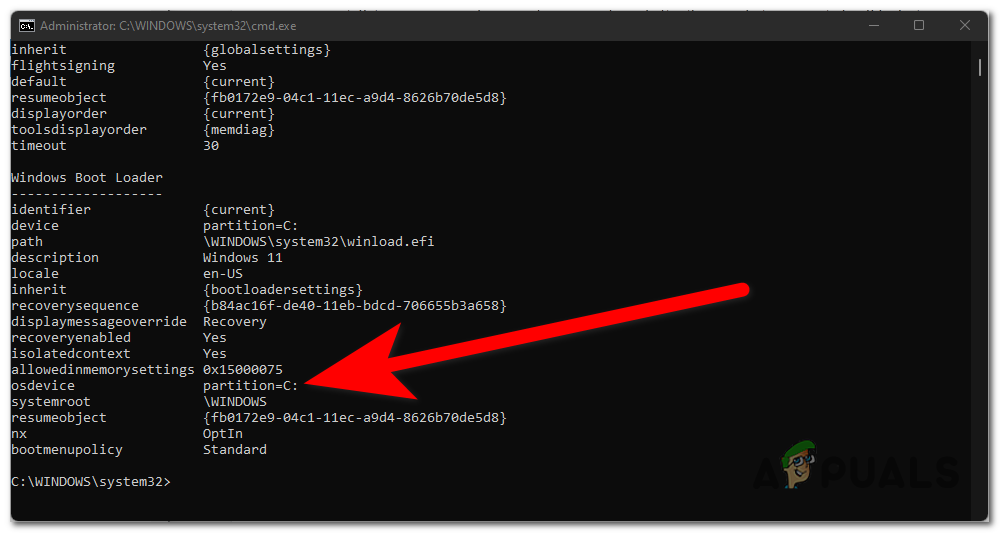
Find the system volume letter in Command Prompt - Now that you know the system volume letter, run the following commands, one by one, and wait for each to complete:
CHKDSK /f C:
DISM /image:C:\ /cleanup-image /restorehealth
SFC /scannow /offbootdir=C:\ /offwindir=C:\windows
Note: If your system volume is not C, replace C with the correct letter in each command.
- After those scans finish, run these commands one by one:
C:
bootrec /fixmbr
bootrec /fixboot
bootrec /scanos
bootrec /rebuildbcd
exit
- After you type the exit command, Command Prompt will close.
- To complete this method, also run a Startup Repair.
Starting the Startup Repair process to complete this method - When the process completes, check if you can now boot into Windows 11.
If you still can’t boot into Windows 11, try the next fix.
5. Start your PC in safe mode
Many users suggest starting the computer in Safe Mode to see if it works there. If it does, perform a clean boot while in Safe Mode to find out if a background app or service is causing the issue.
A clean boot starts Windows with only essential drivers and services. This helps you identify if a background program is the problem. After troubleshooting, you can return to normal startup.
- In this situation, the only way to access Safe Mode is from the Recovery Menu. Press F11 right after you boot the PC.
- Inside the Recovery Menu, go to Troubleshoot, select Advanced options, then click Startup Settings. Click Restart to continue. Your PC will restart.
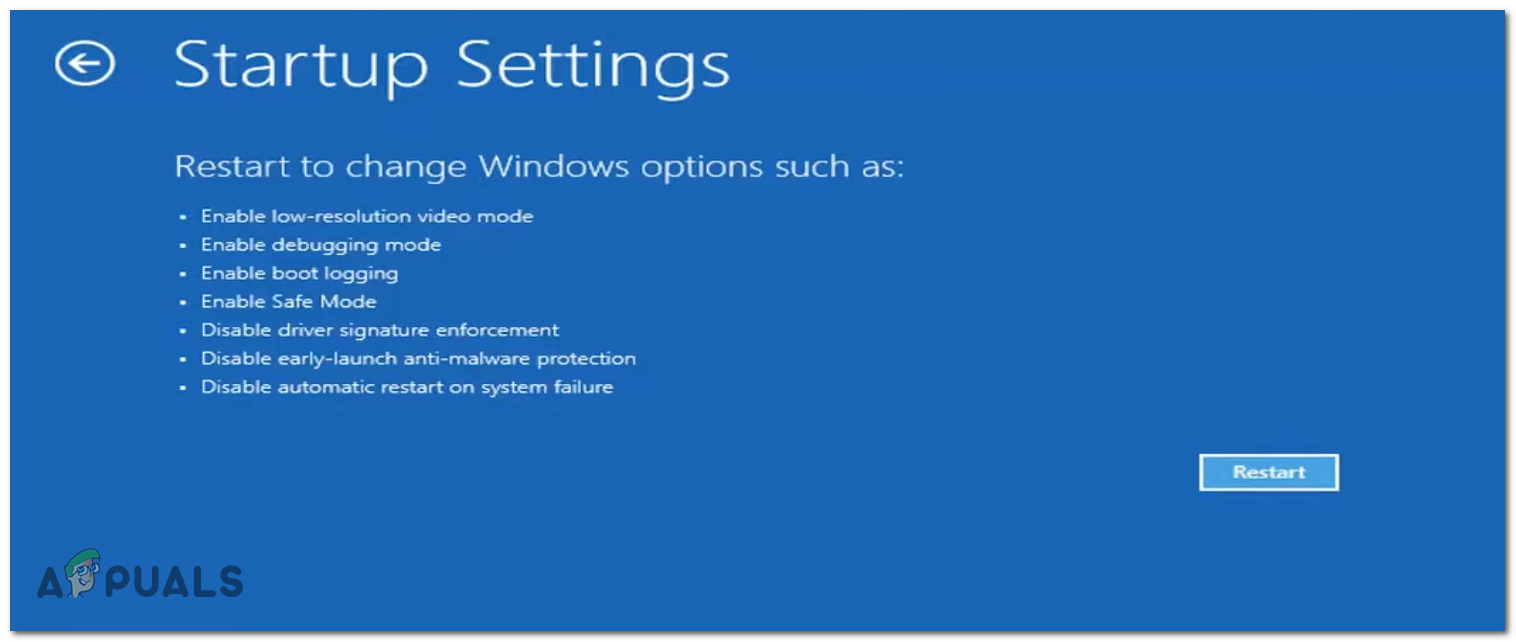
Starting Safe Mode from the Recovery Menu - On the next screen, press 4 or F4 to enable Safe Mode.
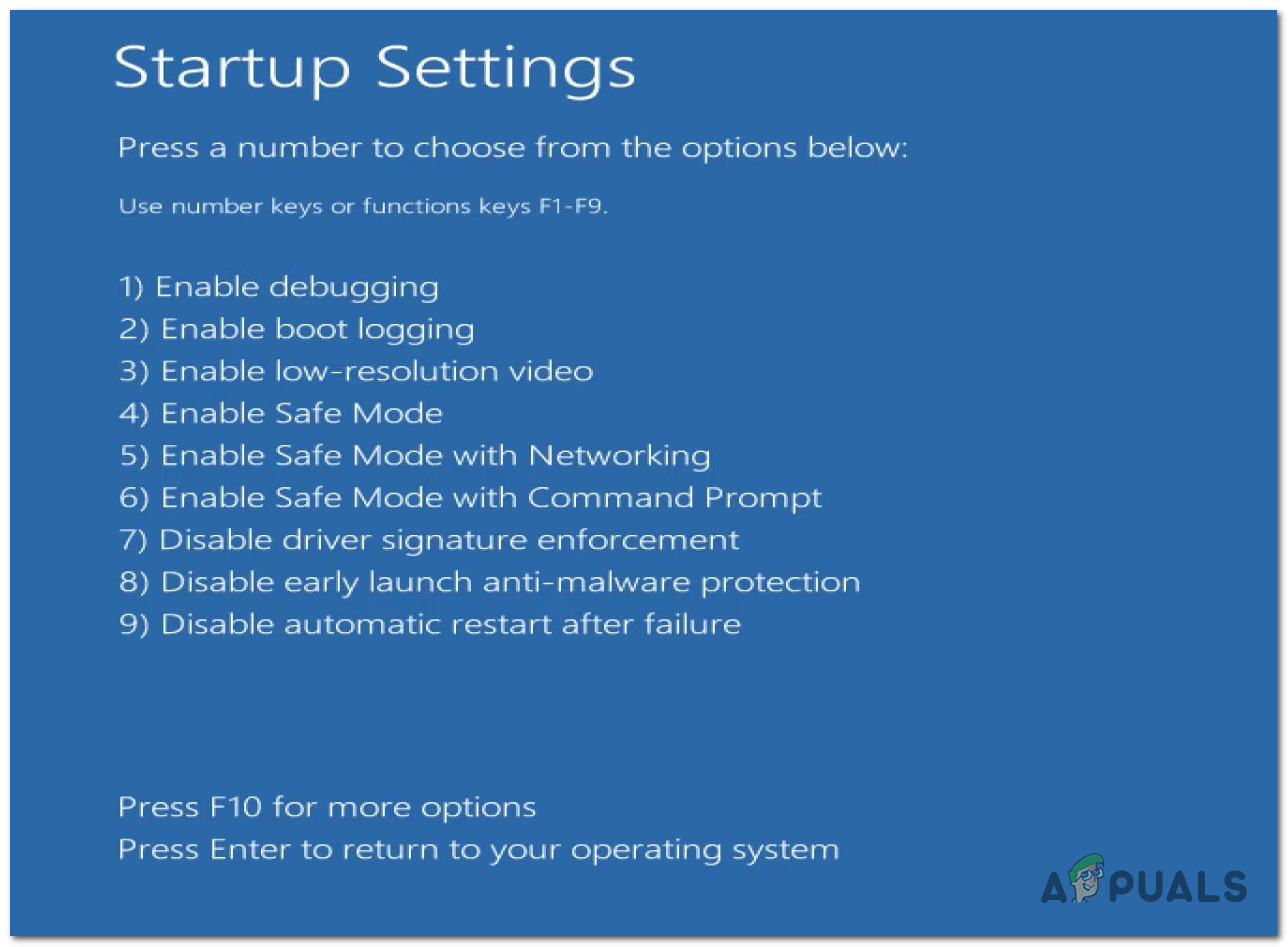
Selecting Safe Mode from the list of options - If you get into Safe Mode and everything works, perform a clean boot to identify which background apps or services are causing the issue.
- If you don’t know how to do a clean boot, follow the steps in this article to do a clean boot.
- After you find the problematic apps, uninstall them.
6. Reset your PC
The last thing to try is resetting your PC. You can do this from the Recovery Menu. It’s a simple process that takes a few minutes and often resolves stubborn boot problems.
Go to the Recovery Menu and open the Troubleshoot section, then choose Reset this PC. You can either keep your personal files or remove everything—it’s up to you.
Note: Even if you want to keep your personal files, the safest option is usually to remove everything (a factory reset). This refreshes all system files and clears out anything corrupted that might be causing the boot issue.
- First, open the Recovery Menu. When you boot your computer, press the F11 key to enter Recovery Mode.
- Click Troubleshoot, then select Reset this PC.
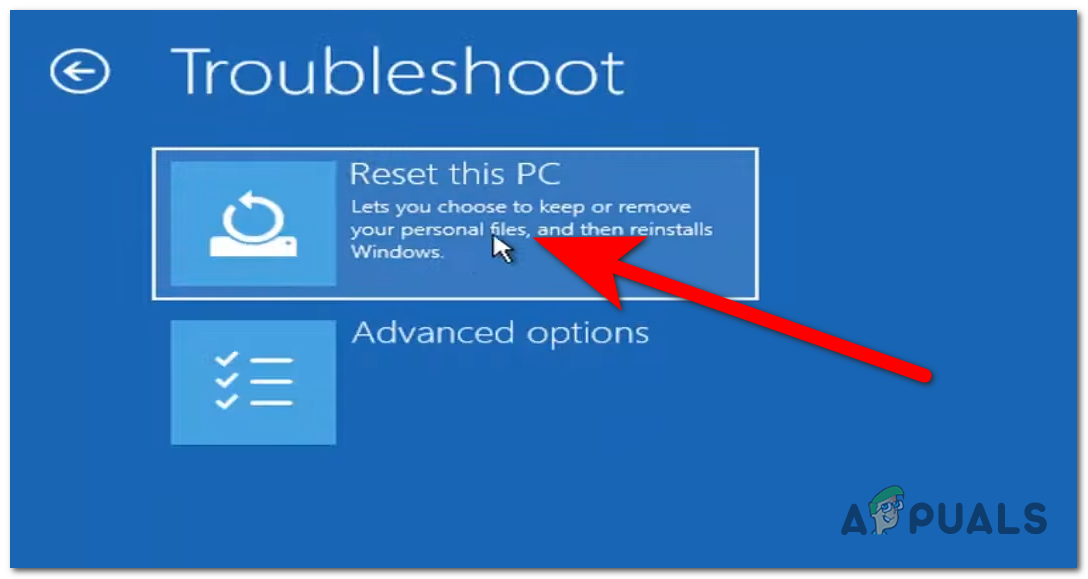
Proceeding with the reset of your PC - Choose between keeping your personal files (removes apps and settings) or removing everything. Most people recommend choosing Remove everything to make sure any corrupted files are gone.
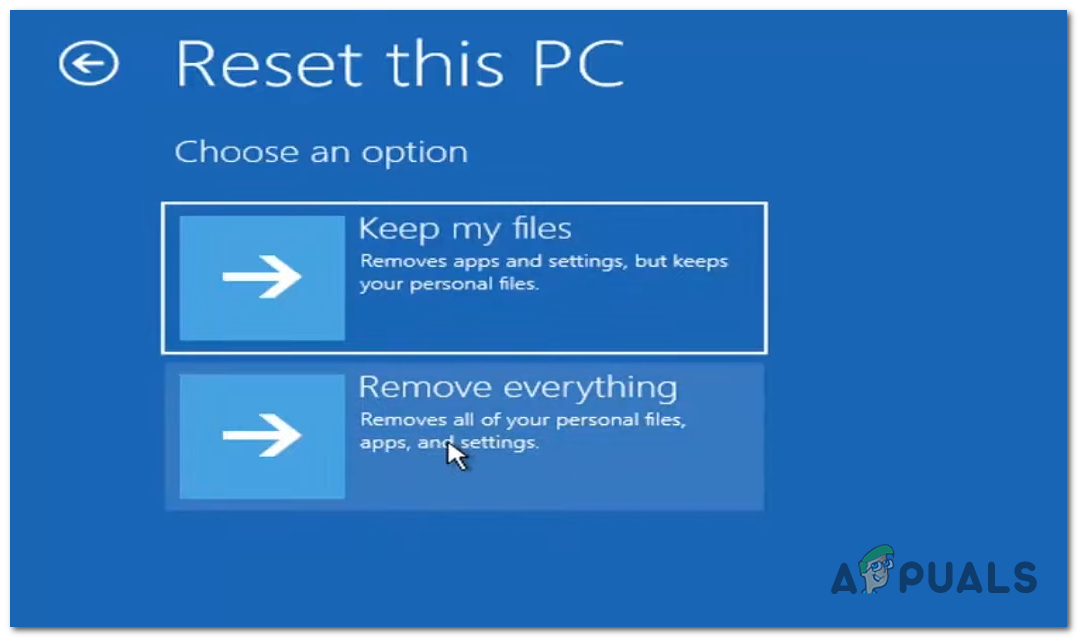
Choose whether to keep your personal files or remove everything - Follow the on-screen instructions to complete the reset.
- After Windows 11 is reset, try to boot into it and see if it now works.


