How to Back Up and Restore the Registry on Windows?
The Registry is a crucial part of any Windows installation. It’s a hierarchical database designed to store low-level settings and configurations for both the Windows Operating System and any and all programs and applications that choose to make use of the Registry.
A wide variety of different settings for everything from a Windows computer’s User Interface and device drivers to the kernel itself and the applications and programs installed are all stored within the Registry. All iterations of the Windows Operating System from Windows XP all the way up to Windows 11 have a fully-fledged Registry that keeps everything together.
Apart from being one of the most fragile and sensitive parts of the Windows Operating System, the Registry also happens to be one of the most important ones. That being the case, it is always a good idea to back a computer’s Registry up every once in a while so that you lose absolutely nothing in the event that the Registry gets wiped or becomes corrupted.
If you back up a Windows computer’s Registry, you can later use the backup file created as a result of the procedure to restore the computer’s Registry to the exact same state it was in when the backup was created, all settings, configurations, registry values and registry keys included.
It is an especially good idea to back up a computer’s Registry before you make any changes to it (either manually or using an application or program capable of doing so) so that, if anything goes wrong, you can simply restore the Registry back to the way it was before you fiddled with it using the backup file.
How to back up the Registry
It is worth noting that the Registry is automatically backed up whenever a System Restore point is created. This means that, if you were to create a System Restore point and then restore your computer to that specific point in time, the computer’s Registry will also be restored to the way it was when the System Restore point was created. If you want to back up the Registry on a computer running Windows Vista, 7, 8, 8.1,10 or the newest iteration (Windows 11), follow the instructions below:
Note: The instructions below are verified and confirmed to work on every recent Windows version.
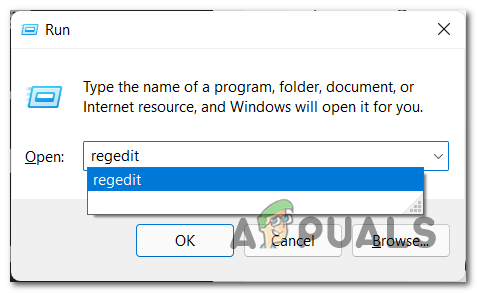
- Start by pressing Windows key + R to open up a Run window.
- Once inside the run box, type regedit into the Run dialog and press Enter to launch the Registry Editor. When you’re prompted by the User Account Control window, click Yes to grant admin access.
Opening the Regedit window - Inside the left pane of the Registry Editor, click on Computer (the Registry key that all other keys branch out from) to select it. Doing so will ensure that a backup of the entire Registry is created.
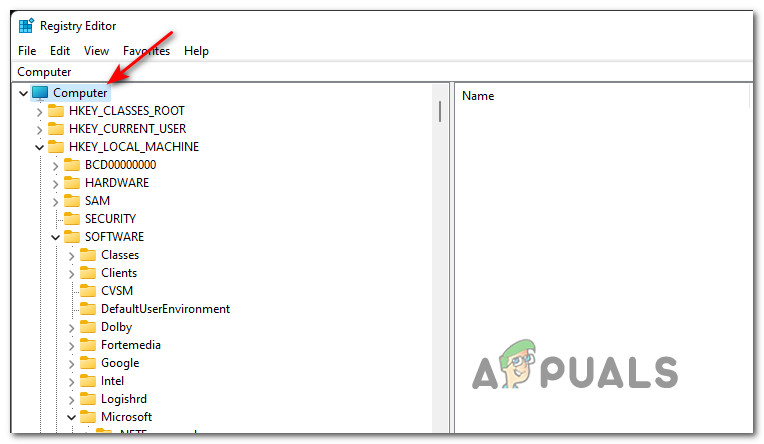
Selecting the Computer key Note: If you only want to back up a specific Registry key and not the entire Registry, select it instead.
- Next, with the proper key selected, use the ribbon at the top to click on File > Export….

Exporting the registry key - In the Export Registry File dialog, navigate to where you want the backup file to be saved, type what you want the backup file to be named in the File name: field (something like RegistryBackup should do just fine), and click on Save to allow the backup file to be created.

NOTE: What this gif is showing is how to export the entire registry hive, but you can also export specific folders in the registry by right-clicking the specific folder and following the same procedure as above. And when you restore, it will automatically be restored in the correct folder.
IMPORTANT: The steps listed and described above do not apply to Windows XP as, in the case of Windows XP, the only way to back up the Registry is to create a System Restore point.
How to restore the registry from a previously created backup
Now that you know how to backup your registry on Windows 11 or any older Windows iteration, another useful skill to master is to restore the Registry from a previously backed cluster. This will prove invaluable in those situations where you’re dealing with a corrupted Registry cluster and you already have a backup in place that you can restore from.
Follow the instructions below to restore the registry from a previously created backup on Windows 7, Windows 8.1 Windows 10, and Windows 11:
- Start by pressing the Windows logo key + R to open a Run dialog box.
- Next, type regedit into the Run dialog and press Enter to launch the Registry Editor.
Opening the Regedit window - From the ribbon bar at the top of the screen inside the Registry Editor, click on File > Import….
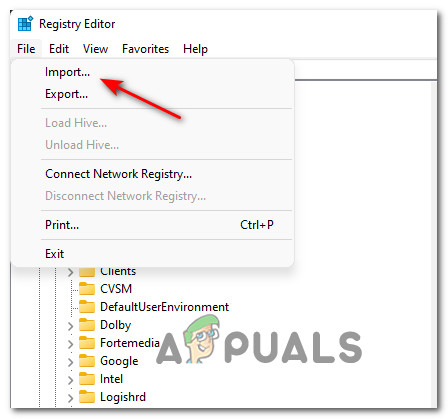
Importing a previously created registry key - In the Import Registry File dialog, navigate to where you saved the backup file you previously created, click on the backup file to select it, and click on Open to have the backup file’s contents imported and the Registry restored to the exact way it was when the backup was created.

IMPORTANT: The steps listed and described above do not apply to Windows XP. To back up the Registry on a computer running on Windows XP, you need to create a System Restore point. Since that is the case, in order to restore the registry on a Windows XP computer, you need to restore the entire computer using the System Restore point that was created.
how do i access a setup file