How to Repair Install Windows 11?
Windows 11 has been a hot topic ever since it was announced back in June. While the operating system has not yet been released officially, there are ISOs made available by the maker of Windows as well as the Insider Previews that allows users to try out the next major release. Since the operating system is in beta, there are going to be rough edges and issues are almost certain to come around. If this scenario is applicable, and you are having problems with the new Windows 11 on your computer, you can perform a repair install of the Windows 11 operating system by doing an in-place upgrade.
As it turns out, this allows you to keep your personal data in place so you don’t have to worry about creating backups but they are still a good idea just to be on the safer side. Performing a repair install of Windows 11 is fairly simple and using the methods that we are going to list down below, you can actually get it over with in a few simple clicks. Doing a repair install is a good idea if you are facing problems that are not going away with the normal routine solutions or troubleshooting.
Down below, we are going to mention different methods that will enable you to perform repair install Windows 11 on your computer. First, you can do so by using the Reset this PC feature that is available in the Settings app of your Windows 11 machine. In addition to that, you can also use a downloaded Windows 11 ISO file to perform an in-place upgrade to repair install Windows 11. With that said, without further ado, let us get started and show you how to repair install your Windows 11 operating system.
Repair Install Windows 11 via Windows Settings
As it turns out, this has to be the easiest and most straightforward way of repairing your Windows 11 installation. Windows Settings has a recovery feature known as Reset this PC that lets you reinstall Windows 11 on your system via the local files that are present on your system. In addition, it also gives you the choice of keeping your personal files and folders so that you do not lose any personal data. However, this will remove third-party apps that you installed on your machine so you will have to reinstall them after the process has finished. With that said, follow the instructions given down below to repair install Windows 11 via Windows Settings:
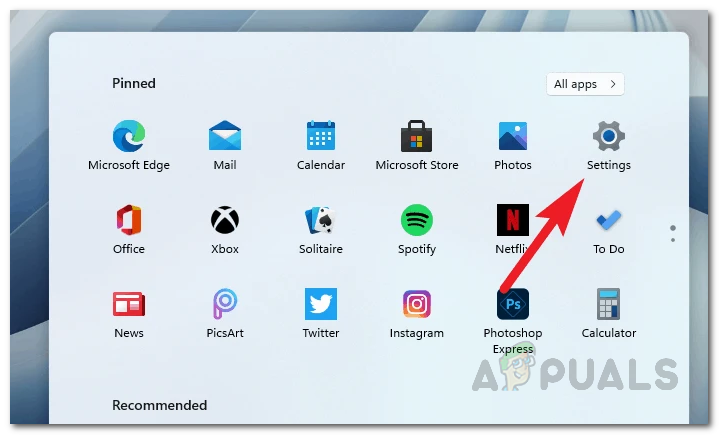
- First of all, open up the Settings app. This can be done by either pressing the Windows key + I combination or alternatively you can open up the Start Menu and click on the Settings icon.
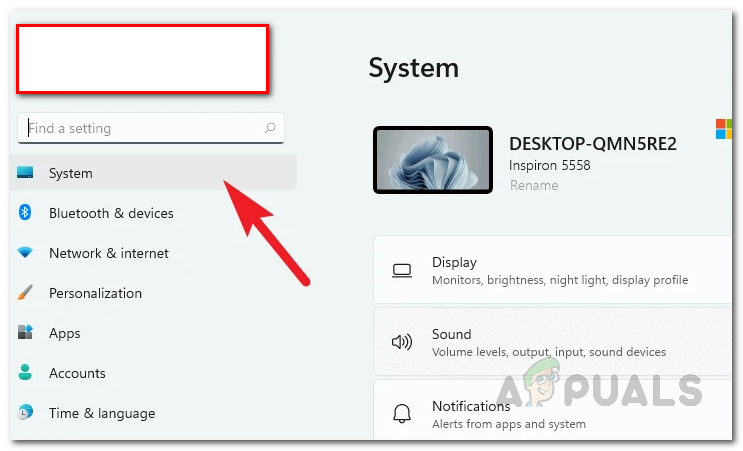
Opening Settings App - Once the Settings app is open, click on the System tab that is located on the left-hand side of the screen.
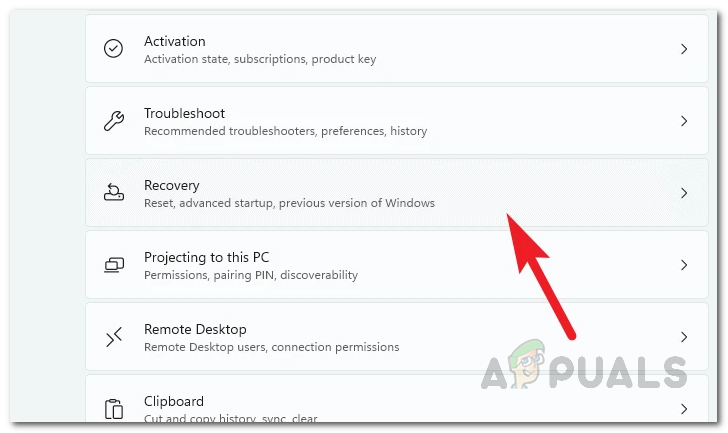
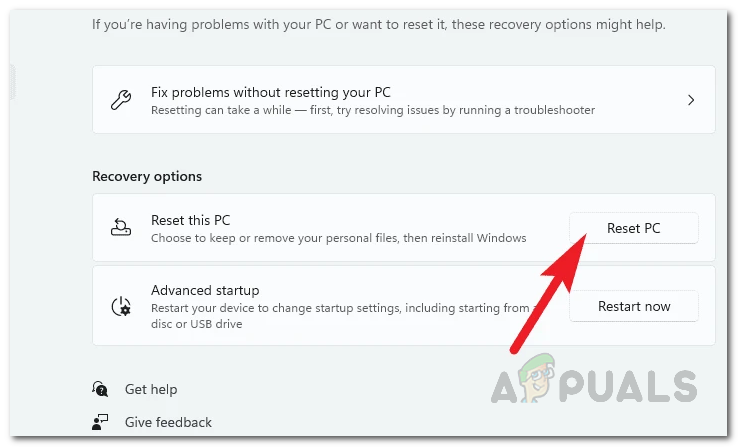
Windows Settings - On the System tab, go ahead and scroll down until you see the Recovery option. Go ahead and click on it.
Recovery Option - Then, under the Recovery options menu, click on the Reset PC button next to the Reset this PC option.
Reset This PC Option - This shall open up a new Reset this PC window.
- Here, it gives you the option of either keeping your personal files and folders or completely erasing everything. Choose whatever option you desire.

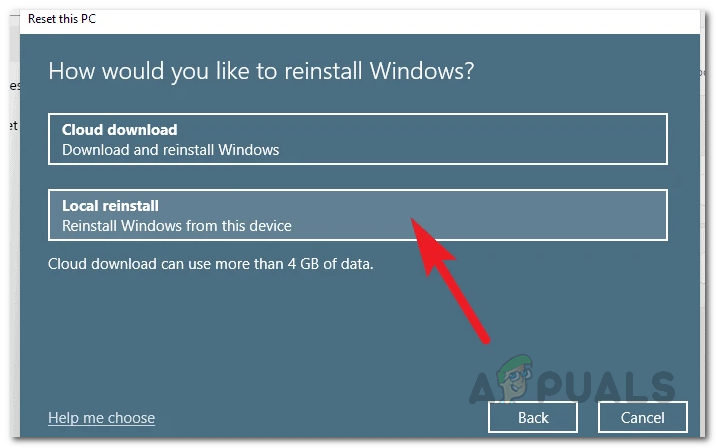
Choosing What to Keep - On the next prompt, you will be asked how Windows is to be reinstalled. You can either choose Local reinstall which will use the local files on your system to reinstall Windows or Cloud download that will download the required files from Microsoft’s servers. Choosing the latter will require a stable internet connection so make sure you are covered there. If you are facing problems on your system, it is recommended to use the Cloud download option as it will download new files and thus, Windows doesn’t have to use the local files in case they are corrupted or damaged.
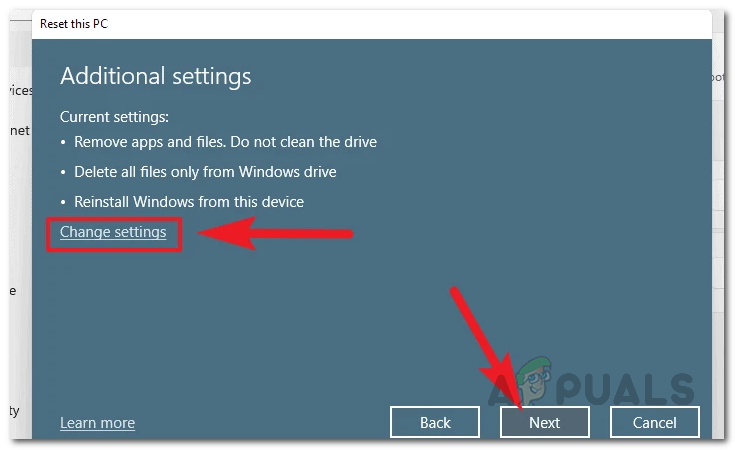
Windows 11 Reinstall Options - Once you have chosen how to install Windows, simply click the Next button on the next prompt that displays the settings that you have chosen so far. If you wish to change any settings, you can click the Change settings option to do so.
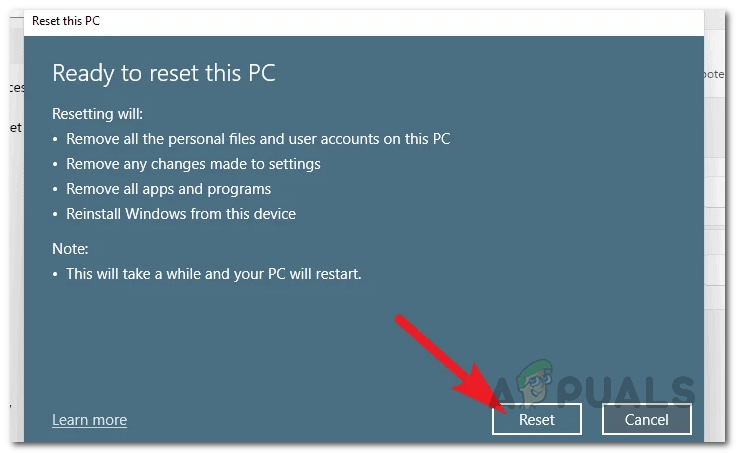
Reset Settings - Finally, on the Ready to reset this PC screen, go ahead and click the Reset option to start the repairing process. This will take time depending on the settings that you have chosen so far so make sure to wait for it. In addition, your PC will be rebooted during this process so don’t worry if you see your system restarting. It’s all intended.
Resetting Windows 11
Repair Windows 11 via Recovery Mode
In addition to the recovery option in the Windows Settings, you can also repair your Windows 11 from the recovery mode which does not require you to log in into your account. This can be really helpful if you are not able to sign in to your PC or if it is acting up and you can’t access the Windows Settings app. If this case is applicable, you can rely on this method which uses the Windows Recovery Environment of the Windows operating system. To do this, follow the instructions given down below:
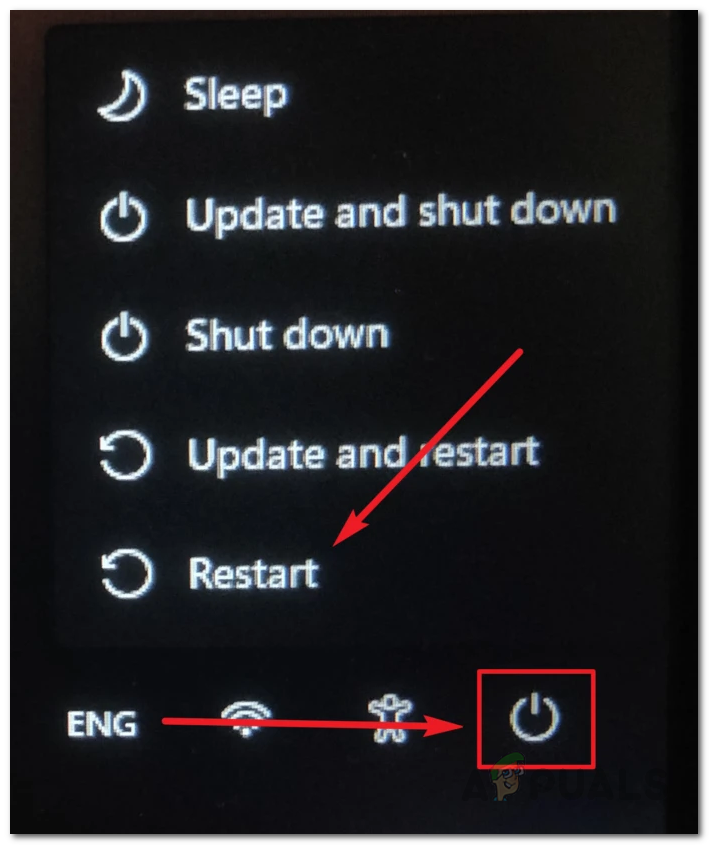
- First of all, power on your computer and then on the Sign-In screen, click the power icon.
- From the menu that appears, click the Restart option while holding the Shift key on your keyboard. This is important as holding down the Shift key will restart your system into the Windows Recovery Environment.
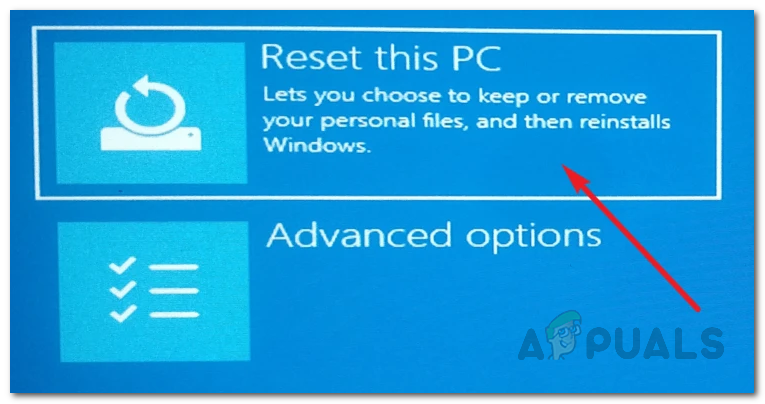
Restarting Windows into Windows Recovery Environment - Once you are in the Windows Recovery Environment, click the Troubleshoot option.
- Then, on the Troubleshoot screen, click the Reset this PC option.
Resetting Windows 11 - At this point, the process is mostly similar to the one mentioned above. You will be asked if you wish to keep your personal files or not. Choose whatever option you wish here.
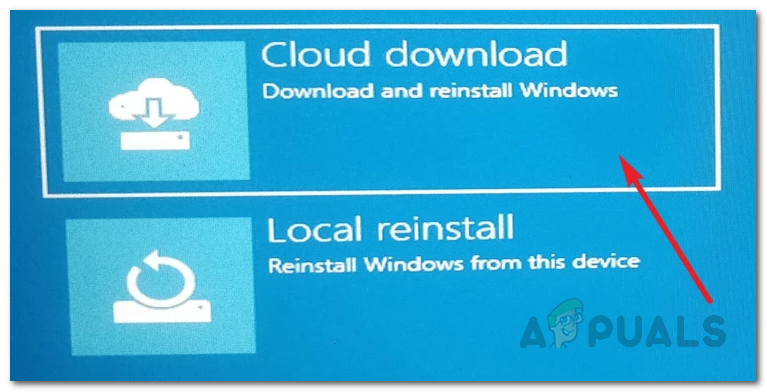
- Next up, you will be asked how Windows installed on your system. We recommend using the Cloud download option if you have trouble signing into your system. This downloads the required files from Microsoft’s servers and thus, you will have a fresh copy of the Windows 11 after the process has finished.
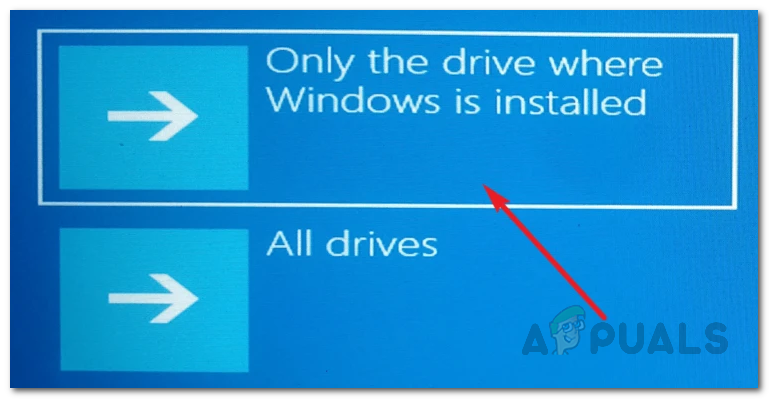
Choosing How Windows 11 is Installed - On the next screen, you will be asked what drives you wish to format. Here, you can choose either to format only the drive where Windows is installed, which is usually the C: drive. Alternatively, you can also have it format all your drives. For that, you can choose the All drives option.
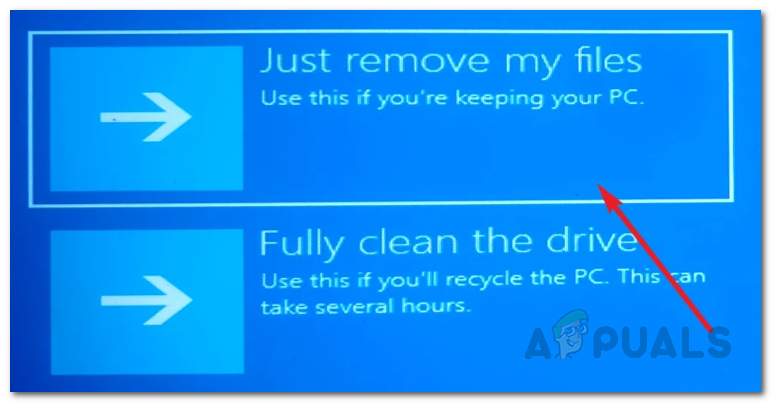
Format Options - After that, you will have to choose how the drive is formatted. You can have it remove your files only or completely clean the drive which can take longer than the first option. Choose whatever fits your situation here.
Additional Format Options - At this point, Windows will list down the settings that you have chosen as well as the impact of these settings. Go through them and then finally, click the Reset button at the bottom to start the process.
- Once done, wait for it to finish. This might take a while depending on your settings.
Repair Windows 11 via Windows 11 ISO
As it turns out, you can also repair your Windows 11 operating system if you have a Windows 11 ISO. This method can also be followed if you have a Windows 11 bootable USB because that’s essentially the ISO burned into the USB. If you repair your Windows 11 by performing an in-place upgrade using the Windows 11 ISO file, you won’t be losing any of your personal data. All of your user accounts as well as the applications will be left as they are while it gets rid of any potential issues that you might be facing with your current installation.
To do this, make sure that you have a Windows 11 ISO file downloaded or a bootable USB of the said operating system. It is also recommended that you disable any third-party antivirus that you have installed on your computer just to make sure that it doesn’t interrupt with the repair install of Windows 11. Once you have filled these prerequisites, follow the instructions down below to repair install Windows 11:
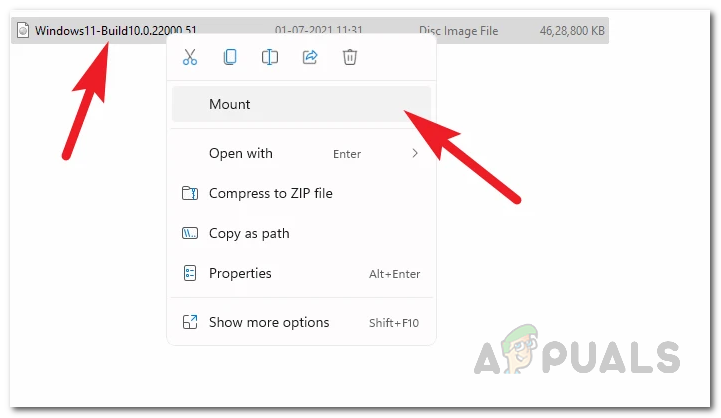
- First of all, go ahead and mount your ISO image. To do this, simply navigate to where your ISO file is located, right-click on it and then choose Mount from the drop-down menu. Alternatively, if you have a bootable USB drive, go ahead and connect it to your computer.
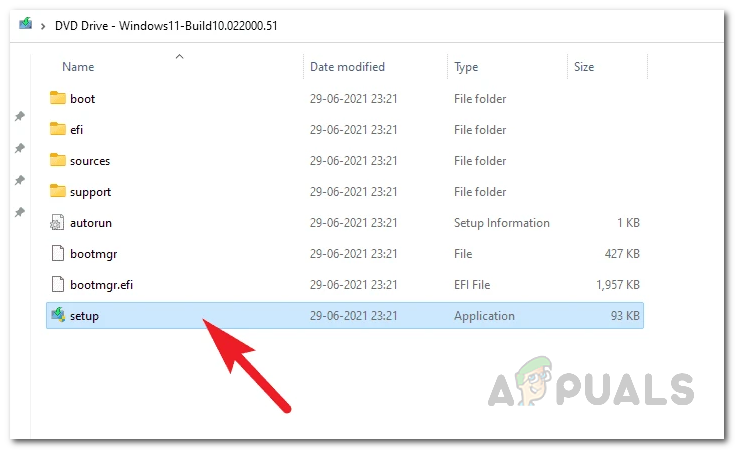
Mounting Windows 11 ISO - After that, navigate to the mounted drive using the File Explorer and then double-click the setup.exe file located inside.
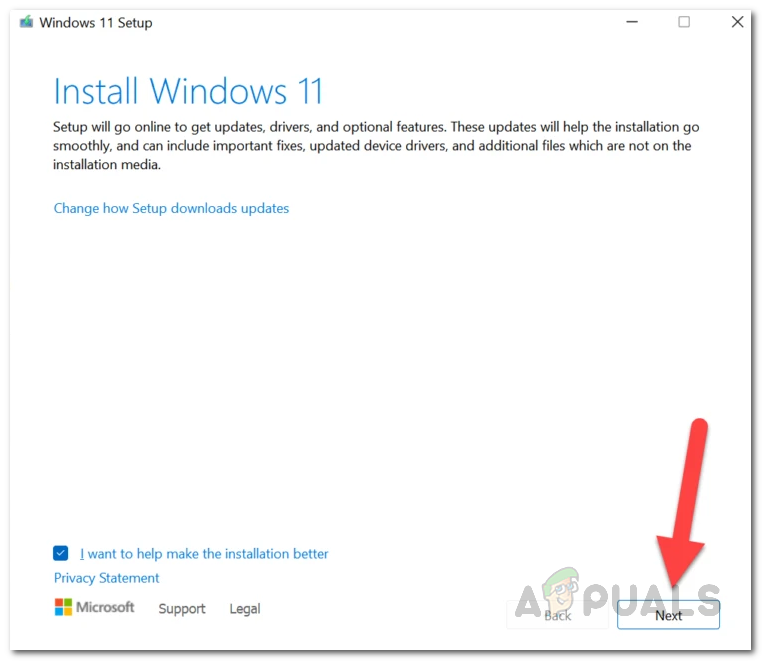
Running Setup.exe - This shall open up the Windows 11 Setup window. Click the Next button at the bottom-right corner of the setup window.
Windows 11 Setup - You will be asked if you wish to download and install updates, drivers and optional features. It is recommended to choose Not right now but you can also leave it as it is and click Next.
- Windows Setup will look for any updates at this point if you chose the latter option. Wait for it to finish.
- After that, you will be prompted with the End User License Agreement. Click the Accept button.
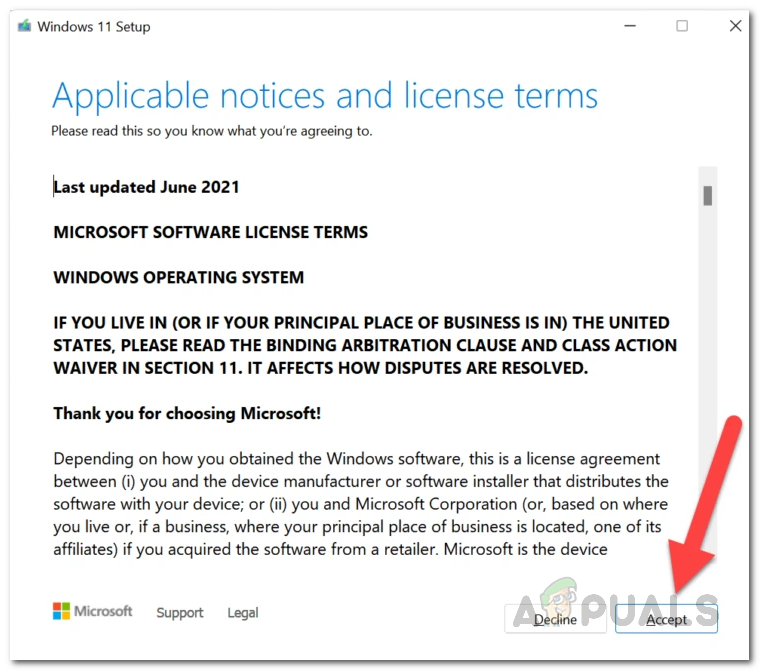
Windows 11 Setup License Agreement - Now, the Windows setup might check for updates again so wait for it to finish. After the updates have been downloaded, the setup will configure itself. Wait for it to finish.

Windows 11 Setup Configuring - On the Ready to install screen, you will be shown the edition of Windows 11 that will be installed along with the files that will be kept. You can change this by clicking the Change what to keep option.
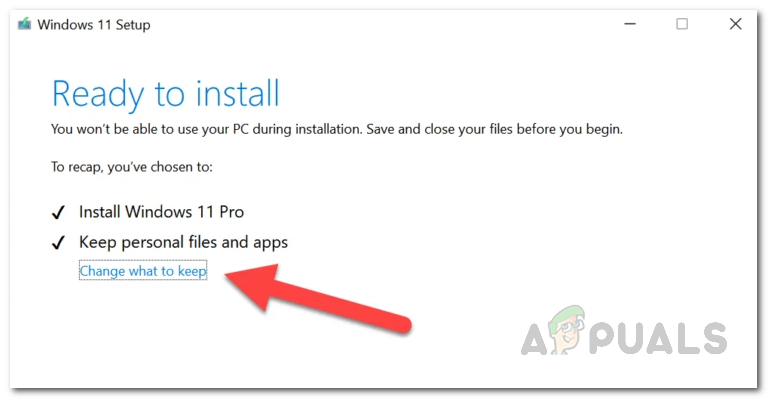
Changing Windows 11 Setup Settings - There, choose whatever files you want to keep by selecting the respective option. Then, click the Next button.
- Now, you will be taken back to the Ready to install screen. Click the Install button at the bottom.
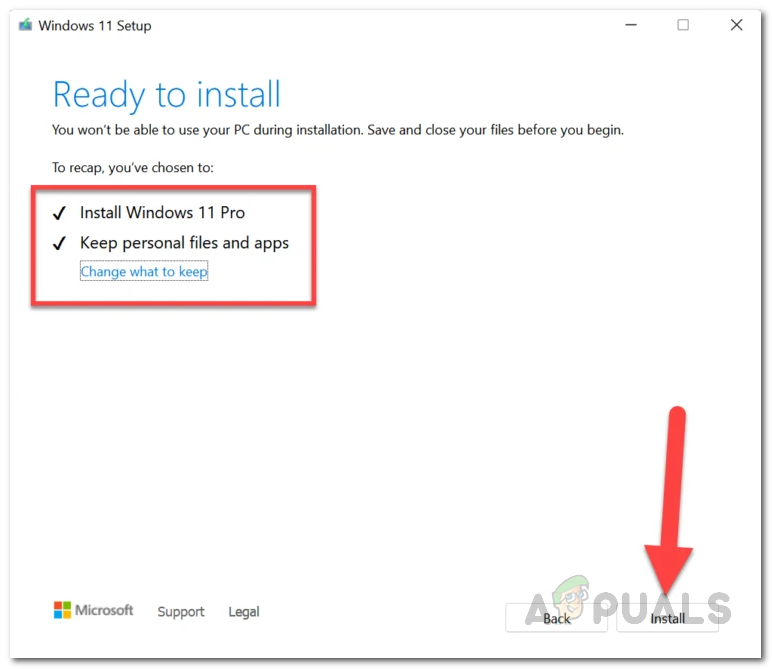
Repair Install Windows 11 - Once you have done that, Windows 11 Setup will begin the repair install of your Windows 11.
- After it has finished, you will be taken to the Sign in screen.
- That’s it, you have successfully repaired installed Windows 11.