Xbox Remote Play Not Working? Try These 4 Simple Fixes
If you are experiencing difficulties with the Remote Play feature on your Xbox, it is likely that you have not fulfilled all of the necessary requirements of the feature. To properly set up Remote Play, several prerequisites must be met, including setting your Xbox to Sleep Mode, changing the NAT Type to Open, and forwarding the required ports.

1. Check the Requirements of Remote Play
The Remote Play feature on your Xbox has a long list of requirements that need to be met for it to work properly. If you’re having trouble using this feature to play Xbox games on your iPhone/Android, the first thing you should check is whether you meet all of these requirements. If even a single one of them is not met, the feature will fail to work.
The first requirement of the feature is an Xbox One or later console. This means that Remote Play does not work on the Xbox 360 – it only works on the Xbox One, Series S, and Series X.
The next and most important requirement of the feature is a strong internet connection. This feature relies entirely on the speed of your internet. If your internet connection is slow or unstable, you will have lots of trouble when trying to use the feature, or the feature may not even work at all.
According to the official Xbox support page, the user’s internet speed must be at least 7-10 Mbps. You should also be using an Ethernet Cable for your internet, as using Wifi or Cellular Data can result in an unstable connection.
If you don’t know what your internet connection speed is, simply open a browser on your device, search “Internet Speed Test” and select the first result on Google. This quick speed test will show you both your download and upload speed.
After ensuring that your internet connection is strong enough, check the lists below to see if your device meets the requirements of the feature.
Required PC specifications:
- A multi-core processor with 1.5 GHz or more clock speed.
- 4 GB or more RAM.
- Windows 10/11
Required Phone Specifications:
- Android Version 6.0 or later.
- iOS version 13 or later.
- Bluetooth 4.0 and greater.
Another thing you should check is the availability of Xbox services in your region. Unfortunately, there are some countries where Xbox services are not available, so features like Remote Play will not work. Visit this site to check if Xbox services are supported in your country.
2. Check the Status of Xbox Live Services
The next thing you should check is the status of the Xbox Live Services. It is not uncommon for these services to go offline due to routine maintenance or high traffic volumes, resulting in connectivity issues for Xbox users. When this happens, the services become unavailable to Xbox users.
So before you try troubleshooting the Remote Play feature on your end, visit the official Xbox Services Status website and check whether any issues with the service are currently being reported. If there are any issues with the feature, they will appear on this website.
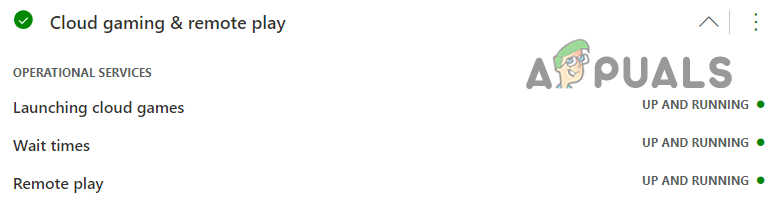
In the event that the website does not display any problems with the feature, you can proceed to the next recommended solution to resolve the issue.
3. Use the Same Account on the Console and Device
In order to use this feature on your Xbox, it is crucial to ensure that you are using the same Xbox account on both the console and the device that you are trying to stream gameplay to.
if you have multiple accounts on your console, you may accidentally be using a different account on your device compared to your console. To avoid this issue, it is recommended that you check and verify that the accounts on both the console and the device are the same.
If you discover that the accounts are different, simply use the same account on both the console and device to immediately resolve the issue. However, if the accounts are already the same, proceed to the next solution in this guide to fix the issue.
4. Ensure that Remote Play is Enabled and Properly Set Up
After confirming that you meet the hardware and software requirements of the feature, the next step is to ensure that the feature is enabled on your Xbox and it is properly set up. The setup process of the feature involves configuring your system and network settings.
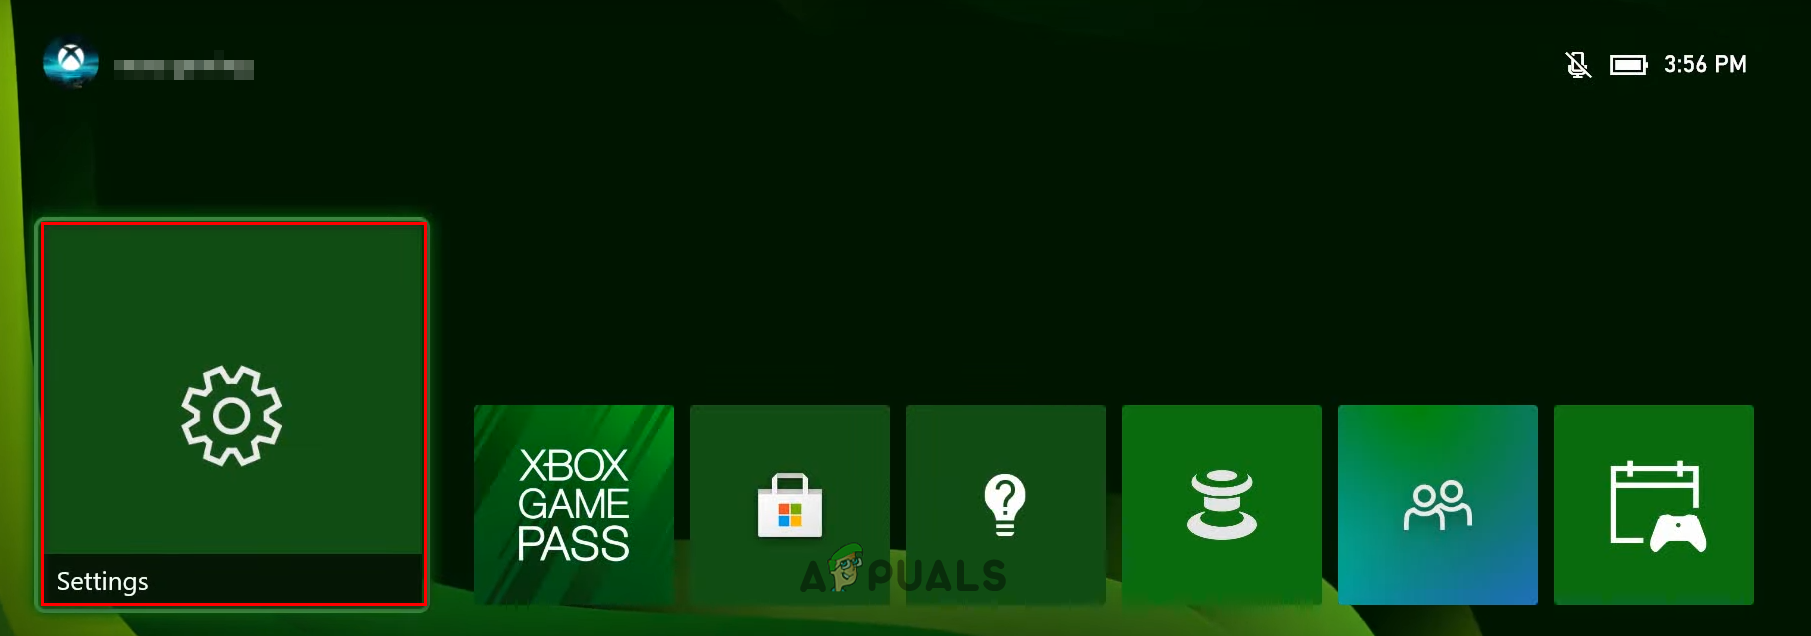
To enable the Remote Play feature on your Xbox, follow the steps we’ve listed below:
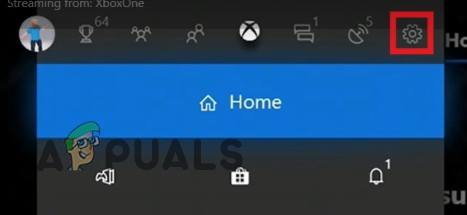
- Go to the dashboard of your Xbox and click on the Settings icon.
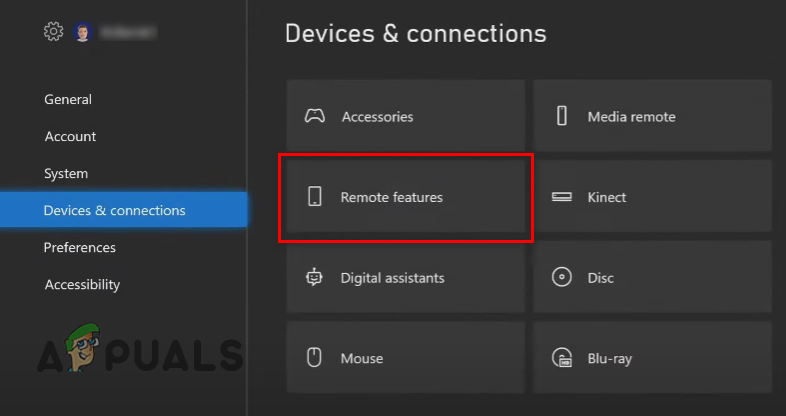
Opening Xbox Settings - Scroll down to the “Devices & Connections” menu.
- Click on the “Remote features” options.
Opening the Remote Features Settings - Click on the “Enable remote features” option (if there isn’t a checkmark next to it already).
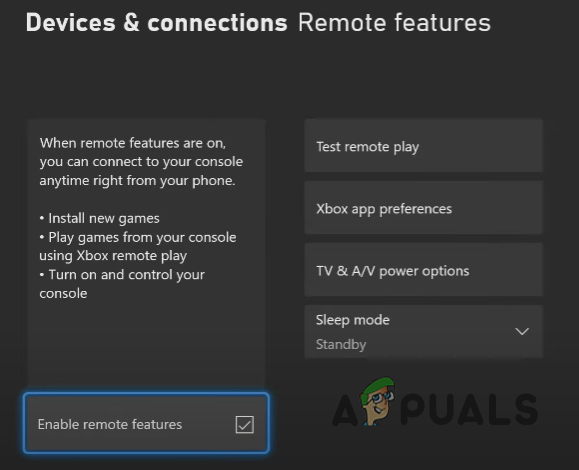
Enabling Remote Features on your Xbox
After enabling the feature, click on the “Test remote play” feature in the same menu. This will perform a test that will help you determine the cause behind the issue you’re facing.
The test will only take a minute or two to finish (depending on your internet speed). After it finishes, it will show you all the necessary information about your connection, such as your NAT Type, bandwidth, latency, network type, outbound port, and console power settings.
The three main settings you need to take note of are:
- Console Power Mode.
- NAT Type.
- Outbound Port.
If any of these settings show a cross or a yellow exclamation mark instead of a green checkmark, they are the reason the feature is not working properly. Below, we’ll show you how you can fix each of these three settings.
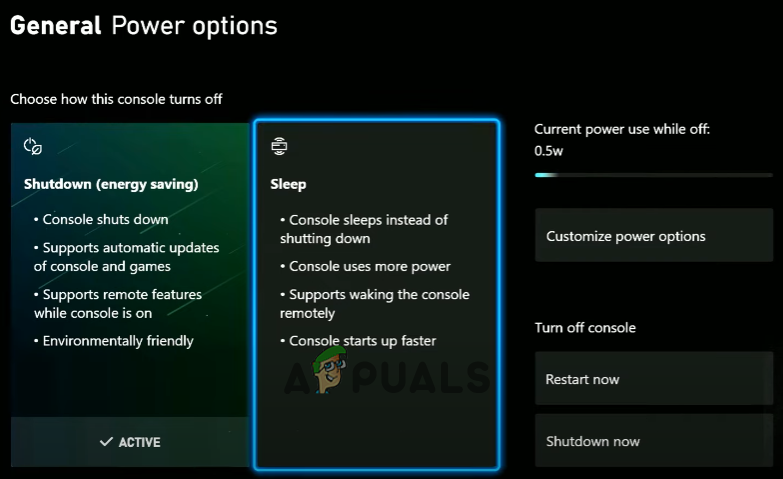
4.1 Set Your Xbox’s Power Setting to Sleep Mode
The power setting of your Xbox must be set to Sleep Mode for Remote Play to work. This mode allows your Xbox to always stay active, even when it is not being used.
This gives your Xbox the ability to turn on automatically when you try to stream games to your phone/PC. Do note that this will consume significantly more energy than the Shutdown mode, but it is a requirement for the feature.
But even though your console will be consuming a higher amount of energy, it will not be high enough to have any real impact on your electricity bill. The cost difference between Sleep Mode and Shutdown Mode is negligible.
Follow the steps we’ve written below to set your Xbox’s Power Settings to Sleep Mode:
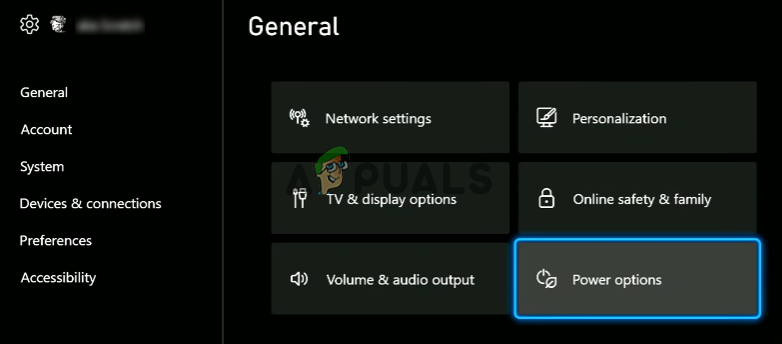
- Open the Settings menu on your Xbox.
- In the General section, click on “Power options.”
Opening Xbox Power Options Menu - Select the Sleep mode.
Setting your Xbox to Sleep Mode
Now that your console is in Sleep mode, it will go into a standby state when you shut it down, quietly using a small amount of power (13-15 watts). This will enable it to start up instantly and automatically when you use the Remote Play feature.
4.2 Set Your NAT Type to Open
NAT stands for Network Address Translation. This network setting governs your console’s ability to connect and communicate with online servers. There are three NAT Types: Strict, Moderate, and Open.
If your NAT Type is Strict or Moderate, you will experience connectivity issues when trying to connect to online servers. Therefore, for gamers, the most ideal NAT Type is Open, as it allows your console to easily communicate with any online server.
To change your NAT Type to Open, you will have to enable the UPnP (Universal Plug and Play) option on your router’s settings menu.
To go to your router’s settings menu, you have to first find out its default gateway, which is also called its IP Address. To find this out, open your laptop/PC and follow the steps listed below:
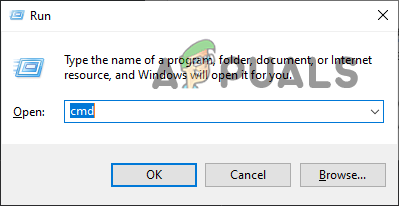
- Press Windows Key + R at the same time and type cmd in the Run dialog box.
Opening Command Prompt using the Run dialog box - Type this command into the Command Prompt terminal and hit the enter key:
ipconfig
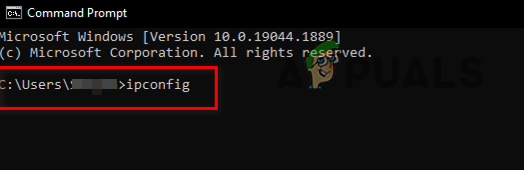
Entering ipconfig command in Command Prompt - Copy the numbers written beside “Default Gateway” in the Ethernet Adapter section.
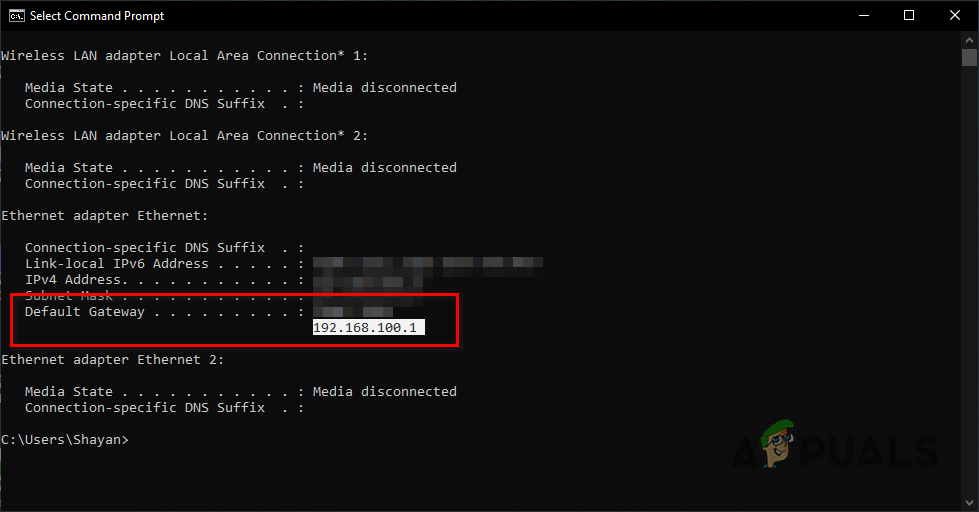
Finding router’s IP Address
Now, open a browser and paste these numbers into the search bar before pressing enter. This will open the login page of your router where you’ll be required to input the username and password assigned to the device.
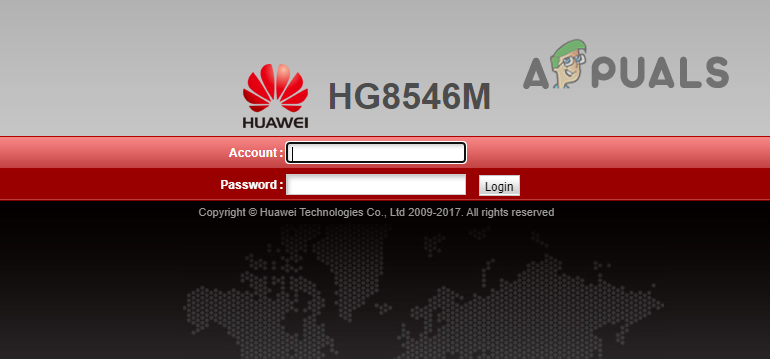
If you have no idea what your router’s login credentials are, take a look at the back of your router. The username and password are usually written on a sticker pasted on the backside the device itself.
If you do not see such a sticker, write down your router’s model number and go back to your PC/laptop. Open your browser and search “(router model number) default username and password“.
The results on Google will show you the factory default login credentials of your device. Enter these credentials into the login page and they should work successfully.
If these login credentials fail, the only thing you can do to access your router’s settings menu is to contact your Internet Service Provider (ISP). Simply ask them for your device’s credentials and they will give them to you.
Once you have opened the settings menu, look for a setting named “UPnP Configuration”. We cannot say where exactly this setting will be located in your router’s menu, as each router’s settings menu has a unique layout. The setting may even be named differently in your device’s menu. If you’re experiencing difficulty finding the setting, search online for help.
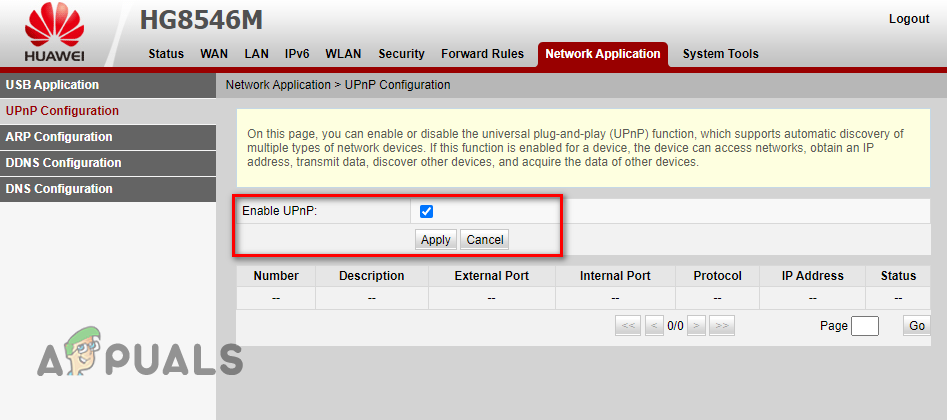
After you’ve found the setting, enable it and click on Apply. Now that this setting is enabled, go back to your console and perform the Remote Play Test. The NAT Type result should now show a green checkmark. But if it doesn’t, restart your router and try again.
4.3 Forward Ports
Your router may be blocking traffic from certain ports that are used by the Xbox Live Services. To solve this issue, you will need to open these ports by performing Port Forwarding.
If you’re not familiar with Port Forwarding, it is a technique that permits traffic on the internet to access particular devices within a private network. Simply put, it enables your router to channel incoming traffic to a certain device (such as your console) on your network, rather than rejecting the traffic altogether.
Below is the list of ports that need to be forwarded for your console:
- Port 88 (UDP)
- Port 3074 (UDP and TCP)
- Port 53 (UDP and TCP)
- Port 80 (TCP)
- Port 500 (UDP)
- Port 3544 (UDP)
- Port UDP 4500 (UDP)
The first step of Port Forwarding for your console is to assign a static IP to it. This is because port forwarding requires a specific IP address to be associated with your Xbox and if the IP address changes (which can happen if it’s assigned dynamically), the port forwarding rule will no longer be effective. A static IP will ensure that your Xbox always keeps the same IP Address.
To assign a static IP, you must first note down the IP and MAC Address of your console. For this, you can perform a network connection test on the device. Follow the steps written below to do so:
Xbox One:
- Go to your dashboard, select your account name located in the upper-left corner of your screen, and then press the A button on your controller.
- Click on the gear icon in the rightmost corner of the menu.
Opening Settings Menu of your Xbox One - Click on the “Settings” option.

Select the Settings option - In the Network tab, select the “Network Settings” option.
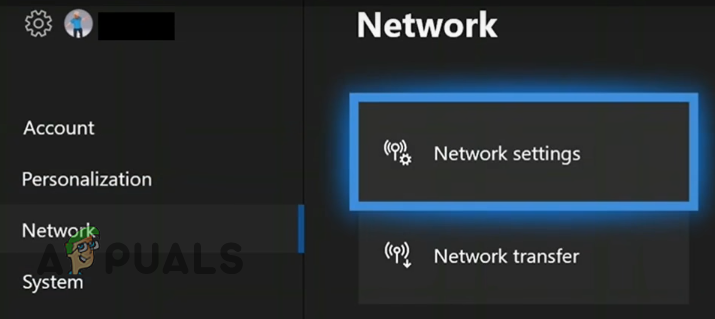
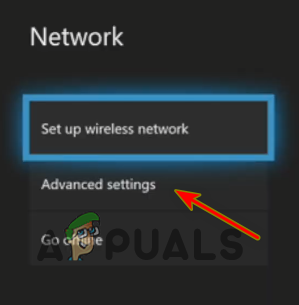
Opening Network Settings of your Xbox One - Select “Advanced Settings.”
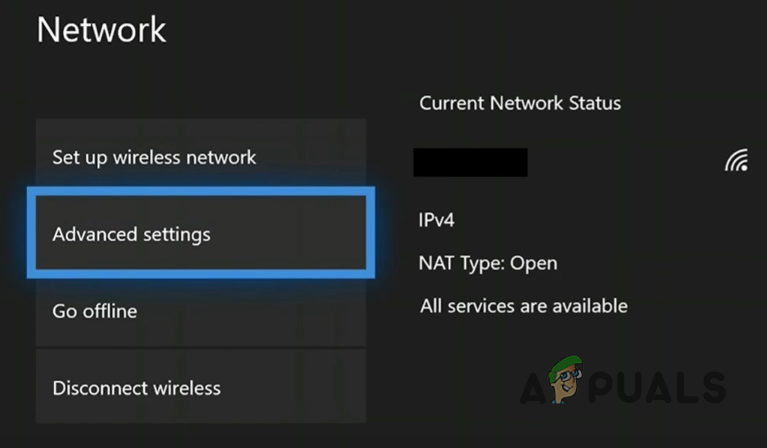
- Note down the IP and MAC Address of your console.
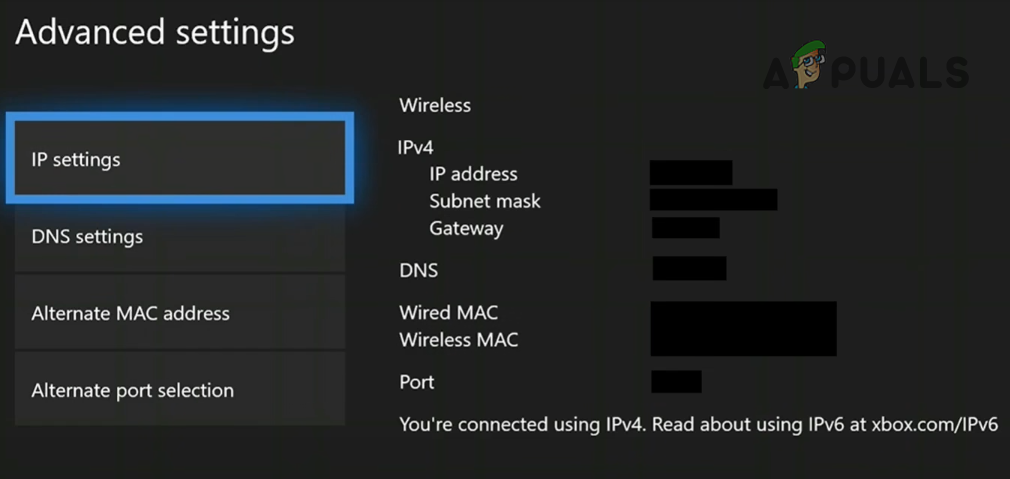
Finding the IP and MAC Address of your Xbox One
Xbox Series S/X:
- Go to your dashboard and press the Xbox button on your controller to open the guide menu.
- Select the “Settings” option located in the Profile and System category.

Opening Settings Menu of your Xbox Series S/X - In the General section, select the “Network Settings” option.
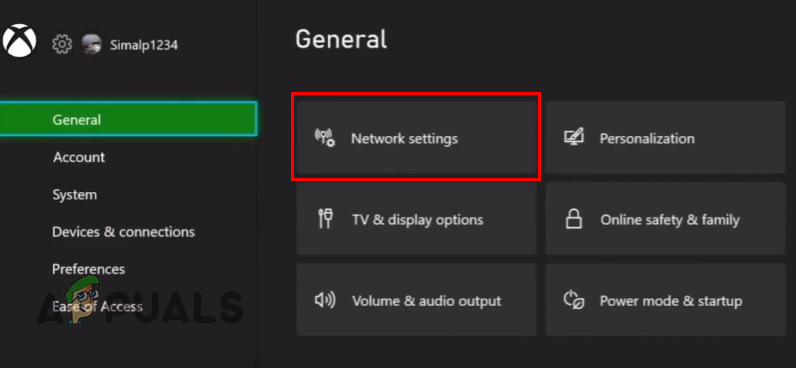
Opening Network Settings of your Xbox S/X - Select “Advanced Settings.”
Opening Advanced Settings - Note down the IP and MAC Address of your console.
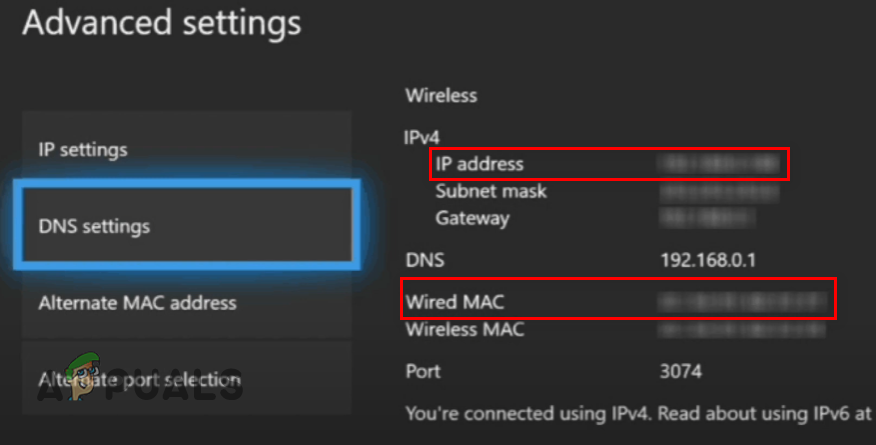
Finding the IP and MAC Address of your Xbox Series S/X
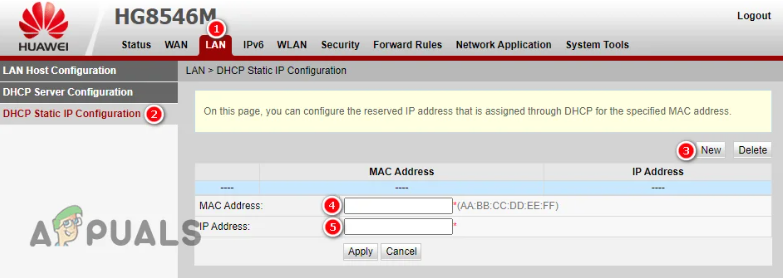
Now, open the settings menu of your router as you did before and look for a setting named “Static IP Configuration”. Search online for help if you cannot find the setting.
Note: Some router models do not allow users to manually assign static IPs. If you have such a router, contact your ISP and ask them to assign a static IP for your Xbox.
After navigating to the setting, click on the “New” button and enter the MAC and IP Address of your console and click Apply. You will have to restart both your router and Xbox for these changes to take effect.
Now that you have assigned a static IP to the console, you can finally forward the required ports. For this, open your router’s setting menu again and locate the Port Forwarding page. It is usually named “Port Forwarding”, “Virtual Server”, or “Forward Rules”.

Note: If there is no such Port Forwarding section in your router’s menu, your device likely does not allow manual Port Forwarding. In this case, you will have to contact your ISP and ask them to forward the ports for you.
Once you’ve found the page, follow these steps to forward the ports:
- Click on the “New” option and press “Add.”
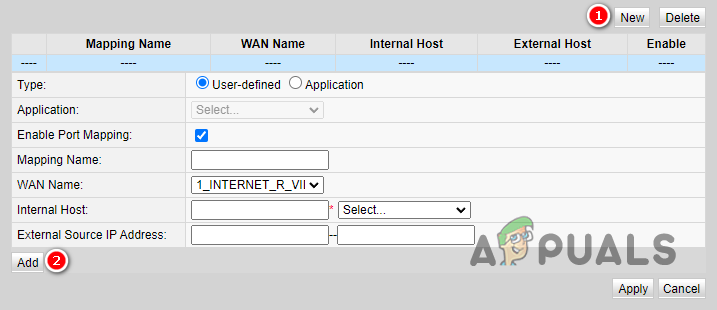
Adding new Ports - Enter any suitable name, such as Ports for Remote Play.
- Enter your console’s IP Address in the “Internal Host” (the field’s name depends on the router model) field.
- For the Protocol, first, select “TCP” and type one of the TCP ports from the list above in the “Internal port number” and “External port number” fields (the field’s name depends on the router model).
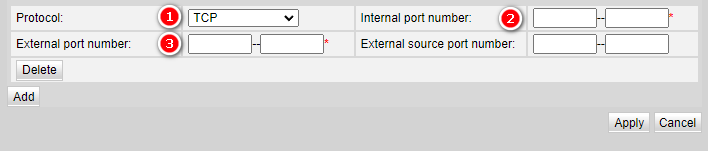
Entering Ports - Press the “Add” button to add the ports.
- Change the Protocol to “UDP” and then type one of the UDP ports from the list above in the same way.
- In this way, add all the ports from the list and then click on Apply to save the changes.
After successfully forwarding the ports, restart both your router and console to make the changes come into effect. Remote Play should now finally work without any issues.


