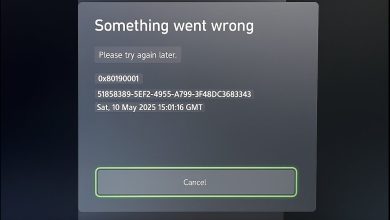
How to Fix Error Code: 0xE0E8000F in Xbox?
The Xbox Error Code 0Xe0e8000F typically occurs after a pending update fails to install. This problem is confirmed to occur on both Xbox One and Xbox Series (S / X).

When troubleshooting this issue, you first have to check if there’s a problem with your profile or if temporary data is causing this issue.
Other potential causes include a bad MAC address, bad DNS, network inconsistency, or a scenario where your console is actually enrolled in the legacy Insider program.
Update: As it turns out, this update error can also occur if external storage is connected to the Xbox while the update is installed.
If you’re experiencing the same 0XE0E8000F issue, let’s go over a series of confirmed fixes that other affected users have used successfully.
1. Sign back in with the Xbox profile
One of the most common scenarios that will ultimately trigger the 0XE0E8000F is when you’re dealing with an account inconsistency caused by a long idle period.
After looking at various user reports, it’s clear that this is an old issue that has been around since the Xbox One era. Fortunately, the fix is the same for current-gen consoles (Xbox Series S / X) as it was for last-gen – You’ll need to sign out of your Xbox profile before signing back in to fix the issue.
Here’s a quick guide that will walk you through the entire process:
Note: The instructions below assume that you are not in control of your console. If you are currently signed in with your account, start directly with step 5.
- Make sure your console is on the home page and is not in sleep mode.
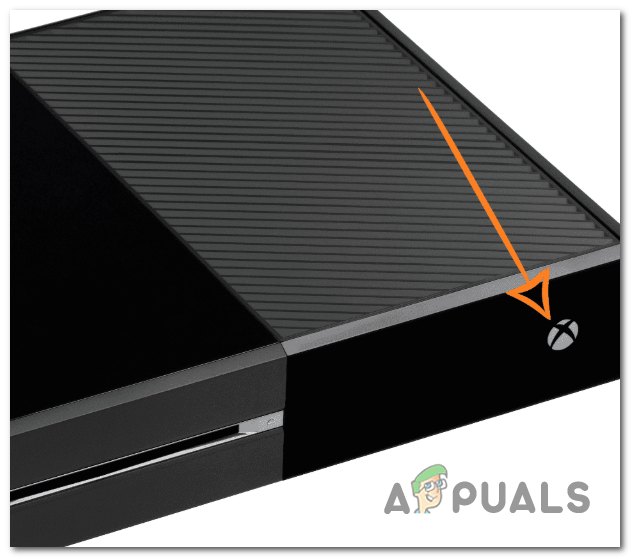
- Press the Xbox button on your controller to bring up the guide menu.

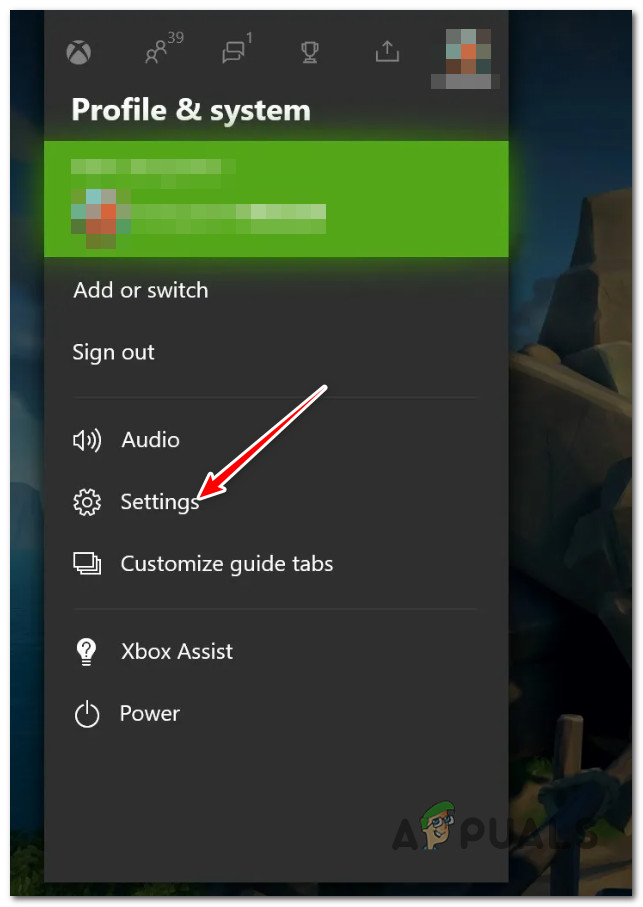
Press the Xbox button on Xbox controller - From the guide menu, go to Profile & system.
- Next, type Add or switch, then select your profile from the list.
- Press the Xbox button once again to return to the guide menu.
- Go to Profile & system, select Sign out, then select your account.
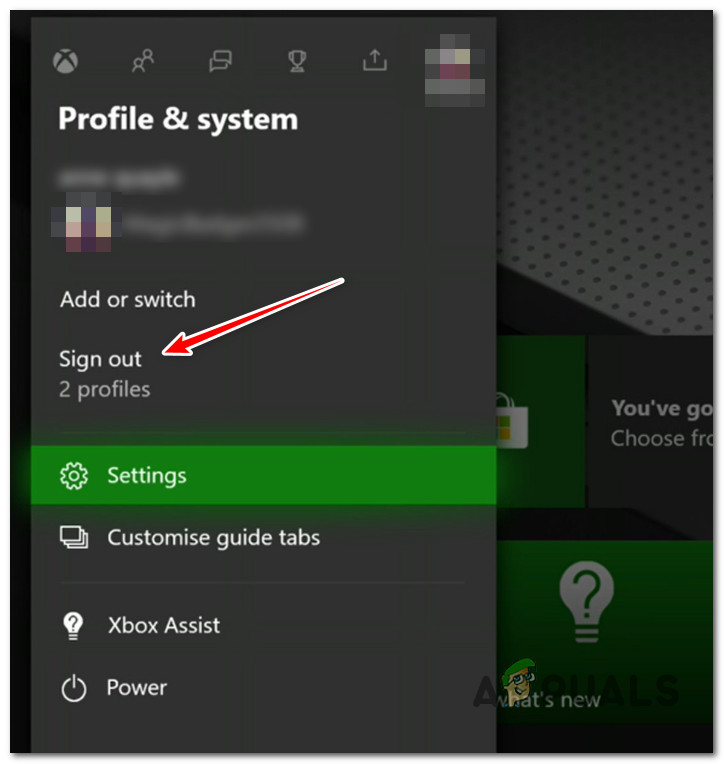
Signing out of your account - Confirm the operation, then wait until you are signed out.
- Press the Xbox button on your controller once again, then select your account once again to sign in again.
2. Power cycle Xbox console (hard reset)
Temporary data is yet another common culprit that might trigger the 0XE0E8000F, especially if you previously confirmed that corrupted profile data is not causing this problem.
In this case, the next thing you should do is erase any temporary data that was saved between restarts by going for a power cycle procedure (also known as a hard reset). This procedure will have the benefit of removing any accumulated temporary data that might mess with the firmware update.
Note: This approach has been proven to work on Xbox One and Xbox Series S/X. The methods below are applicable to both current-generation and previous-generation consoles.
Here’s how to perform a power cycling procedure (hard reset) on your Xbox console:
- Start by making sure that your console is switched on and that no games are running in the background.
- Press and hold the console’s power button (not the controller’s) for about 10 seconds, or until the console’ LEDs turn off.
Press the Xbox Power button - Before attempting to restart your console, manually disconnect it from the electrical outlet.
- Wait at least one minute before reconnecting the power.
- Restart your console to see if the extended Xbox animation sequence is displayed.

Startup animation on Xbox - Once your console has restarted, reestablish the Wi-Fi connection and see whether the disconnection occurs again.
If the problem is still not resolved, proceed to the next solution.
3. Clean the MAC address
If you continue to experience the 0xe0e8000f error while attempting to install a pending console update, you may also consider removing the current MAC address. You may do so by navigating to the Network settings screen. This method will work on both the current-gen and last-gen versions of Xbox.
Note: MAC (Media Access Control) addresses are 12-character alphanumeric identifiers used to distinguish electronic devices. You may set a MAC address to your Xbox console, but doing so may hinder its ability to connect to other devices and your ability to play online.
To ensure that the custom MAC address is not creating network instability, we suggest removing it from your console’s network settings. There’s no advantage to keeping a hard-coded MAC if you’re not actively using it.
Here’s how to remove the MAC address from your console:
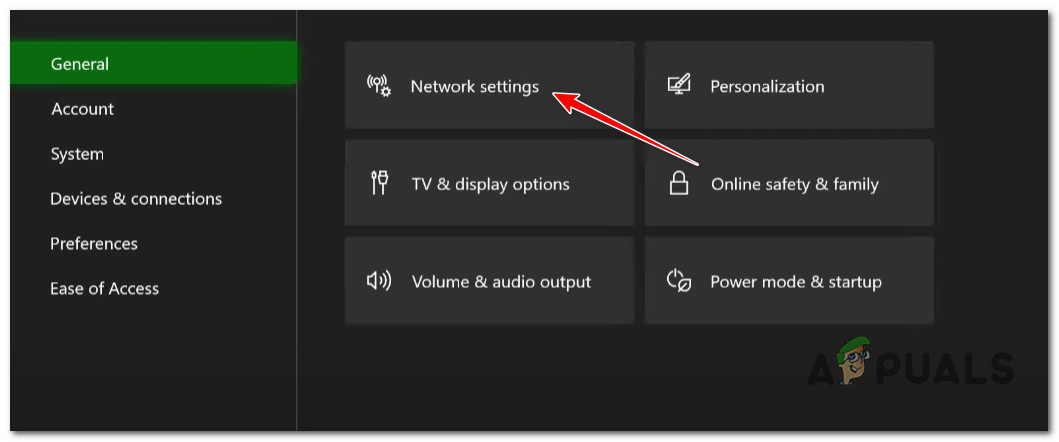
- Navigate to the home screen of the Xbox console, then pick Settings from the vertical menu on the right or left.
- Select the Network tab from the navigation menu next.
- Select Network Settings from the newly displayed menu.
Access the Network settings on Xbox - After doing so, select Advanced Settings and the alternative MAC address option.
- Next, clear the alternative MAC address using the button designated for this purpose.
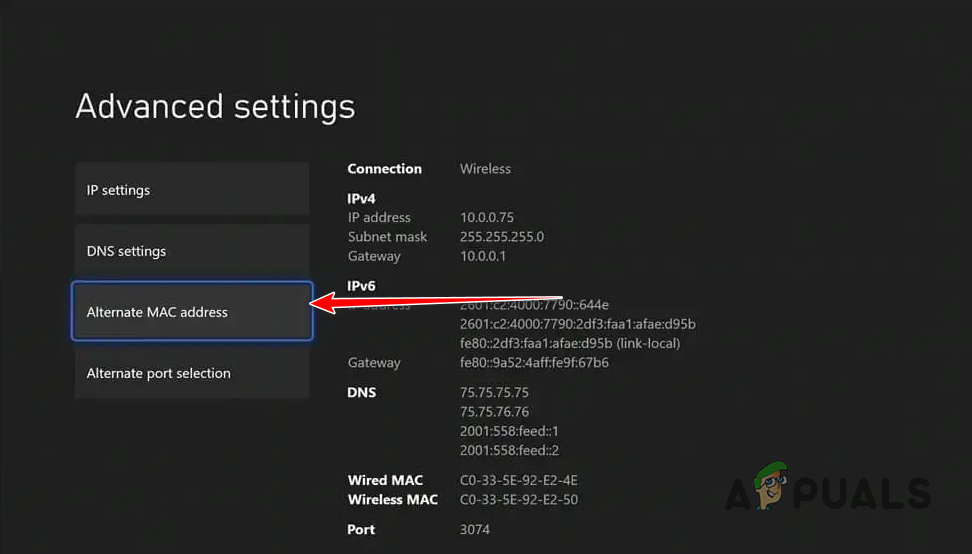
Accessing the MAC address menu - Restart your console and wait for it to boot back up when the default MAC address has been restored.
- Determine if the sign-in problem persists following a console reboot and Wi-Fi session connection.
4. Change the Domain Name Address
If the alternate MAC was not responsible for this issue, the next thing you should investigate is a protocol issue.
It’s not uncommon for the update will fail is broken because IPv6 packets are delivered on an IPv4 network, which causes data packet loss.
In this scenario, you should be able to resolve the issue by visiting your console’s network settings and updating the DNS (domain name address) for IPv6 to a more stable equivalent from Google or Cloudflare.
Note: This method is confirmed to be effective for both Xbox One and Xbox Series S/X consoles.
If you do not know how to change the DNS server for your Xbox console, follow these steps:
- Press the Xbox button on your controller to access the guide menu.
- Next, choose Settings by heading to the Settings section (gear icon).
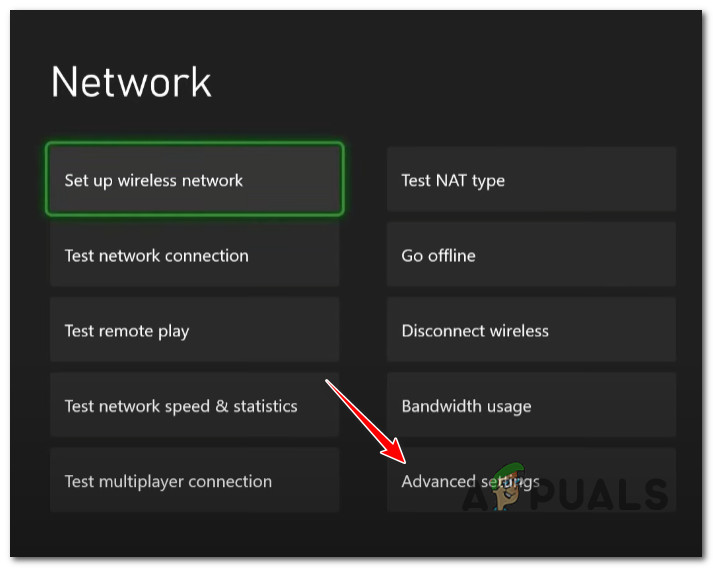
- Navigate to the Network settings in the Settings menu of your Xbox console.
- Navigate to the Advanced settings to access the DNS settings.
Access the Advanced Settings menu - You must now select the Manual option in order to update the DNS server manually.
- Replace the Primary IPv4 DNS and Secondary IPv4 DNS with the following:
1.1.1.1 as Primary DNS for IPv4
1.0.0.1 as Secondary DNS for Ipv4
Note: This is the DNS range provided by Cloudflare. You can also use the following if you want to accommodate Google’s DNS range:
8.8.8.8 as Primary DNS for IPv4
8.8.4.4 as Secondary DNS for IPv4
- Submit the modifications and restart your console after you’re done.
- Attempt to install the pending update once again and see if the problem is fixed.
5. Connect to Hotspot Network (temporary fix)
The 0xe0e8000f error during the installation of a pending Xbox firmware might also occur due to a network inconsistency that is beyond your control.
For example, if your ISP (Internet Service Provider) is using Level 3 nodes, you can expect to get this issue continuously regardless of the DNS range that you use.
The right way to address this issue is to get in contact with your ISP and ask them to lift your restrictions.
But if this is not an option, one quick way to install the pending firmware update is to connect your Xbox to a hotspot network long enough to apply the update. On a hotspot network, you should be able to install the update without getting the same error.
Here’s a quick guide on connecting your Xbox console to a Hotspot network to bypass the 0xe0e8000f error:
Note: The instructions below will work on both Xbox One and Xbox Series S / X.
- First things first, enable the Hotspot network on your Android or iOS device.
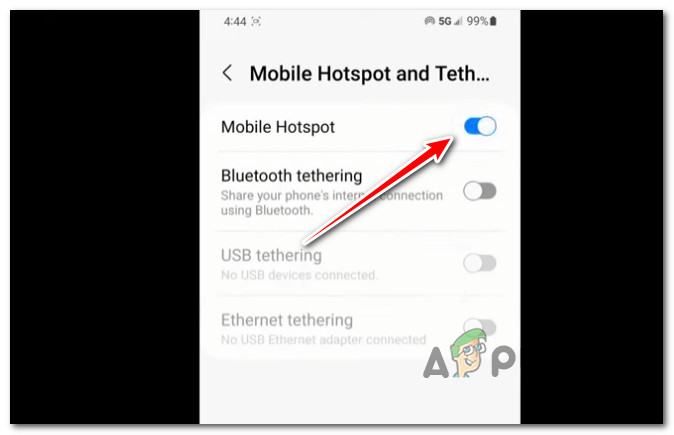
Enabling the Hotspot on Mobile device - On Android: Go to Settings > Connections > Mobile Hotspot and Tethering > Mobile Hotspot, configure a hotspot network, and enable it.
- On iOS: Settings > Mobile Data > Personal Hotspot or Settings > Personal Hotspot and configure a hotspot, and enable it.
- Before you move to your console, make sure you make a note of the associated name and password of the hotspot you’ve just created.
- On your Xbox, press the Xbox button to bring up the guide menu, then access the All Settings menu.
Access the Settings menu on Xbox - Inside the Settings menu, go to General from the left menu, then move over to the right menu and access the Network Settings.

Access the Network settings menu - From the Settings menu, select Set up wireless network.
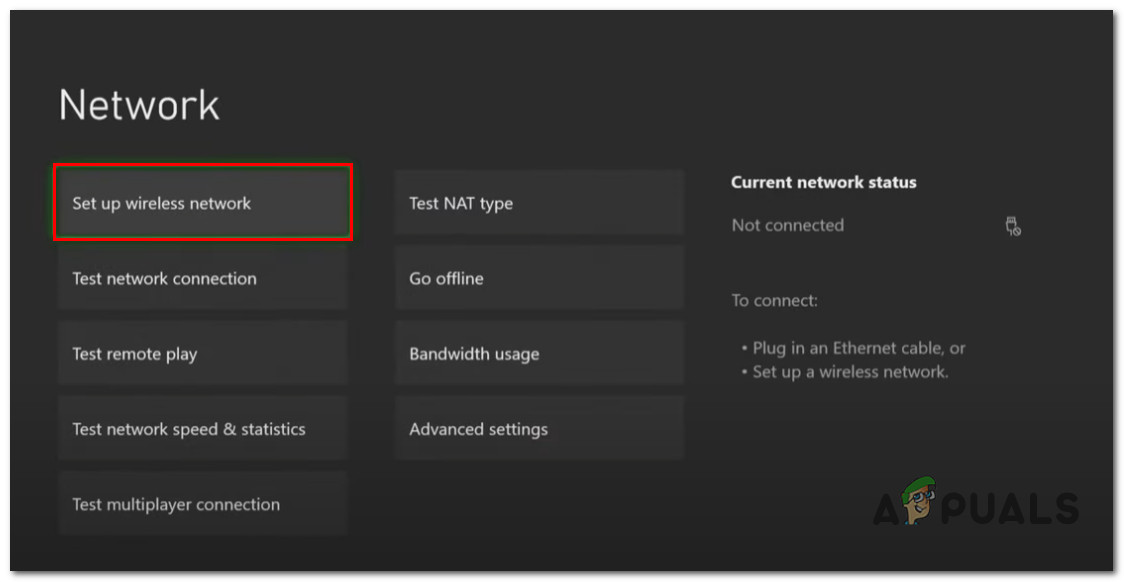
Set up a Wireless network - On the next screen. press X on your controller to start scanning for available networks, then press A on your hotspot network to select it.
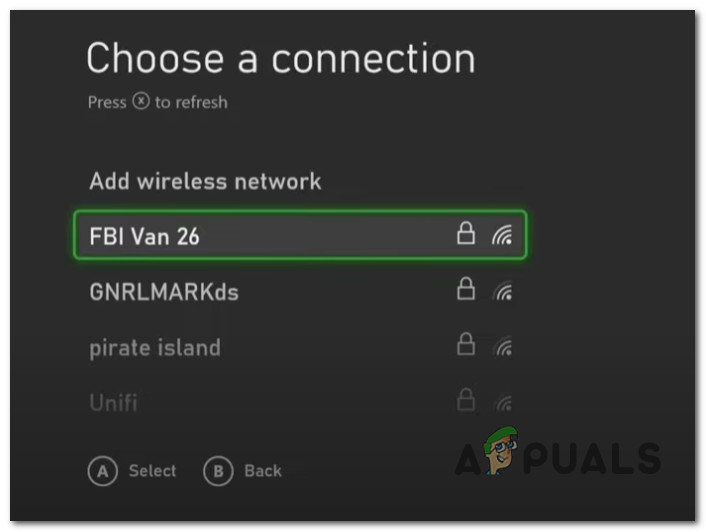
Selecting the hotspot network - Enter the username and password for your recently created hotspot connection and wait until the connection with the network is established.
- When you see the ‘It’s all good‘ message, reboot your console and attempt installing the pending firmware update once again.
6. Remove Xbox from Insider Program App Legacy (if applicable)
Another reason why you might experience the 0xe0e8000f error is that you previously enrolled your Xbox console to an Insider channel that gives you access to beta firmware versions.
If this scenario is applicable, you can fix this issue by removing your console from the Xbox Insider program. This action will force your console to disregard the beta update and look for the latest public firmware version. Most often than not, this will help you bypass the 0xe0e8000f error.
Here’s a quick guide to unenrolling your Xbox console from the Xbox Insider program:
Note: This method will work on both Xbox Series S / X and Xbox One.
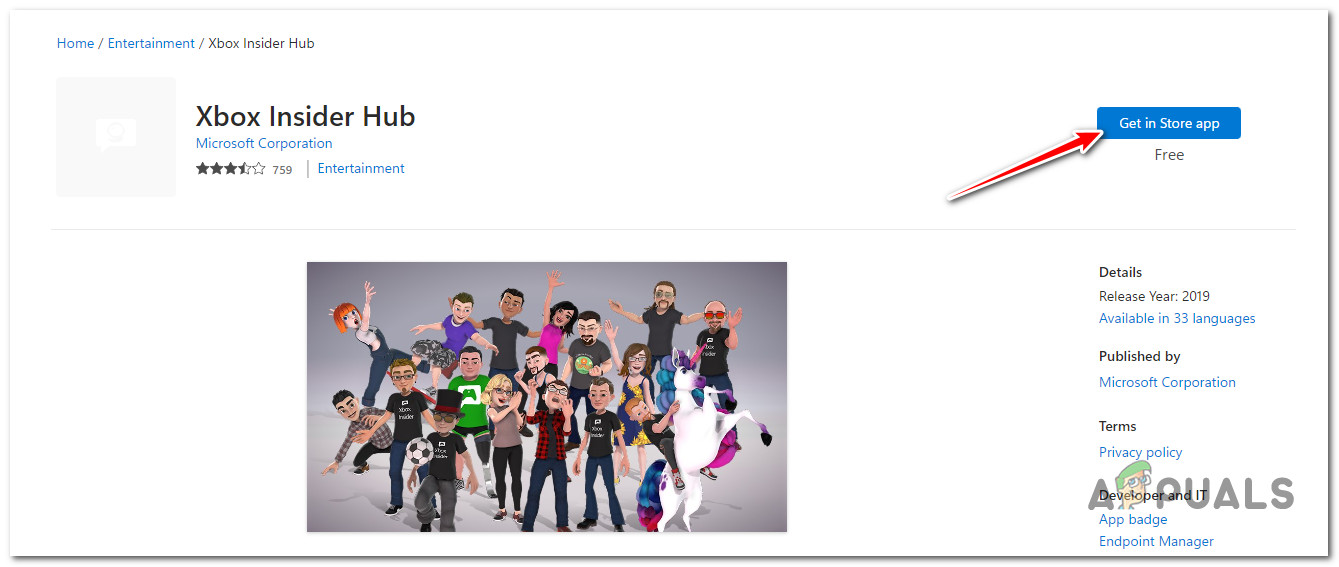
- Sign in on any Windows PC (Windows 10 or Windows 11) using the same Microsoft account that you used to register to the Xbox Insider program.
- Open the Xbox Insider Hub. If this UWP app is not installed on your PC, use this official link to download and install the Xbox Insider Hub.
Downloading and Installing the Xbox insider hub - Inside the Xbox Insider Hub, go to Settings and click on Manage Devices.
- From the next screen, select your Xbox console from the list and click on Done to unenroll it from the Xbox Insider program.
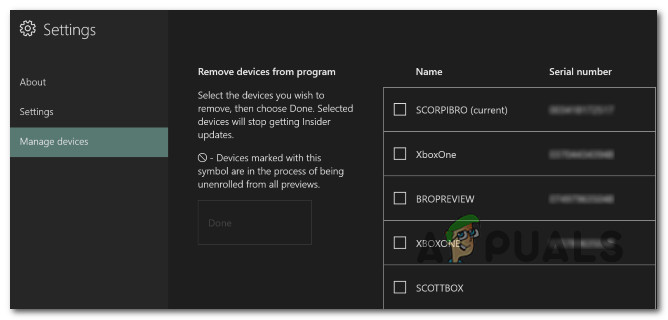
Unenrolling the console - At this point, you have completed the disassociation of the console from the Insider program and removed the access to preview and beta builds. Restart your console and see if the 0xe0e8000f error is now fixed.
7. Disconnect external storage
If you have an external HDD connected to your Xbox, disconnect it from your console before attempting to install the pending update once again.
Several affected users have reported that once they ensured that every non-essential peripheral has been disconnected, they were able to install the pending firmware update without seeing the 0Xe0e8000F error.
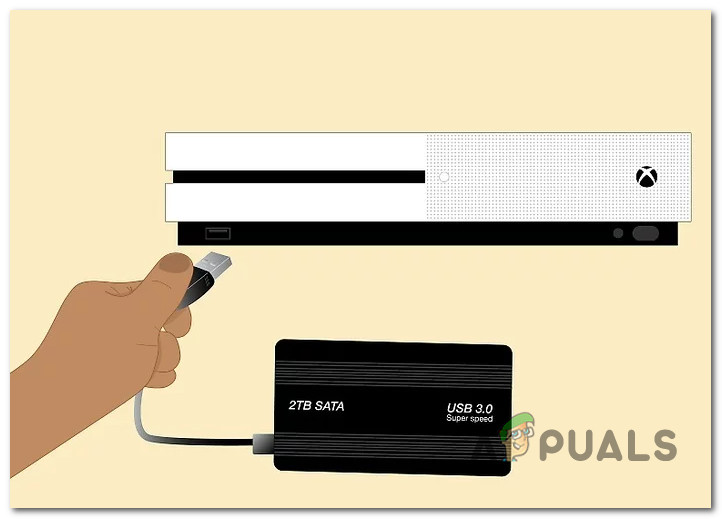
Note: If you are experiencing this issue on Xbox Series S / X and you’re using the official Seagate Storage expansion, unplug it from its port and reboot your console.
Once every external storage device has been removed, unplug the ethernet cable (or disconnect the WI-Fi), then disconnect the power source before plugging them both back in and checking if the update installs without the 0xe0e8000f.
8. Restart and reset the router
Another potential fix that might help you bypass the 0xe0e8000f error when installing an Xbox firmware update is a simple router restart or reset. This is effective in situations where temporary network data is inhibiting the installation of the pending firmware update.
There are two ways to confirm that your router’s temporary data is not causing the issue.
Generally, a simple restart will resolve connectivity difficulties, so let’s start here. Examine the back of your router, then press the On/Off button to power it down.
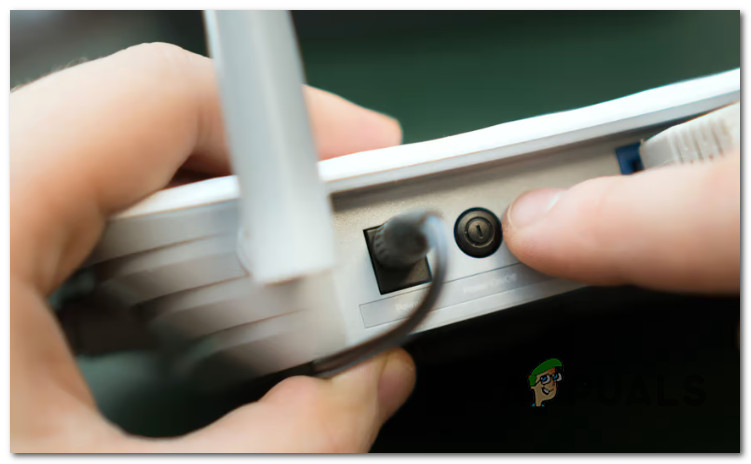
Note: Wait one minute before unplugging the power cord from the socket. This will delete any temporary data your router may be storing and discharge its power capacitors.
Then, power up your router by pushing the power button a second time, and wait for Internet access to be restored. After internet connectivity has been restored, re-establish internet access and see if the firmware update is now installed.
If the problem persists, let’s perform a router reset next.
IMPORTANT: This operation will erase any network configuration changes you have made. This covers closed and open ports, devices on a whitelist, and prohibited connections.
If you want to go through with it, identify the reset button on the back of your router and hold it down for approximately 10 seconds with a sharp item until you see all the router’s LEDs will illuminate (they will all flash at the same time).
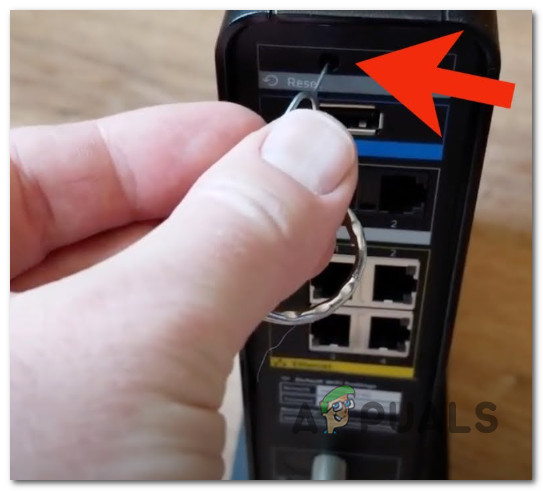
Note: If your ISP uses PPPoE (Point-to-Point Protocol over the Internet), you will need to submit your ISP’s login credentials again to reconnect to the Internet once this operation has been completed.
9. Hard Reset your Xbox console
If none of the methods above have allowed you to fix this issue, the last resort option available at this point is to go for a hard reset.
Note: Before going this route, we recommend trying out all the other solutions indicated above, as doing so might result in the loss of all Xbox data currently stored on your console.
Keep in mind that once you go through with this procedure, you must redownload any games that are presently installed on your console. Additionally, save game files will be erased, so transfer them to the cloud before proceeding (or put them on an external USB stick).
Here’s how to hard reset your Xbox console:
Note: The steps below are universal and will work on both Xbox One and Xbox Series X.
- Start up your console and press the Xbox and eject buttons simultaneously as soon as you see the initial screen.
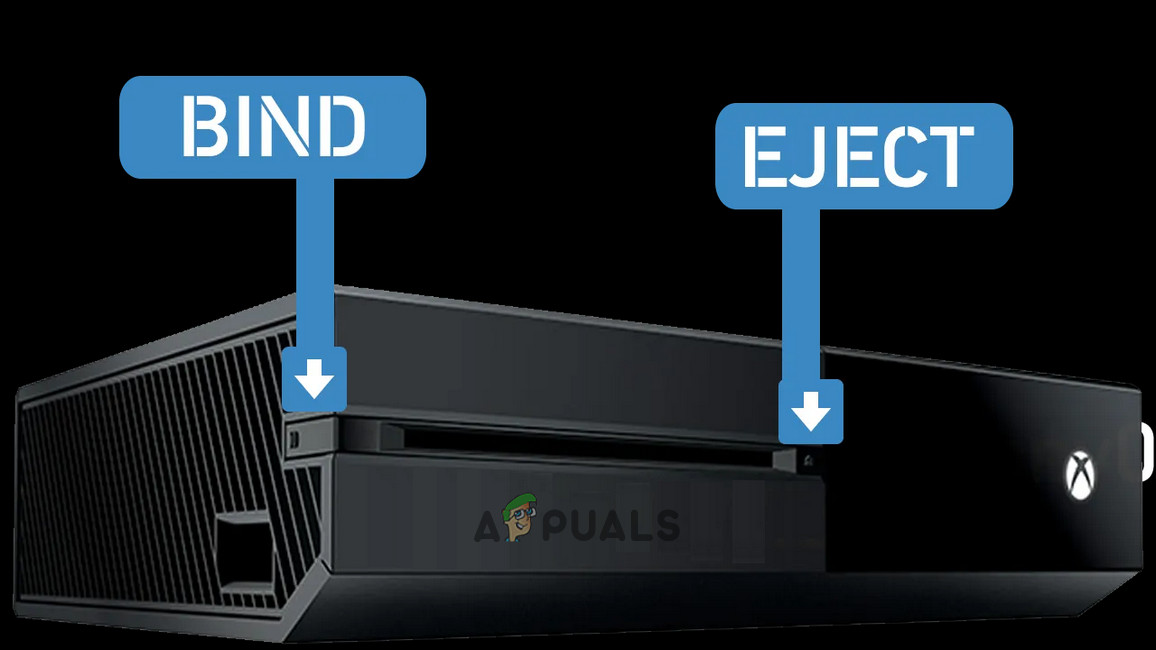
Opening up the Troubleshooting menu on Xbox - Once you see the Troubleshooting tab, select, “Reset this Xbox” and then confirm your choice.
- From the next menu, select System from the drop-down option, then select Reset and remove everything.
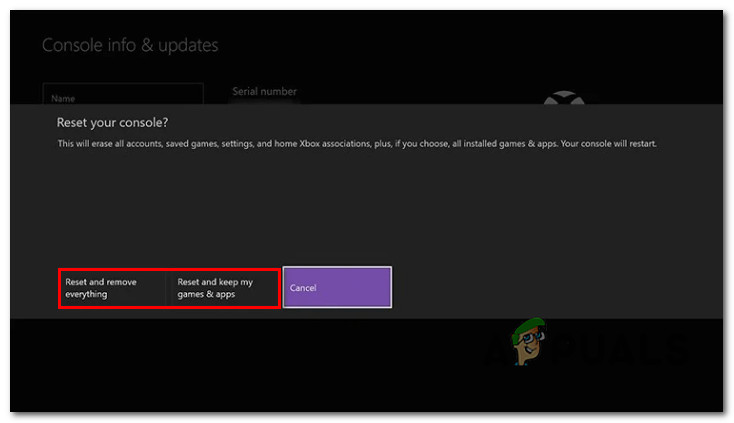
Reset your Xbox console Note: If you want to keep your game data, choose Reset and keep my games and apps instead.
- Once the procedure is complete, re-download the problematic game and verify that the issue has been repaired.