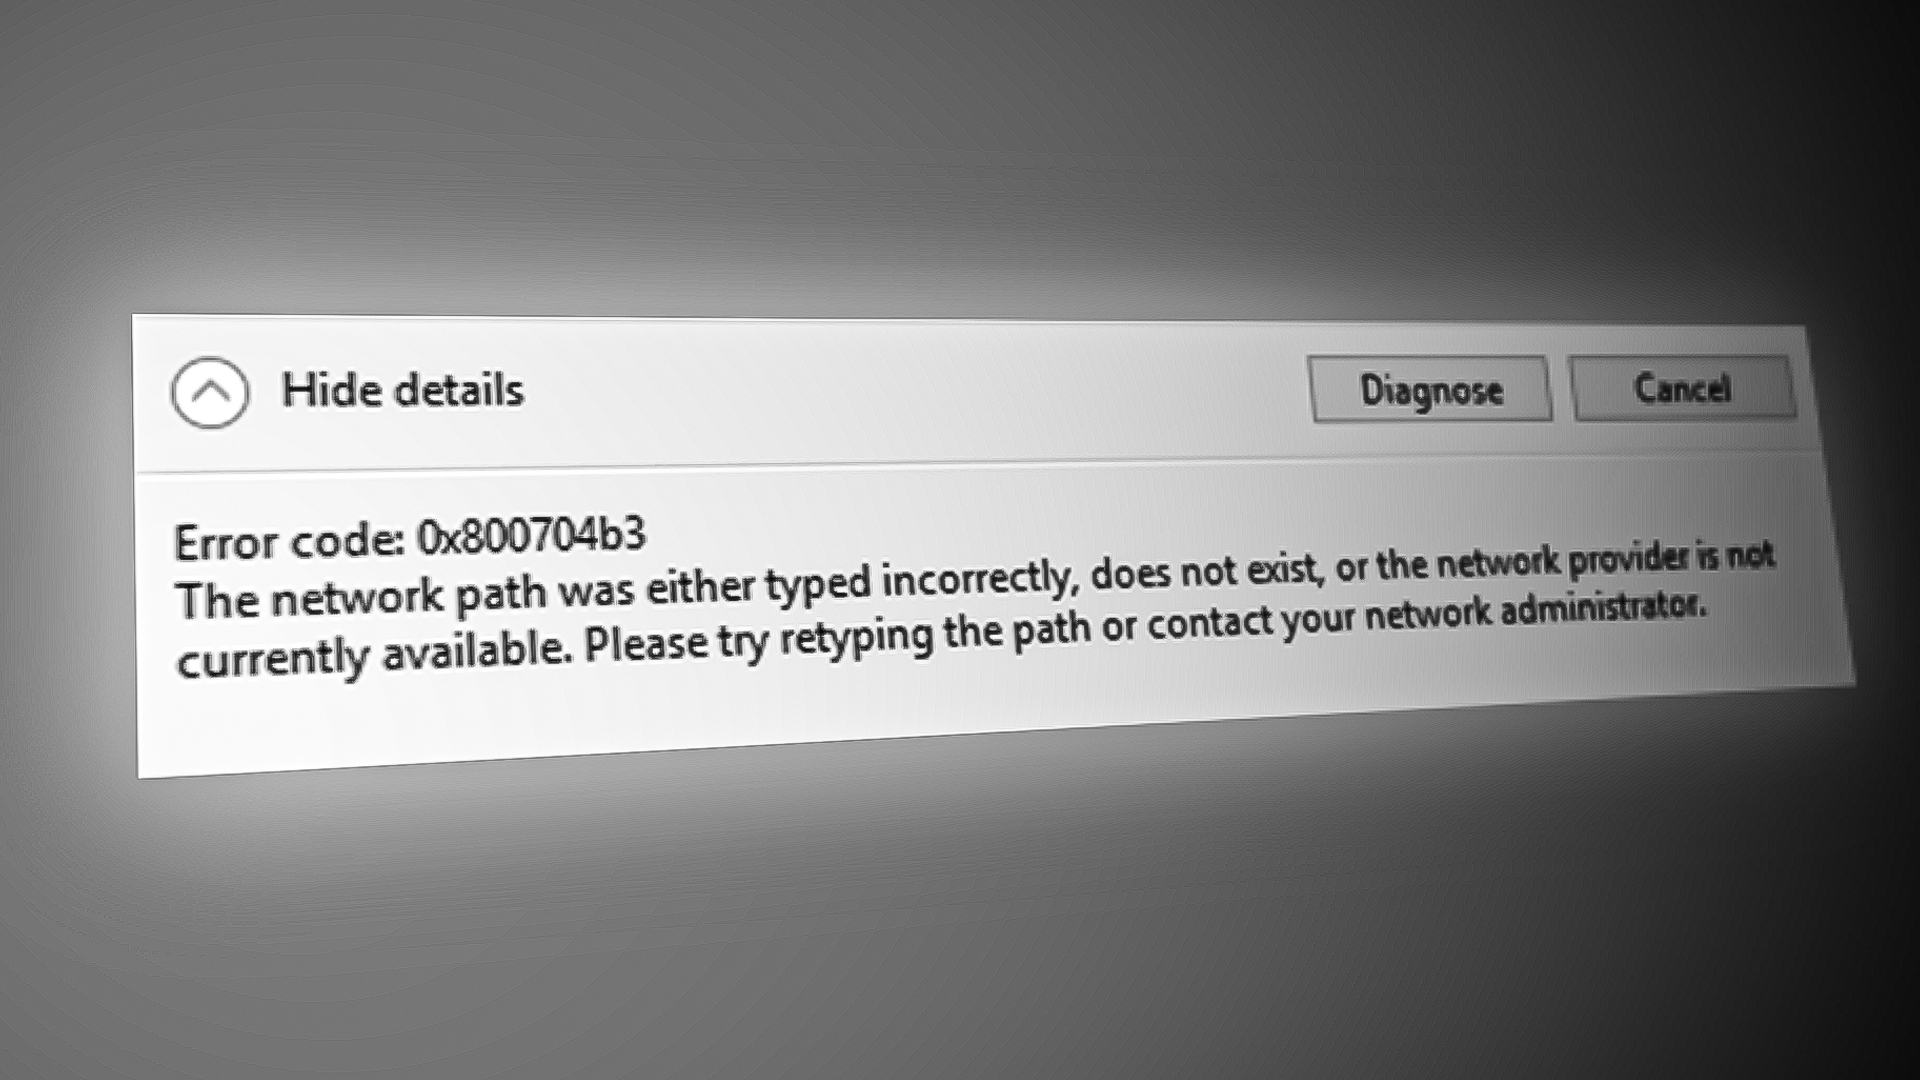
8 Fixes for Network Error Code: 0x800704b3 in Windows
When the 0x800704b3 error occurs in Windows, you are unable to connect to any network, cannot access the C drive, and some applications won’t open either. It can be very frustrating as more often than not, you’ll need to access the internet on your PC or laptop.
If your network services are disabled in the background, you will be getting this error on your system. It’s obvious that if these services are turned off, the computer won’t connect to the internet, and hence the network error would show up.
So, in order to start the network services again, you can either use the Task Manager or the Command Prompt.
We’ll explain all of the solutions for the Windows 0x800704b3 error below, and you can go through each one of them to try them out.
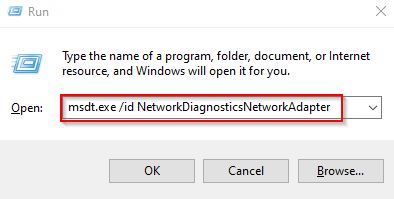
1. Run Windows Network Adapter Troubleshooter
This is the most basic way to counter a network issue. Since the error we are facing here has to do with the network, running the built-in Network Adapter troubleshooter can help fix it.
Follow the steps below to run the troubleshooter.
- Press Win + R keys together to open run and inside the text field enter this command to run troubleshooter:
msdt.exe /id NetworkDiagnosticsNetworkAdapter
Network Adapter command in Run
- Click on Next to start the scan.
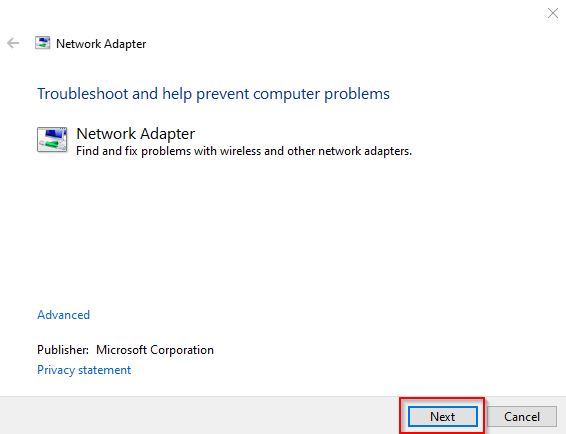
Network Adapter screen
- Wait for the troubleshooter to inspect and fix the issues.
- Once done, see if you can connect to your network now.
2. Run SFC and DISM Scans
The SFC and DISM scans will help in identifying and removing corrupt system files from your computer. Besides, it will also look for integrity violations and try to repair them as well. On top of that, if the problem is with your Windows image, these commands will fix it too. This process needs to be executed in Safe Mode. You can follow our guide about booting into safe mode for both Windows 10 and Windows 11 before performing the steps below.
Once done, then here’s how to run the SFC and DISM scans.
- Press the Windows key now and type cmd.
- Run the command prompt as administrator.
- Type in the following commands in order one by one:
sfc /scannow
DISM /Online /Cleanup-Image /CheckHealth
DISM /Online /Cleanup-Image /ScanHealth
DISM /Online /Cleanup-Image /RestoreHealth
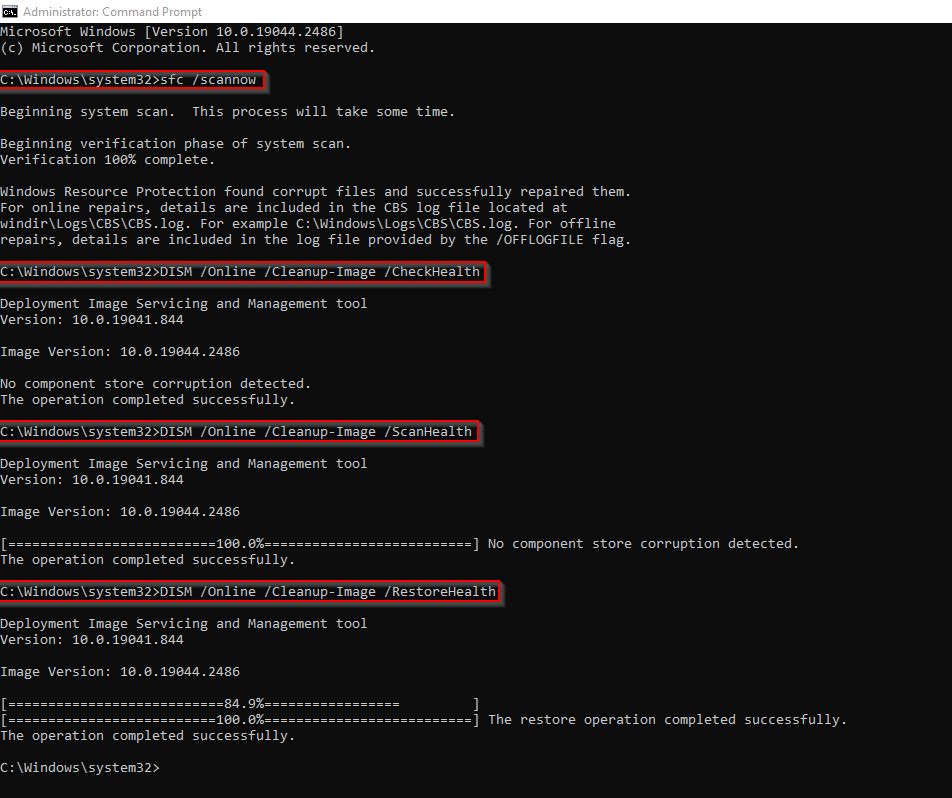
After the process is done, restart your PC to boot into normal mode and see if the error is gone or not.
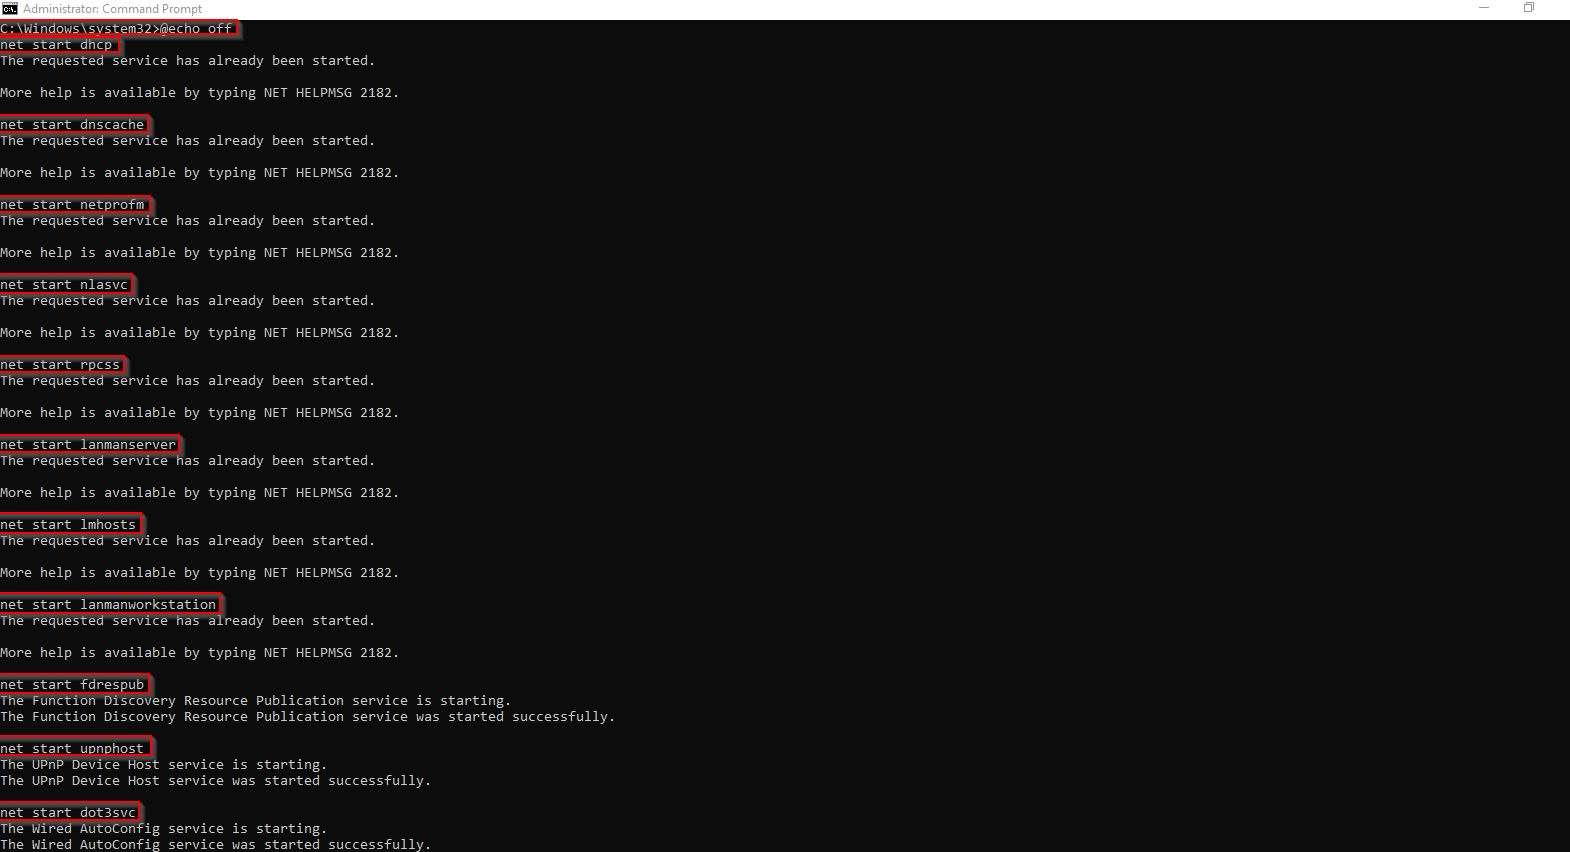
3. Change the Status of Network Services to Running
It’s pretty clear that you won’t be able to connect to the internet if some of your network services are stopped in the background. As a result, Windows will display the 0x800704b3 error. Therefore, running the network dependencies in the background through the Task Manager is recommended.
Here’s how to do it:
- Press the Windows key and type cmd in the search bar
- Open the Command Prompt as administrator.
- Now run the following commands one by one and connect to your network again:
net start dhcp
net start dnscache
net start netprofm
net start nlasvc
net start rpcss
net start lanmanserver
net start lmhosts
net start lanmanworkstation
net start fdrespub
net start upnphost
net start dot3svc
net start wlansvc
net start eventsystem
net start browser
net start wzcsvc
4. Start the TCP/IP NetBIOS Helper
This service allows users to print, share files, and log on to their network. In the event that this service is not running or the value data is wrongly entered, the NetBIOS Helper won’t run, and the user won’t be able to connect to the network. First, try to start the TCP/IP NetBIOS Helper service. If that shows an error, then move on to change its value data to 2.
Here’s how to carry out the whole process.
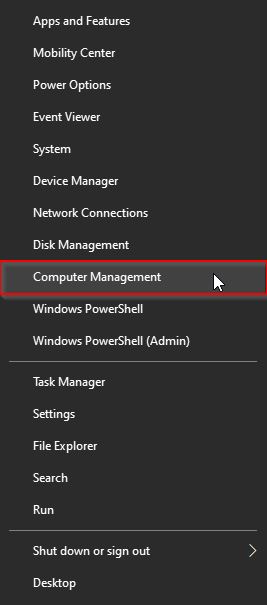
- Select Computer Management after right-clicking on the Start button.
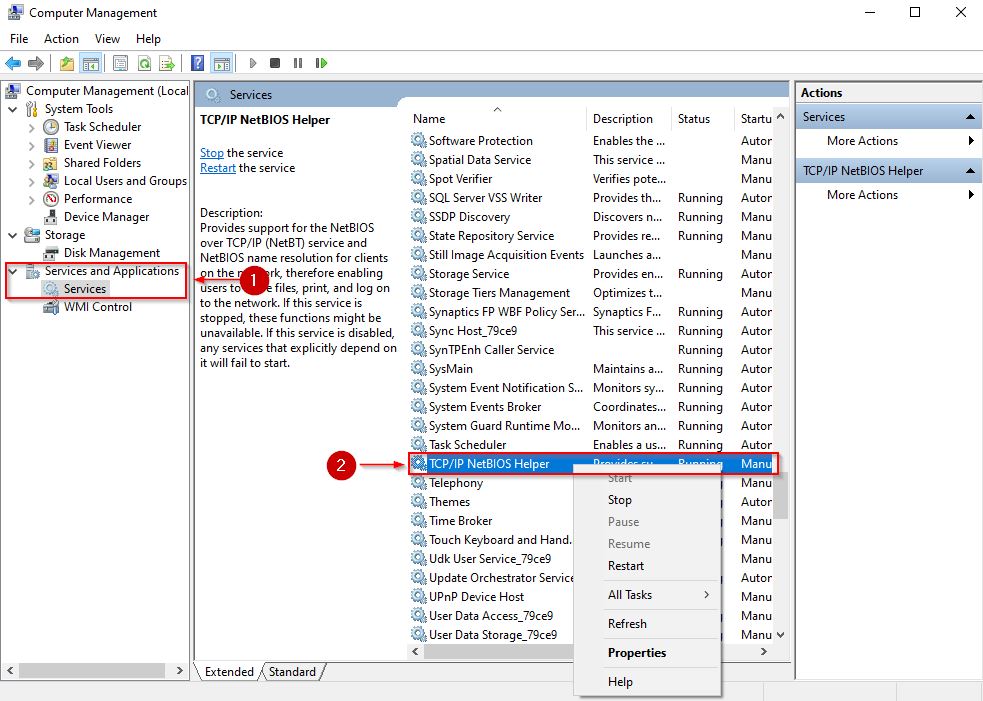
Computer Management option in Windows 10 - Expand the Services and Applications tab and click on Services.
- Now scroll down and right-click on TCP/IP NetBIOS Helper and select Start.
Computer Management Window - You can encounter an error that says “The system could not find the specified path” while starting the service. If so, press the Windows key and open the command prompt as administrator.
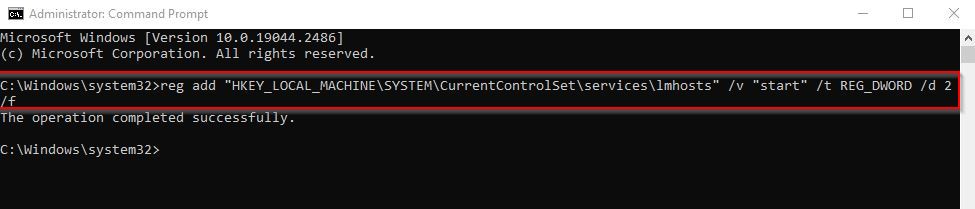
- Now run the following command to change the value data in lmhosts to 2:
reg add "HKEY_LOCAL_MACHINE\SYSTEM\CurrentControlSet\services\lmhosts" /v "start" /t REG_DWORD /d 2 /f
Value data changing command
- Check whether Windows is still showing the error or not after restarting your PC.
5. Disable SMB 1.0 Protocol
SMB is a network file-sharing protocol whose main purpose is to share access to different resources (files, printers, communication) over a network. There are three versions (SMB 1.0, 2.0, and 3.0) of the Server Message Block at the moment.
Version 1.0 is disabled by default. Therefore, if you have enabled it by mistake, your system will fail to connect to the network, and hence the 0x800704b3 error will show up in Windows.
But no worries, just follow the steps below and disable SMB Version 1.
- Click on the Start button and type Windows Features in the search bar.
- On the subsequent window, look for SMB 1.0 and uncheck the option.
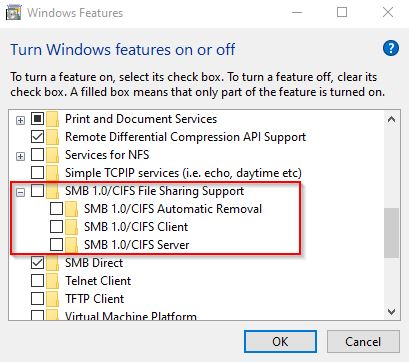
Uncheck SMB 1.0
- Click OK and restart your PC.
- Now check if you can connect to the network.
6. Create a New User Account
Sometimes the problem can be with the account you are using. It could be due to corrupted system files, viruses, or malware. You can create a new admin user account and see if the issue gets fixed or not.
- Enter the following commands after running the command prompt as administrator:
net user "account name" /add
net localgroup administrators "account name" /add
- Enter the name you prefer in place of “account name“
- Now see if the same error occurs in the new account or not.
If the error is gone, follow our guide to transferring all your data to the new account.
7. Perform an In-Place Windows Repair
This method will reinstall Windows without disturbing any files or applications on your computer. Moreover, if there are any corrupt or damaged system files, they will be repaired.
Make sure you use an admin account for the repair and only keep the mouse, keyboard, and LAN cable plugged in. Unplug the rest of the peripherals. Additionally, uninstall any third-party anti-virus software.
Now here’s how to carry out the process.
- Download the Media Creation Tool from the Microsoft website.
- Click on Run.
- Click Yes on the UAC window.
- Once the Media Creation Tool downloads, you will see the Windows 10 setup.
- Accept the license terms.
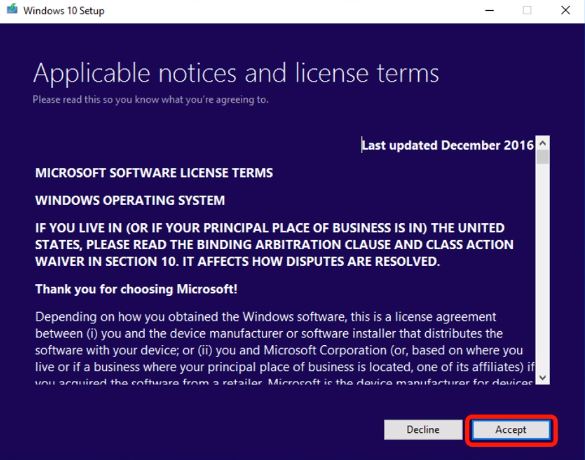
License terms screen
- Select Upgrade this PC Now in the proceeding window and click Next.
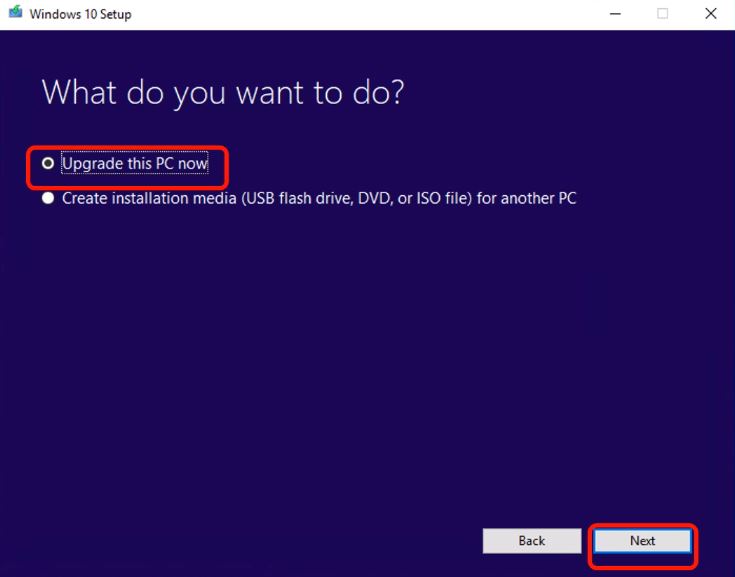
Upgrade this PC now screen
- Now click Install on the Ready to Install screen.
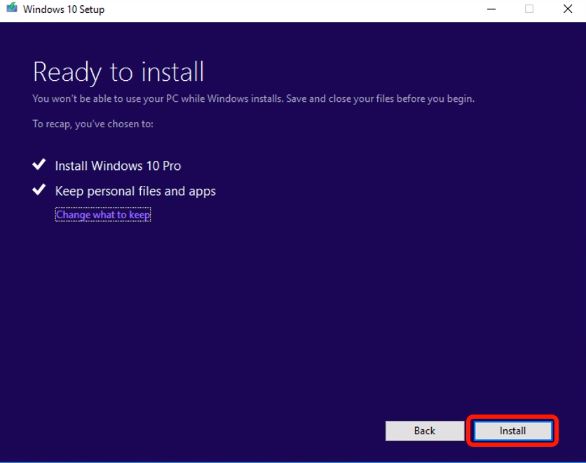
Ready to install screen
- Your PC will restart multiple times during the installation process.
- Once done, sign in with your admin account.
- Click Accept after selecting the Privacy Settings.
- Decline or Use Cortana on the next screen.
- Now the home screen of your system will show up and you can successfully sign in.
- After signing in, check if the error has been countered or not.
8. Custom Install Windows
If none of the processes above work, try to reinstall Windows via an ISO file to get rid of the 0x800704b3 error. Don’t worry, you won’t lose any of your data. After Windows gets installed, you can recover the files from the Windows.old folder.
Here’s how to custom-install the latest version of Windows.
- Use your Windows Installation Media (USB or Disc) to start the setup.
- Move to the next screen after pressing Enter or any other key.
- Wait until the Windows logo is showing up.
- Afterward, select your preferred language, time, and input method.
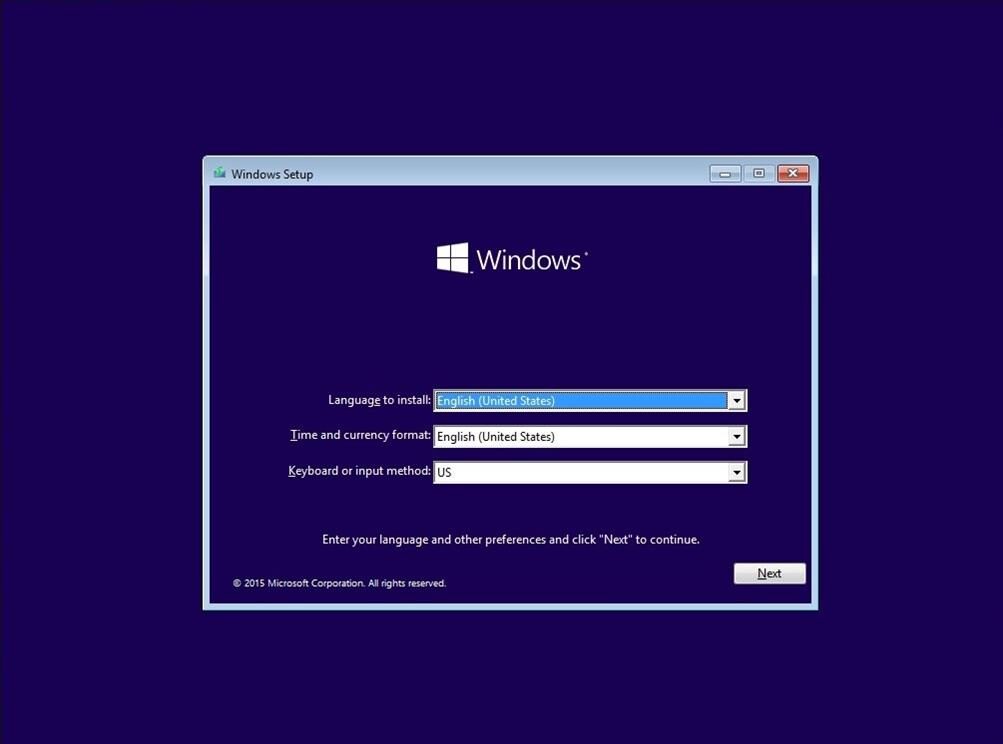
Windows setup language, time, and input method screen - Click on Install Now.
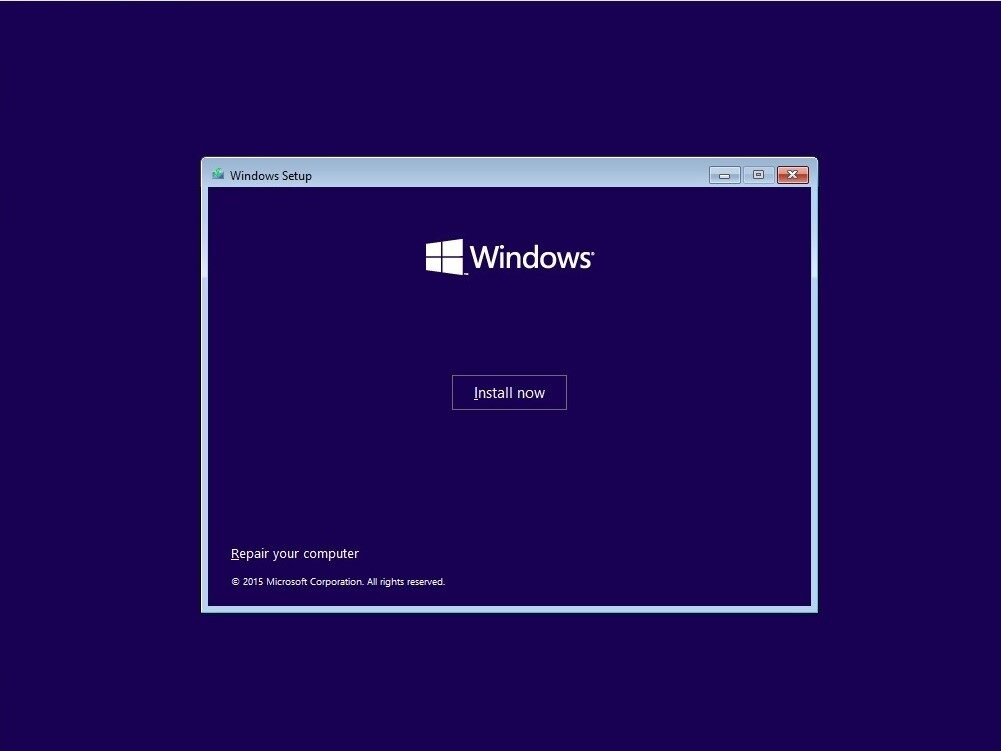
Install Now screen - Click Next on the license prompt.
- Now click Custom and then choose the Primary partition.
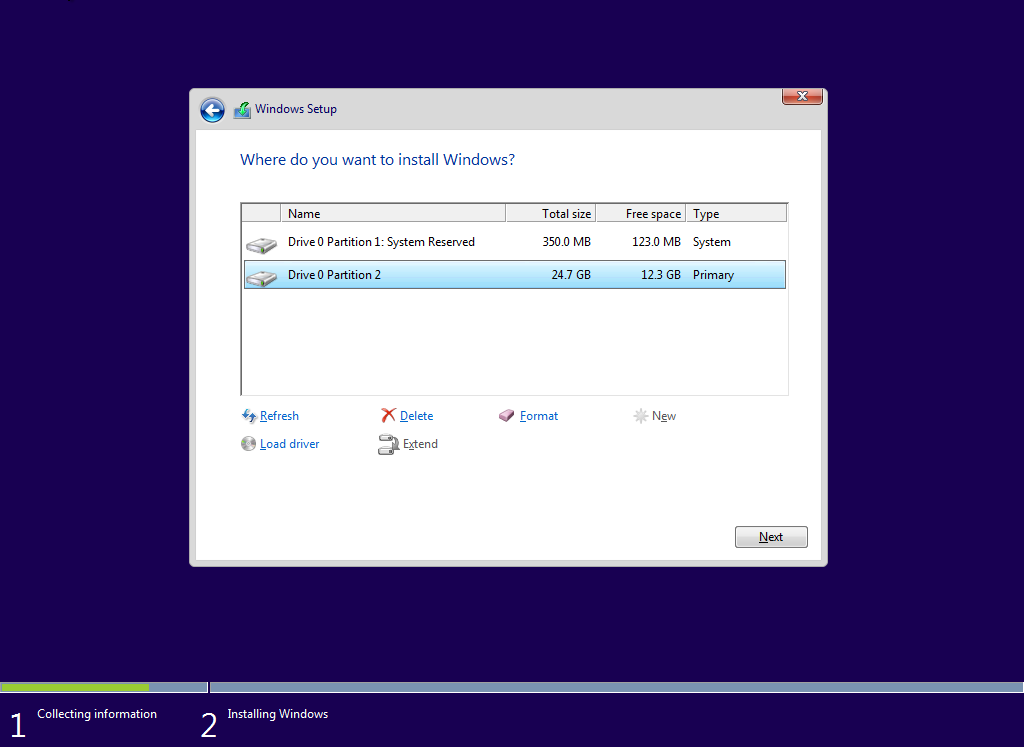
Primary Partition screen - Click Next and then click OK on the warning prompt.
- Wait for the installation.
- After this, Windows will restart automatically and again reboot into setup.
- After Windows restarts for the last time, you can customize the settings.
- Windows will now look for an active network connection and if the issue has been resolved, it will connect to the network.


