How to Fix Twitch ‘Error 1000’
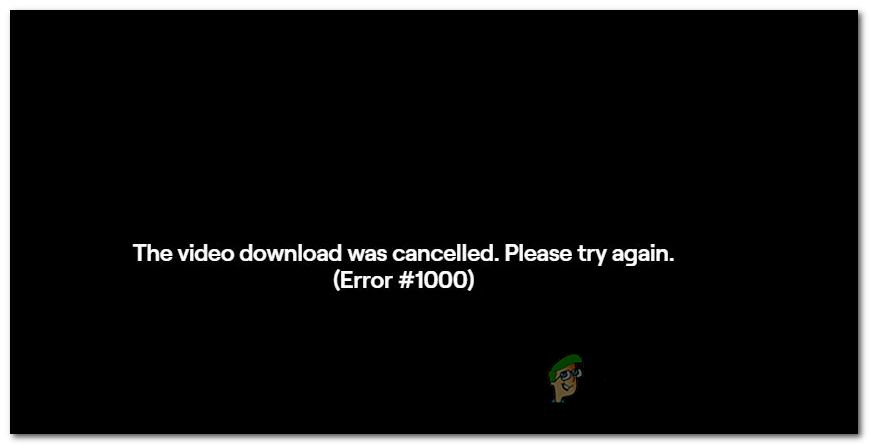
Some Twitch users are currently having intermittent issues where every couple of minutes the steam stops playing and they end up with the Error Code 1000. Some users report that the error message is ‘Media Playback Aborted‘ while others see ‘The Video Download was canceled‘.
After investigating this particular issue, it turns out that there are multiple causes that might contribute to the apparition of this error code in Twitch:
- Corrupted Twitch cookie – As it turns out, in most documented cases, this problem ends up being related to a cookies issue. If this scenario is applicable, you can fix the issue either by specifically deleting the Twitch cookies or by doing a complete cookie sweep on your browser.
- Outdated Google Chrome version – Google Chrome and Mozilla Firefox have both enforced some mandatory security changes related to HTML5 playback. Because of this, you might need to update your browser to the latest build in order to get rid of the error message. This applies to Windows, macOS, and Linux.
- HTML Playback is disabled in Chrome – As it turns out, on Google Chrome, this error might occur due to the fact that HTML5 playback is disabled from the Settings menu. But since Google has removed this setting from the conventional setting menu, the best way to resolve this problem is to reset your Chrome browser back to its factory defaults.
Method 1: Deleting Twitch Cookies
As it turns out, most of the time the Twitch 1000 error ends up being related to a cookie issue. In most cases, a bad cookie saved by your browser ends up causing persisting streaming issues.
If this scenario is applicable, you have 2 ways forward – You can either go specifically after Twitch cookies and only delete them or, you can clear the entire cookie folder from your browser.
Going for a full cleanup is a little quicker, but you will be singed out of any logged websites. On the other hand, clearing the specific Twitch cookies is more tedious but it’s the focused approach.
If you want to go for the full cleanup, here’s how to clean the cache & the cookies from your browser.
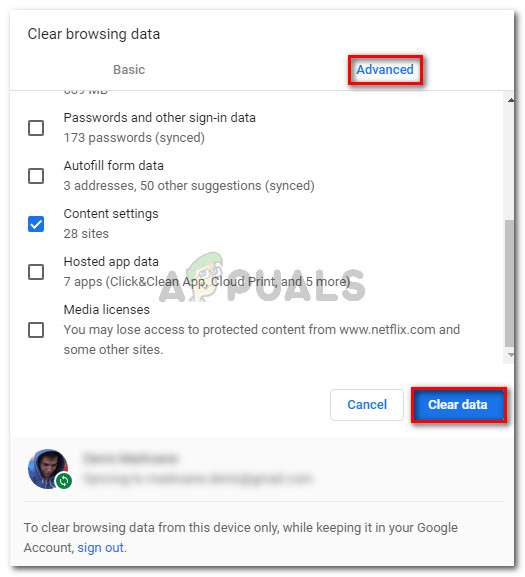
In case you prefer the focused approach, here’s how to clean the specific Twitch cookies from your browser. Once you’re inside the cookie cleanup window, use the search function to find & delete every Twitch specific cookie.
If you have already cleared the cookies and the end result is the same (you’re still seeing the 1000 error code), move down to the next method below.
Method 2: Update Google Chrome or Mozilla Firefox (Linux, Windows, macOS)
As it turns out, one of the most common causes that will facilitate the apparition of this error code is an outdated Google Chrome / Mozilla Firefox version. A lot of affected users have confirmed that the error was completely resolved once they have forced their browser to update to the latest build.
Note: The same problem is also occurring on every Chromium-based browser.
This fix was confirmed to work on Windows, macOS, and Linux, so if you’re just starting to troubleshoot the 1000 error code on Twitch, start by following one of the sub guides below (the one that’s applicable to your operating system.
A. Update Google Chrome
Windows / MacOS
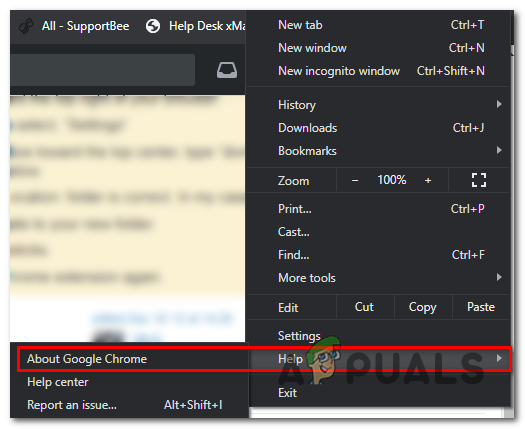
- Start by opening up Google Chrome and click on the action button (three-dot icon) in the top-right section of the screen.
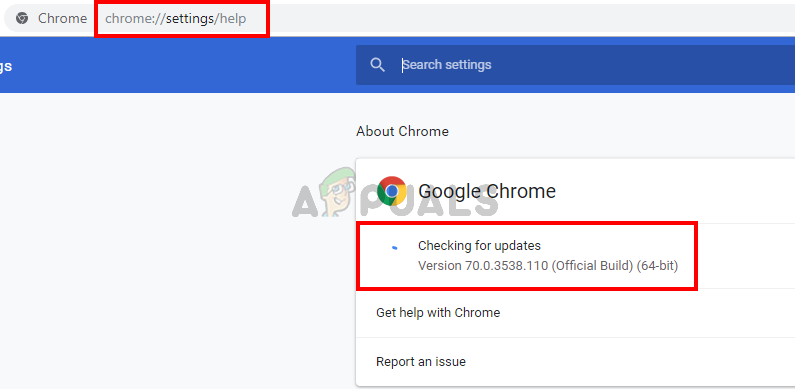
- Once you’re inside the newly appeared context menu, go to Help > About Google Chrome.
Click on Apply Google Chrome - Once you’re inside the About Google Chrome tab, the utility should automatically begin scanning to see if a new version is available. When this happens, you’ll be prompted to install it as soon as the download is completed.
Update Google Chrome - Once the installation of the new browser version is complete, your browser should restart automatically (if not, close it manually before opening it again).
- Return to Twitch and stream normally to see if the error code has been resolved.
Linux
- Start by opening a Terminal window on your Linux system, then type or paste the following command and press Enter to initiate the browser update:
sudo apt update
- When asked to confirm the command, press Y, then wait for the operation to complete.
- Once the latest Google repository is loaded, run the following command and press Enter to install the latest version of Google Chrome:
sudo apt-get --only-upgrade install google-chrome-stable
- Once the installation is complete, launch Google Chrome once again and see if you are still seeing the same error code in Twitch.
B. Update Mozilla Firefox
Windows / MacOS
- Open Firefox and click on the action button (top-right corner) to see the main menu of Mozilla Firefox. Next, click on the Help entry from the available options, then click on About Firefox from the context menu.
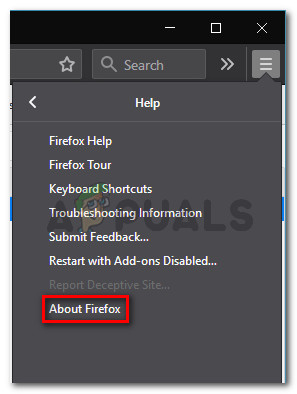
Accessing the Help menu of Firefox - From the About Mozilla Firefox menu, click on Restart and update the Firefox button (if a new version is available), then wait for the operation to complete.
Updating Firefox to the latest version Note: If you are prompted by the UAC (User Account Control), click Yes to grant main access.
- Your browser should then restart automatically. Once it does, return to Twitch and see if the problem is now resolved.
Linux
Start by opening a terminal on your Ubuntu or Debian Linux distribution, then type the following command to update Firefox to the latest build available:
$ sudo apt-get update
$ sudo apt-get install firefox
Note: In case you’re using Fedor, Redhat or CentOS, you’ll need to use the Yum tool or the GUI tool to run these commands instead:
# yum update
# yum update firefox
Once the Firefox builds is updated to the latest, open Twitch and see if the problem is now resolved.
If the same problem is still occurring, move down to the next potential fix below.
Method 3: Resetting your browser (Google Chrome)
If none of the methods above have worked for you, you should start considering the fact that a Chrome setting might contribute to the apparition of the 1000 error code in Twitch.
Several affected users have confirmed that they were able to fix the problem by resetting their Chrome settings back to their default settings. Most of the time, this problem is related to HTML5 playback.
If you haven’t tried this yet and this scenario is applicable, follow the instructions below to reset every Google Chrome setting back to their default values.
Here’s a quick Step-by-Step guide on how to do this:
- Open Google Chrome and click on the action button (top-right section of the screen) in the top-right corner, then choose Settings from the newly appeared context menu.
- Once you’re inside the Settings menu, scroll down to the bottom of the screen and click on the Advanced drop-down menu to make the advanced menu visible.
- Once the Advanced menu is visible, scroll down through the recently revealed settings and click on Restore Settings under Reset and Cleanup.
- Once the operation is complete, restart your browser and open Twitch once the next startup is complete.