How to fix “Error E20” When Signing-in on Steam?
The E20 sign-in error on Steam occurs when the Steam cache files, located in the app data folder, become corrupted. The app data folder contains application data, such as settings and other information required for the application to perform operations. Therefore, when the Steam cache folder becomes corrupted, it causes sign-in errors, such as the E20 error code.
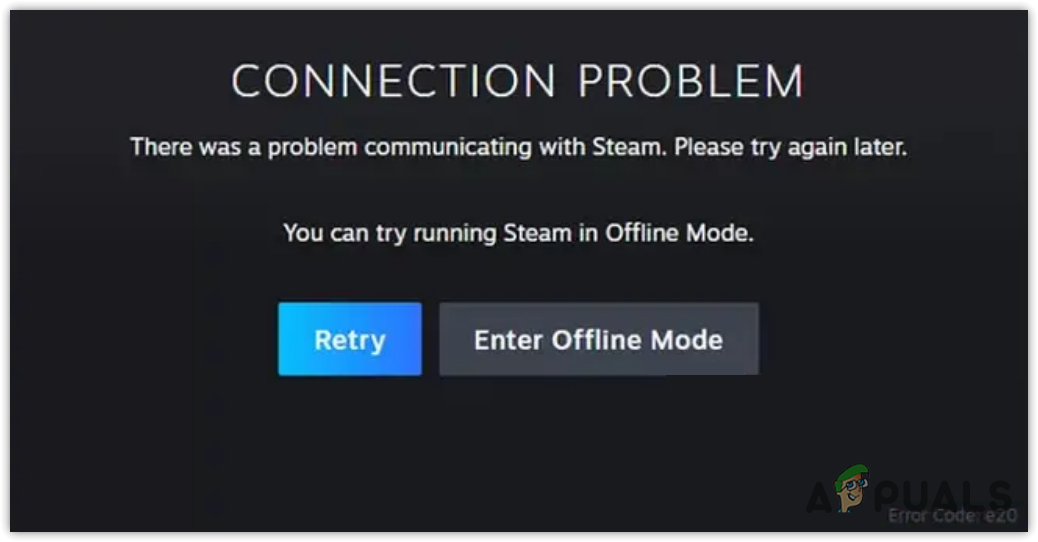
To fix this issue, follow the different solutions down below.
Solution 1. Delete Steam cache
Since we know the main cause of this error, we will start troubleshooting by clearing the Steam cache data. The application creates cache data to reduce the loading time.
When the application stores the data in the cache files, it does not need to request from the server as it can fetch the data from the cache files, which saves a lot of time. This plays a significant role in providing good UX (User Experience).
Therefore, if the Steam cache files are corrupted, Steam won’t let you sign in due to the error code e20, which says, “There was a problem communicating with Steam. Please try again later.” Thus, you can try clearing the Steam cache files. This will force Steam to request data from the server and create new cache files to save the requested data.
To clear the Steam cache, follow the steps:
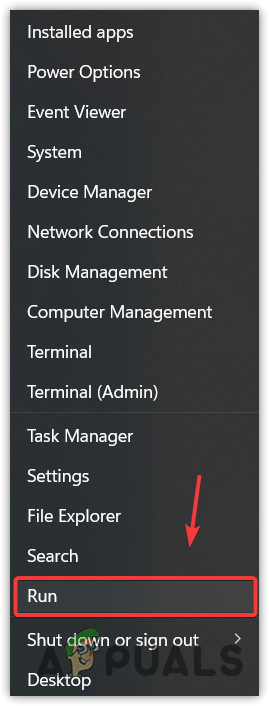
- Make right-click on the Start Menu button.
- Select Run from the given options to open the Run Program.
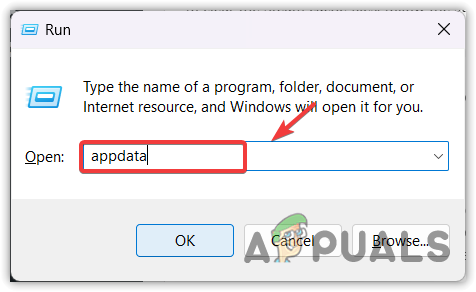
- Then, type appdata in the input box and click OK to navigate to the AppData folder.
- From here, go to the Local folder.
- Then, locate the Steam folder.
- Make right-click on the Steam folder and click the Delete icon.
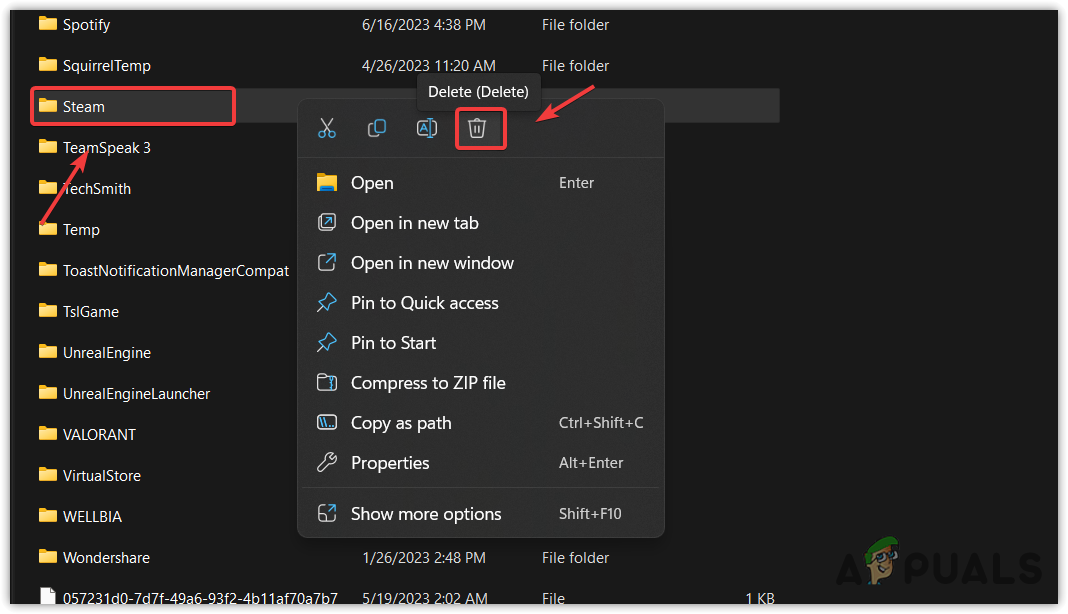
- Once the folder is removed, launch Steam, and try sign-in to your Steam account.
Solution 2. Launch Steam with No Cache
This error often occurs due to a problem with the cache files, we can try launching Steam with no cache. To configure Steam to launch with no cache, you will have to add a launch parameter, which will execute before Steam loads the configuration files.
To add a launch parameter, follow the steps:
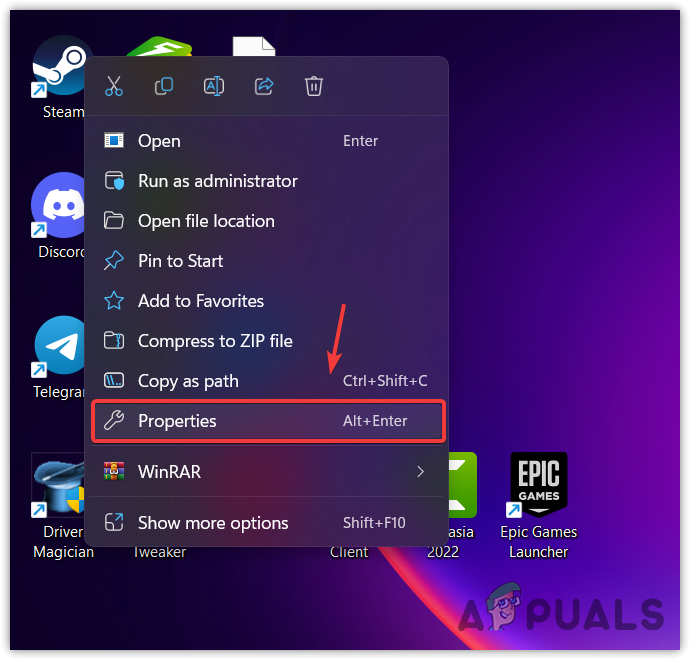
- Right-click the Steam launcher, and go to the Properties.
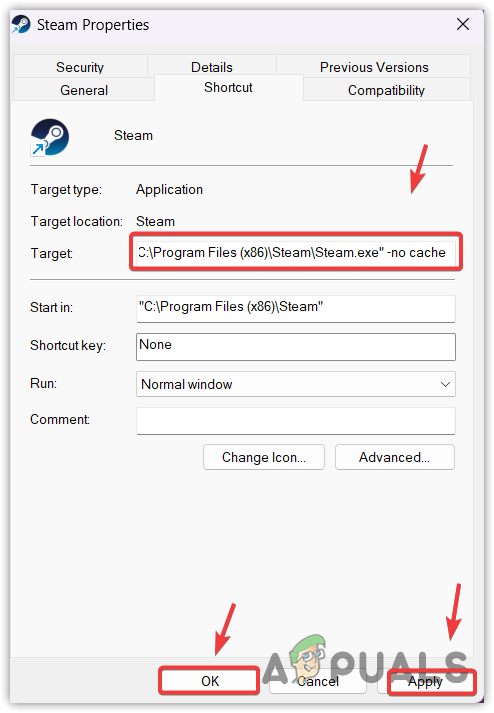
- Then, type -no cache at the end of the target value.
- Once done, click Apply and click OK.
- Once done, launch Steam and sign in with your Steam account.
3. Clear Temporary Files
Temporary files are created to store the information for the short term. Almost every application creates temporary files that can be used to complete several operations. It is possible that your Steam temporary files are corrupted, causing this error.
Since temporary files are not intended to complete long-term tasks, we can safely try deleting them to ensure whether they are encountering the error or not. To clear the temporary files, follow the steps:
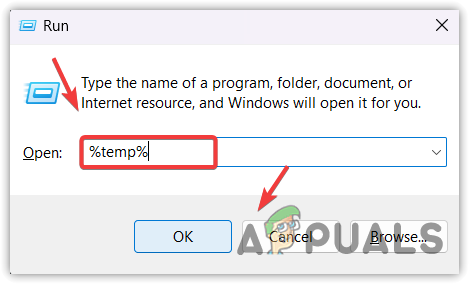
- Use the Win + R keys combination to launch Run Program.
- Here type %temp% and click OK to open the local temporary files folder.
- Use Ctrl + A to select all the files and hit the delete key to remove them.
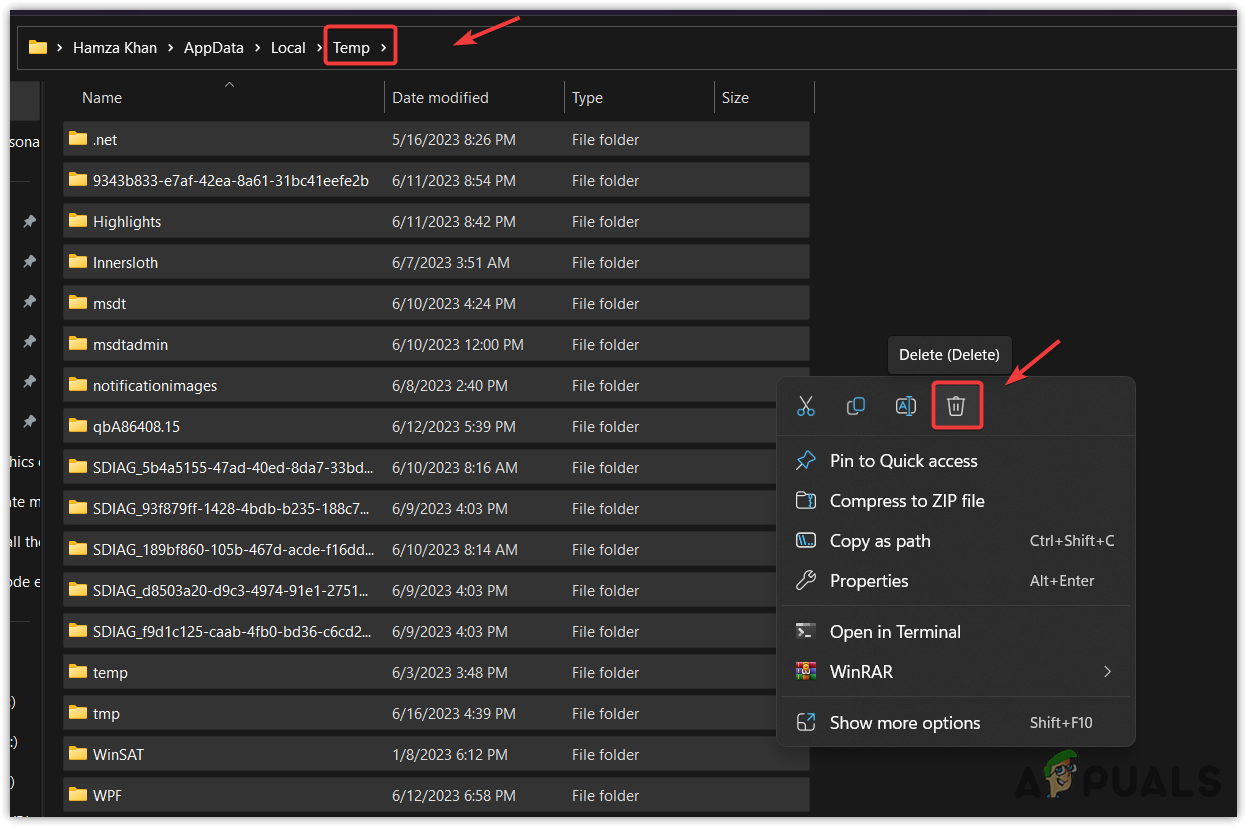
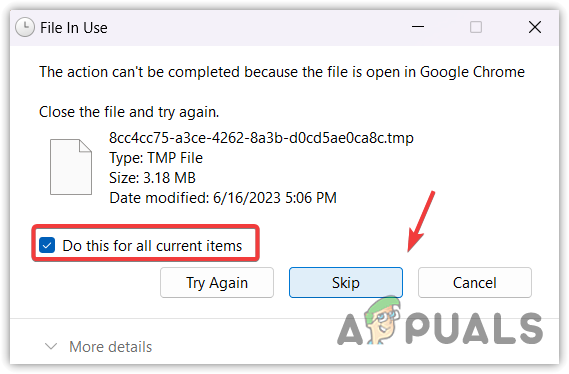
- If you encounter the error message, This action can’t be completed because the file is open in <name> application, tick Do this for all current items and click Skip.
- Once done, again open Run Program by pressing the Win + R keys together.
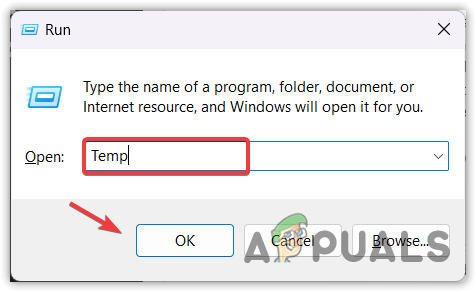
- Type Temp in the input box and click OK to open the Windows temporary files folder.
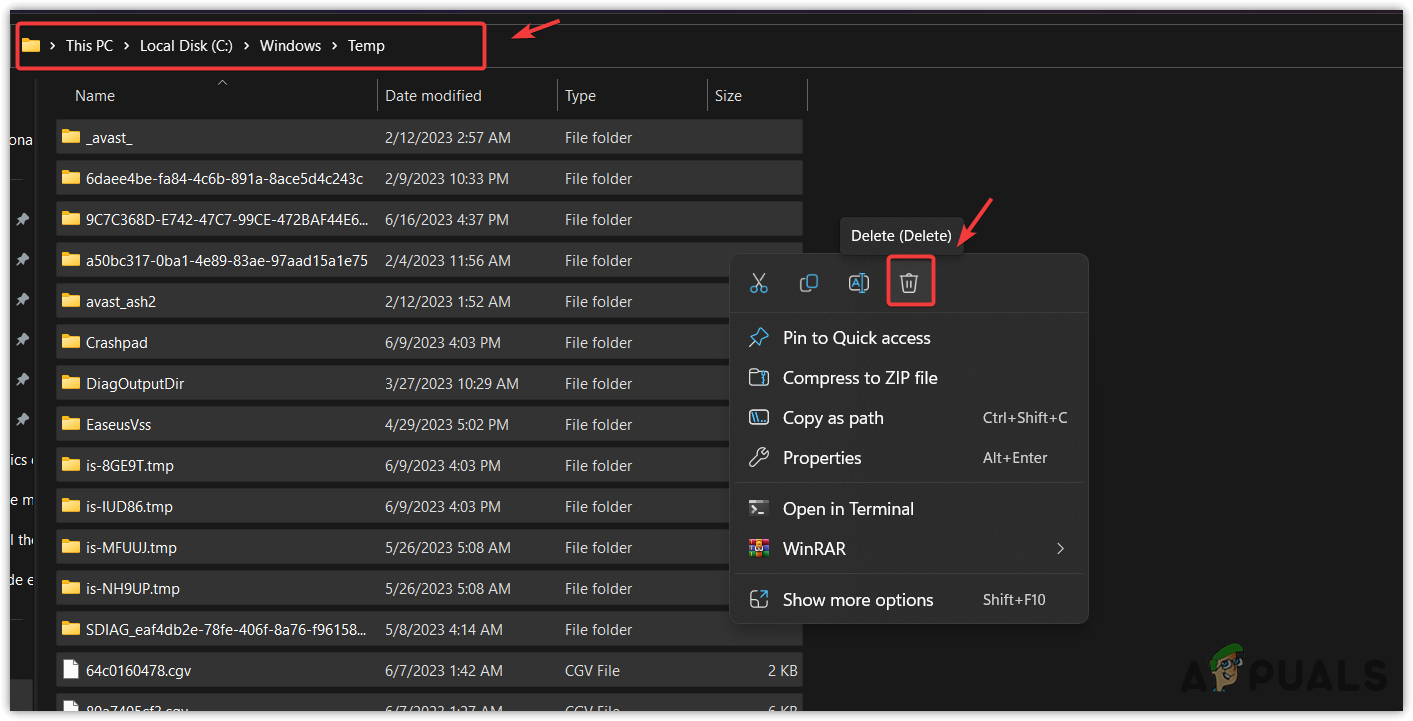
- Select all the files by pressing Ctrl + A and use the delete key to remove the temporary files.
- Again, if you encounter the error message, This action can’t be completed, tick Do this for all current items and click Skip.
- Once done, launch Steam and try login to the account.
4. Use VPN to login into your Steam account
Your internet connection might be struggling to contact the Steam login servers due to a routing problem by your ISP (Internet Service Provider). If that’s the case, then you can connect the VPN (Virtual Private Network), which will allow you to change the route of your internet connection to the Steam login servers.
If you can log in to Steam through the VPN, we recommend you contact the ISP to describe your problem. If this is not possible for some reason, you can wait till the error automatically gets fixed. You can visit our article on The Best VPN For Streaming and Gaming in 2023 to install the best VPN to ensure whether it is a routing problem or not.
5. Use the hotspot
You can also use your mobile data or any other Wi-Fi network to ensure whether it is a routing problem or not.
To connect to the hotspot, simply turn on the other Wi-Fi network or mobile data, then go to the hotspot settings and turn on the portable hotspot. Then connect your laptop or computer to the hotspot. However, if you don’t have a Wi-Fi adapter on your PC, take a USB cable and connect it to your computer and mobile. Then, go to the hotspot settings and turn on the USB tethering option.
6. Reinstall Steam
Throughout this guide, we have mentioned all the possible solutions that could fix the e20 error. However, if you want to try more solutions before reinstalling Steam, visit Sign-in Error Code E84.
Reinstalling Steam will remove all the corrupted files, which might fix this error. To do so, follow the steps:
- Click the Start Menu and type Add or remove programs.
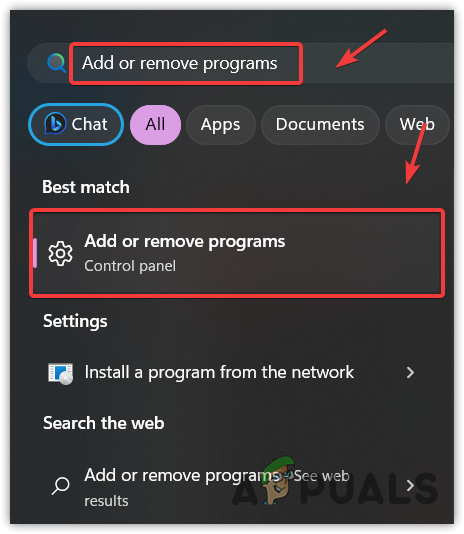
- Press the Enter key to open the Apps and features.
- Here find Steam and click the three dots.
- Select Uninstall option.
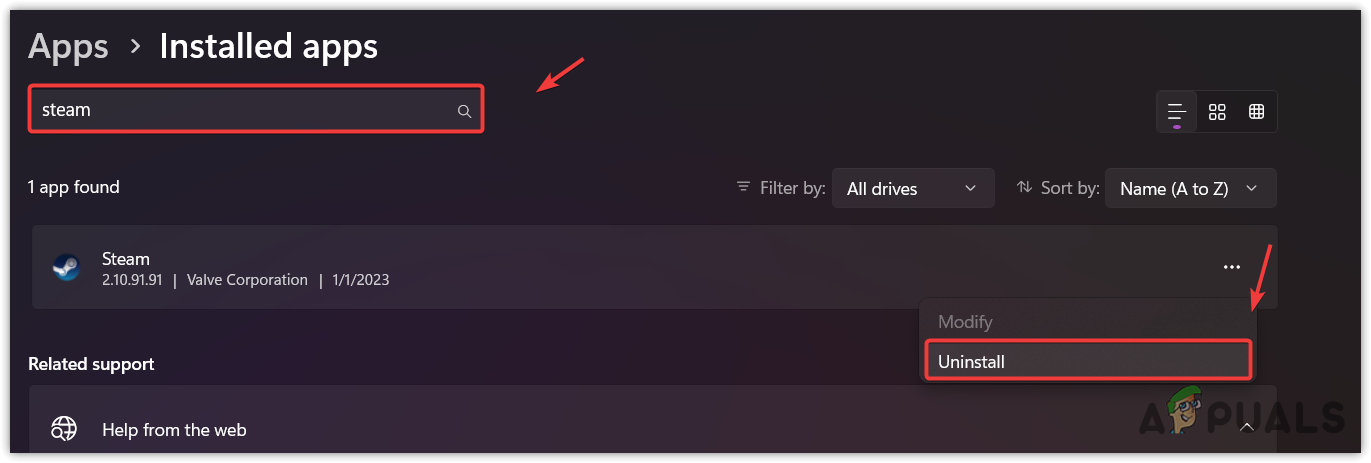
- Then, click Uninstall to uninstall Steam.
- Once done, open Run Program by pressing the Win + R simultaneously.
- Type appdata and click OK.

- Head to the Local folder and remove the Steam folder.

- Once done, launch the Steam application and check if you are encountering the error or not.
Lastly, if the issue persists, try contacting Steam support because they will better check your system and suggest you a solution according to the root cause of your issue.
Steam Error Code E20- FAQs
Steam error code e20 indicates there is a problem with the cache files. Steam creates cache files to store user information, including login information. Therefore, when Steam cache files become corrupted, it causes login errors while trying to sign in to an account.
Since the Steam error code can be caused by a problem with the cache files, we can start by clearing the Steam cache files. Clearing the Steam cache files will only remove the application cache data, which includes the login information and other temporary files that are not necessary, as they can be generated again once you delete them.
 Reviewed by


