Troubleshoot the Blank Start Menu Glitch in Windows 10/11
Is Your Start Menu Blank? Try These 5 Solutions!
The Start menu can at times go blank due to a corrupt Windows update or generic corruption errors within the system. When this happens, the users are unable to see any apps, settings, explorer, as well as the power icons.
In some cases, this problem can also affect the functioning of the taskbar, preventing the users from clicking on and accessing any of the taskbar items. Typically, the issue persists even after restarting the computer multiple times.
Below, we have discussed the several troubleshooting methods that you can try to fix the problem.
1. Uninstall the Problematic Update
Since the issue is typically caused after the users install a problematic update, the first course of action should be uninstalling the problematic update.
We will be uninstalling the update using the Control Panel in this method. In case you are not sure which update might be causing the issue and do not want to take any risks by uninstalling the incorrect updates, move to the next method of reverting the system changes back, below.
Follow these steps to proceed:
- Press Win + R keys together to open a Run dialog box.
- Type control in the text field of Run and click Enter.
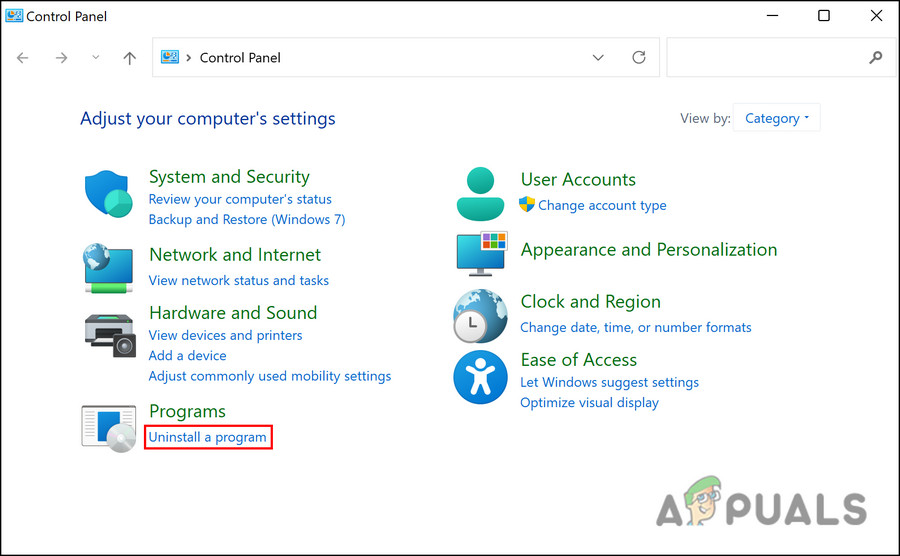
- In the following window, click on Uninstall a program under the Programs section.
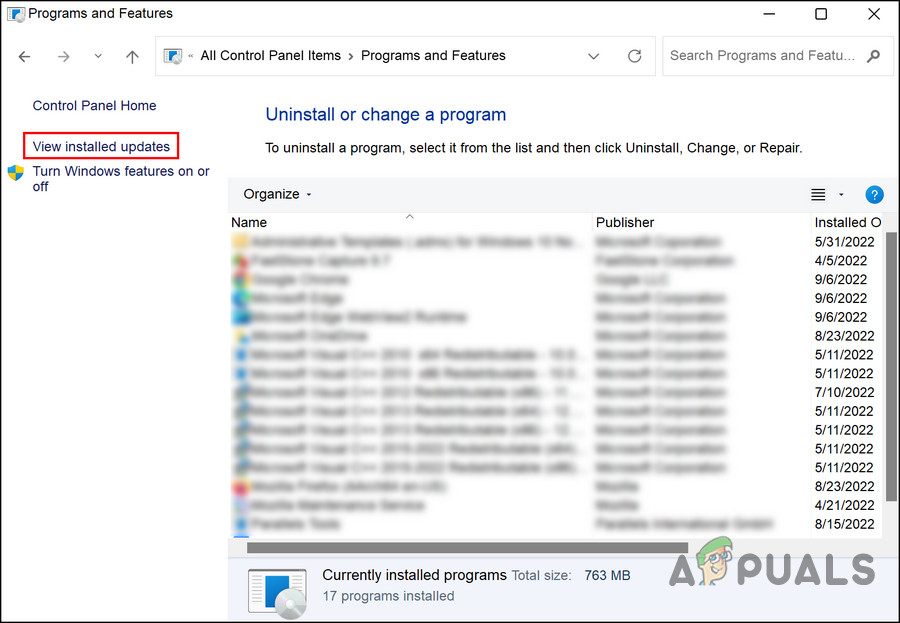
Click on Uninstall a Program - Choose View installed updates option from the left pane.
View the installed updates on computer - Now, locate the problematic update and right-click on it.
- Choose Uninstall from the context menu.
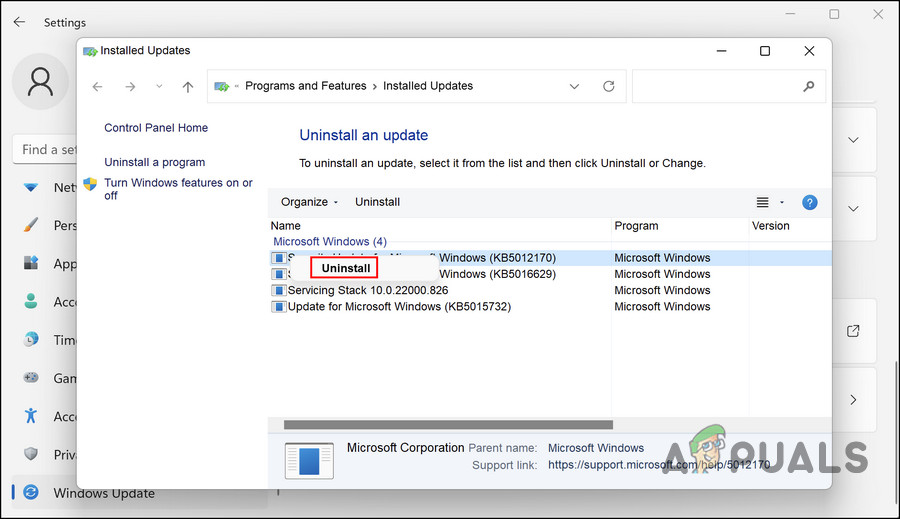
Uninstall the update - Follow the on-screen instructions to complete the uninstallation process.
- Once the update is uninstalled, restart your computer and check if the Start menu if working properly now.
2. Restore the System Back to a Functioning State
In the event that important changes are detected on your computer, System Restore can be used to save a snapshot of its current state as a ‘restore point’. When a critical error occurs (for instance during the installation of an update, driver, or app or when incorrect registry settings are changed), you can restore your computer to an earlier state without losing any files by using this restore point.
In case you are not sure which update caused the problem, then you can use the System Restore utility to revert the system back to a state where the Start menu was working properly. This method will also help get rid of any corruption errors that might be causing the problem.
To proceed, follow these steps:
- Press the Win + R keys together to open a Run dialog.
- Type control in the text field of the dialog and click Enter.
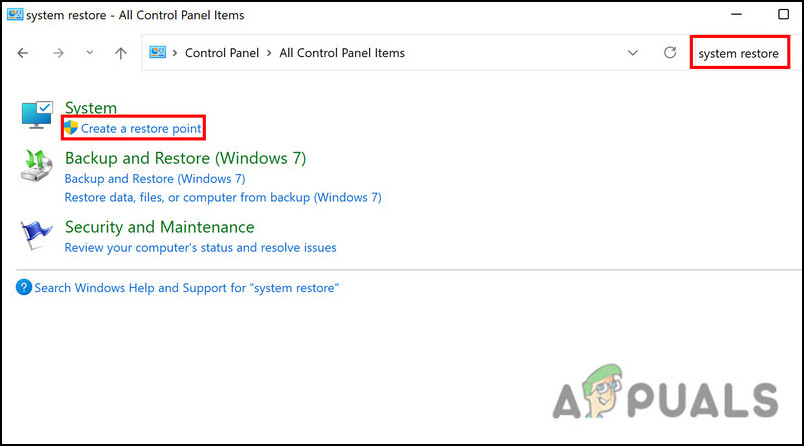
- Type System restore in the search area on the top right corner of the Control Panel window.
- Choose Create a restore point option from the available results.
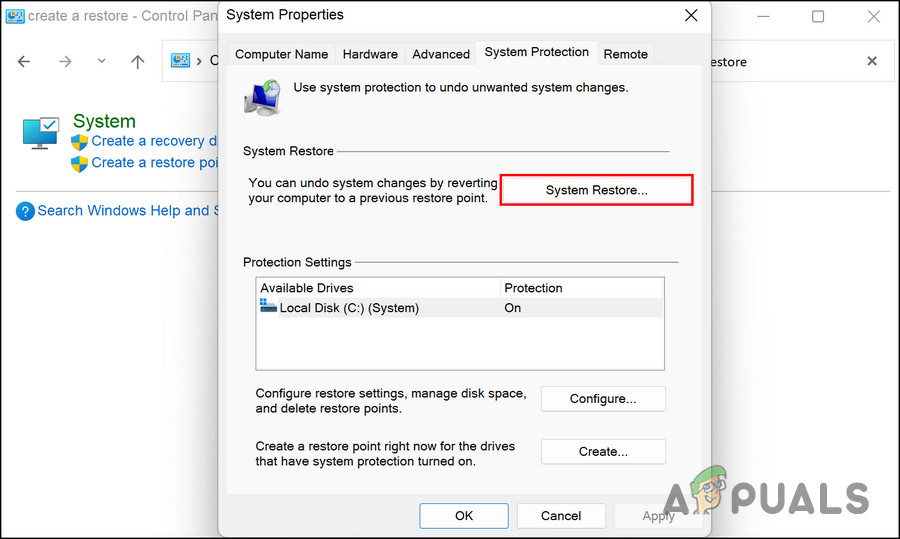
Create a restore point in Control Panel - In the following window, click on the System Restore button.
Click on the System Restore button - You should now see a list of the restore points available. Click on the preferred restore point and hit Next.
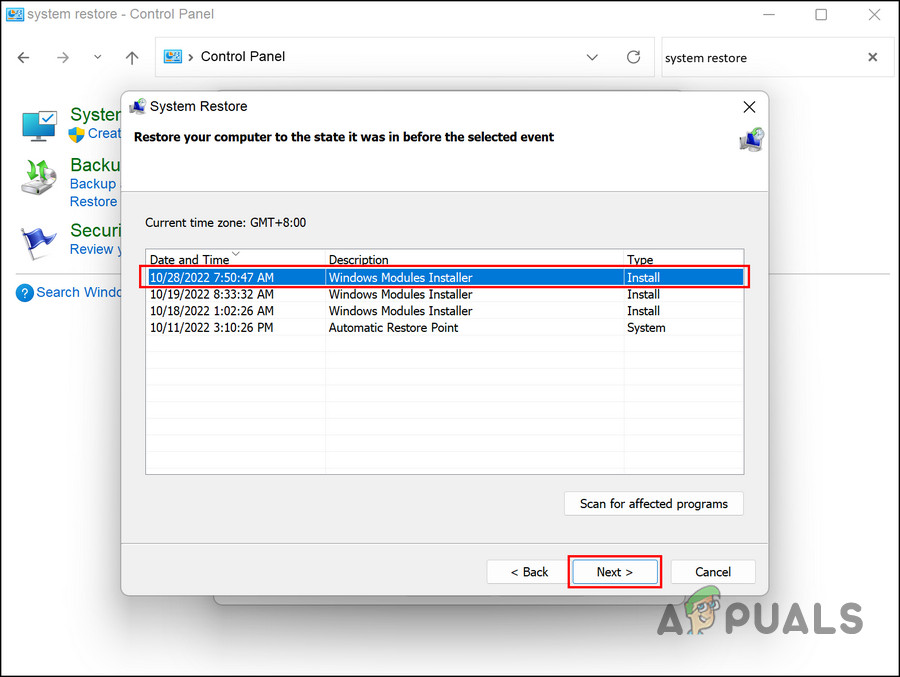
Pick a restore point - Follow the on-screen instructions to proceed and restart your computer.
Hopefully, once the system has reverted back to a previous functioning state, you will no longer feel the problem.
3. Restart Windows Explorer (If Applicable)
In some cases, the Start menu also affects the Windows Explorer. If this scenario is applicable, then this issue can be resolved by restarting the explorer utility via the Task Manager.
Here is how you can do that:
- Press the Ctrl + Shift + Esc keys together on your keyboard to open the Task Manager window.
- In the Processes tab, locate the Windows Explorer utility and click on it.
- Choose Restart and close the Task Manager.
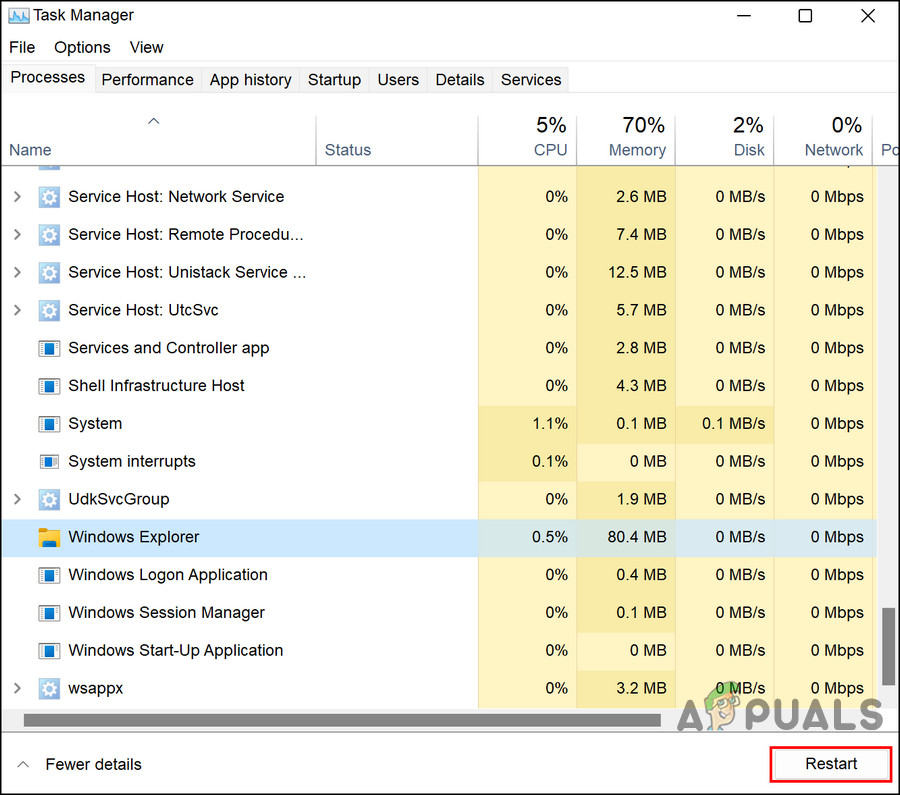
Restart the process - Once the utility is restarted, check if the Start menu, taskbar, and Windows Explorer are back up and running again.
You can also try using some built-in troubleshooting utilities that come built into Windows. Two utilities that we recommend proceeding with are the System File Checker (SFC) and Deployment Image Servicing and Management (DISM.exe).
The System File Checker (SFC) scans the integrity of the system and replaces corrupted or missing system files with working ones. It is a command-line tool that can be executed from a command prompt. Sfc /scannow will inspect all of the important Windows files on your computer, including Windows DLL files. If System File Checker finds a problem with any of these protected files, it will replace it.
Deployment Image Servicing and Management (DISM) is a command-line tool that is used to service Windows images. if one or more Windows 10 files in the local image are damaged, the SFC command won’t work. In this scenario, you can use the “install.wim” image with DISM to repair the image and then use the SFC tool to fix the setup without having to reinstall Windows.
4. Re-Register the Start Menu
Another good way to rule out any corruption issues and bugs within the Start menu is by by re-registering the Start Menu using the Powershell utility.
Follow these steps to proceed:
- Right-click on the Windows icon in the taskbar.
- Choose Powershell (Admin) from the context menu.
- Alternatively, press the Win + R keys together on your keyboard.
- Type powershell in the text field of Run and press the Ctrl + Shift + Enter keys to open Powershell as an administrator.
- Click Yes in the User Account Control prompt.
- Now, type the command mentioned below in the Powershell window and hit Enter to execute it.
Get-appxpackage -all *shellexperience* -packagetype bundle |% {add-appxpackage -register -disabledevelopmentmode ($_.installlocation + “\appxmetadata\appxbundlemanifest.xml”)}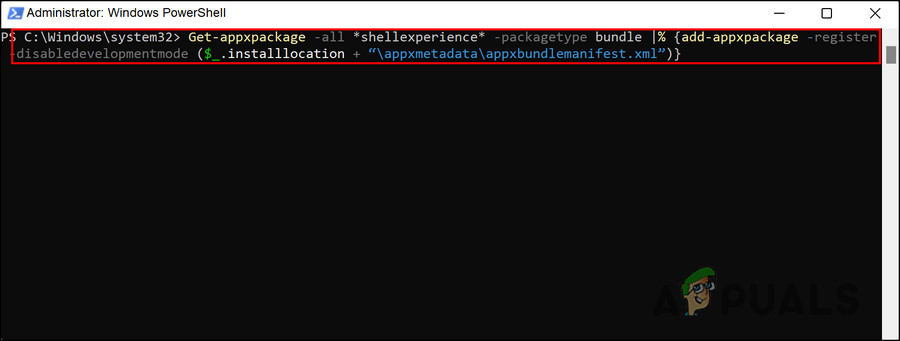
Re-register the start menu
Wait for the command to execute and then restart your computer.
5. Reset Windows
Windows Reset is another built-in tool that can help you fix the issues like the one under consideration. If the troubleshooting methods above have not worked for you, then you can try resetting the PC to its default state using the ‘Reset this PC’ option in Windows Settings.
Using this feature, you can restore your PC to the state it was originally delivered in if you bought a PC with Windows already installed. It will reinstall all the drivers and software that came with the PC.
Keeping or erasing personal files is up to you. Nevertheless, all the programs and settings you have installed will be erased, giving your system a fresh start. Resetting your PC should fix any problems caused by third-party software, corrupted system files, or changes to your system settings or malware.


