How to Uninstall Windows Updates
Microsoft periodically and promptly release updates for every single iteration of the Windows Operating System that it supports at any given time. Depending on the iteration of Windows and Windows Update preferences, any and all released updates are either automatically downloaded and installed by the system, or the system makes the user aware of the availability of the updates and advises them to download and install them. Not every Windows update released by Microsoft is a finished, flawless product, however, much like basically every version of Windows during the initial days of its release. In fact, some Windows updates turn out to be system-breaking menaces that bring about unprecedented destruction and mayhem, inconveniencing hundreds of thousands of Windows users across the globe.
If you have downloaded and installed a Windows update that breaks something for you (or if such an update has been automatically downloaded and installed for you by the system), the first thing you are going to want to do is uninstall the Windows update and regain optimal system function. Thankfully, it is entirely possible to uninstall Windows updates on all versions of the Windows Operating System that are currently supported by Microsoft and for which Windows updates and rolled out. The following are the two most effective solutions that can be used to uninstall Windows updates on a Windows computer:
Solution 1: Uninstall Windows Updates from Programs and Features or Windows Update
First and foremost, the simplest method that you can use to uninstall Windows updates on a Windows computer is to take a look at all of the Windows updates installed on the computer via the Programs and Features utility (if you are using Windows 7, 8 or 8.1) or the Windows Update utility (if you are using Windows 10), and then uninstall the offending update(s). If you would like to apply this solution, you need to:
If you are using Windows 7, 8 or 8.1:
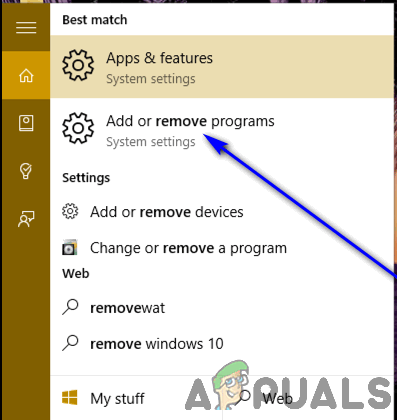
- Open the Start Menu.
- Search for “add or remove programs“.
- Click on the search result titled Add or remove programs. The Programs and Features utility will now open.
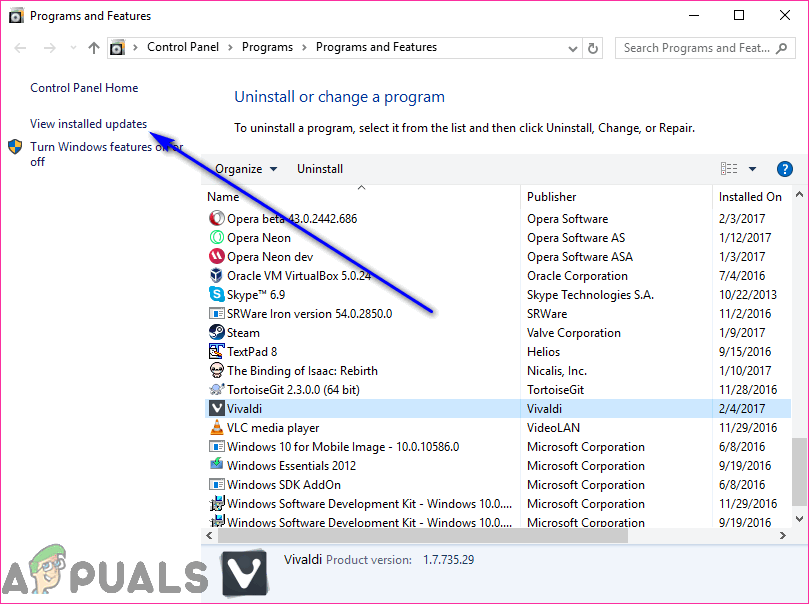
- Once you are in the Programs and Features utility, click on View installed updates in the left pane of the window.
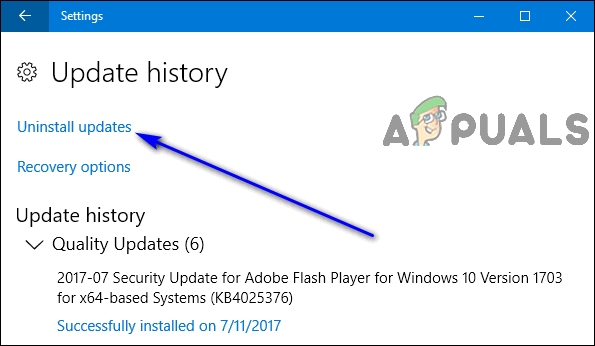
If you are using Windows 10:
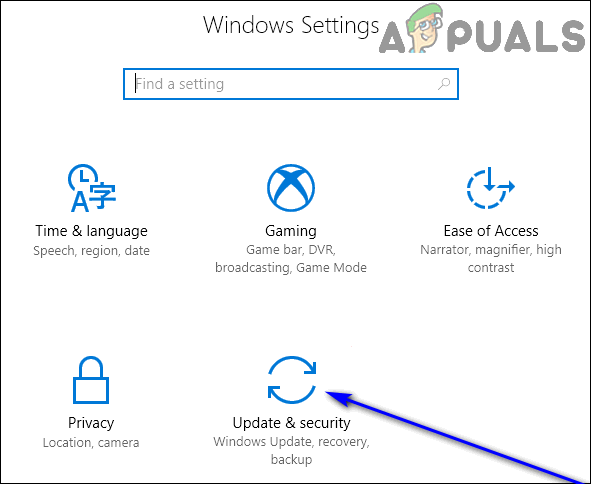
- Press the Windows Logo key + I to launch Settings.
- Click on Update & security.
- Navigate to the Windows Update tab in the left pane of the window.
- In the right pane of the window, click on Update history.
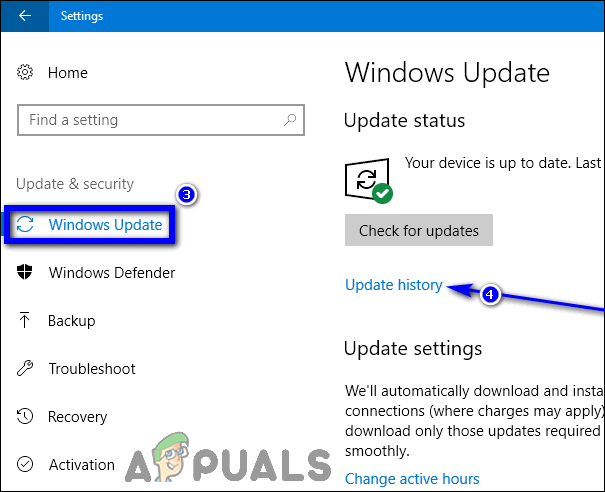
- Click on Uninstall updates.
Next, regardless of what version of Windows you are using, you will have to:
- Wait for the list of Windows updates installed on your computer to be populated.
- In the list of Windows updates installed on your computer, locate the offending Windows update and click on it to select it.
Note: If you do not know exactly which of the Windows updates installed on your computer is the one causing you problems, simply sort the list of installed updates by Installed On and uninstall any and all Windows updates that were installed on or around the same time you started experiencing issues with your computer. - Click on Uninstall.
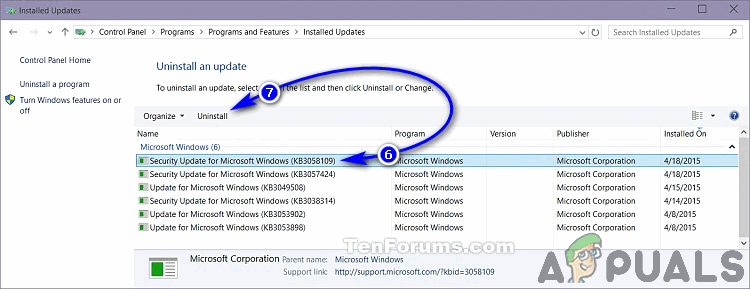
- Follow the onscreen instructions and go through the uninstallation wizard all the way to the very end, at which point the offending Windows update will have been successfully uninstalled from your computer. If there is more than just one offending Windows update, repeat steps 6–8 for each offending update.
- If required to do so, restart your computer.
Solution 2: Boot into Safe Mode and then uninstall the update(s)
If simply trying to uninstall the offending Windows update(s) through the Programs and Features utility right off the bat does not work for you, fear not – you can still boot your computer into Safe Mode and then try to uninstall the update(s), which significantly improves your chances at success. Here’s how to boot your Windows computer into Safe Mode:
If you are using Windows 7:
Boot your computer up, and as it starts up, press the F8 key on your keyboard – doing so will grant you access to your computer’s Advanced Boot Options menu. It might take you a couple tries to get it right, but once you are in your computer’s Advanced Boot Options menu, you can opt to have your computer boot into Safe Mode. 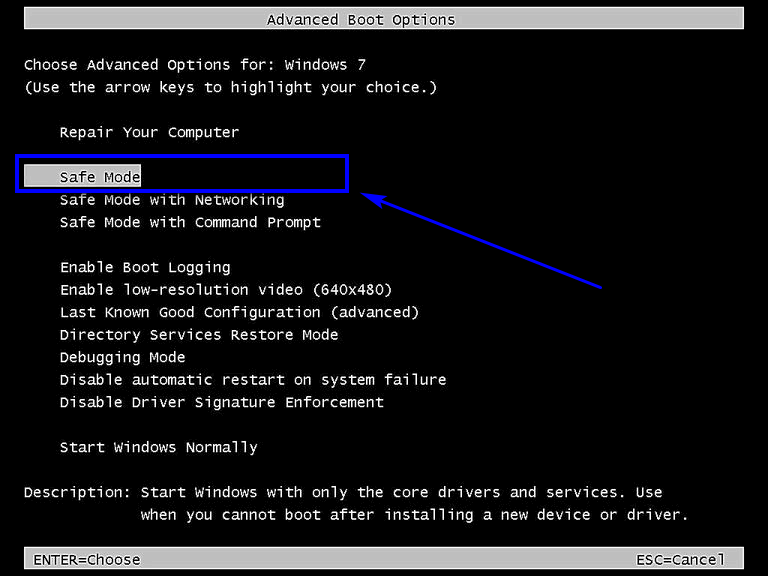
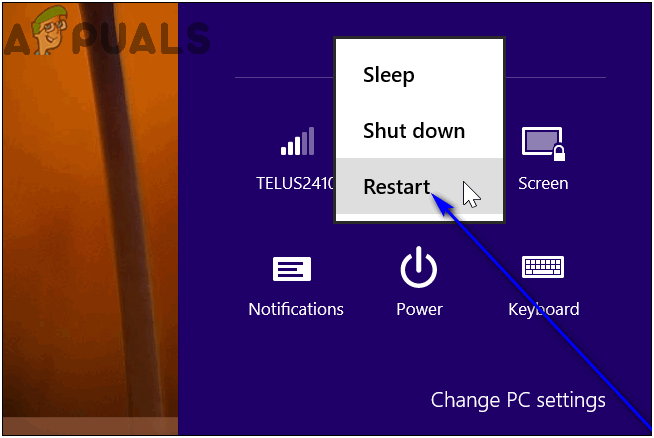
If you are using Windows 8, 8.1 or 10:
- Open the Start Menu.
- Click on Power and then, while holding down the Shift button, click on Restart.
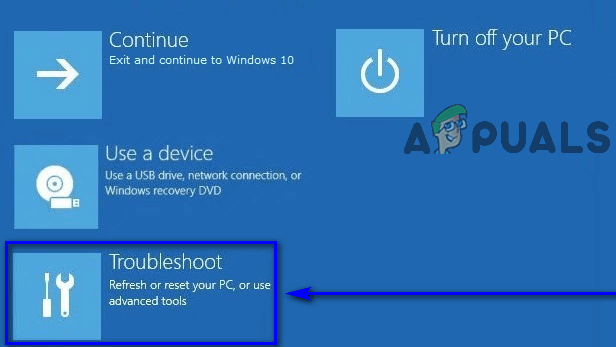
- When your computer boots up, it will display a screen with three options. Click on Troubleshoot.
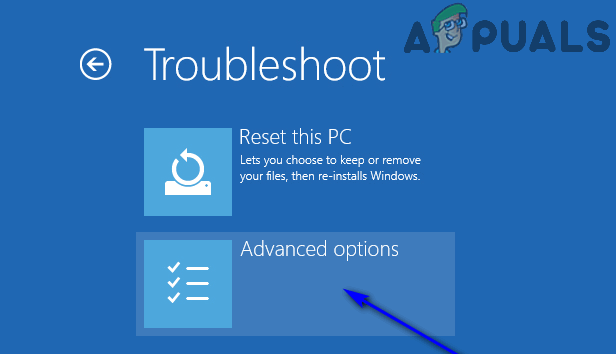
- Navigate to Advanced Options > Startup Settings and click on Restart.
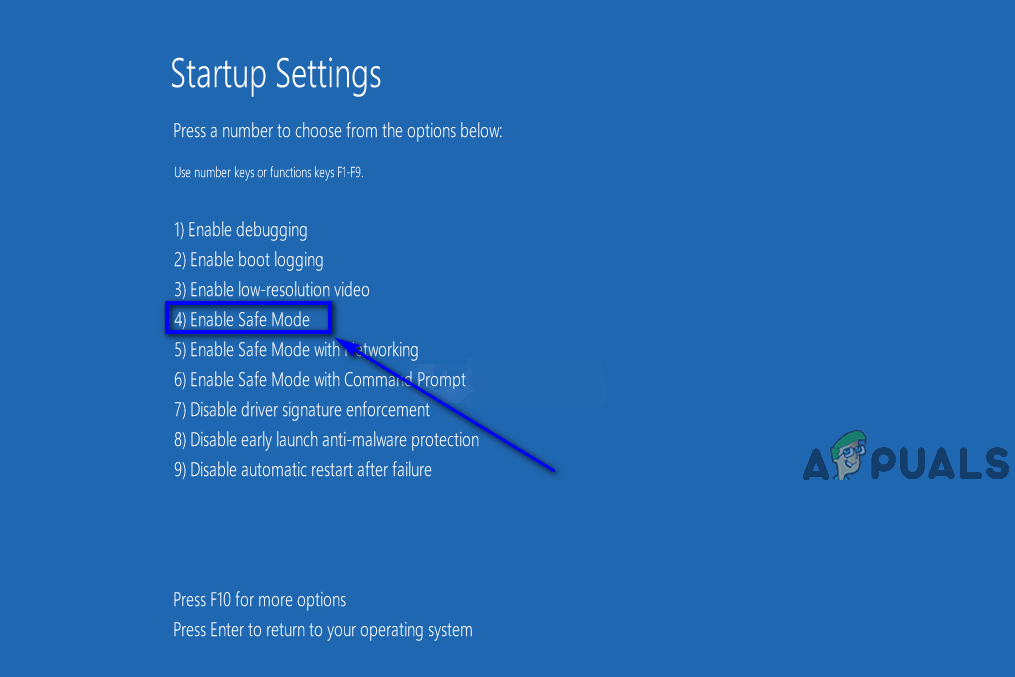
- When your computer boots up, you will be presented with a list of 9 startup options – each of which can be selected by pressing the corresponding Function key. The option you want is Enable Safe Mode, so press its corresponding Function key. For example, if the Enable Safe Mode option is option 4, you are going to have to press F4 key to boot into Safe Mode.
Once your computer has booted up in Safe Mode, follow each and every single one of the instructions from Solution 1 to try and uninstall the offending Windows update(s) from your computer.
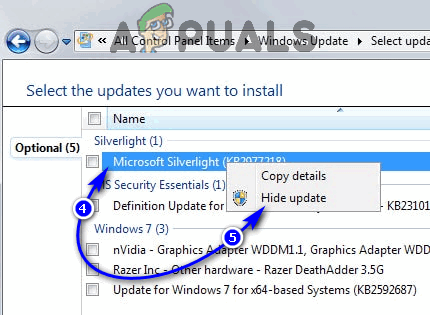
Because this is Microsoft and the Windows Operating System we are talking about, simply uninstalling the offending update won’t spell the end of the matter. As soon as the update is uninstalled, it will be added to the queue of Windows updates waiting to be downloaded and installed on your computer. The update will then be automatically downloaded and installed (which would put you through hell again) or you will be nagged by your computer about downloading and installing the update at regular intervals. This can, however, be prevented by simply hiding the offending update(s) from Windows Update’s available updates queue. If you would like to do so, you need to:
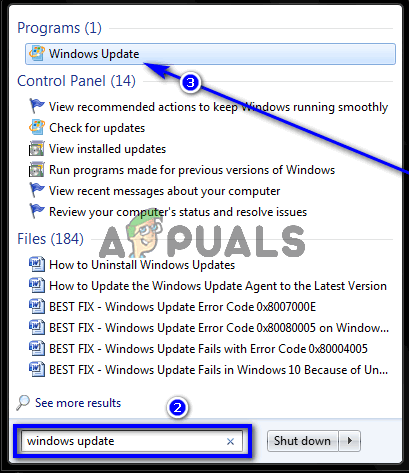
- Open the Start Menu.
- Search for “windows update“.
- Click on the search result titled Windows Update. The Windows Update utility will now open up.
- You should see a list of all the Windows updates currently available for your computer. Look through this list of available Windows updates for the offending update and, once it has been located, right-click on it.
- In the resulting context menu, click on Hide update.
 Note: If there are multiple offending updates, you are going to have to manually hide each one from the list of available Windows updates.
As soon as you do so, the update in question will be hidden, preventing your computer from automatically downloading and installing it. You can still, however, manually download and install the update on your computer.


