Fix: Microsoft Windows Search Indexer High CPU Usage
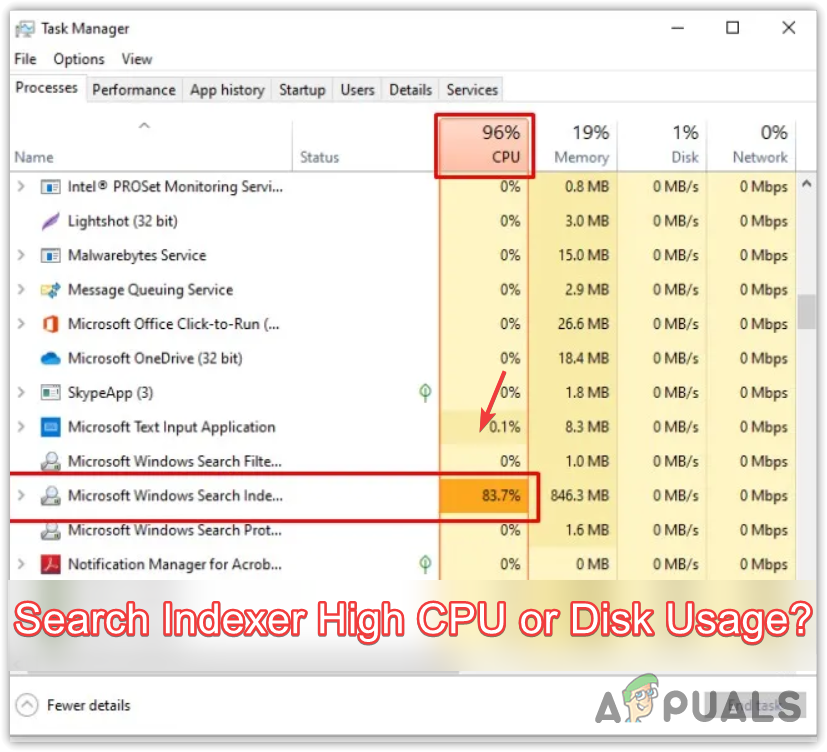
It is common to face high CPU or disk usage due to the Microsoft Windows Search Indexer. It is an essential Windows process used to index items for Windows Search.
This issue mainly occurs when the Windows search service stops working or when there is a problem with the Windows search database. These two factors are the primary reasons that often trigger this issue.
1. Restart Windows Explorer.
The first and basic solution is to restart Windows Explorer. Restarting Windows Explorer is similar to restarting Windows. Both solutions are used to restart essential services, the taskbar, and other Windows components simultaneously.
This often fixes various temporary Windows issues or errors, so it is recommended to restart Windows Explorer.
To restart Windows Explorer, follow these steps:
- Right-click the taskbar and select Task Manager.

- Once opened, right-click Windows Explorer and select Restart.
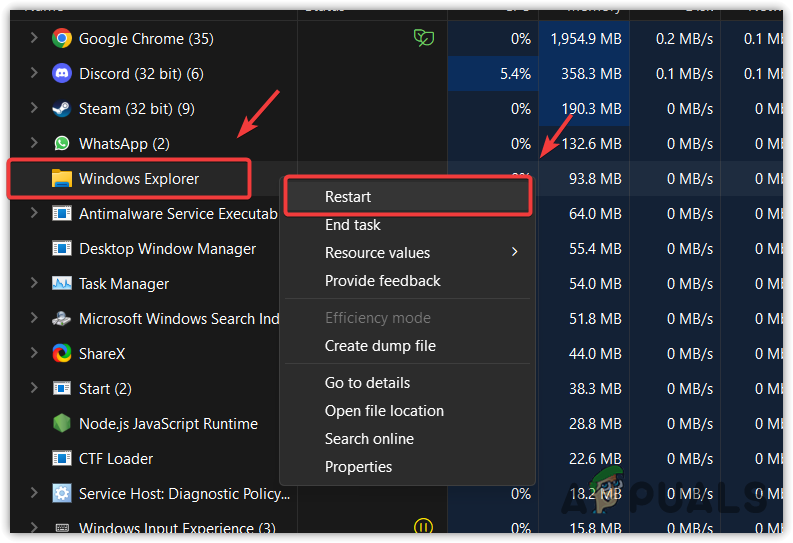
- Once it has been restarted, check whether the issue is resolved or not.
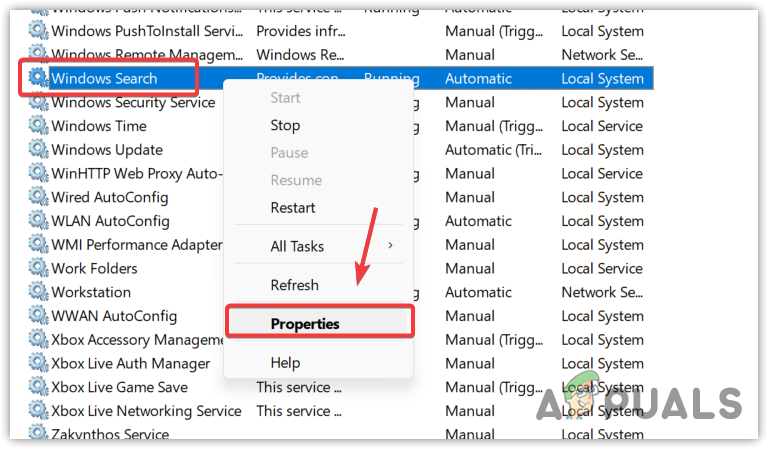
2. Restart the Windows Search Service.
The Windows Search Service is an important part of Microsoft Windows Search Indexer. If this service experiences problems while running in the background, such as interference from third-party applications, you will encounter this issue. Therefore, try restarting the Windows Search Service manually to resolve the problem.
To restart the Windows search service:
- Press the Win + R keys to open the Run Program.
- Enter services.msc in the search box and click OK.

- Find the Windows Search service and right-click on it to select Properties.
- Stop the service, change the startup type to Disabled, click Apply, and click OK.
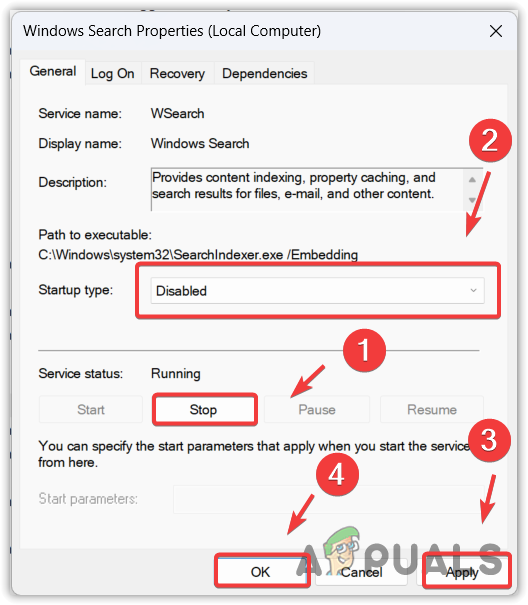
- Open Task Manager and wait for CPU or disk usage to reduce.
- Once completed, return to the services.msc, change the startup type to Automatic, click Apply, and click OK.

- If the issue persists, move on to the next method.
3. Configure indexing options.
You may have incorrect indexing option settings, which prevent the Windows search indexer from working correctly and cause high CPU or disk usage. Therefore, try configuring the indexing options correctly by following the steps.
- Press the Windows key and type Indexing options.
- Open the settings, and click Modify.

- Here, check all of your disks except for the Internet Explorer History and other folders.
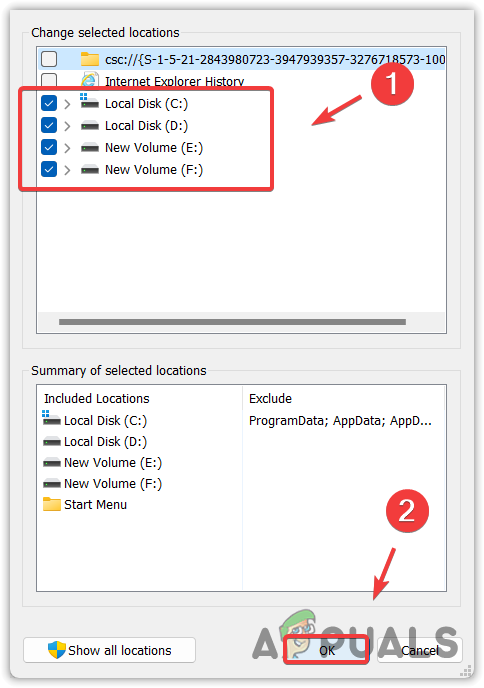
- Once completed, click OK and then click Close to save the changes.
- Now, open Task Manager to see if the error has been fixed or not.
4. Rebuild the search indexer.
Rebuilding the search indexer means that you are going to delete the entire database of Windows search and replace it with a fresh database. Rebuilding the search indexer database will eliminate fragments, reorder the index rows, and reclaim disk storage.
Since the Windows search indexer may cause high CPU or disk usage, rebuilding the database can potentially resolve this issue. Follow the steps below to do so.
- Click the Start Menu and search for Indexing Options.
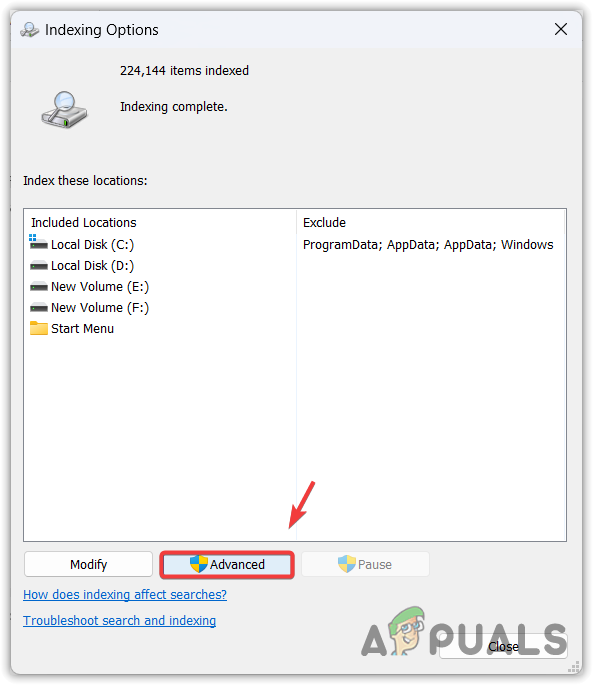
- Open the Indexing Options and click on Advanced.
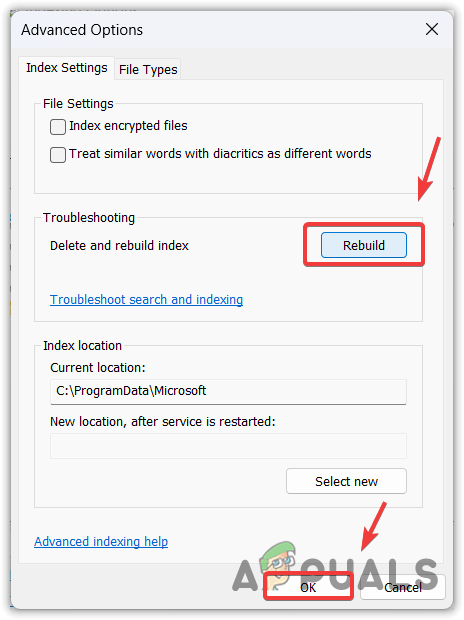
- Finally, click “Rebuild” and then click “Yes” to start the process.
- Once completed, you will see “Indexing Complete” at the top of the dialogue box.
- Now, open the Task Manager and see if your problem is fixed or not.
5. Restore the SearchIndexer.exe file.
Searchindexer.exe is responsible for indexing items in Windows search. It is also known as the Microsoft Windows search indexer, which may be causing high CPU or disk usage in your case. Since this file is located in the system32 folder, it is an essential Windows process and file that can be repaired or restored by running the System File Checker utility.
SFC, or System File Checker, is a command-line utility that is used to restore or fix protected system files if they become corrupted. Since SearchIndexer.exe is one of them, we can attempt to restore it using the SFC command.
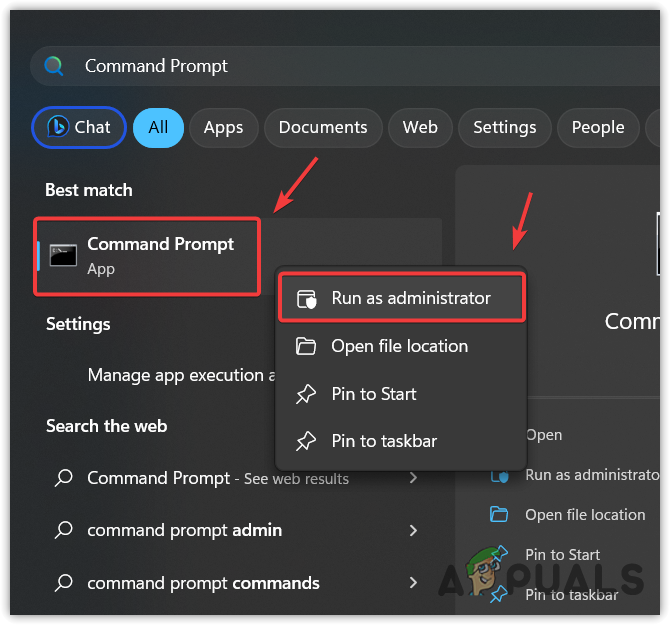
- To do so, click Start Menu, and search for Command Prompt.
- Right-click the Command Prompt and select Run as administrator.
- Once you launch the terminal, enter the following command and wait for it to be executed.
sfc /scannow
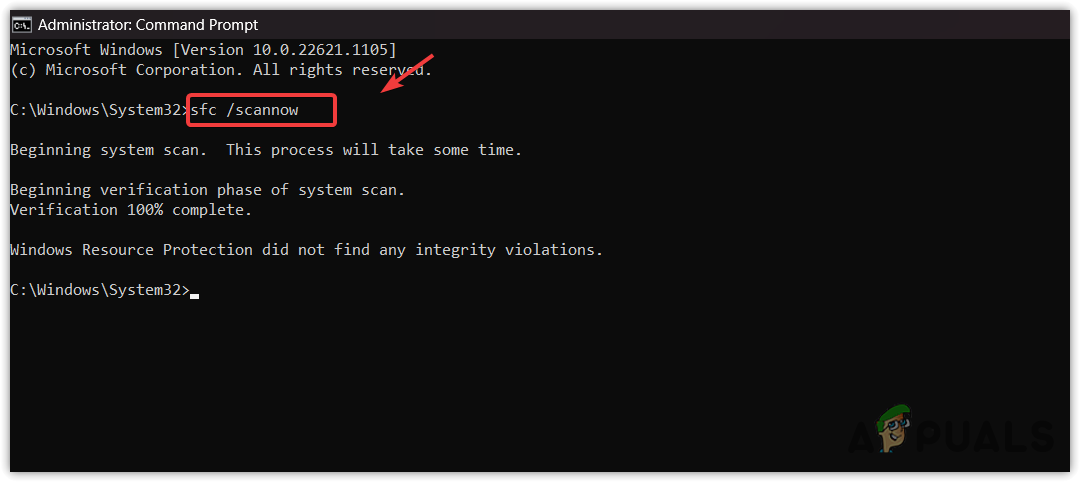
Restoring the Searchindexer.exe file - Once done, check whether the issue still persists.
6. Scan your Windows with antivirus software.
If all the methods have failed to fix this issue, your Windows may be affected by malware or viruses causing this problem. When we download and install pirated games or applications on our PC, they often leave malware in the Windows services, which prevents Windows Defender from detecting it.
To counter this issue, you will need to use third-party antivirus software. There are various antivirus programs, such as Avast and Rkill. You can use one of them to scan your Windows. However, if that also fails, then you cannot do anything other than reinstalling or resetting Windows.
7. Reinstall or reset Windows.
Reinstalling or resetting Windows will surely fix this issue because it recreates all the system files from scratch. If you choose to reinstall Windows, visit the article using the link. However, if you want to reset Windows, follow this method.
Keep in mind that resetting Windows will not delete your data if you choose the “Keep my files” option while resetting Windows. However, it will delete your drivers and programs installed on the system disk.
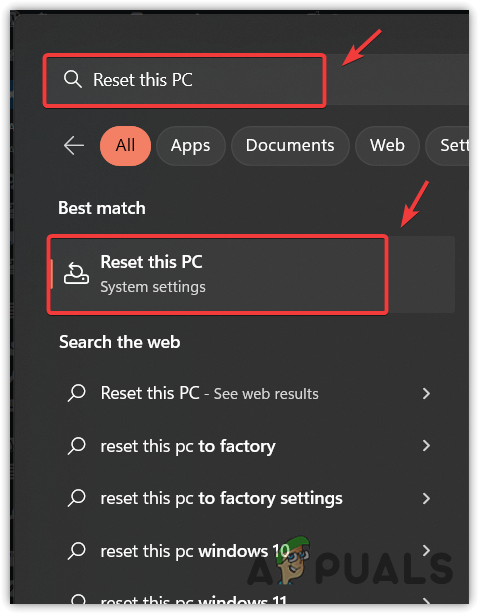
To reset Windows, follow these steps:
- Click the Start Menu and type “Reset this PC.
- Open the settings and click “Reset PC” to access the system reset settings.
- Select Keep my files > Local reinstall.

- Then, click Next and click Reset to start resetting Windows.
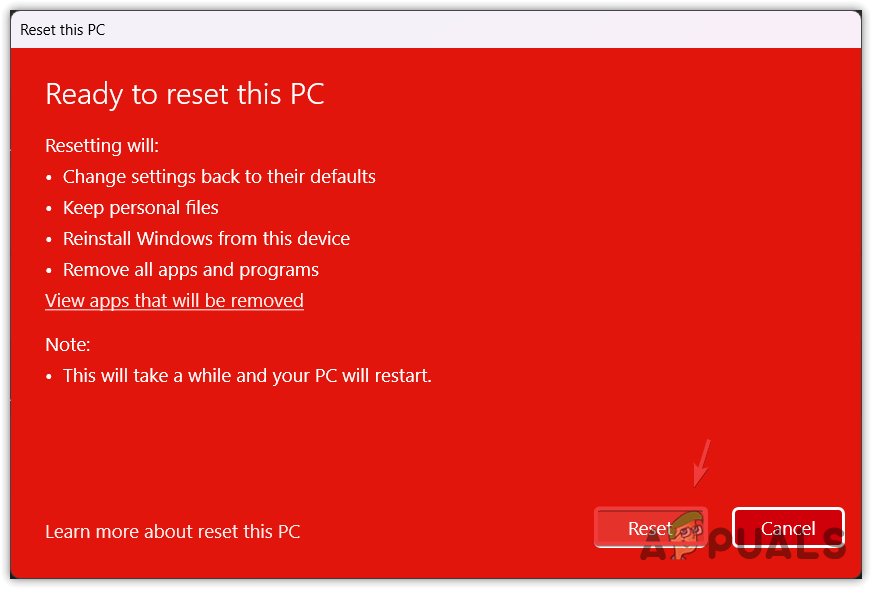
- Once completed, your issue will now be resolved.
Search Indexer High Disk Usage or CPU Usage- FAQs
Restart the Windows search service by going to the service.msc Window. If the issue persists, try rebuilding the database of Windows search, which should fix the problem.
When there is a problem with the Windows search service or database, it consumes high CPU or disk usage. If that’s not the case, you may have malware or a virus on your PC, causing the Windows search indexer to consume high CPU or disk usage.


