Photoshop Crashes when Printing on Windows
Some Windows 10 users are reporting that their Photoshop installation is crashing every time they attempt to print something directly from the application (via File > Print). Affected users are reporting that the issue occurs with any type of file that they’ve tried.
If you’re looking for a quick workaround around this crash, try flattering the .PSD file in Photoshop by transforming it into a .JPG or .PNG and printing it using Windows Photos. But this is not a fix, just a quick workaround.
How to Fix Photoshop Crashes when Printing on Windows 10
If you have the time to troubleshoot the issue properly, start by running a simple scan with the Printer Troubleshooter and see if the utility manages to identify and fix the issue automatically. If you want to do it manually, start by restarting the Spooler service in order to eliminate the possibility of a glitch that’s stopping it from acting as a bridge between Photoshop and the printer.
It’s also possible that you are dealing with a port/driver issue. If this scenario is applicable, use Device Manager to uninstall every Printer-related port in order to force your OS to reinstall the generic equivalents.
However, this problem might be entirely caused by Photoshop. On PhtoshopCC 2015 or older, this problem is often occurring due to badly cached data by the Preference (Settings folder). In this save, you can fix the issue by resetting the Preference / Settings folder.
In some rare circumstances, system file corruption can also be responsible for these printing crashes in Photoshop. In this case, running DISM and SFC scans should allow you to fix the issue entirely.
Flattering the .PSD (Workaround)
If you’re fine with just a quick workaround rather than a proper fix, you have the option to simply flatten the .PSD file to a .JPG or .PNG and then print it via Windows Photo Viewer. But keep in mind that this will not resolve the underlying issue that’s causing this problem – it’s just a reliable workaround that will allow you to print Photoshop files if you are in a hurry.
This workaround has been confirmed to be effective by dozens of affected users on Photoshop CC2015 and older on Windows.
In the event that you’re looking for a quick fix, follow the instructions below to flatten the .PSD file and print it using Windows Photo Viewer:
- Open Photoshop and load up the .PSD file that you’re having issues with.
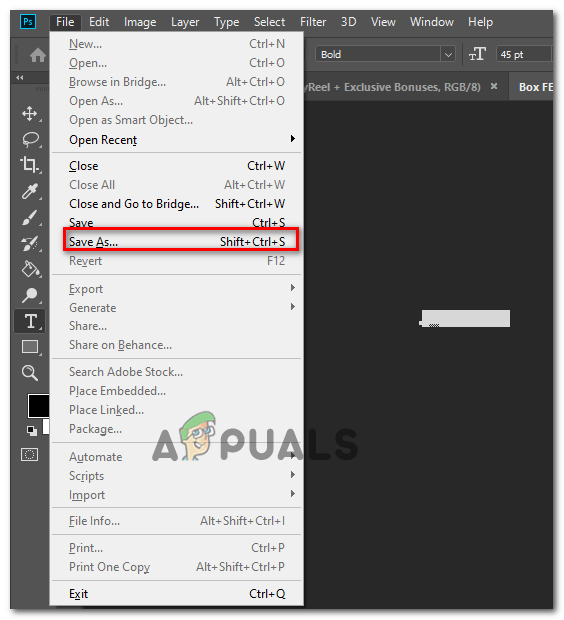
- Next, click on File (from the ribbon bar at the top) and click on Save as from the newly appeared context menu.
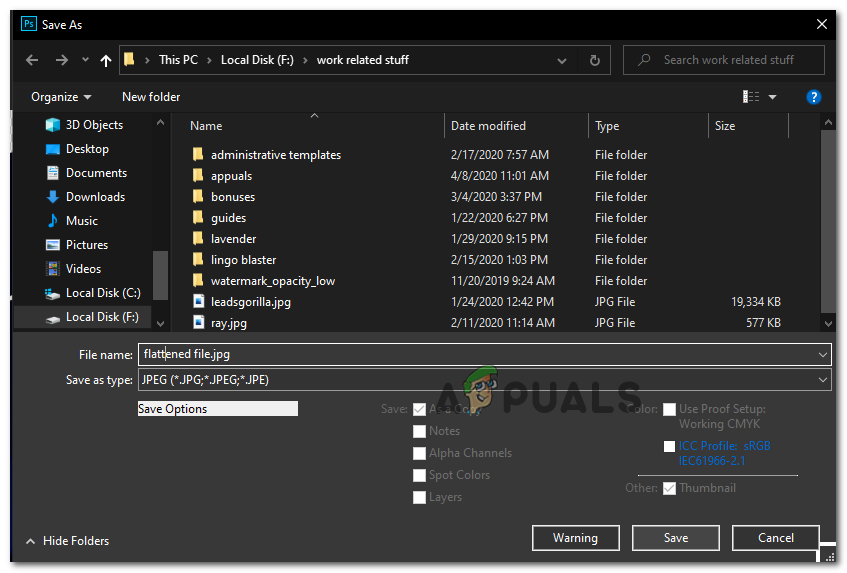
Using the Save As function in Photoshop - Inside the Save As window, select a suitable location where you can save the flattened file, name it whatever you want but ensure that you change the Save as type to .JPEG or .PNG.
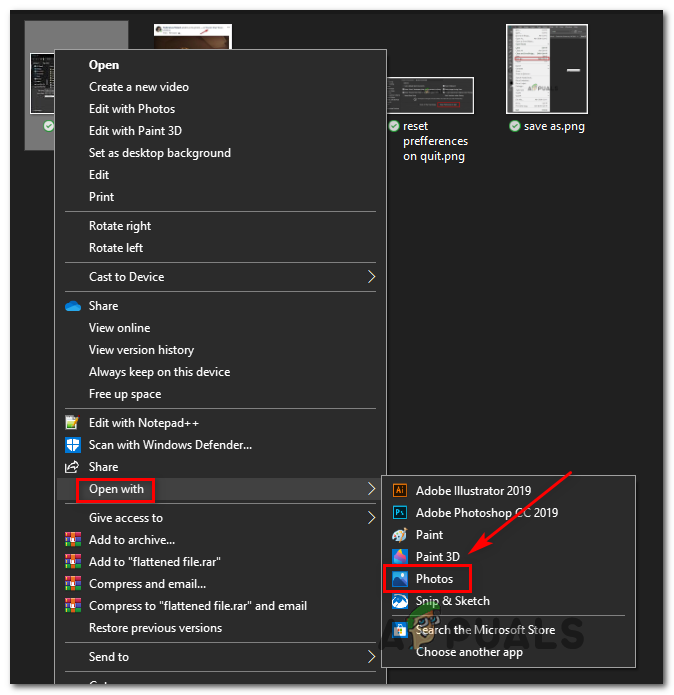
Accessing the Flattened File - Once the file has been successfully saved, you can close your Photoshop application and navigate to the location where you saved the flattened file. Next, right-click on it and choose Open with > Photos from the newly appeared context menu.
Opening the flattened images with the Photos app - Once the flattened image is opened with the Photos app, click the print icon in the top-right section to initiate the printing action.
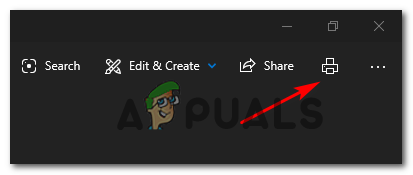
Initiating the printing action
Once you initiate the printing action, see if the print job completes successfully. In case you still get a printing error or you want to deploy a fix that actually fixes the root cause of the PhotoShop crash, move down to the next fix below.
Running the Printer Troubleshooter
Before you try any other fix, you should begin by testing the waters and seeing if your Windows 10 installation is able to fix the issue automatically. Windows 10 is equipped with a robust troubleshooter for printing problems, and there are a lot of reports with users managing to fix their printing issues simply by running it and applying the recommended steps.
The Printer Troubleshooter on Windows 10 will begin by scanning your computer for any inconsistencies. If any problems are discovered and the utility holds a viable repair strategy, you will be prompted to apply it automatically.
If you want to pursue this potential fix, follow the instructions below to run the Printer Troubleshooter on your computer:
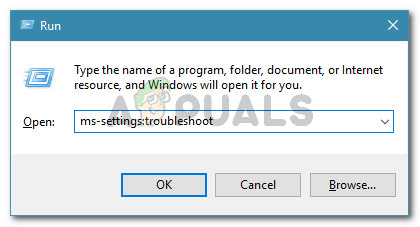
- Press Windows key + R to open up a Run dialog box. Next, inside the text box, type ”ms-settings:troubleshoot” and press Enter to open up the Troubleshooting tab of the settings app.
Accessing the Troubleshooting tab - Once you’re inside the Troubleshooting tab, move over to the right-hand section and then scroll all the way down to the Get Up and running section. When you get there, click on Printer, then click on Run the troubleshooter to open up the utility.
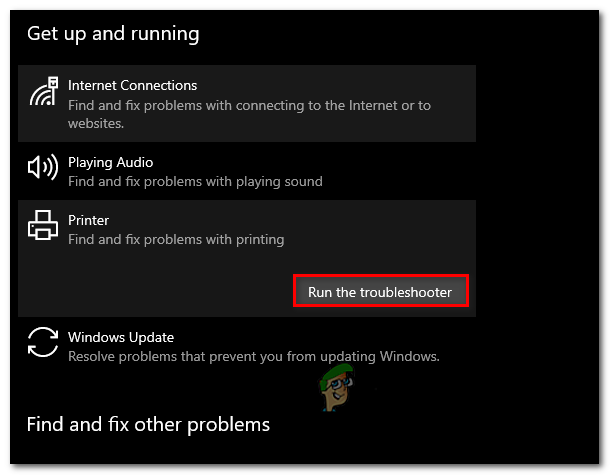
Running the Printer Troubleshooter - Once the utility is started, it will automatically begin scanning all your printer components in a logical order to determine the problem that’s causing your printing issues. In case a problem is discovered and the utility has a viable repair strategy for it, you will be presented with a fix. If this happens, apply it by clicking on Apply this fix, then wait for the operation to complete.
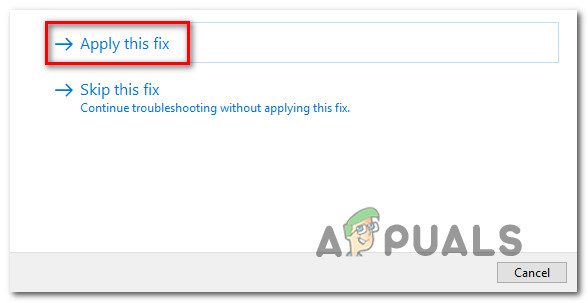
Apply this fix - After the recommended repair strategy is applied, reboot your machine and see if the problem is resolved once the next startup is complete by attempting to initiate a printing task directly from Photoshop once again.
In the event that you still end up experiencing the same kind of crash, move down to the next potential fix below.
Restarting the Spooler Service
As it’s been confirmed by multiple affected users, this problem can also be facilitated by a glitch with the Print Spooler Service. In most cases, you will end up experiencing the crashes because the Print Spooler service will become stuck in a limbo state and will no longer act as a bridge.
If this scenario is applicable, you should be able to fix the issue by restarting the Print Spooler service. This operation was confirmed to be effective by a lot of affected users.
In case you’re unsure on how to restart your Print Spooler Service, follow the instructions below:
- Press Windows key + R to open up a Run window. At the Run prompt, type “services.msc'” and press Enter to open up the Services screen.

Running Services Manager Note: If you’re prompted by the UAC (User Account Control), click Yes to grant administrative privileges.
- Once you’re inside the Services screen, move over to the right-hand side section, then scroll down through the list of services until you locate the Print Spooler Service.
- When you manage to locate the Print Spooler service, right-click on it and then click on Properties from the newly appeared context menu.
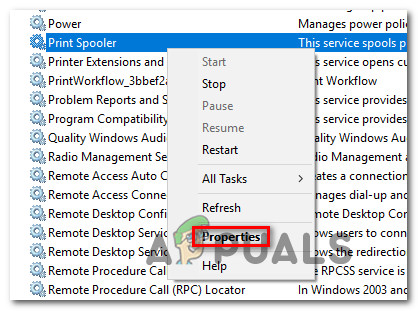
Accessing the Properties screen of the Printer Spooler service - Once you’re inside the Properties menu of the Print Spooler service, select the General tab from the vertical menu at the top. Next, once you are in the correct menu, change the Startup type of this service to Automatic, then click on Stop (under Service Status).
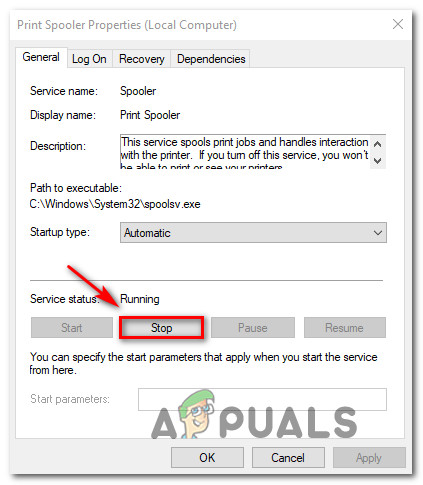
Restarting the Print Spooler service - Once you successfully stop the service, wait a little while before clicking the Start button in order to restart the Print Spooler service.
- After you restart this service, open Photoshop once again and trigger a printing action to see if the problem is now fixed.
In case the same problem is still occurring even after you restarted the Print Spooler Service, move down to the next potential fix below.
Resetting the Photoshop Preference folder
According to some affected users, this Photoshop printing issue can also occur due to a corrupted Preferences file. As it turns out, this file might end up catching corrupted data which might contribute to the sudden crash you’re experiencing when you try to print something directly from Photoshop’s menus.
Fortunately, you should be able to fix this issue swiftly by deleting and resetting the Photoshop Preference folder to the default. This operation is confirmed to be successful on both Windows and macOS.
Important: Keep in mind that resetting Photoshop’s Preference file will reset more than just the custom preference you previously established. It will also clear any custom settings related to color settings, keyboard settings, and workspaces you’ve previously created.
If you understand the consequences and you want to go ahead with resetting your Photoshop Preference folder, follow the instructions below:
Note: The instructions below are applicable to both Windows and macOS.
- First things first, ensure that Photoshop is completely closed (and no background process belonging to it is running in the background). This step is done to clean any temp data that your Photoshop app might currently be holding on to.
- Next, relaunch the app press and hold Shift + Ctrl + Alt (on Windows) or Shift + Command + Option (on macOS). This is done in order to force the Preference (Settings) prompt to appear.
- Once you see the Settings (Preference) popup, click Yes in order to clear it.
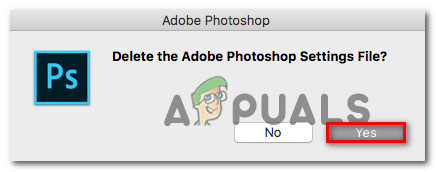
Deleting the Photoshop Settings file Note: If you are using PhotoshopCC, you also have the option to reset the Preference file directly from the application. to do this, go to Preferences > General and click on Reset Preferences on Quit.
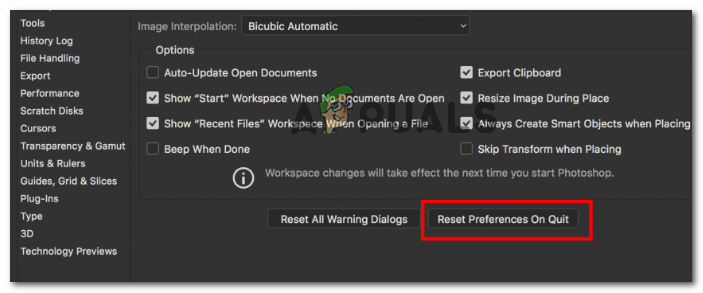
Resetting Preferences on Quit
Reinstalling all Printer ports
Another viable scenario that might cause Photoshop to crash when it has to handle a printing job is an inconsistency with the Printer ports involved in this operation. Some users that were previously facing the same problem have confirmed that they managed to get the issue resolved by reinstalling every printer driver (generic or dedicated)
If you want to pursue this potential fix, follow the instructions below:
- Press Windows key + R to open up a Run dialog box. Next, type ‘devmgmt.msc’ inside the text box and press Enter to open up Device Manager. Once you are prompted by the UAC (User Account Control), click Yes to grant administrative privileges.

Running Device Manager - Once you manage to find yourself inside Device Manager, scroll down through the list of device types, and expand the drop-down menu associated with Print Queues.
- Next, go ahead and right-click on each printer driver that you find under Print Queues and click on Uninstall from the newly appeared context menu.
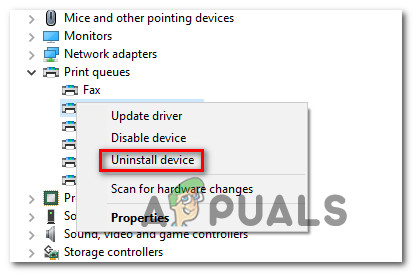
Uninstalling the Printer Driver - Ensure that every printer driver under Print Queues is successfully uninstalled, then move over to the Universal Serial Bus controllers and uninstall everything printer related entry also.
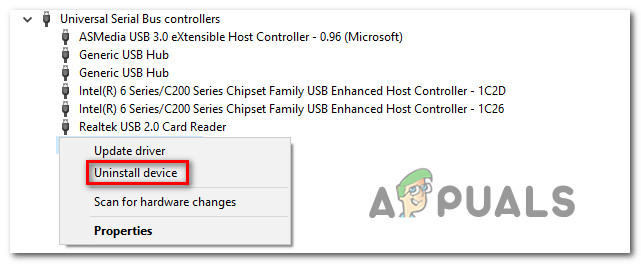
Uninstalling Print ports - As soon as you manage to uninstall every relevant printer driver, restart your computer in order to allow your OS to reinstall the generic set of printer drivers that are missing.
Note: After the next startup is complete, you can install the dedicated drivers once again. - Open Photoshop and attempt to complete a printing job from within the app to see if the issue is now resolved.
In case you still end up seeing the same application crash, move down to the next method below.
Running SFC and DISM scans
If none of the instructions below have worked for you, there’s a high chance that the problem is actually caused by some type of system file corruption that’s either interfering with the Printer service or it ends up affecting some dependencies that the Adobe application uses – this is very likely if you get a different error while attempting to print conventionally (from outside Photoshop).
If this scenario is applicable you should be able to fix the issue by running a couple of utilities capable of dealing with this type of system file corruption – DISM (Deployment Image Servicing and Management) and SFC (System File Checker)
System File Checker is an entirely local tool that uses a default archive to replace corrupted instances with healthy copies. Initiate an SFC scan, wait patiently until the operation is complete, then restart your computer.
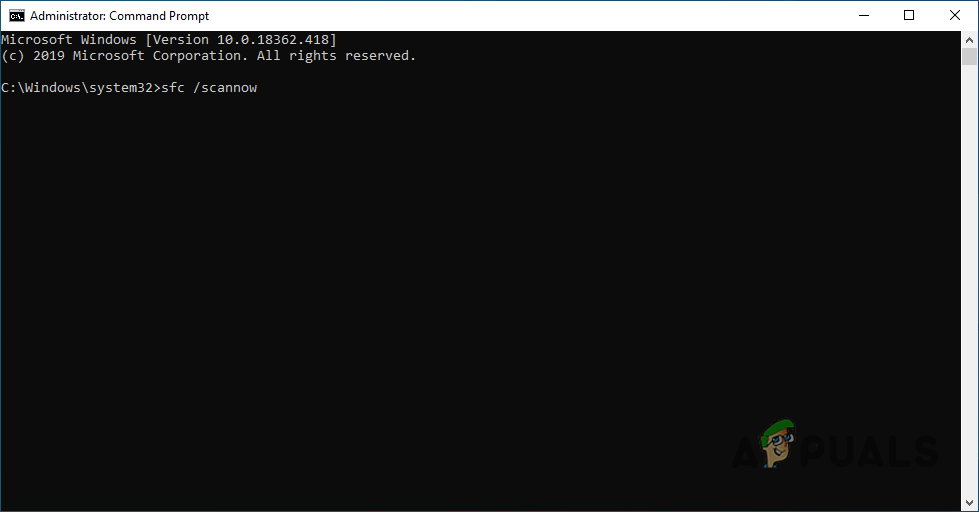
Note: Once you start this process, it’s highly recommended that you don’t interrupt it. Doing so might cause logical errors that might end up to additional problems down the line.
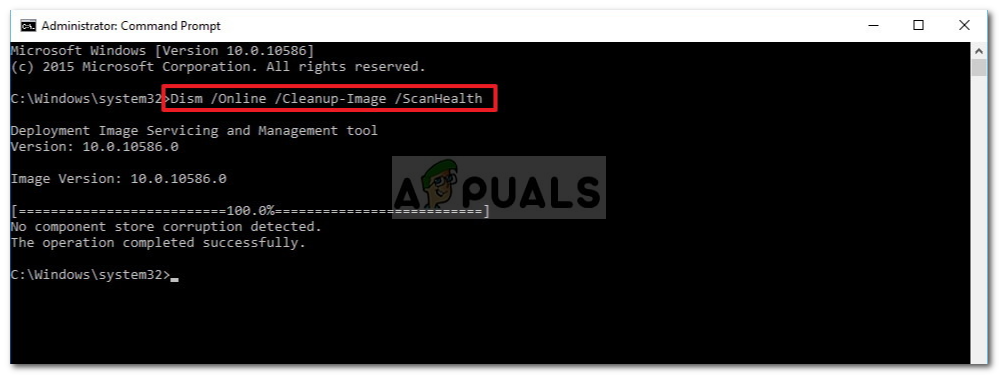
Once the SFC scan is complete, reboot your computer and prepare for the DISM scan. This is different from the first SFC scan, mainly because DISM uses a sub-component of Windows update to replace corrupted files and it’s way more efficient at repairing broken OS-components (rather than drive inconsistencies).
With this in mind, ensure that your Internet connection is stable, then initiate a DISM scan and restart your computer at the end of this procedure.
Once the second scan is finished, restart your computer once again and see if the issue is fixed at the next startup.


