Fix: Outlook Error Code 0x8004011D
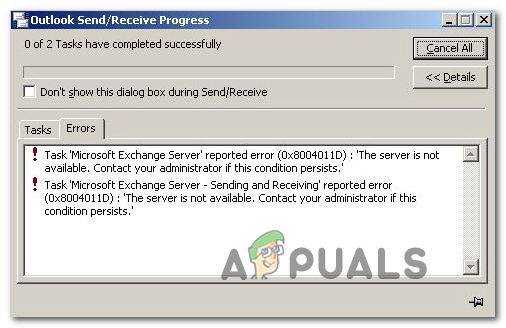
A lot of Windows users are seeing the Error Code 0x8004011D when trying to update their emails on Outlook or when sending/receiving emails. This issue is reported to occur with every recent Windows version (Windows 7, Windows 8.1 and Windows 10) and doesn’t seem to be dependent on the Outlook version that is being used.
In most cases, this issue is reported to occur due to an Exchange server issue that’s only occurring temporarily. If that’s the case, you can probably avoid any instances of future 0x8004011D errors by enabling the use of the Cached mode in Exchange’s Offline settings.
Some users have managed to get this issue resolved by creating a brand new email profile to be used with Outlook. This is not ideal since it will make you lose some data attached to your email that’s stored locally, but you can recover it afterward by syncing with your email client.
If you’re only seeing the 0x8004011D error while an SD card is connected, you might be dealing with a malware infection caused by a virus that likes to resides in the root folders of SD cards & flash drives (jutched.exe). In this case, putting your computer in Safe mode w/ Networking and running the Safety Scanner utility should take care of the issue.
However, there’s also one particular scenario in which the error is triggered due to the fact that two Microsoft accounts are connected at the same time through the same Outlook installation. To fix this, you’ll need to do some modifications to the MaximumAllowedSessionsPerUser value inside ParameterSystem.
Enabling Exchange’s Cache Mode
If you are encountering the 0x8004011D error with a Microsoft Exchange account, you might be able to fix the issue by forcing Outlook to use the Exchange Cached mode and see whether this allows you to connect to the Exchange server normally.
Note: Before you do this, it’s important to ensure that you’re running the latest version of the Outlook program that is causing you this error code.
If you confirm that you’re using the latest version of Outlook, follow the instructions below to enable the use of the Cached Exchange Mode via the User Account Configuration window.
Here’s a quick guide that will show you how to enable ‘Cached Exchange Mode’ for the affected Outlook account:
- First things first, start Outlook and any associated instances.
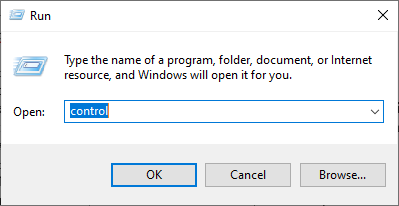
- Next, type Windows key + R to open up a Run dialog box. Inside the text box, type ‘control.exe’ and press Enter to open up the classic Control Panel interface.

Opening the Control Panel - Inside the Control panel window, click on Mail from the list of available options or use the search function (top-right corner) to narrow down the list of items.

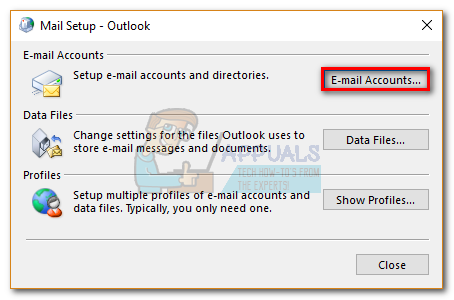
Opening up the Mail app - Once you’re inside the Mail setup screen, click on the E-mail account button associated with E-mail Accounts.
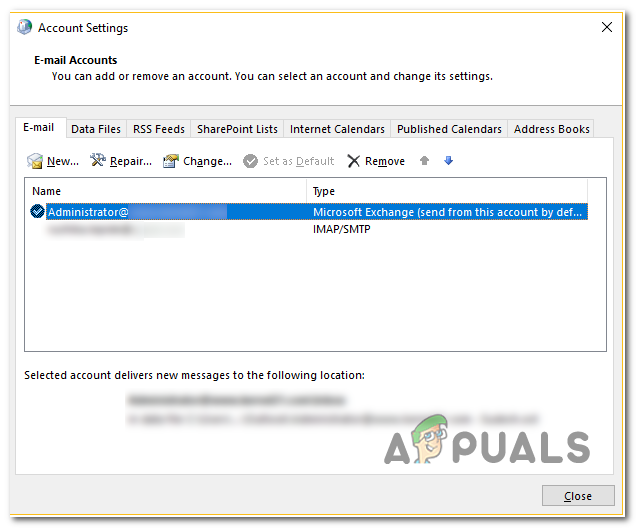
Accessing the Email accounts menu - Inside the Accounts Settings menu, select on the E-mail tab, then double-click on the Exchange account that you’re currently using.
Accessing the email account that is currently active - Once you’re inside the settings menu associated with your email account, scroll down to the Offline Settings section and check the box associated with Use Cached Exchange Mode.

Enabling Cached Exchange Mode Note: If the use of cached Exchange mode is already enabled, disable the option and continue with the steps below. In case the same issue persists, reverse engineer the steps to enable it again.
- Restart Outlook, connect with the same Microsoft Exchange account and see if the issue is still resolved.
In case the issue is still not resolved, move down to the next potential fix below.
Creating a new Outlook Profile
In case the potential fixes above didn’t allow you to resolve the issue and you’re still encountering the 0x8004011D error, you should be able to fix the issue by removing the current Outlook profile and then re-syncing your Outlook 365 account once again.
Several affected users have confirmed that his operation finally allowed them to use their Outlook program normally without encountering the error whenever they tried to sync the application.
IMPORTANT: Unless you back up your .PST / .OST file in advance, you will lose any Outlook data that is being stored locally by following the steps below.
Here’s a quick guide that will show you how to remove your current Outlook profile and create a new one from scratch in order to resolve the 0x8004011D error:
- Start by closing Outlook and any associated services.
- Next, press Windows key + R to open up a Run dialog box. Next, type ‘control.exe’ and press Enter to open up the Classic Control Panel window.
Accessing the Classic Control Panel interface - Once you’re inside the classic Control Panel interface, use the search button (top-right corner) to search for ‘mail’. Next, from the list of results, click on Mail.
Opening up the Mail app - From the main Mail Setup window, click on Show Profiles button associated with Profiles.
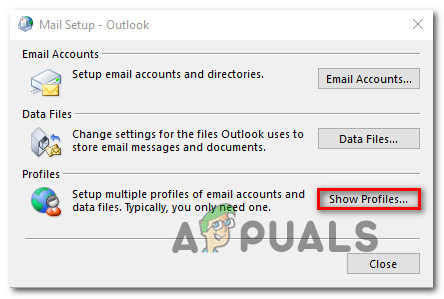
Accessing the Profiles menu - Once you’re inside the Mail window, select the Outlook Profile that you’re actively using and hit the Remove button to get rid of it.
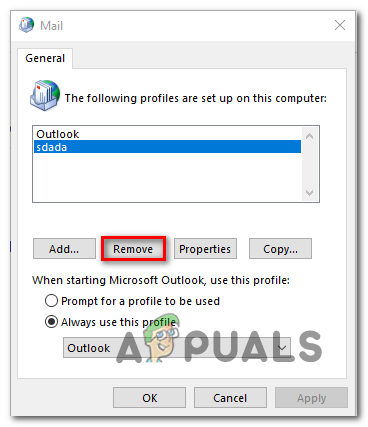
Removing your Outlook email profile Note: Before you do this, back up your .PST or .OST file in order to avoid total data loss.
- When prompted by the confirmation window, click on Yes to complete the operation.
- Next, start Outlook again and follow the on-screen instructions to configure your email from scratch.
Note: Since you previously deleted the old profile, the email client will create a brand new .OST / .PST file and attach it to the new profile after you finish the sign-up procedure. If all goes well, you can attach the old Outlook Data file later on (once you confirm that the 0x8004011D error is resolved). - Attempt to sync your Outlook program once again to confirm if the issue has been fixed.
Running a Malware Scan in Safe mode
As it turns out, this issue can also be facilitated by some kind of malware the found your way on your system. In most cases, affected users have reported that the issue was being caused by a virus (jutched.exe) that was being stored on an SD card.
If this scenario is applicable and you’re only encountering the 0x8004011D while you connect an SD card, you should be able to fix the issue by running Microsoft Safety Scanner while in Safe Mode or by running a powerful 3rd party malware scanner.
Here’s a quick step by step guide on removing the malware that might be causing the Outlook error:
- Connect your SD card to the computer where you’re encountering the issue on and format the drive by right-clicking on the drive and choosing Format from the newly appeared context menu.
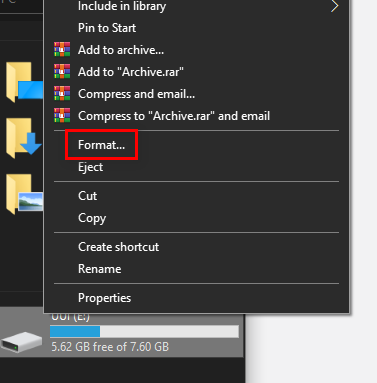
Formatting the SD card Note: If you have any important data on the SD card, back it up before initiating this procedure. But don’t copy any root files (just the contents of the image/video folder that you want to avoid losing).
- Next, leave the same File System as before, but check the box associated with Quick format before clicking on Start.
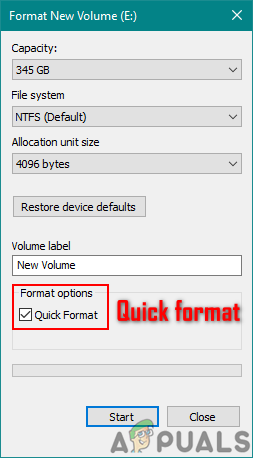
Using the quick format Note: If you have the time, you should consider going for a Full Format (by unchecking the Quick format box), but this is not necessary.
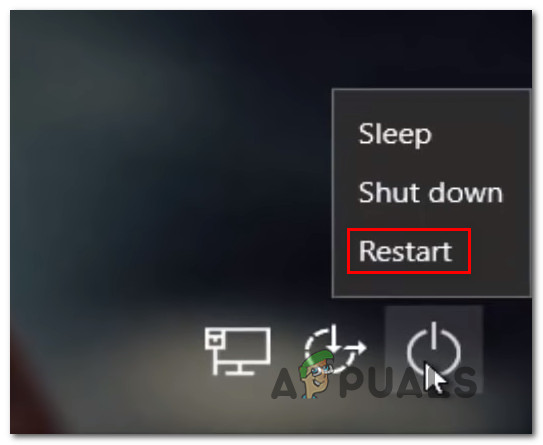
- Once the SD card is formated, restart your computer and wait for the initial login screen to appear. When you see it, click on the Power Options icon (bottom right corner).
- Inside the Power Options menu, hold the Shift key while clicking on Restart in order to force your computer to boot in Safe Mode.
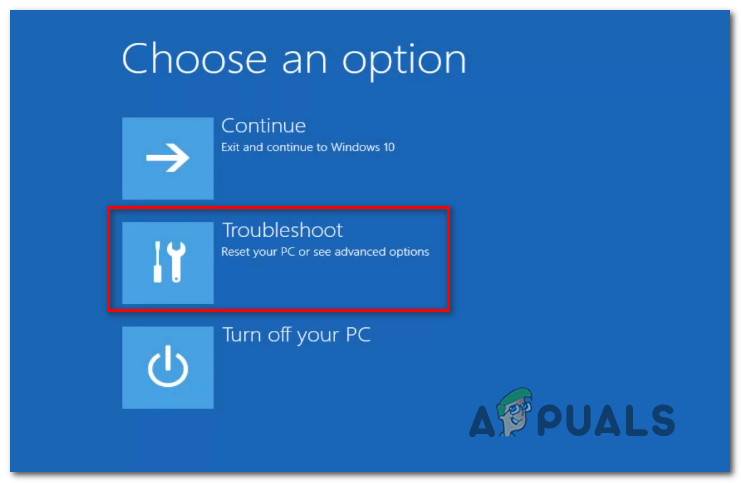
Using Shift key + Restart to force the PC to restart in Safe Mode - Next, your computer will restart directly into the Recovery menu. Once inside, click on Troubleshoot from the list of available options.
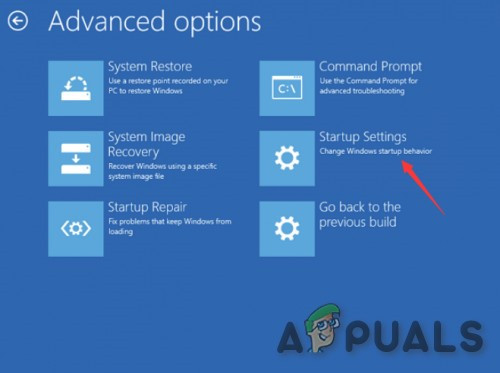
Accessing the Troubleshoot menu - Inside the Advanced Options menu, click on Startup Settings from the list of options.
Startup Settings on Advanced Options Screen - At the next screen, press F5 to boot your computer in Safe Mode with Networking.
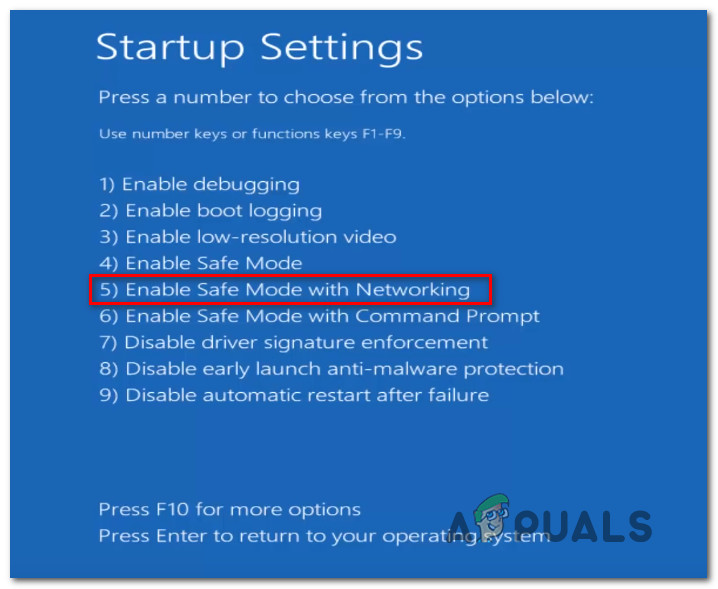
Starting your computer in Safe Mode with Networking Note: Booting in Safe Mode with Networking is critical because you’ll need Internet access in order to download and deploy the Windows Safety Scanner utility.
- After your computer successfully boots in Safe mode with Internet access, use this link (here) to download the latest version of the Microsoft Safety Scanner utility.
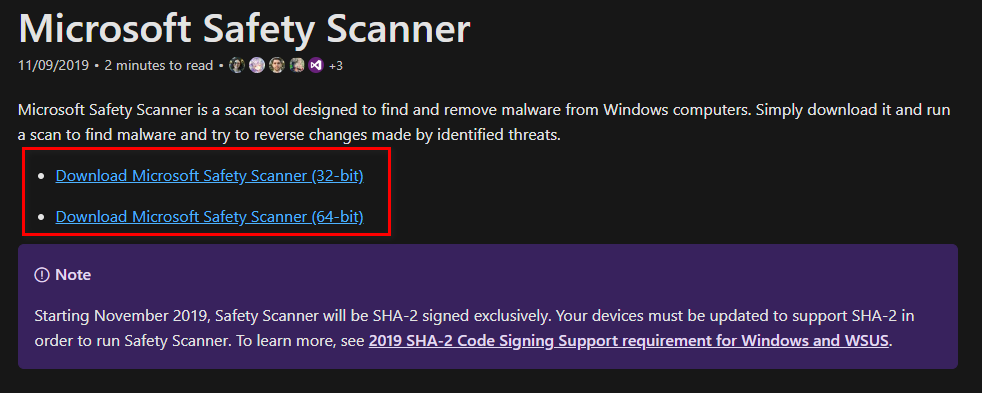
Downloading Windows Safety Scanner Note: Ensure that you’re downloading the correct bit-version according to your OS architecture.
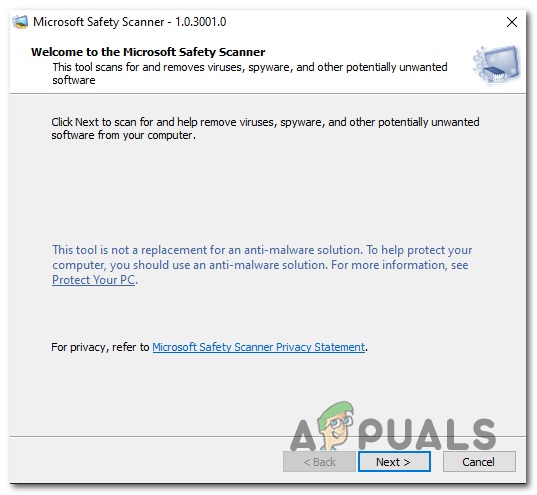
- After the download is complete, double-click on the MSERT executable to open up the anti-malware utility.
Note: When prompted by the UAC (User Account Control), click Yes to grant administrative privileges. - Complete the on-screen prompts to initiate the scan with Microsoft Safety Scanner, then wait for the process to complete
Completing the Microsoft Safety Scan Note: Do not close the window until you see the success message.
- After the operation is complete, reboot your computer once again to boot in normal mode, open Outlook again and see if the issue is now resolved.
If this didn’t do the trick, you should also consider running a deep scan with Malwarebytes.
In case the same 0x8004011D error is persisting, move down to the next potential fix below.
Allowing Two Exchange accounts in one Outlook installation
As it turns out, this issue might occur in situations where the user has 2 Microsoft Exchange accounts connected through the same Outlook installation. This problem seems to be restricted to older Outlook versions (older than Outlook 2013).
If this scenario is applicable, you should be able to fix the issue by doing some Registry modifications in order to expand on the Maximum Allowed Sessions per user.
Here’s a quick step-by-step guide on how to do this:
- Press Windows key + R to open up a Run dialog box. Next, type ‘regedit’ inside the text box and press Enter to open up the Registry Editor.
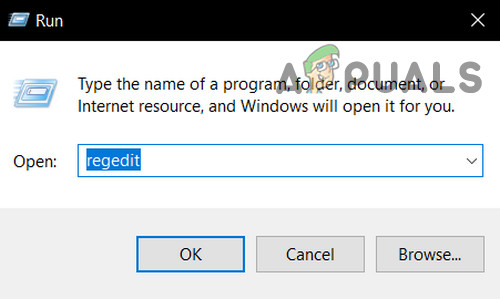
Open Regedit Note: If you’re prompted by the UAC (User Account Control) prompt, click Yes to grant administrative privileges.
- Once you’re inside the Registry Editor, use the left-hand menu to navigate to the following location:
HKEY_LOCAL_MACHINE\SYSTEM\CurrentControlSet\Services\MSExchangeIS\ParametersSystem
Note: You can either get there manually or you can paste the entire path directly into the navigation bar and press Enter to get there instantly.
- After you arrive to the correct location, move to the right-hand section and see if you manage to locate the MaximumAllowedSessionsPerUser entry. If it doesn’t exist, right-click on an empty space and choose New > Dword (32-bit) value
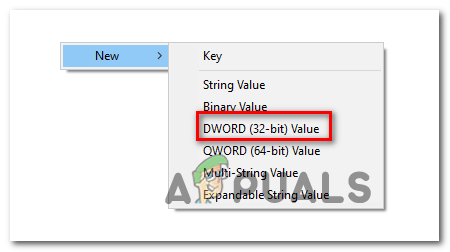
Creating a New Dword (32-bit) value - Name the newly created value MaximumAllowedSessionsPerUser.
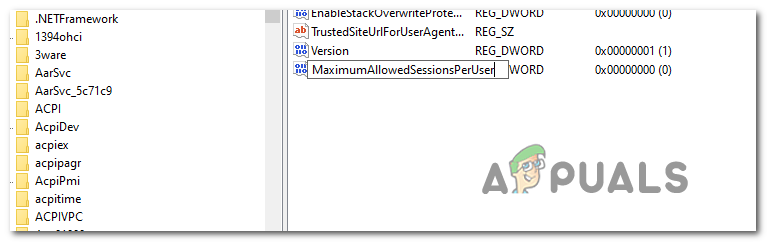
Creating a MaximumAllowedSessionsPerUser Note: If the MaximumAllowedSessionsPerUser value already exists, skip this step.
- Double-click on MaximumAllowedSessionsPerUser, set the base to Decimal and change the Value data to the number of Exchange accounts that you want to use with Outlook and click Ok to save the changes and close the Registry Editor.

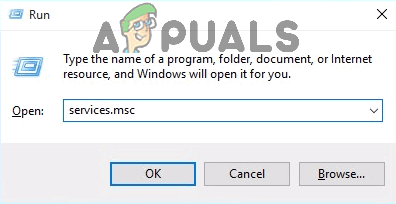
Modifying the MaximumAllowedSessionsPerUser value - Press Windows key + R to open up a Run dialog box. Inside the text box, type ‘services.msc’ and press Enter to open up the Services screen.
Type “services.msc” into the Run dialog and press Enter - Next, move to the right-section, scroll down through the list of active services to locate the Microsoft Exchange Information Store. When you see it, right-click on it and choose Restart service from the context menu.
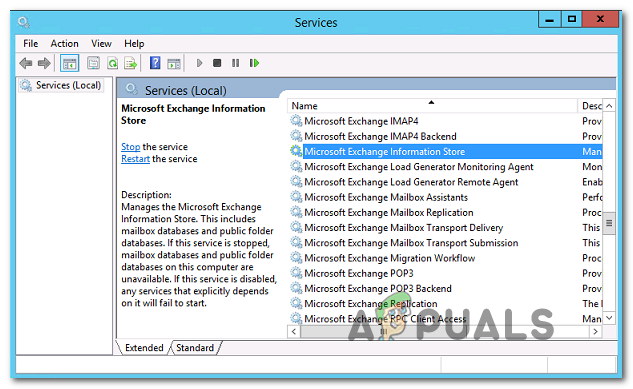
Restarting the Microsoft Exchange Information store - Once the MSExchange Information Store service is restarted, open Outlook again and repeat the action that was previously causing the 0x8004011D error to see if the issue is now resolved.
One of the most common causes for this is where a user has more than one Microsoft account and autodiscovery is messed up because it’s receiving settings from two places. In this case, setting up a new profile won’t work because the autodicovery fails. The solution is actually very easy, close Outlook and sign out of the Office app. Then sign out of one of the Office components (such as Word). You may need to sign out more than once if there is more than one account, so keep signing out until it says no user is logged in. Then sign back into the primary 365 account in Word ad relaunch Outlook. It’ll then be connected.