How to Change or Remove the Primary Account from Outlook
If you want to retain the current profile while trying to move from an internal Exchange server to the new Office 365, you’ll get a message saying that the primary account cannot be removed.
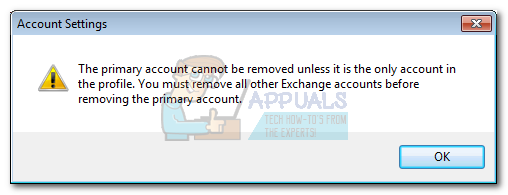
” The primary account cannot be removed unless it is the only account in the profile. You must remove all other Exchange accounts before removing the primary account”
If you think about it, loading a new email account with a new data file should also override the old primary account preference, but it doesn’t. Outlook operates by setting the first account added to a profile as the primary account. You can’t remove a primary account from a profile unless you get rid of all the other Exchange accounts from that particular profile. When you remove the primary Exchange account, the next one (sorted by date) is automatically set as primary.
If you’re in a situation like this, it’s recommended to create a new profile and add the account you want to set as primary first. However, you can go about removing the primary account in two other ways. The second way would be to change some settings in the registry and then removing the primary Exchange account. The third option is to add a PST file to the default profile, set it as the new default and then remove the Exchange account\s.
To make it easier for you, we have included below step-by-step guides with each of the methods presented above. Let’s begin:
Method 1: Changing the Primary Account while Keeping the Profile
If you want to change the primary account without creating a new profile, there is a better option. You can change your primary account and keep your profile along with profile-specific settings by adding a PST file to the profile and setting it as the default data file.
In the steps below, we are going to remove all of the Exchange accounts from your current profile, while keeping the main account last. We’ll then add a PST file to the profile and make it get recognized as the default. Here is the step-by-step guide:
- Close Outlook completely and all the associated dialogs.
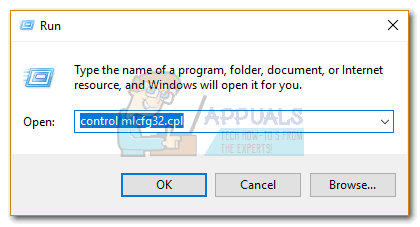
- Press Windows key + R and type “control mlcfg32.cpl”.
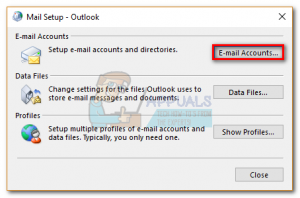
- Once you’re inside Mail Setup, click on Email Accounts.
- In Account Settings (Email tab) start removing your Outlook accounts. Start with secondary accounts and leave the primary account for last. You can remove them by clicking on an account to select it and then clicking on Remove.
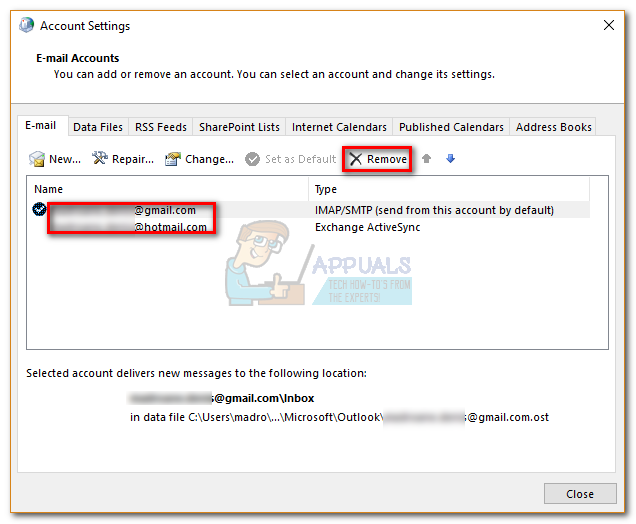 Note: The primary account can be identified via the check mark in the left-hand section of the screen.
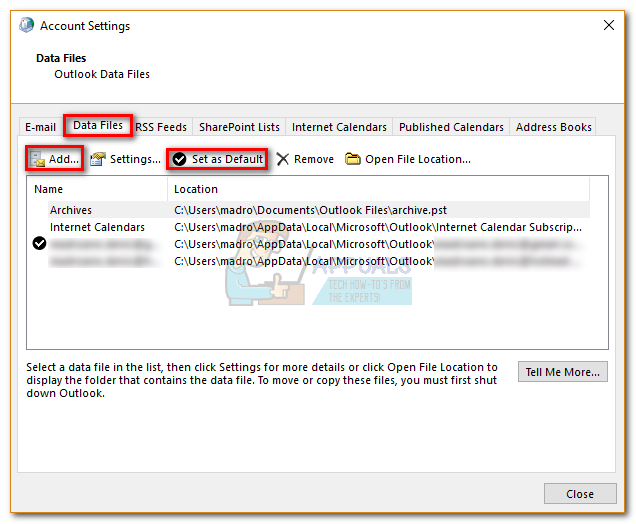
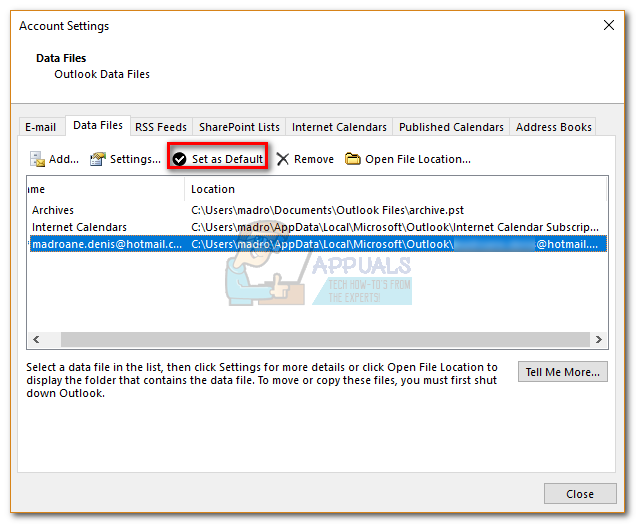
 - Once all the accounts are removed, click the Data Files tab, tap on Add and browse to your PST location. After you load it, click on Set as Default.
Note: The default location of the PST file is in Documents / Outlook Files
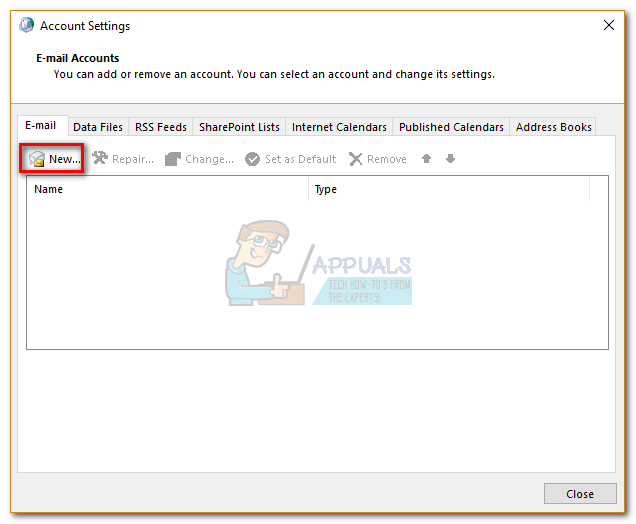
- Close the Outlook setting window. Press Windows key + R and type “control mlcfg32.cpl” to return to Mail Settings. Once again click on Email Accounts.
Note: This step is necessary because otherwise the new account will not be listed in Outlook. - Add the new account that you want to serve as primary by clicking the New button. After you add the new account, close this window.
- Open Outlook and go to Account Settings > Account settings and click on the Data files tab. Once you’re there, make sure the.OST file is set as the default. If it isn’t select it and click the Set as default button.
- Do a final Outlook restart. Your new account should be now shown as primary.
Method 2: Removing the Primary Account by Editing the Registry
While the method above works perfectly fine if you have one or two accounts, it’s not that efficient if you have a lot of Exchange accounts. Even if you have just two of them, if the mailboxes are huge, it will take a lot of time for them to re-sync.
For cases like this, it’s way more efficient to edit the registry file so that the primary flag is deleted. You can then safely delete the account. Here’s what you need to do:
Note: The following procedure is not supported by Microsoft. If you don’t follow the steps below carefully, you run the risk of corrupting your profile with little other choices than creating a new one. Do not attempt this method unless you’re confident you can pull through.
- Close Outlook completely and any other associated dialog boxes.
- Press Windows key + R to open a Run command. Type regedit in the run field and hit Enter.
- Now, navigate to the profile key according to your Outlook version :
Outlook 2016 – HKEY_CURRENT_USER \ Software \ Microsoft \ Office \ 16.0 \ Outlook \ Profiles \ “Your profile name”
Outlook 2013– HKEY_CURRENT_USER \ Software \ Microsoft \ Office \ 15.0 \ Outlook \ Profiles \ “Your profile name”
Outlook 2010 – HKEY_CURRENT_USER \ Software \ Microsoft \ Windows NT \ Current Version \ Windows Messaging SubSystem \ Profile \ “Your profile name”
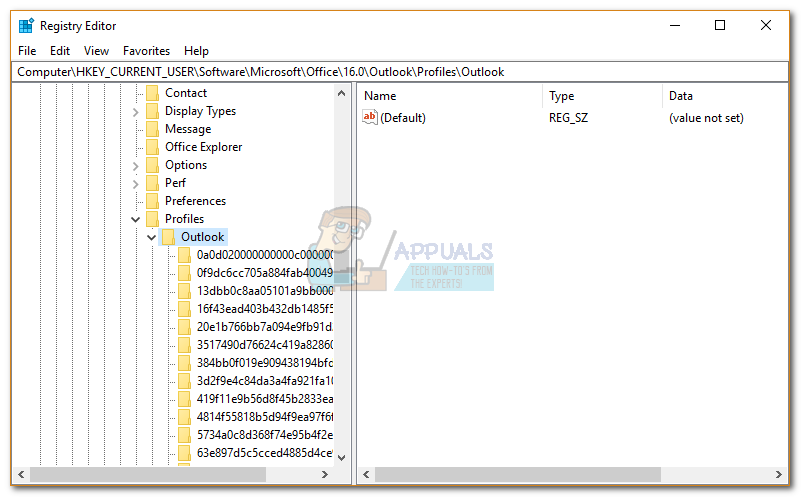
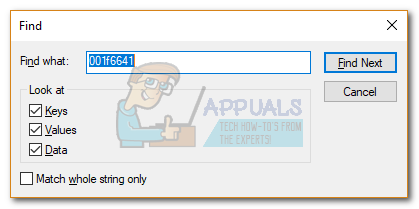
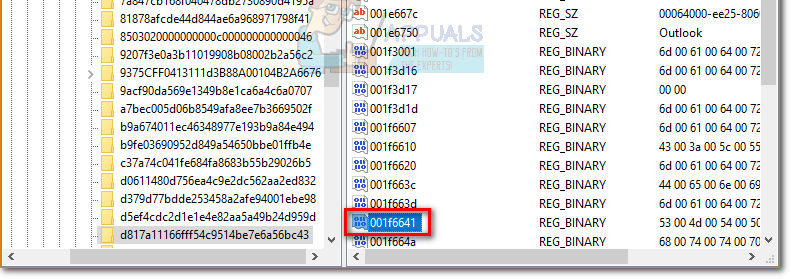
- Now the tricky part. With the Registry Editor window active, press Ctrl + F and search for 001f662b. If you’re on Outlook 2016, search for 001f6641.
- Registry Editor should come up with a result shortly. Let’s make sure it’s the correct account by double-clicking on it.
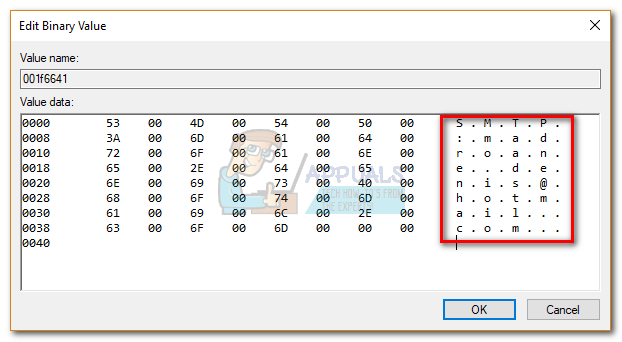
- To confirm that this is the primary account, look a the address inside the data file. If you see your email there, you can safely delete this key.
- Keep in mind that it’s not enough to delete just the registry value. You’ll need to delete the entire key on the left side of the screen. To do this, right-click on the folder in which the value you’ve just searched for is located and hit Delete.
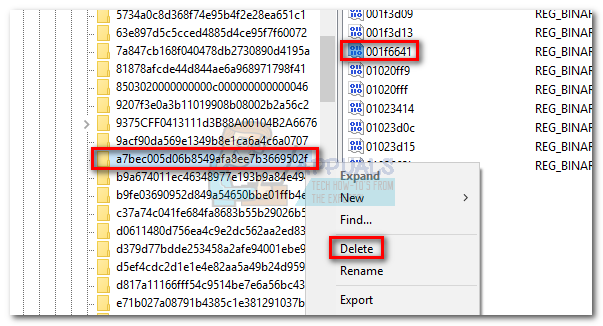
- That’s it. The primary assignment from your account should now be removed.
Method 3: Removing the Primary Account by Creating a New Profile
Making a new profile is recommended when you need to remove the primary account from Outlook. But while it’s faster and more stable, you won’t get to retain profile settings. In other words, you will start from scratch. If you want to change the primary account while keeping your profile, use the first two methods.
- Close Outlook.
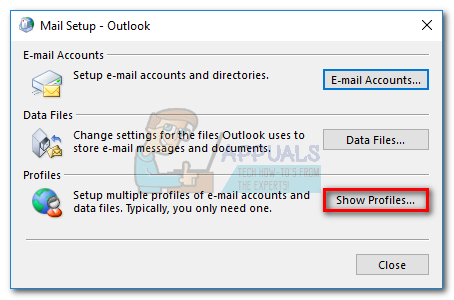
- Press Windows key + R , type “control mlcfg32.cpl” and press Enter.
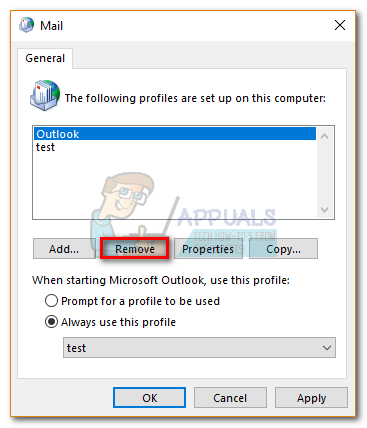
- Click on Show Profiles.
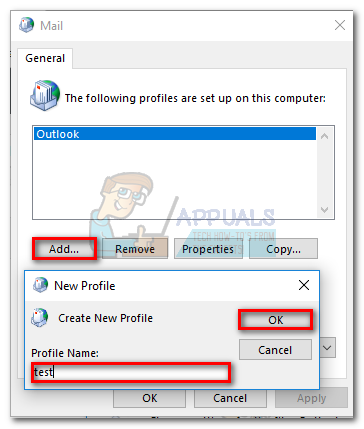
- Click the Add button to create a new profile and insert a name for it.
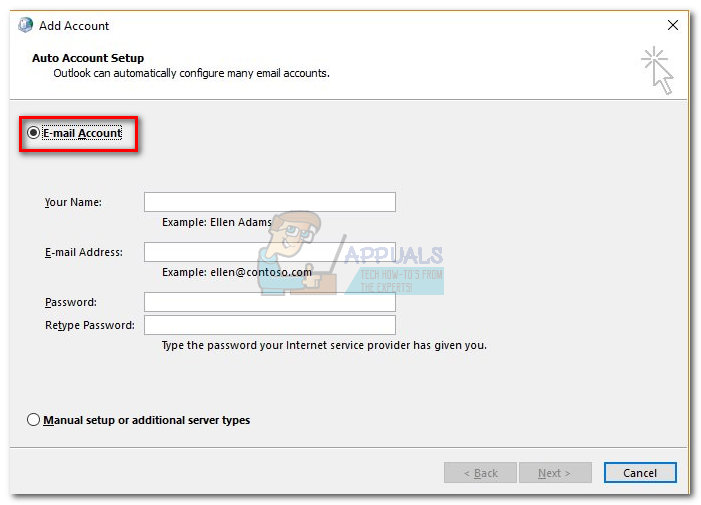
- Use auto Email Account setup to insert your email credentials and configure your account that you want to serve as the primary.
- Once you configure your new profile, return to the initial Mail window and make it the default choice. You can do this by clicking on Always use this profile and select your new profile from the list. Hit Apply to save your preferences.
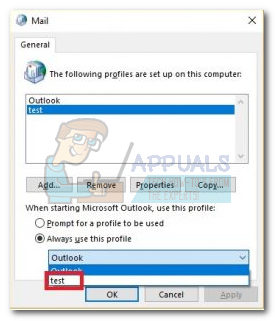
- After the new profile is set to use by default, select your old profile and click Remove.
That’s it. Your email account from the new profile will automatically become the new primary account.
Thanks for this!! I found that method 2 worked fine, except I had to search for “001f6641” multiple times and delete the parent folder (found 4 copies).