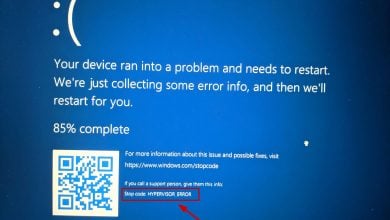
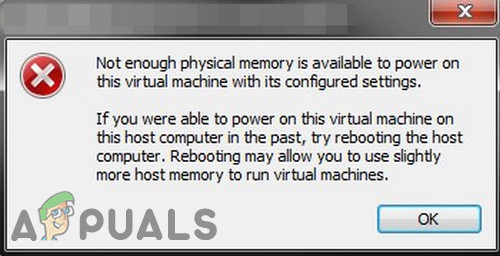
Not Enough Physical Memory Error in VMware
VMware application shows “Not enough physical memory is available” mainly because of conflicting Windows Updates. Also, this error can be caused by non-optimal settings of VMware or outdated VMWare version. This error message occurs when a user tries to boot the machine from an inactive state. This error message doesn’t usually indicate that you have less physical memory; it is instead usually related to software discrepancies between VMware and the computer.
We found this problem mostly to occur after a VMware software update or change in the application’s preferences. This is a very common error message and can be resolved using the methods listed below given that you don’t actually have enough memory to power on the virtual machine.
What Causes ‘Not Enough Physical Memory’ Error in VMware?
- Conflicting Windows Update: VMware has a history of suffering from the error ‘Not enough physical memory is available’ error due to conflicting Windows updates. The current occurrence of this can also be the result of a conflicting Windows update.
- Non-Availability of Administrator Rights: VMware needs administrator access to different files/services/resources of the host environment to complete its operation. If you are using VMware without administrative privileges then VMware may show the error under discussion.
- Outdated VMware Version: Software applications are updated for better performance and to patch loopholes. VMware works in quite a delicate manner and if the host environment has been updated, then it can affect the working of VMware and thus cause the user to face the current VMware error.
- Conflicting Applications: Some applications conflict with VMware and can cause the error at hand. Do note that virtual environment applications create a lot of hindrance in the operation of each other.
- Non-Optimal VMware Settings: You can tweak VMware as per your liking but some users in this process cause VMware to operate under non-optimal settings which eventually lead VMware to show the present problem.
- Wrong Configuration of VMware: VMware uses a certain amount of Host’s RAM but if configured wrongly this setting can force VMware to show the present memory error.
How to Fix ‘Not Enough Physical Memory Available’ in VMware?
Before proceeding with the solutions below, make sure your system has enough RAM to run VMware. If not, then add more RAM to your system and set your pagefile size at least 16GB.
1. Use Safe Mode or Clean Boot Windows
There can be applications that could be interfering in the proper operation of VMware, especially other virtual environment applications like Virtual Box etc. To rule that out, either use Windows built-in Safe Mode or clean boot Windows.
- Clean Boot Windows, or Boot Windows in Safe Mode.
- Launch VMware to check if it is functioning without any problem.
If VMware is operating normally in the clean boot environment or Safe Mode, then try to find out the conflicting application and try to sort out the issue between the applications.
2. Uninstall Conflicting Windows update
Microsoft releases updates for its products to improve features and patch loopholes. But Microsoft has a known history of releasing buggy updates. If the VMware error of not enough physical memory has started to occur just after a Windows update, then uninstalling that update can do the trick for us.
Warning: Disabling an update is not recommended as it can become a security hazard; proceed at your own risk.
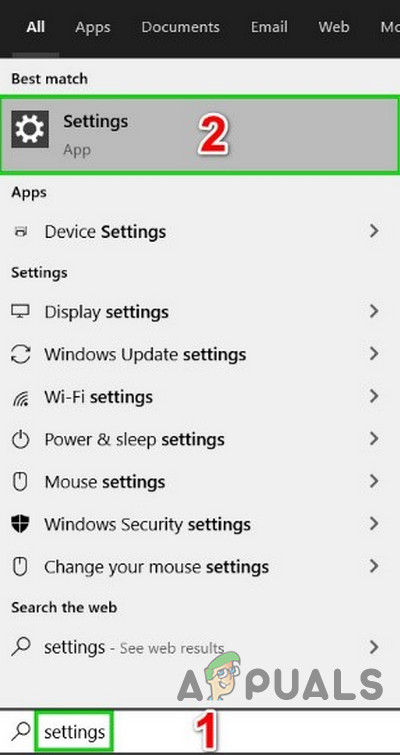
- Press Windows key, then type Settings and in the resulting list, click on Settings.
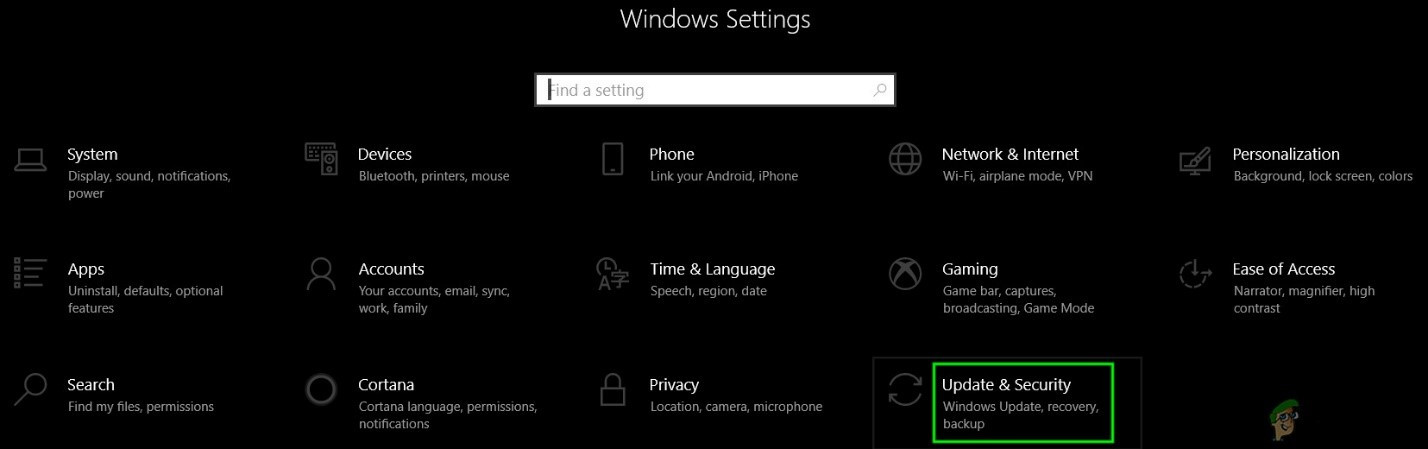
Open Settings in Windows Search - Now click on Update & security.
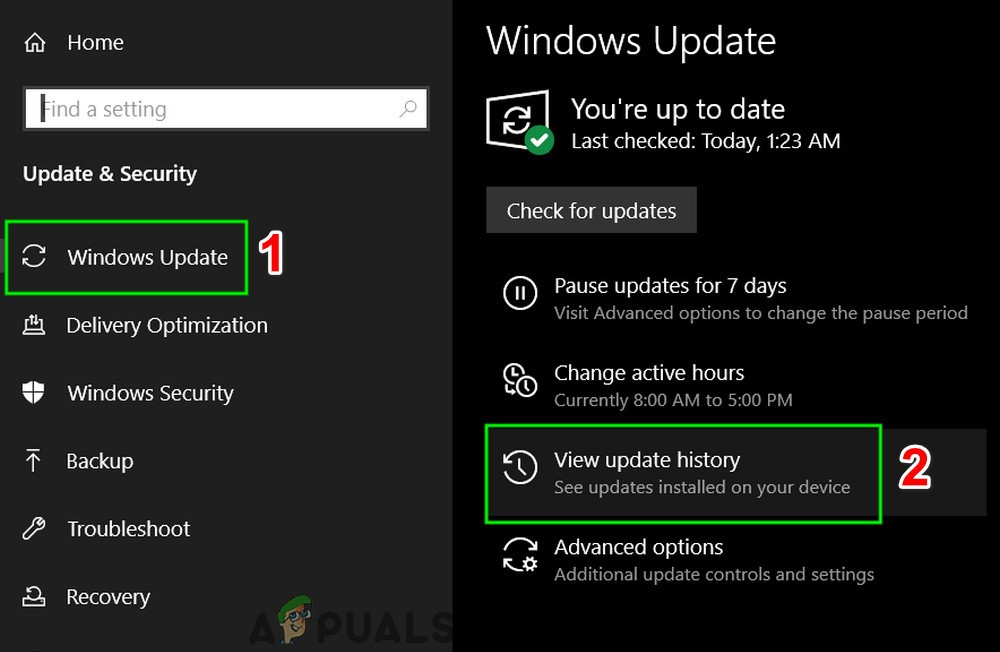
Open Update & Security in Windows Settings - Now click on Windows Update and then on View update history.
View Windows Update History - Click Uninstall Updates to uninstall the latest updates from your system.
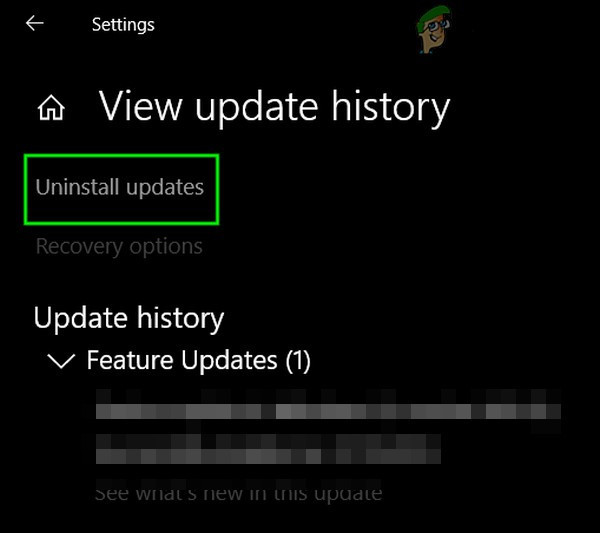
Uninstall Updates in Update History - Now select the update you think is creating the problem and click on uninstall and follow the process on screen to complete the uninstallation process.
- Restart the system and then check if VMware has started to work fine.
Remember that you have to uninstall the latest windows updates one by one and check VMware till you find out the problematic update. After uninstalling the problematic update, reinstall other updates and hide that particular update till the problem is resolved either by Microsoft or VMware.
3. Run VMware as Administrator
VMware needs unrestricted access to different system files, services, and resources. If Windows security is restricting VMware’s access to certain files, services and resources, then VMware will show the ‘Not enough Physical Memory’ error. In that case, running VMware with administrator privileges may solve the problem.
- Shutdown the VMware.
- Press Windows key and type VMware Workstation.
- Right-click on VMware Workstation and select Open File Location.
- Right-click the VMware Workstation icon and select Properties.
- Then click on the Compatibility tab and check the checkbox of “Run this program as administrator.”
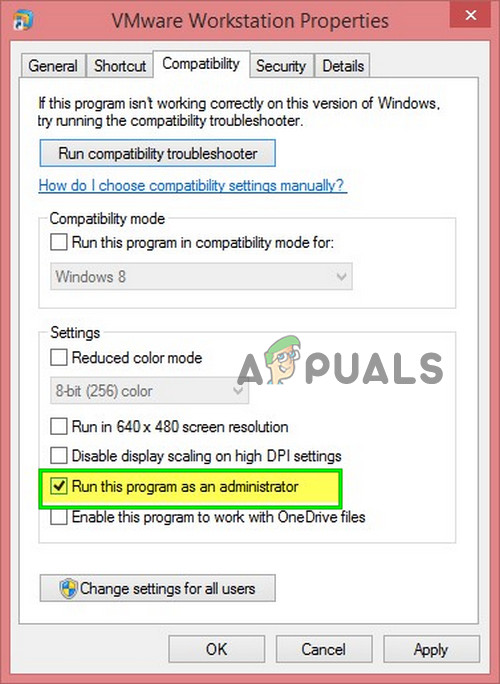
Check Run as Administrator - Click Apply and then OK.
- Now launch VMware Workstation to check if it is operating fine without any issues.
4. Update VMware to the Latest Build
New technologies are emerging day by day on the horizon of the I.T. world. Every software application is updated to keep up with these emerging technologies. If your host environment has been updated to the latest build but you are using an outdated version of VMware, then you may encounter the error message under discussion. In that case, updating VMware to the latest built may solve the problem.
Usually, whenever there is an upgrade available, users get a prompt at the startup of VMware. Users can also use the Workstation user interface and select Help > Software Updates. But if you are having trouble in using VMware then follow the steps mentioned below.
- Open your system’s web browser and navigate to the Official VMware Workstation Download Page.
- Now click on Download Now as per your OS.
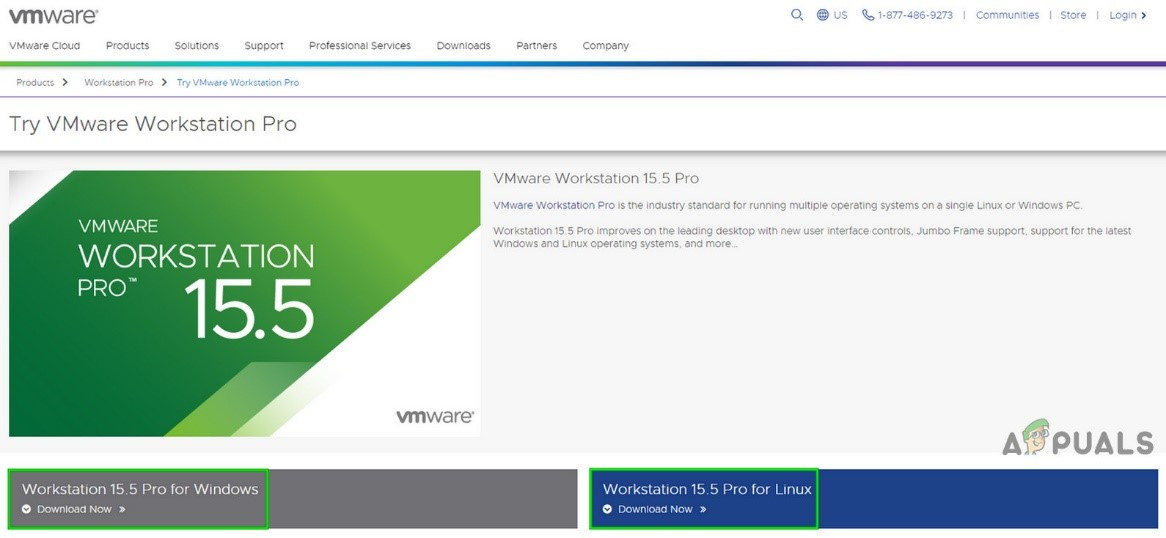
Download Latest VMware Workstation Version - Review the EULA (End User License Agreement) and then click Accept to accept EULA.
- Click Download Now and wait for the completion of the download process.
- Then Right-click downloaded file and click on Run as Administrator.
- Follow the instructions shown on the screen for completion of the installation process.
- Then launch VMware to check if it is clear of the not having enough physical memory error.
5. Change VMware Settings to Optimal
VMware settings allow a user to tweak the system as per their liking. But during this process, users sometimes set the VMware to non-optimal settings which will ultimately cause VMware to show the error of not having enough physical memory.
- Turn off the Guest OS.
- Launch VMware Workstation then click on Edit and click on Preferences.
- Now in the left pane of the Preferences window, click on Memory.
- Fit all virtual machine memory into reserved host RAM: This option should be chosen when you have a large memory.
- Allow most virtual machine memory to be swapped: This option should be chosen when you have a slightly larger memory and you want the virtual machine to run more smoothly.
- Allow some virtual machine memory to be swapped: This option should be chosen when you do not have much memory.
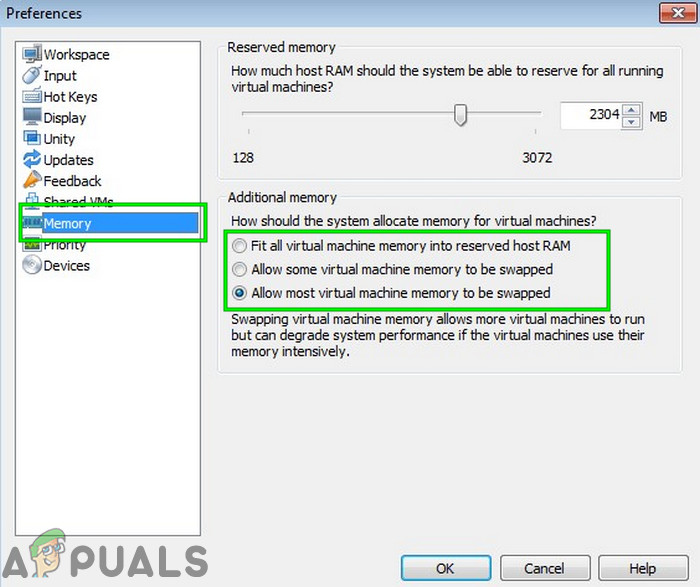
In the present scenario, you should select from the second or third option as per your state but we will recommend using the third option.
- Click OK to save the changes.
- Then Launch your guest OS and check if it is functioning fine now.
6. Modify the config.ini file
If nothing has worked for you so far, then adding or changing the configuration file to restrict VMware Workstation to use a percentage of the host’s available RAM might solve the problem. This will ensure that the VM will use only 75% of the host’s RAM.
- Shut down all guest operating systems and close the VMware Workstation.
- Navigate to the following path
C:\ProgramData\VMware\VMware Workstation.
and open the config.ini file. If it is not there then create one.
- Scroll to the bottom of the file and Add the following line there:
vmmon.disableHostParameters = “TRUE”.
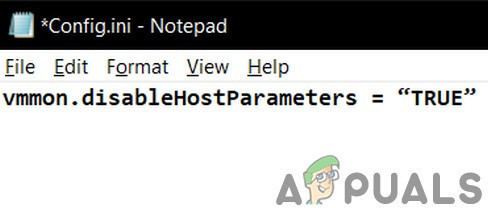
Then Save the file and restart your system.
- After the system is restarted, right-click on the VMware icon on your desktop and click on “Run as Administrator”.If you are still having issues to operate the guest OS then creating a new VM with the correct amount of memory and then linking your existing HDD to the new virtual machine can help you.