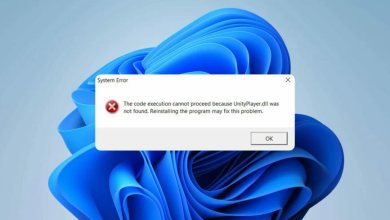
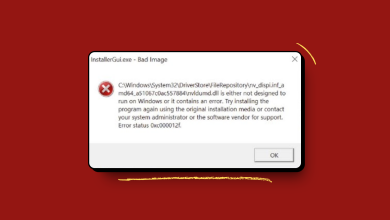
[Fix] ImportError: dll load failed: the specified module could not be found
An ImportError occurs when a user installs a new library, and DLL files related to that library are not loading because Microsoft Visual C++ is incompatible with the application being installed.

Are you having trouble solving this error? This guide will provide all the possible solutions to troubleshoot it.
1. Repair the corrupted and missing DLL files.
o check the missing DLL, Windows has a built-in system file checker to find and install the missing, and replace the corrupted, DLL files. Follow the steps below to implement:
- Open the Windows search box and search for CMD; once you have found CMD, right-click on it to run it as an administrator.
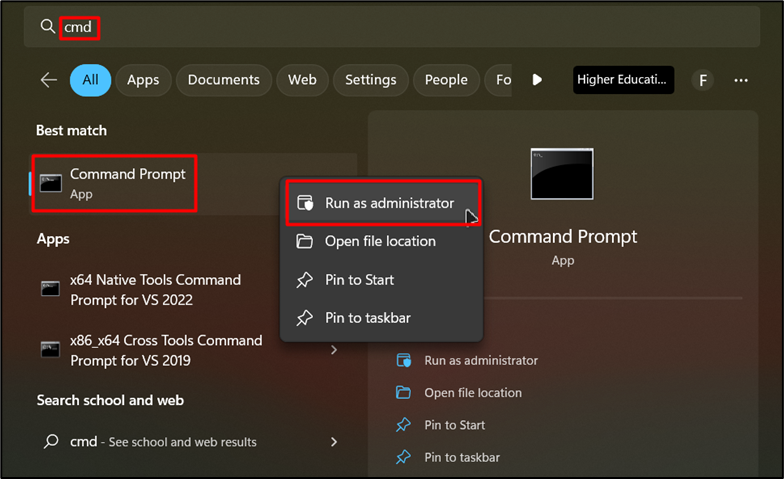
Search and run CMD - Write the following command in CMD.
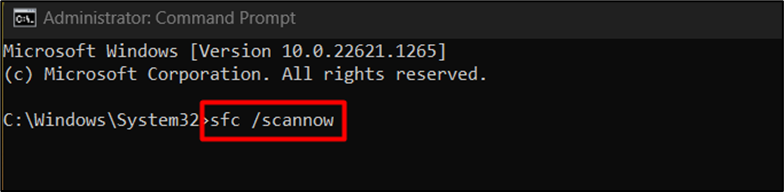
Run scannow command - You will receive the following output after running the above command in your CMD.
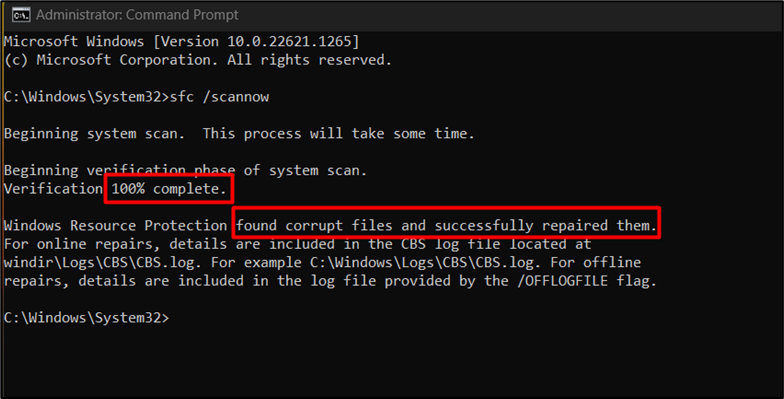
DLL successfully repaired
Windows has verified all the DLL files and repaired the corrupt files.
2. Manually download and install DLL files.
If the above method does not work and you still have missing DLL files, you can also locate those files and add them manually:
- Open the browser, go to “dll-files.com,” and search for the missing DLL.
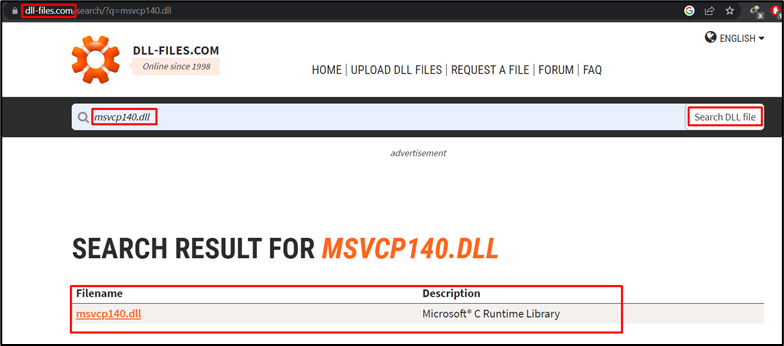
Search for DLL files - Once you have found the missing DLL files, click on them to proceed to the next page and find the compatible version for your Windows.
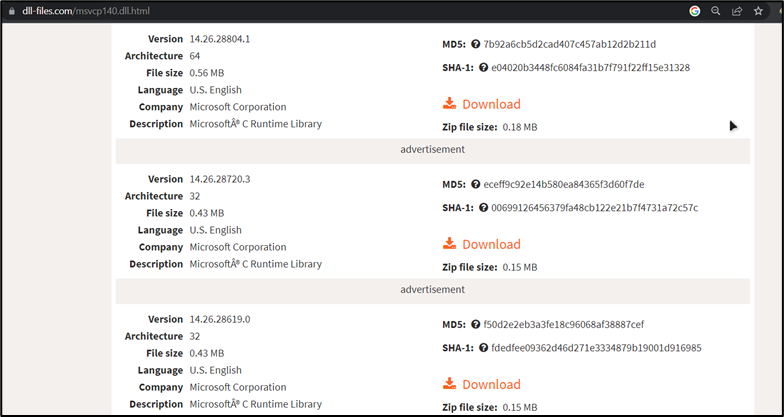
Windows-compatible DLL file version - Download this file, open the “Downloads” folder, right-click on the downloaded file, and click “Extract ALL”.
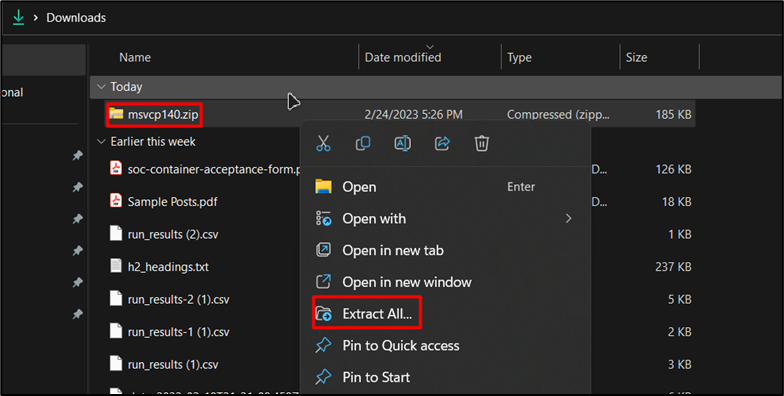
Download and extract the zip folder - After extracting the files, open the folder and copy the DLL file.

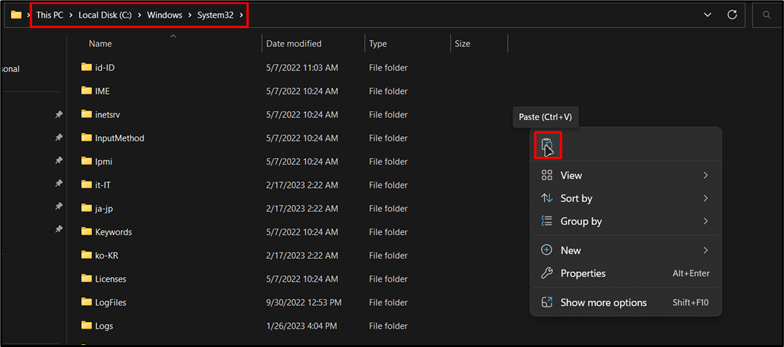
Copy the DLL file - Once copied, go to the disk where Windows is installed, look for the “Windows” folder, and then enter the “System32” folder. Inside the System32 folder, paste the copied DLL file.
Paste the DLL file into the System32 folder - After pasting the file, Windows will prompt you to “Replace the file in the destination.” Click on it to proceed and replace the existing file.
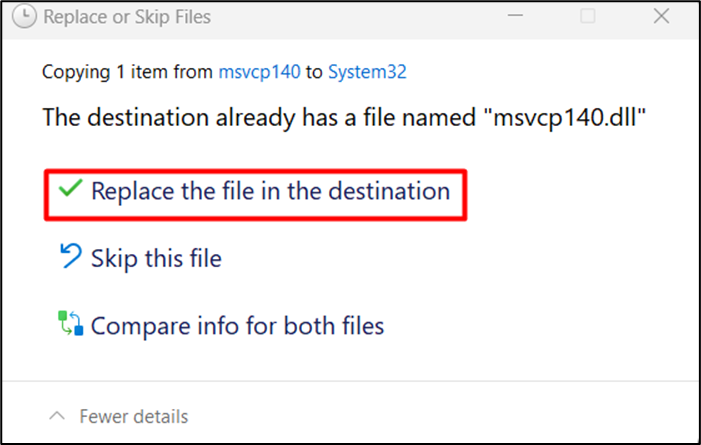 Replace the existing file
Your missing files have been updated, and the issue with your missing files has been resolved.
3. Run the DISM tool.
Another way to fix the missing DLL is to run the “Deployment Image and Services Management (DISM).” The step-by-step procedure for this method is provided below:
- To run this tool, open the search box and find “CMD.” Then, run it as an administrator.

Search and run CMD - Once you are in the CMD, type the following command and press Enter.
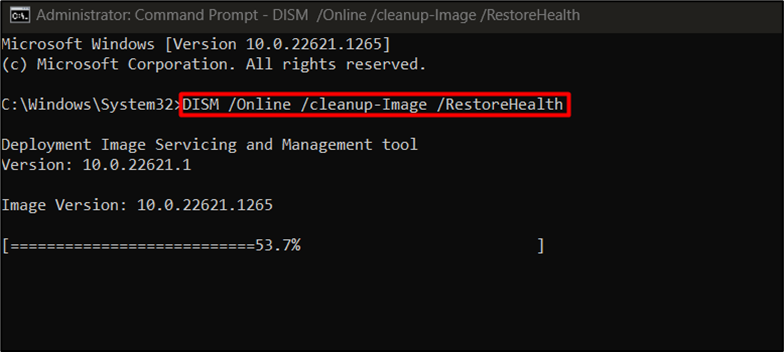
DISM Command - Windows will begin restoring health online. Please wait for the process to finish successfully, and then restart your PC.
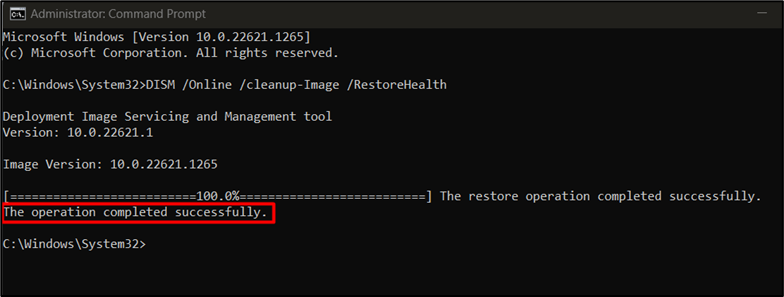
Restoring the clean image file
Once the operation is completed, restart your PC to eliminate the error.
4. Configure environment variables.
Let’s take a look at another solution, which involves configuring the environment variables. The steps to carry out this operation are listed below:
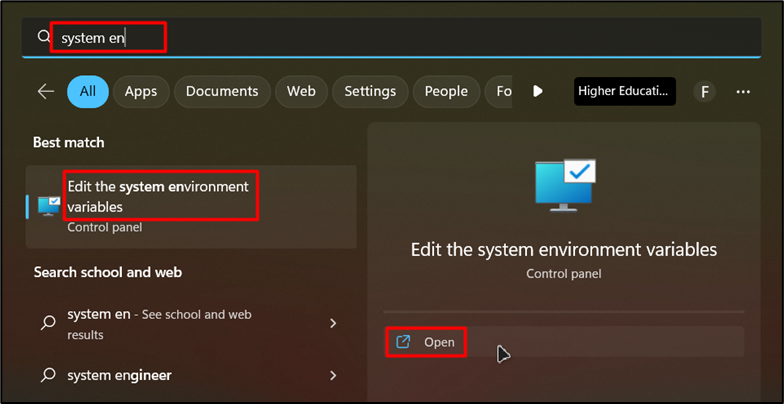
- Open the Windows search feature and write “system environment.” You will see the “Edit the system environment variables” file click and open this file.
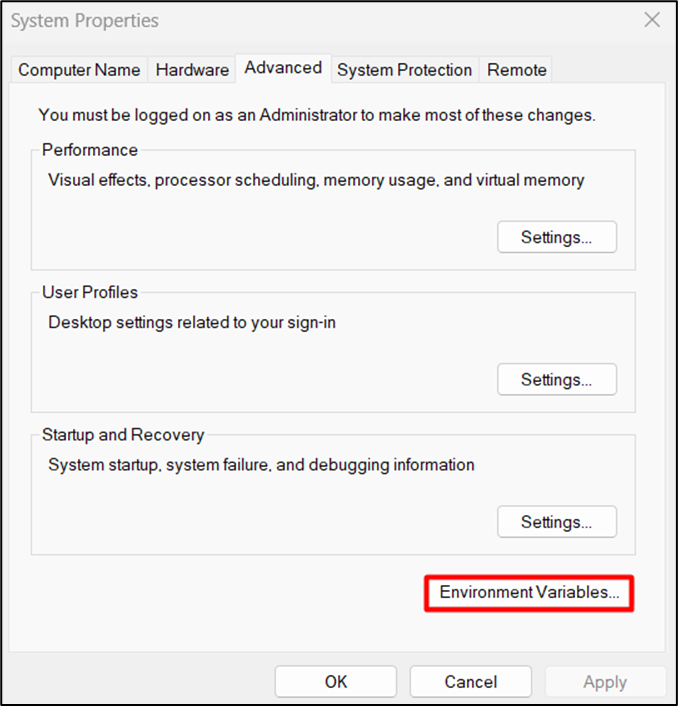
Open system environment file - Now, choose the “Environment Variables” option.
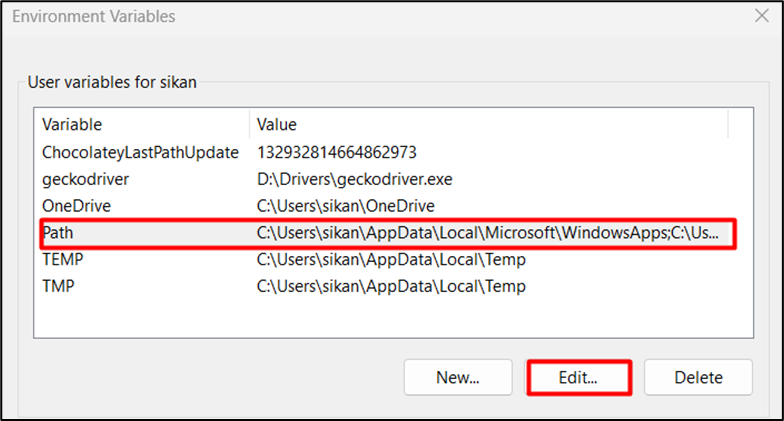
Open environment variable - Once in the Environment Variables, select the Path file and click on the “Edit” option.
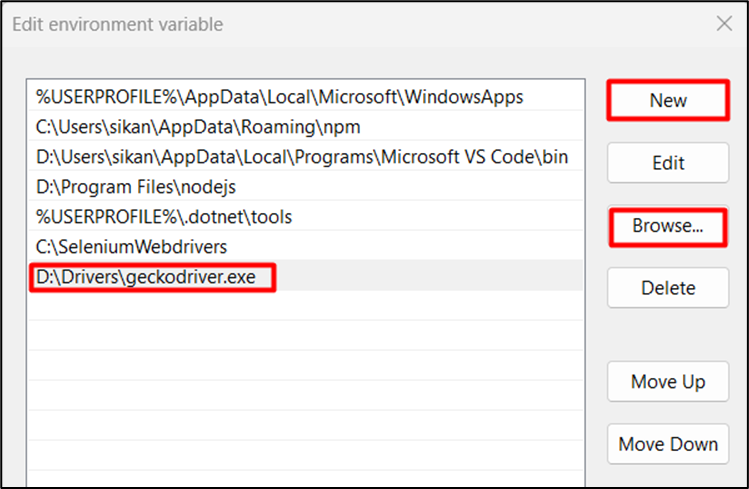
Open path file - There are two possibilities:
- If the path is already present, click on it and input the file’s updated location. Alternatively, click “Browse,” find the file, and then click “OK” to set the file location.
- If you are adding a new path, first copy the file’s location path. Then, click “New” and paste it into the text field, for example, “D:\Drivers\geckodriver.exe” in this case.
Add the new path or edit the old one
Once the path is added, restart the PC to apply the changes.
5. Repair Microsoft Visual C++.
Compatibility issues with Microsoft Visual C++ can also create this error; repairing Visual C++ is the solution for dealing with it. Let’s see how it works:
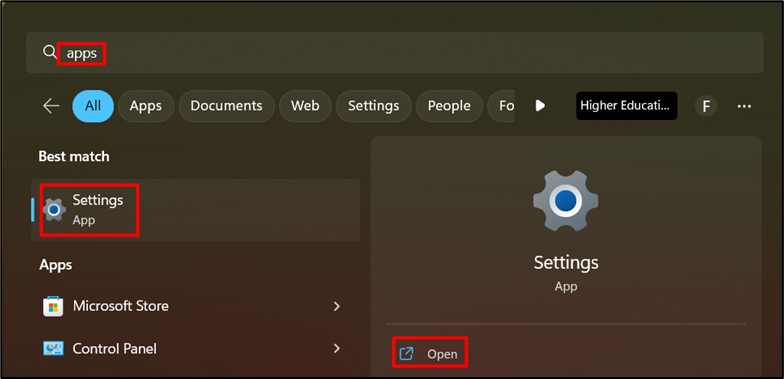
- To repair or reinstall the Microsoft Visual C++, open the Windows search box and open “Settings”.
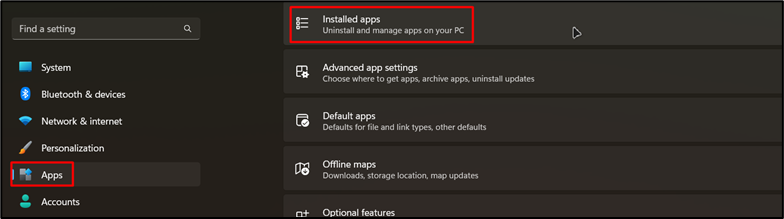
Open windows settings - In Settings, select the “Apps” option and open “Installed apps.
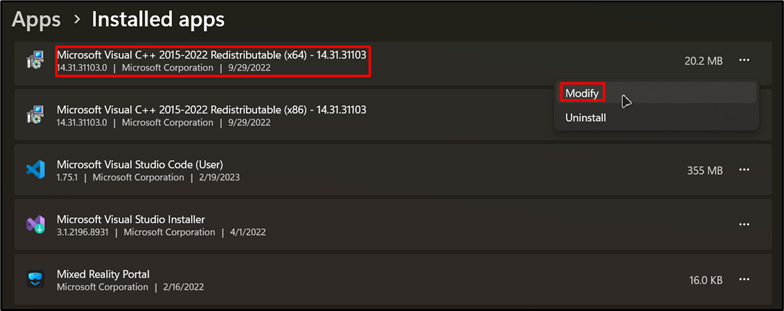
Open installed apps - Find the installed version of Microsoft Visual C++ in the installed apps section. Click on the three dots to modify the app.
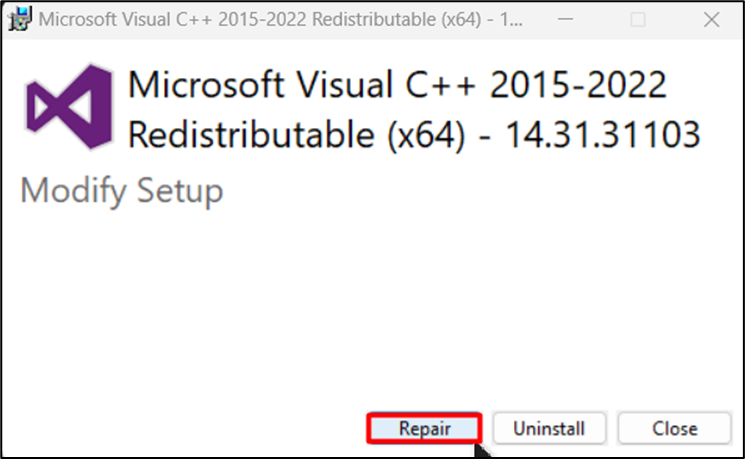
Locate Microsoft Visual C++ - Once you click “Modify,” Windows will ask for permission to launch the app. After granting permission, you will see this window. Click “Repair” to repair your Visual C++ application.
Repair the Microsoft Visual C++ - When Windows finishes repairing, you will receive a notification that says, “Setup Successful.” Click Close.
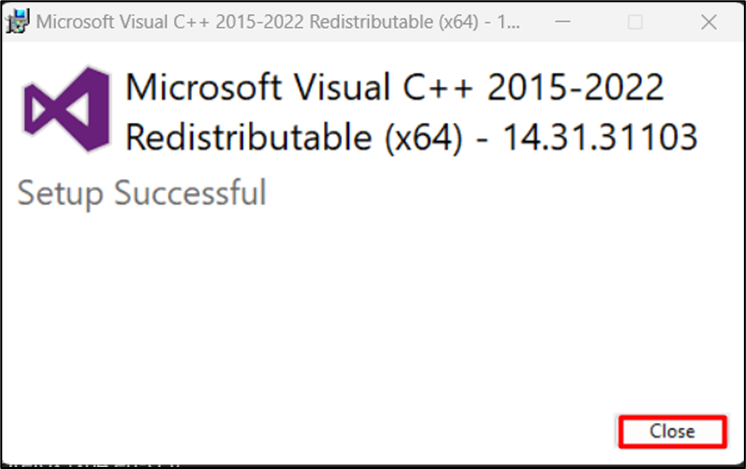
Successful repair of Visual C++
Visual C++ is repaired successfully, and the error will be fixed.
6: Install Microsoft Visual C++.
In case your PC does not have the updated version of Microsoft Visual C++, you can download and update it manually:
- Search for Microsoft Visual C++ and open the “learn.microsoft.com” link.
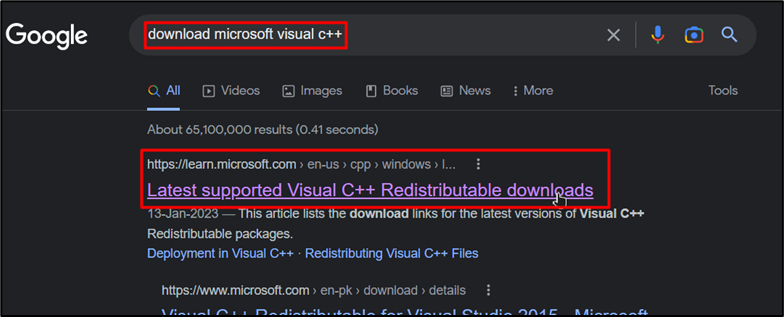
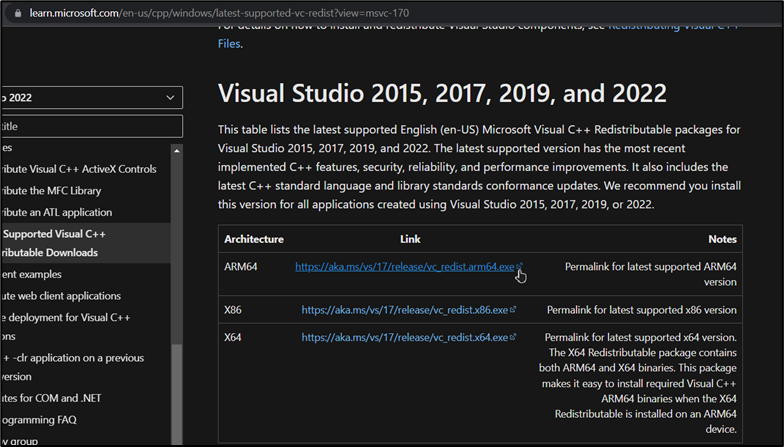
Search for Visual C++ - This link will lead you to the Visual C++ download page. Here, download the appropriate version of Microsoft Visual C++ for your PC. If you are running a 64-bit system, choose ARM64; if your system is a 32-bit system, then choose X86.
Microsoft Visual C++ page - Open the folder where you have downloaded the .exe file, right-click on it, and run the setup. Check “I agree to the license,” and then click “Install.
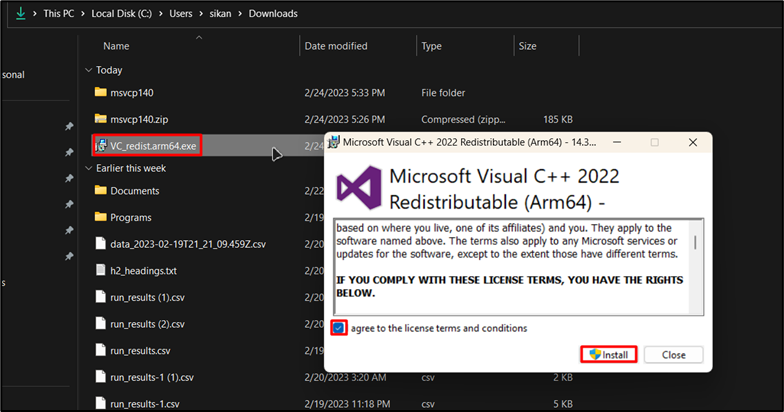
Install Microsoft Visual C++
You have installed Microsoft Visual C++, and the missing DLL or DLL compatibility issue is solved.
An ImportError caused by DLL files not loading due to incompatibility with Microsoft Visual C++ can be resolved through several methods. First, repairing the corrupted and missing DLL files using the built-in file checker in Windows (sfc /scannow) can help. If that doesn’t work, one can try manually downloading and installing DLL files from a trusted source. Another option is to run the DISM tool (Deployment Image and Services Management) to restore the health of Windows online.
Other solutions include configuring environment variables and repairing or reinstalling Visual C++ (it can also be installed manually). By following these troubleshooting steps, users can overcome ImportError caused by DLL files not loading due to incompatibility with Microsoft Visual C++, ensuring smooth functioning of their installed applications.