How to Monitor your VoIP Network using VoIP and Network Quality Manager?
Technology is fascinating and this is but the beginning. It evolves day by day and new inventions are made which once no one thought would have been possible. One of the greatest inventions ever, the Internet has evolved so much that our daily life depends upon it now. Even though we are slow at the adoption process, but once it becomes common and more people start using it, we all happily embrace it without any objections. The same is the case with the VoIP invention. No one demanded it when it was invented, however, through the years, people started utilizing it and now VoIP technology is one of the most common technologies. Voice over IP had made communicating with our friends and family easier and much cheaper.
Now, users don’t have to pay loads of money to the phone services providing companies. VoIP is much more integrative as it is on the internet. You must monitor your network when providing VoIP services. There are a ton of reasons due to which the connection quality can become unacceptable. Using a VoIP monitoring lead can provide important information that will enable you to improve the connection quality. For example, a VoIP monitoring tool will check audio delays, determine your network bandwidth and a lot more. Audio delays or jittering is something most of us suffer from even to this day due to the poor VoIP networks. Therefore, deploying a VoIP monitoring tool will help you solve issues before they impact the users which is something every business should strive for. For this purpose, we will be using the VoIP & Network Quality Manager tool by Solarwinds in this article to help you monitor the network.
Installing VoIP & Network Quality Manager
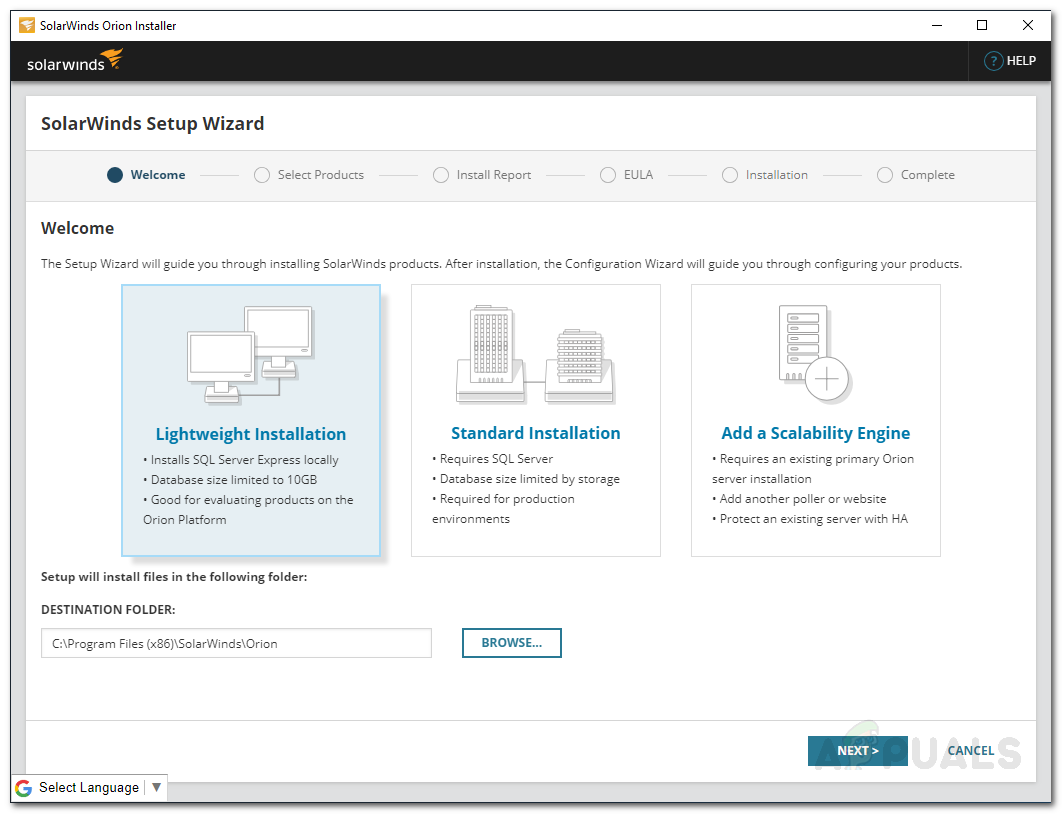
To install the VoIP & Network Quality Manager tool, we will be using the Orion Installer developed by Solarwinds. Using the Orion Installer, you can install a ton of products from Solarwinds like NPM, IPAM, SAM and more. Get the tool from here by providing the requested information and then click ‘Proceed to Free Download’. After that, follow the instructions below:
- Run the Orion installer once it has been downloaded and wait for it to load.
- Select Lightweight Installation and choose the installation destination by clicking Browse. Click Next.
VNQM Installation - Make sure VoIP & Network Quality Manager tool is selected on the Products page. Click Next.
- Wait for the installer to run a few system checks and then agree to the license agreement. Click Next.
- The installer will start downloading the required files for VoIP & Network Quality Manager installation.
- Once the installation has finished, the Configuration Wizard will open up automatically. Click Next.
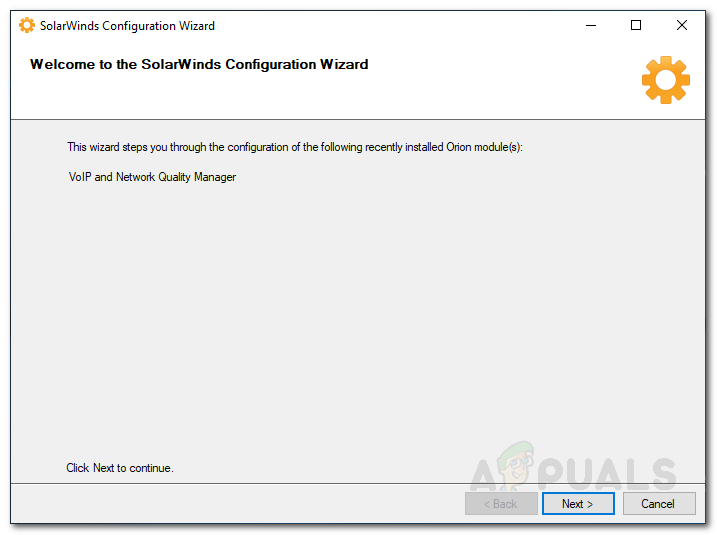
Configuration Wizard - Make sure the services are selected and click Next on the Service Settings page.
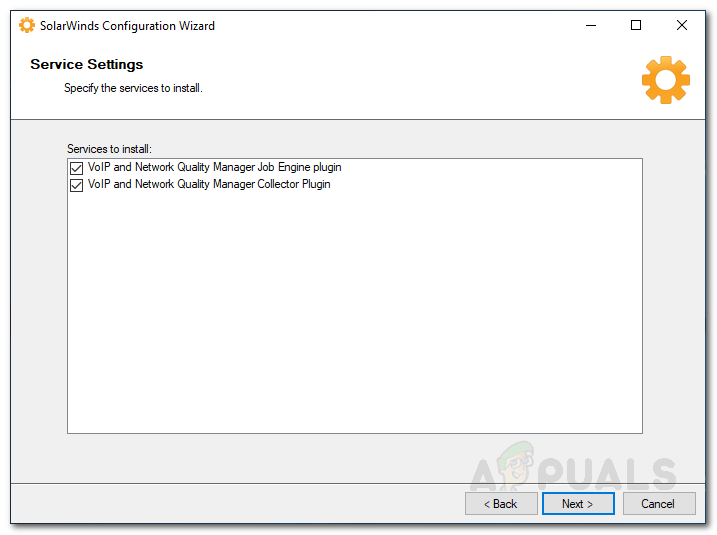
Service Settings - Click Next again to begin the configuration wizard, wait for it to finish.
- Once the configuration wizard has finished, click Finish.
Discovering Devices
To be able to monitor the devices, you will, first of all, have to discover them using the Network Sonar Wizard. Once you have done this, you will be able to add them to VNQM after which you will be able to monitor the network. Here’s how to discover your devices:
- When you close the Configuration Wizard, you will be prompted to the Orion Web Console. Provide a password for the admin account and hit Enter.
- Once you have done, on the toolbar, navigate to Settings > Network Discovery.
- Click on Add a Discovery to start the Network Sonar Wizard.
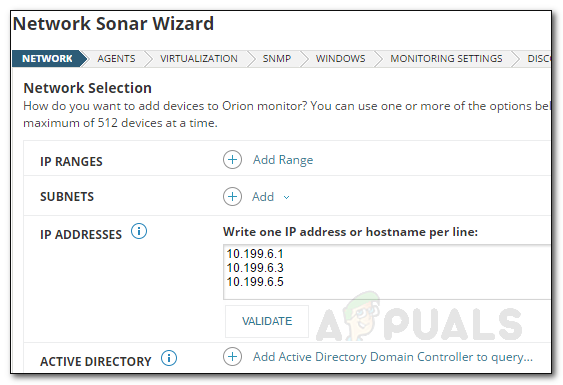
- You’ll be able to discover your device via four options, provide the IP addresses of the devices you want to monitor and then click Next.
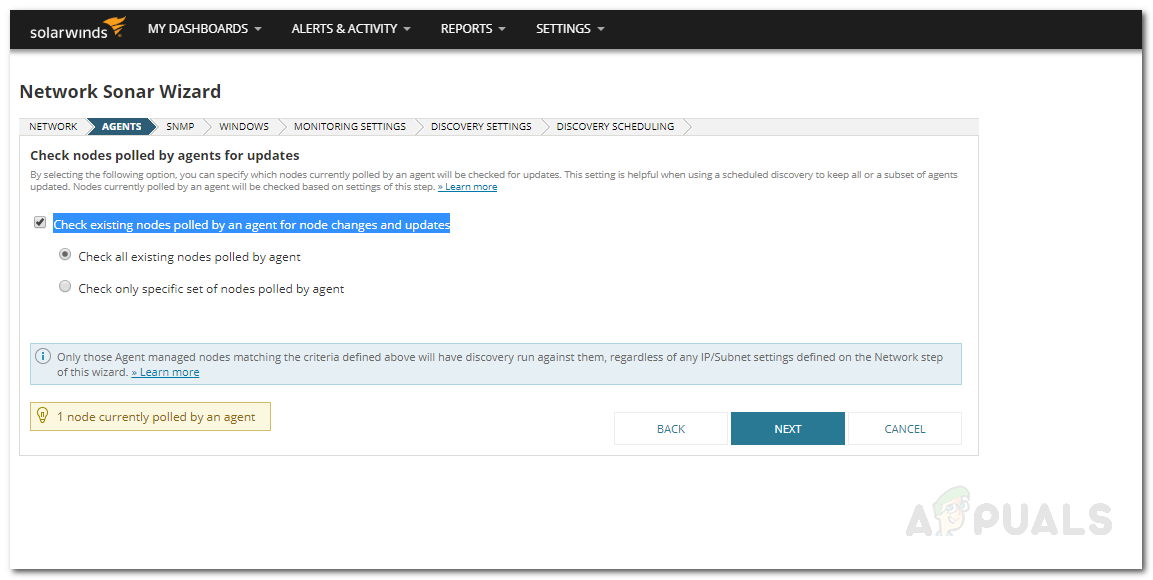
Network Discovery - After that, on the Agents page, check the option provided and then click Next.
Network Sonar Wizard - Now, on the Virtualization page, to discover VMware ESX or vCenter hosts on your network, check the poll for VMware and then click the Add Credential button. Provide the required information, save and then click Next.
- On the SNMP page, if you are using devices with SNMPv3 strings, click on Add New Credential. Also, if you are using SNMPv2 and SNMPv1 community strings other than public and private, add them using the Add New Credential button. Once done, click Next.
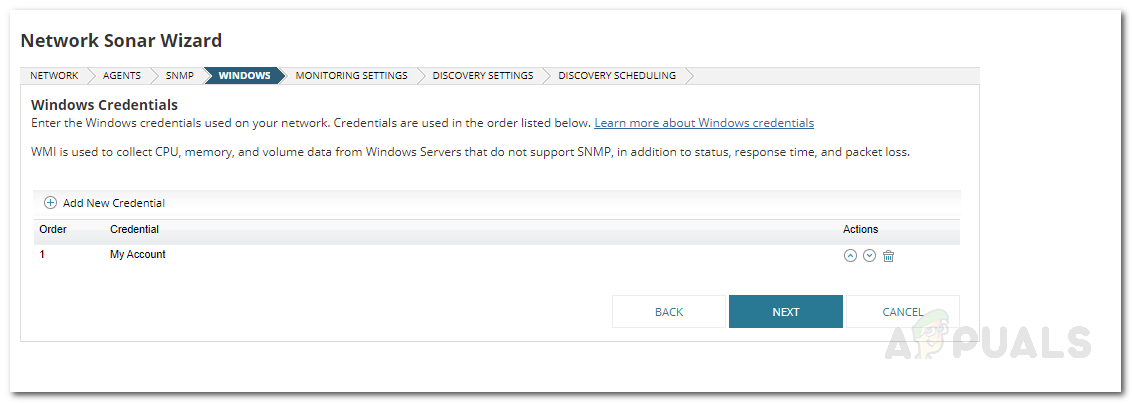
- After that, you will be taken to the Windows panel. If you wish to discover Windows devices, click on ‘Add New Credential’ and then provide the required information. Click Next once done.
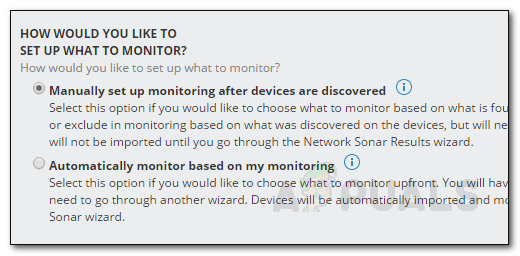
Adding Windows Credentials - For the Monitoring Settings panel, leave the ‘Manually set up monitoring after devices are discovered’ selected and hit Next.
Monitoring Settings - Give your discovery a name on the Discovery Settings panel and then hit Next.
- If you wish to perform a scan more than once, change the Frequency on the Discovery Scheduling page.
- After that, click Discover and wait for the devices to be discovered.
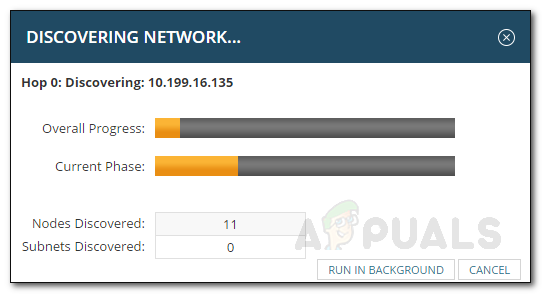
Discovering Devices
Adding Discovered Devices
Once the sonar wizard finishes discovering your devices, you will have to add them using the Network Sonar Results Wizard. Here’s how to do it:
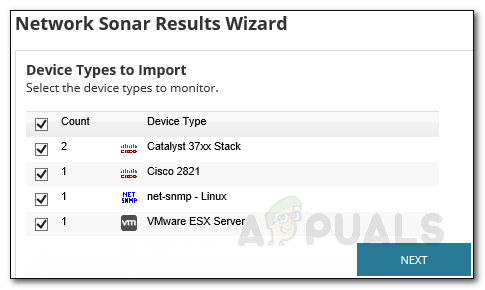
- Select the devices you want to import and then click Next.
Discovery Results - On the Interface panel, make sure that the interfaces you want to monitor are selected and then click Next.
- Select the Volume types to monitor and then hit Next.
- Preview the import summary and then click Import.
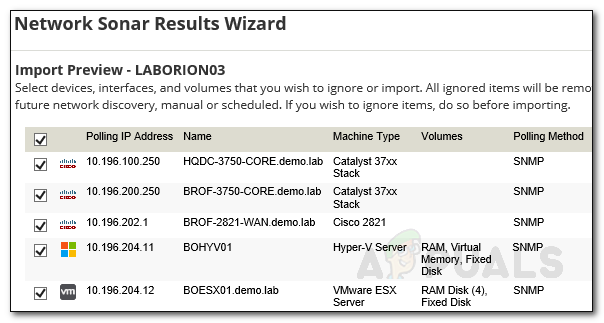
Import Preview - Once the import has finished, click Finish on the Results page.
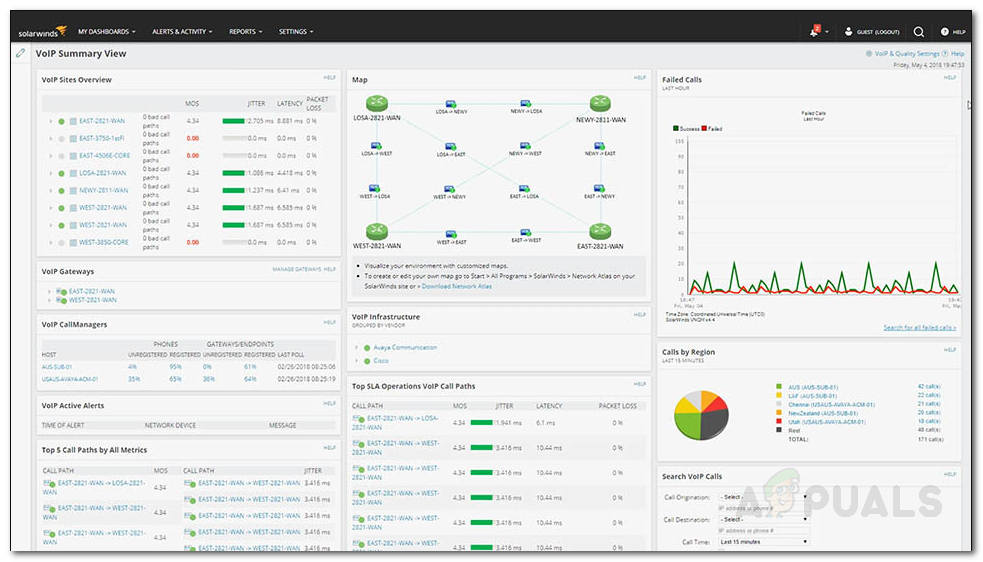
- Navigate to My Dashboard > VoIP Summary to explore your added devices.
Adding a Call Manager Device
To monitor VoIP, you will have to add your call manager device to the VoIP & Network Quality Manager tool. Here’s how to do it:
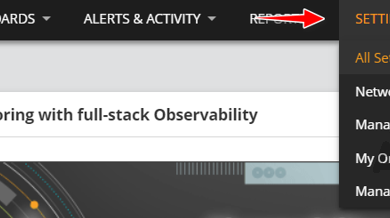
- On the toolbar, click on Settings > All Settings.
- Under Specific Product Settings, click on VoIP & Quality Settings.
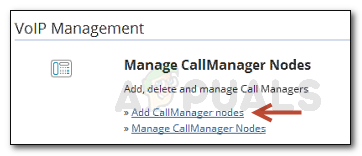
- After that, click on Add CallManager nodes.
Manage CallManager - Select your call manager device from the list and then click Next.
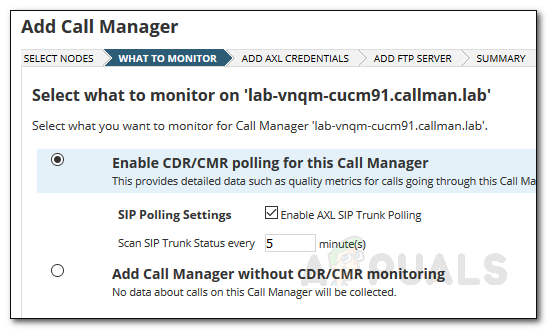
- Make sure ‘Enable CDR/CQR polling for this Call Manager’ option is selected and click Next. If you wish to enable SIP Trunk monitoring, check the respective box (Enable AXL SIP Trunk Polling) and specify a polling frequency for SIP Trunk status scanning.
Adding Call Manager - Enter the AXL credentials and then click Next. You can test the credentials by clicking ‘Test’.
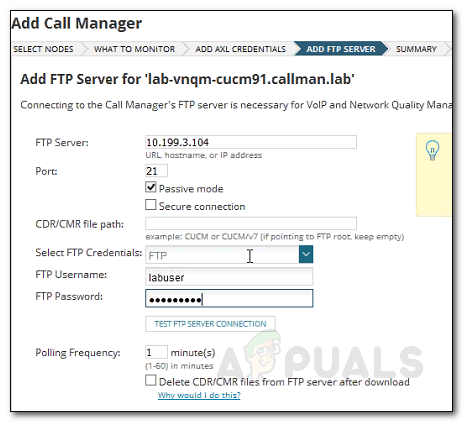
- Enter the FTP server credentials asked on the ‘Add FTP Server’ panel and then click Next. Make sure to test the credentials before hitting Next.
Adding FTP Server Credentials - Review the summary on the Summary page. Once done, click Add Call Manager.
Note: You will have to configure your call manager to send data to the VoIP & Network Quality Manager tool. To do this for Cisco devices, click here. For Avaya Communications devices, head here to learn how to configure it for VNQM.
Start Monitoring
After following the instructions above, you will be able to start monitoring your VoIP network. Make sure to configure your device for VQNM or else you won’t be able to monitor the VoIP network. Navigate to My Dashboard > VoIP Summary to start monitoring.