4 Easy Solutions for ‘AMD Catalyst Control Center Missing’ Error
The AMD Catalyst Control Center is a part of the AMD Catalyst software engine which is used to communicate with your graphics card and provide various tweaking options. Some users were unlucky to find out that, out of a sudden, they are unable to locate the AMD Catalyst Control Center anywhere on their computer.
This issue often occurs after updating to a newer version of Windows or after updating your drivers. Either way, we have prepared a set of useful methods which have helped users in the past who struggled with the same issue. Make sure you follow the instructions carefully and good luck!
What Causes the AMD Catalyst Control Center Missing Problem on Windows?
The problem can be caused by various things and it’s very important to find out what exactly caused the problem on your computer. This can help you understand your scenario and choose the correct troubleshooting method. Check out the list we have prepared below!
- The graphics driver you have installed – AMD software is tightly related to the driver package you have installed on your computer. Reinstalling the drivers can help you resolve the problem completely so make sure you try it out.
- .NET Framework and DirectX – These utilities are vital for almost any app you have installed on your computer and AMD Catalyst Control Center is no exception. Make sure you install the latest versions of both of these tools to try to resolve the problem.
- A problematic Windows 7 update – There is a Windows 7 update which has caused the problem for many users and it appears it’s for the best if you simply uninstall it from your computer.
Solution 1: Reinstall Your Graphics Driver
There is a set of steps which has helped plenty of users resolve this issue. It involves reinstalling your graphics drivers in Safe Mode. Also, you will have to use a tool to completely remove all traces of the driver if you want to resolve the issue you are having. Check out the steps below!
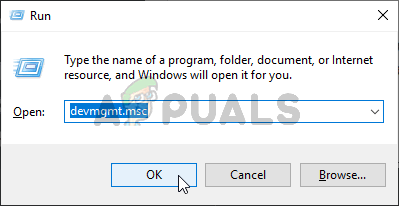
- Search for Device Manager in the Start menu or use the Windows Key + R key combination to open the Run dialog box. Type “devmgmt.msc” in the box and click the OK button to open Device Manager.
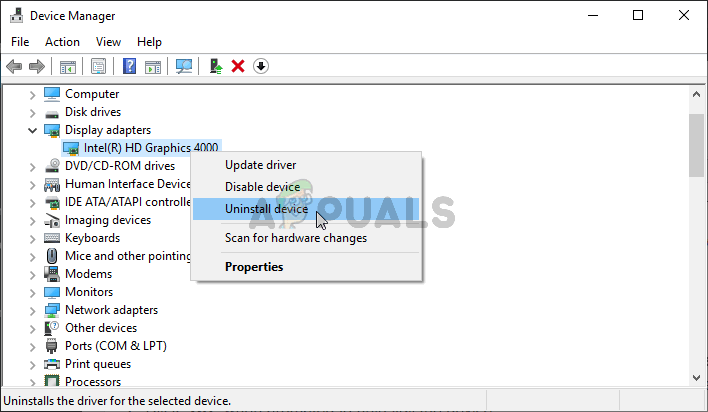
- Inside, expand the Display Adapters section, right-click your AMD graphics card, and choose the Uninstall Device option from the context menu which will appear.
- Make sure you confirm any dialogs which might appear prompting you to confirm your choice.
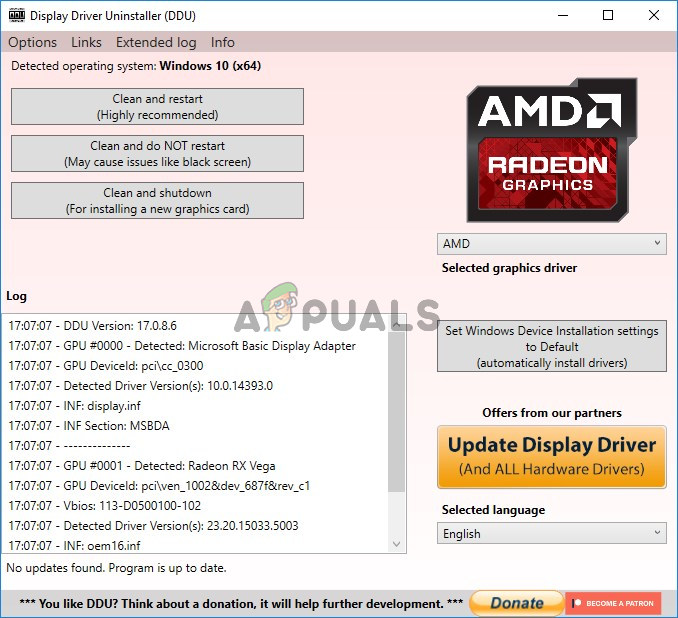
- After that, download the Display Driver Uninstaller and click it from the list of downloaded files to run its installer. Follow the instructions which will appear on-screen to install it.
- Use the Windows Key + R key combination again but, this time, type “msconfig” in the Open textbox before clicking OK. The System Configuration window should appear.
- Make sure you navigate to the Boot tab inside and check the Boot options Check the box next to Safe boot and click to set the radio button next to Minimal.

- Click the OK button and restart your computer. It should boot in Safe Mode. Open the Display Driver Uninstaller while in Safe Mode. It should automatically detect your graphics card under Select Graphic Driver. It should be set to
- Click the Clean and restart (Highly Recommended) button and wait for it to finish. Open System Configuration again and uncheck the box next to Safe boot.
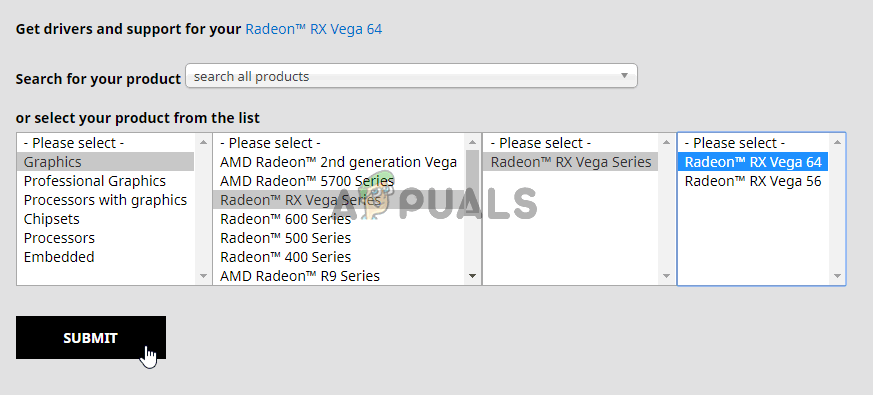
- After your computer restarts, make sure you visit AMD’s Support Website to find the latest drivers for your graphics card. You can search for it and click the Submit
- After that, make sure you choose your operating system, click the + button next to it, and click the Download button for the driver you want to uninstall.
- Run the installation file from the Downloads folder after it has downloaded and follow the instructions on-screen to install it. Make sure you turn off your Internet connection during the installation. Check to see if the problem still appears!
Note: Some users have reported that they were able to resolve the problem similarly. However, they needed to run the new driver’s installation file in compatibility mode for Windows 7. Follow the steps below to try that out as well!
- Open your Downloads folder (or the folder where the driver’s installation file is currently located) and locate the file. Right-click on it and choose the Properties option from the context menu which will appear!
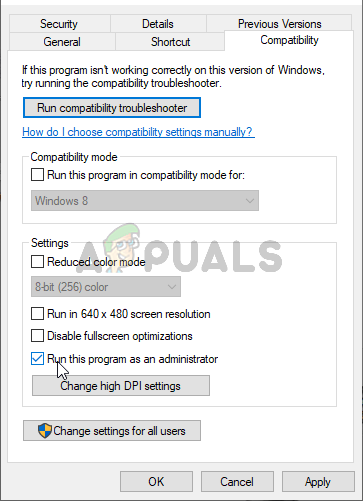
- In the Properties window, make sure you navigate to the Compatibility tab, check the Compatibility mode section, and check the box next to the Run this program in compatibility mode for From the dropdown menu, make sure you choose Windows 7 before clicking the OK button at the bottom of the screen.
Check to see if AMD Catalyst Control Center is still missing on your computer after performing these steps!
Solution 2: Delete Certain Policies
This is yet another solution which requires you to download the latest AMD drivers. If you have followed the steps from Solution 1, you should already have them on your computer. If not, make sure you download them and keep the installation file on your computer. This method has worked for many users so make sure you follow the steps below!
First of all, you will need to uninstall your AMD Software in Control Panel or Settings.
Windows 10:
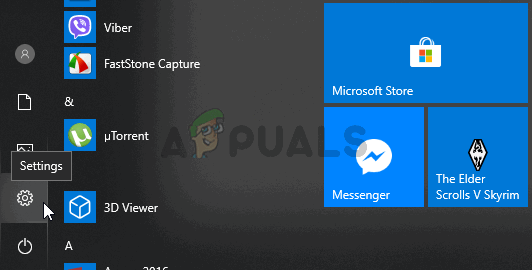
- Use the Windows Key + I key combination to open the Settings Also, you can click the Start menu button and click the cog icon in the bottom left corner of the Start menu to open Settings.

- After that, click to open the Apps A list of all installed programs should appear promptly so make sure you look for the AMD Software entry in the list. Left-click it and click the Uninstall button which will appear. Follow the instructions which will appear on-screen.
Other versions of Windows:
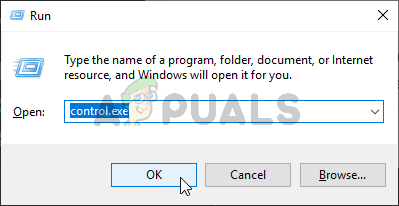
- Open Start menu and type “Control Panel”. Click the first result which will appear. Alternatively, you can use the Windows Key + R key combination, type “control.exe” in the box, and click OK.
- Either way, click the View by option and change it to Category. Under the Programs section, make sure you choose the Uninstall a program.
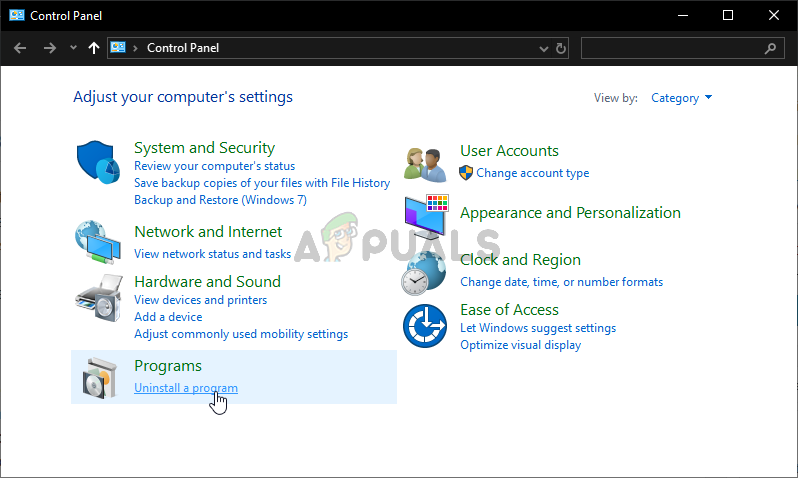
- A list of all installed programs should appear. Make sure you locate the AMD Software entry, left-click its entry, and click the Uninstall button at the top of the window. Follow the instructions which will appear on the screen.
After you have performed the steps above, it’s time to proceed with the remaining steps.
- First, you need to boot into Safe Mode. Use the Windows Key + R key combination again but, this time, type “msconfig” in the Open textbox before clicking OK. The System Configuration window should appear.
- Make sure you navigate to the Boot tab inside and check the Boot options Check the box next to Safe boot and click to set the radio button next to Minimal.
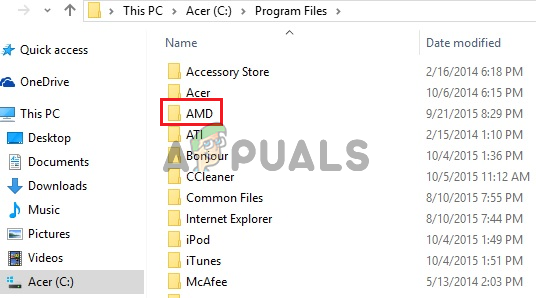
- Restart your computer and open any folder on your computer or click the Libraries button from the Quick Access Click the This PC option from the left-side navigation menu and open your Local Disk.
- Open both Program Files and Program Files (x86) folders and delete ATI or AMD folders location inside. There might be an ATI folder located in the root of your local disk (C:\ATI) so make sure you delete this one as well.
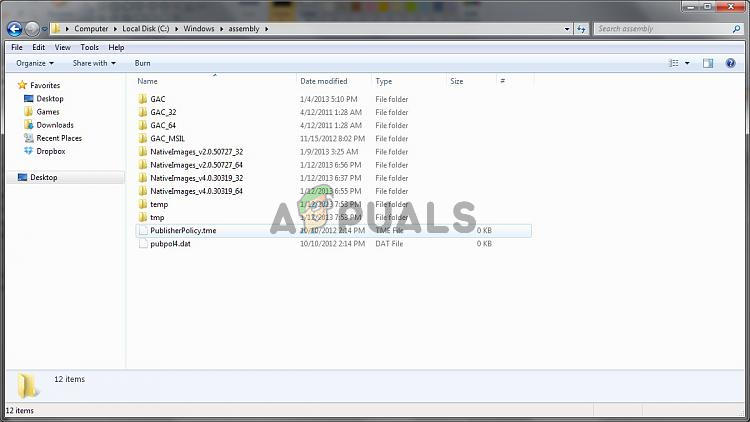
- After that, navigate to the C >> Windows >> assembly Right-click anywhere inside the folder and Sort by >> More. In the Details list, make sure you choose Public Key Token before clicking OK.
- The Public Key Token you need to look for is 90ba9c70f846762e. Right-click on all entries with this Public Key Token and choose Delete from the context menu which will appear.
- Open System Configuration again and uncheck the box next to Safe boot. Restart your computer to boot normally into Windows. Reinstall the AMD Catalyst package by installing the driver you downloaded and check to see if AMD Catalyst Control Center is still missing on your computer!
Solution 3: Install the Latest Versions of Microsoft .NET Framework and DirectX
AMD Catalyst Control Center depends on these two features to be updated fully to work properly so make sure you visit the Microsoft Download Center to download the latest versions. Follow the steps below to do so!
- Open your favorite browser and visit this link. Inside, click the .NET Framework 4.8 (recommended)
- Scroll until you reach the Runtime section and click the Download .NET Framework 4.8 Runtime The download should start immediately.
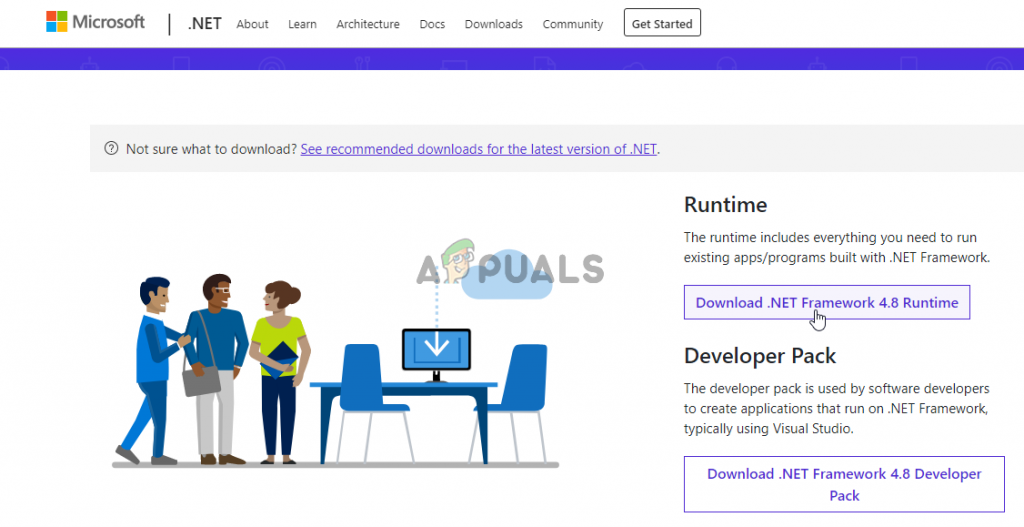
- Open the downloaded file and follow the instructions on-screen to install the latest version of Microsoft .NET Framework!
When it comes to DirectX updates, they can only be obtained along with Windows updates. This was introduced with Windows 10 so we highly recommend you install the latest Windows updates on your computer. Follow the steps below to do so!
- Use the Windows Key + I key combination to open the Settings Also, you can click the Start menu button and click the cog icon in the bottom left corner of the Start menu to open Settings.
- After that, scroll down until you reach the Update & Security section and left-click to open it.
- Make sure you stay in the Windows Update tab and click the Check for updates
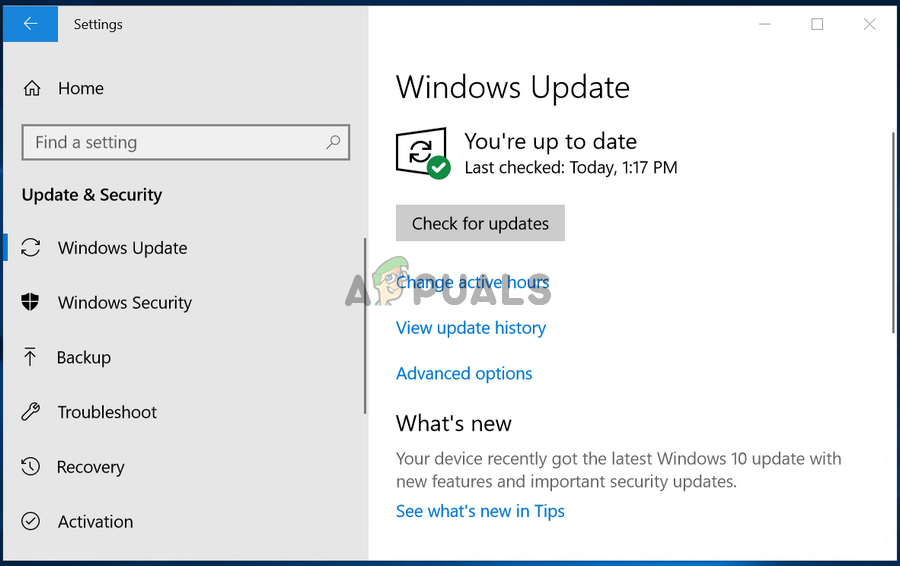
- Wait for Windows to search for new updates which may have been released for your Windows operating system. If one is found, click the Download and install now button below.
Check to see if installing the latest versions of .NET Framework, DirectX, and Windows manages to resolve your problem!
Solution 4: Uninstall a Windows Update (Windows 7 Users)
There is a certain Windows 7 update which has been causing all sorts of graphics-related problems. It goes by the Knowledge Base number of KB2670838 and you should try uninstalling it as a means of resolving this issue. Follow the steps below!
- Open Start menu and type “Control Panel”. Click the first result which will appear. Alternatively, you can use the Windows Key + R key combination, type “control.exe” in the box, and click OK.
- Either way, click the View by option and change it to Category. Under the Programs section, make sure you choose the Uninstall a program
- In the new window which will appear, click the View installed updates button from the left-side menu. Under the Microsoft Windows section, look for the update with the KB2670838 code in the brackets.
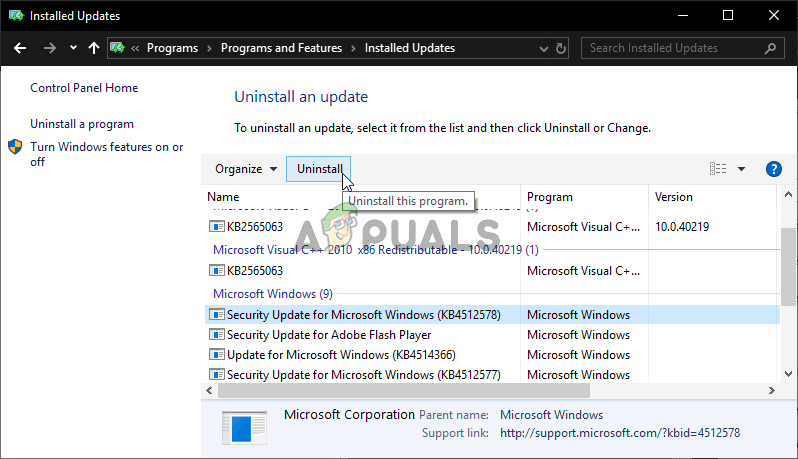
- Left-click this entry to select it and click the Uninstall button from the top of the window to uninstall it from your computer. Check to see if the same problem still appears!