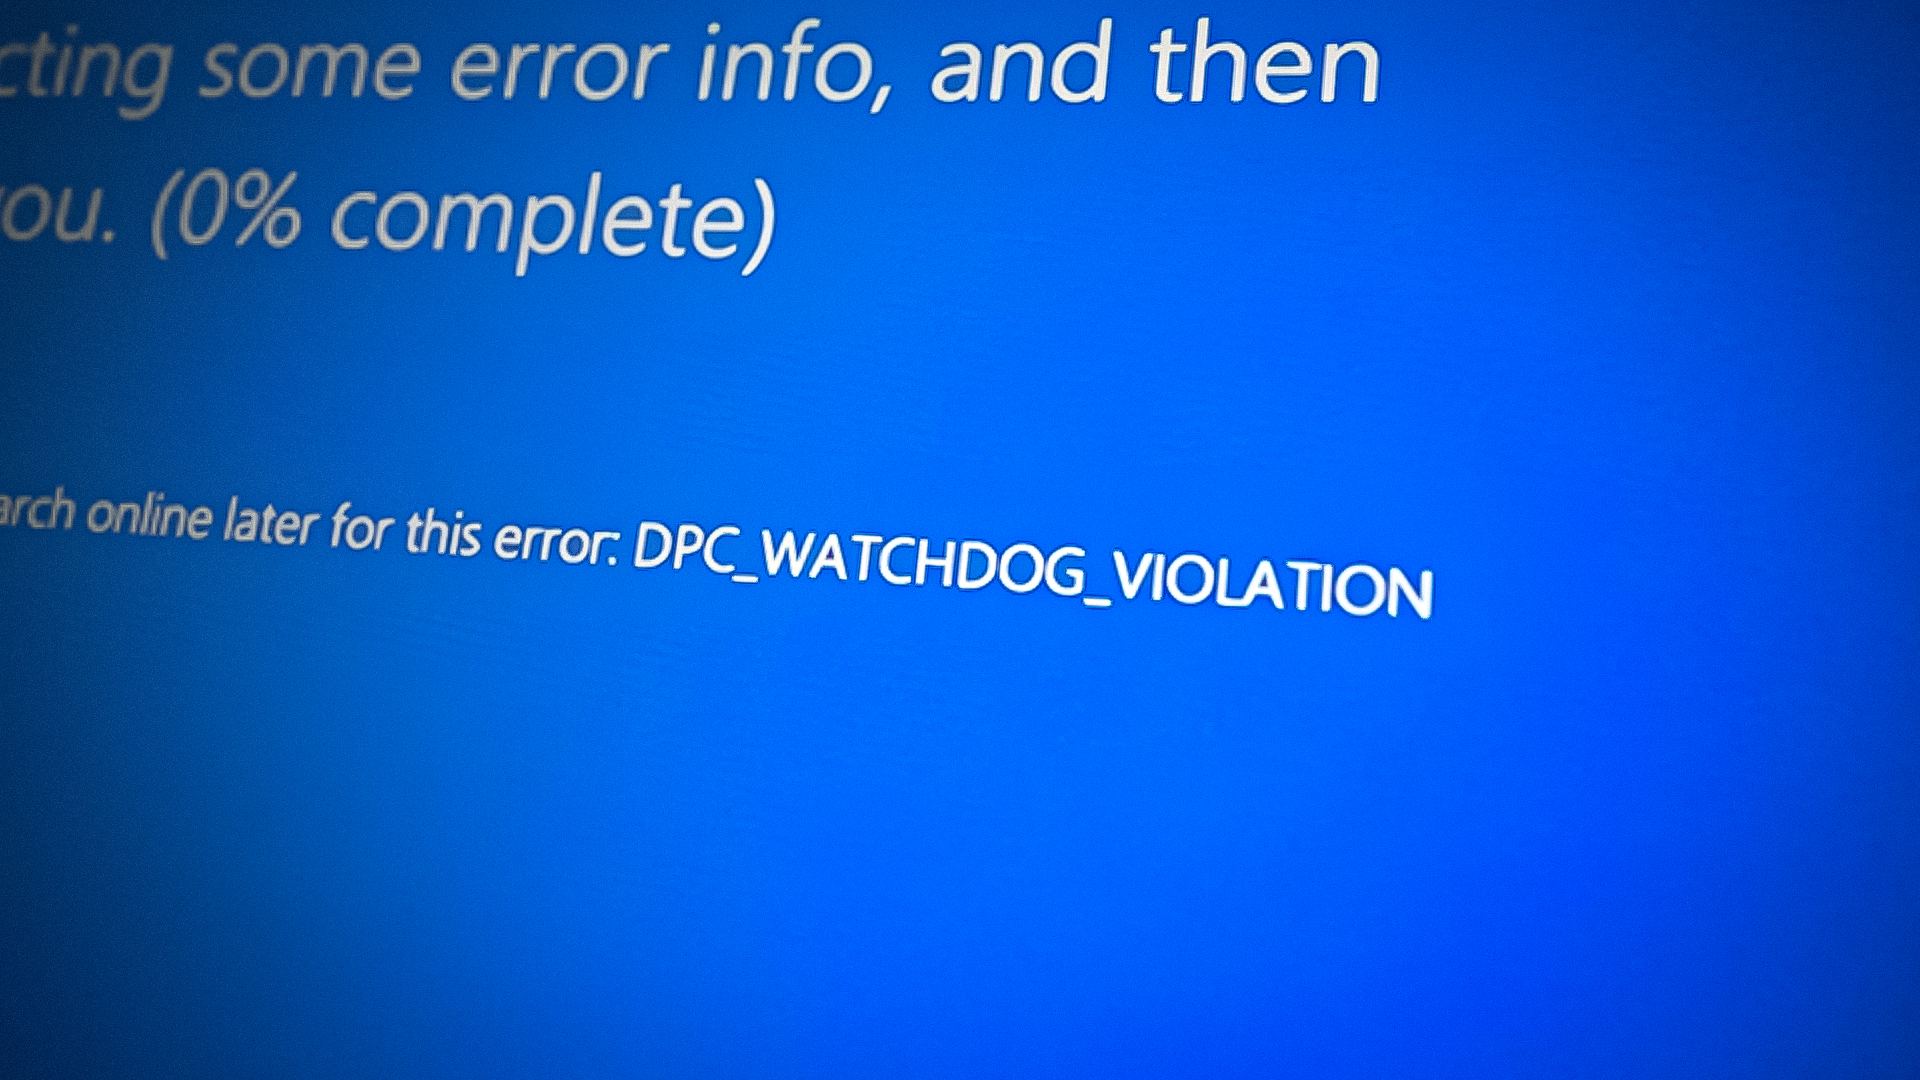
Fix: DPC Watchdog Violation BSOD Error on Windows 10?
The DPC_WATCHDOG_VIOLATION error was one of the most popular error codes on Windows 10 and it’s shaping up to be the same on Windows 11 too. While generally, this error signals some kind of critical compatibility issue with certain devices that makes the PC crash and display the BSOD (Blue Screen of Death screen), there are also other scenarios that will actually cause this problem frequently (as you’ll see below).
We’ve investigated this particular issue thoroughly and made a list of every potential scenario that will ultimately force your PC to crash with the DPC_WATCHDOG_VIOLATION error:
- The BSOD is caused by GPU drivers – One of the most common causes why you might experience this problem is a scenario where your graphics card is either forced to work with an incompatible driver (migrated with an upgrade from an older OS) or due to some kind of system file corruption.
- Missing Windows infrastructure update – If you’re using a medium or high-end PC on Windows 11, one of the first things you should do is ensure that every Windows infrastructure update is installed. This is required in case you frequently get this error while your PC needs to perform a resource-intensive task.
- Outdated or Incompatible ATA / ATAPI Controller Drivers – As it turns out, a lot of user reports documenting this issue can actually be traced back to an issue involving the ATA / ATAPI Controller drivers. A lot of affected users have confirmed that they managed to get the issue fixed after they used Device Manager to update to the latest available version.
- Outdated or Incompatible SSD firmware – If you’re using a newer SSD model on Windows 10 and Windows 11, you’ve got to go the extra mile and see if there’s a new driver version available. You can do this by accessing Device Manager and grabbing the SSD model, then going online and checking if there’s a new firmware update that you can install.
- Conflicting Synaptic drivers – One potential culprit that keeps coming up in almost every user report we’ve investigated in regards to the DPC_WATCHDOG_VIOLATION error is the Synaptics SMBus TouchPad driver. If this driver is causing the unexpected BSOD, uninstalling it will force Windows to use a generic driver equivalent instead which will resolve the issue swiftly.
- External device conflict – As weird as it might sound, a peripheral or a different external device can also be responsible for this type of error. While we can’t provide you with a definitive list of scenarios where this problem occurs, what you can do is physically disconnect all non-essential peripherals until you discover the culprit in your particular case.
- Inconsistent SATA AHCI Controller driver – The SATA AHCI Controller driver can also ve responsible for this error if you’re only experiencing these BSODs while your SSD or HDD is in a full load. To address this issue, you’ll have to open Device Manager and re-configure your OS to use a different SATA AHCI controller driver.
- Critical Disk Error – If you go through all the potential driver-related causes and none of them apply to you, the first thing you should investigate is your disk. If you’re still using a traditional HDD, there’s a chance you’re experiencing the DPC_WATCHDOG_VIOLATION error due to a disk error facilitated by the fact that your disk is dying. As a temporary fix, you can address this issue by deploying a CHKDSK scan in an attempt to replace failing disk sectors with unused equivalents.
- Recent system change – Some users are reporting that in their case, they started seeing this error immediately after they allowed a system change (like the installation of a new driver, a Windows update, etc.). If this is the cause of the error, you can get the issue fixed by using the System Restore to ever your PC back to a healthy state.
- Underlying system file corruption – Under certain circumstances, you can also experience this error due to some type of system file corruption that is currently using the general system instability leading to the BSOD. You can fix most of these issues by deploying SFC and DISM scans or by clean installing or repairing installing your Windows installation.
Now that we went over every potential reason why the DPC_WATCHDOG_VIOLATION error is occurring, let’s explore every verified user-suggested fix that will help you address this pesky BSOD error code:
1. Clean and Reinstall GPU drivers using DDU (AMD and Nvidia)
One of the reasons you might experience this problem is when your graphics card is forced to work with an incompatible driver or due to some kind of system file corruption.
According to other affected users, this problem can also be related to a case where you’re dealing with some corrupted driver dependencies that will force the system to default to a BSOD screen whenever it has to do resource-intensive GPU tasks.
If this scenario is applicable, you should be able to fix the problem by uninstalling your current fleet of GPU drivers and using the DDU (Display Driver Uninstaller) utility to clear any remnant GPU drivers before installing the latest version compatible with your model.
For specific instructions on how to do this, follow the instructions below:
Note: The instructions below will work for both Nvidia and AMD GPUs.
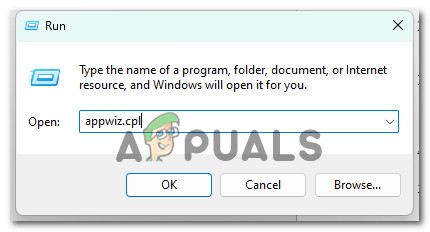
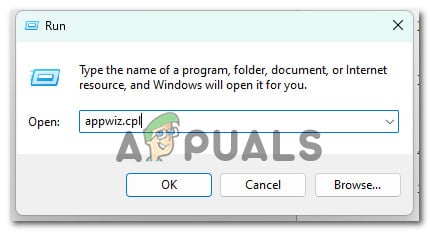
- Start by opening the Programs and Features – to do this, press Windows key + R to open a Run dialog box, then type ‘appwiz.cpl’ and press Enter.
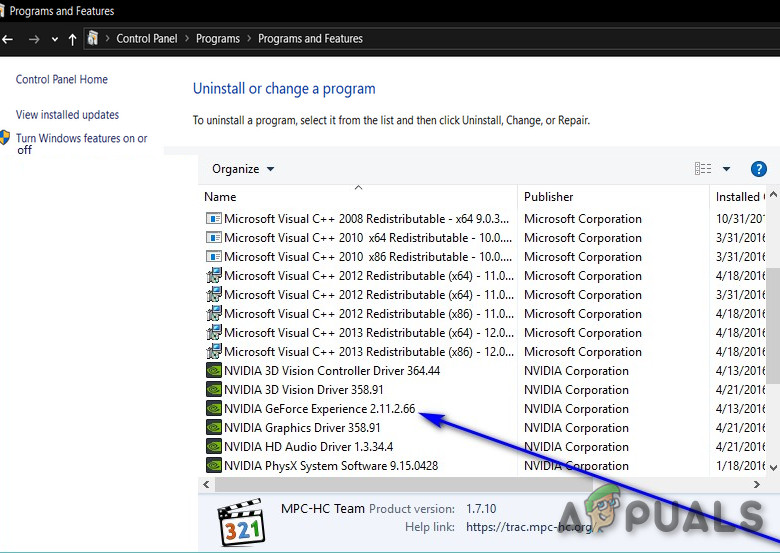
Open up the Programs and Features menu - Once you’re inside the Programs and Features menu, scroll through the list of installed items and uninstall everything published by your GPU manufacturer – Advanced Micro Devices or Nvidia Corporation. You can do this by right-clicking on it and choosing Uninstall from the context menu.
Uninstall the main GPU driver & supporting tools from Nvidia or AMD - Inside the uninstallation screen, follow the on-screen instructions to complete the process, then restart your computer.
Note: During this procedure, you might notice some screen flickering. Don’t panic as it’s perfectly normal. - Once your computer boots back up, it will do so using a set of generic GPU drivers. Next, we’ll need to get rid of all the remaining GPU drivers. To do this, visit the download page of Display Driver Uninstaller and download the latest available version.

Download the latest version of DDU Note: This is a 3rd party freeware that is capable of deep cleaning any remnants of your GPU drivers.
- Once the download is complete, use a utility like 7zip or Winzip to extract the contents of the DDU archive.
- In order to use DDU effectively, you will need to restart your computer in Safe Mode – follow the steps outlined in this article to do so.
- After your computer boots back up, double-click on the DDU executable that you previously extracted and click on Yes when you get to the UAC (User Account Control) prompt.
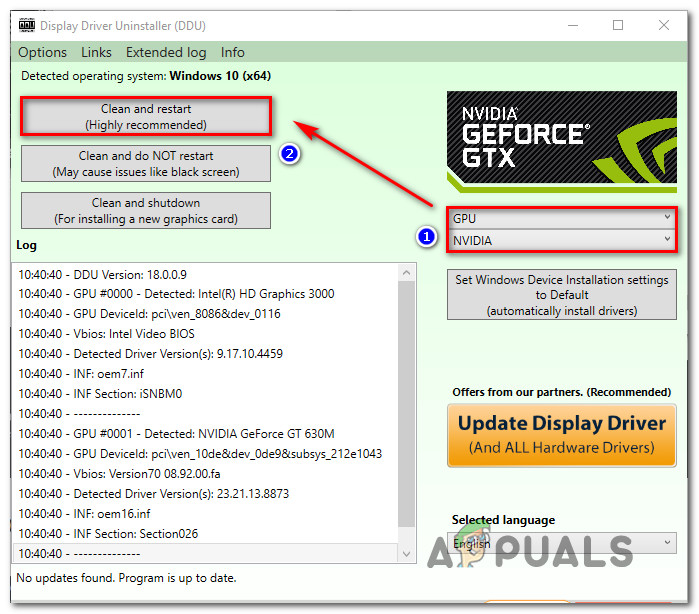
- In the main Display Driver Uninstaller interface, start by selecting your GPU from the Select Device type drop-down menu (right-hand section of the screen).
- Next, click on Clean and restart to begin the cleanup process.
Cleaning up the GPU remnant files with DDU - Once the operation is complete, restart your computer once again to move away from Save mode, then install the latest compatible GPU version by using one of the specialized tools below:
Nvidia Experience
AMD Adrenalin - After the newest version of the driver is installed, restart one final time and see if the DPC_WATCHDOG_VIOLATION error is still occurring.
If the problem is still not fixed or you already had the latest GPU version installed, move down to the next method below.
2. Install every pending Windows infrastructure update
If you have a high-end PC, you’ll want to make sure you’re up-to-date on all the latest Windows infrastructure updates. This is important to do if you find yourself getting this error often when your PC is performing resource-intensive tasks.
If your Windows installation is missing any key infrastructure update, you might be able to fix the DPC_WATCHDOG_VIOLATION error permanently by bringing your Windows 11 up to date.
For specific instructions on how to do this on Windows 10 or Windows 11, follow the instructions below:
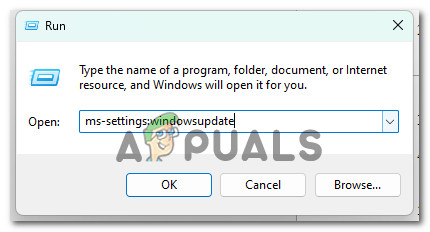
- One way to run Windows Update is by using the Run dialog box. To do this, press the Windows key + R on your keyboard. This will open the Run dialog box.
- In the text box, type ‘ms-settings:windowsupdate’ and press Enter. This will take you to the Windows Update tab in the Settings app.
Accessing the Windows Update screen Note: If you have not changed the UAC settings, you may get a prompt asking for permission to continue. In this case, click Yes to grant permission.
- Once you are in the Windows Update tab, click Check for Updates in the right-hand section.
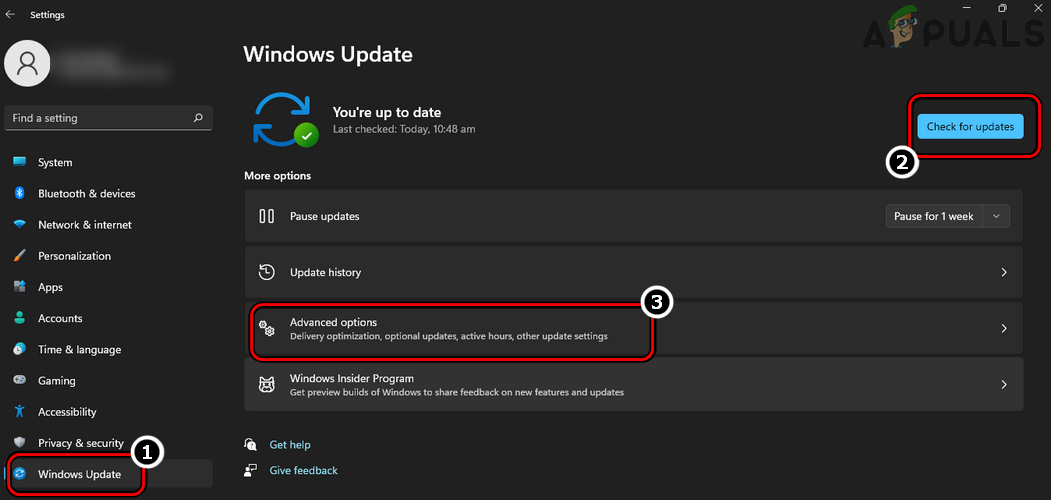
Check for updates - Wait for the update to download, then click Install Now to install it locally.
- Finally, reboot your computer and see if the problem has been fixed.
If the DPC_WATCHDOG_VIOLATION error is still persisting, move down to the next method below.
3. Change the IDE ATA/ATAPI Controller drivers
It looks like many of the user reports about this issue can be linked to a problem with the ATA / ATAPI Controller drivers. Several affected users have said that they were able to fix the issue by updating to the latest version through Device Manager.
Note: This method is typically effective in situations where a traditional HDD is used.
Several affected users have confirmed that once they transitioned from the currently in-use ATA / ATAPI Controller driver to a generic equivalent, the DPC_WATCHDOG_VIOLATION error stopped occurring entirely.
Follow the instructions below for the complete steps on migrating away from the currently used ATA / ATAPI Controller driver:
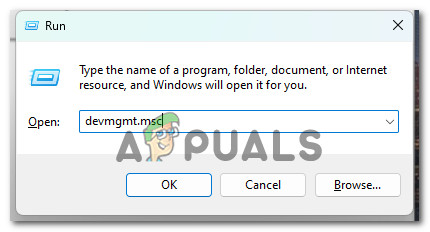
- Press Windows key + R to open up a Run dialog box. Next, type ‘devmgmt.msc’ inside the text box, then press Ctrl + Shift + Enter to open up Device Manager.
Accessing the Device Manager utility - At the User Account Control, click Yes to grant admin access.
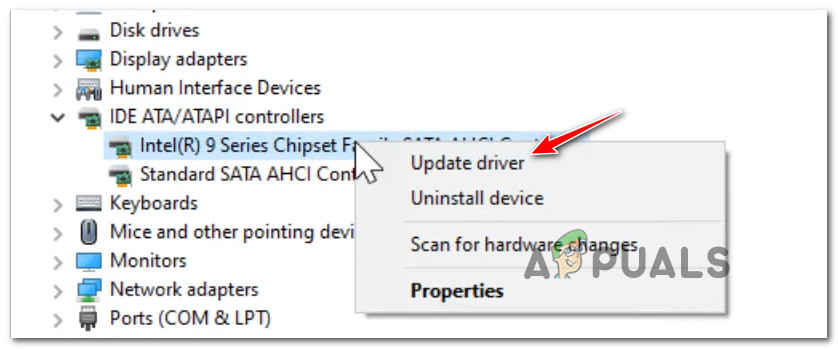
- Once you’re inside Device Manager, expand the IDE ATA / ATAPI controllers drop-down menu, then right-click on your active chipset driver and choose Update driver from the context menu that just appeared.
Update the driver - Once you get to the next screen, click on Browse my computer for driver software.
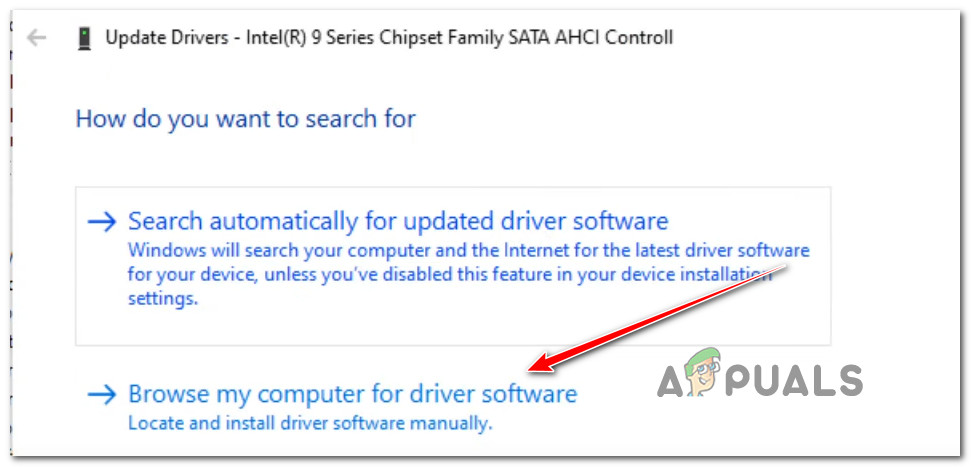
Browser for other driver software - Once you’re inside the Browse screen, ignore the first section of the screen and click on Let me pick from a list of available drivers on my computer.
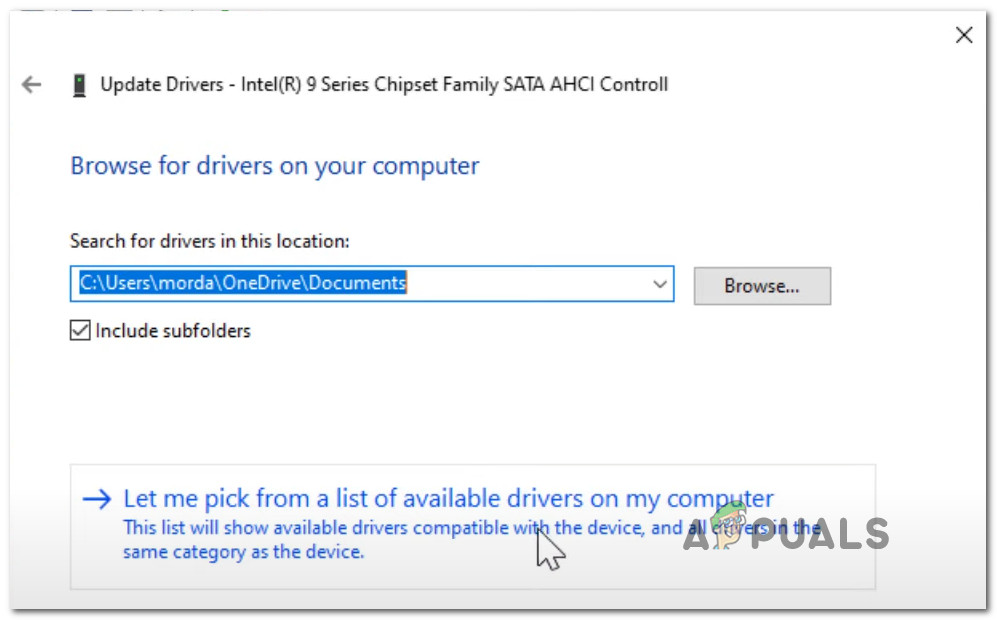
Let me pick from a list of local drivers - From the next screen, make sure the Show compatible hardware box is checked, then select Standard SATA AHCI controller from the remaining items in the box below.
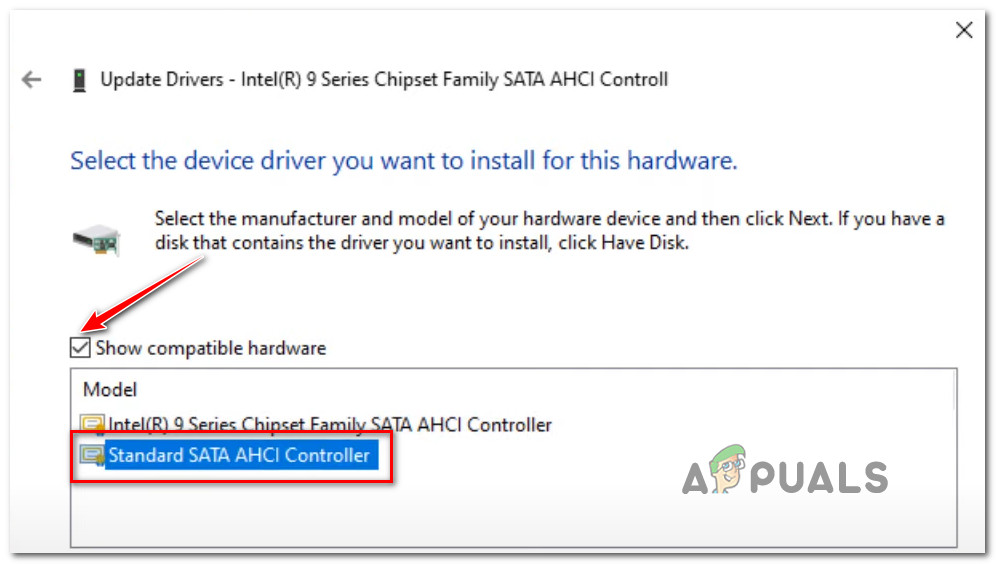
Selecting the correct driver - With the Standard SATA AHCI controller driver selected, click on Next.
- Wait until the generic driver is installed, then click on Close and restart your computer.
- Once your PC boots back up, see if the problem is now resolved.
In case you’re still experiencing the same DPC_WATCHDOG_VIOLATION error is still occurring, move down to the next method below.
4. Update the SSD firmware
If you’re using a newer SSD model, you should check to see if there’s an updated driver available. To do this, go to Device Manager and grab the SSD model number. Once you have that, go online and see if there’s a new firmware update that you can install.
Important: Before you update the firmware on your SSD, make sure to back up your data first. Updating the firmware will erase all data from your drive.
A lot of users experiencing this type of error have confirmed that the DPC_WATCHDOG_VIOLATION error no longer occurred after they followed the instructions below to identify their SSD model number and used it to find a newer driver version.
Note: You can also attempt to update the SSD firmware via Device Manager, but don’t get your hopes up as the chances of finding an updated version are very slim.
Here’s what you need to update the SSD firmware to the latest:
- Press Windows key + R to open up a Run dialog box. Next, type ‘devmgmt.msc’ inside the text box, then press Ctrl + Shift + Enter to open up Device Manager.
Accessing the Device Manager utility - At the User Account Control, click Yes to grant admin access.
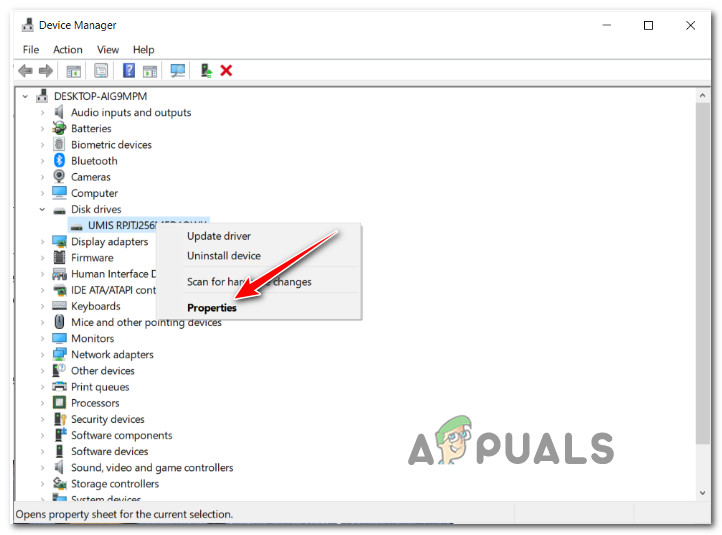
- Once you’re inside Device Manager, expand the drop-down menu named Disk Drives.
- Next, right-click on the SSD drive under Disk Drives, then click on Properties from the context menu.
Accessing the Properties screen - Once you’re inside the Properties screen, click on the Details tab at the top of the screen.
- From the Details tab, go under the Property menu and select Hardware IDs.
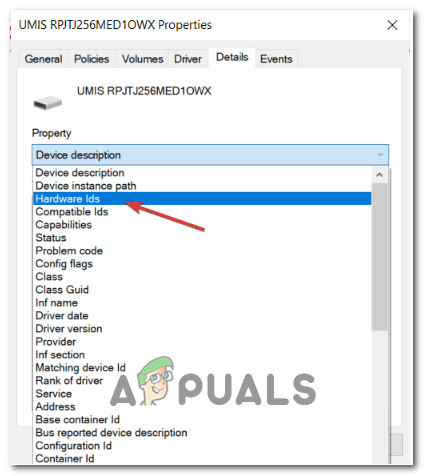
Accessing the hardware ID property - Next, what you want to do is take note of the model number of the drive that you’re actively using (from the upper part) and the firmware version listed after its name.
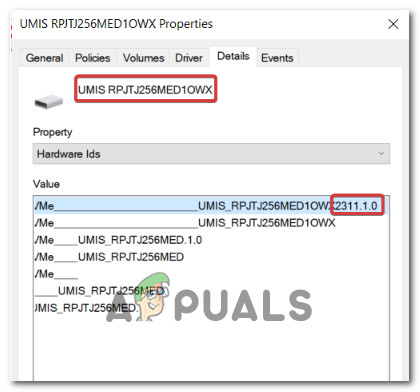
Take note of the model and firmware version - Next, do a search online (or on the SSD manufacturer website / PC manufacturer) and see if there is a new firmware version available for your SSD.
- If a new version is available, go ahead and download it, then follow the on-screen instructions to install it.
- After the new SSD firmware is installed, restart your PC and see if the issue is now fixed.
If you’re still experiencing the same type of DPC_WATCHDOG_VIOLATION BSODs, try the next method below.
5. Uninstall the Synaptic drivers (if applicable)
After investigating many user reports, one potential culprit for the DPC_WATCHDOG_VIOLATION error appears to be the Synaptics SMBus TouchPad driver. If this driver is causing the unexpected BSOD, uninstalling it will force Windows to use a generic driver equivalent which will resolve the issue swiftly.
Note: This method is confirmed to be effective on both Windows 10 and Windows 11 laptops.
Uninstalling the Synaptic driver means that your Windows installation will be forced to revert back to a series of generic drivers. Instead of reinstalling the Synaptic touchpad drivers once again, we recommend continuing using the generic equivalents (especially if you’re not actively your laptop touchpad)
Follow the instructions below to uninstall the Synaptics drivers:
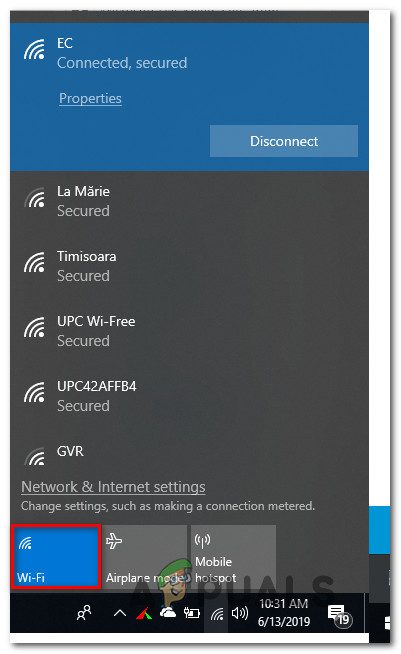
- Disabling your wireless card is the first step. To do so, find the wireless icon in the bottom-right corner of your screen and click on the box next to Wi-Fi.
Disable Wi-Fi card - With the wireless card now off, open a Run dialog box by pressing Windows key + R.
- In the text field, type “appwiz.cpl”, then hit Enter to go to the Programs and Features page.
Open up the Programs and Features menu - Once you’re inside Programs and Features, scan the list of installed applications until you locate the Synaptics driver. When you see it, right-click on it and select Uninstall from the menu.
- Follow the on-screen prompts that appear to finish uninstalling the Synaptic driver .
- Once the Synaptics driver has been uninstalled, restart your computer.
- After your PC boots back up, see if the DPC_WATCHDOG_VIOLATION error is now fixed.
If the same kind of issue is still occurring, move down to the next method below.
6. Remove all Connected External Devices
Strange as it may sound, a peripheral device or another external factor might be to blame for this type of error.
We can’t give you a definitive list of situations where this problem occurs, but you can try disconnecting all non-essential peripherals until you narrow down the source of your particular issue.
It turns out that this particular issue can also occur due to a power draw problem.
If your power supply unit (PSU) is not sufficient to sustain all your USB-connected devices, you might experience this critical DPC_WATCHDOG_VIOLATION BSOD because your system is unable to provide the required power.
This is specifically reported to occur with configurations that have external hard drives connected through USB.
If this scenario is applicable to your current situation, try removing the external hard drive (if applicable) and see if you still get random disconnects.
If the error stops occurring after you disconnect external devices and you plan on fixing the issue without losing any functionality whatsoever, you have two ways forward:
- Get a higher PSU that is able to provide more power to your USB-connected devices. Of course, this is only applicable with desktop configurations.
- Get a USB hub with an external power supply. This should be the fix if you’re encountering the issue on a laptop or ultrabook. USB hubs with included power adapters will take the load off your PSU.
If this method is not applicable in your particular scenario or it didn’t make a difference, move down to the next method below.
7. Check & Fix disk errors with CHKDSK
It turns out that this particular issue can also be caused by some bad sectors on your HDD that might be causing general system instability. If bad sector data affects a critical service, it’s likely that your system will trigger a stop error that forces the machine to restart.
Several users who were struggling with this problem have confirmed that running a CHKDSK (Check Disk Utility) scan resolved the issue for them entirely. Most users who pursued this fix have reported that the BSOD with the DPC_WATCHDOG_VIOLATION status error code stopped occurring after the procedure was complete.
Here’s a quick guide on running a CHKDSK scan:
- To run an offline CHKDSK scan, open a Run dialog box by pressing Windows key + R.
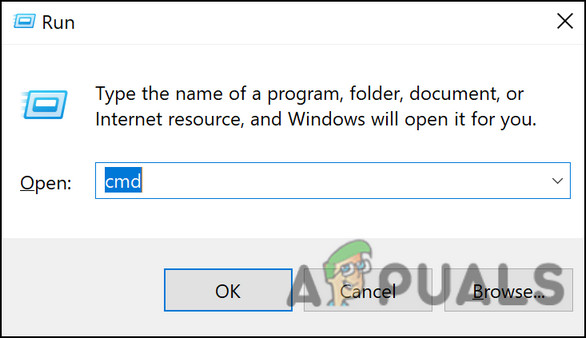
- Next, type ‘cmd’ inside the text box and press Ctrl + Shift + Enter to open up an elevated Command Prompt.
Open an elevated CMD prompt - When you see the UAC (User Account Control) prompt, click Yes to grant administrative privileges.
- In the elevated Command Prompt, type the following command to initiate an offline scan:
chkdsk /f
- After you initiate the CHKDSK scan, wait for it to be complete, then restart your computer and see if the issue is resolved at the next system startup.
If you’re still experiencing the same DPC_WATCHDOG_VIOLATION status error code, try the next method below.
8. Use a System Restore point
As it turns out, the DPC_WATCHDOG_VIOLATION status BSOD might also occur when a recent change to Windows affects the boot configuration data. The best way to fix this problem is to use the System Restore wizard to revert your machine to a point where this problem wasn’t occurring.
Info: The System Restore can use snapshots that are regularly saved to restore the computer state as a whole to the period in time when the snapshot was created. If you are lucky enough to have a snapshot from just before the problem started occurring, you will be able to fix the issue with minimal data loss.
Keep in mind that by default, the System Restore utility is configured to create new system startups at important events such as installing a Windows update or a new driver version. If you haven’t changed this default behavior, you should have plenty of System Restore points to choose from.
Here is a quick guide on how to use the System Restore utility to restore your PC back to a previous state:
Note: We recommend opening the System Restore utility from the Recovery menu in order to improve the likely hood of success.
- Start your computer up and insert the Windows installation media if it’s not already inserted into your computer.
- During the initial booting sequence, press any key when you see the ‘Press any key to boot from the CD or DVD’.

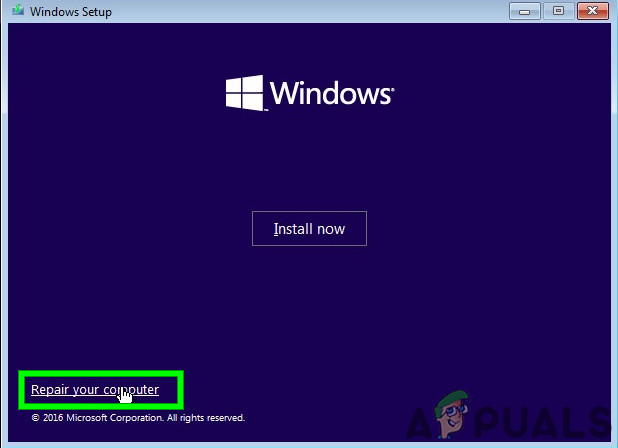
Press any key to boot from DVD - Once you get to the next screen, click on the ‘Repair your Computer’ hyperlink located in the lower side section of the screen.
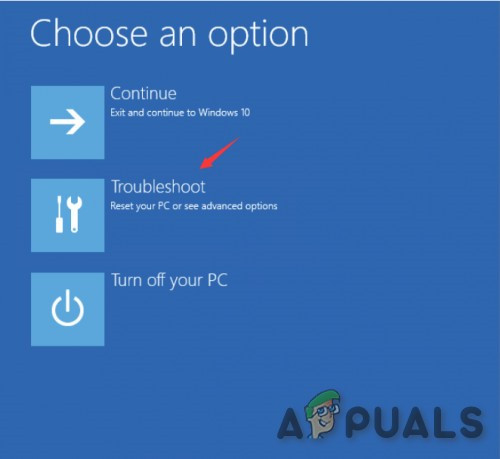
Repair your computer - After several seconds, you will be taken to a Troubleshoot menu where you will have the option to choose between multiple options. Once you get there, select the Troubleshoot feature.
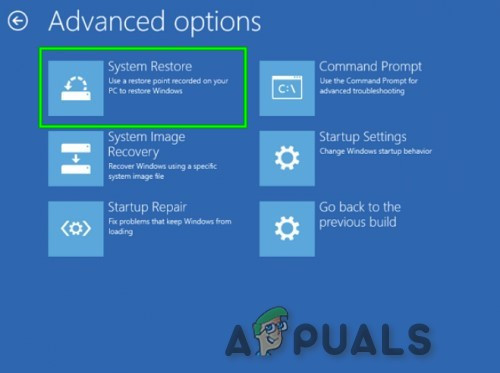
Exploring the Troubleshoot sub-menu inside the Recovery menu - Once you’re inside the Troubleshooting menu, click on System Restore (the first option at the top).
Accessing the System Restore menu from the Recovery menu - Next, start by ensuring that the box associated with Show more restore points are checked.
- By doing this, you get a nice overview of all the restore snapshots that you can use.
- Next, look through the dates of each snapshot and select the one that is dated just before you started to receive face these issues.
- Once you select the appropriate restore point selected, click Next to advance to the final menu.
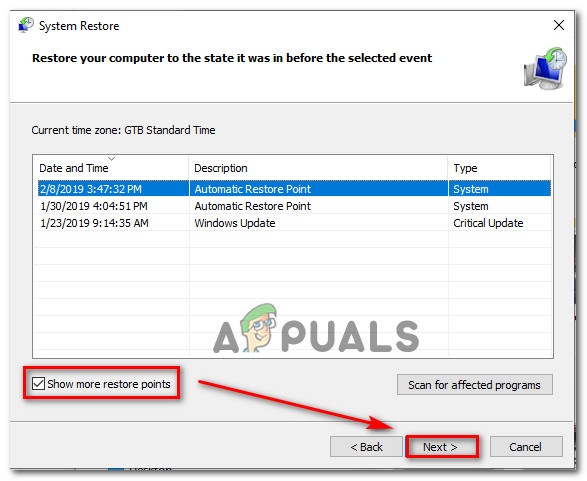
Restore a previous PC state via System Restore - You will be given a confirmation prompt before starting the restore process–click Yes. After several moments, your computer will restart and the older state will be enforced. If the same error persists or this method wasn’t applicable, please refer to the next potential fix below.
9. Deploy SFC and DISM scans
Some users have found that this error can occur due to corruption in system files which are the high resource-consuming aspect of Windows. If you see a DPC_WATCHDOG_VIOLATION error every time you try to render something or open a resource-consuming application, you should use some built-in utilities which can fix common causes of system file corruption.
You can use SFC (System File Checker) and DISM (Deployment Image Servicing and Management) to locate the corrupted files causing the problem and replace them with healthy equivalents.
Note: Although these two utilities share a core similarity, they go about fixing corruption in different ways. SFC uses a locally stored archive while DISM uses a sub-component of Windows Update to download clean files.
If you want to try this method, start by launching an SFC scan.
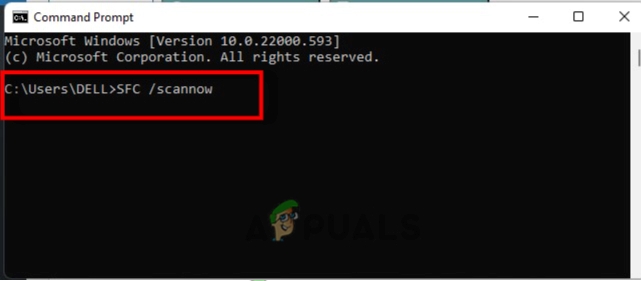
Once the scan is complete, reboot your computer and run a DISM scan.
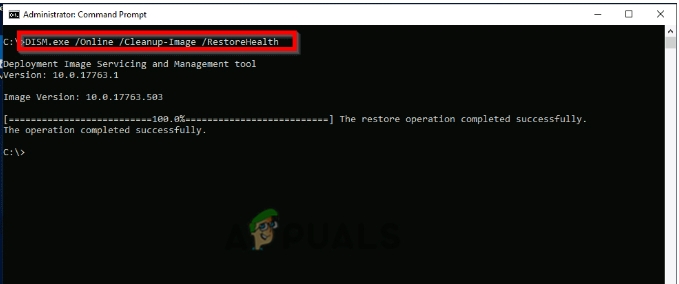
If the utility finds and fixes an underlying corrupt issue, follow the on-screen prompts to replace corrupted files.
Note: Before you launch the DISM operation, make sure you have a stable Internet connection.
Once the DISM scan is completed successfully, reboot your computer once again and see if the problem has been fixed.
10. Clean install or repair install
If you’ve tried all the potential fixes and you’re still seeing the same DPC_WATCHDOG_VIOLATION error code when performing res, chances are you’re dealing with some kind of system file corruption affecting a dependency used by the backup sequence.
The next step would be to reset every Windows component with a procedure like a clean install or repair install (in-place repair).
A clean install is an easy route, but keep in mind that this will delete all personal data on your OS drive. You won’t need compatible installation media for this process.
Repair install (in-place repair) is more tedious but has the advantage of refreshing every potentially corrupted component without losing data from apps, games, documents, and personal media stored on your OS drive. For this process, you will need compatible installation media.
Hi Kevin, I get the watchdog violation code all the time. I’ve already tried everything that is on the internet, except that in my case, I don’t have the IDE ATA/ATAPI settings available in my device manager. I also used the verifier and selected to force all non Microsoft drivers in my following restart. Now I can’t load my windows other than safe mode as I’m also getting the driver verifier detected violation. I didn’t make a restore point to a recent date before doing that, so now I’m trying to avoid restoring the machine.