Fix: External Hard Drive ‘No Media Error’
External hard drives are useful for storing vital data, but regular users might encounter a “No Media Error. This unpredictable error can appear even when the drive was functioning properly during its last use. The issue manifests when the hard drive fails to appear on the computer upon connection and often in other areas such as Device Manager, Disk Management and Computer Management. In some instances, it might still be detectable in the Device Manager or Disk Management. Formatting may also become impossible.
Numerous factors such as corrupted drivers, faulty ports, insufficient port power, among others, could cause this issue. Consequently, a range of solutions exists.
Since there’s no definitive way to identify the issue, begin with method 1 and proceed until the problem is resolved. However, initially go through troubleshooting to help pinpoint the source of the problem.
- The issue may be with the connectivity. For your drive to function, it needs a proper connection with the USB port. A bad or loose connection can cause this problem too, so ensure the drive is properly connected to the USB port. If necessary, reinsert it several times to ensure a secure connection.
- If your external drive has lights, ensure they are on. These lights should illuminate when the drive is properly connected.
- Try plugging your drive into different ports. The issue may be due to a faulty port.
- Test your external drive on a different computer to verify its functionality. If it operates effectively, the problem likely lies with your original computer. However, if the drive is proficient on another PC, initiate a format by right-clicking on the drive. Remember to back up your data before formatting. Subsequently, try using your external drive again on the problematic computer.
- Mac and Windows utilize different file systems for USB and external drives, with Mac using HFS and Windows using NTFS. Therefore, an external hard drive used with a Mac may cause issues when switched to a Windows system and vice versa. To solve this, format the drive on Windows to ensure compatibility. Remember to back up your data before formatting.
Method 1: Review Device Manager for disconnected devices
For Windows 8, 8.1 and 10:
- Press and hold the Windows key and X.
- Click on ‘Command Prompt (Admin)‘.
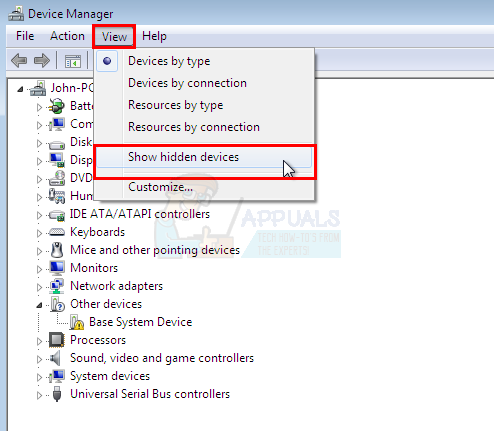
- Click ‘View‘.
- Select Show Hidden Devices.
- Double-click to expand all entries.
- Locate any greyed out entries, right-click on them, and select ‘Uninstall‘.
- Restart your computer.
For Windows 7 and earlier versions:
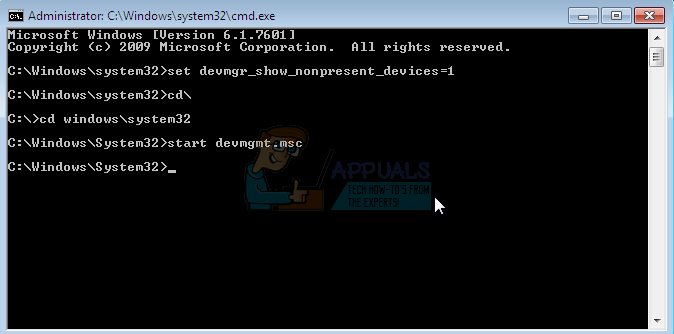
- Click ‘Start‘, type ‘cmd‘ in the search box, then press CTRL, SHIFT, and ENTER simultaneously.
- Type “set devmgr_show_nonpresent_devices=1” and press Enter.
- Type ‘cd\‘ and press ‘Enter‘.
- Type ‘cd windows\system32‘ and press ‘Enter‘.
- Please type “devmgmt.msc” and press Enter.
- Click View.
- Select ‘Show Hidden Devices‘.
- Double-click to expand all entries.
- Locate any greyed out entries, right-click, and select ‘Uninstall‘ for each one you find.
- Restart your computer.
After restarting your computer, reconnect your external hard drive and check if the issue is resolved. If not, repeat steps 1-9, right-click the greyed-out entry, and select ‘Scan for Hardware Changes’.
Method 2: Connect to the Back USB Port
If you’re using a front USB port to connect your Seagate external hard drive, you might encounter power issues as these ports sometimes provide insufficient power. For better power supply, try connecting your external hard drive to the computer’s rear USB port.
You should try changing the port, even if your external hard drive isn’t a Seagate drive.
Method 3: Altering the Drive Letter
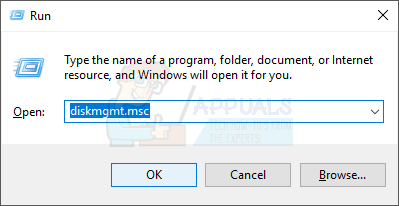
- Press and hold the Windows Key + R.
- Type ‘diskmgmt.msc‘ and press ‘Enter‘.
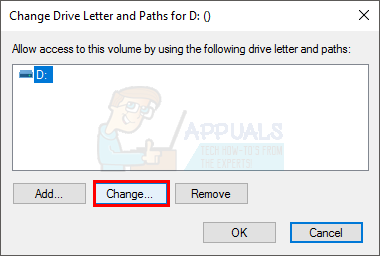
- Check for your external hard drive in the list. If found, right-click it and select ‘Change Drive Letter and Paths…‘.
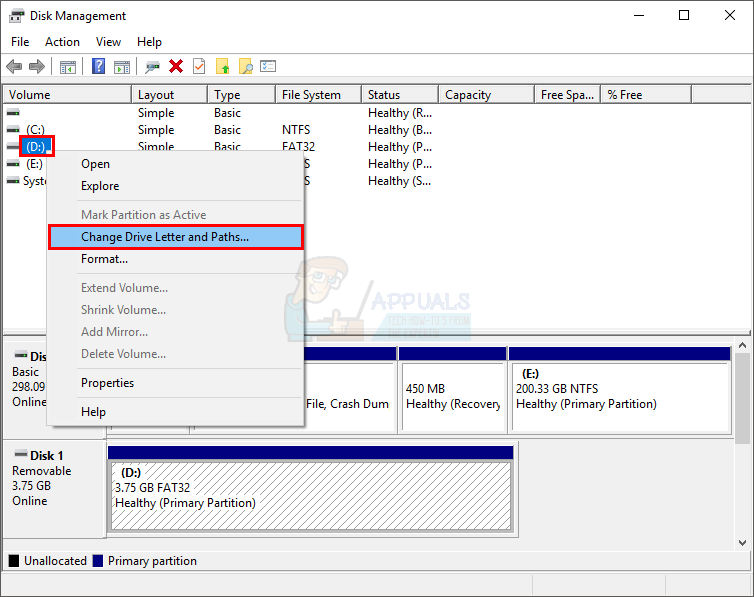
- Click ‘Change‘.
- Select a drive letter from the drop-down menu located next to ‘Assign the following drive letter‘.
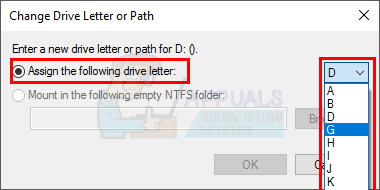
- Click OK.
Method 4: Assign a Letter to the Drive Using Diskpart
- Click Start.
- Type ‘Diskpart‘ into the search box.
- Right-click ‘Diskpart‘ in the search results and select ‘Run as Administrator‘.
- Type ‘list volume‘ and press Enter.
- You should now be able to see your external hard drive.
- Select Volume 1, replacing ‘1‘ with the number assigned to your drive in the list.
- Assign the letter ‘T‘ (replace ‘T‘ with your preferred letter).
Now, close Diskpart and verify if your computer recognizes the drive.
Method 5: Verify Power Source
If you’re using an adapter or hard drive enclosure with a 3.5-inch drive, insufficient power could be the issue. Some adapters include their own power supply, but most necessitate proper power connection for your drive.
If you’re using an adapter or enclosure, connect it to a power supply to ensure sufficient power. Your USB port may not provide enough power for the drive. Please check the manufacturer’s website of the adapter or drive casing to confirm it meets the power requirements.
Note: Some 2.5-inch drives may require more power than usual. If you’re using a 2.5-inch hard drive with an adapter, ensure it’s connected to a reliable power source.
Method 6: Repair Hard Drive Using Chkdsk
In extreme cases, your external hard drive may be damaged with bad sectors. This issue can be resolved by running the chkdsk repair tool. Chkdsk will identify and repair any bad sectors on your disk.
- Press and hold the Windows key + R.
- Type ‘cmd‘ and press ‘Enter‘.
- Type ‘chkdsk #: /R‘, remembering to replace ‘#‘ with your drive letter, then press enter.
The computer will now scan your drive for errors and attempt repairs if necessary. This process may be lengthy, so please be patient, even if initial progress seems slow.
Method 7: Enable External Drive
In rare instances, your external hard drive may automatically disable itself. Usually, re-enabling it resolves the issue.
- Press and hold the Windows key + R.
- Type ‘devmgmt.msc‘ and press ‘Enter‘.
- Find your external drive under the ‘Universal Serial Bus Controller‘ as ‘USB Mass Storage.
- Check for a red mark or arrow on it. If present, right-click and select ‘Enable’. If ‘Enable‘ is not visible, the drive is already enabled.
Double-click ‘Disk Drive‘ in the Device Manager to check the disk drives, ensuring they are enabled. If not, indicated by the same mark as on the USB Mass Storage, right-click and select ‘Enable‘.
Check if the problem is solved.
Worth adding to the list that some USB drive enclosures that support both IDE and SATA have a tiny little switch on the board that needs to be set correctly for the type of drive installed. If it isn’t, then you get a “no media” message just like this.