How to Connect Lutron Caseta to Alexa
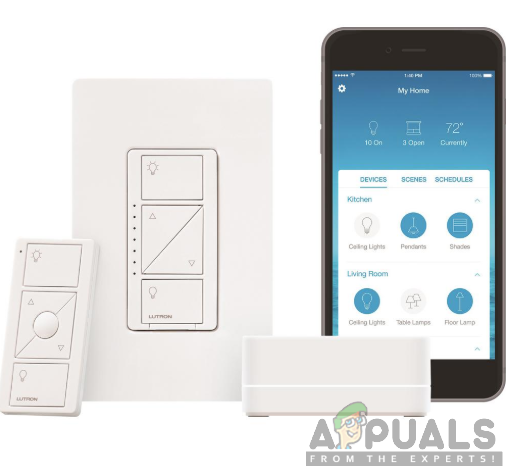
Lutron Caseta is a smart lighting control system that is designed to integrate with other smart home devices and services such as Alexa, Google Assistant, Siri and Nest devices among others. It enables you to easily control multiple lights and shades from anywhere, any time by a press of a button, a remote or through your smartphone. On top of that, the light control system is easy to install and very easy to use as well.
Alexa, on the other hand, is an essential virtual personal assistant capable of listening to your voice command and respond accordingly. This will help you perform a variety of tasks in your home including providing information about news, weather updates, and traffic, playing audiobooks, setting alarm and many more incredible features.
Since the lighting system is such an essential and a paramount aspect in our daily life, there is a much need for a smart lighting control system. As a result, it becomes a great solution for every user. Moreover, the control system will help you regulate the quality and level of light in any given environment for certain tasks or situation.
Why connect Lutron Caseta to Alexa?
You might be asking yourself why would you need to connect these two amazing devices together. As you can see, they are capable of performing excellent tasks. Well, the combination of the two will provide you with a top-notch experience of the capabilities brought by Lutron Caseta and the virtual assistant.
Lutron works seamlessly with Alexa to make your life easier and more comfortable by providing a number of impressive functionalities. With Alexa, you can tell it to turn the lights on, off or dim them depending on your favorite light level. Also, you can be able to control various lights, shades, and temperature by single voice command.
Therefore, it is with no doubt that connecting Lutron Caseta to Alexa will come with a number of incredible benefits. To enjoy the benefits, you will have to connect the smart lighting control to the virtual assistant. Ensure to follow the process below to achieve a successful connection.
Step 1: Installing your Lutron Caseta System
First of all, you need to ensure you have an active internet connection throughout the process. A stable internet connection is an essential necessity for the entire control system hence you should consider having it installed in your home.
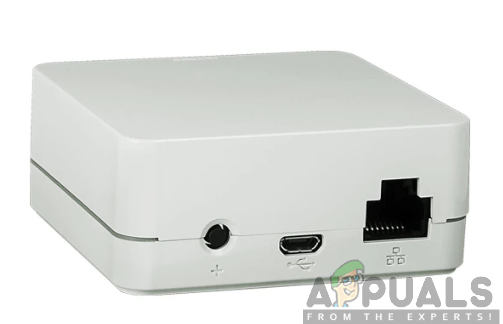
With the presence of the internet, you need to connect your Lutron Caseta smart bridge to your Wi-Fi router. This is made possible by the use of an Ethernet Cable. Similarly, you can connect the smart bridge to the power source as well.
You will then have to download and install the Lutron app in order to set up your Lutron components. For Android users, you can get the app from the Google Play Store and for iOS users from the App Store.
Step 2: Power up your Alexa-enabled devices
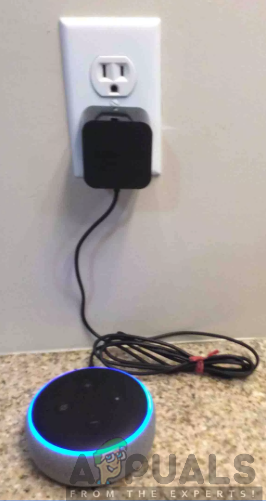
Lutron Caseta is able to work with Alexa-enabled devices such as Amazon Echo Show, Echo, Echo Dot, Echo Spot as well as Amazon Echo Look. Therefore, depending on the type of Alexa-enabled device you are using, you will need to plug them first into a power source. A representation of powering up an Echo device is as shown in the image below.
Step 3: Download Alexa app to your mobile device
You will also have to download the latest version of Alexa app to ensure a successful setup process. This app is compatible with devices having Android 4.4 or higher, iOS 8.0 or higher and also Fire 3.0 or higher. Moreover, the app is available in the App Store and Google Play Store. To download the app, you need to follow the steps below:
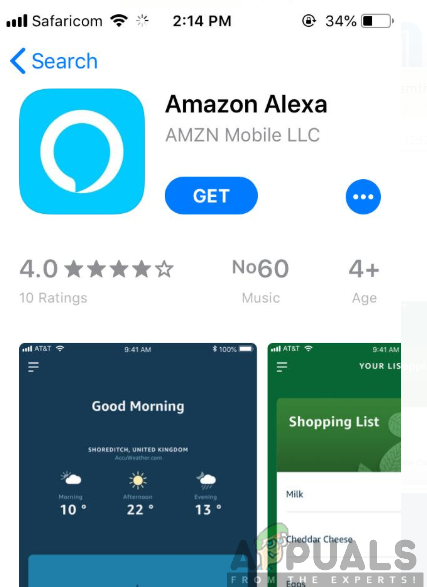
For iOS users:
- Go to the App Store.
- Search for Amazon Alexa app in the search bar.
- Click on Get.
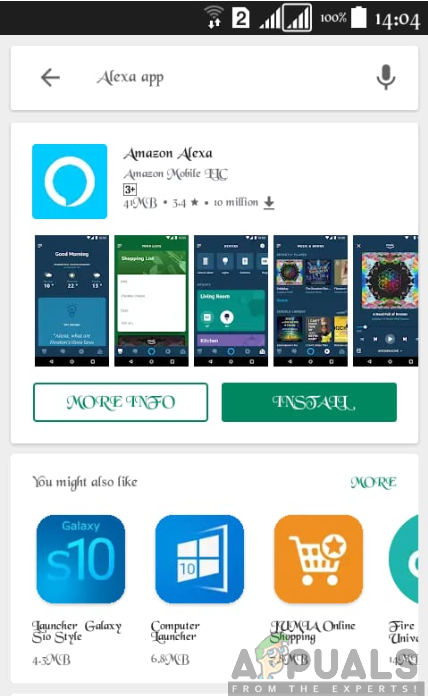
For Android Users:
- Go to Google Play Store.
- Tap the search tab and search for Amazon Alexa app.
- Tap on Install.
Step 4: Setup the Lutron Connect Alexa Skill
With all the necessary components in place, you will then proceed to connect your Lutron Caseta to Alexa. This will involve enabling the Lutron Caseta skill in the Amazon Alexa app. Therefore, after downloading the Alexa app, you should proceed to launch it and follow the onscreen instructions step by step as shown below:
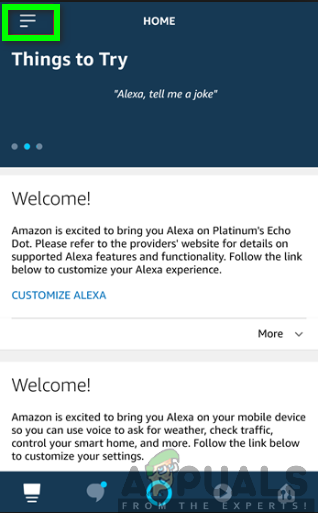
- Open the Amazon Alexa app and tap on the menu icon at the top left corner of the screen.
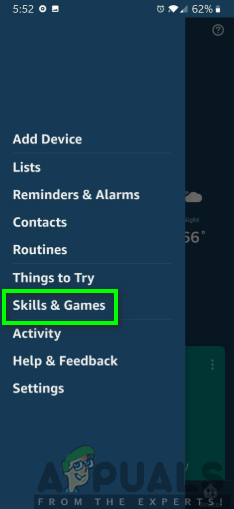
- From the menu screen, select the Skills & Games
- On the search bar, look for Luton Caseta.
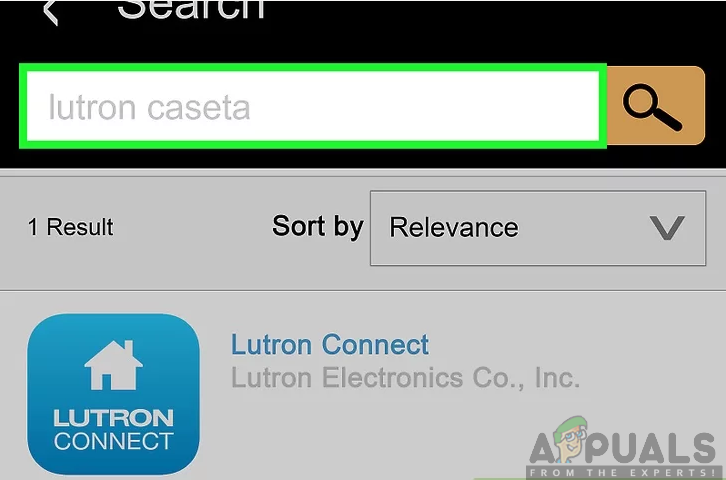
- Click on the Lutron Connect Skill and tap on Enable Skill.
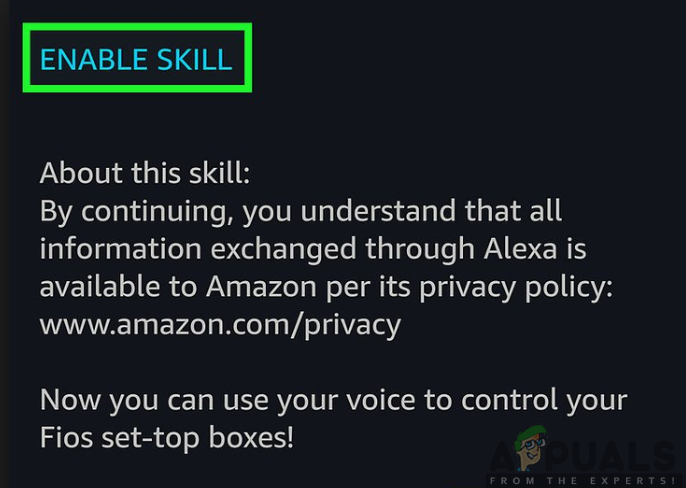
- Next, you will be prompted to sign in to your Lutron Connect account through email address and password. Enter your credentials and click on sign in. the accounts will now be successfully linked.
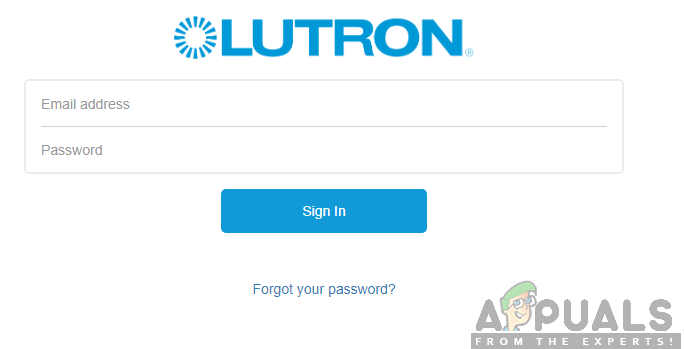
Connecting to Lutron Account
Note: One Amazon Alexa Account cannot control multiple homes. You should consider using multiple Amazon Alexa Accounts if you are using Multiple Homes through the Lutron Connect app.
Step 5: Select Scenes and Devices for Alexa
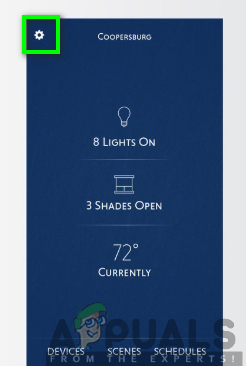
You will then have to launch the Lutron Connect mobile app and go on to select Scenes and Devices for Alexa control. This will give you the ability to add or remove scenes and devices from the Amazon Alexa Integration. Therefore, you need to follow the procedure outlined below:
- Tap on the Gear icon at the top left corner of the screen to access the in-app settings.
- From the settings menu, click the option for Amazon Alexa.
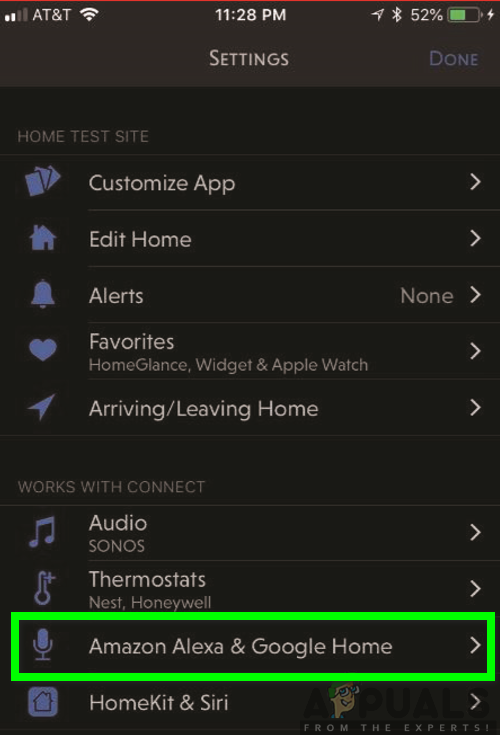
- Tap on Add/Remove Scenes or Add/Remove Lights & Shades.
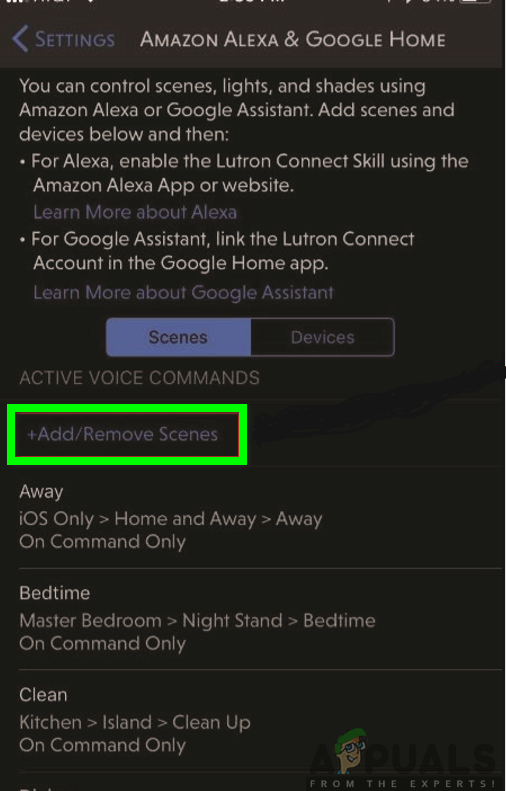
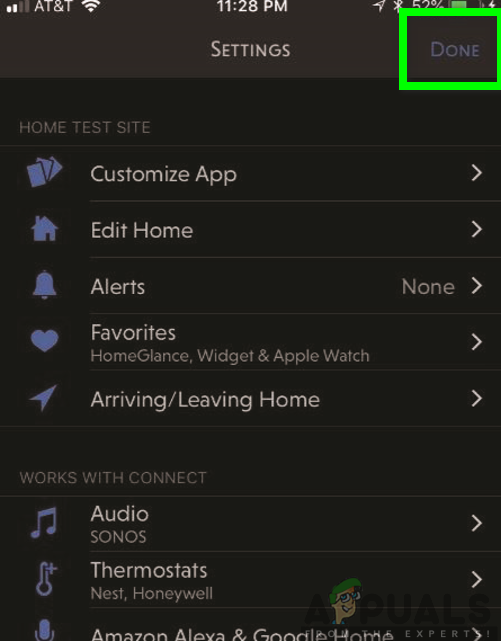
- Select the action of your choice to perform on a particular scene and then click on Done at the top-right corner of the screen.
Note: Only supported devices or scene types will be available for selection. The non-supported components or areas without supported components will be represented by an information icon.
Step 6: Initiate the Device Discovery feature for Alexa
Furthermore, after the completion of selecting Scenes and Devices for Alexa control, you will finally have to introduce the Device Discovery feature. There are three different ways for device discovery which include the use of voice control, Alexa mobile app or Alexa web portal. You are free to use either of these methods for device discovery.
Using Voice for Device Discovery
Just by voice command, you are able to talk to Alexa and let it respond to your request. This is the simplest and the most common method used to discover devices. All you have to do is command Alexa by saying “Alexa, discover devices.” it will then take a few seconds and display to you all the selected scenes and devices available for control by Alexa.
Using the Amazon Alexa app for Device Discovery
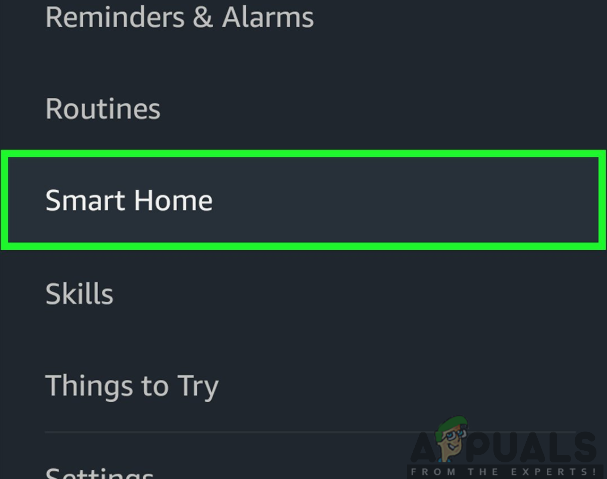
Furthermore, you can also use the Amazon Alexa app to discover devices. You can achieve this by following a series of steps as outlined below:
- Launch the Amazon Alexa app and select the Smart Home option.
- Tap on the plus sign at the top-right corner of the screen.
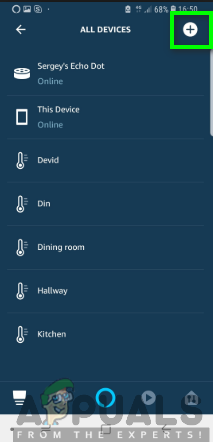
- Click on Add Device.
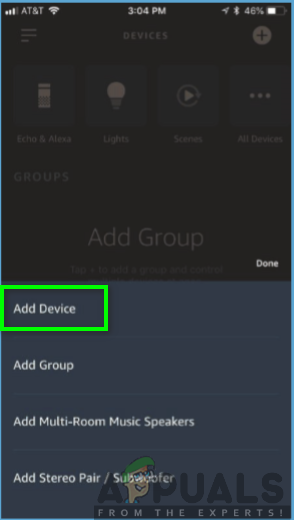
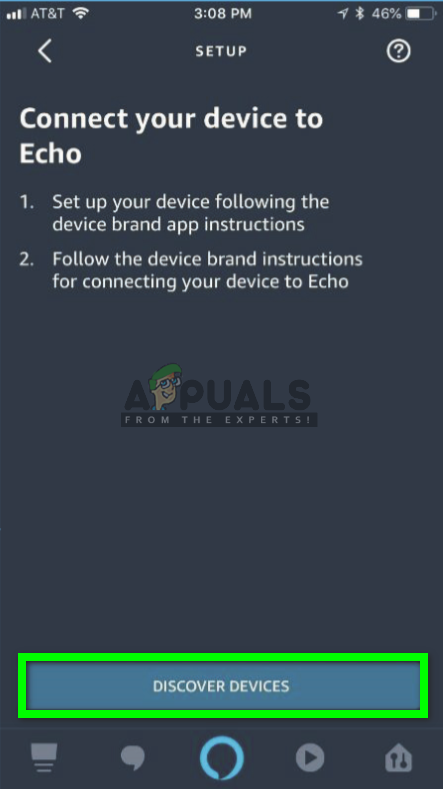
- On the setup screen, scroll down the list of devices and click on Other.

- Click on the Discover Devices button at the bottom of the screen.
Once you complete the steps, Alexa will take some time to complete the discovery process. Thereafter, all of the selected scenes and devices will be displayed with the purpose for control through either voice control, Alexa app control, or web portal control.
Using the Alexa Web Portal for Device Discovery
Even more, you can also use the Alexa web portal control to discover devices. So, you will have to begin by going to alexa.amazon.com and then sign into your Amazon Account which is linked to the Lutron Connect skill. After logging in, you need to follow the steps below:
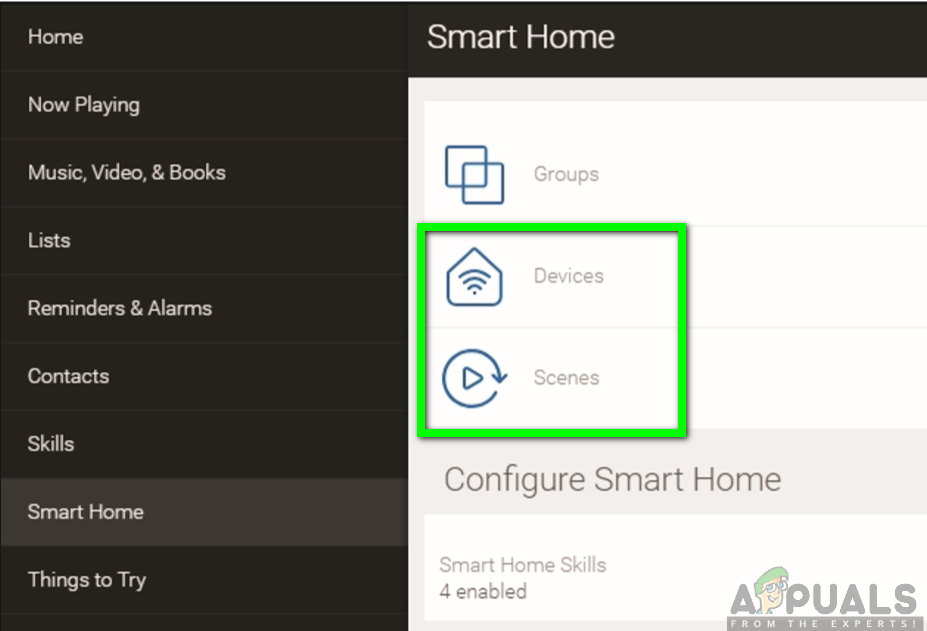
- Click on the menu button at the top-left corner of the screen and tap on Smart Home.

- On the display screen, select the option for either Devices or Scenes.
- Scroll down to the bottom of the screen and click on the Discover button.
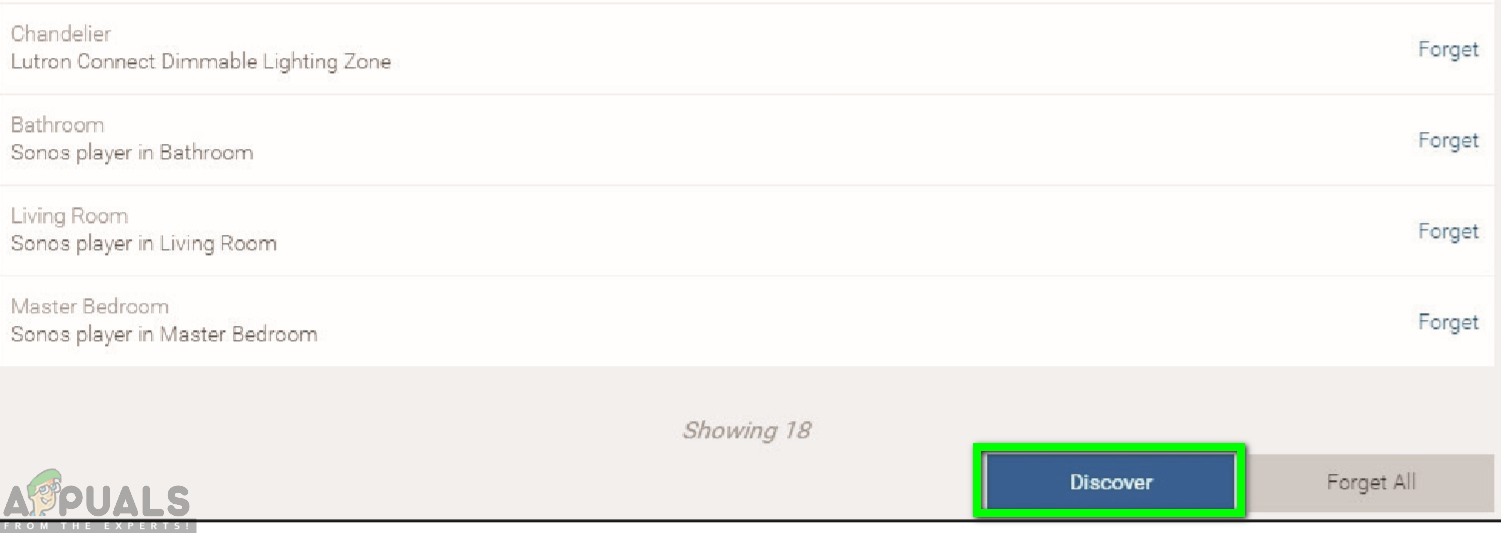
Similarly, Alexa will take up to 60 seconds to complete the discovery process. It will then immediately display all the selected scenes and devices available for control via the voice control, mobile app control or Alexa web portal control.