How to Fix GPU Detected With Wrong Model Number?
A lot of systems nowadays have dedicated GPUs to handle the intensive graphical operations of a system. Lately, reports came forward where users reported that incorrect graphics cards were being detected by the system with a yellow exclamation mark in their Device Manager. 
In some cases, the users are not even able to see the card under the Display Adapters entry in the Device Manager. This usually refers to a restriction imposed by the BIOS configuration. However, that’s not supposed to occur all the time hence we will proceed towards the detailed guide illustrated below to get rid of this problem.
Method 1: Monitor Graphics Card Inside the System
Before we move on to diagnosing the problem through software workarounds, you should first check if the graphics card is inserted correctly inside its slot. Press it firmly and make sure all the pins are inserted firmly. If you have a laptop, just perform the power cycle as explained below:
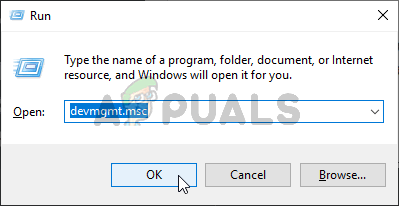
- Press Windows + R, type “devmgmt.msc” in the dialogue box, and press Enter.
Running the Device Manager - Once in the device manager, expand the category of “Display adapters”, right-click on your device and click “Disable”.

Disabling the integrated GPU - Now Turn Off your laptop, take out the battery (in case of a laptop), or take out the main power cable (in case of a PC).
- If you have a PC, open its lid and make sure that the graphics adapter is inserted perfectly into the pins.
After performing the above steps, restart your system, enable the graphics card in the same way we disabled it, and check whether it is being detected accurately or not.
Method 2: Verify GeForce Installation
GeForce Experience allows you to capture and share videos, screenshots, and live streams with friends. It also keeps your drivers up to date and optimizes your game settings and it proves to be a super essential companion to your GeForce® graphics card. The issue under discussion might exist because of two installations of GeForce Experience
- Double-check both your Programs and Programs x86 folders and make sure there’s just one.
- If there are two then track down the duplicate Application Data files and reinstall GeForce Experience from here.
Method 3: Deleting Current Drivers using DDU
Performing a clean re-installation of graphics drivers have proved beneficial for most of the users. Therefore, our aim is to boot the system into Safe Mode so it can load with basic drivers and minimal settings and uninstall the drivers from there. Before you proceed to the steps below, make sure you download DDU from here and copy it to an External Drive, or you can save it on your Desktop before you boot into Safe Mode.
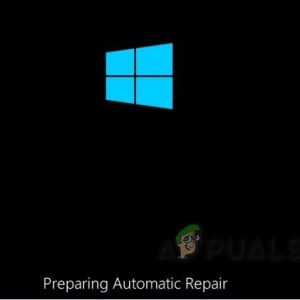
- For Windows 8/10: Click the Start button from the lower right corner, Hold the SHIFT Key and whilst holding the SHIFT Key, choose Shutdown -> Restart to get into Advanced Options or press the power button three times consecutively, at the time of startup, to open the Automatic Repair window.
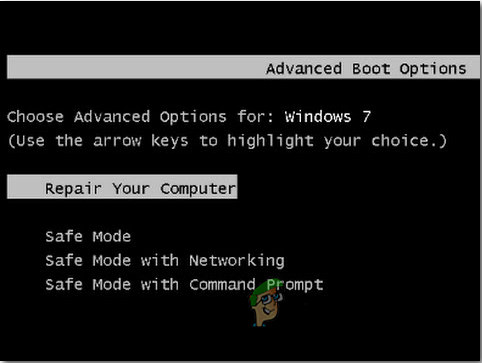
Automatic Repair screen - For Windows Vista/7: However, if you are using Windows 7 or Vista then Restart your computer and repeatedly tap F8 until you see the Advanced Boot Menu. If you do not see this menu, start over again, and repeatedly tap the F8 key on your keyboard until you see this and when you observe this window, select Safe Mode. You will be able to login to safe mode fine.
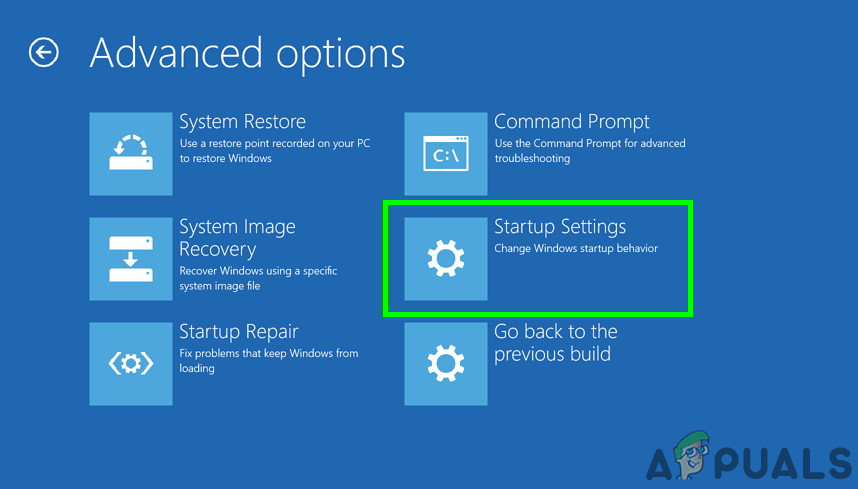
Boot in safe mode - Windows 7 will take you straight to Safe Mode after you choose the Safe Mode option but for Windows 8 and 10, after the Preparing Automatic Repair message, it should take you to Advanced Options and from there choose to Troubleshoot -> Advanced Options -> Startup Settings and wait for the system to reboot. After the reboot choose the last option to start into Safe Mode.
Advanced Options - Once in Safe Mode, either copy the DDU file to your Desktop in a new folder if you saved it onto a USB or locate the file where it was downloaded and move it to a new folder, so the extracted files can stay within the folder, else it will be extracted where you’ve got it saved.
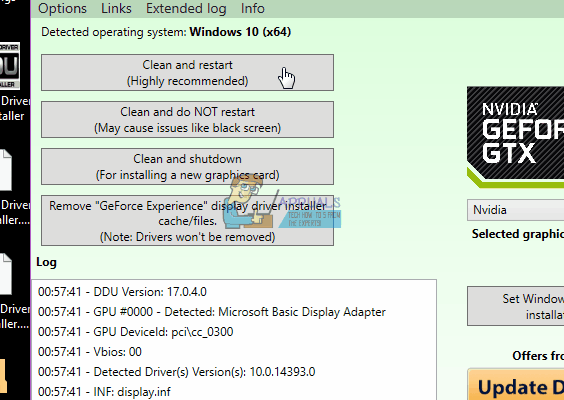
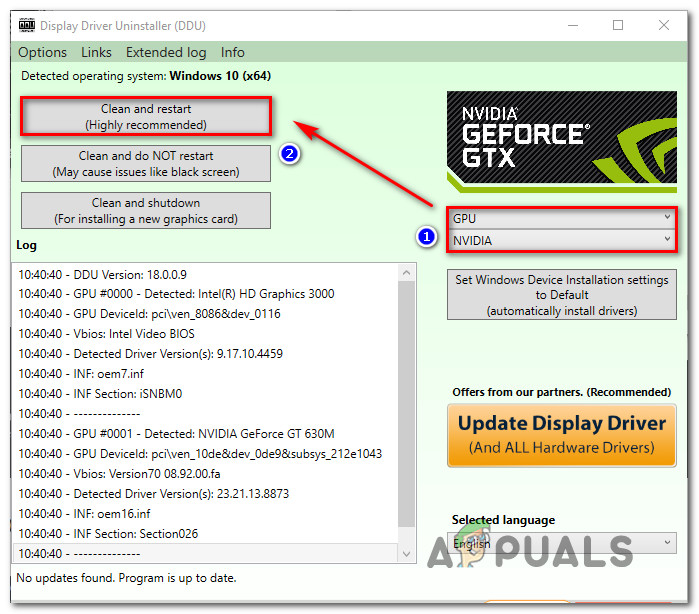
- Once done, click the Display Driver Uninstaller icon and run it. Don’t worry, if it shows “Windows 8.1” as the system detected. Go ahead, and choose your Graphics card type from the drop-down menu and afterward, choose Option 1 that states Clean and Restart. When the Driver Cleaning has finished, the system will reboot back into Normal mode.
DDU Menu - Boot your computer into normal mode and launch the application. Launch the GeForce Application, open the “Drivers” tab and click the button “Driver Download”. Enter your specification on the right side of the screen and click “Start search” for the application to search for the optimal drivers for your computer. When the driver is installed, restart your computer and check whether the problem is resolved.
Method 4: Flash your GPU BIOS
Nowadays manufacturers release updates for graphics cards that tweak some stability issues and fix current issues like incorrect model number etc, therefore, we have to upgrade to a custom BIOS in order to overclock a normally voltage-locked card. There were numerous reports that upgrading the BIOS of the GPU solved the problem instantly, therefore, we’ve illustrated a simple process below to upgrade your GPU bios for both NVIDIA and AMD cards:
- First of all note down your card’s model in order to find what BIOS you’ll want to use. To easily find it use the filters located at the top of this page to navigate to your manufacturer’s card model.
- Now, choose a BIOS from this list that is the most up to date version for your card. The easiest way to do this is to scroll towards the bottom until you see your model name/number and once you find it click on the download button to download that specific BIOS.
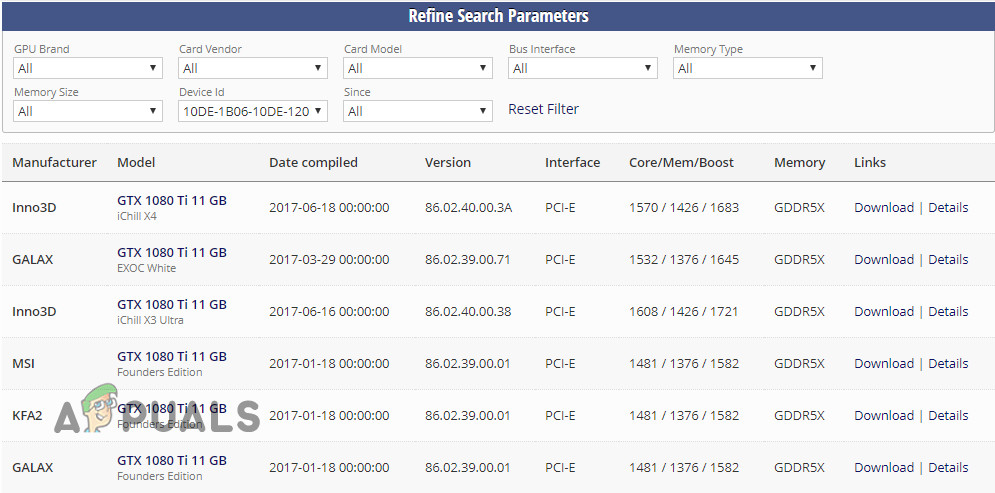
Choose BIOS from the list Note: It is recommended to start searching from the bottom because the first time you see your card’s model, it will be the most recent BIOS as the lists by default go from oldest at the top to newest at the bottom.
- After downloading the bios file you need a flashing tool. This differs based on whether you have an AMD or Nvidia card so the guide will branch off here. If you possess an AMD card then download the flashing tool from here and if you have an NVIDIA card then click here.
For AMD users:
After downloading the AMD flashing tool extract it into its own folder. It doesn’t matter in which folder you extract it to, just make sure you keep all the related files with the ATiWinflash.exe file.
- Firstly, put your BIOS file that you’ve downloaded earlier into the same folder where you just extracted your flashing tool.
- Afterward, right-click on the ATIWinflash.exe file and run it as an administrator.
- Follow the on-screen instructions to flash your BIOS and when the process is complete restart your system and check whether the error is rectified.
For Nvidia Users:
Flashing the BIOS of your Nvidia card is quite simple. Just make sure you downloaded the tool listed above for Nvidia users.
- Extract the zip file you’ve previously downloaded to its own folder. Make sure that your BIOS file is in the same folder as nvflash.exe and it’s related files.
- Double click on nvflash.exe to start up the tool and you would observe a console window that looks something like this:
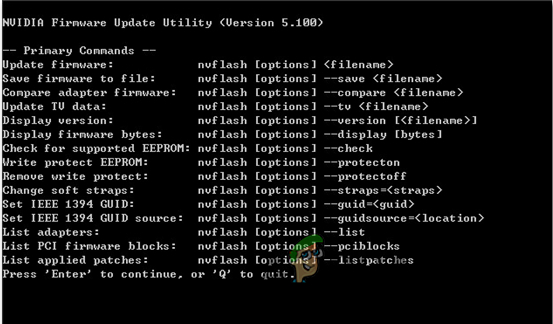
Commands - Press the Enter button to proceed with the installation and as soon as it is finished it is recommended to update your bios.
- Therefore, to update your BIOS, all you have to do is type in:
nvflash yourfilenamehere.bios
(replace yourfilenamehere with the actual filename of your BIOS) and let the tool update your GPU bios so that you can observe the correct model number on your screen.
Bonus Workaround:
In some cases, the Graphics card that you are using might be fake, therefore, in order to verify its authenticity, note down the exact make and model of your Graphics card and check online for its normal speeds. Now, download the software from here and run the executable to install it. After installing, check to see if your card is original or not. If it isn’t original and just a custom BIOS has been flashed on it, return it to the place where you bought it and get a new one. If the problem persists after performing the steps indexed above, it’s always a good idea to test the graphics card on a different computer before confirming that the card is damaged.